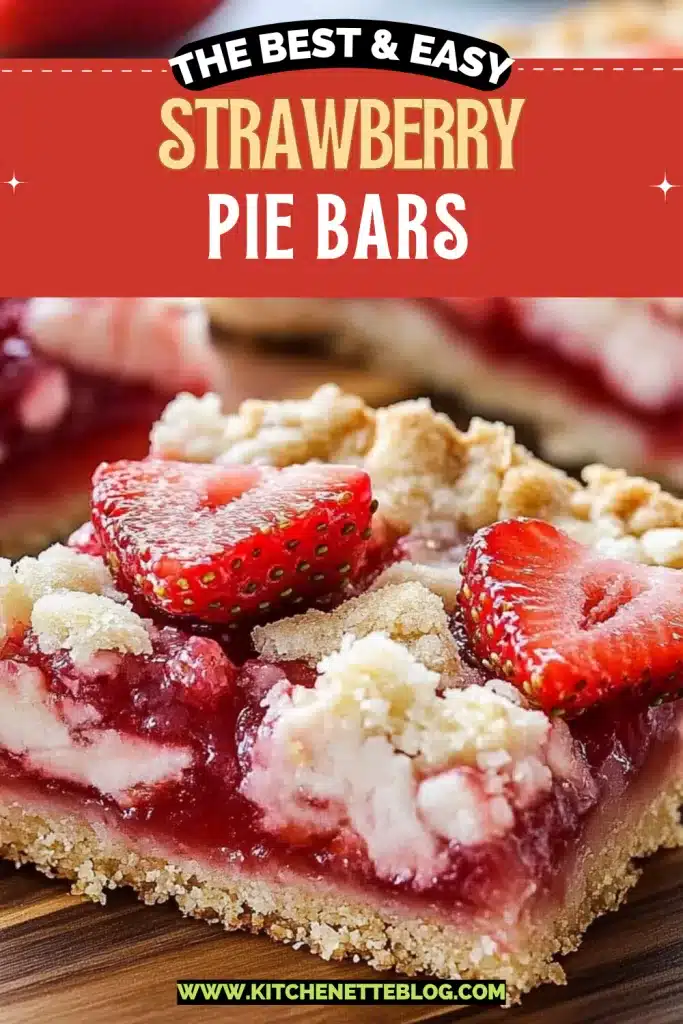
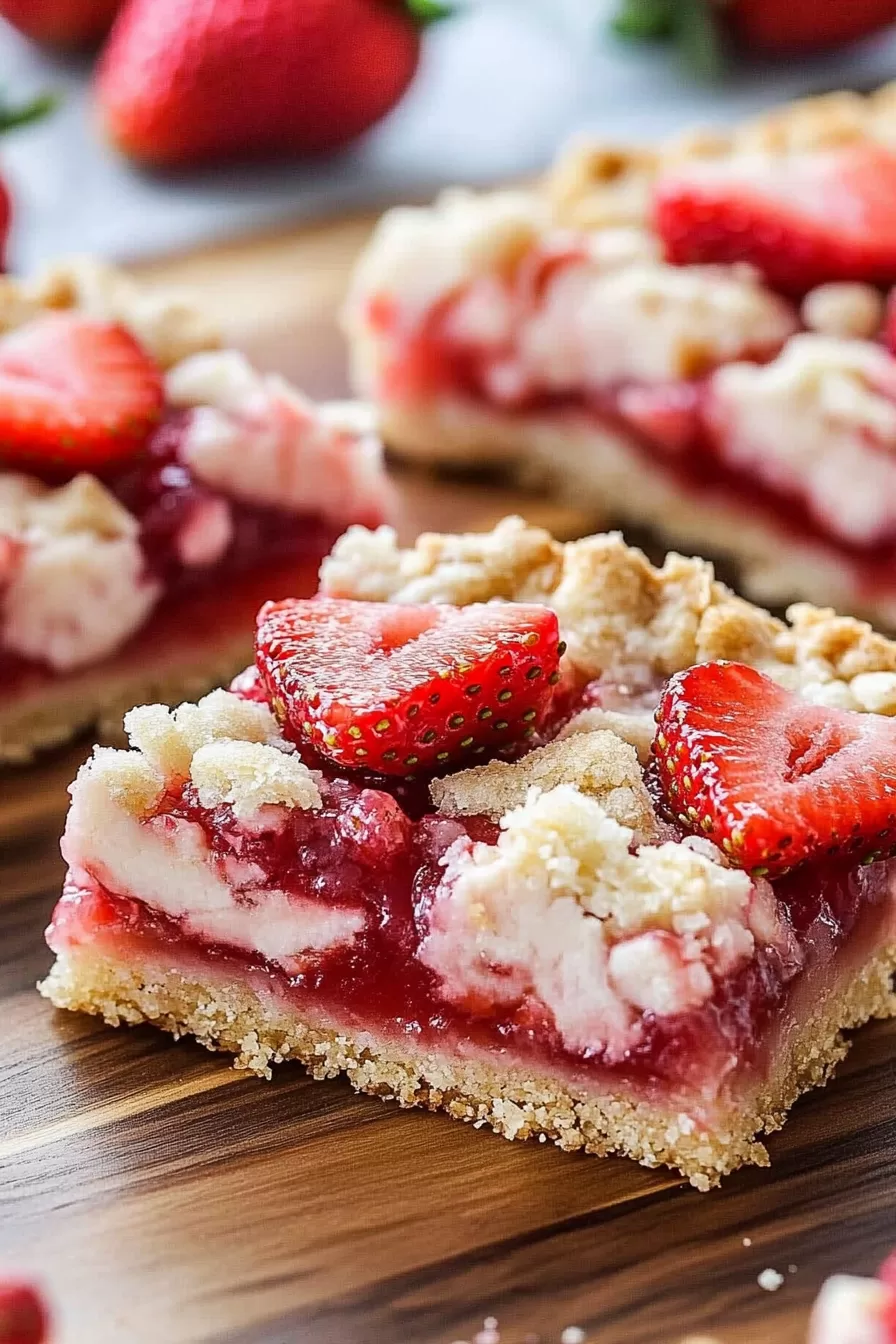
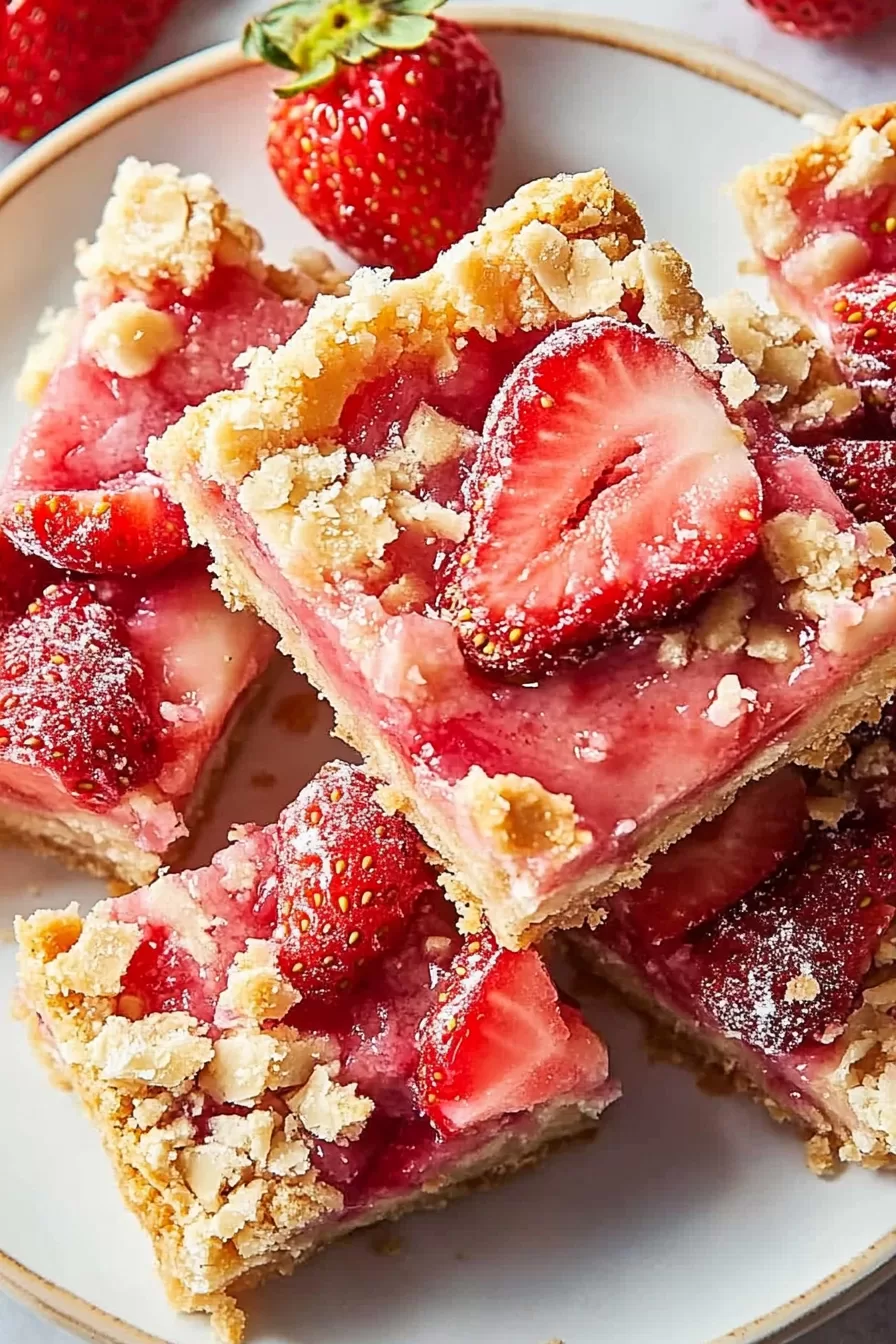
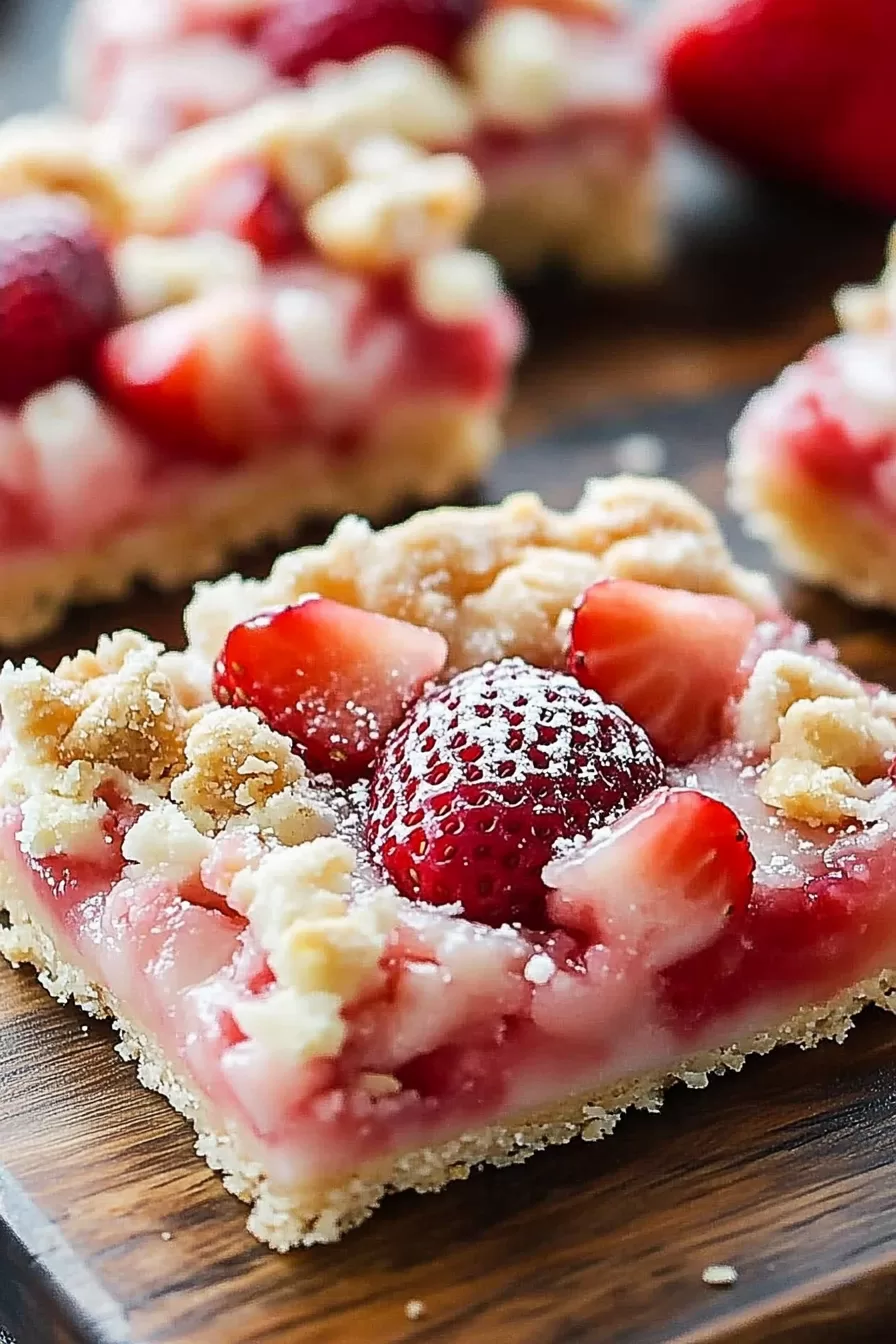
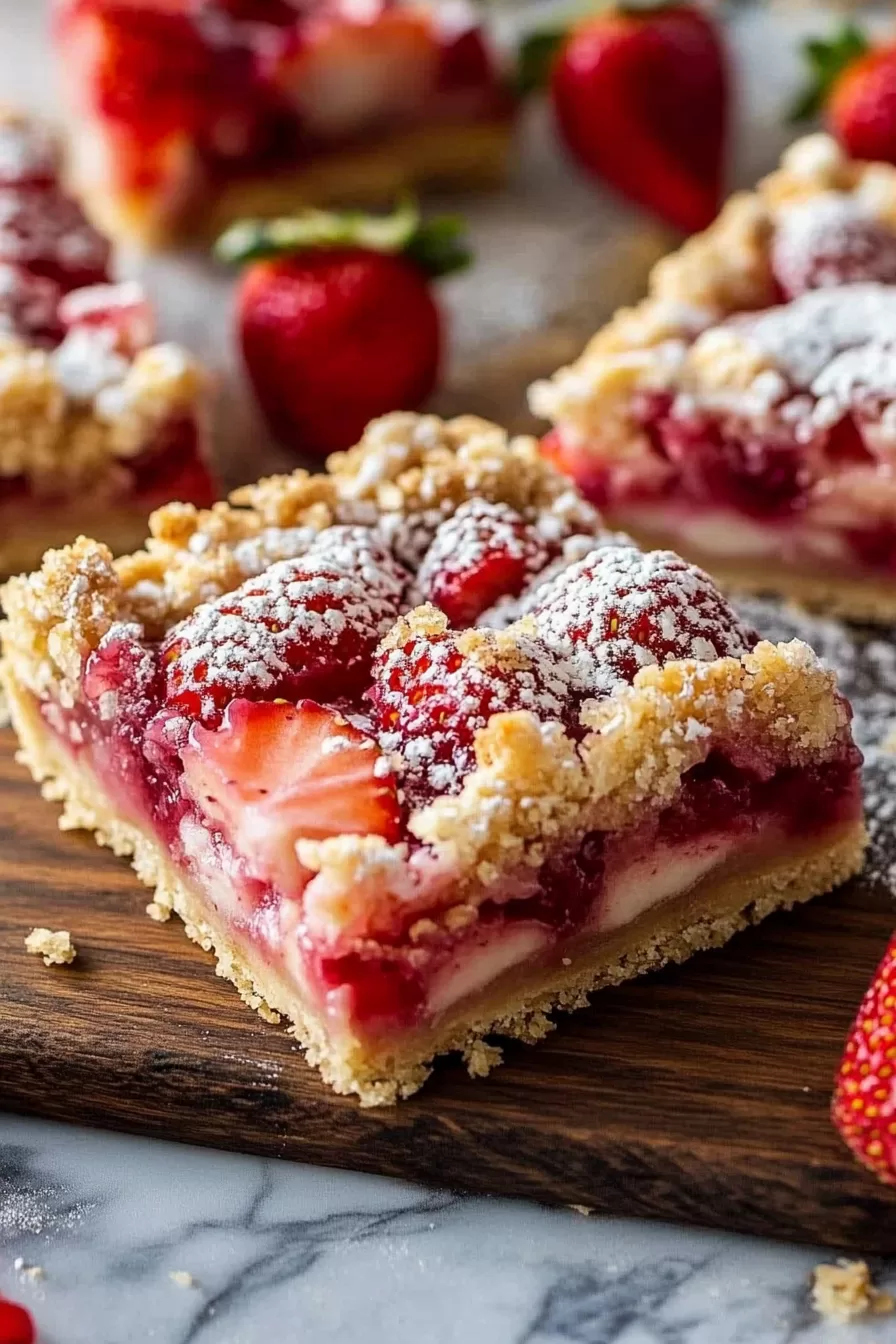
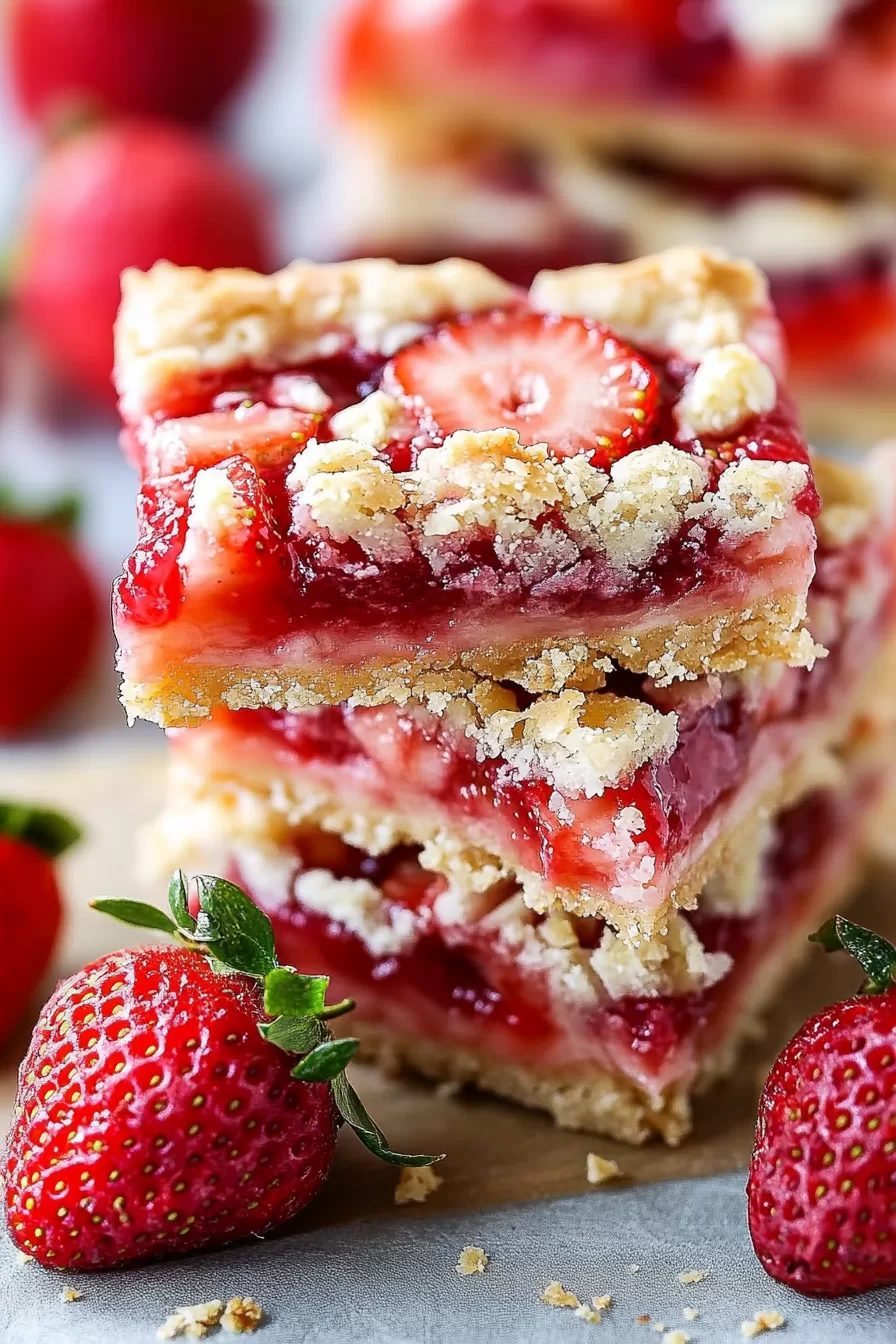
Buttery oat crumbs, sweet-tart strawberries, and just a whiff of lemony brightness—these strawberry pie bars with fresh strawberries, butter, flour, and oats are basically your summer baked into a square. Easy to slice, easier to eat.
Imagine a baked good with layers: soft, warm, fresh-from-the-oven smells swirling around your kitchen while oat crumbs sizzle slightly on top. It’s cozy. It’s vibrant. And honestly? It’s the kind of recipe that doesn’t require a whole afternoon or an advanced degree in crust physics.
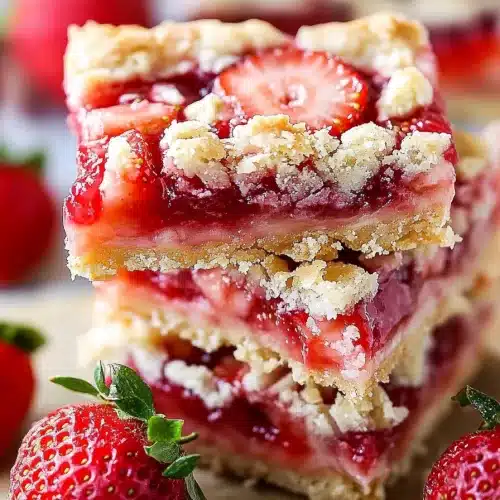
We’re talking sweet strawberries simmered just enough to get jammy and happy, tucked between a buttery base and toasty oat crumbles. These work just as beautifully for a casual brunch plate as they do on a picnic blanket or a “hmm-I-want-something-lovely” Tuesday night. The texture’s a win, the effort’s minimal, and the crumbs are never optional.


Why You’ll Love this Strawberry Pie Bars Recipe
Genuinely? This one’s pretty low-maintenance. You don’t even need to get your mixer out.
- Ridiculously simple to make: No intricate steps, no pastry drama. Just mix, press, simmer, sprinkle, bake. You’re done.
- Perfect sweet-tart balance: The strawberries get just enough sugar, then a kiss of lemon to keep it bright.
- Great texture contrast: Buttery base, syrupy fruit middle, crumbly oat topping. Like a layered hug.
- Works for all kinds of eaters: Not overly sweet, and you can slice squares small or mighty depending on the mood.
- Stays sliceable and portable: So yes, they can survive a picnic basket… if they even make it out the door.
- Oats make it feel halfway virtuous: I’m not saying it’s health food, but I’m not not saying it either.
Ingredient Notes
Let’s talk through the essentials, because understanding the “why” makes the baking feel more intuitive (and fun, honestly).
- All-purpose flour: Gives structure to both your base and topping. Just regular, nothing fancy—this isn’t the time for bread flour.
- Granulated sugar: Sweetens the crust and the filling. You’ll use it twice, so prep accordingly.
- Salt: Important! A tiny amount balances the sugar and actually makes everything taste more flavorful.
- Baking powder: Adds a soft, cakey lightness to the crust layer. Think subtle lift, not a total puff.
- Unsalted butter: Cold butter means craggy little pockets in the crust and topping. Cube it, work it in quickly, don’t melt it.
- Old-fashioned oats: For that rustic crumble topping and light chew. Quick oats… just don’t hit the same.
- Fresh strawberries: Use ripe but firm berries. Soft ones go mushy and make things weepy—not in a good way.
- Cornstarch: Thickens the filling so it sets into that jammy, spoonable (not runny) layer.
- Lemon juice: Just enough zing to brighten the berries so they don’t turn jammy-sweet overload.
How To Make This Strawberry Pie Bars Recipe
Once you’ve got your bowls and measuring cups out, it’s all pretty straightforward—just a bit of stirring and layering. Here’s how it goes, step by gentle step.
-
Prep the pan and oven: Preheat to 350°F and line a 9×13-inch baking pan with parchment. Greasing it first helps the paper stay put (no sliding corners, thank you very much).
-
Make the crust mixture: In a big mixing bowl, stir together flour, sugar, salt, and baking powder. Then cut in cold butter using a pastry cutter or two knives. You should end up with shaggy, crumbly bits. No huge chunks; no sand, either. Use a food processor if you’re feeling fancy.
-
Stir in the oats and portion it: Once the oats are in, it has that pleasant chewy-crumb consistency. Scoop out about ⅓ of the mix for the topping and leave the rest behind for the crust bottom.
-
Par-bake the base: Press the main crust mixture firmly into the pan. I usually use the bottom of a glass for even pressure (hands are fine too). Bake this layer for about 10–12 minutes. This sets it so the filling isn’t sinking into raw dough.
-
Make your strawberry filling: In a medium saucepan, toss in half the strawberries with the sugar, cornstarch, and lemon juice. Bring it to a gentle bubble on medium heat, stirring, until thick and glossy. Then fold in the rest of the strawberries. This mix smells like warm summer. Let it cool a few minutes before assembling.
-
Assemble and bake again: Spoon your slightly cooled strawberry mix over the baked crust, then scatter the reserved crumb mix over the top. Bake another 30–35 minutes until golden and bubbling around the edges.
-
Cool it down: Let it cool in the pan completely. I know, but don’t rush it. Cutting warm bars into squares is messy business. Once cool, lift the whole slab out via the parchment and slice away.
Storage Options
Once you’ve baked these golden beauties, you’ve got a few tasty storage tactics up your sleeve. Let’s chat.
First, fridge life: Strawberry pie bars hold up well in the fridge for up to 5 days. Just pop them into an airtight container. I like placing parchment squares between layers because they can get just a tad sticky if stacked warm (been there).
As for freezing? Absolutely yes, you can freeze them. Wrap individual bars snugly in plastic wrap, then slide them into a freezer bag. They’ll keep their flavor and structure for about 2 months—perfect for pulling out one at a time for impromptu treat cravings. Defrost overnight in the fridge or give them a quick 20-second zap in the microwave if you’re impatient like me.
Reheating is optional, but worth it. A few seconds in the microwave softens the crumble ever so slightly and revives that fruity mellow aroma. You could even fancy it up with a scoop of vanilla ice cream—just putting that out there.
Variations and Substitutions
Feeling rebellious? Or maybe you’re just missing an ingredient. No problem. Here are some swap-ins and mix-ups to try with these bars.
-
Use frozen strawberries: Let them thaw and drain well before using. Add an extra tablespoon of cornstarch so the filling stays thick.
-
Add vanilla or almond extract: A dash (½ teaspoon) stirred into the filling adds a richer, deeper flavor without overpowering the fruit.
-
Go gluten-free: Sub in your favorite 1-to-1 gluten-free flour blend. Make sure the oats are certified gluten-free too, if needed.
-
Try a different fruit: Raspberries, blackberries, even a mix of blueberries and chopped peaches work beautifully. Tweak the sugar if you go tarter.
-
Add chopped nuts to the topping: A handful of chopped pecans, almonds, or walnuts adds a buttery crunch that plays so well with the oats.
-
Make ’em breakfast-y: Dial down the sugar a touch and you’ve got something that pairs weirdly well with coffee. Like a snickerdoodle muffin’s fruity cousin.
What to Serve with Strawberry Pie Bars
Honestly? These bars can pull their own weight at any table. But if you want to build out a full spread, here’s what pairs well.
-
A hot cup of coffee or tea: There’s something about a handheld fruity treat and a warm sip that just feels right. Especially on a slow Saturday morning when breakfast decides to masquerade as dessert.
-
Vanilla bean ice cream: I know, predictable. But scoop some beside a just-warm slice of strawberry pie bar and watch the edges melt into creamy pools. It’s pure summer-as-dessert energy.
-
A lighter meal beforehand: If you’re making a full menu, go with something savory but not super rich. Think light fish and greens or grilled chicken and salad. It makes the bars feel even more indulgent afterward.
-
A boozy brunch setup: Bubbles and berries just belong together. Set these next to some mimosas or a berry sangria pitcher and you’ve got applause-level brunch fare.
-
After-dinner treat with a twist: Serve these instead of pie for holidays or even low-key dinner parties. You’ll look like someone who totally knows what they’re doing in the kitchen—even if you winged most of it.
Frequently Asked Questions
Can I make strawberry pie bars ahead of time?
Yes, and actually, they slice better if made ahead. Prepare and bake the bars fully, then cool completely and store them airtight. They’ll keep in the fridge for up to 5 days or in the freezer for up to two months. Just let them come to room temperature or microwave briefly before serving.
Why is my filling runny?
Usually, the culprits are undercooking the filling or not using enough thickener. Make sure you cook the first half of the strawberries until the mixture is bubbling and glossy like jam. And don’t skip the cornstarch! If you’re using frozen berries without draining first, you’ll need extra to help absorb the moisture.
Can I use other types of oats?
Old-fashioned oats are best here because they keep their texture. Quick oats can make the crumble a bit sandy, while steel-cut oats are too tough and chewy for this. If all you have are quick oats, they’ll still work—just know the texture will be softer and more uniform.
Do I need to refrigerate the bars?
If you’re eating them the same day, you can leave them out at room temp. But after that, yes—pop them in the fridge so they stay fresh. The fruit layer is perishable, and the cool temp helps keep the crust and topping from getting soggy over time.
Strawberry Pie Bars
Ingredients
Crust & Crumble Topping
- 2 cups (260 g) all-purpose flour
- 1 cup (200 g) granulated sugar divided (3/4 cup for crust, 1/4 cup for filling)
- 1/2 tsp (2.5 g) salt
- 1 tsp (4 g) baking powder
- 1 cup (226 g) unsalted butter cold, cut into cubes
- 1 cup (90 g) old-fashioned rolled oats
Strawberry Filling
- 4 cups (680 g) fresh strawberries hulled and chopped (about 1.5 lb or 680g)
- 1/4 cup (50 g) granulated sugar
- 2 tbsp (16 g) cornstarch
- 2 tbsp (30 ml) lemon juice freshly squeezed
Equipment
- 9x13-inch Baking Pan
- Parchment paper
- Mixing bowls
- Pastry cutter or two knives
- Saucepan
Instructions
- Prep the pan and oven: Preheat your oven to 350°F (175°C). Line a 9x13-inch baking pan with parchment paper, leaving overhang for easy removal. Grease the pan first if desired to help the paper stay put.
- Make the crust mixture: In a large bowl, stir together flour, 3/4 cup sugar, salt, and baking powder. Add cold, cubed butter and cut in with a pastry cutter or two knives until you have a crumbly, shaggy texture—no large chunks but not sandy.
- Stir in the oats and reserve some for the topping: Mix in the oats. Scoop out about one-third of this mixture into a separate bowl to use for the crumb topping later.
- Par-bake the base: Firmly press the larger portion of the mixture into the bottom of the prepared pan. Use the bottom of a glass or your hands for an even layer. Bake for 10–12 minutes until just set, but not brown.
- Make the strawberry filling: In a medium saucepan over medium heat, combine half of the strawberries, 1/4 cup sugar, cornstarch, and lemon juice. Cook, stirring, until bubbly and glossy, about 3–5 minutes. Remove from heat and gently fold in the remaining strawberries.
- Assemble and bake: Spread the strawberry filling evenly over the par-baked base. Sprinkle the reserved oat crumble over the top. Return to oven and bake for 30–35 minutes, or until the topping is golden and the edges are bubbling.
- Cool completely before cutting: Let the bars cool fully in the pan (at least 20 minutes). Use parchment overhang to lift out, then slice into squares and enjoy.
Notes
Swaps: Try mixed berries, add vanilla or almond extract, stir chopped nuts into the topping, or substitute a 1-to-1 gluten-free flour blend. Frozen strawberries work but should be thawed and drained—add more cornstarch to compensate for extra moisture.