Get 5 recipes to simplify your life:

easy, delicious, real food recipes

Latest Recipes

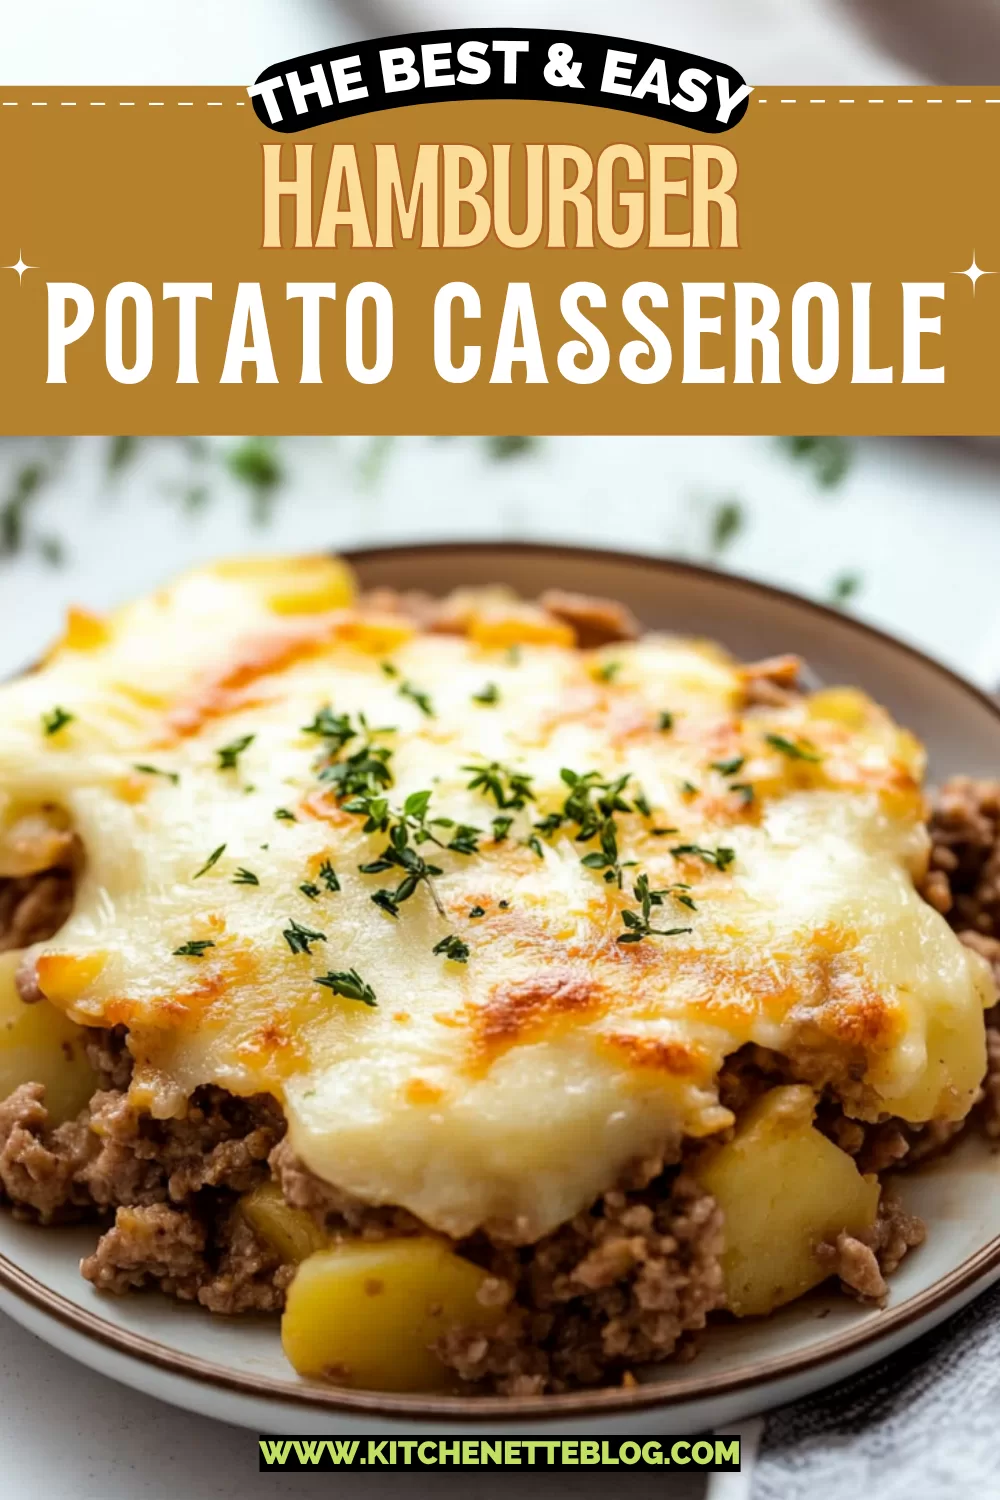
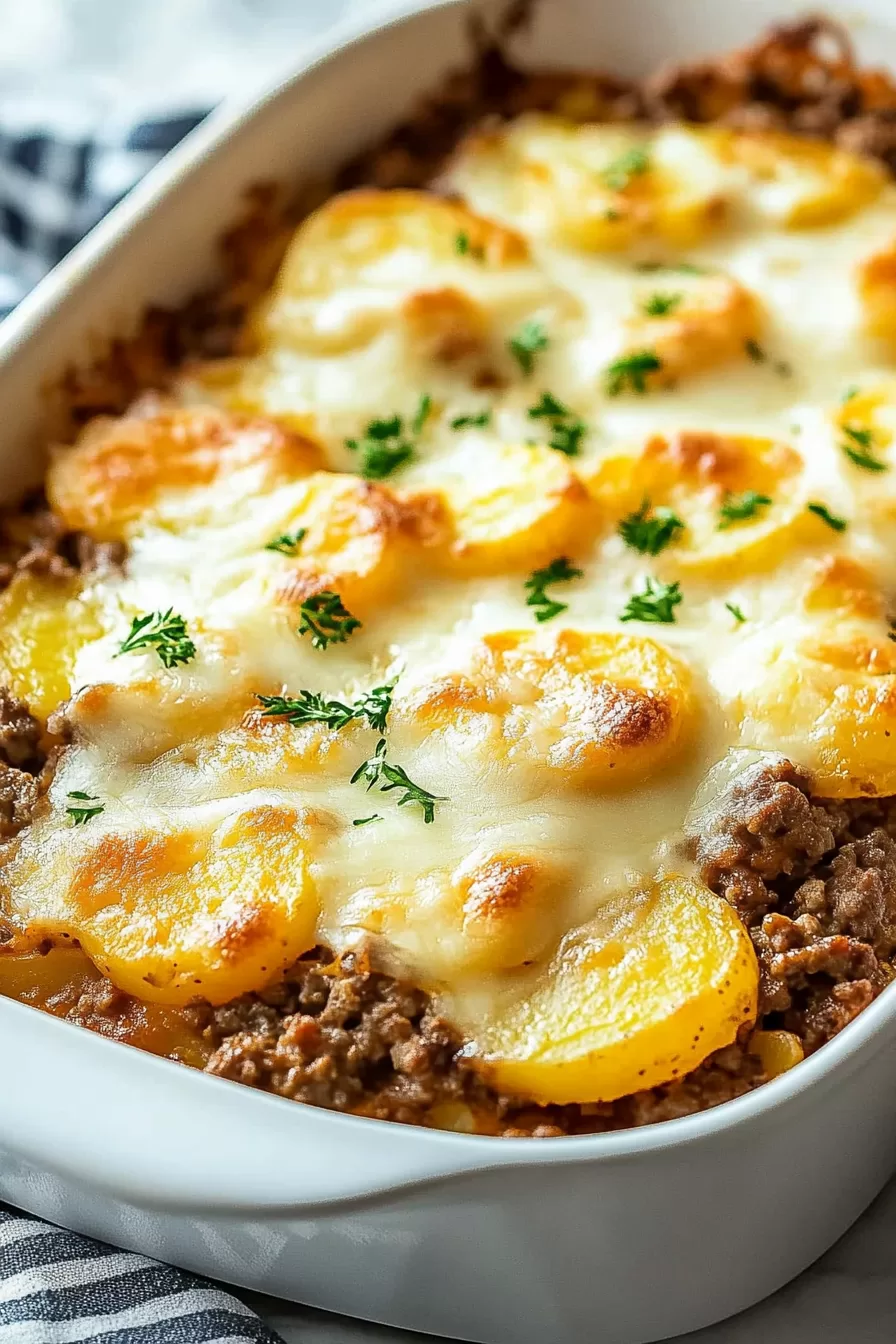
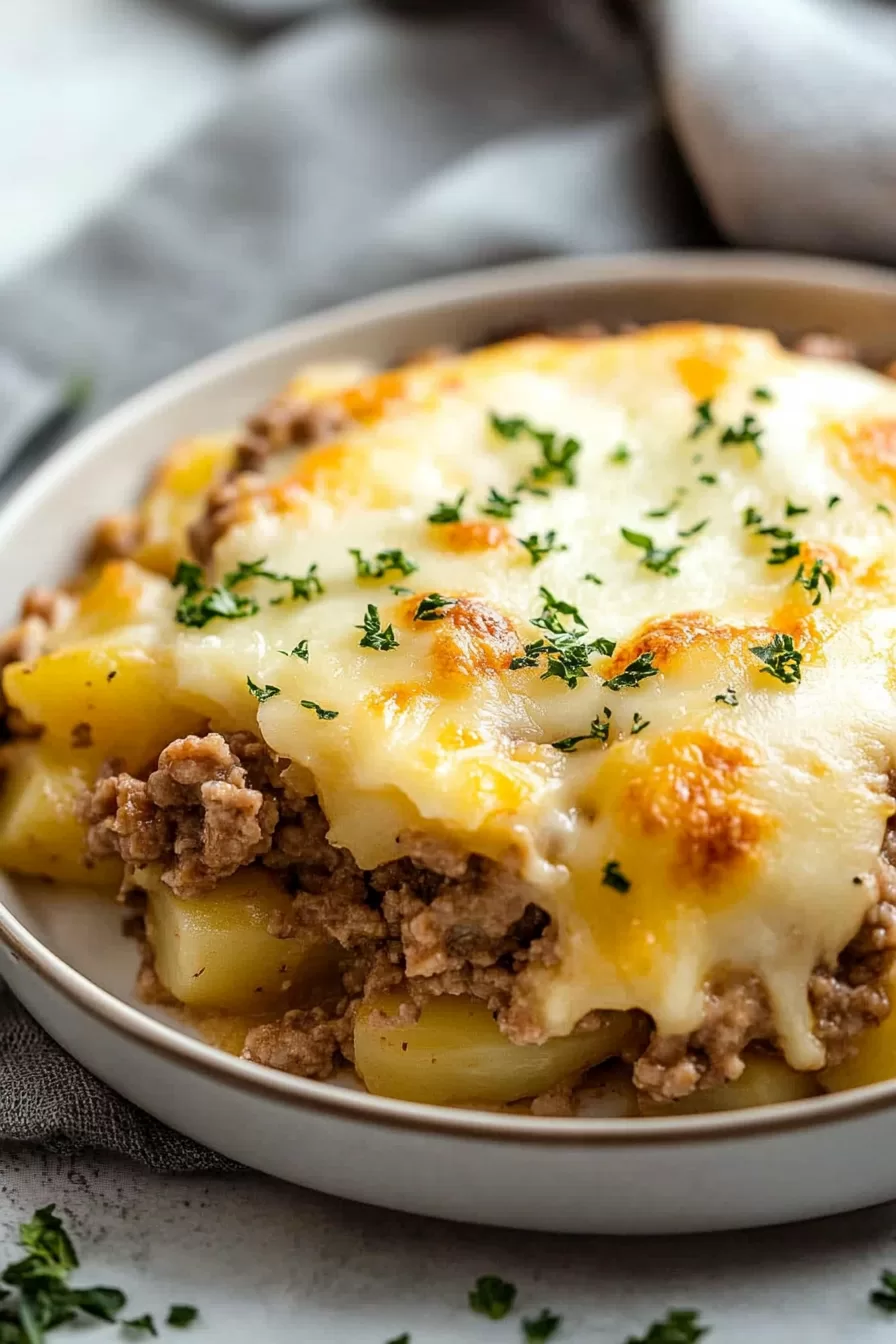
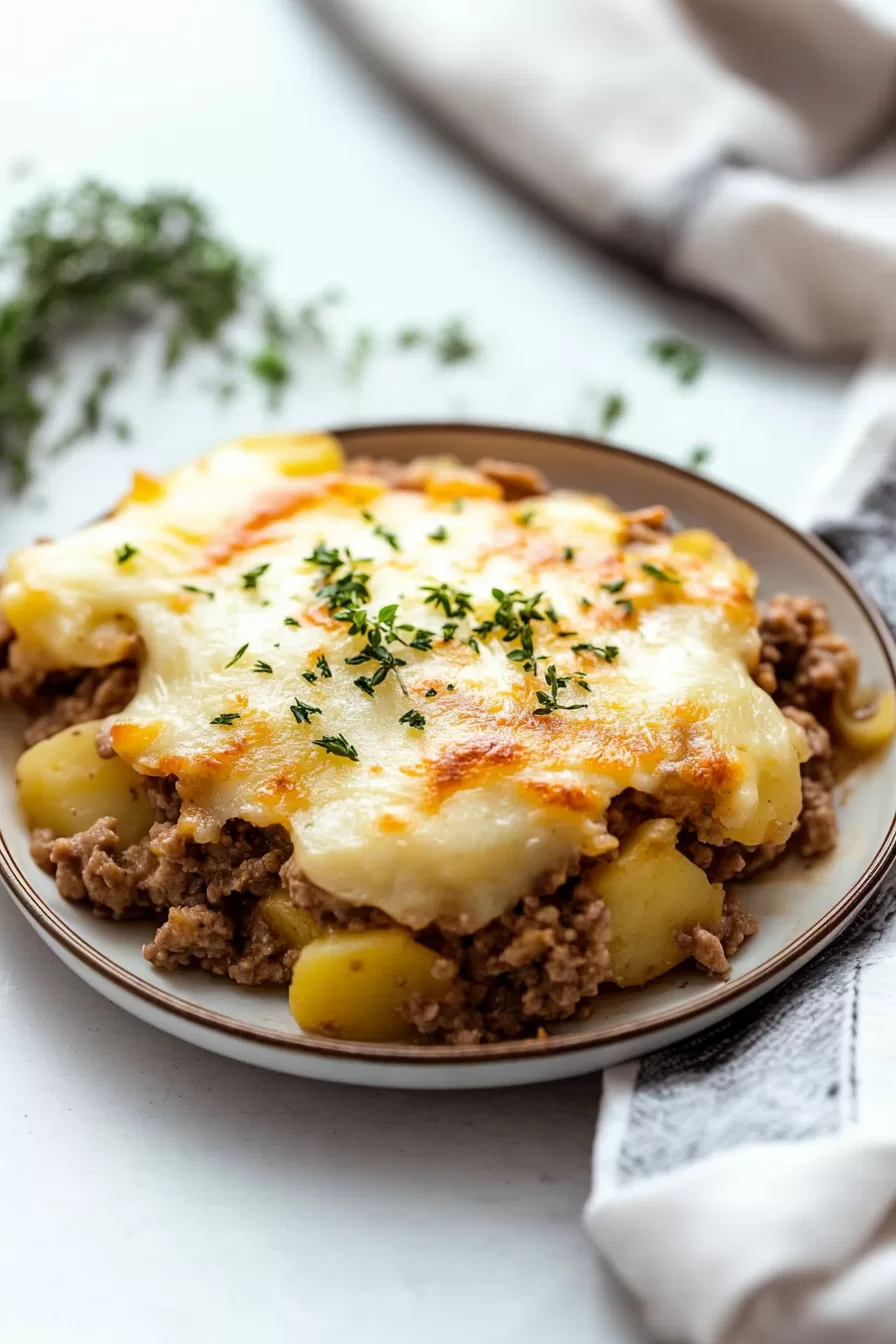
Crispy-edged potatoes, melty cheddar, and savory beef all baked up in one warm, cheesy dish—this hamburger potato casserole brings together ground beef, potatoes, cheddar cheese, and creamy mushroom soup in the coziest way.

If your kitchen smells like sautéed onions and bubbling cheese by the end, congrats—you’ve done it right.

Sometimes you just want dinner to be easy and predictable—but not boring. That’s where this hamburger potato casserole strolls in, totally unfussy in its layers but deeply comforting in flavor. The meat gets seasoned and savory, the potatoes turn creamy-soft, and the cheese ties it all together (twice, because why hold back?). Plus, there’s no need to pre-cook the potatoes. Lovely, right?

Whether it’s Thursday evening and your fridge is half a mystery, or you’re feeding people whose approval hinges on melted cheese, this dish has your back.

Table of Contents

Hamburger Potato Casserole

Why You’ll Love this Hamburger Potato Casserole

This one’s more of a craving than a recipe—straightforward, cozy, and built for second helpings.

  • Ridiculously simple to make: You sauté, layer, whisk, pour, bake—nothing weird or fancy required, just classic comfort food behavior.
  • Layers of texture and flavor: Soft, starchy potatoes meet juicy beef, and the edges crisp up just enough to make you hover near the oven.
  • Leftovers are high-tier: Somehow, the potatoes soak up even more flavor overnight. You’ll want to hover near the fridge the next day too.
  • Budget-friendly but generous: Uses basic grocery staples in a way that feels… expansive. Like it feeds your soul and then your neighbor’s.
  • Kid (and adult) approved: It’s hard to argue with cheese, carbs, and beef. Honestly, who would try?
  • Easy to tweak: Swap a cheese, add a veggie, sneak in a spice—this casserole won’t flinch.

Hamburger Potato Casserole

Ingredient Notes

Before we dive into the cheesy wonderland, here’s a quick peek at the key players and some tips.

  • Olive oil: Just a quick slick in the pan to help soften the onions and boost flavor. You can sub butter if you’re feeling indulgent (I sometimes do).
  • Onion and garlic: These form the flavor foundation. Soften them slowly until they smell sweet and cozy. Not burnt—this isn’t a fire drill.
  • Lean ground beef: I like 85/15 for that balance of flavor and less pooling grease. You’ll drain it anyway, but still.
  • Dried thyme, garlic powder, black pepper: Adds little punches of warmth and savory depth without yelling over the cheese.
  • Russet potatoes: Thin slices = even cooking. I keep the peel on, because rustics are charming and I’m lazy, but peel away if you like.
  • Cream of mushroom soup + milk: This duo becomes the saucy glue that holds it all together. You’ll want it fairly smooth before pouring.
  • Cheddar cheese: Use sharp or medium, pre-shredded or freshly grated (just skip the neon stuff unless that’s your thing).

Hamburger Potato Casserole

How To Make This Hamburger Potato Casserole

You’ll be building this like a lasagna without noodles—just layers of goodness and more cheese than seems necessary (but trust, it isn’t).

  • Preheat & prep your dish: Get that oven to 350°F and grease a 9×13 pan. This helps the edges not glue themselves to the dish like angry toddlers.
  • Sauté onion and garlic: Warm olive oil in a skillet, add the chopped onion, and cook until it’s soft and starting to sweeten up, about 5ish minutes. Toss in the garlic at the end so it doesn’t burn and ruin your dreams.
  • Brown the beef: Add ground beef right into the pan with the seasonings. Break it up as it cooks until there’s no pink left and everything smells like dinner is approaching.
  • Layer the casserole: Go potatoes → half the beef → ½ cup cheese. Then repeat with more potatoes, the rest of the beef, and more cheese. Finish with the last potato layer on top. It’s rustic layering, not a Tetris challenge.
  • Whisk the sauce: In a bowl, mix the soup and milk together until smooth. You want it pourable but not runny. Then drizzle it evenly across everything.
  • Bake covered: Pop foil over the top and let it bake for about an hour. This steams the potatoes and gets everything warmed-up and cozy.
  • Cheese finale and crisping: Remove the foil, scatter on the last of the cheese, and bake another 20 to 30 minutes. You’re aiming for bubbly cheese and fork-tender potatoes. That smell? Yeah, it’s working.
  • Rest and serve: Let it hang out for about 10–15 minutes before slicing. That helps it set up a bit and keeps your tongue from catching fire.

Hamburger Potato Casserole

Storage Options

If you end up with leftovers (which, I’ll be honest, is rare in this house), this casserole is very fridge-friendly.

Pop the cooled leftovers into an airtight container and keep them in the fridge for up to 4 days. Honestly, it might even be better on day two. The potatoes soak up all that savory mushroom-beefiness. Reheat in the microwave or warm slices in the oven if you’re after crispy edges again.

Now, yes, you absolutely can freeze this. I recommend freezing it in individual portions for easier thawing. Just wrap tightly, then stash in freezer-safe bags or containers. It holds up for about 2 months. Thaw overnight in the fridge and reheat until hot throughout (oven or microwave works). The texture’s still solid, though the potatoes might soften slightly more. Still wildly comforting.

Think meal prep, or future-you’s dinner crisis, solved.

Variations and Substitutions

Because let’s face it—we all riff on recipes depending on what’s in the fridge… or what the grocery store forgot to have. Here’s how you can flex this one:

  • Ground turkey or chicken: A lighter twist without losing the flavor; just up the seasoning a bit since these are milder meats.
  • Yukon Gold potatoes: They’re a little creamier and buttery-er (is that a word?). Thinly sliced, they work beautifully.
  • Cream of chicken or celery soup: If mushroom’s not your jam, swap it. The vibe stays similar; the flavor changes just enough to notice, in a good way.
  • Add vegetables: Toss in sautéed bell peppers, frozen corn, or peas in between the beef layers for a bit of brightness and texture.
  • Different cheese blends: Monterey Jack melts like a dream. Mozzarella? Stretchy and fun. Pepper jack brings heat. Go wild.
  • Make it spicy: Add a pinch of cayenne, red pepper flakes, or swap in a spicy cheese to bring some low-key drama.

Hamburger Potato Casserole

What to Serve with Hamburger Potato Casserole

This casserole’s rich and hearty, so sides don’t need to shout. But they can whisper something green or tangy to balance things out.

  • A simple green salad with a punchy vinaigrette is never out of place here. It cuts through the richness and makes you feel like a responsible adult even if you’re on your second helping.
  • Steamed or roasted green beans work great too. Add a little lemon zest and olive oil drizzle and suddenly everyone’s a veggie fan again.
  • Want to go roots-on-roots? Spoon this next to some creamy mashed rutabaga. Earthy meets cheesy, and honestly, they play nice together.
  • Roasted carrots or beets with balsamic glaze provide a touch of sweetness that contrasts all the savory layers.
  • And if it’s a chilly night, a cup of broth-based soup—something simple, like veggie or even tomato—adds a light, warm-up component while the casserole does the heavy lifting.

Frequently Asked Questions

Can I make hamburger potato casserole ahead of time?

Absolutely. You can assemble the whole thing, cover it tightly, and stash it in the fridge for up to a day before baking. Just add an extra 10–15 minutes to the baking time if it’s going in cold. And yes, it still turns out beautifully—you might just be even hungrier by the time it’s done.

Do I need to pre-cook the potatoes?

Nope! That’s the beauty of this recipe—thinly sliced raw russets go right into the dish. The hour-long bake (plus that covered steam situation) takes care of all the soft and creamy magic. Just slice them evenly so everything cooks at the same pace.

Can I use cream of mushroom soup alternatives?

You sure can. Try cream of chicken, cream of celery, or even a homemade béchamel if you’re feeling fancy. The important thing is to add some kind of creamy base mixed with milk so the casserole doesn’t dry out while baking.

What’s the best way to reheat leftovers?

If you’re in a hurry, microwave a slice with a little cover to trap steam. For crispy edges, though, the oven is your friend. Pop leftovers into a foil-covered baking dish and reheat at 350°F until warmed through—about 20 minutes for a large portion. Remove the foil for the last 5 minutes if you want melty-cheesy action on top.

Cheesy Hamburger Potato Casserole

Hamburger Potato Casserole

Prep Time 20 minutes
Cook Time 1 hour 30 minutes
Resting Time 15 minutes
Total Time 1 hour 50 minutes
Crispy-edged potatoes, melty cheddar, and savory beef all baked in one cozy, comforting dish with ground beef, potatoes, cheddar, and creamy mushroom soup. Unfussy layers, rich flavor, and pure comfort.
6 servings

Ingredients

  • 1 tbsp (15 ml) olive oil or substitute butter
  • 1 large onion chopped
  • 2 cloves garlic minced
  • 1.5 lbs (680 g) lean ground beef 85/15 preferred
  • 1 tsp dried thyme
  • 1 tsp garlic powder
  • 1 tsp black pepper freshly ground
  • 2.5 lbs (1130 g) russet potatoes sliced thinly (about 5-6 medium potatoes), peel on or off as you like
  • 2 cans (600 g) cream of mushroom soup 10.5 oz each (about 300g per can)
  • 1 cup (240 ml) milk any kind
  • 2 cups (220 g) cheddar cheese shredded, divided, sharp or medium
  • 1.5 tsp (9 g) kosher salt to taste

Equipment

  • 9x13 inch Baking Dish
  • Skillet
  • Mixing bowl
  • Aluminum foil

Instructions
 

  1. Preheat oven to 350°F (180°C). Grease a 9x13-inch baking dish.
  2. In a skillet, heat the olive oil over medium heat. Add chopped onion and cook, stirring, for about 5 minutes until softened. Add minced garlic and cook another 30 seconds until fragrant.
  3. Add ground beef, dried thyme, garlic powder, black pepper, and 1 teaspoon salt to the pan. Cook, breaking up the beef, until browned and no longer pink. Drain excess fat as needed. Remove from heat.
  4. Layer half the sliced potatoes in the prepared baking dish. Sprinkle lightly with salt. Top with half the beef mixture and ½ cup shredded cheddar.
  5. Add another layer with the remaining potatoes (sprinkle with salt), the rest of the beef mixture, and another ½ cup cheese. Finish with a third layer of potatoes on top.
  6. In a bowl, whisk together cream of mushroom soup and milk until smooth. Pour evenly over the casserole layers.
  7. Cover tightly with aluminum foil. Bake for 60 minutes to steam the potatoes and meld the flavors.
  8. Remove foil. Sprinkle on the remaining cup of cheese. Bake uncovered 20–30 minutes more, until the cheese is golden and bubbly, and potatoes are fork-tender.
  9. Allow to rest 10–15 minutes for easier slicing and serving. Enjoy warm.

Notes

You can prepare this casserole in advance and refrigerate up to a day before baking (add 10–15 minutes extra bake time if starting cold). Leftovers keep well in the fridge for up to 4 days and freeze beautifully for 2 months (wrap tightly). For veggie additions, layer in sautéed bell peppers, frozen corn, or peas. Substitute cream of chicken or celery soup if desired.

Nutrition

Calories: 540kcal | Carbohydrates: 40g | Protein: 32g | Fat: 28g | Saturated Fat: 13g | Cholesterol: 115mg | Sodium: 1090mg | Potassium: 970mg | Fiber: 4g | Sugar: 4g | Vitamin A: 700IU | Vitamin C: 10mg | Calcium: 350mg | Iron: 4mg

Lush with warm spice and cozy vibes, these pumpkin snickerdoodle cookies blend creamy pumpkin, rich brown sugar, and buttery dough in one soft, cinnamon-coated bite.

You can smell it already, can’t you? The scent of fall baking away in the oven, cinnamon twirling around like it owns the place. These pumpkin snickerdoodle cookies bring that unmistakable snickerdoodle chew, only now with a pumpkin-spice kick that tastes like sweater weather and cozy evenings.

Let me just say up front: they’re not trying to be flashy. These cookies know what they are. Mildly golden, soft all the way through, with a crackly cinnamon-sugar hug around each bite. They don’t need chocolate chunks or fancy extras—though I’d never stop you—but what they do need is you, a cup of tea, and maybe a second batch because they vanish fast.

Table of Contents

Pumpkin Snickerdoodle Cookies

Why You’ll Love this Pumpkin Snickerdoodle Cookies

No big pitch here—sometimes you just want a reliable cookie that feels like a hug. These kind of whisper, “Hey, you’re doing great.”

  • Soft and chewy texture: That heavenly bend when you pull one apart? That’s the blend of melted butter and extra yolk magic.
  • Pumpkin-forward but not overwhelming: The pumpkin adds moisture and flavor, but doesn’t hit you over the head with jack-o’-lantern energy.
  • Cinnamon-sugar coating: Like a fuzzy blanket made of dessert. And yes, you roll them by hand. Therapeutic, honestly.
  • No mixer needed: Just bowls, a spoon, and a little arm action. Your upper bicep gets a tiny workout. Win-win.
  • Freezer-friendly dough: Make some now, bake some later. Future you sends thanks.
  • Perfect for chilly-day baking: The smell alone is worth making them. Your kitchen will feel borderline enchanted.

Pumpkin Snickerdoodle Cookies

Ingredient Notes

Before you jump in, here’s the friendly breakdown of what’s going in the bowl and why it matters.

  • Pumpkin puree: Not pie filling! Use plain puree. We blot it with paper towels so the cookies stay soft—not soggy.
  • All-purpose flour: Good ol’ dependable. You don’t need fancy flour here. Just fluff it a little before measuring.
  • Pumpkin pie spice: That shortcut mix of cinnamon, nutmeg, ginger, and cloves makes the whole thing taste like a leaf-crunching walk.
  • Baking soda + cream of tartar: They team up to give that classic snickerdoodle lift and chew. Don’t skip the tartar—it’s what gives that subtle tang!
  • Salt: Just a little to balance all that sugar and spice. Especially important in cozy bakes like this.
  • Unsalted butter, melted: It blends so easily with the sugars and gives the cookies that rich base. Let it cool so you don’t scramble your eggs.
  • Granulated + brown sugar: Light brown sugar adds moisture and depth. White sugar helps with crisp edges and sweetness.
  • Egg yolks: Just the yolks, no whites—this keeps the cookies dense and fudgy instead of cakey.
  • Vanilla extract: Warm and kind of a background player here, but still essential.
  • Cinnamon + sugar (for rolling): The final step before baking. Adds just the right crunch and extra coziness.

Pumpkin Snickerdoodle Cookies

How To Make This Pumpkin Snickerdoodle Cookies

Okay, grab your apron (or just wipe your hands on your jeans, no judgment). We’re going gently, one step at a time.

  • Dry out the pumpkin puree: Lay down paper towels on a plate and spread the pumpkin over them. Press with another layer on top and let it drain for at least 5 minutes. This small step keeps your cookies from getting cakey. Yes, kind of like pumpkin babysitting. Worth it.
  • Mix your dry stuff: In a medium bowl, whisk together the flour, pumpkin pie spice, baking soda, cream of tartar, and salt. This is your spice melody, all coordinated and ready to groove with butter and sugar later.
  • Melt and mix butter and sugars: In a big bowl, stir together the melted (and cooled) butter with both sugars. It should feel like warm caramel on your spoon. Smooth and glossy.
  • Add egg yolks and vanilla: Blend those in until everything looks cohesive and dreamy. Like glossy, brown-sugar custard. No clumps allowed.
  • Stir in the pumpkin: Scrape that now-lean pumpkin right off the towels and into your bowl. Mix until it disappears into the dough.
  • Combine with dry ingredients: Pour your spice-flour mix into the wet. Stir gently with a spoon or spatula just until it comes together. Don’t overdo it—you’re baking cookies, not bread.
  • Chill the dough: Cover the bowl and let it hang out in the fridge for 30 to 60 minutes. It’s sticky dough, and a quick nap makes it easier to roll.
  • Make cinnamon-sugar coating: While the dough chills, stir up that irresistibly sandy cinnamon-sugar in a small bowl.
  • Roll the balls: Scoop about 1½ tablespoons per cookie. Roll each in the cinnamon sugar until completely coated. This is the messy, joyful part. Embrace it.
  • Bake: Space the cookies about 2 inches apart on parchment-lined sheets and bake at 350°F for 10–12 minutes. The edges should look just golden and the centers barely set.
  • Cool and devour: Let them sit on the baking sheet for about 5 minutes (they’re delicate at first), then move to a wire rack. Eat one warm, and pretend you weren’t planning that all along.

Pumpkin Snickerdoodle Cookies

Storage Options

You’ve got options, friend. These cookies know how to stay comfy for days.

On the counter, they’re at their best stored in an airtight container. I like to drop a slice of sandwich bread in there too—it works magic keeping everything soft. The cookies will stay great for about 3–4 days if they last that long.

Wanna stash some dough for later? Freeze the cookie dough after rolling it into balls but before coating it in sugar. Line ’em up on a tray, freeze until firm, then pop into a zip-top bag. When your future self wants a cozy treat on demand, thaw the dough balls just long enough to roll in cinnamon sugar. Then bake like normal—maybe add an extra minute if they’re still chilly in the middle.

And yes, you can freeze the baked cookies too! Let them cool completely first, then seal them up snug in a freezer bag or container. Defrost at room temp… or pop one in the microwave for 10 seconds and pretend it’s fresh from the oven. Your secret’s safe here.

Variations and Substitutions

These pumpkin snickerdoodle cookies are a great base for little twists, whether you’re short on an ingredient or feeling a bit wild.

  • Pumpkin spice blend: If you’re out, mix 1½ tsp cinnamon with dashes of nutmeg, ginger, and cloves. DIY spice rack moment.
  • Add-ins like white chocolate chips: Go ahead and toss in a handful! They melt into the dough and add sweet creaminess that totally works with the pumpkin.
  • Swap for gluten-free flour: Use your favorite 1:1 GF baking blend. Just check if it contains xanthan gum—extra chew insurance.
  • Brown butter instead of melted: If you’ve got time and the patience, brown the butter first. It adds a toasted flavor that’s absurdly good.
  • Maple extract for fun: A drop or two swapped with vanilla can lean these cookies even deeper into fall territory.

Pumpkin Snickerdoodle Cookies

What to Serve with Pumpkin Snickerdoodle Cookies

Once these warm beauties hit the plate, you might wonder what else to pair with them. Here are a few totally-approved, slightly indulgent ideas.

  • A frothy homemade latte or warm chai tea makes the perfect companion. Something spiced and creamy brings out the pumpkin flavor even more. The combo feels like one long exhale.
  • Serve these alongside a fall brunch spread with things like roasted veg and eggs. Yes, cookies at brunch are valid. If you’re feeling bold, sneak in a savory bite like a crisp piece of pan-seared cod with rainbow chard to balance things out.
  • These cookies also vibe wonderfully next to a scoop of vanilla or peanut butter banana ice cream. Warm+chilly = texture magic.
  • A little cheese plate never hurt anyone. If you’ve got mild blue cheese or creamy brie, pair it with one of these cookies and—trust me—the sweet-salty combo will shock you (in the best way).

Frequently Asked Questions

Can I use canned pumpkin pie filling instead of pumpkin puree?

I’d skip the pie filling, honestly. It has added sugar and spices, which can mess with how sweet and spiced your cookies turn out. Go with plain pumpkin puree so you have control over the flavor and sweetness. Totally worth the quick trip to the store if that’s not what’s sitting in your pantry.

Why do I blot the pumpkin with paper towels?

Good question! Pumpkin puree holds a ton of moisture—like, sneaky soup-level. If you don’t blot some of that water out, the cookies can turn out cakey instead of that signature snickerdoodle chew. Just a few minutes pressed between paper towels works wonders.

Can I freeze the dough?

Yes, absolutely. Scoop the dough into balls, freeze them on a sheet pan until solid, then store them in a zip-top bag in the freezer. When you’re ready to bake, roll them in cinnamon sugar and bake straight from frozen—just tack on an extra minute or two in the oven. They’re great to have on hand for surprise cookie cravings.

Do I have to chill the dough?

Chilling isn’t optional here, I’m afraid. The dough is soft and sticky, and a quick fridge nap firms things up so you can roll it without a gooey mess. It also keeps the cookies from spreading like a pancake while baking. Just 30 minutes will do the trick—but an hour’s even better if you’ve got the patience.

Pumpkin Snickerdoodle Cookies

Pumpkin Snickerdoodle Cookies

Prep Time 20 minutes
Cook Time 12 minutes
Chill Time 30 minutes
Total Time 1 hour
Lush with warm spice and cozy vibes, these pumpkin snickerdoodle cookies blend creamy pumpkin, rich brown sugar, and buttery dough in one soft, cinnamon-coated bite. Made with real pumpkin, extra yolks, brown sugar, and classic snickerdoodle tang, they’re fall comfort in cookie form, no mixer required.
24 cookies

Ingredients

Cookie Dough

  • 1/2 cup (120 g) pumpkin puree blotted (not pumpkin pie filling)
  • 2 1/2 cups (310 g) all-purpose flour
  • 1 1/2 tsp (1.5 tsp) pumpkin pie spice
  • 1 tsp ground cinnamon
  • 1 tsp baking soda
  • 1 tsp cream of tartar
  • 1/2 tsp (0.5 tsp) salt
  • 3/4 cup (170 g) unsalted butter melted and cooled
  • 3/4 cup (150 g) light brown sugar packed
  • 1/2 cup (100 g) granulated sugar
  • 2 egg yolks large
  • 2 tsp vanilla extract

Cinnamon Sugar Coating

  • 1/4 cup (50 g) granulated sugar
  • 1 1/2 tsp (1.5 tsp) ground cinnamon

Equipment

  • Mixing bowls
  • Whisk
  • Spoon or spatula
  • Baking Sheets
  • Parchment paper
  • Wire rack

Instructions
 

  1. Dry out the pumpkin puree: Lay down paper towels on a plate and spread the pumpkin over them. Press with another layer on top and let it drain for at least 5 minutes. Scrape up the pumpkin paste when ready.
  2. Mix your dry stuff: In a medium bowl, whisk together the flour, pumpkin pie spice, cinnamon, baking soda, cream of tartar, and salt.
  3. Melt and mix butter and sugars: In a large bowl, stir together the melted and cooled butter with brown sugar and granulated sugar until smooth and glossy.
  4. Add egg yolks and vanilla: Mix in the egg yolks and vanilla extract until well blended.
  5. Stir in the pumpkin: Add the blotted pumpkin puree and mix until fully incorporated.
  6. Combine with dry ingredients: Stir the flour mixture into the wet ingredients just until no streaks remain. The dough will be soft.
  7. Chill the dough: Cover and refrigerate for 30–60 minutes until firm enough to scoop.
  8. Make cinnamon-sugar coating: In a small bowl, stir together 1/4 cup sugar with 1 1/2 teaspoons cinnamon.
  9. Roll the balls: Scoop about 1½ tablespoons of dough per cookie and roll into balls. Roll each ball in the cinnamon-sugar coating until fully covered.
  10. Bake: Arrange balls 2 inches apart on parchment-lined baking sheets. Bake at 350°F (175°C) for 10–12 minutes, until edges are just golden and centers look barely set.
  11. Cool and devour: Let cookies sit on the sheet for 5 minutes before transferring to a wire rack to finish cooling. Enjoy warm!

Notes

For best texture, always blot your pumpkin puree—too much moisture will make cakey cookies! To keep cookies soft for days, store in an airtight container with a slice of bread. Cookie dough balls (uncoated) can be frozen for future fresh baking.
Variations: Add white chocolate chips, swap for brown butter, or use gluten-free flour if desired. Make your own pumpkin spice with cinnamon, nutmeg, ginger, and cloves.

Nutrition

Calories: 130kcal | Carbohydrates: 19g | Protein: 1.5g | Fat: 5g | Saturated Fat: 3g | Cholesterol: 25mg | Sodium: 70mg | Potassium: 25mg | Fiber: 0.5g | Sugar: 9g | Vitamin A: 800IU | Vitamin C: 0.5mg | Calcium: 12mg | Iron: 0.6mg

Bright, buttery, and flecked with rainbow sprinkles, these funfetti shortbread bites are made with cold butter, flour, sugar, a splash of vanilla, and a whole lot of joy. Crunchy at the edges, tender at the center, and insanely snackable.

They’re exactly what your mid-afternoon tea break has been missing. You’ll catch a rich vanilla aroma while they bake—a little like walking into an old-school bakery wearing fuzzy socks.

Imagine a tiny, candy-spackled square that tastes like shortbread and birthday cake had a love child. That’s what we’re working with here. These funfetti shortbread bites are buttery, crumbly, and juuust a little toasty at the edges, with sweet little pops of color baked right in. Perfect for holidays, pantry snacking, or those “I need something with my coffee that isn’t toast” moments. You can make them ahead too, which instantly upgrades your cookie tin game.

Table of Contents

Funfetti Shortbread Bites

Why You’ll Love this Funfetti Shortbread Bites Recipe

These are one-bite wonders—wholesome, playful, and slightly addictive (you’ve been warned). No cookie cutters, no dough chilling stress. Let’s keep baking joyful.

  • Ridiculously simple to make: You don’t even need to roll anything. Just press, chill, chop, and bake.
  • Seriously snackable size: They’re teeny-tiny squares, which somehow justifies eating seven at once.
  • Colorful and cheerful: Nonpareils make them look like they’ve just shown up to a party, even if you’re baking alone in socks.
  • Classic shortbread taste, but fun-ified: All that rich butter and crumbly texture, with a sneaky surprise of sprinkles.
  • Easy to make ahead: They freeze beautifully, and actually improve in flavor overnight. Magic.

Funfetti Shortbread Bites

Ingredient Notes

This is a short ingredient list, but each thing really matters here—the beauty of shortbread is in the balance.

  • Salted butter: It has to be cold and cubed! Salted adds flavor, but if you only have unsalted, just throw in a pinch of salt.
  • Granulated sugar: Classic white sugar gives the right sweetness and that crisp classic edge.
  • Vanilla extract: This brings all the cozy bakery vibes. Swap in almond extract (or do half-and-half) if you want a more ‘wedding cookie’ moment.
  • All-purpose flour: Spoon and level, don’t pack it—unless you want dry, confused shortbread (you don’t).
  • Cornstarch (optional): This gives the bites a slightly silkier crumb. It’s subtle, but noticeable if you’re a texture obsessive like me.
  • Nonpareils: These tiny, brightly colored sprinkles hold their shape when baked. Avoid jimmies—they melt and smear like confetti on a wet sidewalk.

Funfetti Shortbread Bites

How To Make This Funfetti Shortbread Bites Recipe

These are the sort of cookies you can make on a calm Sunday or during a mid-week chaos spiral when you just… need a project. Either way, no fancy steps.

  • Prep the pan: Line a 9×13 dish with parchment, letting it hang over the edges. This makes lifting the chilled dough out not even remotely stressful.
  • Cream the butter and sugar: Grab your mixer and blend the cold butter cubes with the sugar until it’s fluffy and slightly lighter in color. It’ll look like soft frosting and smell like butter heaven.
  • Add vanilla extract: Pour in that vanilla and mix it until your kitchen starts to smell like a sugar cookie candle.
  • Incorporate dry ingredients and sprinkles: Stir in the flour and cornstarch by hand. Yes, use a wooden spoon or your fingertips. It should feel a bit like making streusel. Crumbly, but it’ll smush together when pressed. Then, fold in two tablespoons of those cheerful nonpareils.
  • Press into the pan and chill: Dump that crumbly dough into the lined pan. Press it firmly and evenly to the edges—I sometimes use the bottom of a measuring cup to get it nice and level. Sprinkle on the remaining nonpareils and gently press them in. Chill the whole thing for 30–60 minutes in the fridge.
  • Cut into bites: Once firm, lift the dough out with the parchment and transfer to a cutting board. Use a sharp knife and slice into ½-inch squares. I know they look tiny, but trust the process.
  • Bake and cool: Place bites on lined baking sheets with a little space around each. Bake at 325°F for 12 to 15 minutes until the edges are barely golden. Let them cool right on the pan—they’re delicate when warm but crisp up beautifully.

Funfetti Shortbread Bites

Storage Options

Shortbread is a dream in the storage department. You can make a batch now, enjoy some today, stash some for later, and freeze a few “forget-I-made-these” bites for unexpected cravings.

Once they’re completely cooled, pop them into an airtight container. At room temp, they’ll stay crisp and dreamy for about a week or so. Maybe more, but I’ve never had that kind of willpower.

Fridge? Not ideal. They get weirdly damp. But the freezer? Oh yes. They freeze like little champions. Just spread them in a single layer on a baking sheet until frozen, then transfer to a zip-top bag or container. They’ll keep for a month or two easily.

To serve, let them thaw at room temperature for 10–15 minutes. Honestly, they’re weirdly good straight from the freezer too—extra firm and just shy of crunchy.

Variations and Substitutions

You can definitely play around with these—just don’t mess with the butter-to-flour ratio too much or they’ll go rogue.

  • Almond extract: Swap half the vanilla for almond extract to give it that marzipan-meets-cookie flavor.
  • Lemon zest: A teaspoon of it mixed into the dough adds a light, citrusy brightness that cuts the richness beautifully.
  • Chocolate chip mini-bites: Use mini semi-sweet chips instead of sprinkles—think of it as shortbread meeting your childhood chocolate-chip obsession.
  • Holiday edition: Swap the rainbow sprinkles for seasonal colors, like red and green ones in December or pastels for spring gatherings.
  • Dye-free version: Use naturally colored sugar sprinkles if you’re avoiding artificial dyes but still want that pop of warmth.

Funfetti Shortbread Bites

What to Serve with Funfetti Shortbread Bites

These little squares sit very comfortably alongside a cozy drink or post-meal treat plate. They also make cute little companions for fancier setups.

  • Coffee or tea: They’re the ultimate “one-more-bite” treat with your favorite mug. Crisp edges soften just slightly when dunked… if that’s your style.
  • Ice cream pairings: Crumble them on top of a scoop of vanilla, or sandwich them with something like these peanut butter & banana ice cream sandwiches. Totally acceptable behavior.
  • Holiday dessert platters: Add them to a cookie tray with chocolate truffles, fudge squares, or maybe these graham cracker cookies for texture contrast.
  • Afternoon bake sale or school treat box: Because they travel well, hold their shape, and don’t require frosting, icing, or any babysitting.
  • Late-night snack tray: Grab a cold glass of milk or a mug of hot cocoa, and boom. Your Tuesday evening just improved.

Frequently Asked Questions

Can I use unsalted butter instead of salted?

Totally! I do recommend adding about 1/4 teaspoon of fine sea salt to the dough if you go that route. The salt doesn’t just make them “taste salty”—it brings out the buttery richness and balances the sweetness from the sprinkles and sugar.

Do the sprinkles melt or bleed in the dough?

That’s why you want nonpareils! They hold their shape and color beautifully while baking. Avoid using jimmies or sanding sugar—they tend to melt and either bleed color or just disappear into the dough.

How do I make the bites the same size?

Grab a ruler (yes, really) and lightly score the surface before cutting. It helps you eyeball straight-ish lines and not end up with one giant hunk next to a pinky-sized piece. Also, a metal bench scraper works wonders if you don’t trust your knife aim.

Can I freeze the dough instead of baking it all at once?

Yes, just press the dough into the pan as instructed and freeze the whole slab wrapped tightly in plastic, then foil. When ready to use, let it thaw slightly in the fridge (just enough to slice) and bake straight from chilled. Great for pop-up cookie cravings.

Funfetti Shortbread Bites

Funfetti Shortbread Bites

Prep Time 20 minutes
Cook Time 15 minutes
Chill Time 30 minutes
Total Time 1 hour 5 minutes
Bright, buttery, and flecked with rainbow sprinkles, these funfetti shortbread bites are crunchy at the edges, tender at the center, and deeply snackable. All the classic shortbread nostalgia (plus party sprinkles!) in a bite-sized, easy-to-make treat perfect for tea, holidays, or cookie cravings.
70 bites

Ingredients

Funfetti Shortbread Dough

  • 1 cup (227 g) salted butter cold and cubed; use unsalted + 1/4 tsp salt if desired
  • 2/3 cup (135 g) granulated sugar
  • 1 tsp vanilla extract
  • 2 cups (250 g) all-purpose flour spoon and level, do not pack
  • 1 tbsp (8 g) cornstarch optional, for texture
  • 3 tbsp (33 g) nonpareil rainbow sprinkles divided, plus extra for pressing on top

Equipment

  • 9x13 inch Baking Dish
  • Parchment paper
  • Electric mixer
  • Mixing bowls
  • wooden spoon
  • Sharp knife
  • Measuring cups

Instructions
 

  1. Line a 9x13-inch baking dish with parchment paper, leaving some overhang for easy removal.
  2. Using an electric mixer, cream the cold, cubed butter with granulated sugar until the mixture appears fluffy and a shade lighter—about 2 minutes.
  3. Add vanilla extract and beat to combine until the mixture smells sweet and fragrant.
  4. Stir in the flour and (if using) cornstarch by hand with a wooden spoon or fingertips. Stop when dough is crumbly but will hold together when pressed.
  5. Fold in 2 tablespoons of the nonpareils, distributing evenly.
  6. Dump the mixture into the lined pan and press firmly and evenly into all corners (use the bottom of a measuring cup if needed). Sprinkle remaining nonpareils over the top and gently press in.
  7. Refrigerate the pan 30–60 minutes, until dough is firm and well chilled.
  8. Lift the firm dough out using parchment overhang. Place on a sturdy cutting board and cut into ½-inch squares with a sharp knife for classic bites.
  9. Evenly space bites on parchment-lined baking sheets. Bake at 325°F (163°C) for 12–15 minutes—edges should just barely begin to color.
  10. Let the bites cool on the pan—they are fragile when hot but crisp up as they cool.

Notes

Shortbread bites keep well in an airtight container for up to 1 week at room temperature or up to 2 months in the freezer. Variation ideas: swap half the vanilla for almond extract, add lemon zest, or sub mini chocolate chips for sprinkles.

Nutrition

Calories: 55kcal | Carbohydrates: 7g | Protein: 0.5g | Fat: 3g | Saturated Fat: 1.8g | Cholesterol: 8mg | Sodium: 28mg | Potassium: 6mg | Fiber: 0.1g | Sugar: 2.6g | Vitamin A: 85IU | Calcium: 3mg | Iron: 0.2mg

Soft, buttery, and kissed with cinnamon, these graham cracker cookies wrap up the cozy vibes of graham crackers, buttery brown sugar, and a swoop of marshmallow frosting. Made with flour, sugar, and of course plenty of graham cracker crumbs, they smell like your childhood kitchen—if your childhood involved a snacky obsession with s’mores, cookie dough, or both.

Let’s get you in a graham cracker headspace.

These graham cracker cookies strike a goofy little balance between a chewy cookie and a soft graham crumb. The texture? Crumbly but gooey, especially if you slather on that marshmallow fluff frosting. (You don’t have to, but I personally didn’t come all this way for restraint.) There’s cinnamon warmth if you want it, a familiar crunch from the cracker dust coating, and a sort of soft golden edge that almost looks too pretty to eat. Almost. They belong at bake sales, afternoon pick-me-ups, or midnight baking sprees where you just need to mix something with butter.

Table of Contents

Graham Cracker Cookies

Why You’ll Love this Graham Cracker Cookies Recipe

Okay, full honesty? I didn’t invent the cookie. But I do think we need more ways to let graham crackers live their full dessert potential, and this recipe definitely lets them shine.

  • Buttery meets toasty: The graham cracker crumbs toast up inside and outside the dough, giving you a warm, nutty flavor in every bite.
  • Crispy edges with chewy middles: They bake with this magical tenderness in the center, even when they look a little underdone (trust the process!).
  • Marshmallow frosting is wildly optional… or wildly required: You could skip it, but would you skip joy? It’s creamy, sweet, and feels like a swirly little campfire wink.
  • Customizable spice: The cinnamon is optional. Want nutmeg? Do it. Want none? Still fine! This cookie doesn’t judge.
  • No stand mixer fuss: A bowl, a spoon, and maybe a stubborn wrist and you’re halfway there.
  • They freeze beautifully: You’ll thank yourself later when you find a stash of these in a baggie behind the frozen peas.

Graham Cracker Cookies

Ingredient Notes

We’re keeping things classic, but here’s how everything plays its part in these crumbly-chewy dream cookies.

  • All-purpose flour: It provides just enough structure to keep the cookies from crumbling into graham-y sandcastles.
  • Graham cracker crumbs: Use the honey kind for max nostalgia. Crush them finely for the batter, but save a coarser crumb for rolling the dough balls.
  • Cornstarch: This tiny addition makes the cookies soft and slightly puffy. It’s like a pillow for your dough.
  • Ground cinnamon: Totally optional, but highly encouraged. Adds a warm, toasty note that complements the graham flavor.
  • Baking soda and baking powder: This duo gives you a tender lift without any weird over-rise. Trust their teamwork.
  • Salt: Just a hint offsets all that sweet and deepens the graham flavor, which always surprised me, honestly.
  • Unsalted butter (melted and softened): The melted stuff goes into the dough, while the softened part fluffs into the frosting. Yes, you’ll need both states of butter. Worth it.
  • Granulated sugar and light brown sugar: The combo gives the cookie chew and sweetness without being overly sweet.
  • Egg yolk: That’s right, just the yolk. It adds richness and soft chew without the floury-crumbly vibe a whole egg can bring.
  • Vanilla extract: A generous splash for depth in both the dough and the marshmallow frosting.
  • Powdered sugar: This sweet cloud makes your frosting smooth and dreamy.
  • Marshmallow fluff: Equal parts gooey and nostalgic. Folds into the frosting like a little camp counselor.
  • Crushed graham crackers (for garnish): Optional but highly Instagrammable. Nothing wrong with zhuzhing things up.

Graham Cracker Cookies

How To Make This Graham Cracker Cookies Recipe

You don’t need wizard powers for these, but a little patience and fridge time helps dial in the texture.

  • Whisk the dry ingredients: In a medium bowl, whisk together your flour, 1 cup of graham cracker crumbs, cornstarch, cinnamon if you’re going for it, baking soda, baking powder, and salt. Set it aside like a fancy ingredient bowl on a cooking show.

  • Cream butter and sugars: In a large bowl, beat your melted (cooled!) butter with the white and brown sugars until it looks like thick, gritty frosting. It should smell like caramel and childhood.

  • Add yolk and vanilla: Keep the mixer low and toss in the egg yolk plus vanilla. Mix until it becomes a rich, glossy dough base—almost pudding-ish, but not quite.

  • Fold in the dry mix: Add that bowl of dry ingredients from before and gently stir by hand. Don’t overmix unless you’re aiming for tough cookies (I’m not). It should be soft but not too sticky.

  • Chill the dough: Cover the bowl and let it hang out in the fridge for at least an hour. This step helps the cookies keep their shape, and the flavor settles nicely.

  • Preheat and prep: Turn on the oven to 325°F and line two baking sheets with parchment or silicone mats. The mat lovers out there? You’re seen.

  • Form the dough balls: Scoop 2-tablespoon-sized portions and roll them between your palms. Then roll each in the remaining graham cracker crumbs. They don’t have to be perfect spheres—lumpy is lovely.

  • Bake until golden: Pop those little orbs in the oven and bake for 10 to 12 minutes. The edges will look golden, but the centers might seem soft. That’s exactly what you want. Let them cool on the tray for 5 minutes.

  • Cool completely: After the initial cool-down, move them onto a wire rack so they can firm up into the ideal chewy-crisp shape.

  • Make the frosting: Beat softened butter until creamy, then slowly mix in the powdered sugar, vanilla, and a pinch of salt. Fold in marshmallow fluff gently with a spatula—don’t overbeat or you’ll lose that fluffiness.

  • Frost and Garnish: Once the cookies are cool, frost with a generous swipe of fluff frosting and top with extra graham crumbs if you’re feeling cute.

Graham Cracker Cookies

Storage Options

Alright, so you’re a few cookies deep and wondering what to do with the rest. (If “eat seven” isn’t on the list, here’s what else.)

Once frosted, these graham cracker cookies are best stored in an airtight container in the fridge. The frosting will keep its texture, and the cookie won’t dry out. They’ll be good for about 4 days, but try not to stack them unless you’ve got layers of parchment in between—you don’t want frosting-on-cookie crime.

You’re wondering, “Can I freeze them?” Yes. Yes, you can. Freeze the cookies without the frosting in a zip-top freezer bag, and they’ll keep for up to 2 months. When you’re ready to thaw, bring them to room temperature, then frost them fresh for best texture.

As for reheating? Not really necessary. But if you’re freezing, a quick microwave zap (10 seconds) will bring back that soft, fresh-baked vibe.

Variations and Substitutions

Craving a twist on the classic? Good. Let’s riff a little.

  • Chocolate chips: Fold a handful into the batter for that half-s’more energy (especially good without frosting).
  • Swap the fluff: No marshmallow fluff? Try a quick vanilla buttercream or leave them naked and gloriously plain.
  • Spice it up: Add ground ginger or nutmeg to push the fall-feels. Even a pinch of cardamom gets fancy.
  • Add crushed nuts: A few chopped pecans or walnuts in the dough adds crunch and cuts the sweetness a bit.
  • Coconut twist: Sub in toasted coconut for 1/2 cup of the graham crumbs and thank me later.
  • Mini cookies: Make 1-tablespoon sized dough balls and reduce the bake time by a minute or two for bite-sized versions.

Graham Cracker Cookies

What to Serve with Graham Cracker Cookies

Alright, cookie lovers, here’s where the fun multiplies. These graham cracker cookies are snacky, but they play nice with a bunch of other treats.

  • A mug of hot chocolate, extra marshmallows please. There’s something poetic about matching cookie and cocoa energy. Add a cinnamon stick or a splash of coffee liqueur if you’re feeling grown-up.

  • Pair these with a scoop of creamy vanilla or cinnamon ice cream. Honestly, I’ve used these cookies to sandwich a melty scoop and felt like I cracked the code. You might also like these peanut butter & banana ice cream sandwiches while you’re at it.

  • A tart little lemon dessert to contrast the sweetness. Something like a lemon icebox pie is great with these, especially if you skip the frosting and want a zingy sidekick.

  • Serve alongside cinnamon roll pancakes for a brunch dessert moment. Yes, dessert after brunch is a thing. See for yourself with this gorgeous cinnamon roll pancakes recipe.

  • Just a glass of cold milk. Sometimes that’s the only right answer. Nothing cuts sweet richness like a big, icy, perfect glass of milk.

Graham Cracker Cookies

Frequently Asked Questions

Can I make the dough ahead of time?

Yes! The dough actually benefits from a little chill time. You can mix it up to 2 days in advance and keep it covered in the fridge. Just let it sit at room temp for 10 minutes before scooping so it’s soft enough to roll into balls. You can also freeze the cookie dough balls and bake straight from frozen—just add a couple extra minutes to the bake time.

Do I need to use marshmallow fluff in the frosting?

Nope! It’s delicious, but optional. If you’re not a marshmallow fan or just want something simpler, go ahead and swap in a classic vanilla buttercream, or even serve these cookies plain. They’re soft and flavorful enough on their own, so frosting is totally flexible. You do you, frosting-wise.

Can I make these gluten-free?

Sure thing, but it’ll take a couple swaps. Use a gluten-free all-purpose flour blend that’s meant for 1:1 substitution, and make sure your graham cracker crumbs are certified gluten-free (there are quite a few good options out there nowadays). Just keep in mind that texture might be slightly more delicate—so don’t skip that chill time.

Why is there only one egg yolk in the dough?

Great question. Just using the yolk gives you richness without too much extra moisture, which helps keep the cookie soft and chewy instead of cakey. It’s kind of magical, actually. The yolk also helps the dough stick together better with less mixing, which means a more tender cookie. Don’t worry, you won’t miss the egg white one bit here.

Graham Cracker Cookies

Graham Cracker Cookies

Prep Time 20 minutes
Cook Time 12 minutes
Chilling Time 1 hour
Total Time 1 hour 32 minutes
Soft, buttery, and kissed with cinnamon, these graham cracker cookies combine cozy graham cracker vibes with a rich, chewy cookie texture. Rolled in graham cracker crumbs and optionally topped with marshmallow fluff frosting, they strike a perfect balance between crumbly and gooey. Perfect for bake sales, late-night snacking, or any moment you want a nostalgic treat!
22 cookies

Ingredients

Cookie Dough

  • 1 1/4 cups (160 g) all-purpose flour
  • 1 cup (110 g) graham cracker crumbs finely crushed, plus more for rolling
  • 1 tbsp (8 g) cornstarch
  • 1 tsp ground cinnamon optional but recommended
  • 1/2 tsp (0.5 tsp) baking soda
  • 1/2 tsp (0.5 tsp) baking powder
  • 1/4 tsp (0.25 tsp) salt
  • 1/2 cup (113 g) unsalted butter melted and cooled
  • 1/2 cup (100 g) light brown sugar packed
  • 1/4 cup (50 g) granulated sugar
  • 1 large egg yolk
  • 1 1/2 tsp (1.5 tsp) vanilla extract

Marshmallow Frosting (Optional)

  • 1/4 cup (57 g) unsalted butter softened
  • 1 cup (120 g) powdered sugar
  • 1/2 tsp (0.5 tsp) vanilla extract
  • 1 cup (225 g) marshmallow fluff
  • pinch salt

For Rolling & Garnish

  • Reserved graham cracker crumbs coarse, for rolling dough balls and garnishing

Equipment

  • Mixing bowls
  • Baking Sheets
  • Parchment Paper or Silicone Mats
  • Wire rack
  • Hand mixer or whisk

Instructions
 

  1. In a medium bowl, whisk together the flour, 1 cup of graham cracker crumbs, cornstarch, cinnamon (if using), baking soda, baking powder, and salt. Set aside.
  2. In a large bowl, mix melted (and cooled) butter with the brown sugar and granulated sugar until the mixture resembles thick, gritty frosting.
  3. Add the egg yolk and vanilla extract to the wet mixture, blending until smooth and glossy.
  4. Gently stir the dry ingredients into the wet ingredients until just combined. Do not overmix. Dough should be soft and slightly tacky.
  5. Cover the bowl and refrigerate the dough for at least 1 hour.
  6. Preheat oven to 325°F (163°C). Line two baking sheets with parchment paper or silicone mats.
  7. Scoop out dough (about 2 tablespoons per cookie), roll into balls, then roll each ball in reserved coarse graham cracker crumbs.
  8. Arrange dough balls on prepared baking sheets, spacing them about 2 inches apart. Bake for 10–12 minutes or until edges look golden. Centers will look soft; that's perfect.
  9. Let cookies cool on the baking sheet for 5 minutes, then transfer to a wire rack to cool completely.
  10. For the frosting (optional): Beat softened butter in a medium bowl until creamy. Slowly mix in powdered sugar, vanilla, and a pinch of salt until smooth. Fold in marshmallow fluff gently until just combined.
  11. Once cookies are fully cooled, frost with marshmallow frosting and garnish with extra graham cracker crumbs, if desired.

Notes

Customize these cookies by adding chocolate chips, spices, or nuts to the dough. Skip the marshmallow frosting for a less sweet version, or use your favorite frosting instead. Cookies freeze beautifully (unfrosted) for up to 2 months—just thaw and frost before serving!

Nutrition

Calories: 165kcal | Carbohydrates: 26g | Protein: 2g | Fat: 7g | Saturated Fat: 4g | Cholesterol: 23mg | Sodium: 79mg | Potassium: 26mg | Fiber: 0.4g | Sugar: 12g | Vitamin A: 191IU | Calcium: 30mg | Iron: 0.8mg

Buttery swirls of brown sugar and cinnamon melt into fluffy, golden pancakes, and a silky cream cheese drizzle ties it all together. These cinnamon roll pancakes combine pantry staples like flour, eggs, cinnamon, butter, and cream cheese into something cozy and slightly indulgent. Sunday brunch just got a sweet upgrade—no yeast, no waiting, just warm spirals of joy.

Think of these as your flannel pajama pancakes. They taste like soft cinnamon rolls that got curious and wandered into the breakfast section. Each bite lands with that perfect balance of spiced swirl and tangy buttermilk fluff, and once that melty cream cheese icing hits the warm stack—poof—instant coziness. No yeast, no overnight prep, no regrets. Whip them up when you’re craving something fun and a little extra, whether it’s a lazy Saturday or your third breakfast of the day.

Table of Contents

Cinnamon Roll Pancakes

Why You’ll Love this Cinnamon Roll Pancakes Recipe

No drama here, just pancakes with a cinnamon sugar spiral. It’s exactly what it sounds like, and that’s kind of the magic.

  • That swirl though: The brown sugar-cinnamon butter melts into the pancake as it cooks, forming a gooey, caramelized spiral.
  • Fluffy-meets-gooey texture combo: You get soft buttermilk pancakes with that sticky cinnamon roll middle moment in every bite.
  • Zero yeast or rising time: If you want cinnamon roll vibes but don’t feel like baking or waiting, this skips all the nonsense.
  • Drizzle bliss: That cream cheese icing melts into the warm pancakes like frosting on a cinnamon cloud.
  • Looks fancy, no stress: Pipe on the swirl, flip, drizzle, and suddenly your kitchen smells like a bakery—without the four-hour commitment.
  • Crowd compliant: Whether it’s brunch with friends or bribing sleepy teenagers out of bed, these totally win people over.

Cinnamon Roll Pancakes

Ingredient Notes

This is a pantry-friendly recipe, but a couple ingredients really pull their weight.

  • Unsalted butter: You’ll need this in both the swirl and icing. I like mine just soft enough to smear, not melted to oblivion.
  • Brown sugar: For that classic sticky-sweet spiral. Dark gives a deeper flavor, but light brown works just fine.
  • Ground cinnamon: Go with the good stuff here. It’s the signature spice, so get fresh and fragrant if you can.
  • All-purpose flour: The base for basic, trusty pancake texture. Nothing fancy needed.
  • Buttermilk: Adds a gentle tang and helps make your pancakes fluffy without tasting sour. If you don’t have any, a milk + lemon juice mix can pinch-hit.
  • Egg: Just one! It binds things and helps pancake magic happen.
  • Vanilla extract: I never measure this exactly. Just splash until it smells right…
  • Cream cheese: Softened cream cheese gives the icing that luscious tang. Don’t skip the softening, or you’ll fight your mixer.
  • Powdered sugar: Sweet but gentle, this blends seamlessly into the icing without graininess.
  • Milk: Just a splash, added at the end to thin the icing until drizzle-ready.

Cinnamon Roll Pancakes

How To Make This Cinnamon Roll Pancakes Recipe

This whole pancake process is about layering sweetness without overthinking it. Take your time, sip your coffee, and enjoy the cinnamon air.

  • Make the cinnamon swirl: Grab a bowl and whisk together the softened butter, brown sugar, and cinnamon until it’s thick and glossy. Scoop this into a piping bag or ziplock—just snip the tip later for swirling.

  • Whisk the dry stuff: In a big bowl, stir together flour, baking powder, baking soda, granulated sugar, and salt. Yes, you’re basically preloading the flavor.

  • Combine the liquids: In a separate bowl, whisk the buttermilk, egg, melted butter, and vanilla until it’s all one creamy mix. Try not to drink it (kidding… sort of).

  • Mix it all up: Pour the wet ingredients into the flour party and stir just until combined. You’ll see lumps. Let them be. Overmixing is the highway to gummy-town.

  • Make the icing: Using a hand mixer or some strong elbow grease, beat the softened cream cheese and butter until smooth. Add the powdered sugar and vanilla, then thin out with milk until it’s still thick but pourable.

  • Cook the pancakes: Lightly grease a nonstick skillet or griddle and preheat to medium. Add 1/4 cup of batter per pancake. Immediately swirl in the cinnamon filling using your bag.

  • Flip with care: Once bubbles pop on the surface and the edges look set, flip gently. The swirl side might sizzle a bit—it’s just the sugar doing its delicious thing. Cook the second side 1 to 2 minutes more.

  • Stack and swirl: As pancakes finish, transfer them to a plate and tent with foil to keep warm. Repeat the cooking until you run out of batter.

  • Drizzle time: Warm the cream cheese icing slightly if needed and go wild. Zigzag or pour. There are no rules here.

Cinnamon Roll Pancakes

Storage Options

So let’s say you made a big batch and you’ve got leftovers (hey, self-control champ). These cinnamon roll pancakes actually hold up nicely with the right care.

Pop them in the fridge in an airtight container, and they’ll hang out for about 3 to 4 days. You might want to store the cream cheese icing separately, just so nothing gets soggy or funky.

Freezer? Absolutely. Lay the pancakes in a single layer on a sheet tray, freeze until solid, then pile them into a zip-top bag. They’ll stay pancake-happy for about 2 months. Same deal with the icing, though I recommend freezing it in a small container and giving it a blend after thawing to revive the texture.

To reheat, skip the microwave if you don’t want chewy edges. I like to pop mine into a toaster oven or onto a skillet over medium-low heat. Add the icing after reheating so it stays luscious and doesn’t absorb into the pancakes like a sponge on a hot summer sidewalk.

Variations and Substitutions

Cinnamon roll pancakes are wild as-is, but there’s plenty of room to riff depending on your mood or pantry situation.

  • Swap the buttermilk: No buttermilk? Mix 1 cup of milk with 1 tablespoon of lemon juice or vinegar, let it sit 5 minutes, and boom—DIY tang.

  • Go gluten-free: Use your favorite 1:1 gluten-free baking mix. I’ve tried it and it still does the fluffy, swirly thing just fine.

  • Jazz up the swirl: Add a pinch of mashed banana or a whisper of orange zest to the cinnamon filling. Unexpected, sweet, and cozy.

  • Make it dairy-free: Sub in plant-based butter, almond milk, and a dairy-free cream cheese. The flavor still lands and the swirl still swirls.

  • Pump it up with pumpkin: Add about 1/3 cup of pumpkin purée to the batter with the wet ingredients and throw some nutmeg in the swirl.

Cinnamon Roll Pancakes

What to Serve with Cinnamon Roll Pancakes

These stackers are rich, sure, but that doesn’t mean they need to fly solo. Here are a few tasty companions.

  • A salty breakfast sausage or bacon patty really cuts through the sweetness. The crispy-fatty contrast is unbeatable. If you’re a fan of sweet-savory mashups, this is your moment.

  • A pile of fresh fruit—strawberries, blueberries, or even grilled peaches—brings brightness and a little freshness to the party. You might also like to try that strategy in other recipes, like these ice cream sandwiches with banana and peanut butter.

  • A hot mug of coffee or chai balances that sweet, creamy icing. Bonus points if it’s on a chilly morning.

  • If you’re feeling baked-good energy all around, pair with something spiced like these cinnamon streusel muffins for a dessert-style brunch spread.

Cinnamon Roll Pancakes

Frequently Asked Questions

Can I make the cinnamon swirl ahead of time?

Absolutely. You can mix the cinnamon filling a day or two ahead and keep it in the fridge. Just bring it back to room temp before using so you don’t end up trying to pipe a butter brick through a shaky ziplock. You want it soft enough to swirl but not melted like soup.

Why did my swirl sink or ooze?

This happens when the swirl is too thin (melted too much) or you add it too early before the pancake has set slightly. Keep your swirl thick and pipe it just after the batter is in the skillet, not five seconds before flipping. Also, low to medium heat gives the sugar time to caramelize instead of run wild.

Can I make them without the cream cheese icing?

You totally can, and honestly, they’re still fabulous. Try dusting with powdered sugar or topping with a drizzle of maple syrup. You could also whip up a quick vanilla or even peanut butter glaze if you’re feeling creative—and a little lazy about cream cheese softening.

Can I make this recipe into waffles instead?

Okay, yes, BUT… you’ll need to grease your waffle iron extra well, and keep in mind that the sugary swirl can get a little sticky and burn-y. Try swirling in the cinnamon halfway through cooking, or add it after they’re cooked so you still get that dreamy flavor without caramelized chaos.

Cinnamon Roll Pancakes

Cinnamon Roll Pancakes

Prep Time 15 minutes
Cook Time 20 minutes
Total Time 35 minutes
Buttery swirls of brown sugar and cinnamon melt into fluffy, golden pancakes, and a silky cream cheese drizzle ties it all together. These cinnamon roll pancakes combine pantry staples into pure breakfast magic—no yeast, no waiting, just warm spirals of joy. The best parts of cinnamon rolls and pancakes, all in one cozy stack.
4 servings

Ingredients

Cinnamon Swirl

  • 4 tbsp (55 g) unsalted butter softened
  • 1/3 cup (65 g) brown sugar packed, dark or light
  • 1 1/2 tsp (3 g) ground cinnamon

Pancake Batter

  • 1 cup (125 g) all-purpose flour
  • 1 tbsp (12 g) granulated sugar
  • 1 tsp (4 g) baking powder
  • 1/2 tsp (2 g) baking soda
  • 1/4 tsp (1.5 g) salt
  • 1 large egg
  • 1 cup (240 ml) buttermilk see notes for substitute
  • 2 tbsp (28 g) unsalted butter melted and cooled
  • 1 tsp (5 ml) vanilla extract

Cream Cheese Icing

  • 2 oz (56 g) cream cheese softened
  • 2 tbsp (28 g) unsalted butter softened
  • 1/2 cup (60 g) powdered sugar
  • 1/2 tsp (2.5 ml) vanilla extract
  • 1-2 tbsp (15-30 ml) milk as needed, for thinning

Equipment

  • Nonstick Skillet or Griddle
  • Mixing bowls
  • Whisk
  • Piping Bag or Ziplock Bag
  • Hand Mixer
  • Spatula

Instructions
 

  1. Make the cinnamon swirl: In a bowl, whisk together softened butter, brown sugar, and cinnamon until glossy and smooth. Scoop into a piping bag or ziplock and set aside (do not refrigerate).
  2. Whisk the dry ingredients: In a large bowl, stir together flour, baking powder, baking soda, granulated sugar, and salt.
  3. Combine wet ingredients: In another bowl, whisk buttermilk, egg, melted butter, and vanilla until fully combined.
  4. Mix batter: Pour the wet ingredients into the dry. Stir gently until just combined—lumps are fine. Do not overmix.
  5. Make the icing: Beat softened cream cheese and butter until smooth and creamy. Add powdered sugar and vanilla, then beat again. Thin with milk, a little at a time, until thick but pourable.
  6. Cook the pancakes: Preheat a nonstick skillet or griddle over medium. Lightly grease. Pour 1/4 cup batter per pancake. Immediately pipe a swirl of the cinnamon mixture onto each pancake.
  7. Flip and finish: Cook until bubbles form on top and edges look set. Gently flip; cook other side 1–2 minutes more. Transfer pancakes to a plate and tent to keep warm. Repeat with remaining batter.
  8. Drizzle and serve: Warm the cream cheese icing slightly if needed, then drizzle over warm pancakes. Serve immediately and enjoy!

Notes

Buttermilk substitute: Use 1 cup milk + 1 tbsp lemon juice or vinegar, sit for 5 minutes.
Storage: Pancakes keep 3–4 days in the fridge, or up to 2 months frozen. Store icing separately.
Gluten-free: Swap for a 1:1 gluten-free baking mix.
Dairy-free: Use plant-based butter/milk/cream cheese.
Pro tip: Don't overmix the batter—lumps are good for fluffiness. Keep the cinnamon swirl thick (not runny) for that perfect spiral.

Nutrition

Calories: 375kcal | Carbohydrates: 50g | Protein: 7g | Fat: 15g | Saturated Fat: 9g | Cholesterol: 75mg | Sodium: 430mg | Potassium: 180mg | Fiber: 1g | Sugar: 22g | Vitamin A: 590IU | Calcium: 150mg | Iron: 2.2mg

Warm, buttery, and topped with a crumbly crown of sweet cinnamon, these cinnamon streusel muffins are loaded with brown sugar, sour cream, and a tender, spiced crumb. You’ll smell them before you see them—like your kitchen’s suddenly decided to give you a cinnamon-sugar hug.

These muffins are my go-to when I want something cozy but not overly fussy. They’ve got a surprise swirl of cinnamon sugar tucked inside, a crumb topping that’s delightfully messy, and a soft, moist base thanks to a combo of buttermilk and sour cream. You can eat them fresh out of the oven (hot tip: do this), or let them cool and become your sidekick for coffee breaks or late-night snack moments. And let’s be honest, they’re one of those anytime bakes—not too sweet for breakfast, not too dull for dessert.

Table of Contents

Cinnamon Streusel Muffins

Why You’ll Love this Cinnamon Streusel Muffins Recipe

They don’t ask much of you. No fancy ingredients, no secret handshakes, just a few bowls and a little mixing action.

  • Layers of cozy flavor: You’ve got spice in the batter, a sweet cinnamon swirl in the middle, and streusel on top.
  • Tender and moist texture: Thank you, buttermilk and sour cream. These are not dry cupcakes pretending to be muffins.
  • Sweet, crumbly topping: The streusel bakes into golden-brown nubbins that crunch slightly under your bite and then melt.
  • Pretty enough for brunch, easy enough for Tuesday: Nothing fussy, but they look like you tried.
  • They double as air freshener: Your whole home is going to smell like a cinnamon bakery dream, no candle required.

Cinnamon Streusel Muffins

Ingredient Notes

There’s nothing complicated hiding here. Just pantry staples doing their thing, with a couple of creamy mix-ins that make all the difference.

  • All-purpose flour: This gives structure to both the muffins and the topping. Measure carefully so things don’t get dense.
  • Brown sugar (light): Adds depth and a little stickiness to both the batter and streusel. You’ll use it twice—worth it.
  • Granulated sugar: Balances out the brown sugar and sweetens the batter without overpowering the cinnamon.
  • Ground cinnamon: The real boss here. It’s in the batter, filling, and topping, so use a fresh jar if yours smells like dust.
  • Baking powder + baking soda: The combo keeps things rising just right. No sad, flat muffins allowed.
  • Unsalted butter: Some cold for the streusel (keep it chunky), and some soft for creaming into the batter.
  • Eggs: These help bind everything together and give a bit of lift. Room temp works best, so pull them out early.
  • Sour cream: This adds richness and tang, keeping the muffins soft and fluffy. Don’t skip it.
  • Buttermilk: Works with the leaveners to fluff things up and gives a gentle tang that complements the cinnamon.
  • Vanilla extract: Because why wouldn’t you?

Cinnamon Streusel Muffins

How To Make This Cinnamon Streusel Muffins Recipe

Let’s bake this thing. It’s really a mix of three mini steps: topping, filling, and muffin base. Sounds fussier than it is—I promise. You’ll be muffin queen (or king) before your coffee’s cool.

  • Make the streusel topping: In a bowl, stir together flour, brown sugar, cinnamon, and salt. Cut in the cold butter using your fingers until it looks like damp sand with little pebbles. If it’s too dry, add a splash of milk—just enough until it clumps when you pinch it. Stick it in the fridge for now, to keep it firm.

  • Mix the cinnamon sugar layer: Combine brown sugar and cinnamon. That’s it. Don’t overthink it. This layer adds a gorgeous sweet-spiced ribbon inside the muffins.

  • Whisk the dry ingredients: Grab another bowl (I know, sorry) and combine flour, baking powder, baking soda, salt, and cinnamon. This gets the flavor and loft built right into the base.

  • Cream the butter and sugars: In your biggest bowl, beat the softened butter, granulated sugar, and brown sugar until it turns light and fluffy—which takes a few minutes. If you skip this, the texture won’t be the same, so take your time here.

  • Add the wet stuff: One egg at a time, then in go the sour cream, buttermilk, and vanilla. It may look a little… chaotic. That’s normal. It’ll smooth out.

  • Combine wet and dry: Add the flour mixture slowly, folding it in by hand. Don’t overmix. Just stir until no dry streaks remain. Overworking will make sad muffins. And we don’t want sad muffins.

  • Assemble the muffins: Line your muffin tin and fill each cup halfway with batter. Sprinkle the cinnamon sugar over that layer, then dollop the remaining batter overtop. You’ll need to do a little smoothing so the cinnamon layer hides. Top with your streusel and gently press it into the batter just a smidge so it sticks.

  • Bake in stages: Bake at 425°F for 5 minutes to help them puff high. Then, without opening the oven, drop the temp to 350°F and continue baking for 12 to 15 minutes until a toothpick comes out clean and the tops look golden and… dreamy.

  • Cool (if you can wait): Let them sit in the pan for 5 minutes, then transfer to a wire rack. Or eat one warm if you like living on the edge.

Cinnamon Streusel Muffins

Storage Options

Here’s the good news: these muffins hold up well. And they freeze beautifully too.

If you’re keeping them at room temperature, stash them in an airtight container. They’ll stay soft for about 2–3 days. After that, they’ll still be edible, but the streusel topping starts to lose its charm. You could always re-warm them a bit to revive it—10 seconds in the microwave does wonders.

For longer storage, toss them in the freezer. Let them cool completely first, then wrap individually in plastic wrap and tuck into a freezer bag. They’ll keep for up to 2 months. To reheat, microwave from frozen or let them thaw on the counter, then give them a quick warm-up before devouring.

And yes, you can make the batter the night before, assemble in the morning, and bake fresh. It’s a power move.

Variations and Substitutions

Feel like riffing? These muffins are super adaptable. You can tweak the flavors without toppling the whole operation.

  • Swap the cinnamon: Try pumpkin spice or apple pie spice for a cozy twist that still feels familiar.
  • Add chopped nuts: Pecans or walnuts in the streusel add a toasty crunch that holds up well after baking.
  • Use Greek yogurt instead of sour cream: It works just fine, especially if you use a full-fat version.
  • Add fruit: A handful of diced apples or pears folded into the batter adds little pockets of moisture and flavor.
  • Make them mini: Use a mini muffin pan and reduce the baking time. Perfect for brunch buffets or little grab-n-go snack bombs.

Cinnamon Streusel Muffins

What to Serve with Cinnamon Streusel Muffins

Whether you’re having one solo with your morning mug or making these part of a cozy spread, here’s what pairs nicely.

  • A big old mug of strong coffee or chai. Because if a muffin could pick its soulmate, that’s what it would ask for. The cinnamon plays beautifully with bold coffee or spicy tea.

  • A fresh, crisp salad. Might sound strange at first, but hear me out: muffins for brunch, salad for balance. Something like this classic wedge salad works great for a casual lunch date.

  • A fun egg dish. Think frittatas or soft scrambled eggs with chives. Their light texture balances the muffins’ richness.

  • Something fruity and cool. A mixed berry bowl or yogurt parfait adds contrast and makes you feel like you’re at a little café, even if you’re still in slippers.

  • A sweet finish if you’re feeling extra. Like… say, peanut butter banana ice cream sandwiches. Because yes, muffins then ice cream is perfectly legal.

Cinnamon Streusel Muffins

Frequently Asked Questions

Can I make these muffins ahead of time?

Yep, you totally can. You can fully bake the muffins and store them at room temperature for a couple of days, or freeze them individually for longer storage. Another option? Prep the batter and streusel the night before, refrigerate them separately, and assemble and bake in the morning. Your future self will thank you.

Why did my streusel sink into the batter?

This usually happens when the topping is too wet or the batter is too thin. Be sure the butter in the streusel is cold and your batter isn’t overmixed or runny. And don’t just sprinkle the topping—press it gently on top to help it stay put during baking.

Can I leave out the cinnamon swirl in the middle?

Sure! You’ll lose that sweet-spiced layer inside, but the muffins will still be tasty with the cinnamon in the batter and streusel on top. If you’re short on time or feeling lazy (hey, no judgment), they’re still worth making.

What’s the best way to warm them up again?

Microwave them for 10–15 seconds if they’re room temp, or a little longer if frozen. You can also pop them in the oven at 300°F for about 8 minutes. Just enough to reawaken the butter and make the topping a little crispy again. So satisfying.

Cinnamon Streusel Muffins

Cinnamon Streusel Muffins

Prep Time 20 minutes
Cook Time 20 minutes
Total Time 45 minutes
Warm, buttery, and topped with a crumbly crown of sweet cinnamon, these cinnamon streusel muffins are irresistibly cozy with a surprise cinnamon sugar swirl inside. Thanks to buttermilk and sour cream, they come out tender and moist every time—perfect for breakfast, brunch, or coffee breaks. Their golden, crunchy streusel topping and spiced aroma will make your kitchen (and mood) bright.
12 muffins

Ingredients

Streusel Topping

  • 1/2 cup (60 g) all-purpose flour
  • 1/3 cup (67 g) light brown sugar packed
  • 1 tsp ground cinnamon
  • 1/4 tsp (0.25 tsp) salt
  • 1/4 cup (57 g) unsalted butter cold, diced
  • 1-2 tsp (5-10 ml) milk optional, for clumping topping

Cinnamon Sugar Swirl

  • 1/3 cup (67 g) light brown sugar packed
  • 1 tbsp (8 g) ground cinnamon

Muffin Batter

  • 2 cups (250 g) all-purpose flour spooned and leveled
  • 2 tsp baking powder
  • 1/2 tsp (0.5 tsp) baking soda
  • 1/2 tsp (0.5 tsp) salt
  • 1 tbsp (8 g) ground cinnamon
  • 1/2 cup (113 g) unsalted butter softened (1 stick, 113g)
  • 1/2 cup (100 g) granulated sugar
  • 1/4 cup (50 g) light brown sugar packed
  • 2 large eggs room temperature
  • 1/2 cup (120 g) sour cream room temperature
  • 1/4 cup (60 ml) buttermilk room temperature
  • 2 tsp vanilla extract

Equipment

  • Muffin tin
  • Mixing bowls
  • Whisk
  • Hand mixer or stand mixer

Instructions
 

  1. Make the streusel topping: In a bowl, mix flour, light brown sugar, cinnamon, and salt. Add the cold, diced butter. Use your fingers or a pastry cutter to work the butter in until the mixture resembles damp sand with small pebbles. Add a splash of milk if needed so it clumps together. Place in the fridge while you prep the rest.
  2. Mix the cinnamon sugar swirl: Combine light brown sugar and cinnamon in a small bowl. Set aside.
  3. Whisk the dry ingredients: In a medium bowl, whisk together the flour, baking powder, baking soda, salt, and cinnamon for the muffin batter.
  4. Cream the butter and sugars: In a large bowl, beat softened butter with granulated sugar and light brown sugar until pale and fluffy, about 2–3 minutes.
  5. Add eggs and wet ingredients: Beat in eggs one at a time. Add sour cream, buttermilk, and vanilla extract. Mix until combined (it’s ok if it looks a bit separated).
  6. Combine wet and dry: Fold dry ingredients into wet, mixing gently by hand until just combined. Avoid over-mixing.
  7. Assemble the muffins: Line or grease a 12-cup muffin tin. Fill each cup halfway with batter. Sprinkle a spoonful of cinnamon sugar swirl over each. Cover with remaining batter and smooth the tops. Top generously with streusel, pressing it down gently to help it adhere.
  8. Bake: Bake muffins at 425°F (220°C) for 5 minutes, then (without opening the oven) reduce temperature to 350°F (175°C) and bake for 12–15 more minutes, or until a toothpick comes out clean and tops are golden.
  9. Cool and enjoy: Let muffins cool in the tin for 5 minutes, then transfer to a wire rack. Enjoy warm, or let cool completely before storage or freezing.

Notes

Storage: Keep muffins at room temperature in an airtight container for 2–3 days, or freeze individually wrapped for up to 2 months. Reheat in microwave for 10–15 seconds.
Variations: Add chopped nuts to the streusel, swap in Greek yogurt for sour cream, or mix diced apples into the batter. For mini muffins, reduce baking time.
Make Ahead: Batter and streusel can be prepared the night before and refrigerated; assemble and bake in the morning for fresh muffins.

Nutrition

Calories: 260kcal | Carbohydrates: 38g | Protein: 3g | Fat: 11g | Saturated Fat: 7g | Cholesterol: 48mg | Sodium: 196mg | Potassium: 70mg | Fiber: 1g | Sugar: 18g | Vitamin A: 380IU | Calcium: 60mg | Iron: 1.2mg

Let's Get Cooking!

100+ Recipes for Busy Nights

In a time crunch? Take a look around and browse plenty of recipes to help you get dinner ready and on the table on those busy nights!

Sweet Recipes

Pumpkin Banana Muffins

Pumpkin Banana Muffins Recipe

Strawberry Pie Bars

Strawberry Pie Bars Easy Oven Recipe

White Chocolate Raspberry Muffins

White Chocolate Raspberry Muffins Recipe

Snickerdoodle Muffins

Snickerdoodle Muffins Recipe for Oven

PIN NOW

Follow KitchenetteBlog on Pinterest

Love cozy recipes that actually make it to the table? On Pinterest, I share new comfort-food ideas every week—desserts, dinners, and those little snack cravings that hit at midnight. Come pin with me and never run out of kitchen inspo.

Savory Recipes

Turkey Tetrazzini

Turkey Tetrazzini Baked Pasta Recipe

Grilled Chicken Panini Sandwich

Grilled Chicken Panini Sandwich Recipe

Sweet Potato Cornbread

Sweet Potato Cornbread Recipe Oven Baked

Classic Waldorf Salad

Waldorf Salad Simple Classic Recipe

Get 5 Recipes to Simplify Your Life!

Delicious, versatile recipes you can make over and over.