Get 5 recipes to simplify your life:

easy, delicious, real food recipes

Latest Recipes

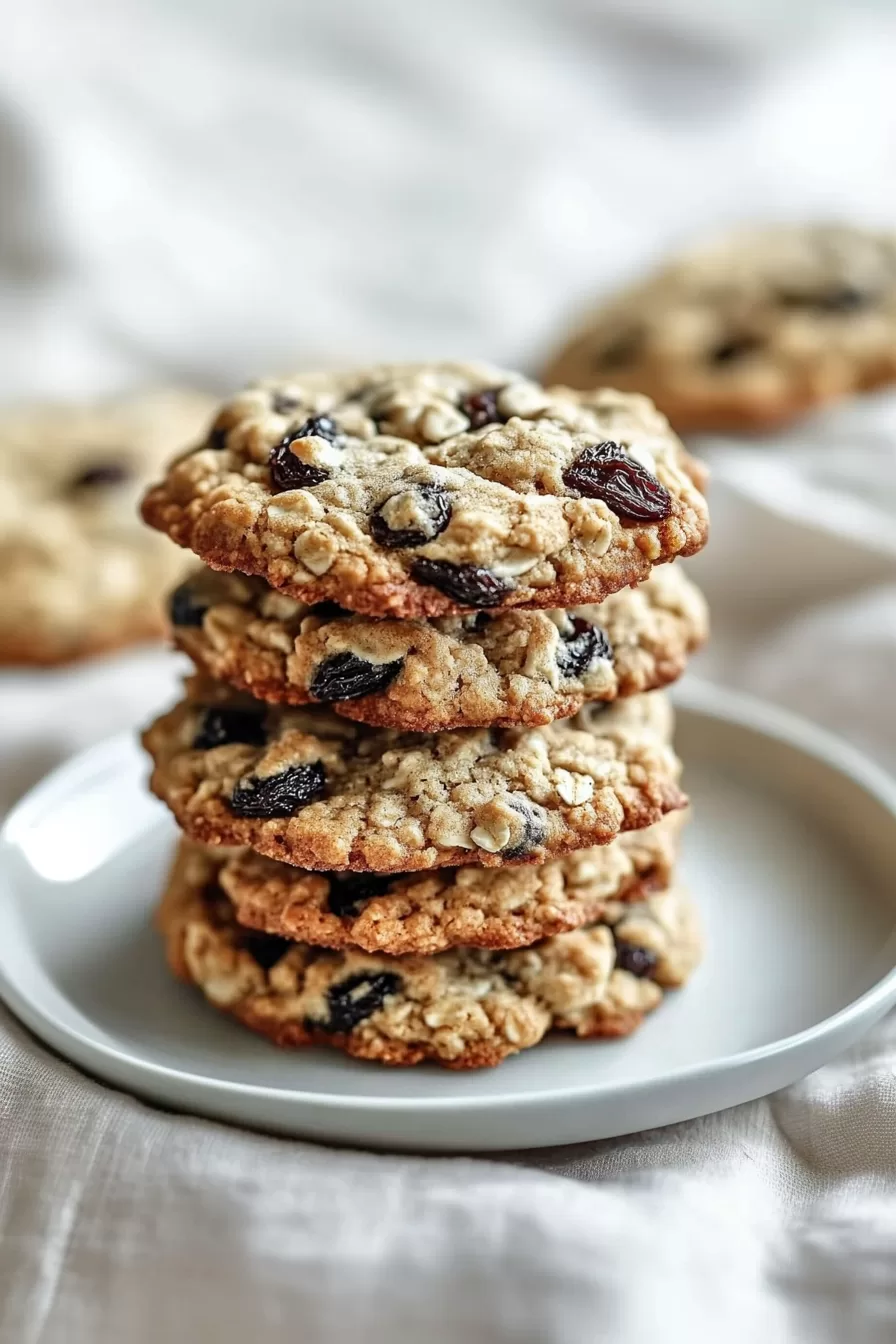
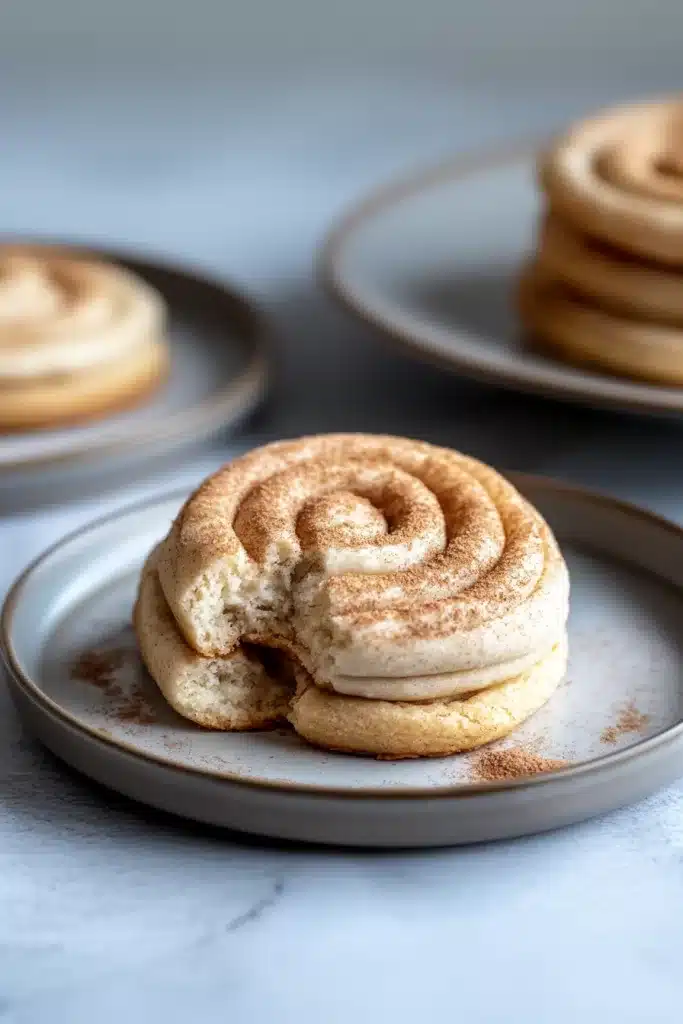
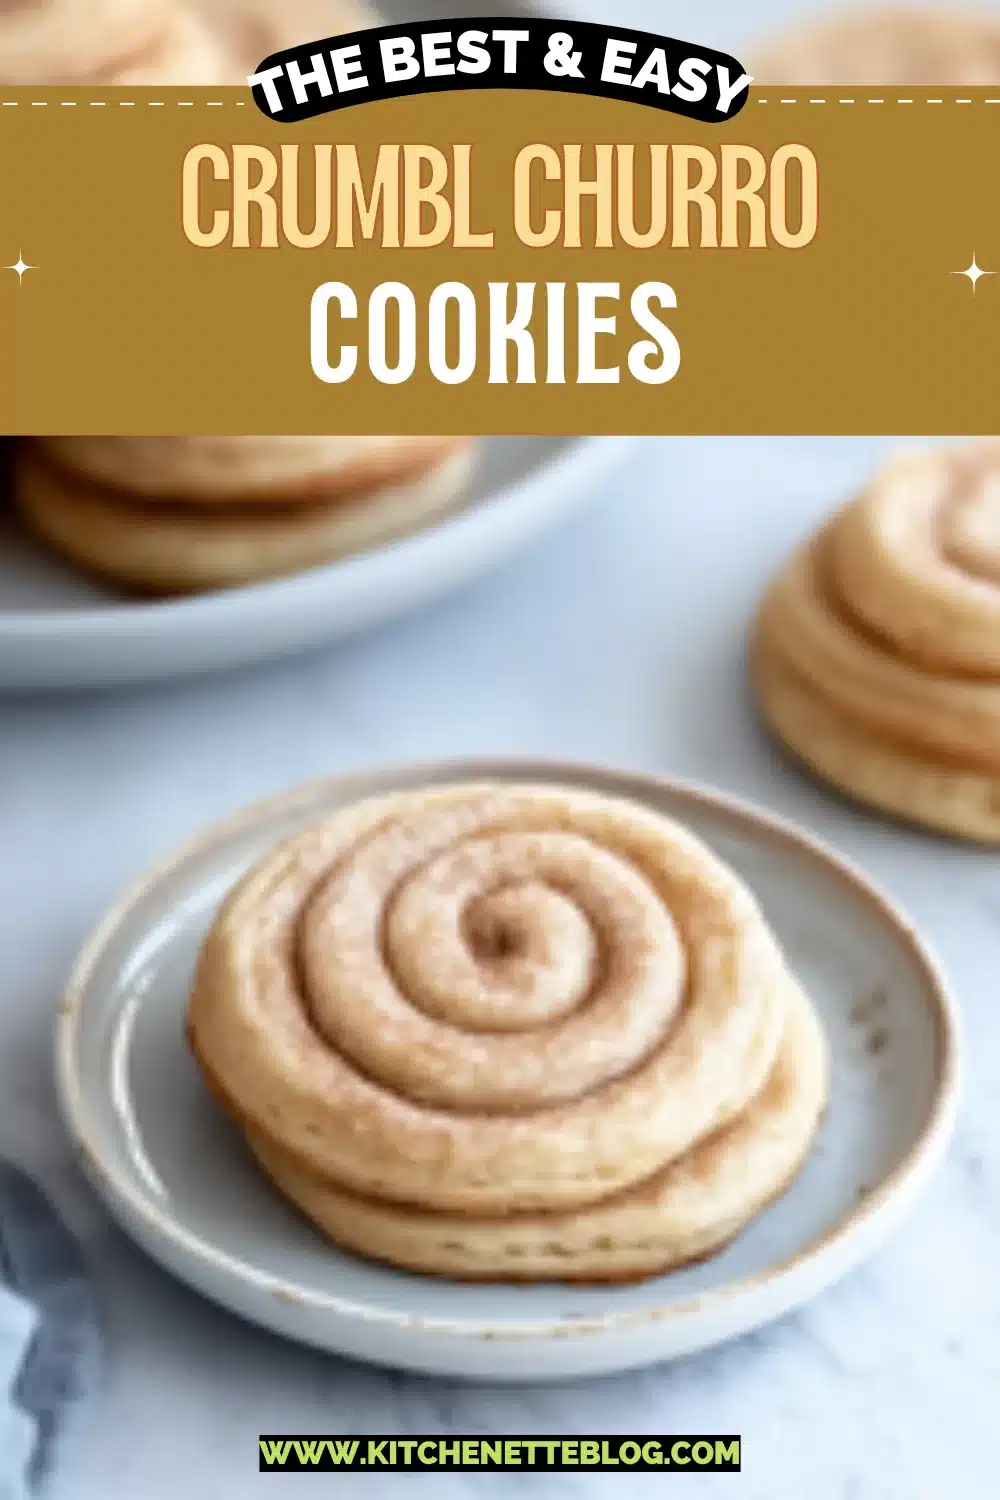
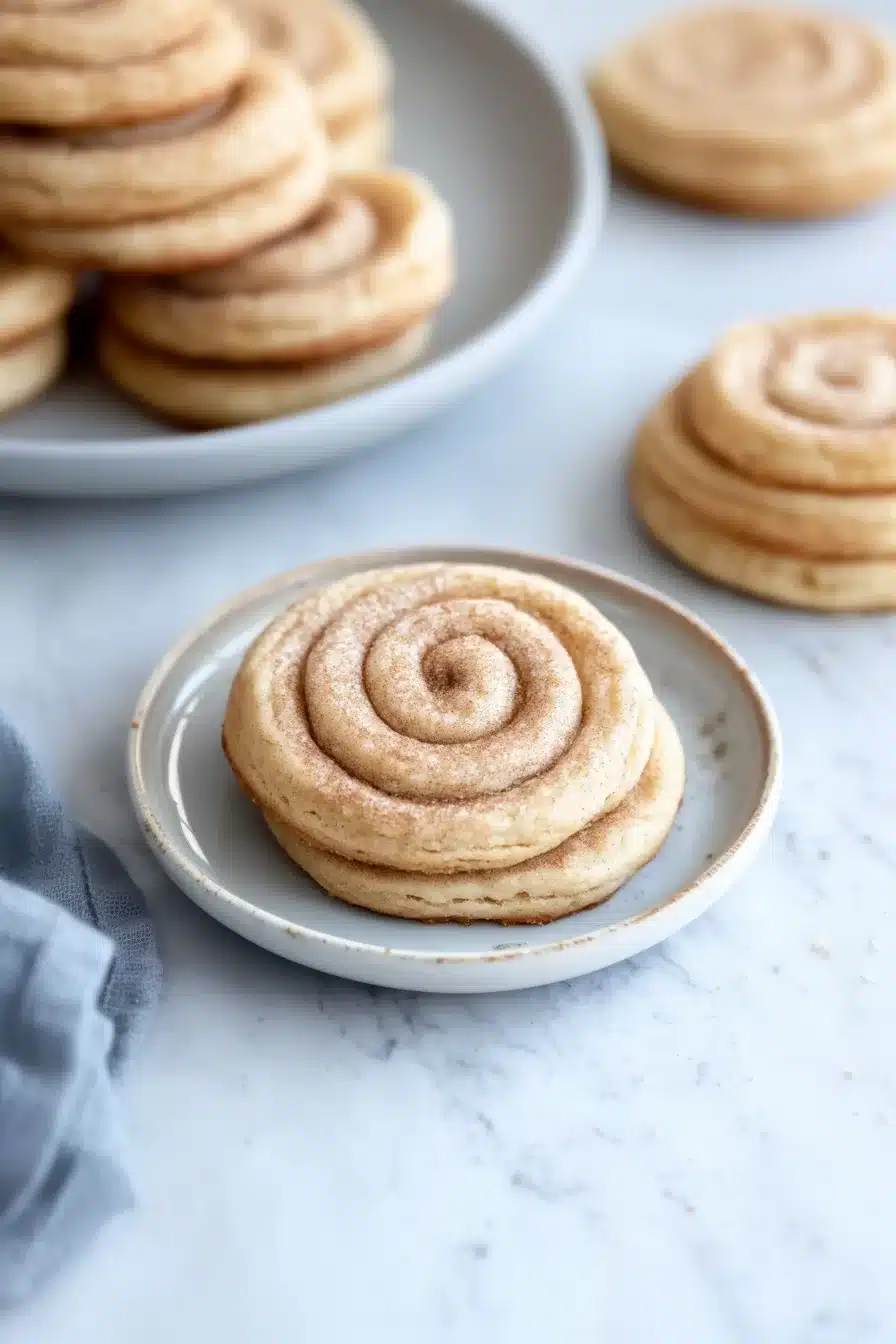
Warm, buttery sugar cookie base meets cinnamon-kissed frosting in these Crumbl Churro Cookies made with real butter, brown sugar, and cinnamon. One bite in, and your kitchen will smell like a sweet little bakery.

If snickerdoodle and cinnamon rolls had a wildly indulgent cookie baby, this would be it. These Crumbl Churro Cookies are thick, tender-chewy, and wrapped in a warm cinnamon-sugar hug. A swirl of whipped brown sugar frosting on top (yes, frosting on a cookie) takes them right over the edge, in the very best way. They’re great for gifting, sharing, or hoarding in your freezer for emergencies of the “ugh, today was trash” variety. If you’re into cookies with a little twist and a lot of cozy charm, come on in. I already preheated the oven.

Table of Contents

Crumbl Churro Cookies

Why You’ll Love this Crumbl Churro Cookies Recipe

No airs here, just a really, really good cookie with a cinnamon heart and a soft center.

  • Ridiculously simple to make: You just mix, shape, coat in cinnamon sugar, and bake. Most of it’s pantry staples, too.
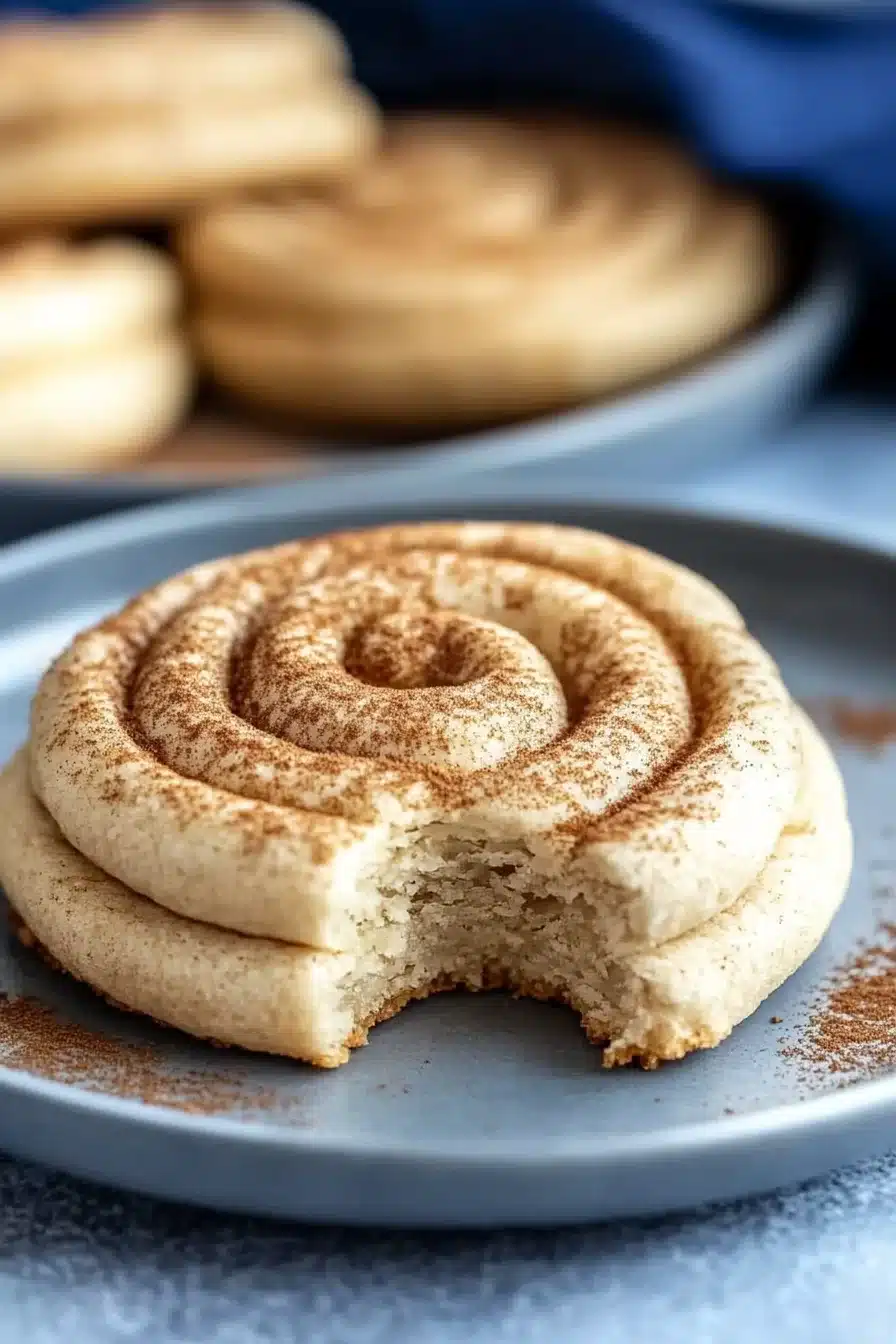
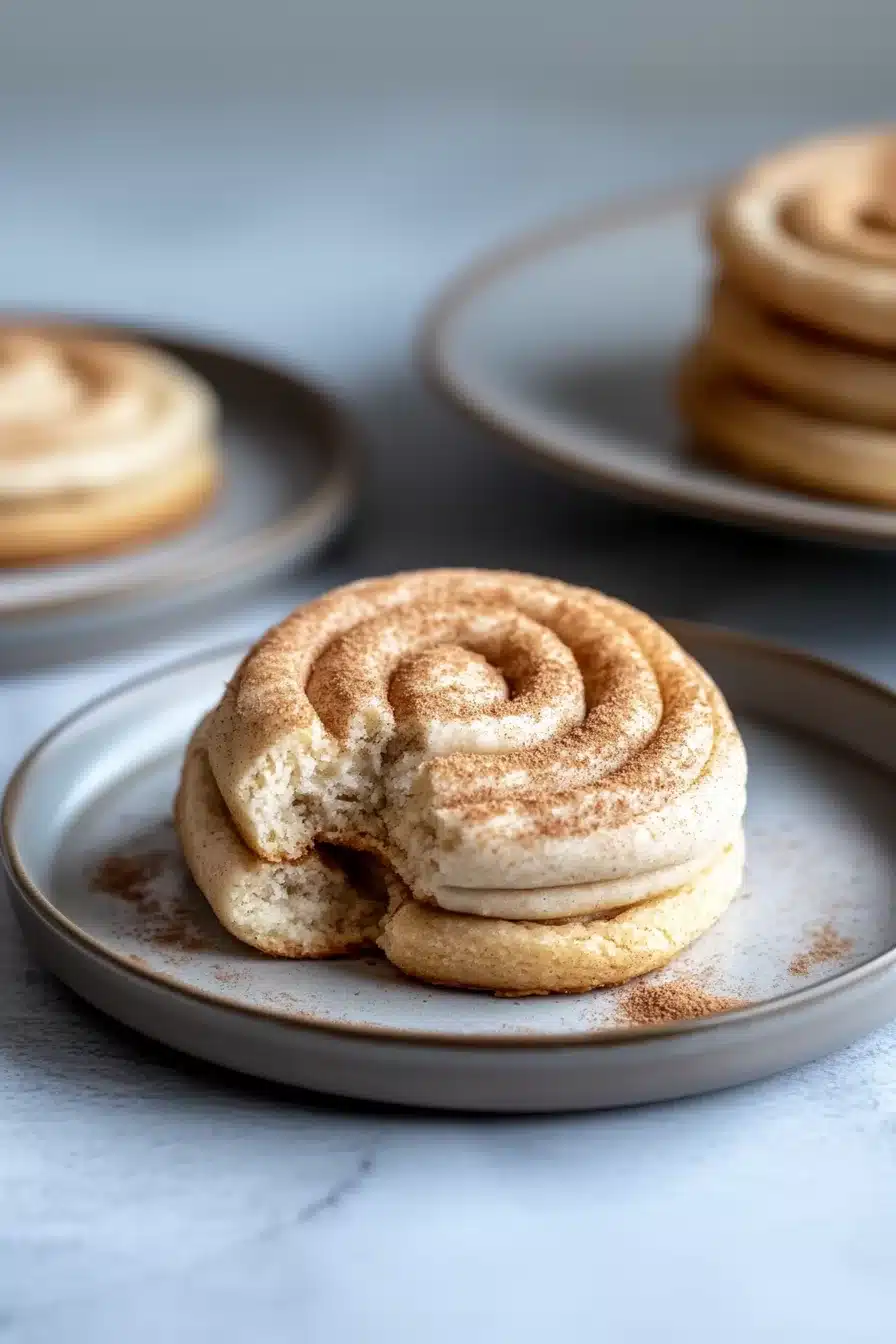
  • They taste like a churro’s cooler cousin: Crispy edges, pillowy center, cinnamon swirl… it’s giving churro energy, but fluffier.
  • That frosting? Oh wow: It’s buttery, subtly brown sugary, and pipes like a dream. I had to stop myself mid-spoon.
  • Freezer-friendly joy bombs: Make a batch, freeze ’em frosted or unfrosted, and treat yourself anytime.
  • Big bakery-style drama: Each cookie is massive (intentionally). Perfect for sharing… or dramatically biting into solo.
  • Make-ahead friendly: You can bake the cookies, chill ’em, and frost later. They love a multitask-friendly schedule.

Crumbl Churro Cookies

Ingredient Notes

Let’s get into the cookie nitty gritty. Almost everything here is probably already in your kitchen, bless.

  • Unsalted butter: This forms the rich base of both the dough and the frosting. Make sure it’s softened, or you’ll fight your mixer.
  • Brown sugar + granulated sugar: We use both for the cookies. The brown sugar adds warmth and chew; the white gives some crisp edges.
  • Egg yolks and whole egg: Two yolks, one egg. The yolks give this dough its soft, almost gooey texture. Don’t skip.
  • Vanilla extract: Real vanilla if you’ve got it. It ties all that cinnamon sugar magic together.
  • All-purpose flour: Nothing fancy here. Just your basic flour to hold all the goodness in place.
  • Cornstarch: This makes the cookies soft and thick. It’s a quiet MVP.
  • Baking powder and baking soda: Power couple of rise and tenderness. Yes, you need both.
  • Ground cinnamon: The real flavor star. I like mine bold, but feel free to dial it down if you’re cinnamon-sensitive.
  • Salt: Just a little—essential to balance flavor, otherwise it’s all sweet on sweet.
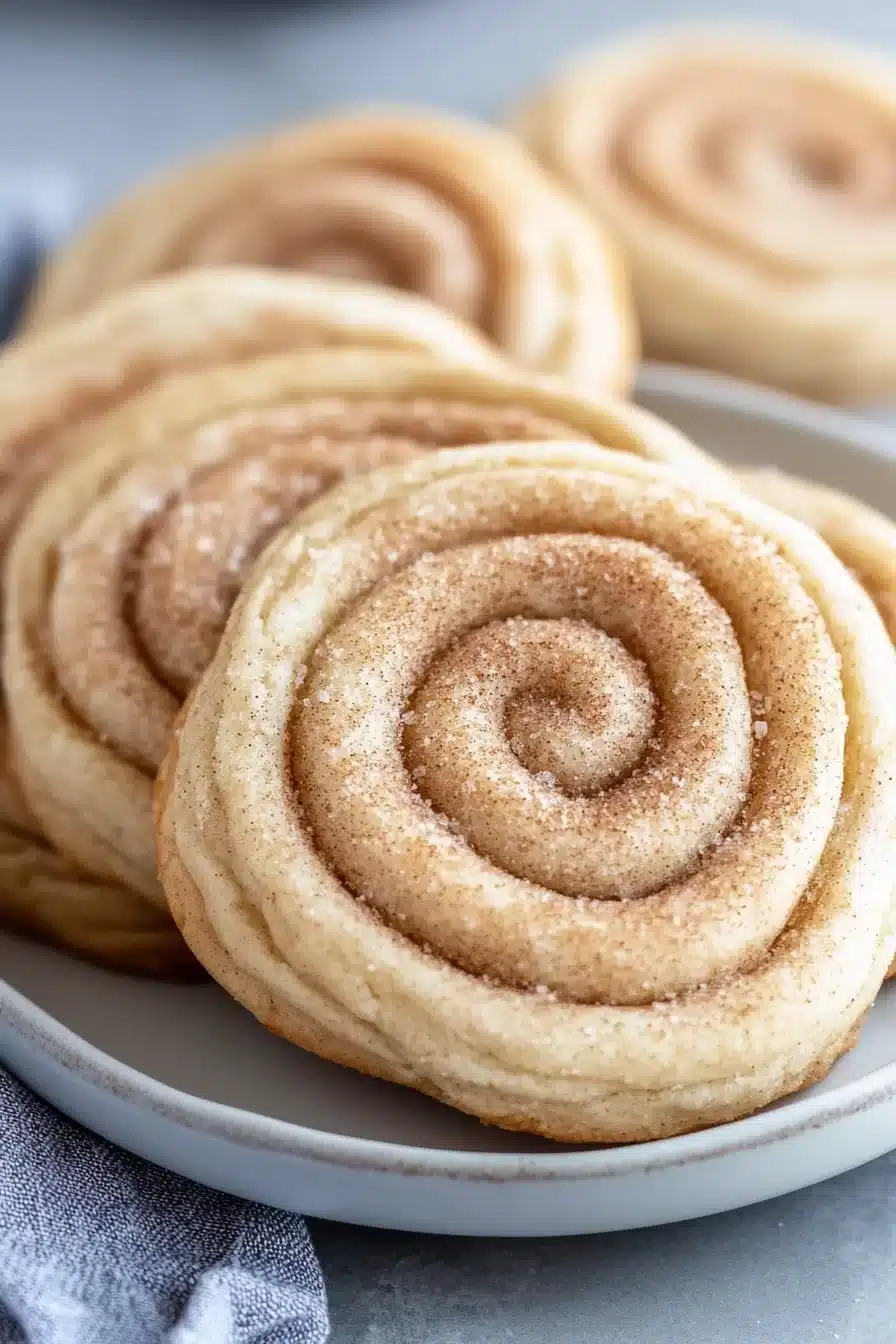
  • Cinnamon sugar coating: 50/50 sugar and cinnamon. Roll every dough ball in it like you’re tucking it in for a cozy nap.
  • Powdered sugar and heavy cream: For that frosting swirl. The cream helps make it silky and pipeable.

Crumbl Churro Cookies

How To Make This Crumbl Churro Cookies Recipe

Crank up the oven, tie on a semi-clean apron, and let’s do this. You’ll surprise yourself with how fancy these look with almost no effort.

  • Preheat and prep: Preheat your oven to 350°F (175°C), and line two baking sheets with parchment or silicone mats. This is your runway for cookie takeoff.

  • Make the dough base: Cream that softened butter with both sugars using a mixer. Mix on medium speed until it’s light and fluffy (like a sugar cloud). Give the bowl a scrape—don’t leave that sneaky butter lump hiding underneath.

  • Mix in eggs and vanilla: Reduce the mixer to low, add in the egg and yolks, one at a time. Mix each in fully before moving on. Add the vanilla and let it swirl in.

  • Dry meets wet: In a separate bowl, whisk the flour, cornstarch, baking powder, baking soda, cinnamon, and salt. Then slowly add these dry guys into the butter mixture, a bit at a time. Stop when a soft dough forms and you can’t stop sniffing it.

  • Roll in cinnamon sugar: In a small bowl, stir together the sugar and cinnamon for the coating. Scoop dough into 12 pieces (about 1/3 cup each), then roll each into a ball. Roll those in the cinnamon sugar—don’t skimp.

  • Shape and space: Flatten each dough ball gently into a thick puck, about ¾-inch thick. Arrange on your lined baking sheets with space to grow (they will spread, just a little).

  • Bake time: Pop them in the oven for 12–14 minutes. The tops should be puffed and set (not shiny). Let them sit on the pan for five minutes, then move to a rack to cool fully.

  • Frosting magic: Beat the frosting ingredients together until smooth and fluffy. Add powdered sugar in batches so you don’t get a sugar cloud. Add cream until it’s the consistency of soft buttercream clouds.

  • Pipe and sprinkle: Use a piping bag (or zip-top bag works fine) and swirl frosting over the cooled cookies. Dust a little leftover cinnamon sugar on top for drama and crunch. Let them chill just a bit, or dive right in with scandalous joy.

Crumbl Churro Cookies

Storage Options

Let’s talk cookie preservation, aka how not to eat all twelve in one go, tempting as it may be.

Once the frosting is set, you can store your Crumbl Churro Cookies in an airtight container at room temp for about 2–3 days. They’ll stay soft and cinnamon-y cozy.

In the fridge? Sure thing. They’ll last closer to a week chilled, but make sure to let them come to room temp before eating. That frosting softens just right with a little warmth.

Now, the freezer. Yes, you can. You can freeze the unfrosted cookies (fully baked and cooled) or the frosted ones. Stack them with parchment or wax paper between layers to keep things neat. Frosted ones do best if you flash freeze first, then store.

To thaw, just set them on the counter for an hour or two. Or microwave for about 15 seconds if you’re weak with impatience (hi, me).

Variations and Substitutions

If you’re feeling like switching it up—or just using what’s on hand—these cookies are flexible like that.

  • Gluten-free flour: Swap all-purpose with a 1:1 gluten-free blend if needed. Look for one that includes xanthan gum to keep texture on point.

  • Cream cheese frosting twist: You can mix in 2–3 oz of softened cream cheese for a tangy version of the frosting that tastes like a cinnamon roll top.

  • Chili-spiced sugar coating: Want a kick? Add a pinch of cayenne or chipotle powder to the cinnamon sugar. Just a hint. It’s sneaky good.

  • Maple extract swap: If you’re out of vanilla (or out of patience), a little maple extract totally works. It brings cozy autumn vibes.

  • Smaller cookies: Want more servings or smaller bites? Scoop about 2 tablespoons per cookie and reduce bake time by a few minutes.

Crumbl Churro Cookies

What to Serve with Crumbl Churro Cookies

These cookies don’t really need backup—they’re stars—but a few pairings can turn them into a full cozy moment.

  • A mug of strong coffee or espresso: Something about the deep roast and the buttery cinnamon just works. Plus, dunking is wildly satisfying.

  • Mexican hot chocolate: That little hint of spice in the cocoa plays off the cinnamon cookie like a total flavor duet. I could sip and nibble all afternoon.

  • A scoop of vanilla or peanut butter banana ice cream: Yes, cookies and ice cream is a cliché. Still, it’s bliss. Especially when you smoosh them into sandwich form.

  • Fruit with a little acid: Think orange slices or strawberries. The brightness cuts the richness and resets your tastebuds for cookie round two… or five.

  • Lazy brunch spread: Sneak these onto a brunch table between the bagels and eggs. People will pretend to choose eggs, but we know who’s getting seconds of cookies.

Crumbl Churro Cookies

Frequently Asked Questions

Can I make these Crumbl Churro Cookies ahead of time?

Yes you absolutely can. You can make the cookie dough in advance, shape it into balls, and freeze them unbaked. When you’re ready, just thaw slightly, roll in cinnamon sugar, flatten, and bake. You can also bake the cookies ahead and frost the next day, or freeze them fully baked (with or without frosting). They hold up beautifully and are extra convenient this way.

Do I need a piping bag for the frosting?

Nope, not required. You can totally use a large zip-top bag and snip off a corner. If you’re going for bakery-style swirls though, a real piping tip helps give that nice spiral. But let’s be honest, even a spoon smear tastes just as good. It’s cookies, not couture.

How can I tell when the cookies are done baking?

You’re looking for puffed, matte tops. If they still look glossy or wet in the center, give them another minute or two. But don’t wait for them to look fully browned or dry on top. They’ll continue baking a little on the sheet after you take them out, and that keeps them nice and soft in the middle.

Can I double the recipe for a party?

Oh yes, it doubles like a dream. Just make sure your mixer can handle the volume. Or mix in two batches to avoid flour clouds in your kitchen. You might also want to swap baking trays halfway through baking if you’re doing two at a time so they bake evenly.

Crumbl Churro Cookies

Crumbl Churro Cookies

Prep Time 25 minutes
Cook Time 13 minutes
Total Time 50 minutes
Warm, buttery sugar cookie base meets cinnamon-kissed frosting in these Crumbl Churro Cookies, made with real butter, brown sugar, and cinnamon. These thick, chewy cookies are coated in cinnamon sugar and topped with a swirl of whipped brown sugar frosting. Think snickerdoodle meets cinnamon roll — bakery-style cookies with cozy charm, perfect for gifting, sharing, or stashing away for sweet emergencies.
12 cookies

Ingredients

For the Cookies

  • 1 cup (227 g) unsalted butter softened
  • 1 cup (200 g) light brown sugar packed
  • 1/2 cup (100 g) granulated sugar
  • 2 large egg yolks
  • 1 large egg
  • 2 tsp (10 ml) vanilla extract
  • 2 3/4 cups (345 g) all-purpose flour
  • 1/4 cup (32 g) cornstarch
  • 1 tsp (4 g) baking powder
  • 1/2 tsp (2 g) baking soda
  • 2 tsp (5 g) ground cinnamon
  • 1/2 tsp (3 g) salt

For the Cinnamon Sugar Coating

  • 1/4 cup (50 g) granulated sugar
  • 1 tbsp (8 g) ground cinnamon

For the Brown Sugar Frosting

  • 1/2 cup (113 g) unsalted butter softened
  • 1/4 cup (50 g) light brown sugar packed
  • 2 cups (240 g) powdered sugar
  • 2 tbsp (30 ml) heavy cream plus more as needed
  • 1/2 tsp (2.5 ml) vanilla extract
  • Pinch salt to taste

Equipment

  • Electric mixer
  • Mixing bowls
  • Baking Sheets
  • Parchment Paper or Silicone Mats
  • Wire rack
  • Piping Bag or Zip-top Bag

Instructions
 

  1. Preheat and prep: Preheat oven to 350°F (175°C) and line two baking sheets with parchment paper or silicone baking mats.
  2. Make the dough base: In a large bowl, cream softened butter, brown sugar, and granulated sugar together with an electric mixer on medium speed until light and fluffy, about 2-3 minutes. Scrape down the bowl as needed.
  3. Add eggs and vanilla: With mixer on low, add egg and yolks one at a time, mixing well after each addition. Add vanilla extract and mix just until combined.
  4. Combine dry ingredients: In a separate bowl, whisk together flour, cornstarch, baking powder, baking soda, cinnamon, and salt.
  5. Mix dough: Gradually add dry ingredients to the wet mixture, mixing on low speed until a soft dough forms. Do not overmix.
  6. Cinnamon sugar coat: In a small bowl, combine 1/4 cup granulated sugar with 1 tablespoon cinnamon. Scoop dough into 12 large balls (about 1/3 cup each), roll each ball in the cinnamon sugar mix until fully coated.
  7. Shape, space, and bake: Gently flatten each dough ball into a thick puck (about ¾-inch thick), then place on the prepared baking sheets with 2 inches of space between. Bake 12–14 minutes, until tops are puffed and matte. Let cool on pan 5 minutes, then transfer to a wire rack to cool completely.
  8. Prepare frosting: In a medium bowl, beat softened butter and brown sugar on medium speed until smooth and creamy. Mix in powdered sugar in batches, then add heavy cream and vanilla. Beat until frosting is thick, fluffy, and pipeable. Add more cream as needed to reach a spreadable consistency. Season with a pinch of salt to taste.
  9. Frost & finish: Pipe or spread frosting onto cooled cookies. Dust with extra cinnamon sugar for a little crunch and drama. Let set briefly or enjoy immediately!

Notes

Storage: Store frosted cookies at room temperature in an airtight container for 2–3 days. Refrigerate for up to 1 week (bring to room temp before eating). Freeze baked cookies (frosted or unfrosted) in layers with parchment up to 2 months. Thaw at room temp before serving.
Variations: Use gluten-free flour blend (1:1 swap). For tangy frosting, add 2–3 oz softened cream cheese. Add a pinch of cayenne or chipotle to the cinnamon sugar for heat. Sub maple extract for vanilla if desired. For smaller cookies, use 2 tbsp dough per cookie and reduce bake time.
Troubleshooting: To check doneness, look for puffed, matte tops (not glossy). Cookies will firm up as they cool.

Nutrition

Calories: 390kcal | Carbohydrates: 55g | Protein: 3g | Fat: 19g | Saturated Fat: 12g | Cholesterol: 85mg | Sodium: 185mg | Potassium: 52mg | Fiber: 1g | Sugar: 34g | Vitamin A: 590IU | Calcium: 64mg | Iron: 1.5mg

Tangy pineapple, crisp chicken, sizzling garlic, and a glossy sweet chili glaze—this Panda Express Sweet Fire Chicken brings the big, bold flavors with juicy chicken breast, red bell pepper, and pineapple. Slightly sticky, lightly spicy, and totally addictive.

There’s something just plain satisfying about that combo of crispy-on-the-outside chicken pieces with a sauce that clings like it means business. And let’s be real, frying at home always smells a little too good.

Panda Express Sweet Fire Chicken is one of those comforting weeknight dishes that gives takeout energy without the soggy delivery box. Imagine tender fried chicken bits getting lovingly tossed in a glossy, sweet-hot sauce with pops of tangy pineapple and crunchy red pepper. That smell? Garlic sizzling with ginger in your skillet. That sound? A tiny fa-la-la of joy. Serve it over fluffy rice, and consider dinner officially handled. Plus, it reheats like a champ if you somehow don’t eat it all (how?).

Table of Contents

Panda Express Sweet Fire Chicken

Why You’ll Love this Panda Express Sweet Fire Chicken

It’s a humble dish, nothing fancy, but my goodness does it hit all the right notes. Here’s why I keep returning to it when I want something fast-ish, crispy, saucy, and louder than plain old stir-fry.

  • Sweet and fiery balance: That chili-pineapple combo walks the line between dessert and dynamite (in the best way possible).
  • Crispy chicken magic: Frying the chicken with flour, egg, and cornstarch gives it that crackly bite you just can’t fake.
  • Weeknight dinner hero: It’s comforting, fast to throw together, and wildly better than whatever’s in your sad freezer section.
  • No weird ingredients: You can find everything in a regular grocery store. No specialty-shop scavenger hunts required.
  • Customizable spice levels: Want more heat? Ramp it up. Need to keep it kid-friendly? Cut back. It plays nice either way.
  • Leftovers that slap: Even the next day, the flavors are somehow better. Especially if you pan-fry the chicken bits again to crisp them back up.

Panda Express Sweet Fire Chicken

Ingredient Notes

Let’s talk ingredients. Nothing tricky here—just a few pantry staples and a couple of things that bring all the pizzazz. If your spice drawer’s a bit sleepy, this is its wake-up call.

  • Sweet chili sauce: This is your starring sauce base. It brings sweetness, a whisper of heat, and that signature sticky sheen we love. Mae Ploy is dependable.
  • Pineapple juice: Brings brightness and helps thin the sauce just enough. Don’t skip it—you need both sweetness and tang here.
  • Soy sauce: Umami boost. Just a tablespoon, but it makes everything rounder, deeper, more delicious.
  • Rice wine vinegar: A splash of acidity to keep the sauce from leaning too sweet. It balances things beautifully.
  • Garlic & ginger: Fresh and punchy. Mince the garlic and grate the ginger fine for maximum flavor.
  • Chicken breast: Boneless, skinless, and cut into bite-sized pieces for max sauciness per bite. You could sub thigh meat if you want it extra juicy.
  • Salt & white pepper: White pepper has a funkier edge than black, and it shines best where you want warmth without visible specks.
  • Flour, cornstarch, and eggs: The dynamic trio for ultra-crisp chicken coating that actually sticks.
  • Onion & red bell pepper: Classic stir-fry veggies to bulk things out and add crunch and sweetness.
  • Pineapple chunks: More sweet tang and juicy texture. Absolutely do not skip these—canned is okay! Fresh is great too.
  • Scallions & sesame seeds (optional): Great finishing touches. A little green and a little nutty crunch go a long way.

Panda Express Sweet Fire Chicken

How To Make This Panda Express Sweet Fire Chicken

You’ll want to get your ingredients prepped before the oil hits the pan. Stir-fry-style dishes move quickly once they start. Plus, who doesn’t love lining up little prep bowls like a cooking show?

  • Make the sauce: In a medium bowl, whisk the sweet chili sauce, pineapple juice, soy sauce, vinegar, garlic, and ginger. It should smell sweet, sharp, and kind of irresistible. Set it aside and try not to taste-test with a spoon (or do, I won’t judge).

  • Prep the chicken: Pat the chicken bits dry, then season generously with salt and white pepper. Dry chicken equals crispier coating, so don’t skip this step or you’ll regret it when things go from crispy to soggy too fast.

  • Coat your chicken: Here comes the three-part breading fun. Toss the chicken pieces in flour first (light, even coating), then dip them in beaten egg (shake off the excess), then toss in cornstarch. You’ll want to work in batches or your fingers will become gluey chicken mittens.

  • Fry till golden: Heat about 2 inches of vegetable oil in a skillet or wok over medium-high. Once shimmering hot (about 350°F if you’re checking), fry in batches. Each batch takes about 3–4 minutes. Listen for a gentle sizzle and look for deep golden brown. Drain them on a paper towel–lined plate.

  • Sauté the veggies: Drain off most of the oil, leaving just a slick in the pan. Throw in your chopped onions and bell peppers. Stir-fry for 2 to 3 minutes—just enough to soften a bit while keeping that tender-crisp vibe.

  • Add the pineapple and sauce: Toss in the pineapple chunks and pour in the sauce you set aside like ten years ago (okay, like 5 minutes ago). Stir it all together and let it simmer briefly to marry the flavors. One minute should do it.

  • Bring it all together: Add your crispy chicken back in and gently toss to coat every piece. Let it simmer for another minute or two, until the sauce thickens just so and clings to the chicken like it was born to.

  • Serve it up: Over rice, with sesame seeds and scallions if you like to be fancy. Or stand by the stove and eat it out of the wok. Your call.

Panda Express Sweet Fire Chicken

Storage Options

If you somehow have leftovers (honestly, rare in my house), here’s how to make the most of them.

Pop any cooled leftovers into an airtight container and stash them in the fridge. They should keep well for about 3 or 4 days. The chicken does lose a bit of crispiness, but honestly, the flavors get even richer. It’s what I call “next-day delicious.”

Now, let’s talk freezing. Can you? Absolutely. Store in a freezer-safe container or even a bag with as much air pressed out as you can manage. It’ll freeze up fine for a solid month. When it’s time to thaw, I like leaving it in the fridge overnight.

For reheating, your microwave works if you must, but I highly recommend tossing the chicken pieces in a nonstick pan over medium heat. Add just a whisper of oil, and take your time. This method coaxes a bit of that crispy texture back to life.

Variations and Substitutions

This dish is surprisingly flexible if you’re in one of those “use what I have” moods. Here are a few ways to shake things up:

  • Chicken thighs instead of breast: Thigh meat stays juicier and more forgiving if you accidentally over-fry. It’s got a little more richness too.

  • Leave out the fry, go baked or air fried: Try air-frying the coated chicken at 400°F for about 10–12 minutes. No splatter, still crisp, mildly virtuous.

  • Use tofu for a vegetarian version: Press and cube extra-firm tofu, then coat and fry like the chicken. It soaks up that sauce like a sponge on vacation.

  • Spice tweaks: Add sriracha for more fire or toss in crushed red pepper flakes. Or dial it back by using a milder chili sauce like Thai sweet chili with less heat.

  • More veggies? Always invited: Try tossing in snap peas, snow peas, or even broccoli before the sauce for extra color and crunch.

Panda Express Sweet Fire Chicken

What to Serve with Panda Express Sweet Fire Chicken

Rice is the obvious choice here—it soaks up all that sweet, sticky, punchy goodness. But if you’re feeling extra or just have odds and ends to use up, here are some great pairings.

  • Sticky white rice or jasmine rice
    A soft, fluffy bed to catch that slick ruby-colored sauce. It’s not flashy, but gosh does it do its job well. You can also throw in a splash of rice vinegar and sesame oil if you’re feeling chef-y.

  • Stir-fried greens
    Think garlicky bok choy, broccoli, or napa cabbage. Just something crunchy and tender that counterbalances the sweet, rich vibe of the chicken.

  • Rainbow chard or even cod could add a brighter, earthier side if you want something a little more dinner-party-in-a-bowl.

  • Fried rice
    Sounds indulgent, but trust me, it works. Make a simple fried rice with leftover rice and whatever bits are floating around in your veggie drawer.

  • A quick cucumber salad
    Crisp and cool, a fast pickle or chilled salad adds freshness and contrast. Mellow the heat, reset your taste buds, repeat.

Panda Express Sweet Fire Chicken

Frequently Asked Questions

Can I make this ahead of time?

Yes, but here’s the trick: fry the chicken and let it cool completely before storing it separately from the sauce. Stir the sauce together and keep that in a jar or a covered container in the fridge. When it’s go time, stir-fry the veggies, warm the sauce, and toss it all together with the cold chicken to heat it through. That way, the coating doesn’t get soggy ahead of schedule.

What’s the best oil for frying the chicken?

Stick with a neutral oil that has a high smoke point. Vegetable oil is perfect, as is canola or peanut oil. Don’t use olive oil here—it’ll taste off, and it doesn’t like the high heat. I’ve used grapeseed oil in a pinch and it worked out just fine, too.

How do I keep the chicken crispy after frying?

Rest the fried pieces on a wire rack instead of paper towels if you have one. That lets the air circulate and keeps them from steaming themselves soggy. If you’re not mixing them into the sauce right away, keep them warm in a low oven (like 200°F) until ready to serve.

Can I bake the chicken instead of frying?

You can, though the texture will be slightly different. Arrange your floured and egg-coated chicken pieces on a greased baking sheet, then spray them lightly with oil. Bake at 425°F for around 20–25 minutes, flipping halfway through. It does save cleanup time, and it’s still plenty tasty, just not quite as crispy.

Panda Express Sweet Fire Chicken

Panda Express Sweet Fire Chicken

Prep Time 20 minutes
Cook Time 25 minutes
Total Time 45 minutes
Tangy pineapple, crisp chicken, sizzling garlic, and a glossy sweet chili glaze—this Panda Express Sweet Fire Chicken brings big, bold flavors with juicy chicken breast, red bell pepper, and pineapple. Slightly sticky, lightly spicy, and totally addictive. The perfect weeknight dinner that brings takeout vibes—with leftovers just as good the next day!
4 servings

Ingredients

Sauce

  • 1/2 cup (120 ml) sweet chili sauce Mae Ploy or other brand
  • 1/4 cup (60 ml) pineapple juice
  • 1 tbsp (15 ml) soy sauce
  • 2 tsp (10 ml) rice wine vinegar
  • 2 cloves garlic minced
  • 1 tbsp (15 g) fresh ginger grated

Chicken

  • 1 lb (450 g) chicken breast boneless, skinless, cut into bite-sized pieces
  • salt to taste
  • 1/4 tsp (1.25 ml) white pepper or black pepper
  • 1/2 cup (60 g) all-purpose flour
  • 1/2 cup (60 g) cornstarch
  • 2 eggs beaten
  • neutral oil for frying (vegetable, canola, or peanut oil recommended)

Stir Fry & Finish

  • 1 small onion cut into 1-inch chunks
  • 1 red bell pepper cut into 1-inch pieces
  • 1 cup (165 g) pineapple chunks drained if canned, or cut fresh
  • scallion sliced, optional garnish
  • sesame seeds optional garnish
  • steamed rice for serving

Equipment

  • Wok or large skillet
  • Mixing bowls
  • Paper towels
  • Tongs or Slotted Spoon

Instructions
 

  1. Make the sauce: In a medium bowl, whisk together sweet chili sauce, pineapple juice, soy sauce, rice wine vinegar, garlic, and ginger. Set aside.
  2. Prep the chicken: Pat chicken pieces dry. Season with salt and white pepper.
  3. Bread the chicken: Toss chicken in flour to coat, dip into beaten eggs, then dredge in cornstarch. Set aside on a plate or tray.
  4. Fry the chicken: Heat about 2 inches of oil in a wok or large skillet over medium-high until shimmering (350°F). Fry chicken in batches for 3–4 minutes each, until golden and crisp. Drain on paper towels or a wire rack.
  5. Sauté veggies: Pour out most of the frying oil, leaving a thin slick. Add onion and red bell pepper; stir-fry for 2–3 minutes until tender-crisp.
  6. Add pineapple and sauce: Stir in pineapple chunks and pour in the sauce. Toss and simmer for about 1 minute until slightly thickened.
  7. Combine everything: Return fried chicken pieces to the pan. Gently toss to coat and let cook for another 1–2 minutes until sauce clings to chicken and everything is heated through.
  8. Serve: Spoon over steamed rice. Garnish with sliced scallions and sesame seeds if desired. Enjoy immediately.

Notes

For even crispier chicken, rest fried pieces on a wire rack and keep warm in a low oven if you’re not serving right away. Chicken thighs work as a juicier substitute for breast. Try air-frying or baking for a lighter twist. Easily adjust spice by adding sriracha or more chili sauce.

Nutrition

Calories: 475kcal | Carbohydrates: 45g | Protein: 28g | Fat: 21g | Saturated Fat: 3g | Cholesterol: 162mg | Sodium: 832mg | Potassium: 605mg | Fiber: 2g | Sugar: 17g | Vitamin A: 1040IU | Vitamin C: 73mg | Calcium: 36mg | Iron: 2.4mg

Soft and golden around the edges, chewy in the center, these vanishing oatmeal raisin cookies are loaded with brown sugar, butter, oats, and cinnamon. The kind of smell that makes you peek in the oven every few minutes just because it feels like a hug.

These are the cookies you “just wanted a nibble of”… then look down and the plate’s mysteriously empty. Oops. They bake up tender, with toasty edges and sweet little pops of raisin in all the right places.

Table of Contents

Vanishing Oatmeal Raisin Cookies

Why You’ll Love this Vanishing Oatmeal Raisin Cookies

No drama here. These are just honest-to-goodness chewy cookies with a whole lot going on between the oats, raisins, cinnamon, and brown sugar. They come together quickly, chill time is flexible, and, well… they sort of vanish.

  • Ridiculously simple to make: You don’t even need a stand mixer (though it helps if you wanna feel all bakery-chic).
  • Delivers maximum cozy energy: The warm cinnamon and brown sugar combo is basically sweater weather in cookie form.
  • Soft, chewy texture perfection: The centers stay slightly underbaked, so they’re tender even days later. If they last that long.
  • Sweet but not cloying: The oats and raisins balance the sugar beautifully. Even raisin skeptics come around for these.
  • Flexible dough life: Chill it for half an hour or a whole weekend. The longer it sits, the deeper the flavor.
  • Great for sharing (or hoarding): A humble, homey cookie that feels much fancier than it is.

Vanishing Oatmeal Raisin Cookies

Ingredient Notes

There are no mystery ingredients here, but a few things are worth chatting about before we get elbow-deep in flour.

  • Unsalted butter: Use it softened, not melted. We’re creaming it for that fluffy, rich base. Salted works in a pinch—just dial back the added salt.
  • Brown sugar (packed): Adds that caramel depth. Go dark brown if you’re feeling bold and molasses-y.
  • Granulated sugar: Helps with spread and balances the softer brown sugar. Keeps things from tasting one-note.
  • Large egg: Room temp blends in smoother. I usually plop mine in warm water for 5 minutes if I forget.
  • Vanilla extract: Don’t skip it. A little splash lifts all the warm flavors like cinnamon and toasted oat.
  • All-purpose flour: Spoon it in and level it off—no scooping from the bag like you’re digging for treasure.
  • Baking soda: Gives our cookies just enough puff without making them cakey.
  • Ground cinnamon: Just half a teaspoon, but it makes the whole house smell like fall.
  • Old-fashioned oats: These give the cookies chew and that signature nubbly texture. Quick oats will make them sandy. Not what we want.
  • Raisins: You’ve got some wiggle room. Use golden raisins, chopped dates, craisins, chocolate chips… I see you, rebel.

Vanishing Oatmeal Raisin Cookies

How To Make This Vanishing Oatmeal Raisin Cookies

Everything about this recipe whispers “let’s keep it simple,” and thank goodness for that. Grab a big bowl, maybe queue up a podcast, and let’s bake something warm and oaty.

  • Cream the butter and sugars: Use a hand or stand mixer to beat them for about 2 to 3 minutes. You want them fluffy and creamy, not just mixed. Listen for the shift in sound—it gets quieter when it’s ready.

  • Add the egg and vanilla: Lower the mixer speed and beat in the egg and vanilla until smooth. It’ll look a little shiny and loosen up the mixture.

  • Whisk the dry ingredients: In another bowl, just whisk the flour, baking soda, cinnamon, and salt together. This helps avoid weird salty pockets or a clump of cinnamon surprise.

  • Combine wet and dry: Add the flour mix gradually to the wet on low speed, but stop a bit early. It’ll look streaky. That’s okay—we’re not done yet.

  • Fold in oats and raisins: Now grab a wooden spoon and mix in the oats and raisins by hand. This keeps things tender and avoids overmixing. Plus, something feels right about using a spoon here.

  • Chill the dough: Pop it in the fridge for at least 30 minutes. You can chill it for up to 48 hours depending on your schedule (or, let’s be honest, your level of cookie emergency).

  • Scoop and bake: When ready, preheat the oven to 350°F (175°C), line your pans with parchment, and scoop away. I go with a rounded tablespoon. Leave some room—they do spread.

  • Know when they’re done: 8 to 10 minutes is usually perfect. Edges should look set and golden, but centers will look a bit underdone. Trust me, they’ll finish setting as they cool.

  • Cool and serve: Let them chill on the baking sheet for 1–2 minutes, then transfer to a wire rack to cool fully (or just long enough that you don’t burn your tongue). Soft, warm cookie = happy human.

Vanishing Oatmeal Raisin Cookies

Storage Options

Okay, so if (somehow) you don’t devour the whole batch in 24 hours, here’s how to stash them.

Soft cookies like these are best kept in an airtight container at room temp. They’ll stay nicely chewy for up to 3 days. I like tossing a slice of bread in the container to keep them extra soft. Sounds weird, totally works.

Want to make the dough ahead of time? Just cover and chill up to two days. You can bake straight from the fridge; maybe give ‘em an extra minute if the dough’s really firm.

To freeze, scoop the cookies onto a tray and freeze till solid, then tuck them into a zip-top bag. You can bake from frozen—just add 1 or 2 minutes to the baking time. Baked cookies themselves also freeze well. I wrap them in twos and freeze for up to a month. Reheat in the microwave for 10ish seconds. Midnight snack sorted.

Variations and Substitutions

Not all oatmeal cookies wear the same cozy sweater. Tweak and twist as you like.

  • Swap the raisins: Use chocolate chips, dried cranberries, chopped dates, or a mix if you’re feeling playful. I once tossed in chopped dried figs—strangely lovely.
  • Add nuts: Walnuts or pecans bring crunch and balance the sweet. Toast them first for extra flavor points.
  • Spice it up: A pinch of nutmeg or a dash of cardamom makes the flavor warmer and deeper. Cinnamon has friends!
  • Go gluten-free: Sub with your favorite 1:1 gluten-free flour blend. The oats help hold everything together anyway.
  • Try browned butter: For a deeper, toffee-like edge, brown the butter first and let it solidify again before creaming. More effort, but wow.
  • Make it vegan-ish: Use plant butter, a flax egg, and check your sugar source. Still chewy, still golden.

Vanishing Oatmeal Raisin Cookies

What to Serve with Vanishing Oatmeal Raisin Cookies

These are snack cookies through and through, but they play nice with lots of cozy things and a surprising dinner or two.

  • A big mug of coffee or chai: Dunking is the move here. The oats absorb just enough bitter warmth and make you feel like you’ve suddenly transported to a log cabin somewhere scenic. Bonus if you’re wearing fuzzy socks.

  • Vanilla ice cream: Slightly warm cookies topped with a scoop of creamy vanilla? No contest. Total “not fancy but this feels luxurious anyway” energy.

  • After a savory dinner: Honestly, these follow a cozy casserole like Johnny Marzetti better than any fancy dessert. Unexpected tones of sweet and spice, right after a saucy pasta bake? Sign me up.

  • Paired with fruit and cheese: Sound strange? A little. But these next to sharp white cheddar and juicy apples or grapes on a little snack board… oddly excellent.

  • With midnight milk: Look, sometimes you just need a cold glass of milk and two cookies on a paper towel at 11:43 PM. Who’s judging?

Vanishing Oatmeal Raisin Cookies

Frequently Asked Questions

Can I use quick oats instead of old-fashioned oats?

Technically, yes, but I wouldn’t recommend it. Quick oats will make the cookies more cakey and less chewy. They’re chopped smaller, so the dough absorbs more moisture and changes the texture. If you only have quick oats, you can try blending half with some rolled oats for balance—but ideally, stick with old-fashioned rolled oats for that hearty texture.

How do I keep oatmeal cookies soft after baking?

Great question and one I’ve definitely wrestled with (literally chasing a crunchy cookie around the counter). Store your cookies in an airtight container with a slice of white bread—seriously. The bread gives up moisture, keeping the cookies chewy and soft for a few days. Just make sure the bread doesn’t touch the cookies directly or it’ll get awkwardly soggy.

Can I make the dough in advance?

Absolutely, and honestly it’s even better that way. Letting the dough chill gives the flavors time to deepen and makes the cookies bake up thicker and chewier. You can chill it anywhere from 30 minutes to 48 hours. Just cover the bowl tightly in plastic or transfer it to a container with a lid.

Can I freeze the unbaked dough?

Totally. Just scoop the dough into balls, freeze them on a tray until solid, then pop them into a zip-top freezer bag. They’ll keep for about 2 months. When you’re ready, bake straight from frozen—no thawing needed. Just add an extra minute or two in the oven and you’re back in chewy cookie town.

Vanishing Oatmeal Raisin Cookies

Vanishing Oatmeal Raisin Cookies

Prep Time 15 minutes
Cook Time 10 minutes
Chill Time 30 minutes
Total Time 55 minutes
Soft, chewy, and golden-edged, these vanishing oatmeal raisin cookies are rich with brown sugar, cinnamon, and plenty of plump raisins. The dough comes together in minutes and chills for flexible timing. Each bite delivers cozy, buttery, and warmly spiced cookie comfort—perfect for a snack, dessert, or midnight treat.
24 cookies

Ingredients

Vanishing Oatmeal Raisin Cookies

  • 1 cup (226 g) unsalted butter softened
  • 1 cup (200 g) brown sugar packed, light or dark
  • 1/2 cup (100 g) granulated sugar
  • 1 large egg room temperature
  • 2 tsp (10 ml) vanilla extract
  • 1 1/2 cups (190 g) all-purpose flour spooned and leveled
  • 1/2 tsp (2 g) baking soda
  • 1/2 tsp (1 g) ground cinnamon
  • 1/2 tsp (3 g) salt
  • 2 cups (180 g) old-fashioned rolled oats not quick oats
  • 1 cup (150 g) raisins or other dried fruit or chocolate chips

Equipment

  • Mixing bowls
  • Hand mixer or stand mixer
  • Baking sheet
  • Parchment paper
  • Wire rack
  • Measuring cups and spoons
  • Wooden Spoon or Rubber Spatula

Instructions
 

  1. In a large bowl, cream together the softened butter, brown sugar, and granulated sugar with a hand or stand mixer for 2-3 minutes until fluffy and creamy.
  2. Lower the mixer speed. Add the egg and vanilla extract; beat until smooth and slightly shiny.
  3. In a separate bowl, whisk together the flour, baking soda, cinnamon, and salt.
  4. Add the dry ingredients to the wet mixture gradually, mixing on low speed until just combined and a few streaks remain.
  5. Using a wooden spoon or spatula, fold in the oats and raisins by hand. Mix until distributed evenly.
  6. Cover the dough and chill in the refrigerator for at least 30 minutes (up to 48 hours for deeper flavor).
  7. Preheat the oven to 350°F (175°C). Line baking sheets with parchment paper.
  8. Scoop dough in rounded tablespoons onto prepared sheets, spacing a couple of inches apart.
  9. Bake for 8-10 minutes, until edges are set and golden but centers look slightly underdone.
  10. Cool cookies on the sheet for 1-2 minutes, then transfer to a wire rack to finish cooling.

Notes

For extra soft cookies, store in an airtight container with a slice of bread. Dough can be made ahead and chilled for up to 48 hours; baked cookies also freeze well.

Nutrition

Calories: 145kcal | Carbohydrates: 23g | Protein: 2g | Fat: 5g | Saturated Fat: 3g | Cholesterol: 18mg | Sodium: 65mg | Potassium: 58mg | Fiber: 1g | Sugar: 10g | Vitamin A: 130IU | Calcium: 18mg | Iron: 0.7mg

Meaty, cozy, and full of creamy gravy comfort—these IKEA Swedish meatballs with ground beef, pork, cream, and onion are your cozy night in, plated.

If you’ve ever wandered into an IKEA just for the meatballs, hey, you’re not alone. There’s something weirdly satisfying about those tender little orbs swimming in creamy, savory sauce. This recipe captures that same magic without needing to buy a flat-pack anything afterward. It’s soft meatballs, creamy gravy, and that warm aroma wafting through your kitchen while everything simmers. Perfect for Tuesday. Or Friday. Or any day ending in Y, honestly.

Table of Contents

IKEA Swedish Meatballs

Why You’ll Love this IKEA Swedish Meatballs

No dramatic backstory here—just a solid, satisfying recipe with a creamy punch. It’s cozy, it smells dreamy, and nothing is complicated.

  • Ridiculously simple to make: You just squish, smear, melt, and drizzle—no obscure steps or chef-y jargon to decode.
  • Deep, cozy flavors: The pork and beef mix does a little meaty dance, while the cream sauce cozies up with mustard and soy for richness.
  • Feels fancy, tastes nostalgic: Somehow it hits classy and comforting at the same time, like the food version of wearing pajama pants and expensive perfume.
  • Make-ahead friendly: You can prep those meatballs ahead of time and nap until dinner. No judgement.
  • Smells like dinner ought to smell: That buttery gravy bubbling on the stove? It’ll summon people to the kitchen better than a dinner bell.
  • Pairs with basically anything starchy: Noodles, potatoes, rice, even a hunk of good bread—this sauce loves them all.

IKEA Swedish Meatballs

Ingredient Notes

This isn’t one of those twenty-ingredient circus acts. Here’s how the key players bring the magic.

  • Ground beef: The base that gives body and richness. Go for a slightly fatty mix—it makes the meatballs juicier.
  • Ground pork: Lightens the texture and adds a subtle sweetness. Using both pork and beef is non-negotiable if you want the real-deal Swedish feel.
  • Onion: Finely chopped and blended in raw for gentle sweetness and a bit of texture. No need to pre-cook.
  • Garlic: Just one clove, crushed or minced. It’s background music, not a solo act.
  • Breadcrumbs: They soak up the milk and keep the meatballs tender instead of rubbery. No dry balls here (yes, I said it).
  • Egg: The glue that holds it all together—and gives that cohesive bite when you cut into them.
  • Whole milk: Softens the crumbs and adds richness. Skip the skim, please.
  • Salt and pepper: Be generous. The meat needs seasoning love from the start.
  • Butter and flour: These make the roux—your sauce base. Butter gives flavor, flour gives body.
  • Vegetable and beef stock: A tag team for depth and balance. The combo avoids making the sauce too heavy or too bland.
  • Double cream: This is where it gets luscious—silky, thick, and smooth. Pure hug-in-a-sauce stuff.
  • Soy sauce: Just a dash, but it rounds everything out with umami warmth.
  • Dijon mustard: Sneaky ingredient alert. It adds a touch of tang to cut the richness and brighten things up.

IKEA Swedish Meatballs

How To Make This IKEA Swedish Meatballs

If you’ve got 30 minutes of hands-on time and a good stirring arm, you’re halfway to gravy heaven.

  • Mix the meatball base: In a big bowl, combine the ground beef and pork. Give it a solid mix with your hands (it’s weirdly satisfying) until the two meats are thoroughly blended and smooth. No mystery clumps, please.
  • Add the flavor gang: Toss in the chopped onion, garlic, breadcrumbs, and egg. Keep mixing until it’s evenly combined—almost dough-like. Add the milk next, and give it one last mix before seasoning well with salt and pepper. Now’s not the time to under-season.
  • Roll ‘em up: Use damp hands or a small scoop to form little meatballs. Aim for about the size of a golf ball—or slightly smaller, if you’re going full IKEA. Spread them out on a plate, then cover and chill for two hours. This firms them up and makes them behave better in the pan.
  • Brown the meatballs: Heat up a glug of oil in a wide frying pan over medium heat. When you hear that first satisfying sizzle, gently add the meatballs, browning them on all sides. You’re not cooking through yet, just getting that golden crust.
  • Bake ‘til done: Once browned, transfer them to an oven-safe dish. Cover loosely and bake at 350°F for about 30 minutes. This finishes cooking them through without over-frying.
  • Start your sauce: Back to the stove! Add that butter to a skillet and let it melt. Whisk in the flour and stir constantly for two minutes to cook off that flour taste. You’ll smell when it’s ready—it goes from raw to nutty real quick.
  • Add the liquids: Slowly pour in the veg and beef stock, stirring all the while. Once it’s smooth, whisk in the cream, soy sauce, and Dijon mustard. Bring everything to a low simmer and let it thicken. This is when the magic happens.
  • Sauce it up and serve: Pour that thick, silky sauce over the warm meatballs or spoon it onto each serving. Then grab a fork, take a bite, and try not to melt into pure comfort.

IKEA Swedish Meatballs

Storage Options

Let’s get real—if you somehow have leftovers (big if), you’re golden.

In the fridge, they’ll keep happily for 3 to 4 days, tucked into an airtight container. I like to store the sauce and meatballs together so everything soaks and settles in all cozy overnight.

To freeze, chill them completely first. Then seal in an airtight container or freezer bag (label it, trust me, mystery meatballs are no fun). You can freeze them for up to 3 months. When you’re ready to reheat, let them thaw in the fridge overnight, then warm gently in a pan over low heat with a splash of cream or broth to loosen the sauce.

Microwave? Totally fine for a quick lunch, though you’ll want to reheat in short bursts so nothing gets rubbery. Stir halfway and, if you’re picky like me, drizzle in a tiny bit more cream at the end. Classy leftovers are a thing.

Variations and Substitutions

This recipe’s flexible enough to handle substitutions, dietary tweaks, or plain ol’ pantry problems. Here’s how you can play around:

  • Ground turkey or chicken: Sub either one for the meats if you want something leaner. The texture’s a bit different, but still tasty—as long as you don’t skip the sauce.
  • Gluten-free breadcrumbs: Easy fix for dietary needs. Use your favorite GF crumbs or even crushed rice crackers. Just watch the soak time; some absorb more than others.
  • Dairy-free swap: Full-fat coconut milk can step in for the cream (just don’t use low-fat—it’s way too runny). Dairy-free butter works too for the roux.
  • Extra herbs: Add chopped parsley or dill to the meatball mix. A hint of nutmeg isn’t traditional here, but it plays surprisingly well.
  • Spicy twist: Not Swedish, but if you like heat, a pinch of cayenne in the sauce warms things up without hijacking the flavor.
  • Vegetarian version: Okay, this takes a leap, but meatless meatballs work fine here—just treat them gently, and the sauce stays exactly the same.

IKEA Swedish Meatballs

What to Serve with IKEA Swedish Meatballs

This dreamy pile of meatballs and sauce almost begs for a soft, starchy counterpart (or two). You’ve got options.

  • Creamy mashed potatoes are the go-to pairing. You’ll want something fluffy yet sturdy enough to hold up under that dreamy sauce. Try swirling a little butter and cream into the mash to really lean into indulgence.
  • Buttered egg noodles are a close second. They cling to the sauce beautifully and feel just rustic enough for a cozy family-style meal. Plus, everyone loves noodles.
  • If you want something green for balance, a bright salad offers nice contrast. A simple green salad works, but this fresh Greek number with vinaigrette and crunchy veggies brings a zippy, welcome crunch.
  • Steamed rice also works. Nothing fancy—just warm jasmine or basmati to soak up all that sauce. It’s a great choice if you’ve got extra gravy and want every drop accounted for.
  • And if you really want to go rogue, try bacon basil cornbread muffins on the side. Not traditional at all, but the savory-sweet combo with the creamy sauce? Weirdly addictive.

IKEA Swedish Meatballs

Frequently Asked Questions

Can I make the meatballs ahead of time?

Yes! You can mix and roll the meatballs a day ahead, cover them, and chill in the fridge. They actually hold their shape better this way. You can even freeze them raw—just place on a tray, freeze until firm, then store in a zip-top bag and defrost before browning.

Why do I have to refrigerate the meatballs before cooking?

While it’s tempting to skip the chill time, refrigerating helps them hold their shape when you brown and bake them. The mixture has added milk and softened breadcrumbs, so it needs to firm up a bit first—or you might end up with sad little meatblobs.

Can I use only beef or only pork?

You can, but you’ll lose a bit of that signature texture and flavor. Pork adds subtle sweetness and softness, while beef gives structure and richness. If going with one, beef holds up a little better, but mix in a bit more milk to keep things tender.

What if my sauce is too thick or too thin?

If it’s too thick, stir in a splash of stock or a bit more cream to loosen it up. Too thin? Just simmer a few more minutes while stirring, and it’ll reduce naturally. If you’re feeling extra, a tiny cornstarch slurry helps—but usually, patience and low heat solve it.

IKEA Swedish Meatballs

IKEA Swedish Meatballs

Prep Time 30 minutes
Cook Time 40 minutes
Chill Time 2 hours
Total Time 3 hours 10 minutes
Meaty, cozy, and full of creamy gravy comfort—these IKEA Swedish Meatballs with ground beef, pork, cream, and onion are your cozy night in, plated. Capturing the iconic taste from everyone’s favorite furniture store, this recipe wraps you in nostalgic, creamy, delicious comfort—no Allen wrench required.
4 servings

Ingredients

For the Meatballs

  • 300 g (10.5 oz) ground beef slightly fatty mix preferred
  • 200 g (7 oz) ground pork
  • 1 small onion finely diced
  • 1 clove garlic crushed or finely minced
  • 60 g (2/3 cup) breadcrumbs plain
  • 1 large egg beaten
  • 90 ml (6 tbsp) whole milk
  • 1 tsp kosher salt to taste
  • 1/2 tsp black pepper freshly ground, to taste
  • 2 tbsp vegetable oil for frying

For the Creamy Gravy

  • 3 tbsp unsalted butter
  • 3 tbsp all-purpose flour
  • 240 ml (1 cup) vegetable stock
  • 180 ml (3/4 cup) beef stock
  • 120 ml (1/2 cup) double cream or heavy cream
  • 1 tbsp soy sauce
  • 1 tsp Dijon mustard

Equipment

  • Large mixing bowl
  • Frying pan or skillet
  • Oven-safe Baking Dish
  • Whisk
  • Measuring cups and spoons

Instructions
 

  1. Mix the meatball base: In a large bowl, combine the ground beef and pork and mix well until blended and smooth. Add onion, garlic, breadcrumbs, and egg, then mix again until nearly uniform. Pour in the milk and mix until cohesive. Season generously with salt and pepper.
  2. Chill the mixture: Shape meat mixture into small meatballs (golf ball-sized or slightly smaller). Arrange on a plate, cover, and refrigerate for 2 hours to firm up.
  3. Brown the meatballs: Heat vegetable oil in a large skillet over medium heat. Add meatballs in batches and brown all over. Transfer browned meatballs to an oven-safe baking dish.
  4. Bake the meatballs: Preheat oven to 350°F (175°C). Cover dish loosely with foil and bake for 30 minutes or until cooked through.
  5. Prepare the sauce: Melt butter in a clean skillet over medium heat. Sprinkle in flour, whisking constantly to make a roux. Cook for about 2 minutes, until it smells nutty but is not browned.
  6. Add liquids & finish sauce: Slowly whisk in vegetable stock, beef stock, and then cream. Continue whisking until smooth. Stir in soy sauce and Dijon. Simmer until thickened, about 4–5 minutes.
  7. Serve: Pour the creamy gravy over hot meatballs (or return meatballs to pan and stir to coat). Enjoy with potatoes, noodles, rice, or your favorite starchy side.

Notes

If you want to make ahead, shape the meatballs and refrigerate up to 1 day or freeze raw on a tray. Store cooked meatballs and gravy together in the fridge for up to 4 days, or freeze up to 3 months. Reheat gently on the stovetop with a splash of cream or stock if needed.

Nutrition

Calories: 502kcal | Carbohydrates: 12g | Protein: 24g | Fat: 38g | Saturated Fat: 17g | Cholesterol: 151mg | Sodium: 1250mg | Potassium: 511mg | Fiber: 1g | Sugar: 3g | Vitamin A: 800IU | Vitamin C: 2mg | Calcium: 80mg | Iron: 2.7mg

Skip the takeout and come hang out in the kitchen—this Ina Garten Greek Salad with tomatoes, cucumbers, bell peppers, onion, olives, and feta is bright, briny, and gloriously crunchy.

This salad is like opening the windows on a breezy day. It’s fresh, tangy, colorful, and bold (kind of like Ina herself). You toss it all together with a simple vinaigrette that smells like summer afternoons in the garden—vinegary, herby, with a little garlic sass. Plus, the feta? Big cubes. No sad crumbles here.

If you’ve ever found yourself hovering near the salad bowl at a potluck, this one’s for you. It’s a little rustic, no lettuce fuss, and ready to sit out at room temp like it’s not even trying. The sour, salty, and crisp notes bounce off each other in every bite. I could happily eat this with just a hunk of crusty bread and call it a meal. Or park it next to grilled meat. Or just a fork and some quiet time.

Table of Contents

Ina Garten Greek Salad

Why You’ll Love this Ina Garten Greek Salad

There’s nothing fussy or finicky happening here. It’s laid-back, generous, and incredibly easy to pull off.

  • Ridiculously simple to make: You’re basically just chopping pretty produce and whisking a quick little dressing.
  • Lettuce-free and loving it: It holds up like a champ without wilting, and nobody misses the greens.
  • Feta in cubes, not crumbs: The big blocks soak up all that garlic-oregano dressing and bring creamy, tangy bites to the party.
  • Balanced like whoa: Sweet peppers, acidic tomatoes, briny olives, sharp onion—it’s a little symphony.
  • Perfect for ahead-of-time magic: It actually gets better as it sits. How many salads can say that?

Ina Garten Greek Salad

Ingredient Notes

This salad’s secretly one giant ode to produce season. Okay, and also feta.

  • Hothouse cucumber: Crunchy but not watery, thanks to seeding it. Skip peeling unless you’re feeling particularly dainty today.
  • Cherry or grape tomatoes: Juicy pops of sweet-acidic flavor. Halving them helps them mingle a bit more with the vinaigrette.
  • Red and yellow bell peppers: For color, for crunch, for sweetness. Ina’s not here for one-note salads.
  • Red onion: The sharp bite gets mellowed out once it hangs with the vinegar. Slice it thin!
  • Kalamata olives: Salty, meaty, and a little wine-y. Make sure they’re pitted unless you enjoy accidental dental work.
  • Feta (in blocks): Get the good stuff, packed in brine. Cube it—don’t crumble—and let it marinate in that dreamy dressing.
  • Garlic and dried oregano: The backbone of the vinaigrette. Oregano is classic here—don’t skip it unless you truly must.
  • Dijon mustard: Oddball, maybe, but it anchors the vinaigrette and gives it that slight creamy heft.
  • Red wine vinegar and olive oil: Use the good ones. It’s a simple dressing, so these two really matter.

Ina Garten Greek Salad

How To Make This Ina Garten Greek Salad

Picture us in the kitchen, music playing, knives out (the helpful kind). You chop, I’ll whisk. Deal?

  • Chop all the veg: In a big bowl, toss the sliced cucumber, both peppers, tomatoes, and red onion. You want bite-sized pieces but not itty-bitty. Aim for “stuff I’d happily spear with a fork.”
  • Make the vinaigrette: In a little bowl, whisk together minced garlic, dried oregano, Dijon mustard, red wine vinegar, kosher salt, and black pepper. Keep whisking while slowly streaming in the olive oil. Yes, slowly! Emulsify like a hero.
  • Combine and toss: Pour the vinaigrette right over the veg. Add the feta and olives (gently now, don’t break the cubes). Toss with your hands or a spoon—just enough to coat.
  • Let it sit and mingle: Set it aside for 30 minutes at room temp. This is where the salad learns to sing. Everything softens slightly, flavors deepen, magic happens.

Ina Garten Greek Salad

Storage Options

This salad is a bit of a unicorn—it actually fares great in the fridge, even fully dressed. Pop it into an airtight container and it’ll hang out for up to 3 days. The vegetables soften slightly, but in a mellow, marinated way—not a sad, soggy way.

Can you freeze it? Honestly, no. Cucumbers and tomatoes are just not freezer-friendly. They go mushy and weird in texture, and that vinaigrette separates like a relationship doomed from day one.

But! If you’re meal-prepping, you can chop everything (except the tomatoes—they go mumbly) and prep the vinaigrette ahead. Toss it all together when you’re ready, and let it sit just like Ina said. Lazy weekday win.

Variations and Substitutions

You can tweak this salad to fit whatever you’ve got on hand. There’s room to riff.

  • Swap the feta for goat cheese: It’ll be creamier and tangier. Crumble it in at the last minute so it doesn’t disappear into goo.
  • Add chickpeas: For a bit of protein heft. They soak up that vinaigrette beautifully and make it more of a meal.
  • Try different olives: Green Castelvetrano olives have a mellow, buttery vibe that’s fun here.
  • Use fresh herbs: Toss in chopped fresh oregano, dill, or even mint for a bit of green brightness.
  • Upgrade your tomatoes: Got gorgeous heirlooms? Use ‘em. Just cut into chunks and enjoy the color explosion.

Ina Garten Greek Salad

What to Serve with Ina Garten Greek Salad

This salad loves to play a supporting role, but it also holds its own as the lead. Here are a few of its favorite costars.

  • One of my favorite quick dinners is pairing it with these easy salmon cakes. Crispy, golden-edged, and cozy next to the bright crunch of the salad.
  • If you’re already grilling, throw on some lamb chops or chicken skewers. The salad is so refreshing it tones down any smoky char like a pro.
  • For a lighter lunch, try wrapping it in warm pita bread with a swipe of hummus. It’s gloriously messy in the best way.
  • Need something creamy and starchy on the side? A scoop of orzo tossed with olive oil and lemon zest fits in beautifully.
  • And if you’re ending on a sweet note, this banana bread has mellow, nutty vibes that totally complete the meal.

Ina Garten Greek Salad

Frequently Asked Questions

Can I make this Greek salad ahead of time?

Yes! In fact, it’s encouraged. The salad improves after sitting for 30 minutes, letting all the flavors mingle. It also holds up in the fridge for a couple of days. Just store it in a sealed container and bring it to room temp before serving if you have time. If you’re prepping for a party, you can chop everything a few hours ahead and dress it closer to serving.

What kind of feta should I use?

Look for feta in blocks, packed in brine. It’s creamier, tangier, and doesn’t have that dry, crumbly texture that pre-crumbled feta can have. Try to avoid anything that looks like it belongs in a pre-grated Parmesan situation—the real deal makes a huge difference here!

Is lettuce supposed to be in Greek salad?

Nope! Traditional Greek salad (Horiatiki) skips the lettuce. It’s all about chunky veggies, olives, feta, and a simple vinaigrette. Lettuce tends to water things down and wilt if it sits too long. Ina sticks to the classic format, which honestly makes prep easier and the texture way more satisfying.

What’s the best way to slice the onions so they’re not overpowering?

Slice the red onion thinly into half-rounds. If you’re sensitive to their sharpness, try soaking them in a bit of water (even better with a splash of vinegar) for 5–10 minutes while you prep everything else. It’ll mellow the bite but keep that nice crunch. No tears and no regrets.

Ina Garten Greek Salad

Ina Garten Greek Salad

Prep Time 20 minutes
Resting Time 30 minutes
Total Time 50 minutes
Skip the takeout and come hang out in the kitchen—this Ina Garten Greek Salad with tomatoes, cucumbers, bell peppers, onion, olives, and feta is bright, briny, and gloriously crunchy. It’s a no-lettuce, no-fuss salad with bold flavors and a zingy vinaigrette. Big cubes of feta, a rainbow of veggies, and a punchy herb-garlic dressing make it the perfect side or a meal on its own.
6 servings

Ingredients

Vegetables

  • 1 English or hothouse cucumber halved lengthwise, seeded, and sliced 1/2-inch thick
  • 2 cups (300 g) cherry or grape tomatoes halved
  • 1 red bell pepper cut into 1-inch pieces
  • 1 yellow bell pepper cut into 1-inch pieces
  • 1/2 (0.5) medium red onion thinly sliced

Other Salad Ingredients

  • 3/4 cup (120 g) Kalamata olives pitted, whole or halved
  • 200 g feta cheese in blocks, cut into 1/2-inch cubes

Vinaigrette

  • 2 cloves garlic minced
  • 1 tsp dried oregano
  • 1 tsp Dijon mustard
  • 1/4 cup (60 ml) red wine vinegar
  • 1/2 tsp (0.5 tsp) kosher salt
  • 1/2 tsp (0.5 tsp) black pepper freshly ground
  • 1/2 cup (120 ml) extra-virgin olive oil

Equipment

  • Large Bowl
  • Small bowl
  • Whisk
  • Knife
  • Cutting board

Instructions
 

  1. In a large bowl, combine the sliced cucumber, cherry tomatoes, red pepper, yellow pepper, and red onion.
  2. In a small bowl, whisk together the garlic, dried oregano, Dijon mustard, red wine vinegar, kosher salt, and black pepper. Slowly stream in the olive oil while whisking until the vinaigrette is emulsified.
  3. Pour the vinaigrette over the vegetables and toss gently to coat.
  4. Add the feta cubes and Kalamata olives to the salad. Toss very gently just to distribute; try to keep the feta cubes intact.
  5. Let the salad rest at room temperature for 30 minutes before serving to allow the flavors to meld.

Notes

Storage: Store leftovers in an airtight container in the fridge for up to 3 days. The salad softens and marinates as it sits, but won't get soggy.
Variations: Swap feta for goat cheese, add chickpeas for protein, use Castelvetrano olives, or sprinkle in fresh herbs like dill, mint, or oregano.
Serving ideas: Pair with grilled meats, tuck into pita with hummus, or serve with orzo for a light meal.

Nutrition

Calories: 240kcal | Carbohydrates: 10g | Protein: 6g | Fat: 20g | Saturated Fat: 7g | Cholesterol: 25mg | Sodium: 650mg | Potassium: 370mg | Fiber: 2g | Sugar: 5g | Vitamin A: 950IU | Vitamin C: 75mg | Calcium: 220mg | Iron: 1.2mg

A cozy baked hug in casserole form, this Johnny Marzetti casserole is loaded with penne, ground beef, sausage, melty cheese, and rich tomato sauce.

The noodles nestle into a sea of savory meat sauce, cheesy layers melt together, and the house suddenly smells like you’ve been simmering something magical all day. You haven’t (promise), but it’ll taste like you did.

This Johnny Marzetti casserole is the kind of dish that shows up like an old friend—no big entrance, just good vibes and comfort food confidence. It’s hearty (some might say gloriously carby), cheesy in all the right ways, and ideal for when your calendar says “make something easy” but your appetite says “let’s go big.”

Whether it’s a laid-back dinner, neighborhood potluck, or just a leftover-loving weeknight, this one’s got you. Grab a spoon.

Table of Contents

Johnny Marzetti Casserole

Why You’ll Love this Johnny Marzetti Casserole

So, here’s the thing. Johnny Marzetti isn’t fancy. And that’s exactly why I like it. It’s reliable, comforting, and slightly retro in the best possible way.

  • Ridiculously simple to make: You brown, simmer, layer, and bake—and honestly, none of it is fussy.
  • Double-cheese situation: Mozzarella melts into creamy strands, cheddar adds bite—you get the best of both cheese worlds.
  • Satisfying and hearty: Between the pasta, meat, and sauce, this feeds a hungry crowd or feeds you for… several days.
  • Works with what you’ve got: You can swap in different proteins, cheeses, or noodles depending on what’s lurking in the fridge.
  • Leftovers are gold: It reheats beautifully and almost tastes even better the next day (the flavors really get cozy).

Johnny Marzetti Casserole

Ingredient Notes

You’ve seen casseroles like this before, probably on a chilly Sunday or at a potluck with mysteriously identical Tupperware lids. Let’s talk about what makes this one tick.

  • Penne pasta: Holds sauce nicely and doesn’t collapse into mush—go al dente for the win. Elbow macaroni works, but penne’s the overachiever here.
  • Ground beef: Classic base, all about that hearty flavor. Try an 80/20 blend for a good balance of fat and richness.
  • Mild Italian sausage: Adds a little spice and fennel-kissed depth. You can go hot if you like a kick.
  • Onion and garlic: They bring that savory backbone—and when they hit the pan? Smells like dinner is happening.
  • Green bell pepper: Adds a little crunch and sweetness. Honestly, you could skip it, but I wouldn’t.
  • Italian seasoning + red pepper flakes: For warmth and a whisper of heat. Keep the red pepper light if feeding spice-sensitive folks.
  • Tomato sauce + diced tomatoes: Two textures, one cozy, saucy hug. Get a flavorful tomato sauce—not all cans are created equal.
  • Mozzarella cheese: Makes everything stretchy and gooey. Layer it in and crown the whole dish with it.
  • Sharp cheddar cheese: For salty tang and that browned edge on top. It plays well with the milder mozzarella.

Johnny Marzetti Casserole

How To Make This Johnny Marzetti Casserole

Here we go—casserole land. This is one of those recipes that feels like a bit of a treasure map: cook a thing, combine it all, then let the oven do its magic. Grab a big pan and let’s do it.

  • Preheat and prep your gear: Set the oven to 375°F and grease a 9×13-inch dish. Doesn’t have to be fancy, just something roomy.

  • Boil your pasta: In very salty water (like, sea-level salty), cook penne until just barely al dente. It’ll keep cooking in the oven so give it a little underbite.

  • Brown the meats: In a large skillet over medium-high heat, cook the ground beef and sausage until no longer pink. Break it up with a wooden spoon or lazy spatula—you want small bits, not meatball chunks.

  • Toss in your veggies: When the meat is about done, add onion, garlic, and green bell pepper. Sauté those together for about 5 minutes. Your kitchen will suddenly smell like you know what you’re doing.

  • Season like you mean it: Stir in Italian seasoning, red pepper flakes, salt, and black pepper. Give it a whiff—it should already smell like dinner.

  • Add the sauce: Stir in tomato sauce and diced tomatoes. Let that all simmer for 10 minutes. This part’s important—it’s when the sauce gets layered and rich. Don’t rush it.

  • Time to layer: In your baking dish, start with half the cooked penne. Sprinkle on 1 cup of mozzarella. Then add half the meat sauce in an even layer.

  • Repeat your layers: Add the remaining pasta, another 1 cup of mozzarella, and the rest of the sauce. Solid home base of flavor here.

  • Cover and bake: Tightly wrap with foil and bake for 30 minutes. It gets steamy and delicious in there.

  • Top it off and finish baking: Pull off the foil, add the rest of the mozzarella (1/2 cup) and all the cheddar. Bake uncovered another 10-15 minutes, until bubbly and winsomely golden.

  • Cool and devour: Let it sit for 10 minutes before scooping. Not only so it doesn’t scorch your mouth, but to let it settle into sliceable layers.

Johnny Marzetti Casserole

Storage Options

So, what if (miraculously) you have leftovers? Good news: they’re basically better the next day.

For the fridge, store leftovers in an airtight container. They’ll hang out happily for 4–5 days. You can even keep it in the baking dish and just cover it tightly with foil or a lid if it fits—lazy storage for the win.

Want to freeze it? Absolutely. This casserole is a dream frozen. Make sure it’s completely cool before wrapping. Slice into portions or freeze the whole pan, tightly wrapped in foil, plus a freezer bag if you’re feeling extra safe. It’ll hold up for about 2 to 3 months.

Reheating is wonderfully easy. Microwave smaller portions, or pop the whole shebang (covered) into a 350°F oven for about 20–25 minutes until warmed through. If it looks a little dry, drizzle on a tablespoon or two of water before baking, then re-cover it. Cheese rescues everything.

Variations and Substitutions

Once you’ve made it the “classic” way, feel free to stray. Johnny won’t mind.

  • Noodle swap: Penne works great, but feel free to try rotini, elbows, or even rigatoni. Just keep it sturdy, not too delicate.
  • Meatless option: Skip the beef and sausage and use sautéed mushrooms, lentils, or a plant-based crumble. Still rich, still satisfying.
  • Add vegetables: Zucchini, spinach, even chopped kale sneak in nicely without stealing the show. Sauté them down first if they’re on the wet side.
  • Spicy upgrade: Use hot Italian sausage instead of mild, or double the red pepper flakes. Or both. YOLO.
  • Different cheeses: Try provolone, Monterey Jack, or fontina if they’re what’s in the fridge. Just aim for melt-friendly choices.

Johnny Marzetti Casserole

What to Serve with Johnny Marzetti Casserole

This casserole is the main character, so keep the sides simple and a little crisp or green if you can. Balance the richness, you know?

  • A big, crunchy salad goes a long way. Try crisp romaine, cucumbers, cherry tomatoes, and a tangy vinaigrette. That snap and acidity cuts through all the melty goodness like a charm.

  • Garlic bread makes zero nutritional sense here but 100% emotional sense. Either make your own or heat up the frozen stuff—dip it into the sauce like it’s your job.

  • Roasted broccoli or green beans, tossed with olive oil, salt, and maybe a sprinkle of parmesan, bring just enough earthiness and texture to round out the plate.

  • For dessert, something light and sweet works beautifully. These peanut butter banana ice cream sandwiches are cold, creamy, and delightfully nostalgic after all that warm, cheesy casserole.

  • If you’re looking for a meatless meal for another busy weeknight, this lazy lasagna is right up Johnny’s alley—just chillier, cheesier neighbors on the casserole block.

Johnny Marzetti Casserole

Frequently Asked Questions

Can I make Johnny Marzetti casserole ahead of time?

Yes! You can assemble the whole casserole, cover it tightly with foil, and refrigerate it for up to 24 hours before baking. Just make sure to let it sit at room temp for 15–20 minutes before popping it in the oven so it heats evenly. Or bake it straight from the fridge—just add about 10 more minutes of bake time to be safe.

Can I freeze Johnny Marzetti before baking?

Definitely. If you’re prepping for freezer meals, assemble it in a freezer-safe dish, wrap it tightly (foil + plastic wrap is a solid combo), and freeze before baking. When you’re ready to cook, thaw it overnight in the fridge, then bake per the recipe instructions. Or bake straight from frozen—just increase the baking time and keep it covered longer before adding that final cheese layer.

What pasta can I use instead of penne?

Great question. You want a shape that holds sauce and doesn’t collapse after baking. Rotini, rigatoni, or even classic elbows all work really well. Avoid thin pastas like angel hair—they’ll just disappear into cheesy goo (and not in a charming way).

Is Johnny Marzetti the same as American goulash?

They’re close cousins but not identical. American goulash is usually a one-pot stovetop situation with elbow macaroni. Johnny Marzetti is layered, baked, and loaded with cheese. In short: one is cozy and fast, the other is cozy and covered in melty cheese crust.

Johnny Marzetti Casserole

Johnny Marzetti Casserole

Prep Time 25 minutes
Cook Time 50 minutes
Resting Time 10 minutes
Total Time 1 hour 15 minutes
A cozy baked hug in casserole form, this Johnny Marzetti casserole is loaded with penne, ground beef, sausage, melty cheese, and rich tomato sauce. The noodles nestle into a sea of savory meat sauce, cheesy layers melt together, and the house suddenly smells like you've been simmering something magical all day.
8 servings

Ingredients

Main Ingredients

  • 12 oz (340 g) penne pasta uncooked
  • 1 lb (454 g) ground beef 80/20 blend recommended
  • 1/2 lb (227 g) mild Italian sausage casings removed if linked
  • 1 onion chopped
  • 3 garlic cloves minced
  • 1 green bell pepper chopped
  • 1 1/2 tsp (1.5 tsp) Italian seasoning
  • 1/2 tsp (0.5 tsp) red pepper flakes or to taste
  • 1 tsp salt plus more for pasta water
  • 1/2 tsp (0.5 tsp) black pepper freshly ground
  • 1 can (425 g) tomato sauce 15 oz (425 g)
  • 1 can (411 g) diced tomatoes 14.5 oz (411 g), with juices
  • 2 1/2 cups (250 g) shredded mozzarella cheese divided
  • 1 cup (100 g) shredded sharp cheddar cheese

Equipment

  • 9x13 inch Baking Dish
  • Large skillet
  • Large saucepan
  • wooden spoon
  • Aluminum foil

Instructions
 

  1. Preheat and prep your gear: Set the oven to 375°F (190°C) and grease a 9x13-inch baking dish.
  2. Boil your pasta: In a large pot of very salty boiling water, cook penne until just barely al dente. Drain and set aside.
  3. Brown the meats: In a large skillet over medium-high heat, cook ground beef and Italian sausage until no longer pink. Break up any large chunks with a spoon.
  4. Add vegetables: Stir in the onion, garlic, and green bell pepper. Sauté about 5 minutes, until softened and fragrant.
  5. Season: Add Italian seasoning, red pepper flakes, salt, and black pepper.
  6. Add sauce: Stir in the tomato sauce and diced tomatoes (with juices). Bring to a simmer and cook for 10 minutes.
  7. Layer the casserole: Spread half the cooked penne into the bottom of the baking dish. Sprinkle with 1 cup mozzarella. Top with half the meat sauce.
  8. Add the remaining pasta, 1 cup more mozzarella, and remaining meat sauce.
  9. Cover and bake: Wrap tightly with foil and bake for 30 minutes.
  10. Add final cheese and finish baking: Remove foil, sprinkle remaining 1/2 cup mozzarella and all the cheddar cheese on top. Bake uncovered 10–15 minutes, until cheese is bubbling and golden.
  11. Rest before serving: Let casserole cool for 10 minutes before scooping and serving.

Notes

Storage: Store cooled leftovers in an airtight container in the fridge for up to 5 days or freeze up to 3 months. Reheat individual servings in the microwave or bake the entire casserole at 350°F (175°C) until warmed through.
Variations: Use mushrooms or plant-based crumbles for a meatless option. Substitute other hearty pasta shapes like rotini or rigatoni. Vary the cheese with provolone, Monterey Jack, or fontina.

Nutrition

Calories: 490kcal | Carbohydrates: 43g | Protein: 28g | Fat: 23g | Saturated Fat: 11g | Cholesterol: 80mg | Sodium: 950mg | Potassium: 600mg | Fiber: 3g | Sugar: 6g | Vitamin A: 600IU | Vitamin C: 20mg | Calcium: 330mg | Iron: 3.5mg

Let's Get Cooking!

100+ Recipes for Busy Nights

In a time crunch? Take a look around and browse plenty of recipes to help you get dinner ready and on the table on those busy nights!

Sweet Recipes

Pumpkin Banana Muffins

Pumpkin Banana Muffins Recipe

Strawberry Pie Bars

Strawberry Pie Bars Easy Oven Recipe

White Chocolate Raspberry Muffins

White Chocolate Raspberry Muffins Recipe

Snickerdoodle Muffins

Snickerdoodle Muffins Recipe for Oven

PIN NOW

Follow KitchenetteBlog on Pinterest

Love cozy recipes that actually make it to the table? On Pinterest, I share new comfort-food ideas every week—desserts, dinners, and those little snack cravings that hit at midnight. Come pin with me and never run out of kitchen inspo.

Savory Recipes

Turkey Tetrazzini

Turkey Tetrazzini Baked Pasta Recipe

Grilled Chicken Panini Sandwich

Grilled Chicken Panini Sandwich Recipe

Sweet Potato Cornbread

Sweet Potato Cornbread Recipe Oven Baked

Classic Waldorf Salad

Waldorf Salad Simple Classic Recipe

Get 5 Recipes to Simplify Your Life!

Delicious, versatile recipes you can make over and over.