Get 5 recipes to simplify your life:

easy, delicious, real food recipes

Latest Recipes

Smoky kielbasa, buttery potatoes, and a swirl of cream come together in this savory kielbasa potato soup. A cozy mix of sausage, veggies, and cheese!

If you’re standing around wondering what on earth to do with that half-circle of kielbasa in your fridge and those potatoes that are starting to whisper your name, this soup might be the answer. It’s hearty without being heavy, satisfying without a 17-step prep, and it makes your entire kitchen smell like dinner is about to get real. The smoky sausage practically sings in the pot, mellowed out by creamy broth and melty cheese.

This kielbasa potato soup is built for those times when you want something comforting bubbling away while you go hide under a blanket (or, you know, finish emails or help with homework). One pot. No fussy steps. Pure weeknight win.

Table of Contents

Kielbasa Potato Soup

Why You’ll Love this Kielbasa Potato Soup

Just a solid, cozy soup with great texture and enough smoky sausage-ness to keep things interesting.

  • Ridiculously simple to make: You just sauté, simmer, swirl, and boom—soup’s on.
  • Smoky, savory, comforting: Kielbasa brings serious flavor that mingles perfectly with creamy potato goodness.
  • Easily customizable: Toss in corn, don’t toss in corn. Swap the cheese. Live your truth.
  • Reheats like a dream: It might even taste better the next day (a bold statement, but I’m standing by it).
  • One pot situation: Which means fewer dishes, and honestly, that’s a huge selling point.
  • Great for using up what’s in the fridge: Got lone carrots, a sad celery rib, half an onion? This is their redemption arc.

Kielbasa Potato Soup

Ingredient Notes

Here’s a quick kitchen close-up of what’s going into your pot and why it matters.

  • Olive oil: A glug to get things started. Helps brown the kielbasa and soften the veggies.
  • Kielbasa: Smoky, savory, and a touch sweet. You can use beef, pork, turkey—go with your favorite.
  • Onion, carrot, celery: The soup’s cozy base. Classic combo, subtle sweetness, a little depth.
  • Garlic: Because we are civilized people. Adds aromatic oomph.
  • Smoked paprika + thyme: The smoky paprika echoes the kielbasa, and thyme adds earthy balance.
  • Red pepper flakes (optional): Only if you want a gentle background tingle. Totally skippable.
  • Yukon Gold potatoes: Creamy and buttery, they hold their shape but also mash just enough.
  • Chicken broth: Stick with low-sodium so you can season to taste. Veggie broth works too.
  • Heavy cream: Makes it luscious but not too rich. Room temp is best so it doesn’t curdle.
  • Cheddar cheese: A little sharpness and meltiness. I love extra sharp, but any melty cheddar does the trick.
  • Corn (optional): Sweet little pops of texture and color. I like it if I’ve got it.
  • Salt + black pepper: Essential, of course. Season after the cheese and broth go in.
  • Fresh parsley: It’s green. It’s cheerful. Toss it on top to kid yourself into thinking this is healthy.

Kielbasa Potato Soup

How To Make This Kielbasa Potato Soup

Let’s do this. You don’t need a culinary degree, just a Dutch oven, a spoon, and maybe a good podcast in the background.

  • Sizzle the kielbasa: Warm up the olive oil in your Dutch oven over medium heat, then toss in the kielbasa chunks. Let them brown up and get nice and crisp on the edges, about 4–5 minutes. That caramelized sausage flavor? Everything.

  • Soft-cook the veggies: Scoop the kielbasa out and set it aside for its return to glory later. Into the same pot go the onion, carrots, and celery. Let those soften up and get just a bit golden, about 5–6 minutes, stirring so nobody sticks.

  • Bring the flavor: Add the garlic, smoked paprika, thyme, and (if you’re feelin’ spicy) red pepper flakes. Stir for just 30 seconds, until your kitchen smells… frankly, fantastic. Don’t let the garlic burn—it turns bitter, which ruins the vibe.

  • Simmer the soup: Drop in those cubed potatoes and pour in the chicken broth. Crank the heat to get a boil going, then lower it to a gentle simmer. Let the potatoes get fork-tender—it’ll take around 10 to 15 minutes max.

  • Optional blend (but worth it): Once the potatoes are soft, grab your immersion blender. Give the soup a few blends for creaminess, or fully blend it if you want a smooth vibe. I like mine about halfway—textured, but velvety.

  • Cream + cheese = joy: Stir in the room temp cream and shredded cheddar until everything’s smoothed out and dreamy. Don’t rush this part—the cheese melts slowly, and that’s okay. Then, throw the kielbasa back in, along with any corn you’re adding.

  • Final simmer & taste check: Let the soup heat gently for another 5–7 minutes. Stir occasionally, and give it a taste. Season with salt and pepper as needed. (Remember, kielbasa itself is salty, so taste first!)

  • Garnish and serve: Ladle into bowls, top with a bit o’ chopped fresh parsley, and grab some crusty bread. Ready to devour.

Kielbasa Potato Soup

Storage Options

This soup is the kind of thing that turns into lunch magic the next day. It keeps beautifully in the fridge, sealed up tight in an airtight container, for up to 4 days. Just make sure it’s cooled to room temp before you stash it.

Now, freezer situation: Yes, you can totally freeze this, but a little heads-up—the texture may shift slightly. Creamy soups sometimes separate when reheated from frozen. If you’re cool with that, go forth! I recommend freezing it in individual portions for easy lunches or dinners. Just leave a bit of room in the container for expansion.

Reheating? Simmer it gently on the stove or zap it in the microwave (medium heat in one-minute bursts, stirring in between). If it thickens up too much, add a splash of broth or water to bring it back to life.

Variations and Substitutions

This kielbasa potato soup is flexible enough to handle whatever fridge clean-out you’ve got going.

  • Turkey or chicken sausage: A leaner protein works just fine and slips right into the smoky vibe with ease.
  • Sweet potatoes instead of Yukon: Sweeter notes and a little more depth—it totally works if you like a twist.
  • No cream? Use milk (plus a little butter): It won’t be quite as rich, but still very comforting. Just heat gently.
  • Skip the cheese: If dairy isn’t your thing, leave it out. Add a spoonful of nutritional yeast if you like that savory, cheesy flavor.
  • Add some greens: Stir in a handful of spinach, kale, or Swiss chard during the last few minutes of simmering.
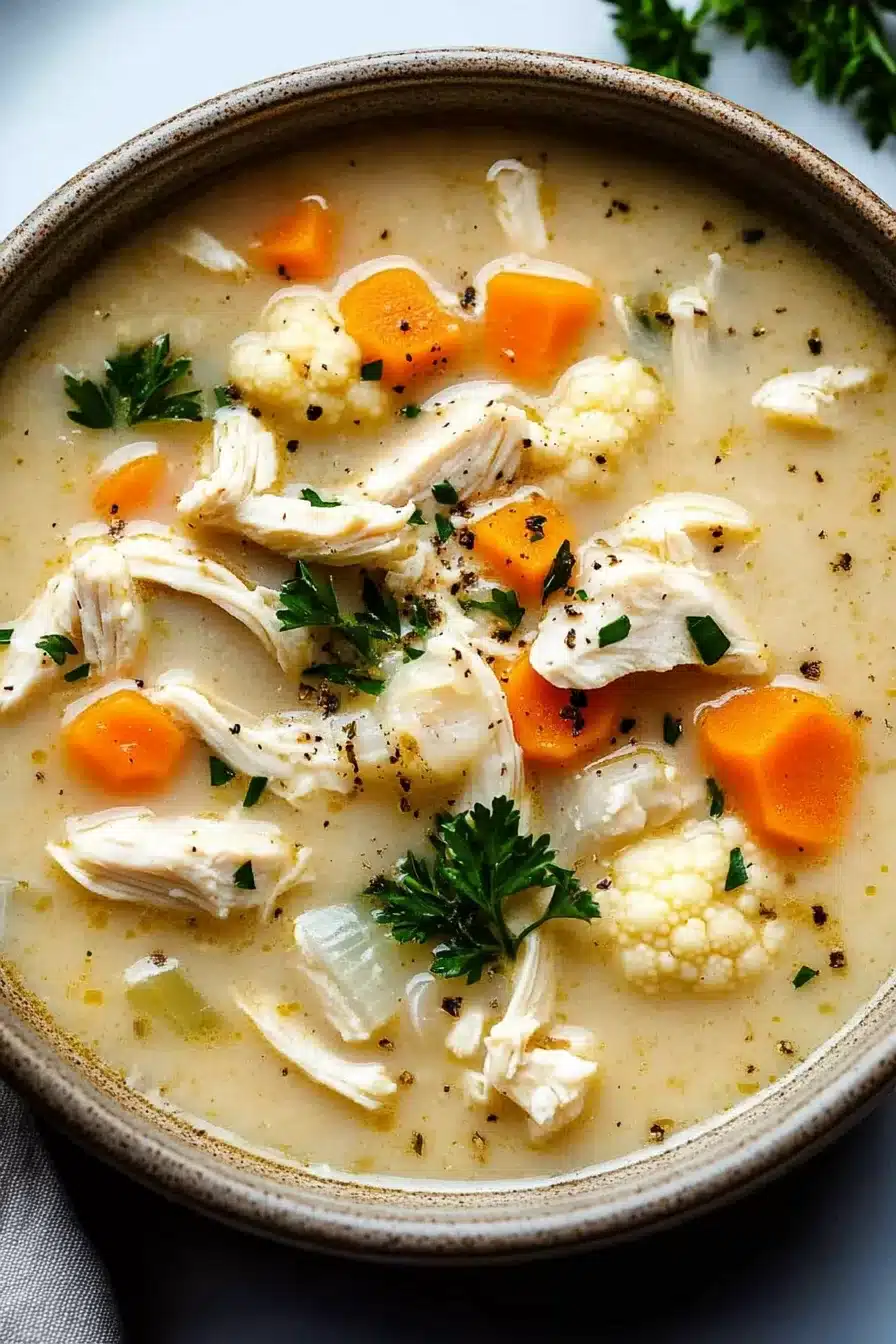
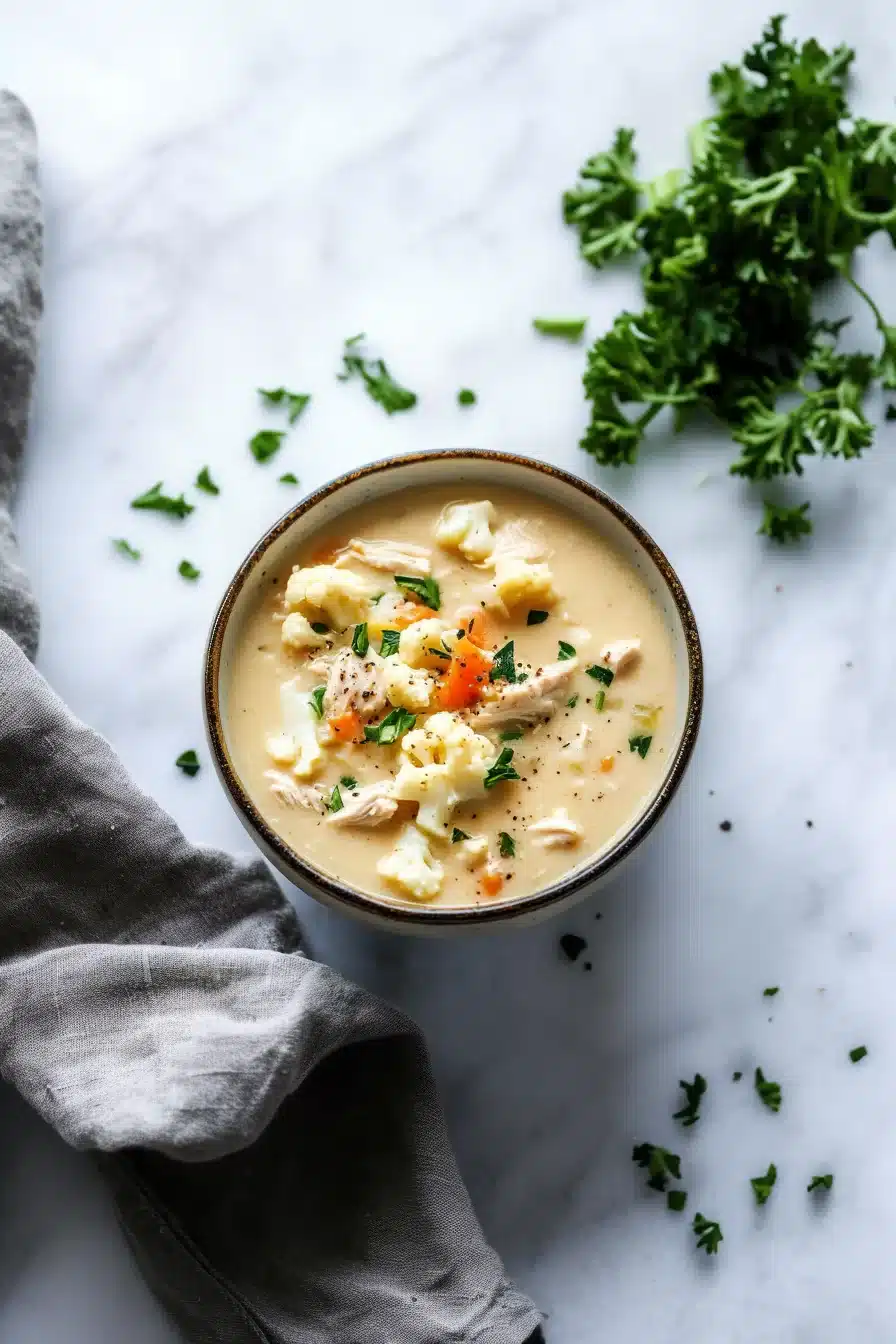
  • Try cauliflower: If you’re avoiding potatoes (but why?) sub in florets and let them simmer ‘til soft. Actually, we have a killer cauliflower-filled soup over here if you want more of that.

Kielbasa Potato Soup

What to Serve with Kielbasa Potato Soup

Let’s set the scene: big bowl of hot soup, something delicious on the side. Life’s good.

  • Crusty bread or biscuits: There’s just something about tearing warm, buttery bread and dipping it in creamy soup. Like edible therapy. Bonus points if it’s garlicky or cheesy.

  • A tangy side salad: Something bright and crisp like a vinegar-dressed cabbage slaw or arugula salad balances the richness. Throw in some pickled onions and citrus if you’re feeling fancy.

  • Cornbread muffins: Slightly sweet, a little crumbly, and perfect with a swipe of butter. Totally recommend trying these bacon basil muffins if you’re feeling bold.

  • Roasted veggies: A tray of brussels sprouts or broccoli roasted ’til crispy adds a great contrast. Plus it feels like you’re being sort of healthy (I won’t tell).

  • Pickles or something briny: A couple of gherkins, pickled beets, or even sauerkraut on the side? Yes. Something about smoky, creamy soup next to a little acid is chef’s kiss.

Kielbasa Potato Soup

Frequently Asked Questions

Can I make kielbasa potato soup ahead of time?

Yes, and honestly, it might even taste better after a day in the fridge. The flavors deepen as it rests, and the texture thickens slightly. Just cool it completely before storing, and reheat gently on the stovetop or in the microwave, stirring occasionally to keep the cream smooth.

What kind of kielbasa should I use?

Go with the variety you love most! Smoked pork kielbasa is the classic, but turkey kielbasa or beef versions work great too. Some kielbasas are a little sweet, some spicier—any of them will give your soup personality, so choose what makes your taste buds happy.

Is this soup gluten-free?

It easily can be! The base ingredients (veggies, potatoes, kielbasa, broth, cream, cheese) are typically gluten-free. Just double-check that your kielbasa and chicken broth don’t have hidden gluten or fillers. Always scan those labels if you’re cooking for someone sensitive.

Can I leave out the dairy?

Yup! You can skip the cream and cheese entirely and still have a great soup. Swap in full-fat coconut milk or an unsweetened dairy-free creamer for richness if you’d like, or go lighter and leave it brothy. It won’t be quite the same, but it’ll still be warm, hearty, and flavorful.

Kielbasa Potato Soup

Kielbasa Potato Soup

Prep Time 15 minutes
Cook Time 30 minutes
Total Time 45 minutes
Smoky kielbasa, buttery potatoes, and a swirl of cream come together in this savory, comforting kielbasa potato soup. This weeknight-friendly, cheesy, and hearty dish brings big flavor with simple ingredients for pure cozy satisfaction.
6 bowls

Ingredients

Soup Base

  • 1 tbsp (15 ml) olive oil
  • 12 oz (340 g) kielbasa sliced into 1/2-inch rounds
  • 1 onion diced
  • 2 carrots peeled and diced
  • 2 celery ribs diced
  • 3 cloves garlic minced
  • 1 tsp smoked paprika
  • 1 tsp dried thyme
  • 1/4 tsp (0.25 tsp) red pepper flakes optional
  • 1 1/2 lb (680 g) Yukon Gold potatoes about 4 medium, peeled and cut into 3/4-inch cubes
  • 4 cups (950 ml) low-sodium chicken broth or vegetable broth
  • 3/4 cup (180 ml) heavy cream room temperature
  • 1 cup (110 g) shredded cheddar cheese preferably extra sharp
  • 1 cup (165 g) frozen or canned corn drained; optional
  • salt and freshly ground black pepper to taste

For Serving

  • chopped fresh parsley for garnish
  • crusty bread for serving (optional)

Equipment

  • Dutch Oven
  • Ladle
  • Immersion Blender
  • Cutting board
  • Chef’s knife

Instructions
 

  1. Heat olive oil in a large Dutch oven or soup pot over medium heat. Add the kielbasa and cook, stirring occasionally, until browned and crisp on the edges, about 4–5 minutes. Remove kielbasa with a slotted spoon and set aside.
  2. Add the onion, carrot, and celery to the pot and cook, stirring, until softened and just starting to turn golden, 5–6 minutes.
  3. Add garlic, smoked paprika, thyme, and red pepper flakes (if using). Stir for 30 seconds, until fragrant, being careful not to burn the garlic.
  4. Add the potatoes and pour in the broth. Raise the heat and bring to a boil, then reduce heat and simmer gently until potatoes are fork-tender, about 10–15 minutes.
  5. To make the soup extra creamy, use an immersion blender to blend a portion of the soup (or blend as much as you like for your preferred texture).
  6. Stir in the cream and cheddar cheese until melted and fully incorporated. Add the cooked kielbasa and corn (if using) back to the pot. Warm gently for 5–7 minutes, stirring occasionally. Taste and season with salt and pepper as needed.
  7. Ladle into bowls and top with chopped parsley. Serve with crusty bread if desired.

Notes

This soup gets even better as it sits! Store leftovers in an airtight container up to 4 days in the fridge. To freeze, portion into containers (leaving space for expansion) and freeze up to 3 months—note that texture may change slightly after thawing and reheating. For a dairy-free version, substitute cream and cheese with non-dairy alternatives or simply omit for a brothy soup. Feel free to throw in greens or swap veggies to use up what’s in your fridge.

Nutrition

Calories: 410kcal | Carbohydrates: 31g | Protein: 17g | Fat: 24g | Saturated Fat: 11g | Cholesterol: 73mg | Sodium: 920mg | Potassium: 814mg | Fiber: 3g | Sugar: 4g | Vitamin A: 2350IU | Vitamin C: 27mg | Calcium: 210mg | Iron: 2.1mg

Warm spices, tender chicken, and creamy cauliflower make this cauliflower chicken soup irresistibly cozy. Think golden broth, soft veggies, and hints of cumin and turmeric.

This pot of comfort simmers with cauliflower, chicken, carrots, and just enough cream to make it slurp-worthy. Bonus: your kitchen’s about to smell amazing.


Let’s be honest, cauliflower doesn’t always get the star role. But here? It’s front and center, cozying up with shredded chicken and just enough punch from garlic and ginger to keep you coming back for another spoonful. This is the kind of soup you make when sweatpants are the dress code and your body’s low-key asking for something warm and grounding.

You can throw it together on a Wednesday night (yes, even if the fridge looks “meh”) and it’ll still feel like a little treat. Personally, I lean into the smoky paprika, but optional doesn’t mean skippable… just saying. Let’s grab a pot and make something soul-hugging.

Table of Contents

Cauliflower Chicken Soup

Why You’ll Love this Cauliflower Chicken Soup

It’s not flashy, it’s not complicated, it doesn’t require obscure ingredients from that one aisle you always skip… and that’s the charm.

  • Ridiculously simple to make: You just chop things, toss them in a pot, and let them mingle—nothing fussy or suspicious.
  • Warmly spiced (but not overpowering): Ginger, turmeric, cumin… the kind of trio that makes your house smell like actual comfort.
  • Creamy without going full Alfredo: The heavy cream softens the edges, but doesn’t turn this into “mac and cheese in a bowl.”
  • Flexible with fridge scraps: Got leftover rotisserie chicken? Toss it in. That half-sad zucchini? Might work here too, honestly.
  • Good for the sniffles or just the blahs: Something about this soup just feels healing—even if you’re only tired from online meetings.

Cauliflower Chicken Soup

Ingredient Notes

This soup doesn’t require anything fancy, but here’s a quick rundown of what each ingredient brings to the pot (besides vibes):

  • Olive oil: Use it to start the sauté party. It helps soften the aromatics and builds your base layer of flavor.
  • Onion: Brings a sweet, mellow depth once softened. Red or white works, but yellow is your BFF here.
  • Cauliflower: The MVP! It soaks up flavor while adding body. Chop it small so it cooks quickly.
  • Carrots and celery: Classic soup besties. They add sweetness and crunch, and frankly, they just belong.
  • Garlic and ginger: They bring that mellow heat and zingy edge. Use fresh for the best zing punch.
  • Turmeric, cumin, smoked paprika: Earthy, a little peppery, a smidge smoky. Totally makes it.
  • Black pepper: Wakes things up and cuts through the cream.
  • Low-sodium chicken broth: Gives you room to salt to taste. Homemade is amazing, but boxed works too.
  • Cooked, shredded chicken: Rotisserie, leftover, or poached fresh—use whatever you’ve got.
  • Heavy cream: Adds richness and brings it all together. Swap with coconut milk if dairy-free.
  • Salt: Season at the end once everything’s cozy. It’s your final friendly nudge of flavor.
  • Fresh parsley: Optional garnish, but it brightens up the bowl and makes it look a little fancy.

Cauliflower Chicken Soup

How To Make This Cauliflower Chicken Soup

This is one of those “dump, stir, simmer” soups that makes you feel like you’ve got your life together, even if laundry’s exploding behind you.

  • Sauté the onion in olive oil: Warm your oil in a big ol’ pot (Dutch oven works beautifully) and toss in the diced onion. Let it soften until it’s translucent, about 3–4 minutes. If it starts to brown, nudge the heat down.

  • Add the cauliflower, carrots, and celery: Stir them around in the pot for a few minutes so they start to soften slightly. This also lets them soak up the oniony oil love.

  • Bloom the aromatics: Stir in the garlic, freshly grated ginger, turmeric, cumin, and smoked paprika. Don’t skip this step—it’s where the flavor party kicks off. Let it cook for 30 seconds or so until fragrant.

  • Add broth and simmer: Pour in the chicken broth with flair. Bring it to a gentle boil, then drop it back to a simmer. Let everything cook for about 10 minutes, or until your veggies are tender enough to smush with a fork.

  • Stir in chicken and cream: Add your shredded chicken and heavy cream. Give it all a good stir and let it heat through for another 5–7 minutes. Now’s the time to taste and salt it just right.

  • Ladle and garnish: Scoop it into cozy bowls, top with chopped fresh parsley, and maybe crack some extra pepper on top because it looks fancy.

Cauliflower Chicken Soup

Storage Options

This soup is your fridge’s best friend, and honestly? It lives its best life on day two.

Once cooled, stash it in an airtight container in the refrigerator. It’ll last 4 to 5 days, and somehow tastes even better after the flavors hang out overnight. Just reheat gently on the stove or microwave, adding a splash of broth or water if it thickened too much.

Freezer folks, you’re in luck. Yes, you can absolutely freeze it—just let it cool completely first. Portion it into freezer-safe containers or bags (leave a little space at the top for expansion) and freeze for up to two months. Thaw overnight in the fridge or gently reheat from frozen if you’re feeling bold and microwave-confident.

Creamy soups can sometimes separate after freezing, but this one usually holds up well. If it looks a little odd after defrosting, a whisk or quick blitz with a stick blender brings it back to life.

Variations and Substitutions

There’s zero shame in switching things up with what you’ve got on hand. This soup forgives. It adapts.

  • Rotisserie chicken: It’s already seasoned and ready to go. Just shred and stir it in during the last few minutes.
  • Coconut milk instead of cream: Adds a hint of sweetness and makes it dairy-free. The ginger and turmeric love it.
  • Extra veggies: Toss in a handful of chopped spinach, kale, or peas toward the end. They brighten things up.
  • Add rice or noodles: A scoop of cooked brown rice or tiny pasta (like pastina) makes this more filling without losing the vibe. In fact, check out this easy pastina soup recipe if that’s your thing.
  • Spice it up: A pinch of cayenne, a splash of hot sauce, or some crushed red pepper if you want a little edge.

Cauliflower Chicken Soup

What to Serve with Cauliflower Chicken Soup

This soup doesn’t demand sides, but it certainly welcomes them. Think cozy. Think munchy. Think, “What else can I dip in this?”

  • Crusty bread with real butter: You know the one. Craggy edges. Makes a crisp schhhh sound when you tear it. Perfect for dunking and scooping up soup like a barbarian (the best kind).

  • A simple green salad: Nothing fancy, just mixed greens with lemony vinaigrette. You need something fresh to keep this creamy bowl in balance.

  • Bacon basil cornbread muffins: If you’ve got a little time and a muffin tin just sitting there, these savory muffins are soup’s soulmate. Just sayin’.

  • Roasted lemony broccoli or brussels sprouts: Wintry greens with a citrus twist are a fantastic contrast to the creamy texture of the soup. Add a little shaved parmesan if you’re feeling indulgent.

  • A cold, crisp white wine: Optional, but if you’ve got a glass of dry Riesling or Pinot Grigio? Sip away, my friend.

Cauliflower Chicken Soup

Frequently Asked Questions

Can I make cauliflower chicken soup ahead of time?

Sure thing! It actually holds up beautifully for a few days, and dare I say, tastes even better on day two. Let it cool fully before storing it in the fridge. When you’re ready to eat, reheat gently and you’re back in comfort-food-land!

How can I make this soup dairy-free?

Easy! Just swap the heavy cream with full-fat coconut milk. It adds a luscious richness with a slightly sweet note that plays well with the ginger and turmeric. Skip the dairy-based garnishes and you’re good to go.

Is it okay to use frozen cauliflower?

Yes, frozen cauliflower works just fine here. No need to thaw—just toss it in and adjust your simmer time slightly if needed. It won’t have quite the same texture as fresh, but the flavor holds up great in a soup like this.

What kind of chicken works best in this soup?

Honestly? Whatever’s in your fridge. Roasted, poached, rotisserie—just shred it and toss it in. Leftover thighs or breasts are both great. You can even poach some chicken breasts while the veggies simmer if you like starting from scratch.

Cauliflower Chicken Soup

Cozy Cauliflower Chicken Soup

Prep Time 15 minutes
Cook Time 30 minutes
Total Time 45 minutes
Warm spices, tender chicken, and creamy cauliflower make this cauliflower chicken soup irresistibly cozy. Golden broth, soft veggies, and just enough zing from ginger and garlic—perfect for chilly nights or when you need a bowl of comfort. Simple to make, flexible for leftovers, and guaranteed to make your kitchen smell amazing!
6 bowls

Ingredients

Main Ingredients

  • 2 tbsp (30 ml) olive oil
  • 1 medium yellow onion diced
  • 1 medium head cauliflower chopped into small florets
  • 2 carrots peeled and diced
  • 2 celery stalks diced
  • 3 cloves (3) garlic minced
  • 1 tbsp (15 g) fresh ginger grated (or 1 tsp ground ginger)

Spices

  • 1 tsp ground turmeric
  • 1 tsp ground cumin
  • 1/2 tsp (0.5 tsp) smoked paprika optional but recommended
  • 1/2 tsp (0.5 tsp) black pepper plus more to taste

Soup Base

  • 6 cups (1.4 liters) low-sodium chicken broth
  • 2 cups (250 g) cooked, shredded chicken rotisserie, leftover, or poached
  • 2/3 cup (160 ml) heavy cream or coconut milk for dairy-free
  • 1 tsp salt or to taste
  • fresh parsley chopped, for garnish (optional)

Equipment

  • Large pot or Dutch oven
  • Ladle
  • Sharp knife
  • Cutting board

Instructions
 

  1. Warm the olive oil in a large pot over medium heat. Add the diced onion and sauté until softened and translucent, about 3–4 minutes. Lower the heat if it starts to brown.
  2. Add the chopped cauliflower, carrots, and celery to the pot. Stir and cook for 3–4 minutes until they begin to soften.
  3. Stir in the garlic, grated ginger, turmeric, cumin, smoked paprika, and black pepper. Cook, stirring, for 30 seconds or until fragrant.
  4. Pour in the chicken broth. Bring the mixture to a gentle boil, then reduce the heat and simmer, uncovered, for about 10 minutes or until vegetables are tender.
  5. Add the shredded cooked chicken and heavy cream. Stir to combine, and allow to heat through for 5–7 minutes. Taste and add salt as needed.
  6. Ladle the soup into bowls, top with fresh parsley and extra cracked black pepper if desired. Serve warm.

Notes

This soup is perfect for using up leftover chicken or veggies from your fridge. For a dairy-free version, substitute coconut milk for the heavy cream. Try adding greens like spinach or kale at the end, or a pinch of cayenne if you like heat. Store in an airtight container in the fridge for up to 5 days, or freeze for up to 2 months (a quick whisk after thawing helps if the texture shifts).

Nutrition

Calories: 260kcal | Carbohydrates: 13g | Protein: 20g | Fat: 14g | Saturated Fat: 6g | Cholesterol: 65mg | Sodium: 980mg | Potassium: 680mg | Fiber: 3g | Sugar: 5g | Vitamin A: 4300IU | Vitamin C: 26mg | Calcium: 60mg | Iron: 1.5mg

Cozy up with a bowl of homemade pastina soup, filled to the brim with carrot, celery, onion, garlic, and a rich, brothy goodness. Perfectly simple.

This is the kind of soup that doesn’t try too hard. It just shows up on your stove, smells amazing, and makes everything feel a little better. We’re talking gently simmered vegetables, a Parmesan rind doing its sneaky flavor-boosting magic, and those tiny star-shaped pastina that make you feel six years old again (in the best way). The broth’s silky, the finish is Parmesan-y, and every spoonful is a tiny comfort parade. Tuck into it on weeknights, make it for a sniffly friend, or just hoard it for yourself. I won’t tell.

Table of Contents

Pastina Soup

Why You’ll Love this Pastina Soup

Nothing dramatic here, just a pot of cozy, healing soup goodness that comes together with ingredients you probably have on hand already.

  • Ridiculously simple to make: You just simmer, blend, stir, and pour. No wild techniques, no stress, very weeknight friendly.
  • Light but satisfying: It’s brothy and warm, but that pastina and puréed veg give it body and depth.
  • Sneaky way to eat more veggies: Blending the carrot, onion, celery, and garlic makes them totally lovable—even for pickier folks.
  • Customizable to your core: Want it with chicken? Cool. Need it dairy-free? Skip the cheese and go forth.
  • Affordable and minimal: This isn’t a $47 grocery list. It’s fridge drawer meets pantry, in broth form.
  • It reheats like a champ: Honestly, it may even taste better the next day. You decide.

Pastina Soup

Ingredient Notes

Let’s take a peek at what’s going into your pot. No mystery here, just good stuff doing its cozy soup thing.

  • Pastina: These baby stars are classic, but feel free to use any tiny pasta shape lingering in your cabinet—ditalini, acini di pepe, even orzo in a pinch.
  • Yellow onion: It’s the flavor backbone. Don’t skip it. Chop it small for a mellow, sweet base.
  • Carrots: They add natural sweetness and color. Peel them if their skin’s seen better days.
  • Celery: That gentle bitterness rounds things out with earthiness. Go for crisp stalks.
  • Garlic: Four cloves, yes. We want that savory warmth to sneak into every spoonful.
  • Low-sodium broth: Chicken or vegetable both work well, depending on your vibe. Low-sodium gives you more control.
  • Parmesan rind (optional but fab): It gently melts and infuses your broth with umami richness. Save those rinds, folks.
  • Salt and pepper: Season in layers. Start small, taste often. Trust your palate.
  • Fresh parsley: Just a sprinkle over the top brightens things up at the end.
  • Grated Parmesan cheese: The salty, nutty topping you’ll want to pile on like a snowcap.
  • Extra virgin olive oil: A drizzle at the end gives it that glossy, aromatic finish.

Pastina Soup

How To Make This Pastina Soup

Here’s where that magic pot of nostalgia becomes reality. It’s a gentle process. No standing over the stove with a stopwatch. Just you, your wooden spoon, and some very nice smells.

  • Simmer the veggies and broth: In a large pot, combine the broth, chopped carrots, celery, onion, garlic, and that glorious Parmesan rind if you’ve got one. Start it on medium heat. Add a small pinch of salt and pepper—just enough to wake things up.
  • Let it get cozy: Once everything hits a gentle boil, reduce the heat to low. Cover and let it simmer about 20 minutes, until the veggies are fork-tender and your kitchen smells like a hug.
  • Blend it up: Fish out the Parmesan rind and set it aside (you’ve done well, little buddy). Scoop the veggies and about half a cup of broth into a blender and purée until smooth. Or blend it right in the pot with an immersion blender—just proceed slowly and wear your “I make soup” face.
  • Combine the broth and purée: Pour the blended mix back into the pot with the remaining broth. Stir to combine. Give it a taste and adjust seasonings—more salt? Little squeeze of lemon? Go with your gut.
  • Drop in the pastina: Crank the heat back to a gentle boil and stir in the pastina. Stir often—it wants to sink and stick. Cook for 5 to 6 minutes, or however long your pasta box tells you. You’re the boss here.
  • Serve and garnish: Ladle hot soup into bowls. Top each one with chopped parsley, a good sprinkle of grated Parmesan, and a glug of high-quality olive oil. Spoon in. Smile like a soup wizard.

Pastina Soup

Storage Options

Let’s face it, soup is the hero of leftovers. Pastina soup in particular hangs out in your fridge like it owns the place… in the best way.

If you’ve got extra, let it cool down to room temp before you transfer it to airtight containers. It’ll happily chill in the fridge for about 4 to 5 days. The pasta will absorb more broth as it sits, though, so expect it to thicken slightly—don’t panic, just splash in more broth or water when you reheat.

Now, can you freeze it? Technically yes—but here’s the thing: that pastina turns mushy in the freezer. If you plan ahead, freeze the blended broth and veggies (before adding pasta), then cook fresh pastina when you’re ready to eat. Frozen soup base keeps for 2 months no problem. Just label your containers unless you like playing freezer roulette.

To reheat, gentle simmering is key. Microwaving works too, but go in short bursts and stir frequently.

Variations and Substitutions

Once you’ve nailed the base, you can easily riff on this. Think of it as your cozy canvas—tweak it with swaps that suit your cravings, fridge inventory, or mood.

  • Add shredded chicken: Stir in cooked, shredded rotisserie chicken near the end for a protein boost and dinner that eats like a meal.
  • Skip the cheese: Going dairy-free? Omit the Parmesan and rind entirely. Add a splash of extra virgin olive oil and nutritional yeast for depth.
  • Use a different pasta: Can’t find pastina? Use orzo, ditalini, or even couscous. Anything small and sturdy works well.
  • Toss in greens: Wilt some spinach or kale in at the end for a pop of color (and to feel like you’re making excellent life choices).
  • Make it spicy: Add a pinch of red pepper flakes or a swirl of hot sauce for a little kick that plays nicely with the creamy base.

Pastina Soup

What to Serve with Pastina Soup

So you’ve got your warm, dreamy bowl of soup. Now what? There’s something special about pairing a simple soup with just the right sidekick. Let’s explore.

  • A crusty hunk of sourdough or a toasted baguette is the move if you’re after Dip Season™. Tear off chunks, dip them right in, and let them get just soggy enough. I’ve even made bacon basil cornbread muffins with it—and wow, highly recommend.
  • Want something fresh and crisp alongside the soft, savory soup? Go with a little arugula salad with lemon juice and olive oil. The peppery greens cut through the richness beautifully.
  • A grilled cheese (yes, classic) works here too. Go sharp cheddar or provolone, and slice it into fingers for the ultimate dunking vehicle.
  • If you’re serving this for dinner, follow it up with something sweet and simple. Maybe peanut butter and banana ice cream sandwiches? It’s a vibe. Playful, nostalgic, completely unnecessary—but wonderful.

Pastina Soup

Frequently Asked Questions

Can I make pastina soup vegetarian?

Absolutely. Just use vegetable broth instead of chicken broth, and skip the Parmesan rind (unless you’re into sneaky dairy). You can even use a vegan Parm-style cheese to finish it if you want that umami kick. The soup is flexible and still rich with blended vegetables alone.

What’s the best pasta shape if I can’t find pastina?

If pastina’s out of stock (or just vanished from existence like pogs), go for other small pasta. Ditalini, orzo, or acini di pepe are great choices. You want something tiny and sturdy that won’t overwhelm the soup. Big shapes like penne will feel out of place here. Tiny shapes = cozy charm.

How do I keep the pasta from soaking up all the broth?

That’s the eternal soup-pasta dance. If you know you’ll have leftovers, consider cooking the pasta separately and stirring it into each bowl as needed. Another trick? Undercook it ever so slightly so it holds up better when reheated. And if it does soak up the broth by the next day, just reheat with an extra splash of broth or water.

Can I blend the whole soup instead of just the veggies?

You technically can, but I wouldn’t recommend it once the pasta’s in there. It’ll turn the whole pot into a gloppy purée. The idea is to blend the aromatics and veggies first, so you keep a silky broth but still enjoy the texture of the pasta. Immersion blender fans, just do a few pulses while it’s still veggie-only.

Pastina Soup

Cozy Pastina Soup

Prep Time 10 minutes
Cook Time 30 minutes
Total Time 40 minutes
Cozy up with a bowl of homemade pastina soup—vegetable-loaded, gently simmered, and finished silky and Parmesan-y for the ultimate comfort. Great for weeknights, recovering from a cold, or nostalgic dinners at home.
4 bowls

Ingredients

  • 1 cup (140 g) pastina or other small pasta like ditalini or orzo
  • 1 yellow onion chopped small
  • 2 carrots peeled and chopped
  • 2 celery stalks chopped
  • 4 cloves garlic smashed or minced
  • 6 cups (1.4 L) low-sodium chicken or vegetable broth
  • 1 Parmesan rind optional, for extra flavor
  • Kosher salt and black pepper to taste, season in layers
  • Fresh parsley chopped, for garnish
  • Grated Parmesan cheese for serving, to taste
  • Extra virgin olive oil for drizzling at the end

Equipment

  • Large pot
  • Blender or Immersion Blender

Instructions
 

  1. Simmer the veggies and broth: In a large pot, combine broth, carrots, celery, onion, garlic, and Parmesan rind if using. Heat over medium. Add a small pinch of salt and pepper.
  2. Let it get cozy: Once boiling, lower heat. Cover and simmer about 20 minutes, until veggies are fork-tender and fragrant.
  3. Blend it up: Remove Parmesan rind (if used). Scoop the veggies and about half a cup of broth into a blender and purée until smooth. Or use an immersion blender directly in the pot, blending just the veggies and some broth until silky.
  4. Combine the broth and purée: Stir blended veggies back into the pot with remaining broth. Taste and adjust seasoning as you like (more salt, pepper, or a touch of lemon juice).
  5. Drop in the pastina: Return to a gentle boil, stir in pastina, and cook 5–6 minutes (or according to package directions). Stir often so it doesn’t stick.
  6. Serve and garnish: Ladle the soup into bowls. Top with chopped parsley, grated Parmesan, and a drizzle of extra virgin olive oil. Enjoy immediately!

Notes

Pasta will absorb broth as it sits. To thin leftovers, just add more broth/water when reheating. For dairy-free, skip cheese and rind—add nutritional yeast for umami. Add cooked shredded chicken at the end for a protein boost.

Nutrition

Calories: 210kcal | Carbohydrates: 34g | Protein: 9g | Fat: 5g | Saturated Fat: 1.5g | Cholesterol: 6mg | Sodium: 460mg | Potassium: 370mg | Fiber: 3g | Sugar: 5g | Vitamin A: 4800IU | Vitamin C: 8mg | Calcium: 110mg | Iron: 1.2mg

Cheesy, creamy, a little earthy—this chicken wild rice casserole comes packed with tender chicken, chewy wild rice, buttery mushrooms, and two kinds of cheese. It’s the kind of dish that fills the kitchen with warm, nostalgic smells and makes you want to stand nearby with a spoon… you know, just in case.

There’s nothing fussy going on here. Just honest comfort layered into a golden-topped bake. You get juicy shredded chicken, a dreamy velvety sauce, a bit of crunch if you go for the breadcrumb topping, and that cozy vibe that kind of melts a stressful day away. Perfect when you’re craving something hearty, or you’ve got some rotisserie chicken staring at you from the fridge like, “Well?” And if you’re anything like me, a second helping is absolutely happening.

Table of Contents

Chicken Wild Rice Casserole

Why You’ll Love this Chicken Wild Rice Casserole

Not gonna pretend this is going to change your life, but I will say it’s one of those dishes you’ll want to make again before your pan’s even clean.

  • Serious texture payoff: You’ve got chewy wild rice, juicy bites of chicken, creamy sauce, and a crispy top if you opt in.
  • Make-ahead magic: Assemble it earlier in the day, then pop it into the oven when hunger hits.
  • Rotisserie chicken shortcut: Already cooked chicken means this comes together faster than you’d think.
  • Versatile veggies: Mushrooms, carrots, celery, and onion all soften into the sauce, but feel free to riff.
  • Leftovers? Bless. It reheats like a dream and might be even better the next day.
  • Feels fancy, isn’t: There’s thyme and cream and bubbly cheese—it tastes like effort, without requiring it.

Chicken Wild Rice Casserole

Ingredient Notes

Let’s break this down a bit, because even simple casseroles have little ingredient quirks. Here are a few tips before you start rummaging through the fridge.

  • Wild rice blend: This gives a nutty chew and beautiful speckled color. If you want to go full fancy, stick to pure wild rice.
  • Chicken broth: This flavors the rice while it cooks and goes into the sauce later—double duty, and worth it.
  • Cooked shredded chicken: Rotisserie keeps things easy, but any leftover chicken works. Even the drier bits soften up in the creamy sauce.
  • Veggies (onion, celery, carrot, mushrooms): These are your aromatics and savory backbone. Mushrooms bring earthiness, but skip ’em if you must.
  • All-purpose flour: Thickens the creamy sauce into a spoon-coating dream.
  • Milk and cream: Milk does the lift, cream brings the luxury. You could tweak that balance, but I like the mix.
  • Dried thyme and parsley: These keep things herbaceous without being overpowering. Thyme is especially lovely with mushrooms.
  • Sharp cheddar and Parmesan: Cheddar’s your melty glue, Parmesan gives it a salty bite on top. Use a good cheese; it matters here.
  • Breadcrumbs and butter (optional): If the words “buttery crunch” make you smile, don’t skip this final topping.

Chicken Wild Rice Casserole

How To Make This Chicken Wild Rice Casserole

Alright, apron on. Let’s get into it. This recipe’s got a few moving parts, but they all come together in a single glorious baking dish.

  • Cook the rice: Give it a rinse first (wild rice is dusty). Simmer it with chicken broth for about 45–50 minutes until tender and nutty. Drain off any extra liquid and set it somewhere cozy.

  • Sauté the veggies: In a big skillet, get that butter melted. Toss in the onion, carrots, celery, and mushrooms. Let it all soften and sizzle for 6–8 minutes until things look glossy and smell… amazing.

  • Add garlic and flour: Stir in minced garlic (just for a minute, so it doesn’t burn), then sprinkle in the flour. Stir it around to coat everything—a quick 1–2 minute stir to cook out that raw flour-y taste.

  • Make the sauce: Slowly whisk in the milk, extra broth, and fancy splash of cream. Keep things moving so it stays smooth. Add your dried herbs, salt, pepper, and smoked paprika if you’re feeling wild. Simmer 5–7 minutes until it thickens just a bit.

  • Mix it up: Preheat that oven to 375°F. In a big bowl, stir together cooked rice, shredded chicken, that creamy veggie sauce, and half the shredded cheddar.

  • Assemble and top: Scoop the mixture into a greased 9×13 baking dish. Top with the rest of the cheddar and all the Parmesan. If you’re using the breadcrumb topping (you really should), mix them with butter and sprinkle it all over.

  • Bake until bubbly: Into the oven it goes, uncovered for 25–30 minutes. It should be golden, gooey, and sending out wafts of cheesy herbiness.

  • Rest, then serve: Let it sit for 5 minutes before diving in. Somehow, it gets even better after a short pause.

Chicken Wild Rice Casserole

Storage Options

So, you’ve got leftovers. First of all, I’m proud. This stuff is dangerously scoopable.

If you’re storing it in the fridge, just cover the baking dish with foil—or scoop everything into an airtight container. It’ll keep nicely for 3 to 4 days. Reheat portions in the microwave (start low so it doesn’t get weirdly dry), or the oven if you’re feeling patient and want to crisp the top again.

Freezing? Absolutely. Let the casserole cool completely, then wrap it tight in foil and pop it in the freezer. It should hold up for 2 to 3 months without fuss. When you’re ready, thaw overnight in the fridge (or on the counter if you’re a rebel), then bake at 350°F covered until it’s heated through.

And yes, you can freeze it before baking too. Assemble everything, skip the topping, wrap well, and freeze. Add breadcrumbs and cheese topping just before baking from thawed.

Variations and Substitutions

Whether you’re low on ingredients or just like tinkering with the classics, this casserole’s forgiving. You can definitely riff without ruining dinner.

  • Gluten-free flour: Swap in your favorite gluten-free all-purpose flour for the roux and you’re good to go. Rice is already naturally gluten-free.
  • No mushrooms: Just say no. Extra carrots or even diced zucchini can fill in the texture gap.
  • Different protein: Turkey’s great here, especially post-holiday. Or try cooked sausage for a savory twist.
  • Dairy tweaks: Use all milk to skip the cream, or go full cozy with half and half. I won’t judge.
  • Cheese swap: Smoked gouda or Gruyère would be outrageously good. Just stay in the melty, bold family.
  • Breadcrumb topping: Try crushed crackers (like Ritz or saltines!) instead for a buttery crunch with attitude.

Chicken Wild Rice Casserole

What to Serve with Chicken Wild Rice Casserole

This casserole kinda covers everything—grains, protein, creamy-saucy-ness—but if you want to round it out, here’s what works (and what I’ve shamelessly eaten it with).

  • A crisp green salad: Something lemony and bright works wonders alongside all that creaminess. Think arugula, radish, and a tangy vinaigrette that bites back just a little.

  • Steamed green beans or roasted broccoli: Simple, green, snappy. Balance is the name of the game here. You could even squeeze a little lemon juice over for extra zing.

  • Garlic bread or crusty rolls: Look, I know we already have carbs inside the casserole. But if you’ve had a day, adding some warm, buttery bread on the side never hurt anybody.

  • Something sweet after: If you’ve got room, may I ever-so-gently suggest these peanut butter banana ice cream sandwiches? Perfect cool-down after a warm, rich bake.

  • Light wine or seltzer: A crisp white, or even a gingery mocktail, gives some contrast if you’re feeling fancy. Pull out the good glasses.

Chicken Wild Rice Casserole

Frequently Asked Questions

Can I make chicken wild rice casserole ahead of time?

Absolutely. You can assemble the whole thing up to a day in advance and keep it covered in the fridge. Just wait to add the breadcrumb topping until right before baking so it stays crunchy. Bake as directed, maybe adding a few extra minutes if it’s cold from the fridge.

Can I use white rice instead of wild rice?

Technically yes, but it’ll change the texture quite a bit. Wild rice (or the blend) adds that chewy, nutty backbone. If you’re subbing in white rice, cut way down on cooking time and expect a softer result overall. Still tasty, just different.

What can I use instead of heavy cream?

If you want to lighten things up, you can use extra milk or go for half and half. If you’re avoiding dairy altogether, a good unsweetened oat milk works for sauce texture, though the flavor might be a little more neutral. Still, the cheese will carry you through flavor-wise.

Can I freeze this casserole after baking?

Yes, and it holds up really well! Let it cool completely, then portion and freeze, or freeze the whole thing. Wrap it tightly, and when you’re ready just thaw overnight in the fridge and reheat in the oven until hot. The topping stays crispier if you reheat uncovered.

Chicken Wild Rice Casserole

Chicken Wild Rice Casserole

Prep Time 25 minutes
Cook Time 1 hour 15 minutes
Total Time 1 hour 40 minutes
Cheesy, creamy, a little earthy—this chicken wild rice casserole comes packed with tender chicken, chewy wild rice, buttery mushrooms, and two kinds of cheese. It’s the kind of dish that fills the kitchen with warm, nostalgic smells and makes you want to stand nearby with a spoon... you know, just in case.
6 servings

Ingredients

For the Casserole

  • 1 cup (195 g) wild rice blend or pure wild rice
  • 2.5 cups (600 ml) chicken broth divided
  • 3 cups (400 g) cooked shredded chicken such as rotisserie
  • 2 tbsp (28 g) unsalted butter
  • 8 oz (225 g) cremini mushrooms sliced, can omit
  • 1 small yellow onion diced
  • 2 carrots peeled and diced
  • 2 celery ribs diced
  • 3 cloves garlic minced
  • 1/4 cup (30 g) all-purpose flour
  • 1 cup (240 ml) milk whole or 2%
  • 1/2 cup (120 ml) heavy cream or more milk
  • 1 tsp dried thyme
  • 1/2 tsp (0.5 tsp) dried parsley
  • 1/2 tsp (0.5 tsp) salt plus more to taste
  • 1/2 tsp (0.5 tsp) black pepper
  • 1/4 tsp (0.25 tsp) smoked paprika optional
  • 1.5 cups (170 g) sharp cheddar cheese freshly shredded, divided
  • 1/2 cup (50 g) Parmesan cheese freshly grated

Optional Topping

  • 1/2 cup (30 g) panko breadcrumbs or crushed crackers
  • 2 tbsp (28 g) melted butter

Equipment

  • Large skillet
  • 9x13 baking dish
  • Medium Pot
  • Mixing bowl

Instructions
 

  1. Cook the rice: Rinse the wild rice blend well. Combine with 2 cups chicken broth in a medium pot, bring to a boil, then cover and simmer for 45–50 minutes, or until tender. Drain off any excess liquid and set aside.
  2. Sauté the veggies: In a large skillet over medium heat, melt the butter. Add onion, carrots, celery, and mushrooms. Cook, stirring often, for 6–8 minutes until softened and fragrant.
  3. Add garlic and flour: Stir in minced garlic and cook for 1 minute. Sprinkle flour over the veggies and cook, stirring constantly, for 1–2 minutes to form a roux.
  4. Make the sauce: Slowly pour in the milk, remaining 1/2 cup chicken broth, and cream. Whisk constantly to keep the sauce smooth. Stir in thyme, parsley, salt, pepper, and smoked paprika if using. Simmer for 5–7 minutes, stirring frequently, until the sauce is thickened but pourable.
  5. Mix it up: Preheat oven to 375°F (190°C). In a large mixing bowl, combine cooked rice, shredded chicken, the creamy veggie sauce, and half the cheddar cheese. Mix thoroughly.
  6. Assemble and top: Lightly grease a 9x13 baking dish. Spread the mixture evenly in the dish. Top with remaining cheddar and all the Parmesan. If using the topping, toss breadcrumbs with melted butter and sprinkle over the casserole.
  7. Bake: Bake uncovered for 25–30 minutes until bubbly and golden brown on top.
  8. Rest and serve: Let casserole cool for 5 minutes before serving for best results.

Notes

This casserole can be assembled ahead and baked fresh when ready to eat. Store leftovers tightly covered in the refrigerator for up to 4 days or freeze for up to 3 months. Variations: Omit mushrooms if desired, swap in turkey or sausage, use gluten-free flour, or change up cheeses for your favorites. For extra crunch, top with crushed crackers instead of breadcrumbs.

Nutrition

Calories: 485kcal | Carbohydrates: 34g | Protein: 32g | Fat: 25g | Saturated Fat: 13g | Cholesterol: 116mg | Sodium: 980mg | Potassium: 590mg | Fiber: 3g | Sugar: 5g | Vitamin A: 3275IU | Vitamin C: 5mg | Calcium: 370mg | Iron: 2.2mg

Hearty and wholesome, this ham and lentil soup simmers gently with onion, carrots, garlic, herbs, and a meaty ham hock. Cozy, savory, and satisfying.

There’s something about a pot of soup bubbling away on the stove that makes the whole kitchen feel like a hug. This ham and lentil soup is exactly that kind of cozy. It’s rich from the ham, a little earthy from the lentils, and it has those herby, garlicky undertones that make you keep going back for “just one more spoonful.”

Whether you’re using up leftover ham or just craving a comforting bowl, this one’s got you. You throw things in, let them simmer, scoop out the meaty bits, and boom—dinner. It’s just rustic enough to feel homey but not so hearty you’ll need a nap afterward.

Table of Contents

Ham and Lentil Soup

Why You’ll Love this Ham and Lentil Soup

There’s no fanfare here, just a reliable, deeply satisfying soup that does what it promises.

  • Hearty and filling: Thanks to all those lentils and generous chunks of ham, it eats like a meal.
  • Layered with cozy flavor: The herbs, garlic, and tomato paste add depth—you’ll taste each spoonful evolving as it simmers.
  • Uses up leftovers: Got a ham hock from the weekend? Toss it in and feel delightfully resourceful.
  • Freezer-friendly: Make extra now, forget about it for a month, and thank yourself later.
  • Meal-prep gold: It stays good for days and gets even tastier after a night in the fridge, just like magic.
  • No fancy ingredients: Everything’s happily sitting in your pantry or fridge, waiting to become soup.

Ham and Lentil Soup

Ingredient Notes

You’ve probably got most of this in your kitchen already. And if you don’t—no worries, I got you covered with a few ideas below.

  • Olive oil: Adds a silky base for the sauté. Use any neutral oil if you’re out (but olive oil adds a little extra flavor).
  • Onion, carrots, celery: This is the classic trifecta for building a flavorful base. Don’t skip ‘em—they’re the quiet heroes of soup.
  • Garlic: Adds warmth and sharpness. If you accidentally go overboard, I wholeheartedly support your decision.
  • Tomato paste: Just a tablespoon, but it deepens the entire flavor like you simmered this soup all day (even if you didn’t).
  • Dried thyme and oregano: Earthy and comforting, these dried herbs work beautifully here. Feel free to toss in fresh if you’ve got it.
  • Bay leaf: Subtle but effective. It softens everything and nudges the flavor toward the “soup you remember from childhood” zone.
  • Ham hock or bone-in ham: This is where the magic comes from—smoky, savory, and slightly salty. Leftover spiral ham works too.
  • Chicken broth: Use low-sodium since that ham hock is already flavorful. Homemade or boxed, both are a-okay.
  • Dried lentils: Green or brown hold up best during the simmer. Red ones get mushy—save those for a puree situation.
  • Salt and black pepper: Season to taste at the end. The ham might be saltier than you think, so go easy and build it up.

Ham and Lentil Soup

How To Make This Ham and Lentil Soup

Grab your biggest pot, something heavy and wide if you’ve got it. This all comes together in one place, and it smells ridiculously good by step two. Here we go:

  • Sauté the veggies: Warm the olive oil over medium heat, then add the onion, carrots, and celery. Give them a stir every so often and let them soften—about five minutes. No need for any caramelizing here, just get ‘em friendly and golden.

  • Add garlic and seasonings: Stir in the garlic, tomato paste, thyme, oregano, and bay leaf. Let it all mingle and wake up the aromatics—just 1 to 2 minutes should do it. You’ll smell the magic starting to happen.

  • Add the ham and liquids: Pop that ham hock or leftover bone in, pour in the chicken broth, and add the rinsed lentils. Give everything a solid stir. Then, bring it up to a boil—you want to see some gentle bubbling action.

  • Simmer slowly: Reduce the heat, cover most of the pot (leave a little vent), and let the soup simmer quietly for 50 to 60 minutes. You’re aiming for tender lentils—soft but not falling apart—and a rich, slightly thickened broth.

  • Shred the ham: Fish out the ham, set it on a plate, and let it cool for a second. Shred the meat, discard the bone, and toss the meat back in the soup. This part always feels a little like treasure hunting.

  • Taste and finish: Give it a taste. Now’s the time to add salt or more pepper if needed. Remove the bay leaf unless you like the thrill of someone getting it in their bowl.

Ham and Lentil Soup

Storage Options

You’ll be happy to know this soup likes to be made ahead. It’s one of those “better the next day” situations.

In the fridge, ham and lentil soup keeps beautifully for up to 5 days. Let it cool completely before tucking it into airtight containers. Plus, the flavors deepen overnight, which makes leftovers exciting (not sad).

And yes, you can absolutely freeze it. Let everything cool first, then ladle into zip-top bags or freezer-safe containers. Lay flat if you’re short on space; they’ll stack neatly once frozen. It should keep for 2 to 3 months in the freezer. Just label it unless you like mystery soup surprises.

To reheat, thaw overnight in the fridge if frozen (or use a gentle defrost in the microwave in a soup-safe bowl). Warm on the stovetop over medium-low heat until steamy and delicious. Stir occasionally, and if it thickened too much, just add a splash of water or broth to loosen it up.

Variations and Substitutions

Feel like changing it up? You’ve got options, my friend.

  • Swap the ham hock: No hock? No problem. Use diced leftover ham or even smoked turkey legs for that same cozy depth.

  • Vegetarian version: Skip the meat and use veggie broth. Add a splash of soy sauce for umami, and maybe a handful of mushrooms too.

  • Busy weeknight hack: Use canned lentils and pre-cooked ham. Just simmer for 20-ish minutes until everything’s hot and melded.

  • Spice it up: Want some heat? Add a pinch of red pepper flakes with the herbs or stir in a little smoked paprika.

  • Add greens: Toss in chopped kale or spinach in the last five minutes. It adds color, texture, and makes it feel a little fresher.

  • Play with legumes: Don’t have lentils? Try split peas instead (just note they cook a bit differently and may need more broth).

Ham and Lentil Soup

What to Serve with Ham and Lentil Soup

This soup is a meal all on its own, but if you wanna round things out (or impress guests), a couple easy sides make it shine.

  • A crusty loaf of bread or a warm hunk of sourdough is basically required. Dunking is encouraged. Bonus if it’s homemade, but store-bought is just fine. If you’re feeling ambitious, try making a batch of bacon basil cornbread muffins. You’ll thank me.

  • A crisp green salad balances out the heartiness. Think peppery arugula or romaine with a lemony vinaigrette—simple enough to whip up while the soup simmers.

  • For something lighter and bright, a side of roasted veggies or even a quick pickle plate adds a splash of acidity and crunch. Pickled onions, anyone?

  • Craving a little sweetness afterward? Try one of those genius peanut butter and banana ice cream sandwiches. They’re surprisingly chill to assemble, even on a lazy Sunday.

  • And if you’re making this for friends, a glass of red wine or spiced cider doesn’t hurt. Cozy vibes times one thousand.

Ham and Lentil Soup

Frequently Asked Questions

Can I use a different kind of lentil for this soup?

You sure can, but keep in mind they cook differently. Green or brown lentils hold their shape best and stay pleasantly toothsome after an hour of simmering. Red lentils will break down much faster, giving the soup more of a creamy texture… which isn’t bad, just different. If that’s your thing, go for it! Just reduce the cooking time.

What if I don’t have a ham hock?

No ham hock? No sweat. You can use chopped leftover ham, a smoked turkey leg, or even some good-quality bacon as a starter. You just want something smoky and meaty to build up those deep flavors. Or skip the meat altogether and go veggie—it’s still hearty if you season thoughtfully.

How do I make this soup thicker?

Easy fix: let it simmer uncovered for a bit longer to reduce the broth. If you’re impatient like me, you can mash a few lentils directly in the pot with a wooden spoon or use an immersion blender to give it a few pulses. Don’t over-blend though, unless you’re intentionally going for a pureed style.

Can I make ham and lentil soup ahead of time?

Absolutely. In fact, I’d encourage it. The soup tastes even better the next day once everything has had time to hang out and get cozy together. Just cool it down, pop it in the fridge, and reheat gently when ready. It’s ideal for prepping a few days ahead or freezing for future lazy meals.

Ham and Lentil Soup

Hearty Ham and Lentil Soup

Prep Time 15 minutes
Cook Time 1 hour
Total Time 1 hour 15 minutes
Hearty and wholesome, this ham and lentil soup simmers gently with onion, carrots, garlic, herbs, and a meaty ham hock. Cozy, savory, and satisfying — the perfect comfort soup for any day!
6 bowls

Ingredients

Soup Base

  • 2 tbsp (30 ml) olive oil or any neutral oil
  • 1 large onion diced
  • 2 carrots peeled and diced
  • 2 celery stalks diced
  • 3 cloves garlic minced
  • 1 tbsp (15 g) tomato paste

Herbs and Seasonings

  • 1 tsp dried thyme
  • 1 tsp dried oregano
  • 1 bay leaf

Main Ingredients

  • 1 meaty ham hock or bone-in ham or leftover ham bone
  • 8 cups (2 l) low-sodium chicken broth
  • 1 1/2 cups (300 g) dried green or brown lentils rinsed and picked over
  • salt and black pepper to taste (add at the end)

Equipment

  • Large heavy-bottomed pot

Instructions
 

  1. Heat olive oil in a large, heavy-bottomed pot over medium heat.
  2. Add onion, carrots, and celery. Cook, stirring occasionally, until softened and lightly golden, about 5 minutes.
  3. Stir in garlic, tomato paste, dried thyme, oregano, and bay leaf. Cook for 1–2 minutes until fragrant.
  4. Add the ham hock (or ham bone), chicken broth, and rinsed lentils to the pot. Stir until combined.
  5. Bring the soup to a boil, then reduce the heat to low. Partially cover the pot and let it simmer gently for 50–60 minutes, until lentils are tender.
  6. Remove the ham hock from the pot and set aside to cool slightly. Discard the bay leaf. Shred the ham meat from the bone, discarding bone and any excess fat, then return the shredded ham to the soup.
  7. Taste and season with salt and black pepper as desired. Serve hot with bread and your favorite toppings!

Notes

Feel free to use leftover ham instead of a hock, or swap in smoked turkey for a twist. For a vegetarian version, omit the ham and substitute vegetable broth, adding a splash of soy sauce and mushrooms for extra umami.
This soup keeps well in the fridge for up to 5 days and freezes beautifully for up to 3 months. Reheat with a splash of water or broth if it thickens too much.
Variations: Add a scant pinch of red pepper flakes for heat, stir in greens like kale or spinach for color and freshness, or trade lentils for split peas if that's what you have.

Nutrition

Calories: 310kcal | Carbohydrates: 35g | Protein: 22g | Fat: 9g | Saturated Fat: 2g | Cholesterol: 27mg | Sodium: 870mg | Potassium: 650mg | Fiber: 11g | Sugar: 5g | Vitamin A: 3470IU | Vitamin C: 8mg | Calcium: 65mg | Iron: 4.2mg

Comforting, cozy, and just a little indulgent, this penne bolognese simmers ground beef, tomato, red wine, and herbs into a rich, savory sauce. Perfect with penne, topped with Parmesan.

If you could bottle the smell of a pot of bolognese quietly bubbling away on the stove, I’d wear it as perfume. Even if it made me smell like a trattoria at dinnertime. This penne bolognese is all about hearty simplicity: deeply savory, a little creamy at the end, and the kind of thing you’ll want to eat curled up with fuzzy socks and a second glass of wine (you know, the one leftover from cooking). It’s a great way to turn pantry staples and a humble pack of ground beef into something deeply satisfying. You can dress it up or down, serve it for friends or just yourself, and honestly… leftovers the next day are kind of magical.

Table of Contents

Penne Bolognese

Why You’ll Love this Penne Bolognese

It’s not fancy, just solid, soul-warming food. Great when you’re craving something cozy without requiring a culinary degree or seven specialty ingredients.

  • Hearty but not heavy: The sauce has depth and richness, but thanks to milk and a touch of sweetness, it stays balanced.
  • Weeknight doable: The whole thing comes together in under an hour, with plenty of stirring breaks for sips of wine.
  • Familiar flavors, little upgrade: It’s your usual pasta night—just with a bit more oomph and a slow-cooked vibe.
  • Leftovers? Yes please: Letting it sit overnight only makes it better. It gets sassier, somehow.
  • Pasta flexibility: If penne’s not your jam, swap in rigatoni or even spirals. That sauce clings like a champ.

Penne Bolognese

Ingredient Notes

This one’s all about layering flavor. Nothing fancy, but each part pulls its weight.

  • Olive oil: Rich, silky, and gives the veggies a running start toward deliciousness.
  • Onion, carrot, celery: The classic soffritto trio—sweet, earthy, and the flavor backbone of the sauce.
  • Garlic: Just two cloves, but they bring a low-key bite that balances the sweetness of the veggies.
  • Tomato paste: It adds deep, concentrated tomato flavor (and makes everything smell toasty once it hits the pan).
  • Ground beef (or beef and pork): Beef keeps things hearty. Pork makes it a little richer and bouncier in texture.
  • Dry red wine: Adds a whisper of acidity and complexity. Use something you’d drink… but maybe not your fanciest bottle.
  • Crushed tomatoes or passata: Both work. Crushed tomatoes offer more texture. Passata gives a super smooth finish.
  • Worcestershire sauce: Not traditional, but just trust—it sneaks in umami and rounds out the beefiness.
  • Italian seasoning: All the usual suspects (oregano, basil, thyme) in one easy shake.
  • Sugar: Just enough to soften the tomatoes’ acidity without tipping into sweetness.
  • Penne pasta: Sturdy tubes that trap that rich sauce in every bite.
  • Whole milk: Added at the end to mellow and make it luxuriously silky.
  • Grated Parmesan: Salty, nutty, and a must on top (don’t skip it).
  • Fresh basil or parsley: Adds brightness to all that rich, saucy goodness on the plate.

Penne Bolognese

How To Make This Penne Bolognese

Let’s turn that pile of humble ingredients into a pot of magic, shall we? It’s mostly about patience and stirring with purpose.

  • Sauté the veggies: Warm the olive oil in a large pot over medium heat, then toss in the finely diced onion, carrot, and celery. Cook for 5 to 7 minutes, stirring occasionally, until everything softens and starts to sing together (you’ll smell it). If they start browning too much, dial down the heat.

  • Bloom the garlic and tomato paste: Stir in minced garlic and that bold tomato paste. Cook for 3 to 4 minutes. This part makes it smell like an Italian grandma just moved in. You want the tomato paste to deepen and darken slightly.

  • Add the meat: Crank the heat to medium-high and add your ground beef (or beef-pork mix). Break it up with a wooden spoon as it cooks—no big clumps. Give it about 5 to 8 minutes until the meat’s no longer pink and starting to get some nice crispy edges.

  • Deglaze with wine: Pour in the red wine. Stir well and let it simmer for 3 to 5 minutes. It’ll reduce a bit, lifting up all that good stuff stuck to the bottom of the pot. Don’t skip this—it’s flavor gold.

  • Simmer the sauce: Add the crushed tomatoes, Worcestershire, Italian seasoning, and sugar. Stir it all up, bring to a gentle simmer, then reduce heat to medium-low. Partially cover and let it simmer for 15 minutes. Give it a stir every few minutes so nothing sticks.

  • Boil the penne: While the sauce does its thing, bring a big pot of salted water to a boil. Cook the penne until just al dente, then drain. Save a cup of pasta water—it’s liquid gold.

  • Creamy finish: Remove the sauce lid and stir in the milk. This mellows the sauce and brings it all together. Taste and adjust seasoning (needs salt? Bit more pepper? You do you).

  • Mix it up: Add the drained pasta to the sauce and toss thoroughly. Add spoonfuls of that reserved pasta water to loosen things if needed until it’s glossy and clinging just right.

  • Serve and top: Pile into bowls and shower with grated Parmesan. Sprinkle chopped basil or parsley for color and a fresh kick.

Penne Bolognese

Storage Options

This penne bolognese holds up surprisingly well, which is great news if you’re the sort of person who plans lunch while still eating dinner. (Same.)

For the fridge, just let the pasta cool completely before transferring it to an airtight container. It’ll keep happily for about 3 to 4 days. The flavors deepen as it sits—so honestly, the day-after version might taste even better.

Want to freeze it? Totally doable. I recommend freezing just the sauce, not the pasta. Portion it into freezer-friendly containers and it’ll keep for up to 3 months. When you’re ready to use it, thaw it in the fridge overnight, then reheat gently in a pot. Add a splash of milk or water to loosen it a bit.

Reheating leftovers is easy: just warm gently on the stove or in the microwave. A little saved pasta water or regular water can help wake up the sauce if it’s thickened too much. Always reheat with a little patience—it rewards you.

Variations and Substitutions

There’s a lot of room to play here, especially if your fridge or pantry is looking a little “curious.” Let’s get creative.

  • Meat swap (or none at all): Try ground turkey or chicken for a lighter version. Or skip meat entirely and bulk up with lentils or finely chopped mushrooms.
  • Dairy-free? Use unsweetened oat milk or even coconut milk instead of whole milk. It’ll round out the sauce without creaminess overload.
  • Different pasta shape: No penne? No problem. Rigatoni, fusilli, or even wide egg noodles will play nicely with that sauce.
  • Spicy kick: Stir in a pinch (or three) of crushed red pepper flakes with the garlic. It’ll warm things up without throwing off the balance.
  • Deeper veggie flavor: Up the ante by roasting the carrots and onions first, or toss a bay leaf into the simmer for a whisper of earthiness.

Penne Bolognese

What to Serve with Penne Bolognese

This pasta brings the cozy, but a little something on the side can turn it into a full-on experience. Here’s what I love alongside it.

  • A crisp green salad with a zippy vinaigrette balances the lusciousness of the sauce. Bitter greens like arugula or radicchio especially cut through that rich tomato-meat mix the right way.

  • Garlic bread (or cheesy bread, if you’re going rogue) is practically required. Use it to scoop up the last bits of sauce. Skipping it feels illegal.

  • A big bowl of acorn squash soup makes this a meal with seasonal flair. The sweet creaminess of the soup plays surprisingly well with the tomato base of the pasta.

  • Steamed or sautéed greens (like rainbow chard or spinach) are great for contrast. Bonus points if you add a little lemon or chili flake on top—bright, punchy, and vibrant.

  • For dessert? I mean, if you’re already in Italian mode, nothing beats a cold, creamy tiramisu cup pulled from the fridge while your pasta coma sets in.

Penne Bolognese

Frequently Asked Questions

Can I make penne bolognese in advance?

Yes, and honestly, it might taste even better the next day. The sauce continues to deepen and mellow as it rests. Make the sauce a day early, let it cool completely, and store it in the fridge. When ready to eat, warm it up gently and toss with freshly cooked pasta. If it thickens too much in the fridge, just add a splash of milk or water while reheating.

What wine should I use in the sauce?

A dry red works best—nothing sweet. Think chianti, merlot, or a cabernet. Don’t overthink it, though. Use something you’d be fine sipping on. And if you don’t have wine or prefer not to use it, you can swap in low-sodium beef broth or even a bit of balsamic vinegar (just a splash) for depth.

Can I use milk alternatives in this recipe?

Absolutely. The milk is there to smooth things out and mellow the acidity of the tomatoes. Unsweetened oat or almond milk will do nicely. Just avoid anything overly sweet or flavored (vanilla milk in bolognese? Please, no). Full-fat canned coconut milk also works if you’re into a richer, slightly tropical twist.

Do I really need to save pasta water?

If you want restaurant-level pasta, yes! Pasta water helps the sauce cling to the noodles and adds a bit of silky texture thanks to the starch. Just scoop out a cup before draining your pasta—you probably won’t need all of it, but it’s nice insurance if your sauce is too thick. It’s a little tip with big payoff.

Penne Bolognese

Comforting Penne Bolognese

Prep Time 15 minutes
Cook Time 40 minutes
Total Time 55 minutes
Comforting, cozy, and a little indulgent, this penne bolognese simmers ground beef, tomato, red wine, and herbs into a rich, savory sauce. Perfect with penne, topped with Parmesan for guaranteed dinner bliss.
4 servings

Ingredients

For the Sauce

  • 2 tbsp (30 ml) olive oil
  • 1 medium onion finely diced
  • 1 carrot finely diced
  • 1 celery stalk finely diced
  • 2 cloves (2) garlic minced
  • 2 tbsp (32 g) tomato paste
  • 1 lb (450 g) ground beef or a mix of beef and pork
  • 1/2 cup (120 ml) dry red wine
  • 1 28-oz can (800 g) crushed tomatoes or passata
  • 2 tsp (10 ml) Worcestershire sauce
  • 2 tsp Italian seasoning
  • 1 tsp sugar
  • salt and pepper to taste
  • 1/2 cup (120 ml) whole milk

For the Pasta & Serving

  • 12 oz (340 g) penne pasta
  • 1 cup (240 ml) reserved pasta cooking water
  • freshly grated Parmesan cheese for serving
  • fresh basil or parsley chopped, for garnish

Equipment

  • Large pot
  • wooden spoon
  • Pasta Pot

Instructions
 

  1. Warm the olive oil in a large pot over medium heat. Add diced onion, carrot, and celery. Cook 5–7 minutes until soft, stirring occasionally. Lower heat if veggies start to brown.
  2. Add minced garlic and tomato paste. Cook 3–4 minutes, stirring, until fragrant and tomato paste darkens.
  3. Increase heat to medium-high. Add ground beef (or beef-pork mix). Break up meat as it cooks, about 5–8 minutes, until no longer pink and starting to crisp.
  4. Pour in red wine to deglaze the pan. Stir, scraping any bits from the bottom. Simmer 3–5 minutes until reduced slightly.
  5. Add crushed tomatoes, Worcestershire sauce, Italian seasoning, and sugar. Stir, bring to a gentle simmer, then reduce heat to medium-low. Partially cover and simmer 15 minutes, stirring occasionally.
  6. Meanwhile, bring a large pot of salted water to a boil. Cook the penne until al dente. Reserve 1 cup of pasta water, then drain.
  7. Uncover sauce and stir in the milk. Taste and adjust salt and pepper as needed.
  8. Add drained pasta to the sauce. Toss well, adding reserved pasta water as needed to achieve a glossy, clinging sauce.
  9. Serve in bowls. Top with plenty of grated Parmesan and a sprinkle of chopped basil or parsley.

Notes

This penne bolognese gets even better as leftovers. Store cooled pasta in an airtight container in the fridge for 3–4 days, or freeze just the sauce up to 3 months. For dairy-free, use unsweetened oat milk instead of whole milk. Swap in whatever pasta you love—rigatoni, fusilli, and even egg noodles work great.

Nutrition

Calories: 620kcal | Carbohydrates: 62g | Protein: 34g | Fat: 26g | Saturated Fat: 10g | Cholesterol: 90mg | Sodium: 740mg | Potassium: 1120mg | Fiber: 5g | Sugar: 10g | Vitamin A: 4500IU | Vitamin C: 18mg | Calcium: 250mg | Iron: 5mg

Let's Get Cooking!

100+ Recipes for Busy Nights

In a time crunch? Take a look around and browse plenty of recipes to help you get dinner ready and on the table on those busy nights!

Sweet Recipes

Pumpkin Banana Muffins

Pumpkin Banana Muffins Recipe

Strawberry Pie Bars

Strawberry Pie Bars Easy Oven Recipe

White Chocolate Raspberry Muffins

White Chocolate Raspberry Muffins Recipe

Snickerdoodle Muffins

Snickerdoodle Muffins Recipe for Oven

PIN NOW

Follow KitchenetteBlog on Pinterest

Love cozy recipes that actually make it to the table? On Pinterest, I share new comfort-food ideas every week—desserts, dinners, and those little snack cravings that hit at midnight. Come pin with me and never run out of kitchen inspo.

Savory Recipes

Turkey Tetrazzini

Turkey Tetrazzini Baked Pasta Recipe

Grilled Chicken Panini Sandwich

Grilled Chicken Panini Sandwich Recipe

Sweet Potato Cornbread

Sweet Potato Cornbread Recipe Oven Baked

Classic Waldorf Salad

Waldorf Salad Simple Classic Recipe

Get 5 Recipes to Simplify Your Life!

Delicious, versatile recipes you can make over and over.