Get 5 recipes to simplify your life:

easy, delicious, real food recipes

Latest Recipes

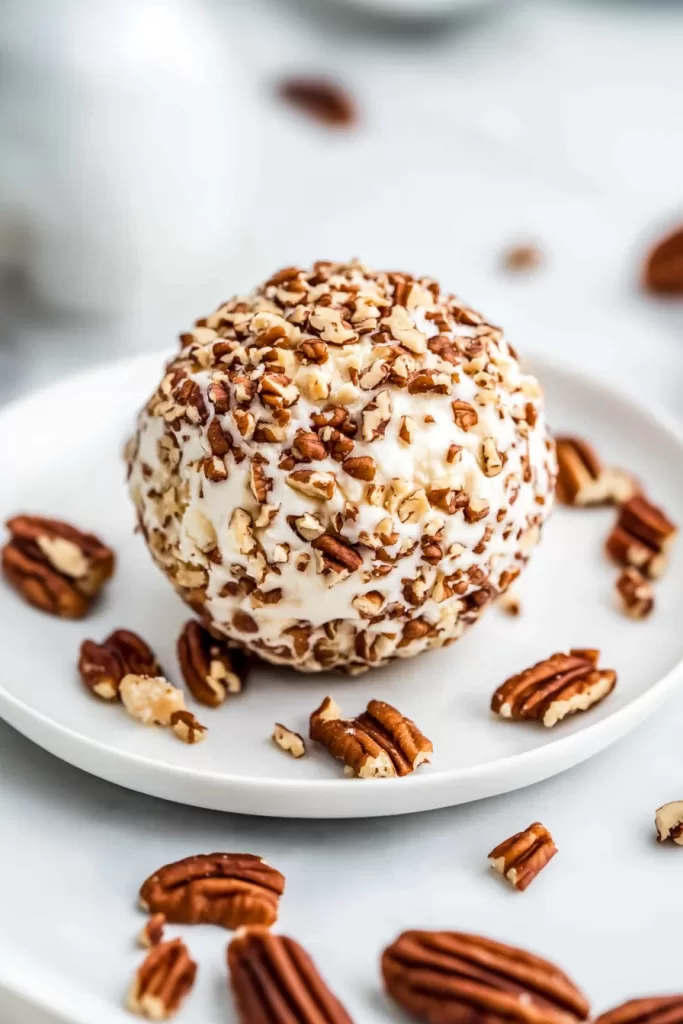
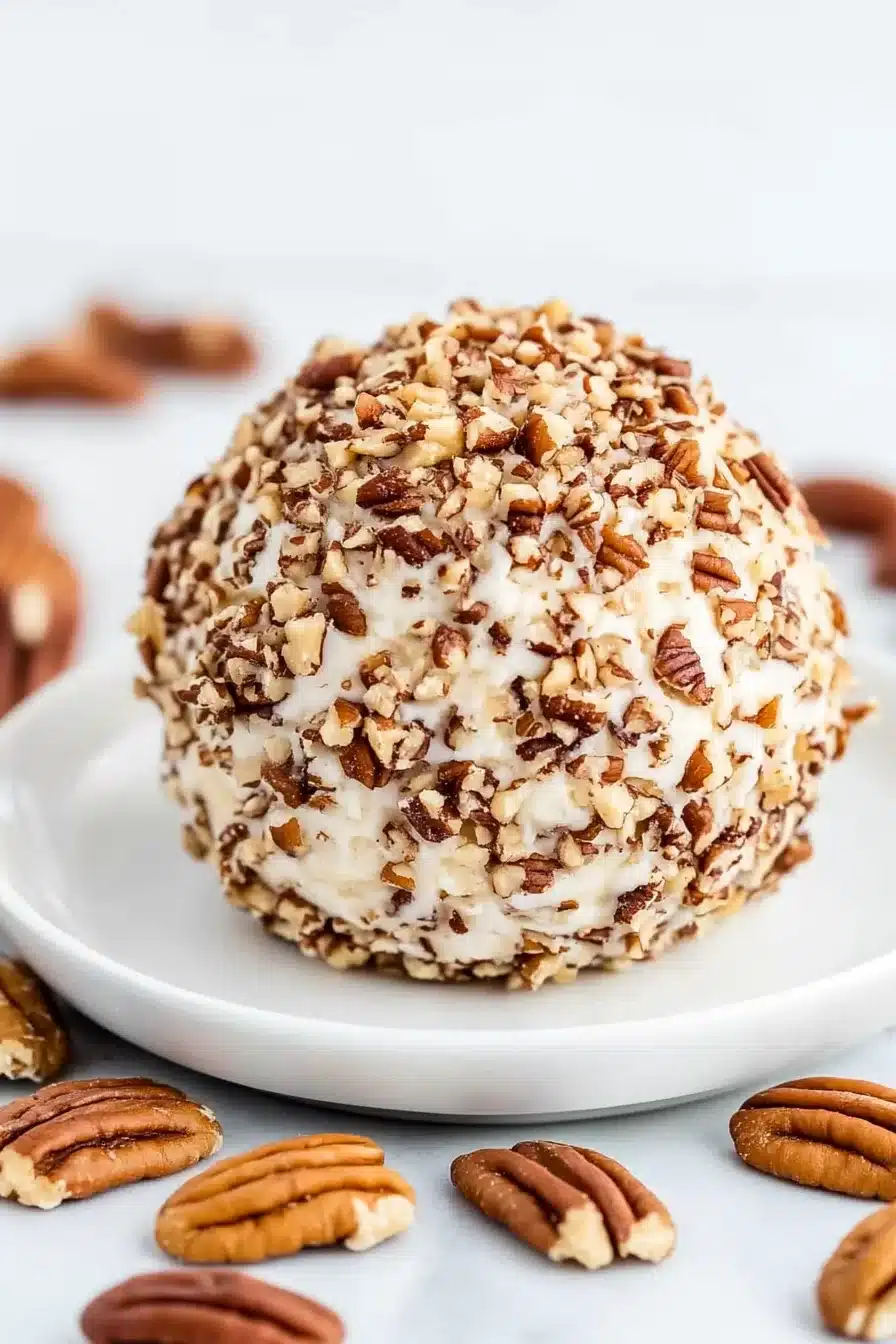
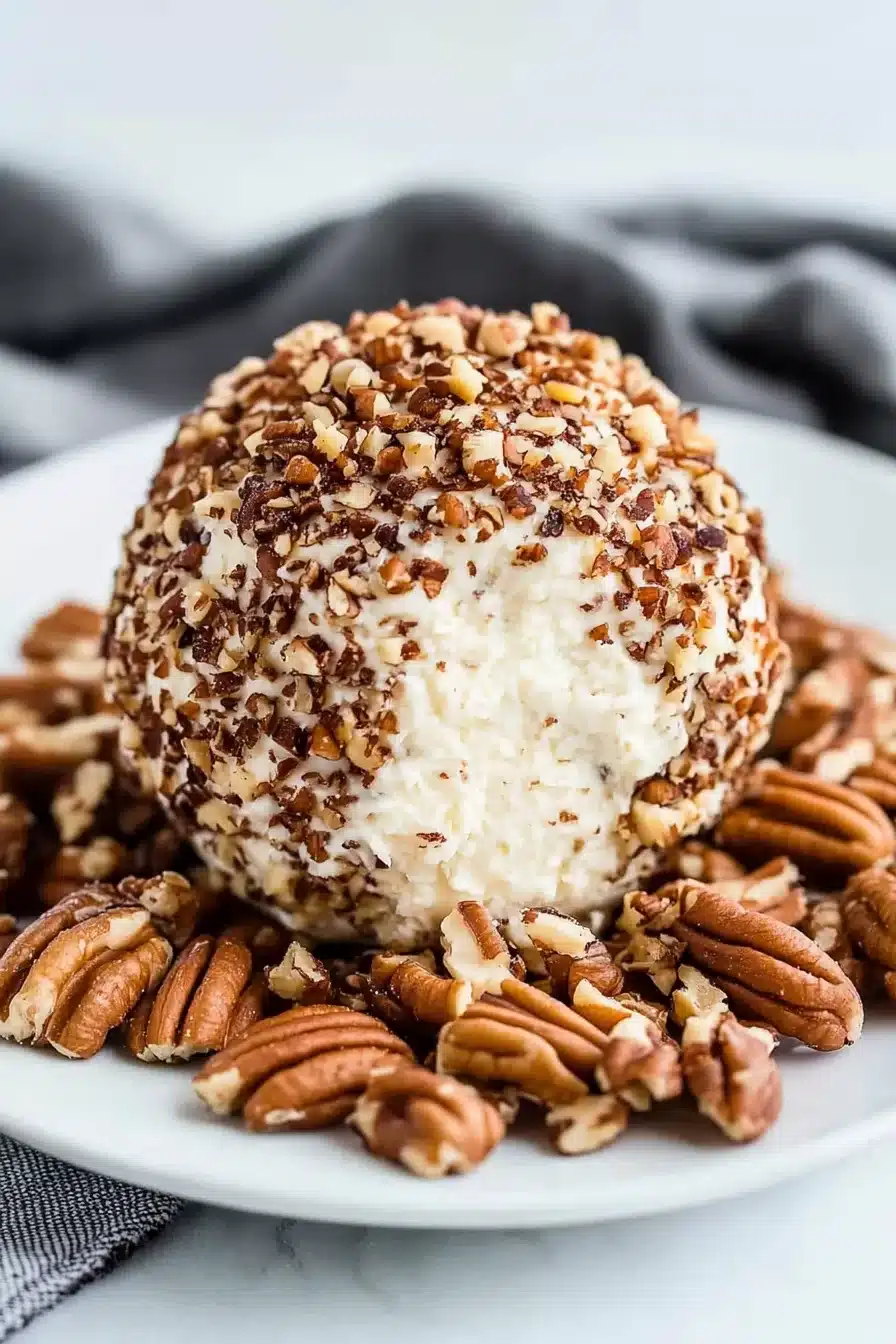
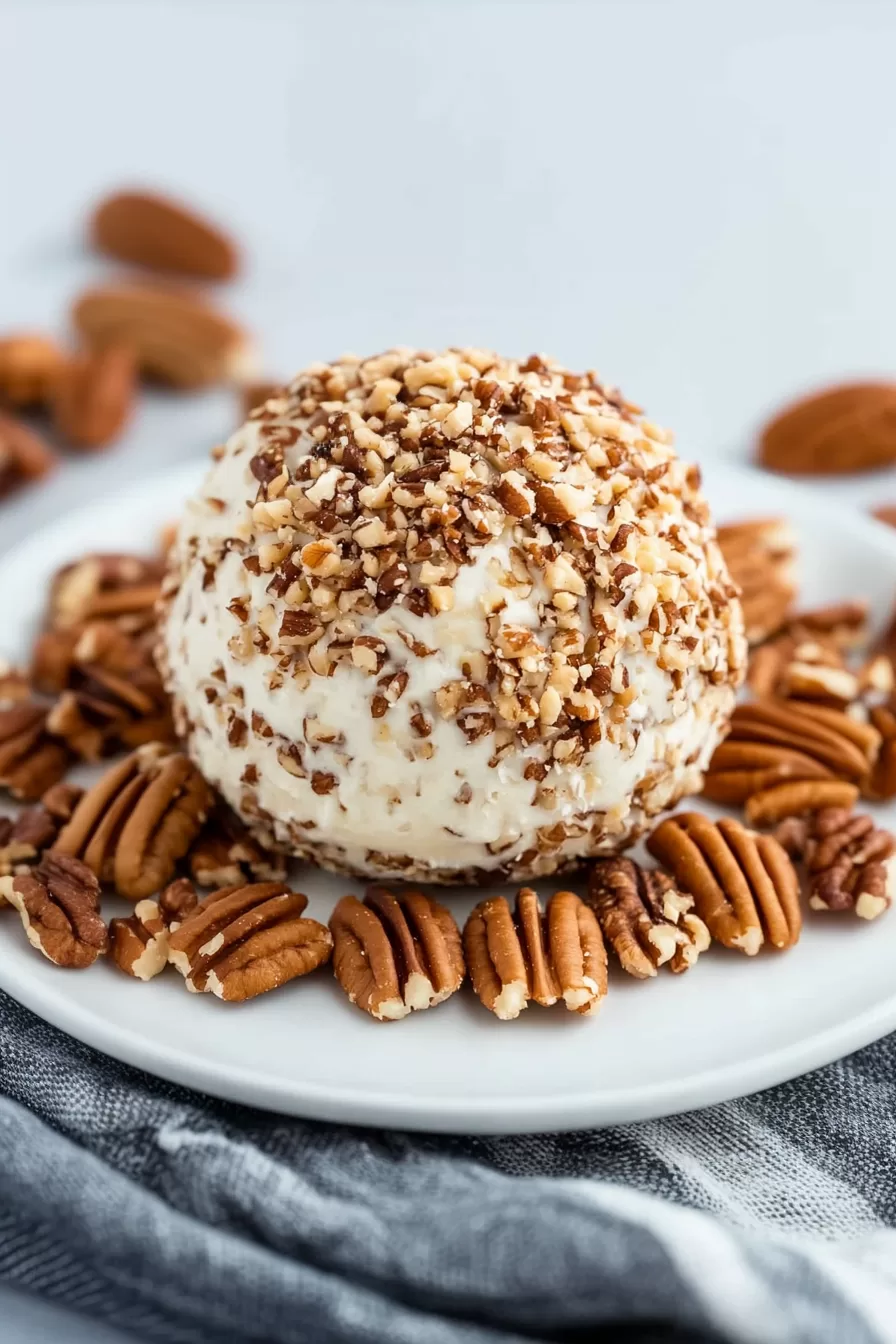
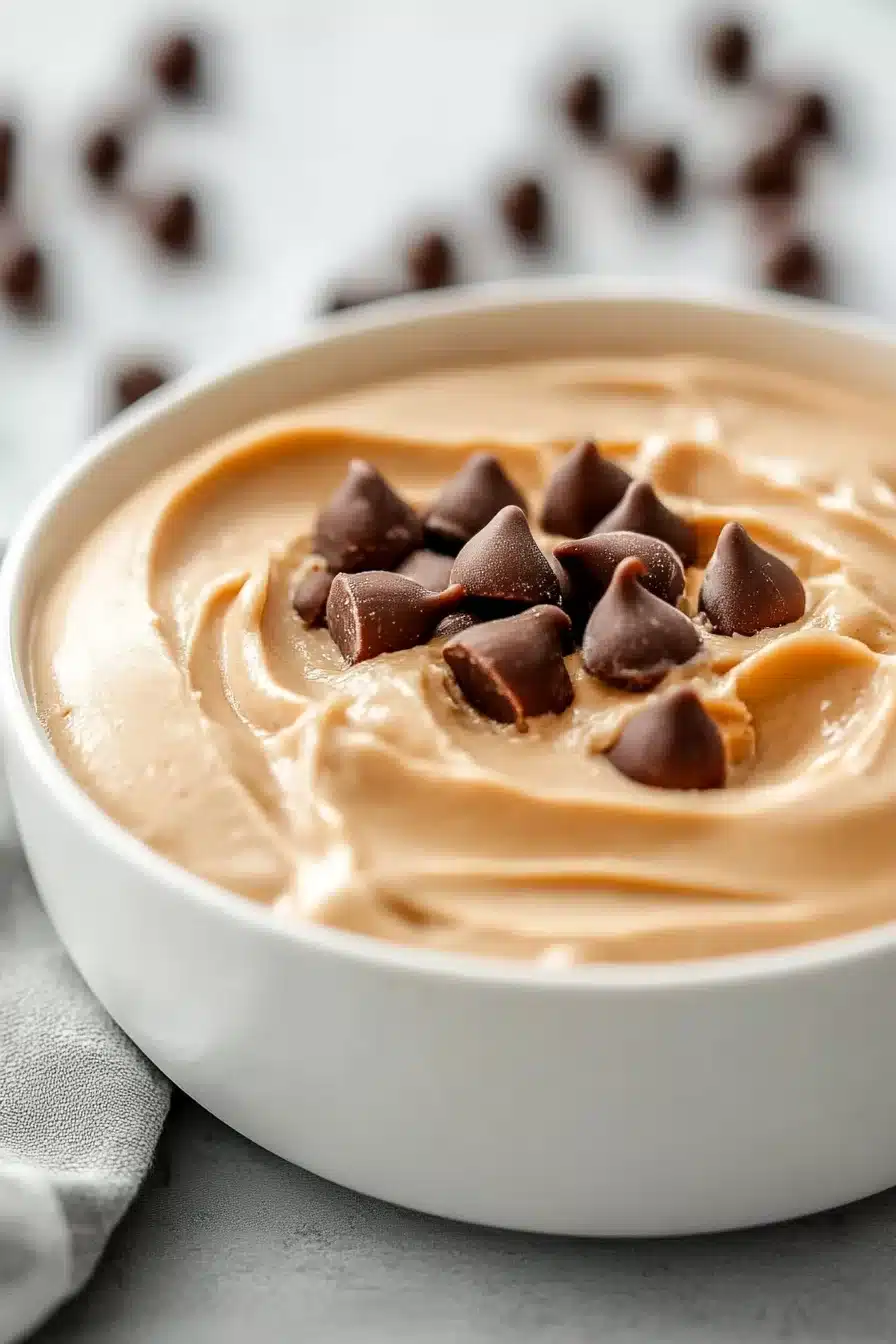
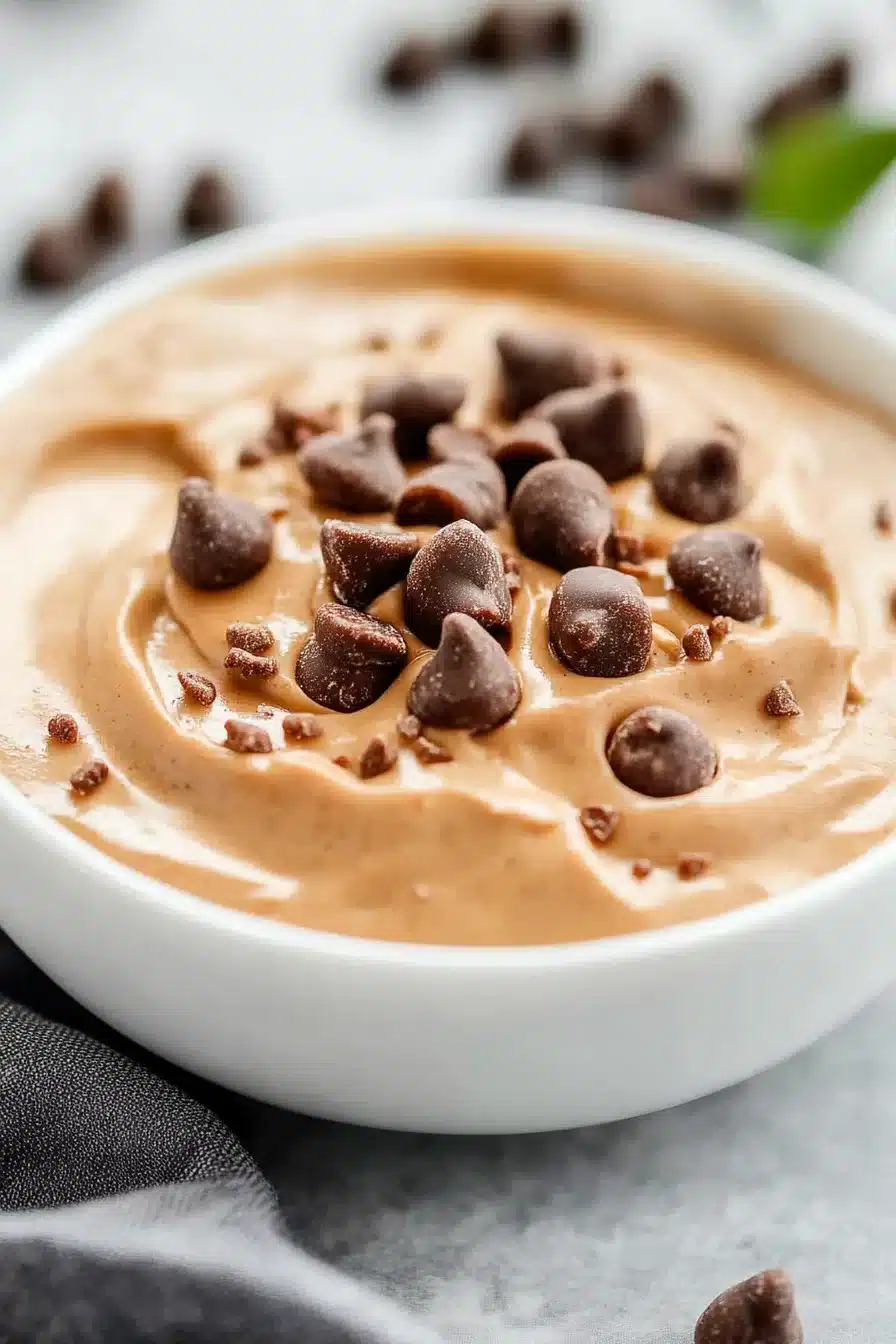
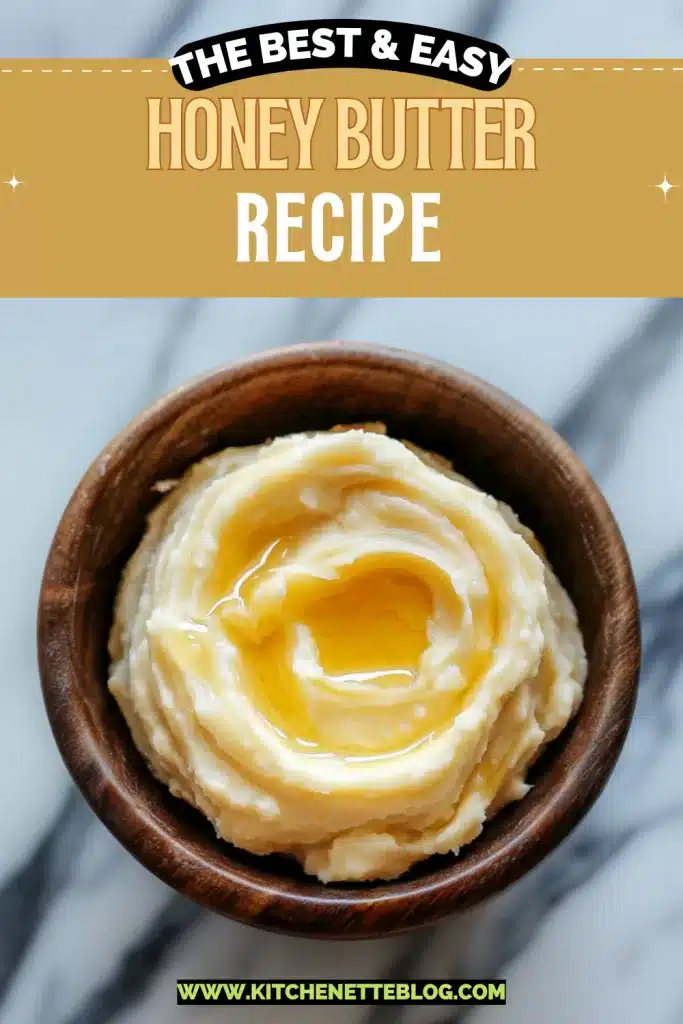
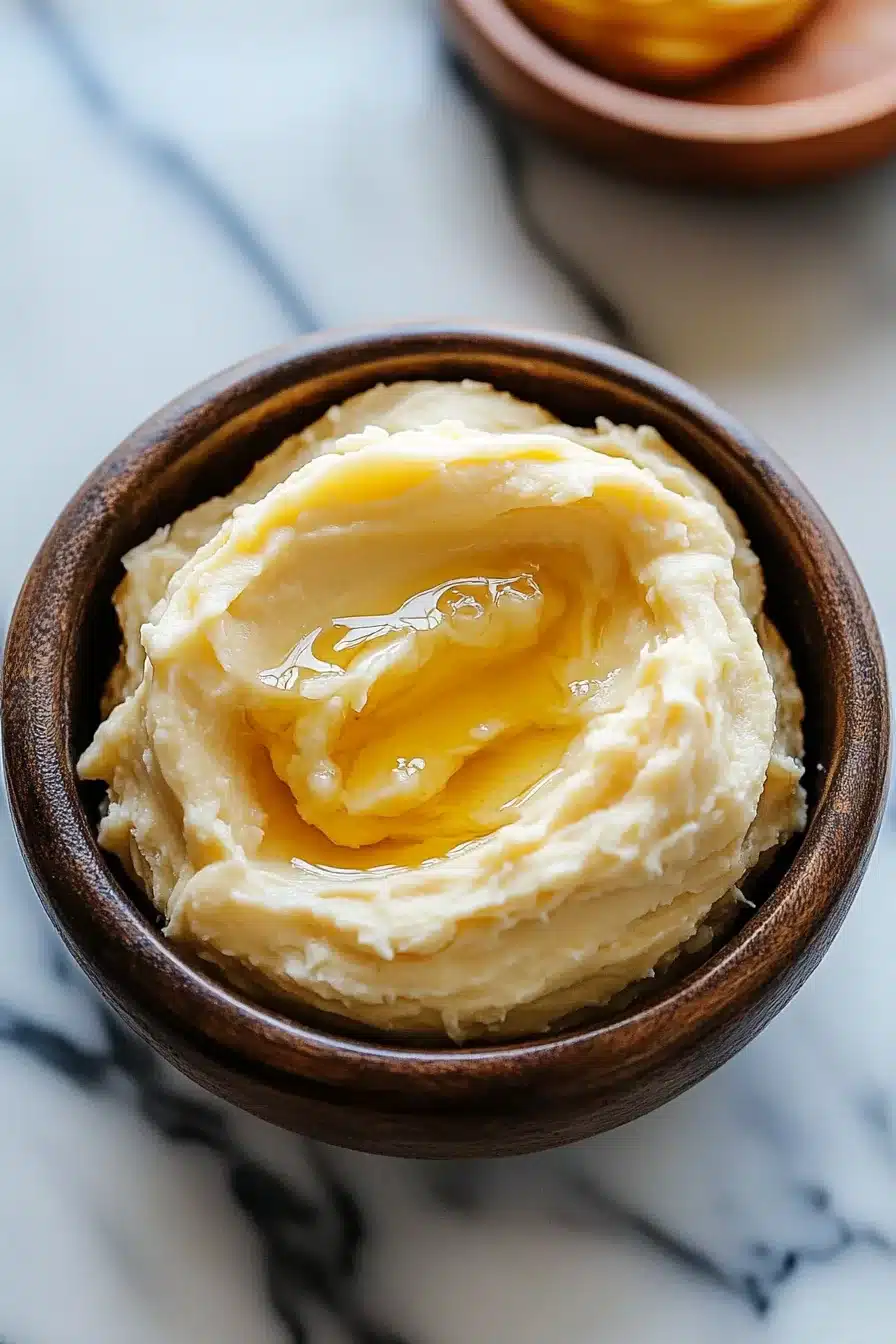
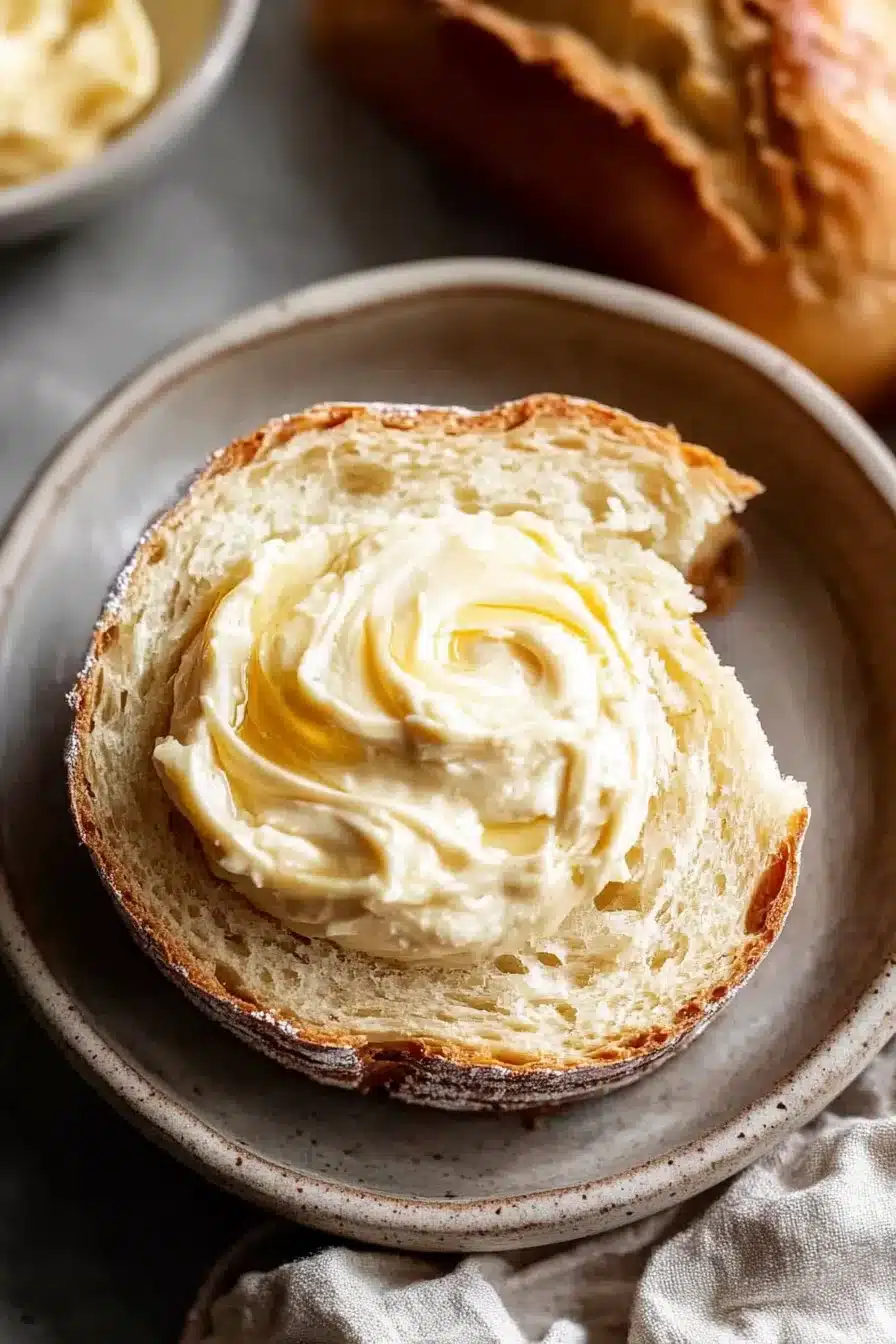
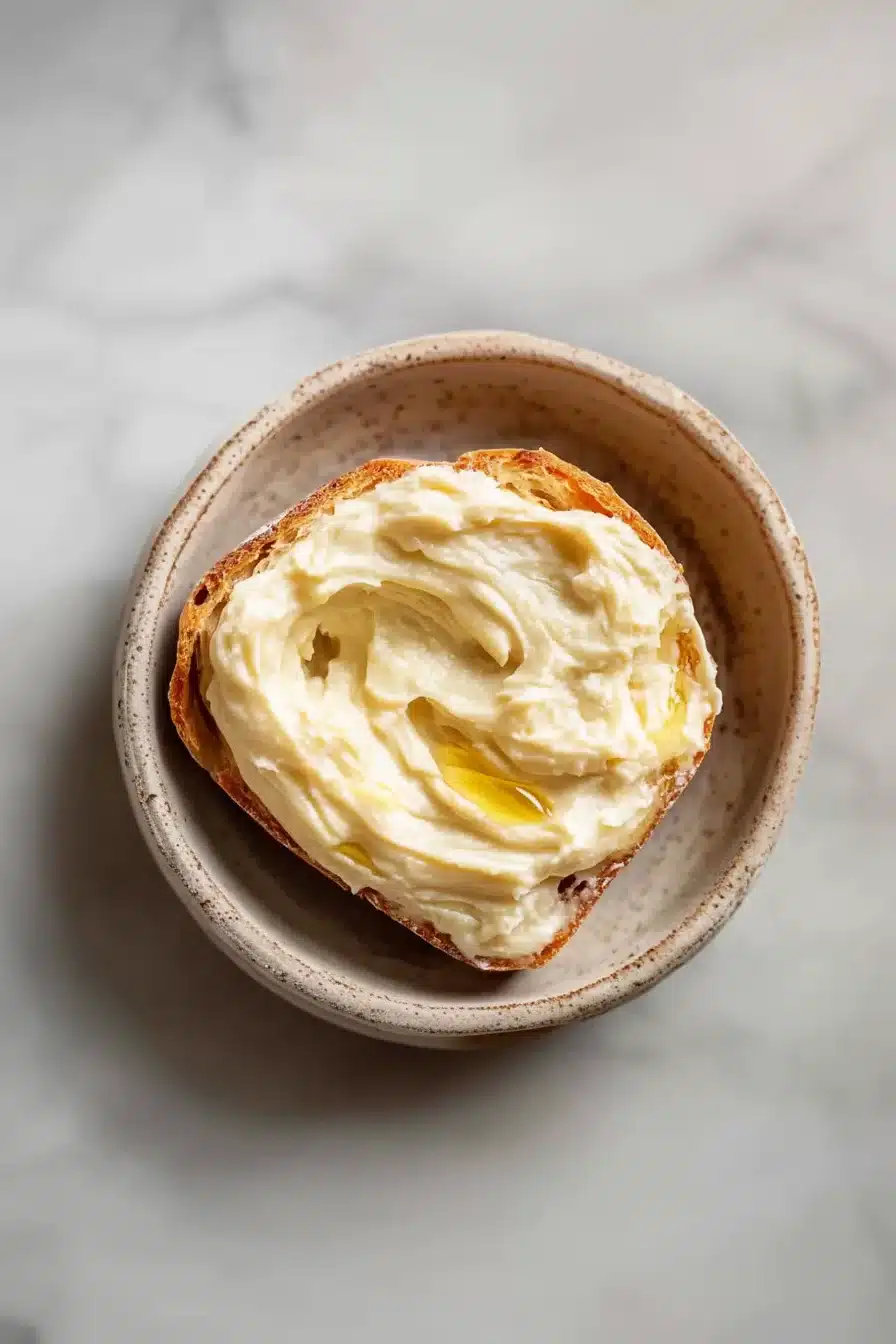
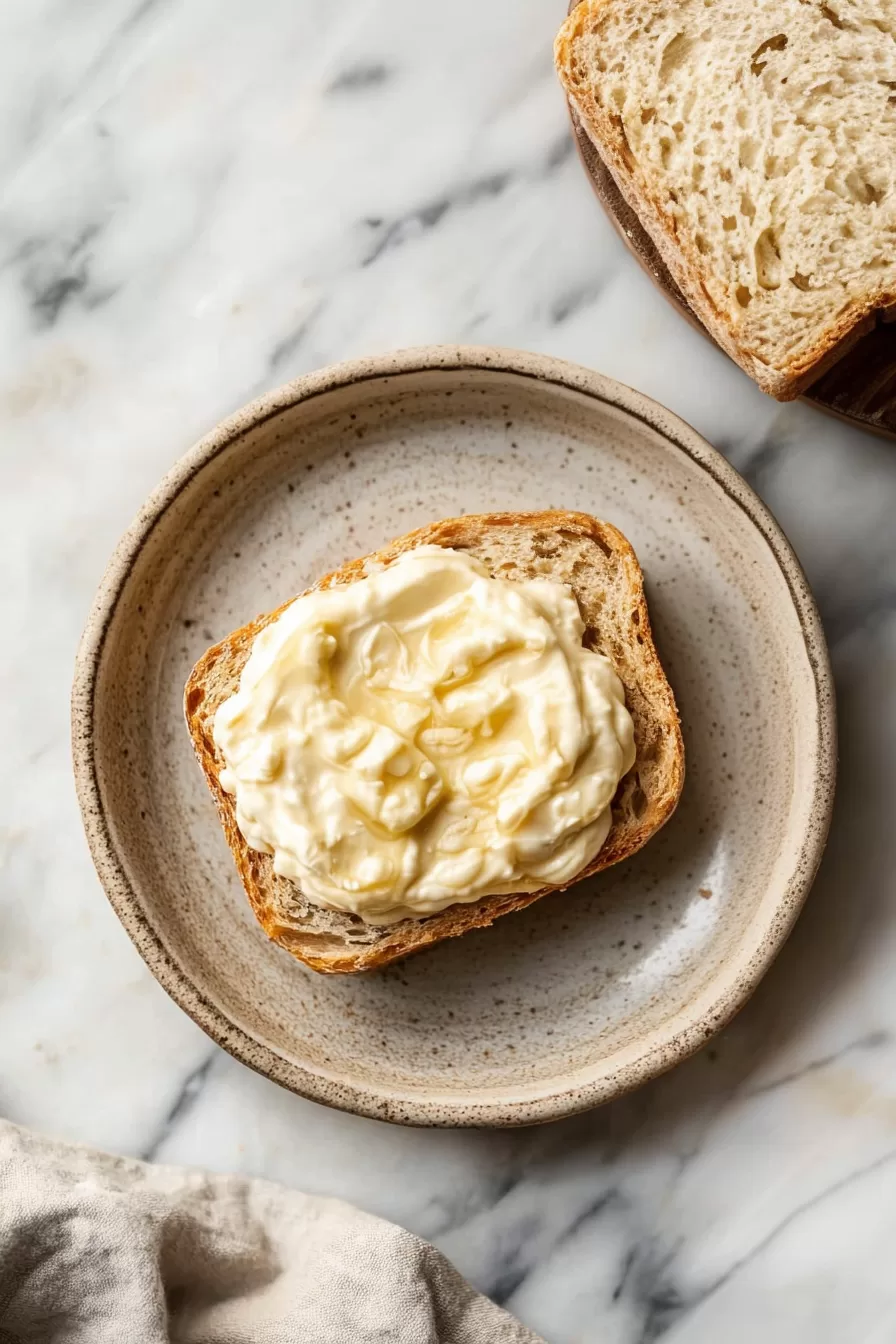
Sweet, salty, and silky. This honey butter whips together soft unsalted butter, rich honey, and a hint of sea salt into something you’ll want to slather on absolutely everything. It smells like cozy Sunday mornings and tastes like dessert pretending to be breakfast.

Whether you’re spooning it onto warm biscuits or sneaking tiny finger swipes straight from the jar (no judgment), this soft, creamy spread adds instant joy to your kitchen.

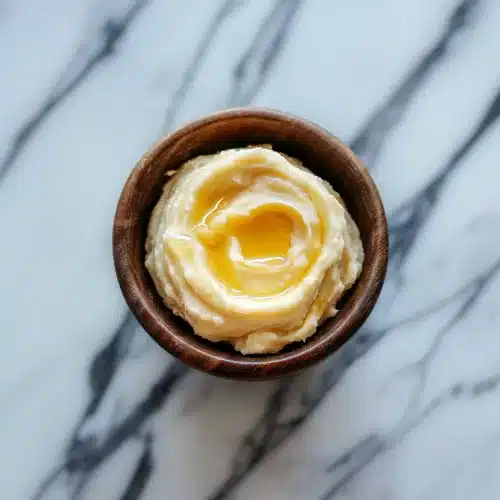
So here’s what we’re working with: butter that’s soft enough to sigh under a mixer, lush honey with that golden glow, a sprinkle of sea salt (trust me on that part), and just a whisper of vanilla if you’re feeling fancy. The vibe here is edible comfort. It’s perfect for adding a little sunshine to toast, elevating cornbread, or heck, glazing roasted veggies if you’re feeling wild. Just keep it close—it’s the kind of thing that disappears fast.

Table of Contents

Honey Butter

Why You’ll Love this Honey Butter

Okay, so it’s not going to do your taxes or walk your dog, but this honey butter does a pretty spectacular job of making food taste better.

  • Ridiculously simple to make: You just beat, drizzle, taste, tweak, and try not to eat it all immediately.
  • Tastes like butter’s more charming cousin: Soft, sweet, and just salty enough to keep things interesting.
  • It’s endlessly versatile: Slather it on muffins, swirl it onto pancakes, pair it with savory things—you do you.
  • Adjustable sweetness: Like it really sweet? Add more honey. Prefer balance? Dial back and let the salt shine.
  • Looks fancy with zero effort: A swirl of honey on top and a little salt sprinkle? Voila, you’re hosting brunch.

Honey Butter

Ingredient Notes

This buttery spread only needs a few things, but the details matter. Here’s how to make every ingredient shine.

  • Unsalted butter: Go for the real-deal, full-fat stuff. It should be room temp, soft but not melty. Salted butter can work in a pinch—just skip the added salt.
  • Honey: Use whatever honey you love the taste of. I like a medium amber one for color and flavor. Local or raw honey can add extra dimension, if you’re feeling fancy.
  • Sea salt: A little sprinkled into the butter, a little flaked on top—magic. It balances the sweetness and makes everything taste more… intentional.
  • Vanilla extract (optional): Just a teeny splash brings warmth and depth. Totally optional, but if you’ve got it, your tastebuds will thank you.

Honey Butter

How To Make This Honey Butter

This takes five minutes, maybe less. It’s just one bowl and one mixer away from becoming your new favorite fridge staple.

  • Whip the butter: Place your softened butter in a medium bowl. Using an electric mixer, beat it on medium speed until it’s pale, fluffy, and just a little whipped-looking—should take about 2 to 3 minutes. Scrape down the sides and bottom halfway through to make sure everyone’s getting equal attention.

  • Add honey, salt, and vanilla: Pour in the honey, sprinkle in half the salt (save some for flair at the end), and if you’re using it, add the vanilla. Beat again until it all melds into a golden, fluffy cloud of deliciousness.

  • Taste and tweak: Dip in a spoon (or cracker). Add more honey or salt if needed. Don’t overthink it—this is all flexible based on how sweet or salty you like things.

  • Serve (or stash): Spoon it into a bowl with a rustic drizzle of honey and that extra pinch of sea salt over top. Or store it in an airtight container in the fridge until you’re ready to swoon.

Honey Butter

Storage Options

Once you’ve made this lovely whipped honey butter, you’ve got options. It keeps well, plays nicely with cold temps, and gives leftovers a major upgrade.

Pop it into an airtight container and stash it in the fridge for up to two weeks. It’ll firm up a bit, so pull it out about 10 to 15 minutes before you want to use it if you prefer it spreadable and soft.

Can you freeze it? Actually, yes. Honey butter holds up surprisingly well in the freezer. Scoop it into a small container, or portion it into an ice cube tray if you’re into that kind of thing. Wrap it well to keep out weird freezer flavors, and you can freeze it for up to 3 months. Thaw overnight in the fridge.

Reheating tip: You don’t really need to “reheat” it, but a few seconds in the microwave on a very low setting can soften it up again. Just don’t zap it too long or it’ll melt into a puddle (perhaps a happy puddle, but a puddle nonetheless).

Variations and Substitutions

This basic honey butter is a dream on its own, but it’s also a tasty blank canvas. Feel free to remix it a little.

  • Maple syrup instead of honey: Totally works. It gives a deeper, earthier sweetness and pairs beautifully with fall flavors.
  • Cinnamon swirl: A dash of ground cinnamon adds cozy warmth. Perfect for toast or slathering on bacon basil cornbread muffins.
  • Add citrus zest: Lemon or orange zest brings zingy brightness and makes it great for spring brunches.
  • Herb twist: Fresh thyme or rosemary (just a pinch) turns it into a whole new thing—surprisingly great on roasted carrots or warm bread.
  • Brown butter upgrade: You can brown the butter first, chill it ‘til soft again, then whip it with honey for a nutty, complex version.

Honey Butter

What to Serve with Honey Butter

The beauty of honey butter is how wildly versatile it is. Sweet or savory, breakfast-y or dinner-ish—it mingles with it all like a polite guest at a potluck.

  • Warm, fluffy biscuits fresh from the oven practically beg for a big smear of this stuff. The butter melts just slightly, clinging to the flaky edges while the honey adds a little mmm.

  • Slather it over roasted sweet potatoes or carrots—the sweet-salty combo is chef’s kiss. Bonus points if you hit it with some flaky salt at the end.

  • Cornbread and honey butter are besties. I’m especially into pairing it with these quirky little bacon basil cornbread muffins.

  • Got leftover pancakes? Lucky you. Reheat and spread on a generous layer of honey butter instead of syrup. Or, you know, use both. Dream big.

  • Try dolloping it onto a light fish dish (hear me out!). It’s surprisingly good with something like this pan seared cod and some roasted veggies.

Honey Butter

Frequently Asked Questions

Can I make honey butter ahead of time?

Yes, absolutely. Make it a day (or a week) before and toss it in the fridge. It’ll keep beautifully for up to two weeks. Just remember to take it out a bit early to let it soften—cold honey butter is a little stubborn. Want it even further ahead? Freeze it! It holds surprisingly well in the freezer for up to 3 months.

Does it have to be refrigerated?

Yes, since it’s made with real butter, it needs to be stored in the fridge—especially if you’re not eating it all in one go (which, honestly, I get). Keep it in an airtight container and it’ll stay fresh for a couple of weeks. If you want it soft and spreadable, just let it sit out for 10 to 15 minutes before using.

Can I use salted butter instead of unsalted?

You can! Just skip or reduce the extra sea salt in the recipe so it doesn’t end up, well, assaulting your taste buds. It won’t be as customizable, but it still works—and sometimes it’s all you’ve got lurking in the fridge, right?

How do I keep it from separating or hardening weirdly?

The key is to beat the butter really well so the honey incorporates smoothly. If your butter is too cold or your honey is crystalizing, it might not blend evenly. Use softened butter and room-temp honey, and don’t skimp on the whipping. If it firms up in the fridge, just let it warm up on the counter before spreading.

Honey Butter

Whipped Honey Butter

Prep Time 5 minutes
Total Time 5 minutes
Sweet, salty, and silky—this honey butter whips together soft unsalted butter, golden honey, and a hint of sea salt into a creamy, dreamy spread. Perfect for biscuits, toast, cornbread, veggies, or simply by the spoonful. Cozy, quick, and endlessly versatile!
10 servings

Ingredients

Honey Butter

  • 1/2 cup (113 g) unsalted butter softened to room temperature
  • 3 tbsp (60 ml) honey plus more for drizzling
  • 1/4 tsp (1.5 g) fine sea salt plus a pinch of flaky salt for serving, to taste
  • 1/4 tsp (1.25 ml) vanilla extract optional

Equipment

  • Electric mixer
  • Medium mixing bowl
  • Spatula

Instructions
 

  1. Whip the butter: Place softened butter in a medium bowl. Using an electric mixer, beat on medium speed until pale, fluffy, and slightly whipped—about 2 to 3 minutes. Scrape sides and bottom halfway through mixing.
  2. Add honey, salt, and vanilla: Pour in honey, sprinkle in half the salt, and add vanilla if using. Beat until the mixture is creamy, smooth, and golden.
  3. Taste and adjust: Taste with a spoon or cracker. Add extra honey or salt, if desired, and mix again.
  4. Serve or store: Spoon into a serving bowl, drizzle with extra honey, and sprinkle with flaky salt. Store in an airtight container in the fridge for up to 2 weeks. Let soften at room temperature before serving, if needed.

Notes

Storage: Honey butter will keep in the fridge (airtight) for up to 2 weeks. For longer storage, freeze for up to 3 months, tightly wrapped. Thaw overnight in the fridge.
Flavor tweaks: Try a little cinnamon, citrus zest, or fresh chopped herbs for extra flair. Maple syrup works instead of honey for a different twist.
Serving ideas: Spread on biscuits, toast, cornbread, roasted sweet potatoes, muffins, pancakes, or even a mild fish with roasted veggies.

Nutrition

Calories: 100kcal | Carbohydrates: 6g | Fat: 9g | Saturated Fat: 6g | Cholesterol: 24mg | Sodium: 77mg | Potassium: 5mg | Sugar: 6g | Vitamin A: 268IU | Calcium: 3mg

Tart fresh cranberries meet sweet, sparkly sugar in these bright little bites. With just water, cranberries, and granulated sugar, sugared cranberries are as easy as they are irresistible.

They’re crisp, tangy, and make that satisfying crunch when you take a bite. A little chewy inside, a little glittery on the outside—like holiday popcorn but bougier. And hey, they’re kinda fancy-looking without trying very hard.

Whether you’re doling them out into snack bowls or nesting them on top of frosted cake like edible ornaments, sugared cranberries just bring the vibe. They’ve got that sweet-sharp thing going on, almost like nature’s Sour Patch candy (well, cuter cousins anyway). And the best part? You only need three ingredients, a saucepan, and a smidge of patience. They’re so simple but feel special—like you actually planned ahead. I kinda love that.

Table of Contents

Sugared Cranberries

Why You’ll Love this Sugared Cranberries Recipe

There’s no pretending here—this recipe is as simple and sparkly as it looks. No kitchen acrobatics required.

  • Ridiculously simple to make: You heat, soak, roll, and dry. That’s it. It’s candy-making for the rest of us.
  • Strikingly pretty: They look like they’ve been dusted with fresh snow. Not to be dramatic, but they kinda glitter.
  • Sweet-tart flavor: The perfect balance of zingy bite and sugary crust. Like cranberry sauce went to finishing school.
  • Versatile as heck: Garnish, snack, or charcuterie board sparkle bombs. I’ve even popped them onto cupcakes.
  • Make-ahead friendly: They actually get even better after a day, once the sugar coating crisps up a bit more.

Sugared Cranberries

Ingredient Notes

Only three ingredients, and you probably have two of them already. Here’s the tiny ingredient roll call:

  • Fresh cranberries: Look for firm, glossy ones. If you find a soft or shriveled guy, toss him—no drama, just quality control.
  • Granulated sugar: Regular white sugar is your MVP here. You’ll make a syrup and use it for rolling, so don’t swap with coarser blends.
  • Water: Just plain old water to dissolve the sugar and get everything sticky enough for the sparkle to stick.

Sugared Cranberries

How To Make This Sugared Cranberries Recipe

Don’t let the sparkle intimidate you. This is truly a rinse, stir, wait kind of deal. If you can simmer and roll, you’re totally golden.

  • Rinse the cranberries: Give them a cold-water bath and pluck out any sad or mushy ones. The firmer the better—you want them to hold their shape.
  • Make the syrup: In a saucepan, combine ½ cup of sugar with the water. Stir over medium-low heat just until the sugar fully dissolves. Don’t let it boil or bubble—calm and steamy is the mood.
  • Coat the cranberries: Turn off the heat, then stir in the cranberries. Gently toss them around so each one gets a sweet syrup hug.
  • Dry phase one: Using a slotted spoon, transfer the cranberries to a wire rack over a tray. Let them dry for an hour. This sets the sticky stage.
  • Roll in sugar: Place the remaining sugar in a shallow bowl, then roll the syrupy cranberries in it a few at a time. They’ll start to look like sugared jewels right away.
  • Dry phase two: Return them to the rack for one more hour. That sugar crust needs a bit of air to firm up and get crunchy.

Sugared Cranberries

Storage Options

Once your sugared cranberries are fully dry and crisped up a bit, you can stash them in an airtight container at room temp—but only for a couple of days. After that, they start to get a little sticky and lose some of their crunch. I like to line the container with parchment or wax paper to avoid any stuck-together berry blobs.

For longer storage, pop them into the fridge (still tightly sealed) and they’ll stay tasty for about a week. They might weep a tiny bit of syrup over time, but just give them a fresh sugar roll if they look tired.

Wondering if you can freeze them? Technically, yes—but I wouldn’t recommend it. The texture takes a hit and the sugar coating can melt when thawed. Better to make a fresh batch; it’s quick enough. Honestly, that’s half the charm.

Variations and Substitutions

Once you’ve made them once, you might start dreaming up ways to tweak them. Join the club.

  • Flavored syrup: Add a pinch of cinnamon or a strip of orange zest to the syrup while it’s warm. It infuses a cozy background note.
  • Vanilla sugar finish: Swap half the rolling sugar with vanilla sugar for a soft perfumed kick. Homemade or store-bought both work.
  • Mixed berries: Try this method with fresh blueberries or grapes (if firm). Just test with a small batch first to check drying times.
  • Colored sugar: Toss in a few spoonfuls of colored sanding sugar for a festive twist. Red and gold around the holidays? Super cute.
  • Spicy coating: Add a tiny pinch of cayenne or ground ginger to the rolling sugar for a little unexpected bite.

Sugared Cranberries

What to Serve with Sugared Cranberries

These shiny little guys love to sit on top of desserts and cheeseboards like tiny edible ornaments. But they’re not just for show—they bring that sweet tangy zip as well.

  • A towering Brie wheel with rosemary and crackers becomes instantly festive with a handful of sugared cranberries scattered on top. The creamy, melty cheese against that sugar crunch? Yes please.

  • Tuck them around a frosted bundt cake, especially something citrusy or spiced. They add that wintery touch without fussing with marzipan or fondant. (Who has time for fondant?)

  • Pop a few skewered on cocktail sticks alongside a cranberry gin fizz or orange spritz. A simple drink suddenly looks very sophisticated. Like she owns matching wine glasses kind of sophisticated.

  • They’re charming on a plate next to something savory, too. Pan-seared salmon with a tart glaze? Sugared cranberries are the shiny supporting cast.

  • Or just play snackmaster and put them in a bowl next to your chocolate chip cheese ball or a nut mix. Unexpected, but addictive.

Sugared Cranberries

Frequently Asked Questions

How long do sugared cranberries last?

If stored properly in an airtight container, sugared cranberries will stay fresh for about 3–4 days at room temperature. You can extend that to about a week in the fridge, but they may get a little sticky over time. A fresh sugar toss will perk them up again.

Can I use frozen cranberries?

You can, but they must be thawed and patted very dry first. Frozen cranberries tend to soften a bit, so the texture might not be as snappy as using fresh. If you can get your hands on fresh ones, they’ll give you that perfect crisp bite.

Do they need to dry overnight?

Not necessarily. Two hours—one after soaking, one after rolling in sugar—is usually enough. If your kitchen is humid or the berries still feel sticky, letting them rest longer won’t hurt. Just keep them loosely covered somewhere cool and dry.

Can I flavor the sugar or add spices?

Absolutely. Mix in a bit of ground cinnamon, ginger, or citrus zest with the rolling sugar. You could also use vanilla sugar. Just don’t go overboard—flavoring the sugar works best in small batches so the cranberries still shine.

Sugared Cranberries

Sugared Cranberries

Prep Time 10 minutes
Cook Time 5 minutes
Drying Time 2 hours
Total Time 2 hours 15 minutes
Tart fresh cranberries meet sweet, sparkly sugar in these bright little bites. With just water, cranberries, and sugar, sugared cranberries are as easy as they are irresistible. Crunchy, tangy, a little chewy inside, and glittery on the outside—like edible holiday snowballs! Perfect for snacking, topping baked goods, or adding sparkle to cheeseboards.
8 servings

Ingredients

  • 2 cups (200 g) fresh cranberries firm and glossy, rinsed and sorted
  • 1 1/4 cups (250 g) granulated sugar divided (1/2 cup for syrup, 3/4 cup for rolling)
  • 1/2 cup (120 ml) water

Equipment

  • Saucepan
  • Slotted spoon
  • Wire rack
  • Baking tray
  • Shallow Bowl

Instructions
 

  1. Rinse the cranberries in cold water and remove any soft or shriveled berries. Set aside to drain.
  2. In a small saucepan, combine 1/2 cup of granulated sugar with the water. Stir over medium-low heat just until the sugar is dissolved. Do not let the mixture boil or bubble; it should be clear and steamy only.
  3. Turn off the heat. Add the cranberries to the syrup and stir gently to coat all the berries evenly with the syrup.
  4. Using a slotted spoon, move the syrup-coated cranberries to a wire rack set over a baking tray (to catch any drips). Let them dry for 1 hour.
  5. Place the remaining 3/4 cup sugar in a shallow bowl. Working in batches, roll the sticky cranberries in the sugar until well coated and sparkling.
  6. Transfer sugared cranberries back to the wire rack and let them dry for 1 more hour, until the sugar crust is crisp and crunchy.

Notes

Store sugared cranberries in an airtight container at room temperature for up to 2–3 days or in the refrigerator for up to a week. If they become sticky, toss them in extra sugar before serving. Great as a snack, on cheeseboards, as cake toppers, or for jazzing up drinks.
  • For a flavor twist, add orange zest or a cinnamon stick to the syrup, swap in vanilla sugar for rolling, or add a pinch of cinnamon or ginger to the finishing sugar.

Nutrition

Calories: 91kcal | Carbohydrates: 24g | Sodium: 1mg | Potassium: 40mg | Fiber: 2g | Sugar: 23g | Vitamin A: 33IU | Vitamin C: 7mg | Calcium: 4mg | Iron: 0.1mg

An ultra-creamy bite of tangy cream cheese meets buttery sweetness and gooey mini chocolate chips in this chocolate chip cheese ball with brown sugar, vanilla, and pecans. Dreamy with graham crackers or cookies!

So here’s what we’ve got: a dessert pretending to be a dip, and frankly, crushing it. This chocolate chip cheese ball is like if cheesecake got invited to a casual snack party and didn’t want to leave. It’s smooth, a little tangy, buttery sweet, studded with mini chips (I mean, hello), and rolled in crushed pecans because texture. It chills out in the fridge before making its big debut on a platter surrounded by things to scoop it up with—graham crackers, cookies, a spoon if no one’s watching (no judgment). You could throw this together for game night, holidays, or because your Thursday needed a little sparkle.

Table of Contents

Chocolate Chip Cheese Ball

Why You’ll Love this Chocolate Chip Cheese Ball

This is one of those things that makes people tilt their heads when they hear it… and then ask for the recipe after the first bite.

  • Ridiculously simple to make: You just mix, chill, and roll. Like a lazy cheesecake in disguise.
  • Dessert-dip hybrid glory: It looks like a cheese ball, acts like a cheese ball, but tastes like a cookie dough dream.
  • Texture heaven: Creamy insides, crunchy pecan coating, and every bite laced with mini chocolate chips. Hello party in your mouth.
  • Make-ahead friendly: The fridge does most of the work—you chill it twice, and that’s way more effort than I’ve given some dates.
  • Adaptable for tastebuds: Don’t like pecans? Swap them. Want dark chocolate chips? Go for it.
  • Fun to eat + serve: Who doesn’t love a snack that lets you scoop dessert onto cookies?

Chocolate Chip Cheese Ball

Ingredient Notes

Fewer than ten ingredients and they’re all very chill—no scavenger hunts required. Just cozy, reliable fridge and pantry staples doing the most.

  • Cream cheese: Softened to room temperature, this is our creamy base. Full-fat is your best friend here—low-fat can get runny and sad.
  • Unsalted butter: Also softened, it brings that smooth, rich mouthfeel. Salted butter will work in a pinch but scale back on mix-in sweetness.
  • Brown sugar: Adds a little molasses-y depth that makes this feel more cookie dough than frosting.
  • Powdered sugar: For that light, fluffy sweetness that melts into the mix and smooths things out.
  • Vanilla extract: The background note that you’ll miss if it’s not there. Pure extract, please—not the imitation kind.
  • Mini chocolate chips: Crunchier than you’d expect! They give sparkle and fun to every bite while keeping the ball sliceable.
  • Finely chopped pecans: Rolled on the outside for crunch and toasty flavor. Already toasted nuts work beautifully.
  • Graham crackers/cookies for dipping: Basically spoons in disguise. Choose your vehicle: graham crackers, vanilla wafers, or even a sneaky pretzel stick.

Chocolate Chip Cheese Ball

How To Make This Chocolate Chip Cheese Ball

This is barely a recipe, honestly; it’s more of a delicious craft project with edible glue. Let’s roll into it.

  • Cream everything together: In a mixing bowl, beat the cream cheese, softened butter, and brown sugar until the texture is dreamy and smooth. Don’t skimp on scraping down the sides—no lumpy bits allowed.

  • Add sweetness and vanilla: Slowly mix in the powdered sugar and vanilla. The powdered sugar might puff up a little, so go slow unless you want to powder the kitchen (been there).

  • Fold in chocolate chips: Gently stir in your mini chocolate chips. You want them evenly spread but still intact—no smashing allowed.

  • Chill round one: Cover the bowl with plastic wrap and tuck it in the fridge for about 2 hours, so it firms up enough to shape.

  • Shape into a ball: Grab your cold, sweet blob and shape it into a ball with your hands. It doesn’t have to be a sphere of mathematical perfection. Wrap it in plastic again and toss back into the fridge for another hour.

  • Roll in pecans: When it’s firm, gently press chopped pecans all over the outside. Not into nuts? You could skip this… but it looks fancy and adds crunch.

  • Serve it up: Place your beautiful cheese ball on a plate surrounded by your dippers of choice. Watch it vanish before your very eyes.

Chocolate Chip Cheese Ball

Storage Options

This beauty actually improves with a little advance prep. Like cheese’s version of a glow-up.

Stash your chocolate chip cheese ball in the fridge, tightly wrapped in plastic wrap or inside an airtight container, and it’ll keep nicely for 4–5 days. If it’s already rolled in pecans, keep in mind they’ll soften a bit over time. Still tasty, but if you’re going super crisp, wait to roll until closer to serving.

Wondering about freezing it? Yep, you can go for it. Wrap it pre-pecan-roll stage in a couple layers of plastic wrap, pop it in a freezer-friendly bag, and freeze up to one month. Thaw overnight in the fridge before rolling in the nuts and serving. I wouldn’t recommend freezing once the pecans are on, though—they’ll turn soggy and weird.

As for reheating… okay, don’t. This isn’t that kind of dish. Keep it cool, and you’re golden.

Variations and Substitutions

Want to switch it up? This cheese ball has range.

  • Different chips: You can totally swap the mini chips with dark chocolate, white chocolate, or even peanut butter chips for a wild little remix.

  • No nuts, no problem: Allergies? Or just not a pecan fan? Use graham cracker crumbs, crushed toffee bits, or even finely chopped pretzels instead.

  • Add-ins galore: Fold in a few chopped dried cherries, tiny marshmallows, or crushed candy if you’re feeling bold and snacky.

  • Spice it up: A pinch of cinnamon or espresso powder in the base mix can bring in a whole new flavor dimension.

  • Sweetener swap: Feel free to use maple syrup or honey instead of brown sugar for a different sweetness vibe. Just reduce the powdered sugar a bit to balance texture.

Chocolate Chip Cheese Ball

What to Serve with Chocolate Chip Cheese Ball

Dippers are half the fun here. You’re basically pairing cookies with candy… and calling it elegant.

  • Graham crackers: These are classic for a reason. Their honeyed crispness is the perfect match for soft, sweet cheese ball bites. Bonus: they don’t overpower the chocolate flavor.

  • Vanilla wafers: Buttery and nostalgic, they’re very easy to stack with cheese ball bites. Plus, they hold up surprisingly well without crumbling.

  • Pretzels: Sweet and salty lovers, this one’s for you. The crunch is amazing and the salt balances out all that creamy sweetness.

  • Chocolate chip cookies: Yes. A cookie sandwiched with a cookie-flavored cheese ball? You’re welcome. For a fun party platter, use mini cookies so folks don’t get overwhelmed.

  • Fruit slices: A little lighter, for balance. Apple slices or strawberries make a tart, juicy contrast to the creamy richness. Kind of like a hidden fruit salad… but not at all.

Chocolate Chip Cheese Ball

Frequently Asked Questions

Can I make this chocolate chip cheese ball ahead of time?

Absolutely! This is one of those magical desserts that actually improves with a bit of hang-out time in the fridge. Make it a day or two ahead, wrap it tightly (plastic wrap is your friend), and keep it chilled. I prefer rolling it in pecans right before serving so they stay crisp and fancy.

What can I use instead of pecans?

If you’re not into pecans (or they’re just not in your pantry), no worries. Try using crushed graham crackers, chopped toffee bits, mini M&Ms, shredded coconut, or even crushed pretzels. Basically, anything with texture that won’t go soggy works. It’s a “choose your crunch” situation.

Can I serve this with fruit?

You totally can! Apple slices, strawberries, and even thick banana rounds (not too ripe though) dip super well and add a refreshing element. It’s like giving your dessert cheese ball a little health halo. Okay, a tiny one, but it counts.

Is this freezer-friendly?

Yep—with one catch. You’ll want to freeze the cheese ball before rolling it in pecans. Wrap it tightly twice, then stash it in a zip-top freezer bag. It’ll be good for about a month. Let it thaw in the fridge overnight, roll in fresh pecans, and serve like it was made that morning. Magic.

Psst… if you’re feeling all sweet toothy today, you might also love these peanut butter & banana ice cream sandwiches. Or keep the cozy going with a little savory from this roasted butternut squash salad. Opposites attract, right?

Chocolate Chip Cheese Ball

Chocolate Chip Cheese Ball

Prep Time 20 minutes
Cook Time 0 minutes
Chilling Time 3 hours
Total Time 3 hours 20 minutes
An ultra-creamy bite of tangy cream cheese meets buttery sweetness and gooey mini chocolate chips in this chocolate chip cheese ball with brown sugar, vanilla, and pecans. Dreamy with graham crackers or cookies! It’s a dessert pretending to be a dip—smooth, a little tangy, buttery sweet, studded with mini chips, and rolled in crushed pecans for perfect texture.
10 servings

Ingredients

For the Cheese Ball

  • 8 oz (225 g) cream cheese softened; full-fat preferred
  • 4 tbsp (60 g) unsalted butter softened
  • 1/3 cup (67 g) brown sugar packed
  • 1/2 cup (60 g) powdered sugar
  • 1 tsp (5 ml) vanilla extract pure
  • 3/4 cup (120 g) mini chocolate chips

For Rolling

  • 3/4 cup (90 g) pecans finely chopped, toasted if desired

For Serving

  • graham crackers for dipping
  • vanilla wafers or cookies for dipping
  • pretzels or fruit slices optional, for dipping

Equipment

  • Mixing bowl
  • Hand mixer or stand mixer
  • Plastic Wrap
  • Spatula

Instructions
 

  1. Cream everything together: In a mixing bowl, use a hand mixer (or stand mixer) to beat the softened cream cheese, butter, and brown sugar until very smooth and creamy. Scrape down the sides as needed.
  2. Add sweetness and vanilla: Mix in the powdered sugar and vanilla extract slowly, blending until smooth and fluffy.
  3. Fold in chocolate chips: Gently stir in the mini chocolate chips until evenly distributed.
  4. Chill round one: Cover the bowl with plastic wrap and chill in the refrigerator for 2 hours, or until the mixture is firm enough to shape.
  5. Shape into a ball: Remove the chilled mixture and form into a ball with your hands (it doesn’t have to be perfect!). Rewrap in plastic and chill for another hour, until very firm.
  6. Roll in pecans: Spread the chopped pecans on a plate and gently roll the cheese ball to coat the exterior evenly.
  7. Serve: Place on a serving platter with graham crackers, cookies, pretzels, or fruit for dipping. Enjoy!

Notes

Make ahead: This cheese ball improves after chilling and can be made a day or two in advance. For best crunch, roll in pecans just before serving. Storage: Wrap tightly and store in the fridge for 4–5 days, or freeze before rolling in pecans for up to 1 month (thaw in fridge before coating and serving). Customizations: Try different nuts, crushed toffee, chocolate varieties, or graham cracker crumbs for rolling. Gluten free: Serve with gluten-free cookies, crackers or fruit.

Nutrition

Calories: 290kcal | Carbohydrates: 24g | Protein: 3g | Fat: 21g | Saturated Fat: 10g | Cholesterol: 37mg | Sodium: 97mg | Potassium: 99mg | Fiber: 1g | Sugar: 19g | Vitamin A: 530IU | Calcium: 52mg | Iron: 0.6mg

Butternut squash is roasted until caramelized and cozy, then tossed with greens, goat cheese, cranberries, and a maple vinaigrette. This roasted butternut squash salad is sweet, savory, and a little spiced.

There’s something about the smell of squash roasting with cumin and cinnamon that makes the kitchen feel like a hug. This roasted butternut squash salad is a little crunchy, a little creamy, and honestly? Kinda fancy-feeling without, you know, actually being fancy. It works as a lazy dinner when you want something warm-ish and green-ish or as a side where the goat cheese does most of the impressing.

Table of Contents

Roasted Butternut Squash Salad

Why You’ll Love this Roasted Butternut Squash Salad

Let’s be honest: salads can be boring. This one doesn’t fall into that trap. It has texture, warmth, and actual flavor (shocking, I know).

  • Ridiculously simple to make: You basically roast, whisk, toss, and boom, salad magic.
  • A cozy seasonal vibe: Thanks to the squash, warm spices, and maple-balsamic dressing that smells like autumn met a spa.
  • Sweet and savory balance: The cranberries, goat cheese, and toasty walnuts all play nicely, no small talk needed.
  • Delicious warm or cold: Serve it straight from the roasting tray or pack it for a fancy fridge lunch tomorrow.
  • Endlessly customizable: Toss in roasted chickpeas, lentils, or even swap the greens (hello, butter lettuce).
  • Plays well with others: Works alongside proteins like pan-seared cod or roasted chicken.

Roasted Butternut Squash Salad

Ingredient Notes

This salad doesn’t need anything fancy—you probably have most of it already. Here’s the lowdown on what matters and why.

  • Butternut squash: Sweet, nutty, and roasts like a dream. Make sure it’s peeled and chopped evenly so it cooks consistently.
  • Ground spices (cumin, coriander, cinnamon, smoked paprika): These turn plain squash into “ooh, what’s that smell?” levels. Smoked paprika adds a slight campfire edge.
  • Olive oil: Used both to roast and to make the vinaigrette silky and rich.
  • Mixed greens: A blend (like arugula, spinach, or baby kale) keeps things tender yet peppery. Avoid full-grown kale unless you massage it first (yes, really).
  • Red onion: A little sharp, a little juicy. Slice it thin so it doesn’t overpower.
  • Dried cranberries: Sweet and chewy contrast to the roasted veg. You could use golden raisins too, if that’s your vibe.
  • Toasted walnuts: Crunchy, earthy, and just rustic enough to make you feel like you pulled this from a harvest picnic.
  • Goat cheese: Creamy, tangy, and melty if the squash is still warm. Feta works too, but goat cheese loves this salad more.
  • Maple syrup, balsamic vinegar, Dijon mustard, garlic: All part of a dressing that’s tangy-sweet and deeply flavorful without any heavy lifting.

Roasted Butternut Squash Salad

How To Make This Roasted Butternut Squash Salad

This salad comes together with just a couple of bowls and thirty minutes in the oven. No fancy tricks, just a tiny bit of chopping and waiting.

  • Preheat and prep the squash: Get that oven going at 400°F and line a baking sheet with parchment (no one has time for sticky pans). While that warms up, whisk your olive oil with cumin, coriander, cinnamon, smoked paprika, salt, and black pepper. It might smell like you’ve started making mulled wine. You haven’t. Not yet.

  • Roast the squash: Toss your cubed squash into the spice-oil mixture until everything’s glossy and speckled. Spread it out on the pan like you’re tucking each cube in for a quick nap. Roast for 25 to 30 minutes, flipping halfway through so both sides get caramelized edges. Let it cool a bit so it doesn’t instantly wilt your greens.

  • Make the dressing: While the squash is doing its golden thing, whisk together olive oil, balsamic, Dijon, maple syrup (start with one tablespoon, then taste), and a minced garlic clove. It should look slightly syrupy and smell like a salad dressing you’d actually want to eat.

  • Build the salad: In a big bowl, toss your greens, sliced red onion, dried cranberries, and walnuts. You might eat a few walnuts during this. I support that.

  • Assemble and serve: Top the greens with your just-warm (not hot) butternut squash. Crumble goat cheese over like fairy dust. Drizzle with dressing, toss lightly, and serve on plates—or just eat with a serving fork straight from the bowl. Again, no judgment.

Roasted Butternut Squash Salad

Storage Options

Okay so, you made the salad. But now what if you have leftovers? First off, high five for making enough to have leftovers. That’s future-you thinking right there.

Let’s handle storage.

Once assembled, this roasted butternut squash salad does best eaten same-day. The squash is warm, the dressing hasn’t weighed down the greens yet, and everything’s basically in harmony. But if you’re prepping ahead or saving bits? Store things separately.

Keep the roasted squash in an airtight container in the fridge for up to 4 days. The dressing holds well too—just give it a good shake after it chills, since the oil might solidify a bit. As for greens, store them dry in a zip-top bag with a paper towel tucked inside. It keeps everything crisp and smugly green.

Don’t freeze it though. Roasted squash won’t survive the cold gracefully—it comes back watery and kinda sad. And salad leaves in a freezer? Just… no.

Variations and Substitutions

Once you’ve made this the first time (and realized how extra a salad can be), you might want to mix it up. Here are some fun swappy directions to explore.

  • Swap the greens: If you’re not into arugula or spinach, try chopped Little Gem or butter lettuce. Just go for something tenderish that won’t turn soggy.

  • Add a grain: Toss in cooked quinoa or farro to bulk this into a full-on meal. They soak up the vinaigrette like tiny flavor sponges.

  • Try a different cheese: Feta brings extra saltiness. Ricotta salata is crumbly and mild. Blue cheese if you’re feeling chaotic.

  • Roast other veg: Sweet potatoes or acorn squash work just as well. Or throw in a few carrot chunks to roast alongside the squash.

  • Add protein: Chickpeas or grilled chicken turn this salad from side dish energy to full meal bossiness. It also plays really nicely beside this pan-seared salmon.

  • Nut options: Pecans or sliced almonds work great too. Toasting them is the non-negotiable part.

Roasted Butternut Squash Salad

What to Serve with Roasted Butternut Squash Salad

This salad can totally hold its own, but sometimes it wants a little company on the plate. These pairings strike the right balance—nothing too heavy, nothing too meh.

  • A piece of crusty bread with salted butter does wonders on the side. Warm from the oven or toaster, it soaks up that maple-balsamic dressing like it was destined to.

  • Light protein, like grilled chicken or seared tofu, plays it cool so the salad can shine. You can even serve alongside a simple roast (or reheated rotisserie chicken… hey, it counts).

  • A classic soup-and-salad combo makes this feel like a cozy lunch. Butternut squash soup might sound redundant, so maybe something like tomato or French lentil instead.

  • Holiday table? This salad actually fits in well despite being a shade less beige than typical sides. It cuts through richer dishes but still tastes festive.

  • A not-too-sweet dessert. Something like these peanut butter fluff cups or even a square of dark chocolate keeps the meal light.

Roasted Butternut Squash Salad

Frequently Asked Questions

Can I prep this salad ahead of time?

Yes, absolutely! The best way to prep ahead is to roast the squash, make the dressing, and store the components separately. Assemble just before serving so the greens don’t wilt and everything keeps its texture. If you’re meal-prepping it for lunch, layer everything except the dressing and goat cheese, then add those when you’re ready to eat.

Is the dressing sweet? Can I make it less maple-y?

It has a gentle sweetness thanks to the maple syrup, but it’s definitely more tangy than dessert-y. If you’re not into sweet dressings, start with one tablespoon of maple syrup, taste it, and adjust. A squeeze of lemon juice can cut the sweetness too if you went overboard. Been there.

What’s the best way to peel and cube butternut squash?

I won’t lie: peeling squash can be annoying. Use a sharp peeler (Y-peelers work great), trim off both ends, and slice the squash in half where the neck meets the round part. Cube it from there. Or, cheat a little and buy it pre-cubed—totally valid choice and saves you 10 minutes and a sore wrist.

Can I serve this salad cold?

Yes! It’s lovely cold. Just make sure the squash is fully cooled before mixing with the greens so they stay perky. It’s especially good as leftovers the next day, with all the dressing flavors having soaked into the goodies. It’s practically salad karma. Add a squeeze of lemon to brighten it up.

Roasted Butternut Squash Salad

Roasted Butternut Squash Salad

Prep Time 15 minutes
Cook Time 30 minutes
Total Time 45 minutes
Butternut squash is roasted until caramelized and cozy, then tossed with greens, goat cheese, cranberries, and a maple vinaigrette. This roasted butternut squash salad is sweet, savory, and a little spiced for the perfect balance. Great warm or cold, it's a crowd-pleaser for dinners and potlucks alike.
4 servings

Ingredients

Roasted Squash

  • 1 medium butternut squash peeled and cubed (about 4 cups/600g)
  • 2 tbsp (30 ml) olive oil
  • 1 tsp ground cumin
  • 1 tsp ground coriander
  • 1 tsp ground cinnamon
  • 1 tsp smoked paprika
  • 1/2 tsp (0.5 tsp) sea salt plus more to taste
  • 1/4 tsp (0.25 tsp) black pepper

Salad Base

  • 5 cups (150 g) mixed greens arugula, spinach, or baby kale
  • 1/4 (0.25) red onion thinly sliced
  • 1/2 cup (60 g) dried cranberries
  • 1/2 cup (60 g) toasted walnuts chopped
  • 1/3 cup (75 g) goat cheese crumbled (or feta)

Maple Balsamic Vinaigrette

  • 3 tbsp (45 ml) olive oil
  • 1 tbsp (15 ml) balsamic vinegar
  • 1-2 tbsp (15-30 ml) maple syrup to taste
  • 1 tsp Dijon mustard
  • 1 clove garlic minced

Equipment

  • Baking sheet
  • Parchment paper
  • Large Bowl
  • Whisk

Instructions
 

  1. Preheat your oven to 400°F (200°C). Line a baking sheet with parchment paper.
  2. In a large bowl, whisk together 2 tbsp olive oil, cumin, coriander, cinnamon, smoked paprika, salt, and black pepper.
  3. Add the cubed butternut squash and toss until evenly coated.
  4. Spread squash cubes out in a single layer on the prepared baking sheet. Roast for 25-30 minutes, flipping halfway, until caramelized and tender. Let cool slightly.
  5. Meanwhile, make the vinaigrette: In a bowl or jar, whisk together 3 tbsp olive oil, balsamic vinegar, maple syrup, Dijon mustard, and minced garlic until emulsified. Taste and adjust maple syrup as desired.
  6. In a large salad bowl, add the mixed greens, sliced red onion, dried cranberries, and toasted walnuts.
  7. Add the warm roasted butternut squash on top. Crumble goat cheese over everything.
  8. Drizzle with the maple vinaigrette and toss gently to combine. Serve immediately, warm or at room temperature.

Notes

Storage: Store roasted squash, greens, and dressing separately in the fridge for up to 4 days. Assemble just before serving for best texture.
Substitutions: Swap cheese (feta, ricotta salata, or blue cheese), nuts (pecans, almonds), or greens (butter lettuce, Little Gem). Add cooked grains or protein for a fuller meal.

Nutrition

Calories: 325kcal | Carbohydrates: 38g | Protein: 7g | Fat: 17g | Saturated Fat: 5g | Cholesterol: 15mg | Sodium: 350mg | Potassium: 740mg | Fiber: 6g | Sugar: 15g | Vitamin A: 11460IU | Vitamin C: 37mg | Calcium: 108mg | Iron: 2.3mg

Sweet cinnamon-spiced apples wrapped in crispy golden wrappers—these cozy, handheld apple pie egg rolls are loaded with fresh apples, brown sugar, butter, and warm spices. They’re crunchy, gooey, and just begging to be dunked in caramel or topped with melty vanilla ice cream.

Imagine everything you love about apple pie, but in bite-sized, crispy form. No fork required. They smell like fall, but I’d devour them in July without a single moment of shame. Let’s be real: dessert rules don’t apply here.

Table of Contents

Apple Pie Egg Rolls

Why You’ll Love this Apple Pie Egg Rolls Recipe

Okay, hear me out: these are not your average fried things. They’re squishy in the middle, crunchy on the outside, and glowing with cinnamony joy. They come together faster than a real pie, and they disappear even faster. Trust me, I’ve “tested” that theory extensively.

  • Crispy on the outside, gooey on the inside: That snap of the shell followed by warm, spiced apple filling? Chef’s kiss.
  • Way easier than making a whole pie: No lattice crust, no blind baking, and no tears on your countertop.
  • Perfect for sharing… or hoarding: They’re individually portioned, which is cute. But also means you can eat three and still act innocent.
  • Insanely customizable: Swap the fruits, tweak the spices, drizzle what you want. These play nice with creative moods.
  • Ideal little dessert bombs for any event: Movie night, brunch, your third Tuesday breakdown—these egg rolls don’t judge.

Apple Pie Egg Rolls

Ingredient Notes

We’re not working with any high-maintenance ingredients here—just simple pantry stuff and apples that have seen better days. The vibe is low-stress, high-reward.

  • Apples: Go for crisp varieties like Honeycrisp or Granny Smith. You want them to hold their shape without going full applesauce.
  • Unsalted butter: Adds that warm, rich flavor to the filling. If you only have salted, it’s totally fine—just ease up on any extra salt.
  • Brown sugar: Makes the filling deep and molasses-y. Light or dark works, but I lean dark when I feel dramatic.
  • Cinnamon and nutmeg: Classic pie spices. Measure with your heart, but don’t go too rogue unless you like chaotic results.
  • Lemon juice: A splash keeps the apples from turning weirdly brown and adds a touch of brightness to balance the sweetness.
  • Cornstarch: Mixed with water, it thickens the filling into that glossy, sticky, holdable state.
  • Vanilla extract: Rounds everything out with its sweet, soft hug of flavor.
  • Egg roll wrappers: Found in the refrigerated section by tofu and herbs—don’t confuse them with spring roll wrappers (those are thinner and dry out fast).
  • Egg: Just one, beaten, to glue everything shut.
  • Oil for frying: Any neutral oil with a high smoke point works—canola or vegetable are perfect.
  • Granulated sugar + cinnamon: Roll the fried egg rolls in this and watch your self-control vanish.
  • Optional toppings: Caramel sauce, whipped cream, or vanilla ice cream if you’re leaning full dessert maximalist.

Apple Pie Egg Rolls

How To Make This Apple Pie Egg Rolls Recipe

It’s kind of fun. Like arts-and-crafts, but edible. You’ll cook the filling, roll it up, and fry until golden and glorious. Here’s how we do it:

  • Cook the apple filling: Melt the butter in a large skillet until it starts to smell nutty and good. Then toss in the brown sugar, cinnamon, and nutmeg. Stir until it becomes this dreamy syrup situation.

  • Add apples and lemon juice: Dump in the diced apples. They’ll start to soften and soak up all that buttery sugar magic. Cook for about 5 minutes—you want tender, not mushy.

  • Thicken the mixture: In a small bowl, whisk together cornstarch and water. Pour it into the pan along with the vanilla extract. Stir diligently until the filling thickens and starts to look like…well, pie filling.

  • Let it cool: Important! Hot filling equals sad, torn wrappers. Let it come to room temp before you roll.

  • Assemble the egg rolls: Place a wrapper on a clean surface, diamond-style. Spoon about 1 to 2 tablespoons of apple filling in the middle. Brush the edges with beaten egg, fold the bottom up, fold the sides in, then roll it up like a tiny burrito.

  • Heat your frying oil: Pour about 2 inches of oil into a deep pan, then heat it up to 350°F. A candy thermometer helps, but if not, a small drop of water should sizzle without going berserk.

  • Fry in batches: Lower each egg roll gently into the hot oil. Give them about 2 to 3 minutes per side, flipping once, until they’re golden brown all over.

  • Drain and sugar-coat: Transfer them to a paper towel-lined plate for a quick drain. Then toss them (while still warm) in cinnamon sugar until each one sparkles.

  • Serve warm with toppings: These are best fresh, especially with a little whipped cream or a scoop of melty vanilla ice cream on the side. If you want to really go all out, drizzle some caramel on top and watch happiness happen.

Apple Pie Egg Rolls

Storage Options

Let’s talk leftovers. If there are any, that is.

So, fresh is best for these apple pie egg rolls—especially for that crispy outer shell. But if you have a few stragglers clinging to the plate after dessert, don’t toss them out.

Store any cooled leftovers in an airtight container in the fridge. Pop a paper towel under them to soak up any moisture. They’ll last for about 2 to 3 days before the wrapper starts to get a little floppy.

Can you freeze them? Absolutely—just freeze them before frying. Lay the assembled egg rolls (pre-fry!) out on a baking sheet and flash freeze for an hour. Then transfer them to a sealed zip-top bag. They’ll last about 2 months that way.

For reheating, your best friend is the oven or an air fryer. A few minutes at 375°F crisps ’em right back up. Microwave works in theory, but you’ll lose that satisfying crunch. So…your call.

Variations and Substitutions

Think of these egg rolls as dessert chameleons. They’re good as-is, but oh, the places we can go.

  • Pear or peach filling: If apples aren’t vibing with your fruit bowl, swap in pears or peaches. Just adjust the cook time slightly since they soften faster.

  • Add chopped nuts: A handful of pecans or walnuts in the filling adds crunch and a great nutty twist. Toast them first if you’re feeling fancy.

  • Pumpkin spice mix-in: Feeling festive? Add a teaspoon of pumpkin spice instead of just cinnamon and nutmeg for fall market flair.

  • Use store-bought pie filling: No judgment here. This shortcut works great if you’re in a hurry—or out of energy but still want that pie fix.

  • Bake instead of fry: Spray them with oil or brush lightly with melted butter, then bake at 400°F for about 15-18 minutes. Flip once for even crispiness.

Apple Pie Egg Rolls

What to Serve with Apple Pie Egg Rolls

These little crispy bundles play nice with a ton of other treats. Whether you’re making a full dessert spread or just want one thing on the side, here are some dreamy pairings:

  • A scoop (or three) of vanilla ice cream is classic. Let it melt just a bit so it dribbles onto the egg rolls and creates that hot-meets-cold dessert drama.

  • Drizzle them in caramel sauce, or go rogue and try maple syrup or a bourbon glaze if you’re feeling extra. The sticky-sweet pairing is just right.

  • Pair them with coffee or chai and you’ve basically got yourself a cozy café dessert moment at home. Bonus points if you’re also in fuzzy socks.

  • Want to go dessert tapas-style? Toss these on a platter with other handheld treats like peanut butter and banana ice cream sandwiches and everyone gets a little something different.

  • Or serve them alongside something savory first. These could follow something like easy breakfast burritos if you’re into brinner (breakfast for dinner, absolutely a lifestyle).

Apple Pie Egg Rolls

Frequently Asked Questions

Can I make these egg rolls ahead of time?

Yes! If you’re looking to plan ahead, you can absolutely prep the egg rolls and keep them in the fridge (uncooked) for about 24 hours. Just cover them tightly so they don’t dry out. Want to go even further? Freeze them before frying. They’ll keep in the freezer for up to two months… then fry straight from frozen, adding just a minute or two to the cook time.

What’s the best type of apple to use?

Something crisp and slightly tart works best—Granny Smith is my usual go-to. Honeycrisp or Fuji can also hold their own without turning into mush. Soft apples like Red Delicious tend to break down too much and make things soggy. So go for firm, fresh varieties with flavor and a bit of bite.

Can I bake these instead of frying?

Yes, and honestly, they’re still pretty delightful. Brush or spray them lightly with oil, then bake at 400°F for 15–18 minutes until golden and crispy. Flip them halfway for even browning. The texture is slightly different—crisp, not shatteringly crunchy—but still totally worth it if you’re avoiding frying or just want less mess.

How do I keep them crispy after frying?

After frying, place the egg rolls on a wire rack instead of directly on a plate. That way, air circulates around them and avoids sogginess. Don’t stack them while they’re still hot and make sure to cool them a bit before covering. If you’re making a big batch, pop finished rolls into a warm oven (around 200°F) while you fry the rest—it keeps them crisp without drying them out.

Apple Pie Egg Rolls

Apple Pie Egg Rolls

Prep Time 20 minutes
Cook Time 15 minutes
Total Time 35 minutes
Sweet cinnamon-spiced apples wrapped in crispy golden wrappers—these cozy, handheld apple pie egg rolls are loaded with fresh apples, brown sugar, butter, and warm spices. Crunchy, gooey, and perfect for dunking in caramel or topping with ice cream, they're the best parts of apple pie, made easy and portable!
10 egg rolls

Ingredients

Apple Filling

  • 2 cups (280 g) apples peeled, cored, diced (about 2 medium crisp apples, e.g. Honeycrisp or Granny Smith)
  • 2 tbsp (28 g) unsalted butter
  • 1/3 cup (65 g) dark brown sugar light brown sugar also works
  • 1 tsp ground cinnamon
  • 1/8 tsp (0.13 tsp) ground nutmeg
  • 1 tbsp (15 ml) lemon juice fresh preferred
  • 2 tsp (5 g) cornstarch
  • 1 tbsp (15 ml) water
  • 1 tsp (5 ml) vanilla extract

Assembly

  • 10 egg roll wrappers
  • 1 egg beaten (for sealing)
  • neutral oil for frying such as canola or vegetable oil, enough for about 2 inches in your frying pan

Cinnamon Sugar Coating

  • 1/4 cup (50 g) granulated sugar
  • 1 tsp ground cinnamon

Optional Toppings

  • caramel sauce, whipped cream, or vanilla ice cream for serving

Equipment

  • Large skillet
  • Mixing bowl
  • Deep Pan or Dutch Oven
  • Tongs
  • Paper towels

Instructions
 

  1. Make the Apple Filling: In a large skillet, melt butter over medium heat. Add brown sugar, cinnamon, and nutmeg; cook, stirring, for about 1 minute until the sugar is melted and everything is fragrant.
  2. Add diced apples and lemon juice. Stir and cook for about 5–6 minutes, just until apples are soft but not mushy.
  3. In a small bowl, whisk together cornstarch and water until smooth. Stir the slurry and vanilla extract into the skillet. Cook until the mixture thickens and looks glossy, about 1 minute. Remove from heat and let cool to room temperature.
  4. Assemble Egg Rolls: Lay an egg roll wrapper on a clean surface in a diamond shape. Spoon 1–2 tablespoons of cooled apple filling in the center. Brush the edges lightly with beaten egg. Fold the bottom up over the filling, then fold in the sides, and roll up tightly like a burrito. Press to seal. Repeat with remaining wrappers and filling.
  5. Fry: Pour oil into a deep pan to a depth of about 2 inches. Heat to 350°F (175°C). Fry egg rolls in batches for 2–3 minutes per side, turning once, until golden and crisp. Do not overcrowd the pan. Use tongs to transfer fried egg rolls to a paper towel-lined plate to drain.
  6. Cinnamon Sugar Coating: While still warm, roll the fried egg rolls in a mixture of granulated sugar and cinnamon until coated all around.
  7. Serve warm with caramel sauce, whipped cream, or ice cream, if desired.

Notes

Make ahead: Uncooked, assembled egg rolls can be covered and stored in the fridge for up to 24 hours, or frozen (unfried) up to 2 months. Fry from frozen, adding 1–2 additional minutes to frying time.
For a lighter version, bake egg rolls at 400°F (200°C) for 15–18 minutes, flipping once. Texture will be crisp but not as shatteringly crunchy as fried.
Try swapping apples for pears or peaches, or add a handful of chopped nuts for extra crunch!

Nutrition

Calories: 170kcal | Carbohydrates: 29g | Protein: 2g | Fat: 5g | Saturated Fat: 1.5g | Cholesterol: 10mg | Sodium: 120mg | Potassium: 66mg | Fiber: 1g | Sugar: 13g | Vitamin A: 80IU | Vitamin C: 2mg | Calcium: 17mg | Iron: 0.7mg

Creamy, fluffy, and totally irresistible, this peanut butter fluff blends cream cheese, peanut butter, vanilla pudding, milk, and whipped topping into one swoony bowl of dessert dip. Spoon-licking encouraged.

This one’s for the peanut butter lovers. You know who you are. The ones who “accidentally” leave a spoon in the jar like it’s no big deal. This recipe? It’s like that moment, but fully embraced. Silky-soft, sweet-but-salty, and just the right kind of nostalgic, this peanut butter fluff is part dip, part dessert, part unspoken joy. You can serve it up with graham crackers, apple slices, or a sneaky finger swipe—it doesn’t judge.

Table of Contents

Peanut Butter Fluff

Why You’ll Love this Peanut Butter Fluff

So here’s the thing. Peanut butter fluff isn’t trying to win a fancy award. It’s just here to taste like a dream and get eaten fast.

  • Ridiculously simple to make: You just mix, fold, chill, and boom—you’re a fluff person now.
  • Creamy with a salty kick: The peanut butter and cream cheese join forces to create a sweet-savory silkiness that’s chef’s kiss.
  • Make it ahead-friendly: It actually tastes better after a few hours in the fridge, once everything has time to chillax together.
  • Great for dipping (or scooping): Pair it with crunchy cookies, fruit slices, or an unspoken spoon situation—we’re not here to judge.
  • You can dress it up or down: Top it with crushed peanut butter cups, drizzle caramel, sprinkle chips…or don’t. It’s incredibly chill like that.

Peanut Butter Fluff

Ingredient Notes

There’s just a small gathering of ingredients here, but they each bring something very important to the table. Literally.

  • Cream cheese: Adds tangy richness and helps stabilize the fluff so it’s creamy without being soup. Use it softened for easy mixing.
  • Creamy peanut butter: Go with the classic, no-stir kind if you can. Natural peanut butters can be a little too oily or gritty here.
  • Instant vanilla pudding mix: No cooking required, and it sets super fast. It provides sweetness and gives the fluff that silky body.
  • Milk: Cold milk activates the pudding. Whole milk gives the richest texture, but 2% works fine too.
  • Whipped topping: Classic frozen whipped topping like Cool Whip makes this ultra-light. Whipped cream isn’t quite sturdy enough.
  • Optional toppings: Crushed peanut butter cups, mini chocolate chips, cookie crumbs—whatever your peanut buttery heart desires.

Peanut Butter Fluff

How To Make This Peanut Butter Fluff

This whole thing reads like a love letter to creamy things in bowls. Let’s get the hand mixer ready and dive in.

  • Beat the cream cheese until smooth: In a big mixing bowl, beat it on medium speed until it looks fluffy and lump-free. Scrape those sides like your life depends on it (because it kind of does, texture-wise).
  • Add the peanut butter and beat together: Plop in the peanut butter and mix again for a couple of minutes. The color turns into this dreamy light tan, like pudding’s flirty cousin.
  • Add the pudding mix and slowly blend in milk: Toss in the dry pudding mix and beat it in, then stream in the milk a little at a time. Mixing slowly helps avoid lumps and sudden surprises. Scrape the bowl again, because stubborn bits like to hide.
  • Fold in the whipped topping gently: This step turns the whole mixture into cloud fluff. Switch to a spatula and use big, slow folds until it’s all one happy, streak-free mix.
  • Chill for a few hours: Scoop it into a serving dish, cover it, and let it chill for 2 to 3 hours. Overnight? Even better. The flavors settle in and the texture becomes spoonable magic.
  • Add optional toppings and serve: Just before serving, zhuzh it up however you like. Then watch people linger near the bowl like it owes them money.

Peanut Butter Fluff

Storage Options

If you’re lucky enough to end up with leftovers (or you made a double batch knowing what happens), here’s the scoop on storing this fluff.

In the fridge, it holds up beautifully for about 4 to 5 days. Cover it tightly so it doesn’t take on the scent of fridge mysteries. Stir it gently before serving if it’s been sitting—a tiny fluff revival, if you will.

Now, the freezer. Technically, yes, you can freeze peanut butter fluff. That said, the texture shifts after thawing. It’ll be denser, with a less airy feel. Still tasty, but more like a peanut butter cheesecake mousse. If you go this route, freeze it in small portions, and let it thaw overnight in the fridge before eating.

Reheating? Don’t. This is a chilled dish. Warm fluff is just not part of this universe.

Variations and Substitutions

Want to make this peanut butter fluff your own? Good. It’s the kind of recipe that cheers you on while wearing a cozy sweater.

  • Chocolate pudding mix instead of vanilla: For that peanut butter cup vibe, use chocolate instant pudding instead. The color gets darker, the result: richer.
  • Crushed Oreos folded in: If you want texture inside the fluff, go wild and stir in some cookie bits. It’s like cookies and cream got peanut buttered.
  • Swap Cool Whip with homemade whipped cream: You can use stabilized whipped cream (extra whipped until stiff), but it may soften quicker.
  • Add banana slices and crushed Nilla wafers: Basically turns it into a pudding-fluff-hybrid situation. Reminds me a bit of these peanut butter & banana ice cream sandwiches.
  • Top with salted caramel drizzle and flaky sea salt: A fancy touch if you’re serving this to guests (or yourself in a mood). Sweet, sticky, and that salty pop? Yes, please.

Peanut Butter Fluff

What to Serve with Peanut Butter Fluff

Honestly, half the fun of this dish is the dipping situation. Pick a few, set them out, and watch the fluff disappear.

  • Graham crackers or vanilla wafers: These are the classic dippers. Crunchy, a little sweet, and perfectly scoop-able. Gets that nostalgic lunchbox energy going.
  • Pretzels (especially the twisty kind): That salty crunch with the fluff is a total win. Plus, something about the combo makes you keep going back “just for one more.”
  • Apple slices: For a lighter, crisp contrast. I like slightly tart apples here—like Granny Smith—for a little zing that cuts the richness.
  • Chocolate chip cookies: Chewy or crunchy work, depending on your cookie vibe. It’s basically turning dessert into a deluxe dessert.
  • Straight up with a spoon: No shame in the scoop game. Sometimes, dippers feel unnecessary, especially around hour three of chilling when it’s peak fluff.

Frequently Asked Questions

Can I make peanut butter fluff ahead of time?

Absolutely, and honestly, you should. It tastes better after a few hours in the fridge—everything has a chance to meld, and the texture sets up into that perfect scoopable fluff. You can even make it the night before and not worry about a single thing until it’s snack time.

What kind of peanut butter works best?

Stick with creamy, no-stir peanut butter if you can. The natural kind with the oil on top is delicious, but it can mess with the fluff’s consistency. Classic brands like Jif or Skippy keep things smooth and stable. Crunchy peanut butter could be fun, but it changes the texture completely.

Can I freeze peanut butter fluff for later?

You *can* freeze it, but just know that the texture won’t be quite the same after thawing. It becomes firmer and less airy, kind of like peanut butter mousse. Freeze it in small containers, thaw in the fridge overnight, and give it a gentle stir before serving.

Is this gluten-free?

The fluff itself is naturally gluten-free if all your ingredients are certified (check that vanilla pudding mix label). But if you serve it with cookies or crackers, those might not be. Just keep an eye on your dippers, and you’re good to go.

Peanut Butter Fluff

Peanut Butter Fluff

Prep Time 10 minutes
Chilling Time 2 hours
Total Time 2 hours 10 minutes
Creamy, fluffy, and totally irresistible, this peanut butter fluff blends cream cheese, peanut butter, vanilla pudding, milk, and whipped topping into an ultra-silky dessert dip. Serve with graham crackers, fruit, cookies, or just a spoon—and be ready for it to vanish fast!
8 servings

Ingredients

Main Ingredients

  • 8 oz (225 g) cream cheese softened
  • 3/4 cup (180 g) creamy peanut butter classic no-stir is best
  • 1 packet (96 g) instant vanilla pudding mix 3.4 oz (96g); not prepared
  • 1 cup (240 ml) milk cold; whole or 2% preferred
  • 8 oz (225 g) frozen whipped topping thawed (e.g. Cool Whip)

Optional Toppings

  • crushed peanut butter cups
  • mini chocolate chips
  • cookie crumbs

Equipment

  • Electric mixer
  • Mixing bowl
  • Spatula

Instructions
 

  1. Beat the cream cheese: In a large mixing bowl, beat the softened cream cheese with an electric mixer on medium speed until smooth and fluffy, scraping down the sides as needed.
  2. Add peanut butter: Add the creamy peanut butter and beat again until completely combined and creamy.
  3. Add pudding mix and milk: Sprinkle in the dry instant vanilla pudding mix. Begin mixing, then slowly pour in the cold milk, blending until smooth and silky. Scrape the bowl as needed.
  4. Fold in whipped topping: Add the thawed whipped topping and gently fold it into the peanut butter mixture with a spatula until fully combined and streak-free.
  5. Chill: Transfer the fluff to a serving dish, cover, and chill in the refrigerator for 2 to 3 hours (or overnight) for best texture and flavor.
  6. Top and serve: Add your desired toppings before serving. Serve with graham crackers, cookies, fruit, pretzels, or just a spoon!

Notes

Store leftovers covered in the refrigerator for up to 4-5 days. If freezing, thaw overnight in the fridge and stir gently before serving; texture will be somewhat denser. Do not reheat. For peanut butter cup flavor, use chocolate pudding instead of vanilla. Add-ins like crushed cookies or banana slices are welcome! To make gluten-free, ensure your pudding mix and all dip-ins are gluten-free.

Nutrition

Calories: 320kcal | Carbohydrates: 26g | Protein: 6g | Fat: 21g | Saturated Fat: 7g | Cholesterol: 25mg | Sodium: 330mg | Potassium: 180mg | Fiber: 1g | Sugar: 20g | Vitamin A: 300IU | Calcium: 130mg | Iron: 0.6mg

Let's Get Cooking!

100+ Recipes for Busy Nights

In a time crunch? Take a look around and browse plenty of recipes to help you get dinner ready and on the table on those busy nights!

Sweet Recipes

Pumpkin Banana Muffins

Pumpkin Banana Muffins Recipe

Strawberry Pie Bars

Strawberry Pie Bars Easy Oven Recipe

White Chocolate Raspberry Muffins

White Chocolate Raspberry Muffins Recipe

Snickerdoodle Muffins

Snickerdoodle Muffins Recipe for Oven

PIN NOW

Follow KitchenetteBlog on Pinterest

Love cozy recipes that actually make it to the table? On Pinterest, I share new comfort-food ideas every week—desserts, dinners, and those little snack cravings that hit at midnight. Come pin with me and never run out of kitchen inspo.

Savory Recipes

Turkey Tetrazzini

Turkey Tetrazzini Baked Pasta Recipe

Grilled Chicken Panini Sandwich

Grilled Chicken Panini Sandwich Recipe

Sweet Potato Cornbread

Sweet Potato Cornbread Recipe Oven Baked

Classic Waldorf Salad

Waldorf Salad Simple Classic Recipe

Get 5 Recipes to Simplify Your Life!

Delicious, versatile recipes you can make over and over.