Get 5 recipes to simplify your life:

easy, delicious, real food recipes

Latest Recipes

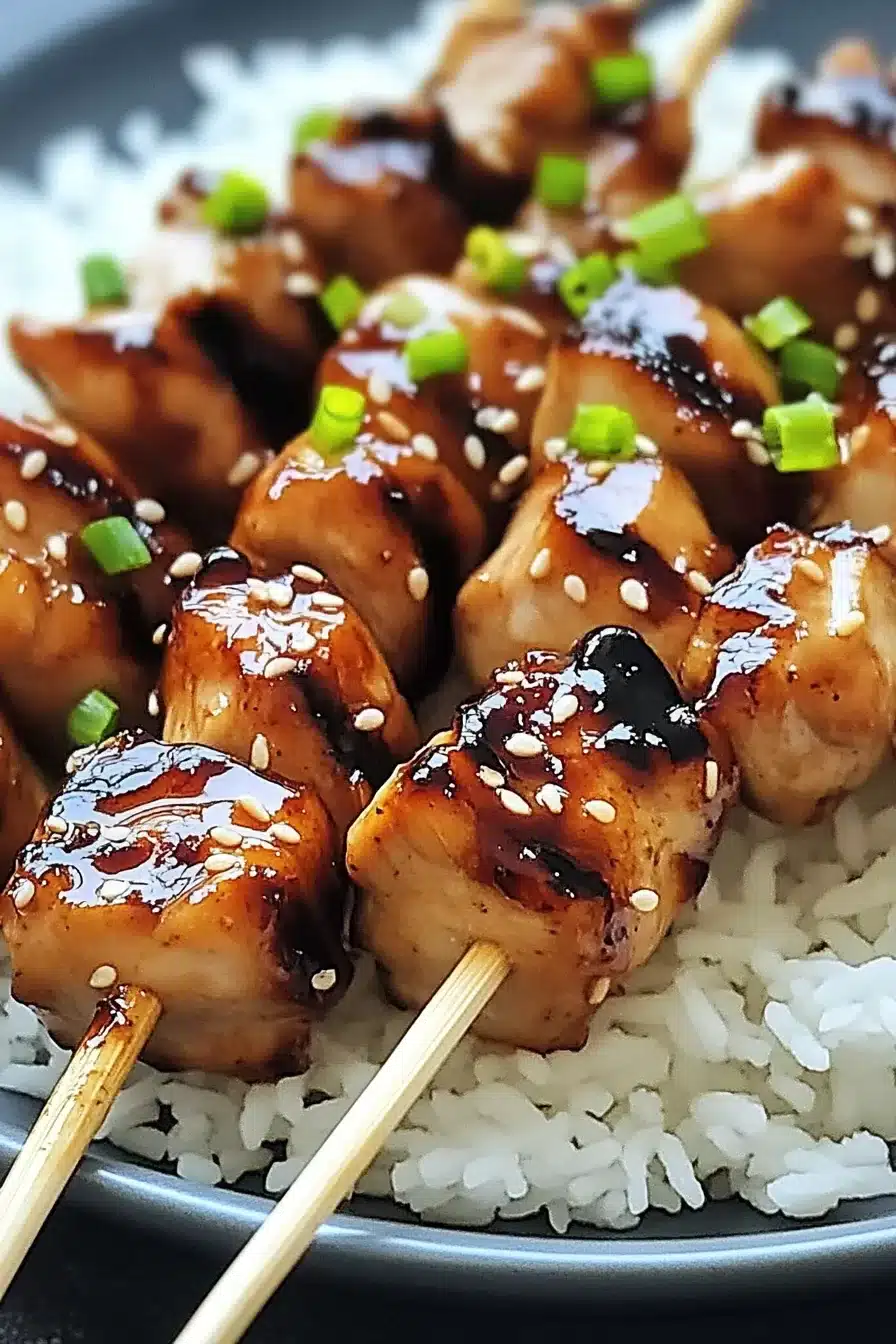
Sweet, sticky, and straight from the grill (or skillet if you’re indoor-inclined), these teriyaki chicken skewers get their magic from juicy chicken thighs, brown sugar, soy sauce, garlic, and a glossy drizzle of homemade sauce. They’re savory with just a whisper of sweetness, and yes, they sizzle. Tempted yet?

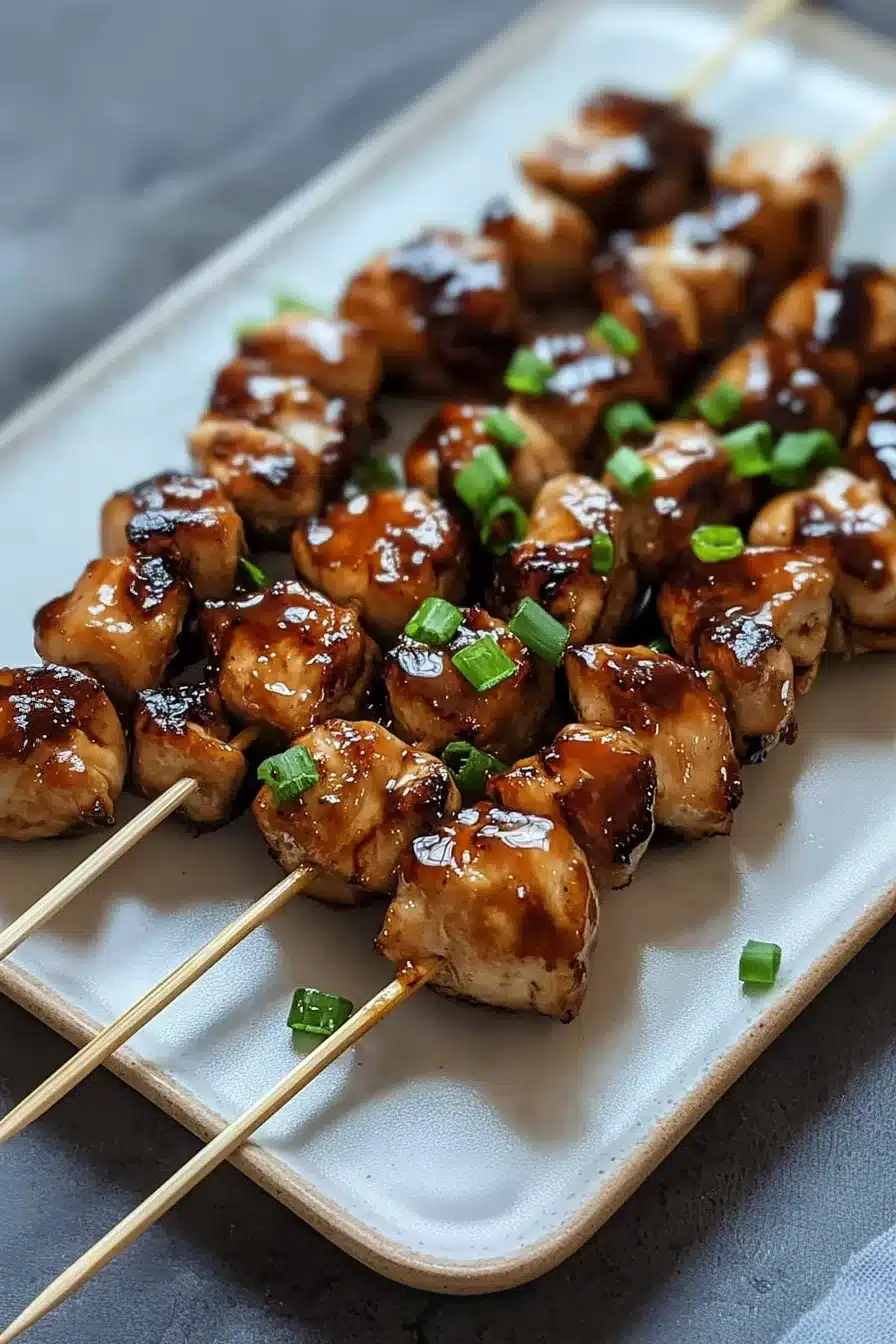
These lend-your-neighbors-some-napkins type skewers are all about that juicy tender interior and caramelized edges that almost crackle. Whether you’re fanning smoke out the door or standin’ proud by your grill, they’re bound to make you feel like the dinner boss.

Marinated in a punchy ginger-garlic-soy bath with just enough honey to feel cheeky, these teriyaki chicken skewers straddle cozy and cookout like pros. Serve them straight-up with a bowl of rice, pile onto salads, or wave them like edible wands over dipping bowls of extra sauce. They’re also just fun to eat. On a stick. That’s a strong “yes” from me.

Table of Contents

Teriyaki Chicken Skewers

Why You’ll Love this Teriyaki Chicken Skewers Recipe

These skewers don’t need a big pitch—they speak for themselves when they hit the grill. But let’s break it down anyway, just in case you’re still undecided.

  • Ridiculously simple to make: You toss chicken in a quick marinade, thread them on sticks, and boom—you’re halfway done.
  • Glossy, sticky sauce magic: The homemade teriyaki goes from loose and gingery to thick and lacquered with just a touch of cornstarch fun.
  • Back-pocket meal win: Whether you’re solo feasting or feeding five, this scales up (or down) without fuss.
  • Versatile cooking options: Don’t want to fire up the grill? Skillet’s fine. Pan. Grill pan. Whatever gets hot and sizzles.
  • Flavor that travels well: They hold up like champs in lunchboxes, picnic baskets, and mid-fridge raids.
  • No mystery ingredients: You control the sauce, which means it’s actually garlic-forward and not cloyingly sweet.

Teriyaki Chicken Skewers

Ingredient Notes

Just a heads-up—the sauce is where this thing really lives. But the other components? Still pulling their weight.

  • Chicken thighs: They’re more forgiving than breasts and stay tender even if you’re distracted mid-grill. But if you’re a strict white-meat person, you can swap.
  • Soy sauce: Go for regular, not low-sodium, unless you’re watching salt. It’s the main umami punch.
  • Brown sugar: Adds depth and a hint of molasses warmth—it’s not just sweet, it’s…moody sweet.
  • Mirin: This sweet rice wine smooths everything out and whispers, “I’m authentic.” (But you can sub a little extra honey if you’re out.)
  • Rice vinegar: Brightens and lifts so the sauce isn’t too heavy.
  • Garlic & ginger: Fresh is everything here. The grated ginger should smell like it could clear your sinuses—and it might.
  • Honey: Balances the savory kick and gives the final glaze its shine factor.
  • Sesame oil: Just a splash adds a toasty finish; don’t skip this. Unless you dislike flavor, but that’s between you and your palate.

Teriyaki Chicken Skewers

How To Make This Teriyaki Chicken Skewers Recipe

If you can whisk, skewer, and flip things without burning your eyebrows off, you’ve got this covered—and I’m here for moral (and recipe) support.

  • Make your thickener first: In a small bowl, whisk cornstarch and water until smooth. No lumps. Set that aside while your pan heats up.

  • Build the sauce flavor: In a medium saucepan, combine soy sauce, brown sugar, garlic, mirin, rice vinegar, honey, ginger, and sesame oil. Let it gently bubble and mingle over medium heat, just until it hits a low boil and everyone’s cozy.

  • Thicken it like a champ: Reduce the heat, pour in that cornstarch slurry, and stir. Within a couple minutes, it’ll turn from “soup” to “satin robe.” Remove from heat and cool completely so it doesn’t cook your chicken on contact.

  • Marinate the chicken: Add your chicken cubes to a big bowl or a zip-top bag, pour in half the cooled teriyaki sauce, and massage like it’s spa day. Toss it in the fridge for at least 30 minutes (but 2 hours? Dreamy).

  • Soak your skewers: Unless you love flaming sticks, soak those bamboo skewers in water for 30 minutes. It’s not optional.

  • Thread and prep: Once marinated, thread the chicken onto the soaked skewers. Leave a little wiggle room between each chunk so they cook evenly (don’t smush them together like a chicken crowd).

  • Grill method: Preheat your grill to medium-high, around 375°F. Oil the grates to avoid sticky heartbreak. Grill the skewers for about 12–15 minutes, flipping every few minutes. In the last 5 minutes, brush with reserved sauce until gloriously sticky and glazed.

  • Stovetop method: Use a grill pan or skillet if you’re inside today. Medium-high heat, a touch of oil, then 10–12 minutes of flipping and brushing with sauce until they hit 165°F and shimmer a little.

  • Rest and glamorize: Let the skewers rest for 3–5 minutes so the juices settle. Heat that last bit of sauce, drizzle away, then sprinkle sesame seeds and green onions like you’re a food stylist on TV.

Teriyaki Chicken Skewers

Storage Options

Okay, so say you didn’t inhale all the skewers (respect, honestly). Here’s how to keep things tasty for later.

In the fridge, store leftovers in an airtight container for up to 4 days. The sauce will thicken a bit more when chilled, but it reheats nicely with a quick zap in the microwave or a warm-up in a skillet over medium-low heat.

Yes, you can absolutely freeze them. Wrap the cooked skewers in foil, then stash them in a freezer bag. (Or just dump them in if you’re a chaotic neutral like me.) They’ll keep for about 2 months. When you reheat, go low and slow—you want the chicken to stay juicy, not rubbery.

And if you’re wondering whether the sauce can be frozen separately—yes, indeedy! It actually makes a great glaze-on-command situation. Just label it (because “brown stuff in jar” is vague at best).

Variations and Substitutions

Feel like tinkering? You’ve got options. The sauce is totally adaptable, and so is the protein, if chicken isn’t in the cards.

  • Chicken breasts instead of thighs: They’ll work, but keep a close eye on the grill—white meat dries out faster, so don’t overcook.
  • Gluten-free swap: Use tamari or coconut aminos in place of soy sauce, and check that your mirin is certified GF if needed.
  • Pineapple chaser: Add chunks of fresh pineapple between the chicken pieces. They caramelize beautifully and add a juicy pop.
  • Spicy kick: Stir a bit of sriracha or chili garlic sauce into the marinade if you want to raise eyebrows at the dinner table.
  • Alternative protein: Swap the chicken for cubed tofu, shrimp, or even beef. If you try shrimp, you’ll also love this shrimp chow mein stir fry.

Teriyaki Chicken Skewers

What to Serve with Teriyaki Chicken Skewers

Honestly, these skewers are comfy hanging out with just about anything carb-y, crunchy, or green. You decide their vibe.

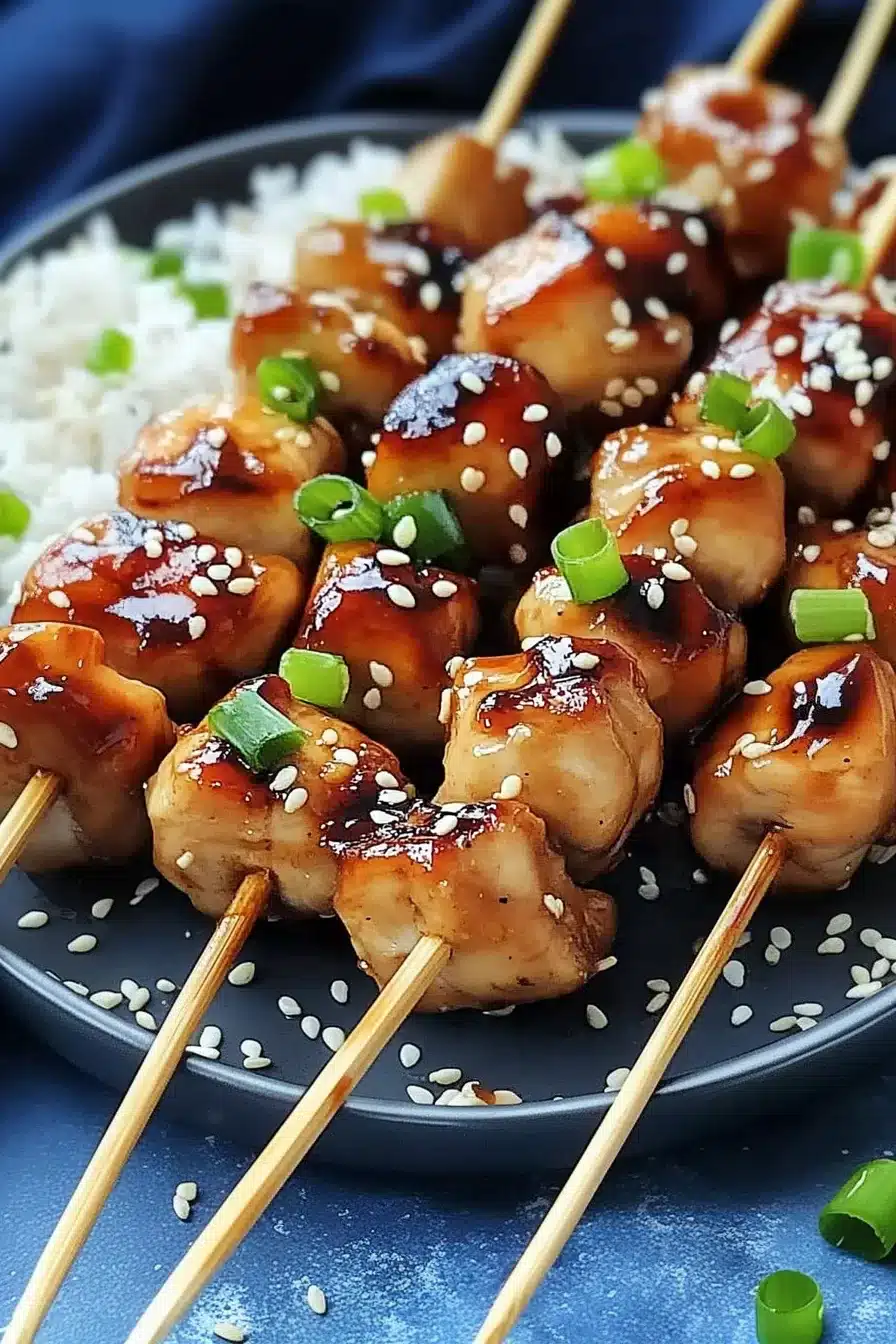
  • Steamed rice or coconut rice: A soft bed of jasmine or even sticky rice is the classic go-to. It soaks up sauce like a sponge with dreams. Coconut rice adds a subtle roundness that plays off the soy and ginger beautifully.

  • Sesame slaw: Shredded cabbage with sesame oil, rice vinegar, and a touch of honey balances out the rich chicken. Crunchy, cold, and a teensy bit tangy—yes please.

  • Grilled or roasted veggies: Toss together bell peppers, onions, and zucchini for that steakhouse-on-a-skewer vibe. Or if you’re over summer squash (same), try blistered green beans with garlic. Simple, good, hot.

  • Noodles like soba or ramen: Serve cold sesame noodles for contrast, or a tangle of soy-dressed ramen with scallions. Quick and slurpable. Or hey, if you’re in a pasta mood, this butternut squash pasta isn’t traditional, but tastes fab alongside.

Teriyaki Chicken Skewers

Frequently Asked Questions

Can I make the teriyaki sauce ahead of time?

Absolutely! The sauce can be made up to 5 days in advance. Just let it cool and stash it in the fridge in a sealed jar or container. It may thicken a bit more as it chills, but that just makes it perfect for brushing onto hot food. Reheat it gently on the stove or zap it in the microwave for 20–30 seconds if it’s too stiff.

Do I have to use chicken thighs?

You don’t have to, but I highly recommend them if you want juicy, flavorful bites that won’t dry out. Chicken breasts are fine, just keep a close eye while cooking to avoid turning them into chewy little sadness cubes. Want to mix it up even more? Try it with tofu, shrimp, or beef.

What’s the best way to reheat leftovers?

If using the microwave, a damp paper towel on top helps prevent dried-out chicken. Otherwise, the stovetop is your friend—medium-low heat with a splash of water or reserved sauce until warmed through. If you’re feeling extra, toss them under the broiler for a couple minutes to crisp the edges up again.

Can I bake these skewers instead?

Yes, you can! Bake the skewers in a 400°F oven on a foil-lined sheet for 20–25 minutes, turning halfway through. Baste with sauce during the last 5 minutes for that sticky finish. They won’t get the char from a grill, but they’ll still be tasty and caramelized if you crank up the broiler at the end.

Teriyaki Chicken Skewers

Teriyaki Chicken Skewers

Prep Time 15 minutes
Cook Time 15 minutes
Marinating Time 30 minutes
Total Time 1 hour 15 minutes
Sweet, sticky, and irresistibly glossy, these teriyaki chicken skewers sizzle on the grill (or stovetop) and get their big flavor from juicy chicken thighs, brown sugar, soy sauce, ginger, and garlic. With a glossy homemade sauce, these skewers are equally perfect for a weeknight dinner or a backyard party—and they're just plain fun to eat!
4 servings

Ingredients

Teriyaki Sauce

  • 1/3 cup (80 ml) soy sauce
  • 3 tbsp (40 g) brown sugar packed
  • 2 tbsp (30 ml) mirin or extra honey if out
  • 1 tbsp (15 ml) rice vinegar
  • 2 tbsp (30 ml) honey
  • 3 cloves garlic finely grated
  • 1 tbsp (15 g) fresh ginger grated
  • 1 tsp (5 ml) sesame oil
  • 2 tsp (6 g) cornstarch
  • 2 tbsp (30 ml) water to mix with cornstarch

Chicken Skewers

  • 2 lb (900 g) boneless skinless chicken thighs cut into 1.5 inch pieces
  • 1 tbsp (15 ml) vegetable oil for grill/grill pan
  • bamboo skewers soaked for 30 min if grilling

Garnishes

  • toasted sesame seeds
  • sliced green onions

Equipment

  • Grill or Grill Pan
  • Medium saucepan
  • Mixing bowls
  • Bamboo Skewers (soaked)

Instructions
 

  1. Whisk the thickener: In a small bowl, thoroughly whisk cornstarch and water until smooth. Set aside.
  2. Start the sauce: In a medium saucepan over medium heat, combine soy sauce, brown sugar, garlic, mirin, rice vinegar, honey, ginger, and sesame oil. Bring to a gentle simmer, stirring occasionally.
  3. Thicken sauce: Reduce heat. Stir in cornstarch slurry. Cook, stirring, for 1–2 minutes until thick and glossy. Remove from heat and let cool completely.
  4. Marinate the chicken: Place chicken thigh pieces in a large bowl or zip-top bag. Pour in half of the cooled teriyaki sauce. Toss well to coat, then marinate in the fridge for at least 30 minutes, up to 2 hours for maximum flavor.
  5. Soak skewers: (If grilling) Soak bamboo skewers in water for at least 30 minutes to prevent burning.
  6. Thread chicken: Thread marinated chicken pieces onto soaked skewers, leaving a bit of space between each piece for even cooking.
  7. Grill method: Preheat grill to medium-high (about 375°F/190°C). Oil the grates. Grill skewers 12–15 minutes, turning every 3–4 minutes. In the last 5 minutes, brush with reserved sauce until caramelized and sticky. Chicken should reach 165°F/74°C.
  8. Stovetop method: Heat a grill pan or skillet over medium-high with a little oil. Cook skewers 10–12 minutes, turning and brushing with sauce until cooked through and glossy.
  9. Rest and serve: Let the skewers rest 3–5 minutes. Drizzle with remaining sauce, then sprinkle with sesame seeds and sliced green onions. Serve hot.

Notes

Swap chicken thighs for breasts if needed—just don’t overcook. Want it spicy? Stir a little sriracha into the marinade. For extra punch, thread pineapple chunks between chicken pieces or swap in shrimp, beef, or tofu. Store leftovers refrigerated up to 4 days or freeze for 2 months. Sauce can be made ahead (up to 5 days).

Nutrition

Calories: 370kcal | Carbohydrates: 22g | Protein: 37g | Fat: 14g | Saturated Fat: 3g | Cholesterol: 180mg | Sodium: 1130mg | Potassium: 520mg | Sugar: 11g | Vitamin A: 75IU | Vitamin C: 2mg | Calcium: 27mg | Iron: 2mg

Spicy, garlicky, and just the right kind of messy—in the best way. This spaghetti arrabbiata brings together olive oil, garlic, fresh chili peppers, and crushed tomatoes for a beautifully bold pasta you’ll crave on repeat.

There’s something deeply satisfying about a big twirl of spaghetti coated in a fiery red sauce, steam curling up from the plate. Whether it’s a chilly night in or you’re just in a mood for something with a little sass, this one’s got you covered. Grab a glass of wine. Let’s make dinner.

Table of Contents

Spaghetti Arrabbiata

Why You’ll Love this Spaghetti Arrabbiata

This is one of those dishes that feels comforting and oddly thrilling at the same time. It’s simple, spicy, and deeply satisfying.

  • Ridiculously simple to make: You sauté, simmer, swirl, and boom—dinner’s served faster than it takes to scroll a food haul on TikTok.
  • Big flavor, few ingredients: It leans hard on garlic, chilies, and good tomatoes. No fluff, just flavor.
  • Make it your spice-level: Dial the chilies up or down depending on your current mood or who you’re feeding.
  • Weeknight friendly: You can pull it together with one eye closed and one hand holding a glass of vino (not that I’m promoting recklessness).
  • Smells like a cozy kitchen dream: As soon as garlic hits oil… oof. That aroma alone is practically an appetizer.
  • Plays well with add-ins: Got leftover roasted veg or cooked shrimp? Toss it in.

Spaghetti Arrabbiata

Ingredient Notes

We’re keeping it classic here. A few pantry staples, some fresh heat, and love (aka stirring things a lot) really bring it home.

  • Extra-virgin olive oil: Adds richness and helps carry the garlic-chili flavor. Use the good stuff if you can; you’ll taste it.
  • Onion or shallot: Go with shallot for a slightly sweeter, gentler vibe. Onion if you want it more assertive. Either one works.
  • Garlic: Don’t hold back. The thin slices caramelize into this toasty, mellow layer of flavor. Just don’t let it burn or it’ll taste bitter.
  • Fresh chili peppers: These bring the heat. Fresno, Thai, even jalapeños if you’re feeling wild. Seed them unless you like things nuclear.
  • Tomato paste: Adds depth and gives that intensely tomatoey backbone. Stir it well—it likes to stick to the pan.
  • Crushed tomatoes: The base of our sauce. Go for a good quality can; San Marzano if you’re feeling fancy.
  • Sugar: Just a little to balance all the acidity. Not to be skipped unless you love a sour sauce.
  • Spaghetti: Holds the sauce perfectly. But if you only have penne? Totally fine. It’s still arrabbiata in spirit.
  • Basil: For bright, fresh contrast. It lifts the whole thing. Also, it looks pretty. Priorities.
  • Parmesan cheese: Optional but highly recommended. Saltiness and creaminess for the win.

Spaghetti Arrabbiata

How To Make This Spaghetti Arrabbiata

We’re making a sauce that hums with garlic, sings with heat, and wraps around every strand of noodle like a spicy hug.

  • Sauté the aromatics: Warm the olive oil over medium-low heat. Add onion, garlic, and the chopped chilies. Stir frequently and don’t wander off—burnt garlic is a real party pooper. Five to seven minutes until everything’s soft and fragrant is perfect.

  • Cook the tomato paste: Push everything to the side, plop in the tomato paste, and stir it like it owes you money for 2–3 minutes. It should darken a bit and smell super-savory.

  • Add crushed tomatoes and seasonings: Stir in the crushed tomatoes, sugar, salt, and black pepper. Let it all become best friends as the sauce simmers for 10–15 minutes. Stir here and there so no scorching sneaks in.

  • Cook the pasta: Meanwhile, get your spaghetti boiling in a generously salted pot of water. Cook until al dente. Reserve a mug of pasta water before draining—you might need it later.

  • Finish the sauce: When it’s thickened and lovely, kill the heat and stir in a generous handful of basil. Taste. Adjust salt or pepper if something feels flat.

  • Combine pasta and sauce: Add the drained pasta right into the skillet. Toss like your life depends on it. If it looks a little stiff, ladle in some of that starchy pasta water. Magic.

  • Serve and garnish: Top with more basil and grated Parmesan if you’re into that. (I am. I definitely am.)

Spaghetti Arrabbiata

Storage Options

Let’s be honest: this rarely makes it to leftovers stage. But if you’re blessed with restraint (or maybe made a double batch), here’s how to keep it tasty.

Pop any extras into an airtight container and slide it into the fridge. It’ll keep happily for 3 to 4 days. The flavors deepen a bit overnight, too—kind of like revenge, but more edible.

Reheating is easy enough. Add a splash of water or extra olive oil in a pan over low heat and stir until warm. Microwaving works too, but try covering it with a damp paper towel so it doesn’t dry out.

Now, freezing? Technically, yes—you can freeze arrabbiata. Portion it into freezer-safe bags or containers (sauce and pasta separately is best) and freeze up to 2 months. But heads-up: the pasta texture goes a little soggy when thawed. If you know you’ll want leftovers, consider freezing just the sauce and boiling fresh noodles later.

Variations and Substitutions

This dish has just the right amount of backbone to handle changes without losing its spirit. Let’s riff a little.

  • No fresh chili peppers? A pinch of red pepper flakes works fine. Start small and sneak up on your spice tolerance.
  • Low on tomatoes? Use a combo of whatever canned tomatoes you’ve got on hand. Just blend them down a bit if they’re whole.
  • Need it gluten-free? Sub your favorite gluten-free pasta. Some cling to sauce better than others, so test a few if you’re picky.
  • Low on basil? Flat-leaf parsley works in a pinch. Or skip herbs entirely if you’re aiming for pantry-only minimalist chic.
  • Add-ins welcome: Cooked sausage, roasted mushrooms, grilled shrimp—or try some crumbled baked tofu for a vegan option.
  • Speaking of veggies: Toss in sautéed zucchini or roasted eggplant. They soak up the sauce beautifully.

Spaghetti Arrabbiata

What to Serve with Spaghetti Arrabbiata

This is a properly satisfying main dish, but a little something on the side never hurts. Here’s how I like to round it out.

  • If you’ve already got the oven going, pair this with some crisp, garlicky bread to scoop up every last bit of sauce. It’s simple, it’s messy, it’s perfect. If you’re more of a baking person, these bacon basil cornbread muffins bring crunch and savory herbs to the table.

  • A good salad balances the heat. Think a chilled arugula salad with lemon vinaigrette and shavings of Parmesan. Sharp, cool, and just bossy enough to stand next to all that chili-spiked spaghetti.

  • Want something a bit more substantial? A side of roasted or grilled veggies like broccolini or bell peppers adds some color and contrast without stealing the show.

  • Feeling fancy-ish? Pop open a bold red wine, maybe a Nero d’Avola or Sangiovese, and go heavy with that Parmesan on top. You’ve earned it.

  • Prefer something lighter and sea-kissed? This pan-seared cod with rainbow chard is such a lovely contrast to the fiery pasta.

Spaghetti Arrabbiata

Frequently Asked Questions

How spicy is spaghetti arrabbiata supposed to be?

Well, “arrabbiata” literally means “angry” in Italian—so yes, it’s meant to bring a little fire. But how spicy? That’s entirely up to you. Mild chilies keep it gentle, while bird’s eye or Thai peppers will light a glorious fire in your soul (and mouth). Start with one chili, taste, and work your way up if you’re feeling bold.

Can I make this recipe vegan?

Absolutely. This dish is already vegan unless you add the Parmesan at the end, so you’re good to go without it. Or you can sprinkle on a bit of nutritional yeast or your favorite vegan Parm. Either way, you won’t miss a thing—just lots of spice, tomato goodness, and satisfied forkfuls.

What type of pasta works best with arrabbiata sauce?

Traditionally, spaghetti is the go-to—its long strands cradle the sauce like a cozy blanket. But you’re not locked in. Penne, rigatoni, or bucatini also do a fine job soaking up all that spicy red gold. Use what you love or already have in your pantry, and it’ll still be all kinds of wonderful.

Can I make the sauce ahead of time?

Totally, and it actually gets better with a bit of rest. Store the sauce on its own in the fridge for up to 4 days, then heat and toss with freshly cooked pasta when you’re ready to eat. It’s perfect for meal-prepping or playing it cool on a stressful weeknight.

Spaghetti Arrabbiata

Spaghetti Arrabbiata

Prep Time 10 minutes
Cook Time 25 minutes
Total Time 35 minutes
Spicy, garlicky, and the best kind of messy—this classic spaghetti arrabbiata brings together olive oil, garlic, fresh chilies, and crushed tomatoes for a fiery, deeply satisfying pasta experience. Perfect for chilly nights or anytime you crave something bold and cozy, all in under 40 minutes.
4 servings

Ingredients

Arrabbiata Sauce

  • 3 tbsp (45 ml) extra-virgin olive oil use good quality if possible
  • 1 medium onion or shallot finely chopped (shallot for sweetness or onion for a bolder flavor)
  • 5 garlic cloves thinly sliced
  • 2 fresh chili peppers Fresno, Thai, or jalapeño, finely chopped; seed for less heat
  • 2 tbsp (30 ml) tomato paste
  • 1 can (800 g) crushed tomatoes about 28 oz / 800g, high quality if possible
  • 1 tsp (5 g) sugar
  • 0.75 tsp (4 g) fine sea salt plus more to taste
  • 0.5 tsp (1 g) freshly ground black pepper plus more to taste

For Serving

  • 400 g (14 oz) spaghetti or penne, bucatini, or rigatoni
  • 1 cup (15 g) fresh basil leaves roughly torn, plus extra for garnish
  • Parmesan cheese optional, grated, or use vegan Parmesan

Equipment

  • Large pot
  • Large skillet
  • wooden spoon
  • Chef’s knife
  • Cutting board
  • Colander

Instructions
 

  1. Sauté the aromatics: In a large skillet over medium-low heat, warm the olive oil. Add the chopped onion (or shallot), sliced garlic, and chilies. Cook, stirring often, until softened and fragrant but not browned, about 5-7 minutes.
  2. Cook the tomato paste: Push the aromatics to the side of the pan, add the tomato paste, and cook it, stirring, for 2–3 minutes until it darkens slightly in color.
  3. Add tomatoes and season: Add the crushed tomatoes, sugar, salt, and black pepper. Stir well to combine. Let the sauce simmer uncovered for 10–15 minutes, stirring occasionally, until slightly thickened and vibrant.
  4. Boil the pasta: While the sauce simmers, boil the spaghetti in a large pot of salted water until just al dente. Reserve about a cup of the pasta cooking water before draining.
  5. Finish the sauce: Once the sauce is thickened, remove from heat and stir in the torn basil leaves. Taste and adjust salt and pepper as needed.
  6. Combine pasta and sauce: Add drained spaghetti directly to the skillet with the sauce. Toss to coat well, adding a splash or two of reserved pasta water if needed for a silky finish.
  7. Serve and garnish: Divide between plates. Top with extra basil and a shower of grated Parmesan, if using. Serve immediately.

Notes

Storage: Cool completely, then store in an airtight container in the fridge for up to 4 days. The sauce (without pasta) can be frozen for up to 2 months. Reheat gently with a splash of water or olive oil.
Vegan: Omit the Parmesan or sub with vegan cheese or nutritional yeast.
Variations: Use red pepper flakes instead of fresh chili; add veggies or protein (shrimp, sausage, mushrooms, tofu). Gluten-free pasta works well here too.

Nutrition

Calories: 420kcal | Carbohydrates: 77g | Protein: 13g | Fat: 9g | Saturated Fat: 1.5g | Sodium: 520mg | Potassium: 670mg | Fiber: 5g | Sugar: 8g | Vitamin A: 950IU | Vitamin C: 23mg | Calcium: 65mg | Iron: 3.2mg

Roasted butternut squash, crispy bacon, and herby goodness come together in this cozy butternut squash pasta carbonara. Creamy, savory, and comfortingly autumnal.

So, let’s talk carbonara… but with a twist. This version is still gloriously silky, thanks to egg yolks and Parmesan, but instead of pancetta and cream (no judgment, I love a shortcut), we’re bringing roasted butternut squash into the mix. It sneaks in this caramelized nuttiness that hugs every noodle, while crispy bacon and fresh herbs keep things grounded.

I love this as a romantic Tuesday “hello fall” dinner, but honestly, it also fits into the chaotic “I only have bacon and this weird squash” weeknights. Bonus? It reheats surprisingly well for a pasta dish (more on that below), so leftovers are totally fair game for lunch the next day.

Table of Contents

Butternut Squash Pasta Carbonara

Why You’ll Love this Butternut Squash Pasta Carbonara

This one surprised me with how much depth you get from just a sheet pan, a skillet, and a blender. No food miracles, just good ingredients doing their thing.

  • Earthy, cozy flavor: Roasting the squash with garlic and onion gives it nutty, caramelized warmth that balances the dish beautifully.
  • Silky without the cream: Egg yolks and starchy pasta water do all the heavy lifting, making the sauce rich without being heavy.
  • More herbs, please: Tossing in crispy thyme and rosemary adds those fragrant little pops that make every bite interesting.
  • Actual bacon bliss: It’s the salty, crunchy contrast that plays really well with the sweetness from the squash.
  • No fancy steps: If you can roast a vegetable and stir pasta in a pan, you’ve got this.
  • It feels both fancy and low-key: You could casually serve it in a bowl while in slippers… or dress it up with wine and candles.

Butternut Squash Pasta Carbonara

Ingredient Notes

Just a few pantry staples and a humble squash, and suddenly you’re starring in your own cozy cooking montage.

  • Butternut squash: Go for a small one, about 2 cups cubed. You want it roasted until tender and golden at the edges. If you’re not into peeling, check the freezer section for pre-cubed squash.
  • Garlic: Smashed and roasted with the squash, it mellows and sweetens. You’ll blend it right into the sauce—no biting chunks here.
  • Onion: Wedges add depth and savoriness to the puree. Any yellow or sweet onion works.
  • Olive oil: Keeps the roasting situation from drying out, and helps everything get golden instead of sad and steamed.
  • Bacon: Thick-cut gives the best texture. It crisps up beautifully and leaves behind the perfect amount of flavorful fat.
  • Fresh thyme and rosemary: Add them to the bacon pan right at the end for a quick sizzle. You’ll get toasty, savory little herb bites that earn their keep.
  • Spaghetti or fettuccine: Either works, though I lean slightly toward fettuccine for more surface area to hold that sauce.
  • Egg yolks: These are your sauce magic. They thicken everything without cream. Use fresh ones—no carton stuff here.
  • Parmesan cheese: Grated, not shredded, so it melts easily. Add more at the end if you’re feeling extra salty-cheesy.

Butternut Squash Pasta Carbonara

How To Make This Butternut Squash Pasta Carbonara

Let’s walk through it together, like we’re cooking side by side and occasionally pausing to sip whatever’s in that glass.

  • Roast the squash, garlic, and onion: Preheat to 400°F, then spread everything on a parchment-lined sheet. Toss with olive oil, plus salt and pepper. Roast for 20 to 25 minutes, flipping once if you remember (we’re not robots), until edges are golden and everything’s fork-tender.

  • Crisp the bacon: Start it in a cold skillet (don’t rush this part). Heat to medium and let it slowly sizzle until golden and crisp, about 10 minutes. Move it to a paper towel-lined plate. Leave the bacon fat right where it is.

  • Fry the herbs: In that bacon fat, toss in the chopped rosemary and thyme. Cook just 30 seconds until they’re fragrant and darkened slightly. Scoop those out and join them with the bacon on the plate.

  • Boil the pasta: Salt the heck out of that water and cook your pasta till al dente. Scoop out a cup of pasta water before draining.

  • Make the sauce base: Blend the roasted squash, garlic, and onion with 1/4 cup of pasta water. You want it smooth and silky—adjust with a bit more water if it’s too thick. Give it a taste; it’s already delicious.

  • Build the sauce: Pour the puree into the skillet over medium heat. Stir in the egg yolks and Parmesan while whisking. You don’t want scrambled eggs, just a smooth, glossy sauce. If it’s too thick, another splash of pasta water saves the day.

  • Toss it all together: Add in that hot drained pasta, plus half the crumbled bacon and all those crispy herbs. Toss with tongs till every strand gleams. Taste and adjust salt and pepper as needed.

  • Serve it up: Top with the rest of the bacon and extra Parm for good measure. Grab a fork. Admire your work. Okay, now dig in.

Butternut Squash Pasta Carbonara

Storage Options

So you made a big batch. Bless you. Luckily, this reheats better than you’d expect from a creamy pasta, thanks to the sturdy squash base.

For the fridge, scoop leftovers into an airtight container and chill. It’ll keep nicely for about 3 days. When you reheat, add a splash of water or milk and stir often over medium-low heat until everything’s smooth again. The sauce does thicken a bit, but it bounces back beautifully with just a touch of liquid.

Now—freezing. Technically, yes, you can freeze it. Just know that pasta, when frozen and thawed, gets a little softer than ideal. That said, the flavor holds up, and I’ve totally defrosted a batch on a “what’s-for-dinner-oh-no” evening and it was still delightful.

If you do freeze it, store it in single servings. Let it cool completely first, then pop it into a freezer-safe bag or container. It’ll keep for up to two months. Thaw overnight in the fridge, or gently defrost in a pan with a bit of liquid.

Variations and Substitutions

Feel like riffing a little? This dish is weirdly flexible for something that looks fancy.

  • Guanciale or pancetta instead of bacon: If you’re feeling authentic or just happen to have it, either one brings a delicious salty richness.
  • Vegan version: Swap bacon for crispy mushrooms or smoky tempeh, use plant-based Parm and skip the egg yolks entirely. Thin hummus can kinda fake the silky texture—don’t tell Rome.
  • Use different herbs: Sage works beautifully in place of rosemary if you’re into more fall spice vibes.
  • Try other squashes: Can’t find butternut? Kabocha works nicely. Even canned pumpkin in a pinch (just roast the garlic/onion for extra depth).
  • Make it spicy: Add crushed red pepper when whisking the sauce for a little kick that cuts through the creaminess.

Butternut Squash Pasta Carbonara

What to Serve with Butternut Squash Pasta Carbonara

This is a rich, cozy pasta, so balancing it out with something light and zingy works wonders.

  • A big leafy green salad with lemony vinaigrette balances the creaminess of the dish. Arugula, radicchio, and shaved fennel love being next to carbonara, trust me.

  • Warm crusty bread, obviously. Something rustic you can tear apart and use to mop up any sauce left behind. Bonus points for garlic butter, go big.

  • A crisp white wine like Pinot Grigio or Sauvignon Blanc cuts the richness and makes the bacon sing. If you skipped the bacon (who are you?), go with a dry rosé.

  • If you’re in the mood to go all-out, follow it up with something sweet and playful like these salted caramel cupcakes. Soft, gooey, sweet-salty heaven.

  • Looking to keep things light? A veggie-packed side dish like pan-seared cod with rainbow chard makes a great follow-up meal the next night using your leftover herbs.

Butternut Squash Pasta Carbonara

Frequently Asked Questions

Can I make this ahead of time?

You can roast the squash, garlic, and onion a day ahead and blend the puree. Fry the bacon and herbs too. Then when you’re ready to eat, just boil your pasta, reheat the puree, and stir in the yolks and cheese to make the sauce fresh. That way, everything stays silky and doesn’t get weirdly grainy from reheating.

What if I don’t have a blender or food processor?

No worries! You can mash the roasted squash, garlic, and onion with a potato masher or even a fork. It won’t be *quite* as silky, but it’ll still be dreamy and rustic. Just be sure everything is super tender before roasting so it mashes easily.

Can I skip the bacon to make it vegetarian?

Absolutely. Swap in mushrooms sautéed in butter or olive oil for that meaty richness. If you want some smokiness, a sprinkle of smoked paprika works great in the sauce. Don’t forget to salt more generously without the bacon’s saltiness in the mix.

How do I prevent the eggs from scrambling in the sauce?

Ah yes, the classic sauce panic! The key is *constant stirring* while whisking the sauce over medium heat. Don’t let the pan get too hot before adding the yolks. You can also temper them slightly by whisking in a little warm squash puree first, then adding that whole mixture back into the pan.

Butternut Squash Pasta Carbonara

Butternut Squash Pasta Carbonara

Prep Time 15 minutes
Cook Time 30 minutes
Total Time 45 minutes
Roasted butternut squash, crispy bacon, and herby goodness come together in this cozy carbonara twist. Creamy, savory, and autumnal, this dish blends silky egg yolks & Parmesan with the sweet nuttiness of squash for a comforting, craveable pasta meal.
4 servings

Ingredients

For the Roasted Squash Puree

  • 2 cups (320 g) butternut squash peeled and cubed (about 1 small squash)
  • 4 cloves garlic peeled and smashed
  • 1/2 (0.5) yellow onion cut into wedges
  • 2 tbsp (30 ml) olive oil
  • Salt and freshly ground black pepper to taste

For the Carbonara

  • 5 slices (150 g) thick-cut bacon chopped
  • 1 tbsp (3 g) fresh thyme finely chopped
  • 1 tbsp (3 g) fresh rosemary finely chopped
  • 12 oz (340 g) spaghetti or fettuccine
  • 3 large egg yolks room temperature
  • 3/4 cup (60 g) Parmesan cheese finely grated, plus more for serving
  • Reserved pasta water as needed to thin sauce
  • Salt and black pepper to taste

Equipment

  • Sheet Pan
  • Blender or Food Processor
  • Large skillet
  • Large pot
  • Tongs

Instructions
 

  1. Preheat oven to 400°F (200°C). Line a sheet pan with parchment paper.
  2. Arrange the butternut squash, garlic, and onion on the sheet pan. Drizzle with olive oil, season with salt and pepper, and toss to coat. Roast for 20–25 minutes, until golden and fork-tender.
  3. Meanwhile, place bacon in a cold large skillet. Set over medium heat and cook, stirring, until fat is rendered and bacon is crisp, about 8–10 minutes. Transfer bacon to a paper towel-lined plate. Reserve bacon fat in skillet.
  4. Add chopped thyme and rosemary to the bacon fat in the skillet. Fry for 30 seconds until fragrant. Transfer herbs to the plate with bacon.
  5. Bring a large pot of salted water to a boil. Cook pasta until al dente, according to package directions. Reserve 1 cup pasta water, then drain.
  6. Transfer roasted squash, garlic, and onion to a blender. Add ¼ cup reserved pasta water and blend until smooth and silky, adding more water as needed.
  7. Return the puree to the skillet over medium heat. Stir in the egg yolks and grated Parmesan, whisking constantly until sauce is glossy and smooth. Add more pasta water to thin as needed. Season to taste with salt and black pepper.
  8. Add drained pasta to the skillet along with half the bacon and all the fried herbs. Toss until pasta is well-coated and heated through.
  9. Serve immediately, topped with remaining bacon and extra Parmesan.

Notes

To make ahead: Roast the squash, garlic, and onion, and fry the bacon and herbs up to a day in advance. Store separately and finish pasta/sauce fresh. For vegetarian, sub mushrooms for bacon. Reheats well with a splash of water or milk. For a vegan option, see full notes above.

Nutrition

Calories: 520kcal | Carbohydrates: 62g | Protein: 19g | Fat: 22g | Saturated Fat: 7g | Cholesterol: 159mg | Sodium: 650mg | Potassium: 630mg | Fiber: 5g | Sugar: 5g | Vitamin A: 9000IU | Vitamin C: 28mg | Calcium: 310mg | Iron: 3.7mg

Plump shrimp, tender noodles, and crisp veggies all tangled up in a glossy, savory sauce—this cozy shrimp chow mein hits all the right notes. With bell pepper, cabbage, soy sauce, garlic, and a hint of sesame, it smells like your favorite takeout joint moved into your kitchen. And bonus: it’s way easier than it looks (like, Tuesday-night easy).

Comfort food made impressive. That’s what I’m calling it. This shrimp chow mein checks all the important boxes: slurpy noodles? Yep. Saucy, shrimp-y bites? You bet. Crunch from fresh veggies? Hello! The sauce is that perfect mix—deeply savory with a touch of sweetness (hi hoisin, you smooth operator). If you’re daydreaming of something warm and filling but don’t want to wrestle with a 47-step recipe, I’ve got you. Toss it all in a wok, give it a swirl, and dinner’s done before you can say, “Wait, we HAVE hoisin sauce?”

Table of Contents

Shrimp Chow Mein

Why You’ll Love this Shrimp Chow Mein

Sometimes we just want something satisfying, flavorful, and noodle-y without overthinking it. This is that meal.

  • No mystery ingredients: Everything is easy to find at a regular grocery store, hoisin sauce included (yes, it’s near the soy sauce).
  • That sauce though: It’s a little sweet, a little salty, a little nutty, and it clings to every noodle like it was born to be there.
  • Shrimp cooks lightning fast: Blink and you’ll miss it—these little guys are pink and ready in minutes.
  • One big pan, minimal mess: You’re basically playing stir-fry Tetris, and everything ends up in one skillet.
  • Total texture party: Tender noodles, crisp cabbage, juicy shrimp, and crunchy bell peppers—it’s chaos in the best way.

Shrimp Chow Mein

Ingredient Notes

This one’s all about the balance—each component brings something different to the wok-party:

  • Shrimp: Go for medium, peeled and deveined. Frozen is fine, just thaw and pat dry so they sear instead of steam.
  • Chow mein or yakisoba noodles: Honestly, any long and squiggly noodle works. I won’t fight you if you use spaghetti in a noodle emergency.
  • Oyster sauce: Adds that deep umami layer that makes takeout so addictive. Don’t skip it.
  • Hoisin sauce: Sweet, tangy, and thick. The flavor MVP keeping your sauce from feeling flat.
  • Soy sauce: A salty backbone—go with low sodium if you’re salt-sensitive.
  • Sesame oil: Just a splash adds that nutty, toasty vibe your kitchen will smell amazing.
  • Cabbage and carrots: These bring crunch and color. You could use a bagged coleslaw mix if you’re short on time.
  • Garlic and ginger: Fresh is definitely worth it here—your nose will say thank you every time that sizzle hits the pan.

Shrimp Chow Mein

How To Make This Shrimp Chow Mein

Okay, clear off a little counter space and let’s talk wok moves. You’ll be shocked how fast this comes together.

  • Whisk together the sauce first: In a small bowl, stir up the chicken stock, sauces, sesame oil, sugar or honey, and white pepper. Set it aside like a secret weapon. The smell already hints at greatness.

  • Cook the noodles: Follow package vibes, then rinse with cold water so they don’t get mushy. Toss with a drop of oil to keep things un-sticky.

  • Sear the shrimp: Heat part of your oil in a big ol’ skillet. Lay the shrimp in flat, give them 2 minutes per side, and watch them blush pink. Out they go onto a plate.

  • Sauté the veggies: Add the rest of the oil, then onions, carrots, and bell pepper. Stir over high heat until they’re crisp-tender but not floppy (2–3 minutes).

  • Add garlic and ginger: Stir in until your kitchen smells like you’re pulling off something fancy—usually takes about 30 seconds.

  • Add cabbage and sprouts: These soften quick, so a splash of water and a couple tosses are all you need till they get cozy.

  • Bring it all together: Add your shrimp back in, slide in the noodles, then pour in your sauce. Tongs help here! Toss, toss, toss until the glossy goodness coats every bite.

  • Serve it up: Sprinkle green onion on top, maybe hit it with a sliver more sesame oil if you’re feeling bold, and dive in.

Shrimp Chow Mein

Storage Options

Let’s be honest, this kind of oily noodle magic tastes best fresh out of the pan. That said, leftovers totally hold their own.

Slide any extras into an airtight container and pop it in the fridge for up to 3 days. Reheat in a skillet over medium heat with a splash of water or broth—the noodles get a second wind and the shrimp stays happy. Avoid microwaving the whole batch if you can help it, since shrimp and nukes have a rocky relationship (chewy central, no thanks).

As for freezing? Meh. The noodles and shrimp both get a bit soggy and sad. If you must, freeze just the cooked veggies and sauce part, then toss with fresh shrimp and noodles when you’re ready to serve. Otherwise, the texture won’t be worth it.

Variations and Substitutions

This is one of those choose-your-own-adventure recipes that plays nice with substitutions.

  • Different protein: Swap the shrimp with sliced chicken, tofu, or even leftover steak if you’ve got it hiding in the fridge.
  • Spice it up: Add chili crisp or a little squirt of sriracha to the sauce if you like a kick in your noodles.
  • No oyster sauce? Use more hoisin and soy, maybe a dash of fish sauce if you have it. Not identical, but still yummy.
  • Gluten-free friendly: Use tamari instead of soy sauce and get gluten-free rice noodles (just a heads-up, texture will shift a bit).
  • Extra veggies: Broccoli, snap peas, or mushrooms would be right at home here—toss in whatever’s rolling around your crisper drawer.

Shrimp Chow Mein

What to Serve with Shrimp Chow Mein

While this dish is pretty much a meal in itself, sometimes you’re in the mood to build a little plate party. Here are some tasty pals that go well with chow mein:

  • A crisp, zingy cucumber salad adds contrast and cools things down beautifully. Thin slices, rice vinegar, sesame oil, and a whisper of chili flake—that’s it. Refreshing and light.

  • A side of creamy mashed potatoes might sound odd with noodles, but if you’re feeding a crew that needs comforting carb-on-carb joy, stranger combos have worked.

  • Pan-fried dumplings or potstickers turn this into a FEAST. Especially with a vinegar-soy dipping sauce nearby. Bonus points if some have crispy bottoms.

  • Chicken cobbler? Hear me out: it’s the midwestern cousin to your chow mein’s zippy umami vibes. Perfect if you’re serving a group with mixed flavor preferences.

Shrimp Chow Mein

Frequently Asked Questions

Can I use frozen shrimp for chow mein?

Absolutely! Just make sure to thaw them fully—ideally overnight in the fridge, or under cold running water in a pinch. Be sure to pat them really dry before tossing into that hot pan. This helps them sear nicely instead of making the pan steamy and sad. Nobody wants soggy shrimp.

What noodles work best if I can’t find chow mein?

Yakibosa noodles, lo mein, or thin egg noodles are great swaps. In a complete noodle emergency, spaghetti or linguine will do—just cook them slightly al dente so they hold up in the stir-fry. The key is not overcooking, so the sauce can cling like it’s meant to.

Is shrimp chow mein spicy?

Not by default! This version is mellow, with zero spice unless you add it. Want a little heat? Toss in red pepper flakes, chili oil, or a spoonful of sambal to the sauce. You’re the boss of your spice level, so crank it up if that’s your jam.

Can I double this recipe for a group?

Yes, with a small caveat: bigger batches are harder to stir-fry evenly unless you’ve got a giant wok or pan. You might want to cook the shrimp and veggies in batches, then combine everything with the noodles at the end. That way, nothing gets steamed into sadness.

Shrimp Chow Mein

Shrimp Chow Mein

Prep Time 15 minutes
Cook Time 15 minutes
Total Time 30 minutes
Plump shrimp, tender noodles, and crisp veggies all tangled up in a glossy, savory sauce—this cozy shrimp chow mein hits all the right notes. Packed with cabbage, carrots, bell peppers, and a restaurant-worthy sauce, it comes together faster than you’d expect and tastes like takeout (but better). Make it your own, mess-free, in one big skillet!
4 servings

Ingredients

Sauce

  • 1/4 cup (60 ml) chicken stock
  • 2 tbsp (30 ml) oyster sauce
  • 1 tbsp (15 ml) hoisin sauce
  • 2 tbsp (30 ml) soy sauce low-sodium recommended
  • 1 tsp (5 ml) toasted sesame oil
  • 1 tsp (4 g) sugar or honey
  • 1/8 tsp (0.5 g) white pepper or regular black pepper

Noodles

  • 8 oz (225 g) chow mein or yakisoba noodles or egg noodles; even spaghetti will work in a pinch

Stir Fry

  • 1 lb (450 g) medium shrimp, peeled and deveined thawed and patted dry if frozen
  • 2 tbsp (30 ml) vegetable oil divided
  • 1 yellow onion small, thinly sliced
  • 1 red bell pepper thinly sliced
  • 1 carrot medium, julienned or shredded
  • 2 cloves garlic minced
  • 1 tbsp (15 g) fresh ginger minced or grated
  • 2 cups (130 g) thinly sliced green cabbage
  • 1 cup (70 g) bean sprouts
  • 2 green onions sliced, for serving
  • extra sesame oil for drizzling (optional)

Equipment

  • Wok or large skillet
  • Tongs
  • Small mixing bowl

Instructions
 

  1. Mix the sauce: In a small bowl, combine the chicken stock, oyster sauce, hoisin sauce, soy sauce, sesame oil, sugar (or honey), and white pepper. Whisk until smooth and set aside.
  2. Cook the noodles: Prepare the noodles per package instructions. Drain, rinse with cold water, and toss with a tiny bit of oil to prevent sticking. Set aside.
  3. Sear the shrimp: Heat half the vegetable oil in a large wok or skillet over medium-high heat. Arrange the shrimp in a single layer and let cook undisturbed for about 2 minutes per side, until pink and just cooked through. Remove shrimp to a plate.
  4. Sauté veggies: Add the remaining oil to the skillet. Add onion, bell pepper, and carrot, stirring over high heat for 2–3 minutes until just tender but still crisp.
  5. Add aromatics: Add the garlic and ginger. Stir-fry for 30 seconds until fragrant.
  6. Add cabbage and sprouts: Stir in cabbage and bean sprouts. Add a splash of water if pan looks dry, and toss until just wilted, 1–2 minutes.
  7. Combine: Return shrimp to the skillet, add cooked noodles, and pour in the sauce. Using tongs, toss everything together over high heat until noodles are glossy and evenly coated, about 1–2 minutes.
  8. Serve: Transfer to bowls and top with sliced green onions and a drizzle of extra sesame oil if desired. Serve immediately.

Notes

This dish is flexible—use chicken, tofu, or extra vegetables depending on what you have. If substituting for oyster sauce, bump up the hoisin and add a dash of fish sauce if handy. For gluten-free, use gluten-free noodles and tamari.
Store leftovers in the fridge for up to 3 days. Reheat in a skillet with a splash of water. Avoid microwaving shrimp to keep it tender.

Nutrition

Calories: 410kcal | Carbohydrates: 50g | Protein: 29g | Fat: 10g | Saturated Fat: 2g | Cholesterol: 220mg | Sodium: 1320mg | Potassium: 510mg | Fiber: 4g | Sugar: 7g | Vitamin A: 4500IU | Vitamin C: 54mg | Calcium: 160mg | Iron: 3.3mg

Buttery vanilla cupcakes filled with gooey homemade caramel, topped with rich frosting and flaky sea salt—salted caramel cupcakes hit that golden spot between sweet and salty. Made with pantry basics like sugar, flour, butter, and sour cream, they come out soft, rich, and totally bakery-vibes.

The smell alone is going to pull folks into the kitchen—trust me, it’s like caramel popcorn met a vanilla cake and decided to start a bakery. These are the kind of treats you make when you want to impress, but also secretly sneak a second one after dinner.

Table of Contents

Salted Caramel Cupcakes

Why You’ll Love this Salted Caramel Cupcakes Recipe

So look, I’m not going to throw cupcake glitter at you and scream “YOU NEED THESE NOW!” But… you kinda do. These salted caramel cupcakes are the cozy, golden child of desserts—sweet, creamy, slightly salty, and a little showy without trying too hard.

  • Ridiculously simple to make: You just squish, smear, melt, and drizzle—like an edible DIY craft project.
  • That gooey caramel center: It’s the buttery surprise hidden under a cloud of frosting. Totally optional to share with others.
  • Perfect balance of sweet and salty: Right when things get a little rich, the sea salt waltzes in and drops the mic.
  • The frosting is basically caramel buttercream: Like licking the beaters, but socially acceptable.
  • They look fancy without being fussy: Drizzle some caramel on top, toss on some flaky salt, and boom—Instagram is jealous.
  • Make-ahead friendly: Bake them off, keep ‘em cool, frost the day of—magic disguised as planning.

Salted Caramel Cupcakes

Ingredient Notes

These ingredients are mostly pantry basics, which is dangerous because… now you have no excuse not to bake them.

  • Granulated sugar: You’ll use it twice—once for making the caramel and once for fluffing up that cake batter. It gives structure and sweetness.
  • Water: Just a splash to get your caramel started. Helps make sure the sugar melts evenly instead of clumping into sugar gravel.
  • Heavy cream: Transforms your sugar lava into actual caramel. Rich, creamy, and makes that drizzle drizzle.
  • Unsalted butter (and lots of it): Found in the caramel, cake, and frosting. Softened is key. Don’t microwave into a puddle!
  • Vanilla extract: Don’t skip it—gives warmth and brings out the magic in both caramel and cake.
  • Sea salt: Use a flaky, pretty one for the top. Regular fine salt goes into the caramel and cupcake batter.
  • All-purpose flour: The base of the cupcake. Weigh it if you can or spoon into the cup and level off—no scooping straight from the bag.
  • Baking powder + baking soda: Both play key roles in helping the cupcakes rise without being dense little domes.
  • Light brown sugar: Adds moisture and a subtle molasses hug to the cake.
  • Eggs: They bind, lift, and give structure. Room temp is best for easy mixing.
  • Sour cream: Adds tang and keeps things incredibly soft—seriously, don’t sub it out unless you have to.
  • Powdered sugar: For the frosting! Adds body, sweetness, and all the fluffy cloud energy.
  • Pinch of sea salt (optional): Only if your sweet tooth likes the occasional mic drop of savory.

Salted Caramel Cupcakes

How To Make This Salted Caramel Cupcakes Recipe

Okay, apron on, good podcast queued up (or maybe something lively like 2000s throwback jams), and let’s get into it. Yes, there are a few steps, but none are hard. Promise.

  • Make your caramel first: Add the sugar to the center of a heavy-bottomed saucepan, pour the water along the edges, and give it a little shake to flatten the pile. Heat it on medium—don’t stir, just let it do its thing—and wait while the sugar dissolves and turns into a golden, liquid amber. When it’s ready, reduce the heat and carefully pour in the heavy cream while whisking. It’ll hiss and bubble like it’s mad at you (completely normal). Keep stirring, then toss in the butter, vanilla, and salt. Strain it into a bowl to cool.

  • Get the oven ready and prep your tins: Preheat to 350°F and line a muffin tin with cupcake wrappers. If you don’t have liners, spraying the tin works too (but liners are less drama later).

  • Mix dry ingredients: Grab a medium bowl and whisk the flour, baking powder, baking soda, and salt. Set aside. You’ve just done 20% of the work!

  • Cream the butter and sugars: In a stand mixer or with electric beaters, whip the softened butter, granulated sugar, and brown sugar until pale and fluffy. This takes a few minutes, so maybe hum a little tune.

  • Add wet ingredients one by one: Drop in the eggs (one at a time), then fold in the sour cream and vanilla. The batter should look luscious—like frosting almost, before flour gets involved.

  • Combine wet and dry: Add your flour mixture in two parts—stir gently by hand at this point to avoid tough cupcakes. Just barely mix until no dry streaks remain.

  • Bake: Spoon batter into your liners until about 2/3 full. Bake 18–22 minutes, or until a toothpick slides out clean. Cool in the pan 5 minutes, then let them finish chilling on a wire rack.

  • Make the frosting: Whip butter until creamy (don’t skip this part—it gives you volume). Add in the cooled salted caramel and beat until fully blended. Gradually add powdered sugar until you get the texture you love: fluffy, not runny.

  • Fill and frost: Core out a little hole from the center of each cooled cupcake. Add a spoonful of caramel inside (and try not to eat it all as you go). Frost the tops generously and drizzle with extra caramel. Sprinkle with flaky salt and admire your glorious creation.

Salted Caramel Cupcakes

Storage Options

So, you made a dozen cupcakes—now what? Assuming you didn’t inhale them all by nightfall (hard not to), here’s how to keep them fresh without sacrificing texture or caramel drama.

First up, refrigeration: If your kitchen’s on the warmer side or you’re saving them for more than a day or two, pop the frosted cupcakes in the fridge in an airtight container. They’ll stay good for up to 4 days. Just bring them to room temp before serving so the cake softens and the frosting isn’t rock solid. Nobody likes cold buttercream (it’s like eating frosted clay).

Freezing? Totally doable. Freeze the unfrosted cupcakes individually wrapped in plastic wrap, then store them in a zip-top freezer bag. They’ll last about 2–3 months. Thaw at room temp, frost fresh, and ta-da! Instant bakery magic.

And yes, you can freeze the caramel too. Seal it up in a jar or container, leaving a little room at the top, and freeze for 1–2 months. Reheat gently in a saucepan or microwave, stirring well.

Variations and Substitutions

Let’s say you’re missing an ingredient. Or allergic. Or just feeling feisty and want to switch things up a bit. Here’s what can be swapped without totally wrecking the vibe.

  • Greek yogurt instead of sour cream: Tangy, protein-packed, and works 1:1. Just avoid anything fat-free—it won’t have the same richness.
  • Make it gluten-free: Use a cup-for-cup gluten-free flour blend. I’ve done it, and the texture’s still on point. Don’t skip the resting step if your blend calls for it.
  • Add chopped pecans inside or on top: Adds crunch, which contrasts beautifully with the soft crumb and gooey middle. Toast them first if you’re extra like that.
  • Use store-bought caramel: If you’re short on time or making these for a party where no one’s checking your caramel credentials, go for it. Warm it up just a tad so it blends smoothly into frosting or drizzles nicely.
  • Spice it up: Add 1/2 teaspoon of cinnamon or a pinch of cayenne into the cake batter. That tiny kick against sweet caramel? Kind of magical.

Salted Caramel Cupcakes

What to Serve with Salted Caramel Cupcakes

These cupcakes absolutely stand alone, but a little company never hurts. Whether you’re serving them after dinner or at a casual brunch gathering, here’s a few fun pairings.

  • A rich cup of coffee or espresso is basically meant to be consumed with one of these beauties. The bitter edge of a dark roast balances out all that sugary sweetness and makes it feel like a grown-up dessert (even with frosting on your nose).

  • Want to get really extra? Serve them alongside a few scoops of vanilla or butter pecan ice cream. You’ll want something creamy but not too loud—let the cupcake be the diva.

  • Afternoon tea? Yes please. A black tea with a splash of cream mellows things out. Earl Grey works surprisingly well—there’s something about the bergamot and caramel together.

  • If you’re going for dinner-party vibes, a light savory dish like pan seared cod with rainbow chard sets the stage beautifully without sending you into a food coma before dessert.

  • Just snacks and sweets? Pair these with a tray of banana pudding parfaits or nutty cookies for a mellow, creamy dessert spread.

Salted Caramel Cupcakes

Frequently Asked Questions

Can I make the caramel ahead of time?

Absolutely. You can make the caramel up to a week in advance. Just store it in the fridge in a sealed container or jar. It does firm up when chilled, so reheat it gently (microwave or double boiler both work) and stir well before using it in the frosting or as a drizzle. I like to make extra and keep it on hand for emergency apple dipping.

Do I have to use a cupcake corer to fill them?

Nope, no fancy tools needed. A small paring knife or even a grapefruit spoon will work just fine. Just scoop out a little cavity in the center, plop in that caramel, and move right along. Try not to eat the little cake centers as you go, though I fully support it if you do.

Can I double this recipe?

Yes you can! Just make sure you use a large enough bowl (especially for the frosting) and scale up your baking trays. I recommend baking them in two separate batches if your oven isn’t wide enough to keep heat even. Keep an eye on them—sometimes baking time shifts a minute or two when the oven’s crowded.

Why did my caramel crystalize?

Ugh, the heartbreak of grainy caramel. It happens when sugar gets agitated or cold spots hit the pan walls. To avoid this, don’t stir once the sugar starts boiling. You can gently swirl the pan if needed. And make sure your saucepan is clean to start—sugar clings to grime like a toddler to snacks.

Salted Caramel Cupcakes

Salted Caramel Cupcakes

Prep Time 35 minutes
Cook Time 20 minutes
Cooling Time 20 minutes
Total Time 1 hour 15 minutes
Buttery vanilla cupcakes filled with gooey homemade caramel, topped with rich frosting and flaky sea salt—salted caramel cupcakes hit that golden spot between sweet and salty. Made with pantry basics, they’re soft, rich, bakery-quality treats that impress and totally satisfy both sweet and salty dessert cravings.
12 cupcakes

Ingredients

Salted Caramel

  • 1 cup (200 g) granulated sugar
  • 1/4 cup (60 ml) water
  • 1/2 cup (120 ml) heavy cream room temperature
  • 3 tbsp (45 g) unsalted butter cut into pieces, room temp
  • 1 tsp (5 ml) vanilla extract
  • 1/2 tsp (2 g) sea salt fine

Cupcakes

  • 1 1/2 cups (190 g) all-purpose flour
  • 1 1/2 tsp (6 g) baking powder
  • 1/2 tsp (2 g) baking soda
  • 1/2 tsp (2 g) sea salt
  • 1/2 cup (115 g) unsalted butter softened
  • 3/4 cup (150 g) granulated sugar
  • 1/4 cup (50 g) light brown sugar packed
  • 2 eggs room temperature
  • 1/2 cup (120 g) sour cream room temperature
  • 2 tsp (10 ml) vanilla extract

Salted Caramel Buttercream

  • 1 cup (230 g) unsalted butter softened
  • 1 1/2 cups (180 g) powdered sugar more as needed
  • 1/2 cup (120 ml) salted caramel (from above) cooled
  • 1/4 tsp (1.5 g) sea salt to taste, optional

Topping

  • extra salted caramel for drizzling
  • flaky sea salt for garnish

Equipment

  • Muffin tin
  • Cupcake liners
  • Stand Mixer or Hand Mixer
  • Medium saucepan
  • Wire rack
  • Sieve or strainer
  • Whisk
  • Paring knife or cupcake corer

Instructions
 

  1. Make the caramel: In a heavy-bottomed saucepan, add granulated sugar to the center and water around the edges. Do not stir. Heat on medium until the sugar dissolves and turns a deep amber. Lower the heat, slowly whisk in heavy cream (it will bubble), then add butter, vanilla, and sea salt. Strain into a bowl and let cool.
  2. Prep for cupcakes: Preheat oven to 350°F (177°C). Line a muffin tin with 12 cupcake liners.
  3. Mix dry ingredients: In a bowl, whisk together flour, baking powder, baking soda, and salt. Set aside.
  4. Cream butter & sugars: In a stand mixer or with electric beaters, beat softened butter, granulated sugar, and brown sugar until pale and fluffy, about 2–3 minutes.
  5. Add eggs & flavor: Add eggs one at a time, mixing well after each. Mix in sour cream and vanilla until smooth.
  6. Combine wet and dry: Add the dry ingredients in two additions, gently mixing by hand just until no streaks remain.
  7. Bake: Fill cupcake liners 2/3 full with batter. Bake for 18–22 minutes, until a toothpick inserted comes out clean. Cool in pan for 5 minutes, then transfer to a wire rack to cool completely.
  8. Make salted caramel buttercream: Whip softened butter in a mixer until light and creamy. Add 1/2 cup cooled caramel and beat until fully incorporated. Gradually add powdered sugar (and pinch salt to taste), beating until light, fluffy, and pipeable.
  9. Fill & frost: Use a paring knife or cupcake corer to remove a small center from each cupcake. Fill with 1–2 tsp caramel. Pipe or spread buttercream generously on top.
  10. Decorate: Drizzle with extra caramel and sprinkle with flaky sea salt before serving.

Notes

For extra decadence, top with toasted pecans or add 1/2 tsp cinnamon to the batter! Use Greek yogurt instead of sour cream if preferred, and a gluten-free flour blend for a gluten-free version.
Store frosted cupcakes airtight in the fridge up to 4 days, bringing them to room temp before serving. Freeze unfrosted cupcakes up to 3 months; freeze caramel in a jar for 1–2 months.

Nutrition

Calories: 420kcal | Carbohydrates: 55g | Protein: 4g | Fat: 21g | Saturated Fat: 13g | Cholesterol: 85mg | Sodium: 320mg | Potassium: 70mg | Sugar: 43g | Vitamin A: 670IU | Calcium: 55mg | Iron: 1.1mg

Creamy, dreamy, and packed with layers of love. These banana pudding parfaits are built with ripe bananas, silky pudding, cookies, cream cheese, and whipped wonder. Every spoonful is soft, cool, and nostalgic—as if your spoon just dipped into a dessert cloud.

No baking, no fuss. Just layer, chill, and dive in. Whether you’re prepping treats for a party or sneaking bites in your pajamas at midnight (hi, it’s me), these parfaits feel like a tiny celebration in a jar.

There’s something about banana pudding parfaits that makes me feel like I should be barefoot on a porch somewhere, fanning myself lazily with a cookie in one hand. The combo of cold custardy pudding, sweet bananas, and crunchy cookie bits is both comforting and just a little indulgent. Simple layers, yes, but they build into something beautifully textured and downright satisfying by the time your spoon hits the bottom.

They’re low effort but taste like you did something fancy. Great for parties, yes, but also kind of perfect when you’re just craving a spoonful of nostalgia straight out of the fridge.

Table of Contents

Banana Pudding Parfaits

Why You’ll Love this Banana Pudding Parfaits

No tricks here—just bananas, pudding, and a heap of creamy layers living their best life together.

  • Ridiculously simple to make: You don’t need to turn on the oven, boil sugar, or even break a sweat.
  • No wilted bananas here: The pudding layers seal in the fruit so the slices stay fresh and golden.
  • Great for make-ahead desserts: Chill ‘em while you do your thing, and they’re even better a few hours later.
  • Customizable to all moods: Add caramel drizzle, chocolate shavings, or use different cookies if you’re feeling bold.
  • Kid-friendly but sneakily sophisticated: Cream cheese and sweetened condensed milk elevate things just enough.
  • A textural dream: Creamy, soft, crunchy, smooth—every spoonful keeps things interesting.

Banana Pudding Parfaits

Ingredient Notes

This one’s stacked with familiar pantry staples and a few creamy ringers that pull serious weight in the flavor department.

  • Pudding Mix (vanilla or banana cream): This is your silky custard base. Banana makes it extra banana-y (Captain Obvious here), but vanilla gives it a mellow, neutral charm. Don’t overthink it—both are dreamy.
  • Cold Milk: Helps the instant pudding set up to that perfect spoon-standing-thickness level. Go with whole milk if you can; it gives the best consistency.
  • Sweetened Condensed Milk: Adds smooth richness and just the right stick-to-your-lips sweetness. Skip this and the whole thing feels a little sad.
  • Cream Cheese: Softened is key—don’t try beating a brick. This adds tangy depth that balances the sweet.
  • Whipped Topping: Folds into the pudding mix like a fluffy pillow. You could whip your own, but this shortcut works like a charm here.
  • Vanilla Wafers or Cookie of Choice: The classic choice is crunchy yet soften-up-perfect cookies. I’ve also used graham crackers and even gingersnaps once (vibes were weird that day but it worked).
  • Ripe Bananas: Go for peels with a few brown spots. Overripe gets mushy, underripe tastes like disappointment.
  • Heavy Whipping Cream + Powdered Sugar: Freshly whipped cream for the top because we don’t skip glamour. Just before serving, dollop or pipe—your call.

Banana Pudding Parfaits

How To Make This Banana Pudding Parfaits

Putting these together feels kind of therapeutic. That whole whisking, folding, layering rhythm? Highly satisfying. Plus, no judgment if a spoonful or two goes missing in the process.

  • Make the pudding base: In a large bowl, use an electric mixer to beat your instant pudding mix with cold milk for about 2 minutes. It should thicken up and look glossy. If you tap the bowl and it jiggles just a little, you’re golden.

  • Add the cream cheese goodness: In another bowl, beat the softened cream cheese with the sweetened condensed milk until smooth. You want zero lumps and a unified, slightly shiny texture. Combine this with the pudding gently—fold it in by hand so it stays nice and fluffy.

  • Swirl in the whipped topping: Now fold in the whipped topping carefully. This isn’t cardio. Use a spatula and light hands—just enough to get rid of white streaks without deflating all that airy loveliness.

  • Layer like a dessert architect: Grab your parfait glasses, jars, or whatever’s clean. Start with pudding, then cookies, then banana slices. Repeat if there’s room. Just make sure each banana layer is snugly covered so they don’t brown on you.

  • Chill until set: Cover the tops with plastic wrap and pop them in the fridge for at least 4 hours (or overnight). This is essential for the pudding to set fully and for the cookies to soften into that cake-ish texture dreams are made of.

  • Top with fresh whipped cream: Just before serving, whip up the heavy cream with powdered sugar until stiff peaks form. Spoon or pipe it on like a generous cloud.

  • Add a final flourish: Garnish with a few pretty banana slices (just cut ‘em before serving so they don’t brown). Then… try to share, I dare you.

Banana Pudding Parfaits

Storage Options

Ah yes, the aftermath. You’ve got leftover banana pudding parfaits in the fridge, and you’re wondering what to do next besides eat them straight out of the jar at 11pm. (Look, no judgment.)

These store well in the fridge, tightly wrapped or in jars with lids, for about 3 days. The bananas usually hold up just fine if buried under the pudding, but they can start to brown if exposed. Not cute, but still tasty. The cookies soften over time too—delightfully so by day two.

But can you freeze them? Technically, yes. Will I recommend it? Not really. The texture changes quite a bit after defrosting. The pudding can get weepy and the bananas go rogue. Your best bet is keeping them refrigerated and enjoying them relatively fresh.

If you do want to prep them way ahead, you can freeze the pudding mixture by itself and layer everything else later. But honestly, fresh tastes infinitely better with this kind of dessert.

Variations and Substitutions

Let’s bend some rules. You can absolutely put your own twist on these banana pudding parfaits without upsetting the pudding gods.

  • Different cookies: Swap the vanilla wafers for graham crackers, shortbread, or even ginger snaps. Crushed peanut butter cookies also absolutely slap.
  • Chocolate lovers unite: Use chocolate pudding instead of vanilla or banana. Then toss in a few chocolate chunks and boom—you’ve got a whole new vibe.
  • Dairy-free version: Use almond or oat milk and a vegan whipped topping. Bonus points if you find dairy-free cream cheese alternatives (they’re getting pretty good!).
  • Extra fruity: Add sliced strawberries, blueberries, or even mango alongside the bananas. Fun little tropical detour.
  • Boozy flair: Want to get fancy? Splash in a little banana liqueur or bourbon into the whipped cream topping. Just a tablespoon or two. But maybe keep these ones away from kids (and nosy in-laws).

Banana Pudding Parfaits

What to Serve with Banana Pudding Parfaits

Since these are on the sweeter side of things, you’ll want to pair them with something that balances rather than competes. Or just lean into full comfort mode. Your call.

  • If you’re doing a cozy Southern-style dinner, something like this million dollar meatloaf would hit the spot. Savory, rich, then sweet? Perfection in sequence.

  • For lighter fare, serve with a simple dinner like roasted chicken or pan seared cod and greens. That balances the richness of the dessert while still feeling special.

  • Hosting brunch? Lay these out with mini muffins, bubbly, and coffee. They actually work beautifully as a brunch dessert because there’s fruit… and that counts, right?

  • If you’ve got a BBQ going, these are the chilled finale everyone needs. Especially after something smoky or meaty—they’re like an edible palate cleanser.

  • Feeling real extra? Slide one next to a little espresso and pretend you’re at a rustic European café. No one needs to know you’re in sweats.

Banana Pudding Parfaits

Frequently Asked Questions

Can I make these banana pudding parfaits the night before?

Absolutely, yes. These parfaits actually benefit from some overnight chill time. It gives the layers time to meld, and the cookies soften into a cakey texture that’s honestly better than fresh. Just keep them tightly covered, and make the whipped cream topping just before serving so it stays fluffy and fresh.

What’s the best way to keep bananas from browning?

The secret is making sure the banana slices are fully covered in pudding or cream—air exposure is what causes browning. You can also toss the slices with a little lemon juice before layering, but that can mess with the flavor if overdone. I usually just cover them well and call it a day.

Can I use homemade pudding instead of instant?

You totally can! Homemade pudding will make them even richer and more luxurious, but it does take more time and dishes. If you’re already making a meal from scratch and energy is low, instant is no shame—especially once the layers come together.

What kind of cookies work best besides vanilla wafers?

Ooh, so many good options. Graham crackers, shortbread, or even butter cookies hold up well and soften nicely. For a twist, try peanut butter cookies or Oreo thins. Just steer clear of super airy cookies like meringues—they tend to melt into mush rather than soften pleasantly.

Banana Pudding Parfaits

Banana Pudding Parfaits

Prep Time 20 minutes
Chilling Time 4 hours
Total Time 4 hours 20 minutes
Creamy, dreamy, and packed with nostalgic layers—the ultimate banana pudding parfaits! No baking, just lots of ripe bananas, silky pudding, cookies, cream cheese, and luscious whipped cream. Scoop into a dessert cloud that's cool, soft, and joyfully simple.
6 parfaits

Ingredients

Pudding Base

  • 1 box (1 box (96g)) instant pudding mix (vanilla or banana cream) 3.4 oz (96g) box
  • 2 cups (500 ml) cold whole milk
  • 1 package (226 g) cream cheese, softened 8 oz (226g)
  • 1 can (397 g) sweetened condensed milk 14 oz (397g)
  • 1 container (227 g) whipped topping (thawed) 8 oz (227g)

Layers & Topping

  • 40 vanilla wafers or cookies of choice plus extra for garnish
  • 3-4 ripe bananas peeled and thinly sliced
  • 1 cup (240 ml) heavy whipping cream
  • 2 tbsp (16 g) powdered sugar

Equipment

  • Electric mixer
  • Mixing bowls
  • Parfait Glasses or Jars
  • Spatula

Instructions
 

  1. Make the pudding base: In a large bowl, beat the instant pudding mix with cold milk using an electric mixer for about 2 minutes until thick and glossy. Let it stand for a few minutes to set up.
  2. Make the cream cheese mixture: In a separate bowl, beat the softened cream cheese and sweetened condensed milk until completely smooth, with no lumps. Fold this mixture gently into the prepared pudding base until well combined and fluffy.
  3. Fold in whipped topping: Use a spatula to gently fold in the whipped topping (Cool Whip or similar), mixing until no white streaks remain. Don’t overmix.
  4. Layer the parfaits: In parfait glasses or jars, layer pudding mixture, cookies, then banana slices. Repeat layers as space allows, ending with a pudding layer on top to cover bananas.
  5. Chill: Cover parfaits tightly and refrigerate at least 4 hours, or overnight. This allows the pudding to set and cookies to soften to cake-like texture.
  6. Make whipped cream topping: Just before serving, beat the heavy cream and powdered sugar together until stiff peaks form. Spoon or pipe on top of parfaits.
  7. Finish and serve: Garnish with additional banana slices and cookies, if desired. Serve chilled and enjoy!

Notes

Store leftovers in the fridge, tightly covered, for up to 3 days. Cookies will soften, and bananas stay fresher if fully covered by pudding layers. Best not to freeze as texture changes. Swap cookies, try chocolate pudding, or add berries for fun variations!

Nutrition

Calories: 420kcal | Carbohydrates: 57g | Protein: 7g | Fat: 19g | Saturated Fat: 11g | Cholesterol: 57mg | Sodium: 275mg | Potassium: 420mg | Fiber: 1g | Sugar: 40g | Vitamin A: 750IU | Vitamin C: 7mg | Calcium: 180mg | Iron: 1mg

Let's Get Cooking!

100+ Recipes for Busy Nights

In a time crunch? Take a look around and browse plenty of recipes to help you get dinner ready and on the table on those busy nights!

Sweet Recipes

Pumpkin Banana Muffins

Pumpkin Banana Muffins Recipe

Strawberry Pie Bars

Strawberry Pie Bars Easy Oven Recipe

White Chocolate Raspberry Muffins

White Chocolate Raspberry Muffins Recipe

Snickerdoodle Muffins

Snickerdoodle Muffins Recipe for Oven

PIN NOW

Follow KitchenetteBlog on Pinterest

Love cozy recipes that actually make it to the table? On Pinterest, I share new comfort-food ideas every week—desserts, dinners, and those little snack cravings that hit at midnight. Come pin with me and never run out of kitchen inspo.

Savory Recipes

Turkey Tetrazzini

Turkey Tetrazzini Baked Pasta Recipe

Grilled Chicken Panini Sandwich

Grilled Chicken Panini Sandwich Recipe

Sweet Potato Cornbread

Sweet Potato Cornbread Recipe Oven Baked

Classic Waldorf Salad

Waldorf Salad Simple Classic Recipe

Get 5 Recipes to Simplify Your Life!

Delicious, versatile recipes you can make over and over.