Get 5 recipes to simplify your life:

easy, delicious, real food recipes

Latest Recipes

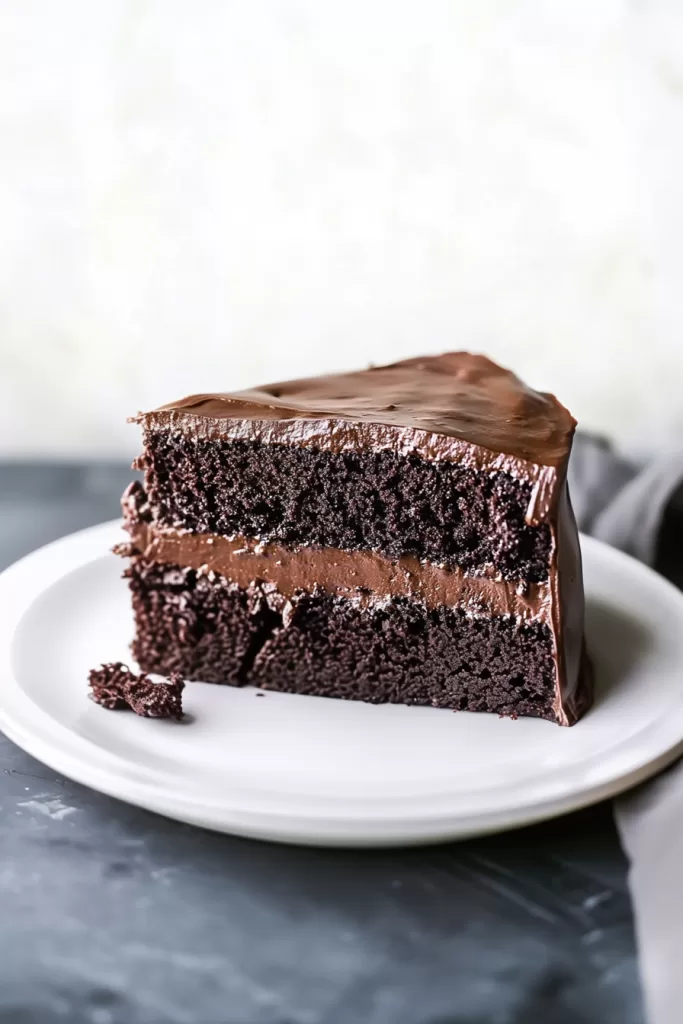
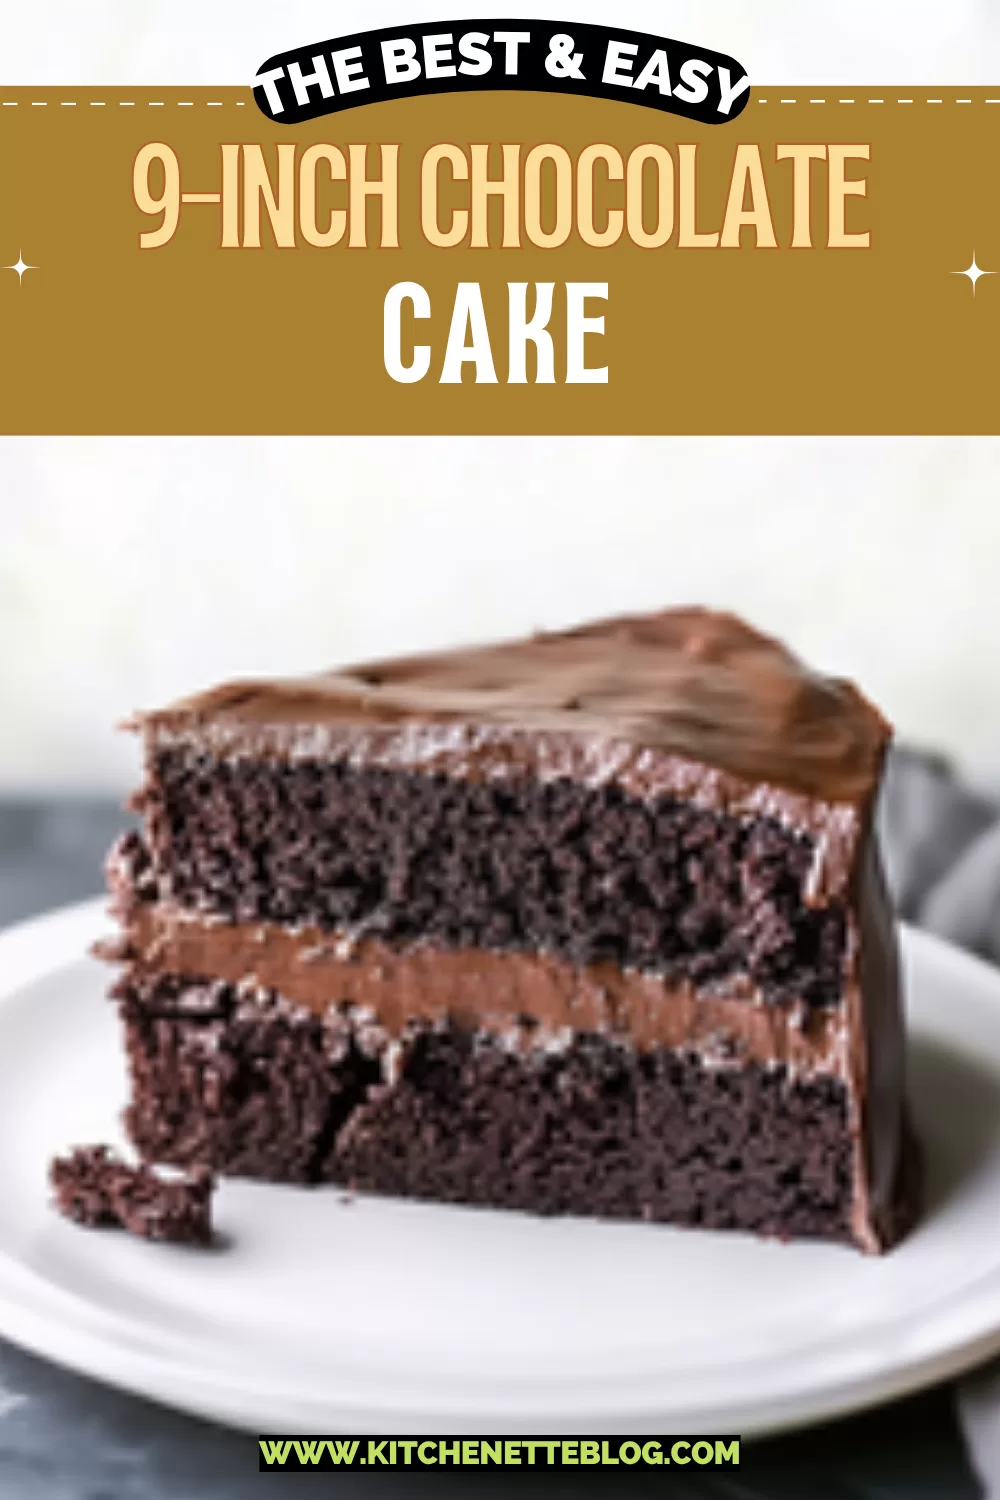
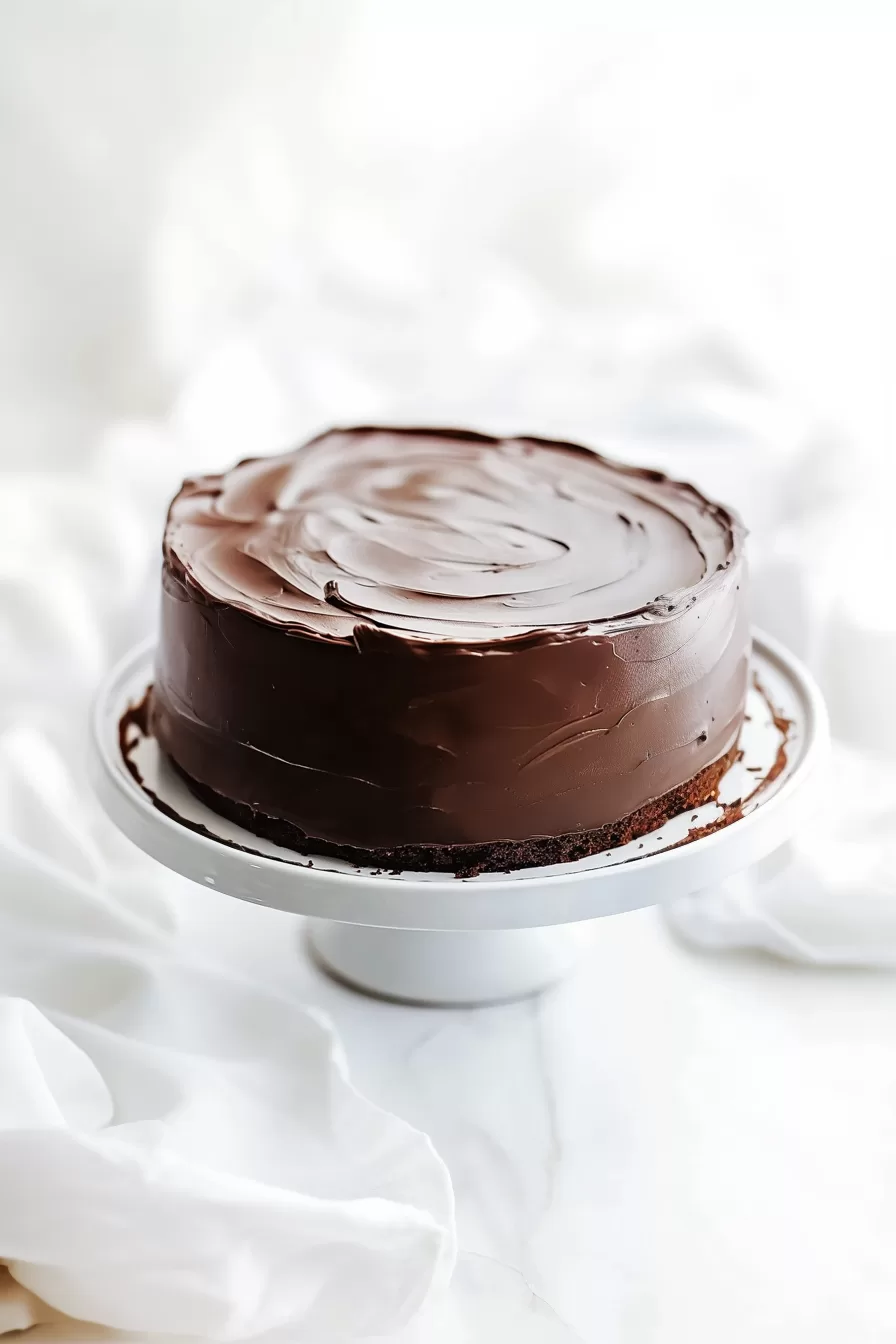
Moist, rich, and undeniably dreamy—with whispers of cocoa and vanilla drifting from the oven—this 9-inch chocolate cake uses cocoa powder, sugar, flour, and eggs to create tender, chocolate-sponge perfection. Come for the smell, stay for the thick, creamy frosting.

This one’s the kind of chocolate cake you make “just because”… because the craving calls for it, because Tuesday felt like a Thursday, or because you like your kitchen smelling like a cocoa cloud. The layers are soft but sturdy, rich without being brownie-dense, sweet but not cloying, and the frosting? Silky, chocolatey magic that spreads like a dream. Whether it’s a low-key celebration, a late-night kitchen raid, or a casual bake with a side of nostalgia, this 9-inch chocolate cake slides right into the moment like it belongs there. (Spoiler: it does).

Table of Contents

9-Inch Chocolate Cake

Why You’ll Love this 9-Inch Chocolate Cake

Let’s just say no one is mad when a chocolate cake appears. This one especially—it’s got great texture, balanced flavor, and no high-maintenance fuss.

  • Ridiculously simple to make: Just stir, pour, and wait while your kitchen fills with the smell of cocoa paradise.
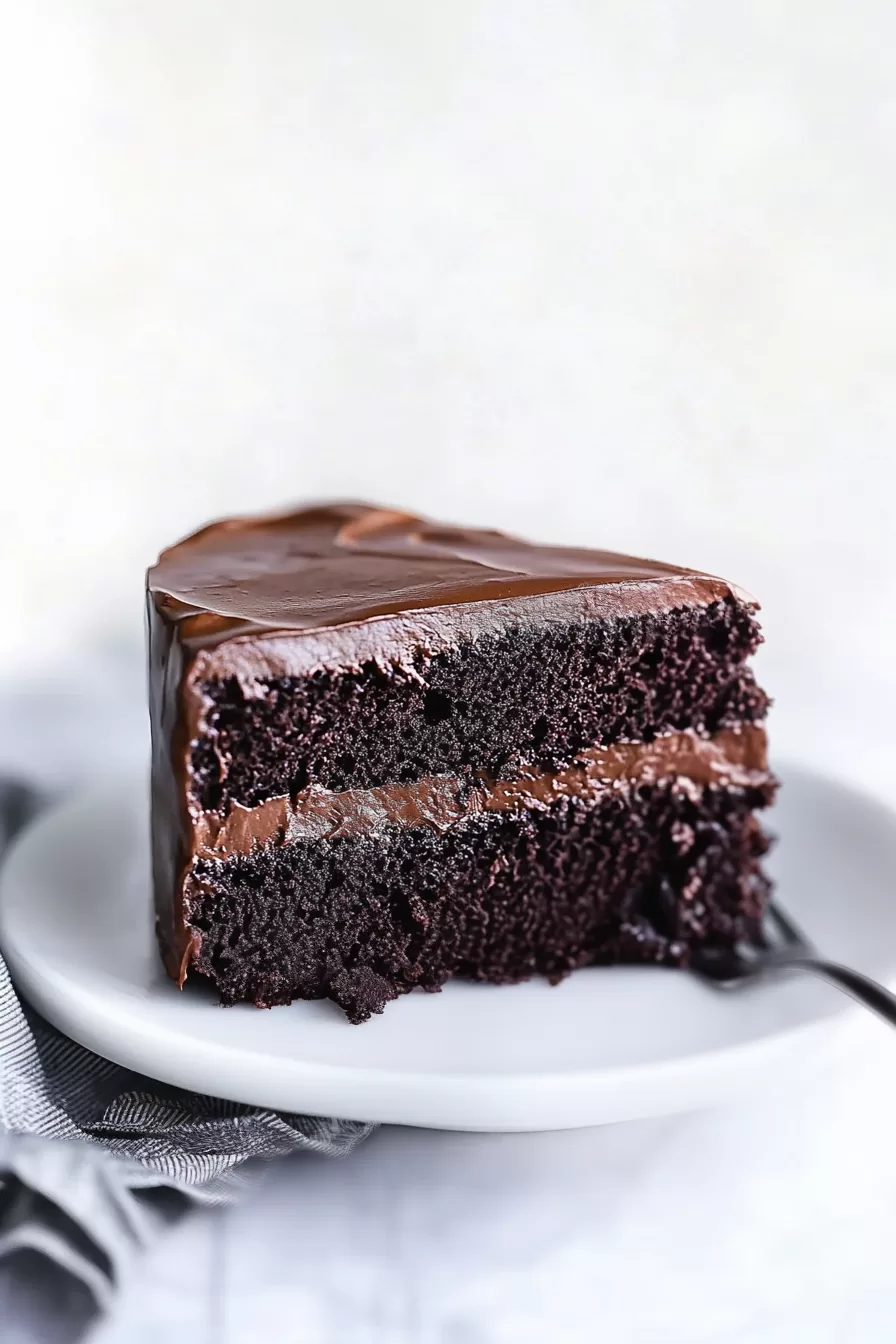
  • Crazy tender crumb: That cup of boiling water? Weird, yes. But it works wonders for a plush, almost melt-in-mouth texture.
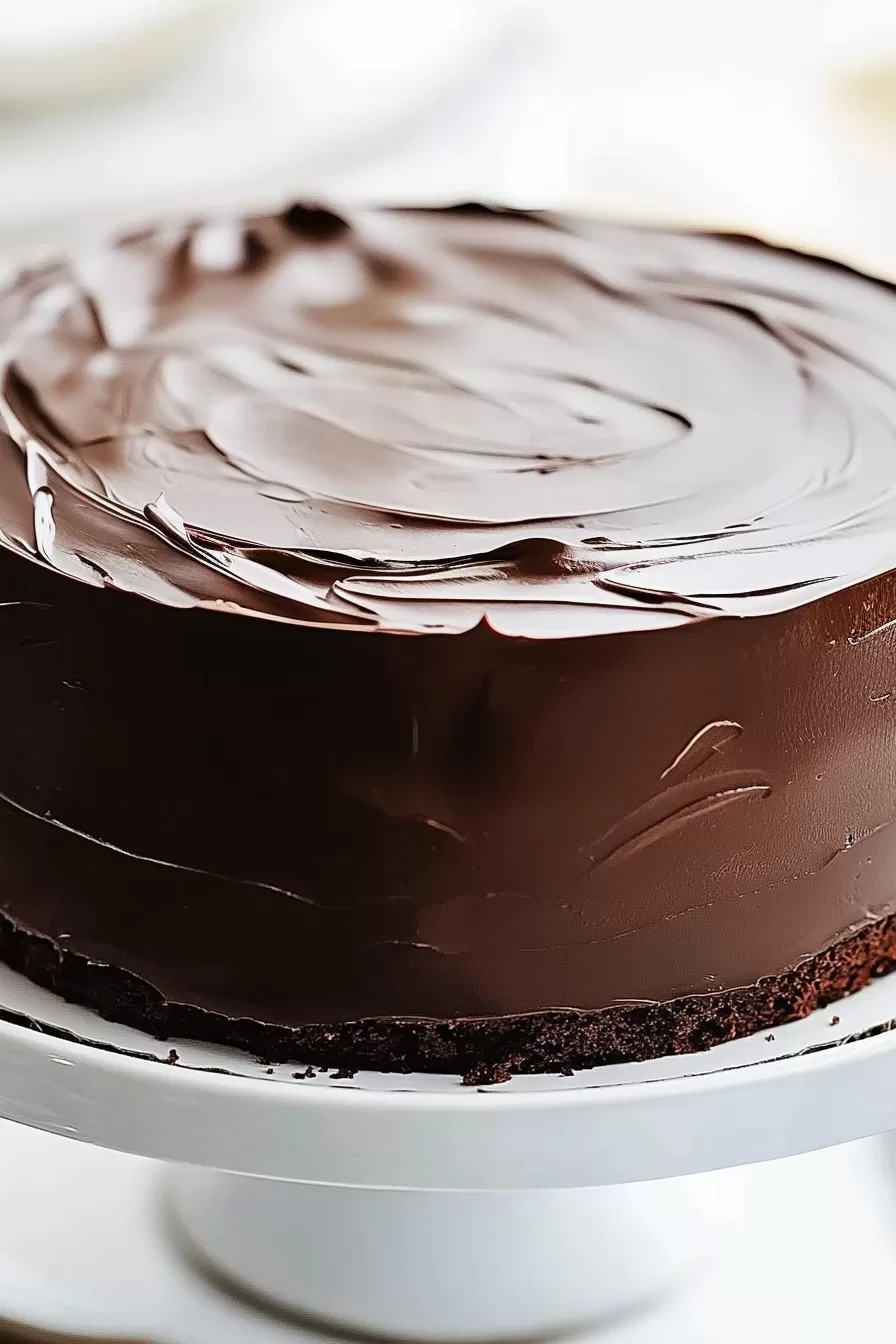
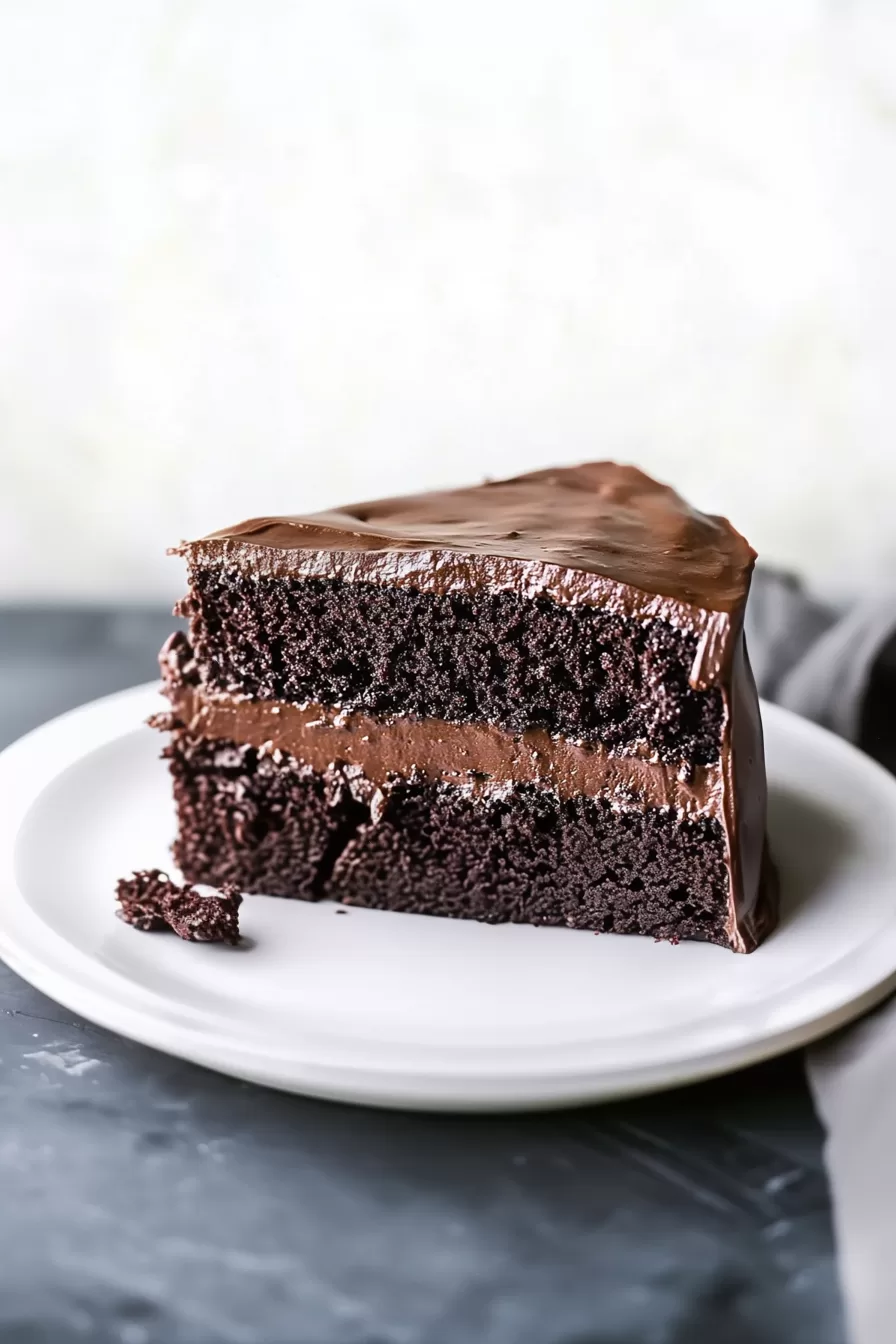
  • Frosting that behaves: No tricky buttercream rituals here, just smooth, fluffy chocolate goodness that spreads like a charm.
  • Adaptable to your vibe: Whether you’re doing layers, a single sheet, or sneaky cupcakes, this batter’s got you.
  • Great make-ahead option: It stays moist for days and even tastes better the second day (like soup but sweet).
  • Freezes like a champ: Make it ahead, stash it in the freezer, then pull out chocolate happiness on demand.

9-Inch Chocolate Cake

Ingredient Notes

The ingredients look classic at first glance, but each one plays a sneaky little role in making this cake the soft, chocolate bomb it should be.

  • Granulated sugar: It sweetens, yes, but it also helps create that tender crumb and nice crusty edge on top.
  • All-purpose flour: Good ol’ reliable gives you structure without making the cake dense or chewy.
  • Unsweetened cocoa powder: Brings the deep, dark chocolate backbone. Use Dutch process for smoother flavor, natural if you want more punch.
  • Baking powder and baking soda: This duo brings lift and lightness. You don’t want a brick, after all.
  • Salt: Just a touch makes the chocolate shine brighter and keeps the sweetness in check.
  • Eggs: Provide structure and richness. Bring them to room temp so they incorporate smoothly.
  • Milk: Adds moisture and makes everything feel a bit creamier and more luxurious.
  • Vegetable oil: Key to a moist cake that stays soft, even straight from the fridge.
  • Vanilla extract: It smooths out the cocoa sharpness and rounds out the flavor in a subtle, but essential way.
  • Boiling water: No, it’s not a typo. It helps bloom the cocoa, unlocking more chocolate flavor and helping with the cake’s airy texture.
  • Butter or margarine: For the frosting—go butter if you can, it adds way more flavor and creaminess.
  • Powdered sugar: Helps create a smooth, fluffy frosting (without the grit of granulated).
  • More cocoa, milk, and vanilla: All mixed into the frosting for that rich, dreamy finish.

9-Inch Chocolate Cake

How To Make This 9-Inch Chocolate Cake

You’ve got bowls. You have a spoon (or mixer, if you’re fancy). That’s really all you need to bring this chocolate cake to life.

  • Preheat your oven like a pro: Set it to 350°F and grease two 9-inch round cake pans. I like butter plus a tap of flour—it releases clean and adds flavor.

  • Get your dry mix together: Sift sugar, flour, cocoa powder, baking powder, baking soda, and salt into a big mixing bowl. Use a whisk to break up lumps and feel very in control of your life.

  • Add the wet ingredients: Crack in the eggs and pour in the milk, oil, and vanilla. Beat everything together for 2 minutes on medium speed. It’ll look like pudding batter—but not the good kind—just trust the process.

  • Now the magic liquid: Stir in that cup of boiling water. The batter will suddenly feel wild and thin. That’s 100% okay, weirdly comforting even.

  • Divide and bake: Gently pour the liquidy batter into your prepared pans. Bake for 30 to 35 minutes or until a toothpick poked in the center pulls out clean or with just a smidge of crumb.

  • Cool before frosting (please): Let the cakes hang out in their pans for 10 minutes. Then transfer them to wire racks and let them cool completely before frosting unless you like frosting puddles.

  • Make your frosting while waiting impatiently: Mix melted butter and cocoa powder until shiny and smooth. Then beat in powdered sugar and milk in turns, adjusting until it spreads easily. Stir in vanilla at the end.

  • Assemble like a confident cake boss: Place the first layer on your plate. Spread a third of the frosting evenly on top. Stack the second layer over it, then frost the top and get those sides too. Offset spatula = your best friend here.

  • Optional paths to dessert happiness: One-pan style? Use a 13×9 pan, bake 35–40 min. Cupcakes? Fill 2/3 full, bake 22–25 min. Bundt? 50–55 min. Or do three 8-inch layers for a dramatic, tall moment.

9-Inch Chocolate Cake

Storage Options

So, what do you do with extra cake (if that situation somehow arises)? Surprisingly, this cake holds up like a champ.

Once fully cooled and frosted, you can store it covered at room temperature for about 2 days. I like to dome foil loosely over the top or use one of those great obnoxiously large cake carriers. In a cooler kitchen, it does just fine unrefrigerated, and the texture actually stays more tender this way.

In warmer months, or if you’re keeping it longer than 2 days, into the fridge it goes. Cover it tightly so it doesn’t dry out. Let slices sit out for 15 minutes before serving to soften the frosting and bring back the rich texture.

Freezing? Absolutely. Wrap individual slices or full layers tightly in plastic wrap, then foil. Freeze the unfrosted layers up to 2 months. You can even stash frosted chunks (technical term) and nibble straight from frozen. Zero judgment.

Variations and Substitutions

You can play around with this base and still get great results. Here’s how you can remix it without breaking anything:

  • Swap the cocoa powder: Use Dutch-processed for smoother chocolate flavor. Natural cocoa gives a brighter, more old-school vibe.

  • Try coffee instead of water: Hot brewed coffee in place of boiling water deepens the chocolate without adding actual coffee flavor. It’s subtle but bold.

  • Dairy-free twist: Use almond or oat milk and vegan margarine or coconut oil. The crumb stays fabulous. Just pick a neutral-flavored dairy-free milk.

  • Add-ins to jazz it up: Stir in mini chocolate chips, chopped walnuts, or crushed peppermint for fun twists in the batter.

  • Vanilla buttercream instead: Not a chocolate-on-chocolate fan? Frost it with plain vanilla buttercream to lighten the whole mood.

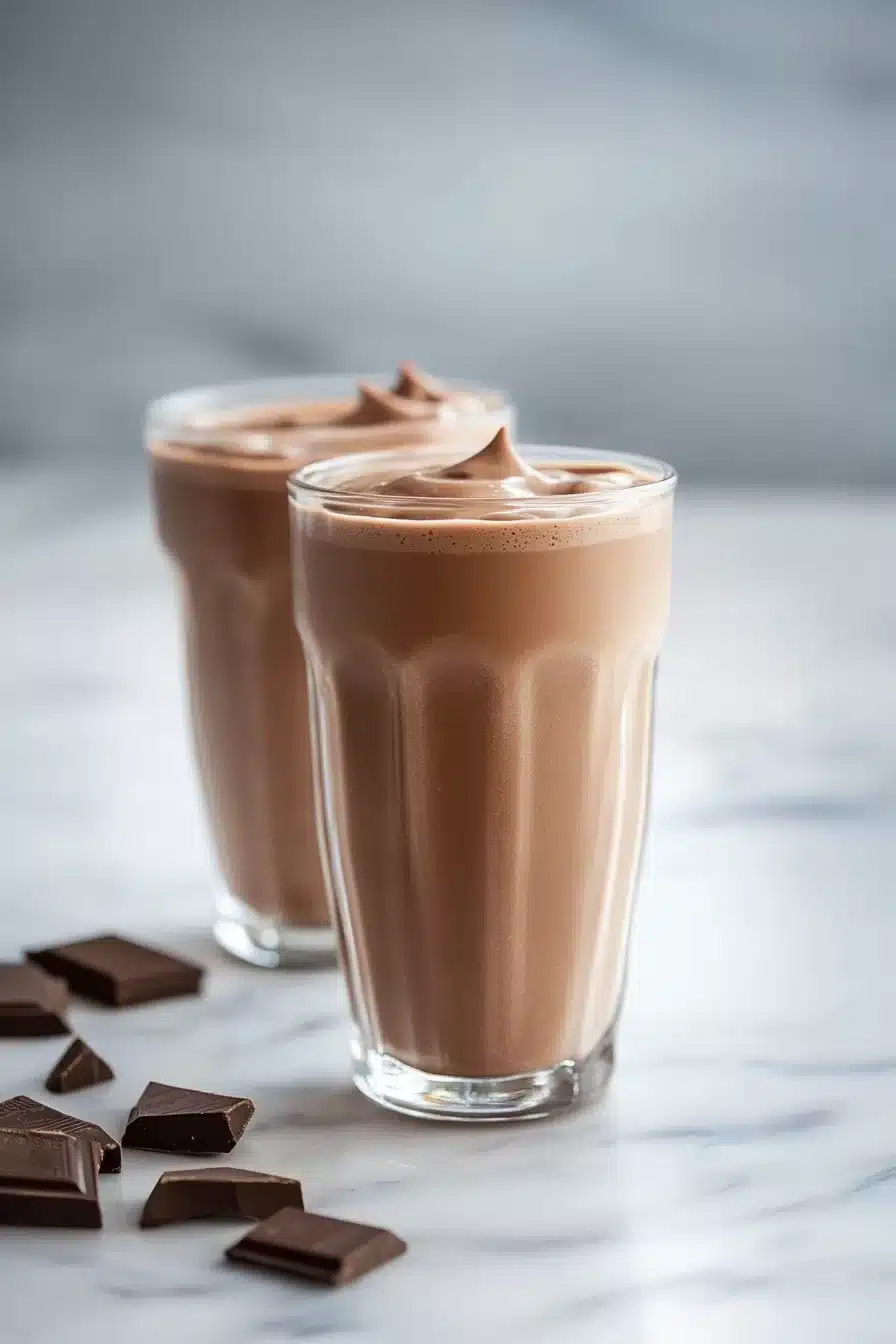
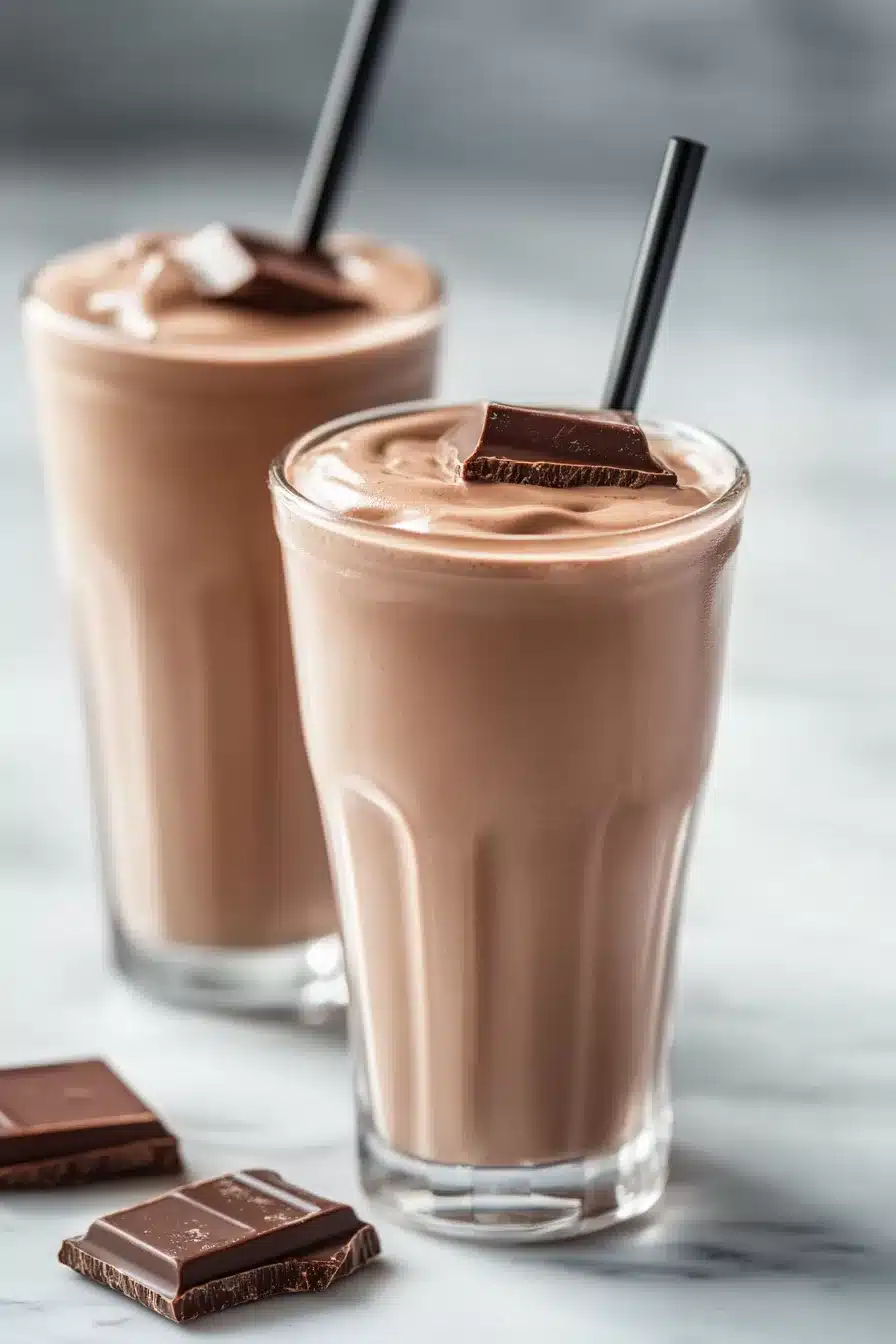
  • Go wild with toppings: Think berries, toasted coconut, or even a dollop of copycat chocolate shake whip on the side.

9-Inch Chocolate Cake

What to Serve with 9-Inch Chocolate Cake

Sure, this cake can hold its own, but it loves company too. Here’s what goes surprisingly well with a big ol’ slice.

  • A hot cup of something bold: Coffee, black tea, or even a chai latte cozies right up to chocolate cake. The slight bitterness cuts richness in the most satisfying way.

  • A scoop of ice cream (obviously): Vanilla is classic, but don’t overlook peanut butter or espresso swirl. Or hey, a DIY dessert bar moment with peanut butter banana ice cream nearby? Yes.

  • Fruit on the side for contrast: Sliced strawberries, raspberries, or even stone fruits if they’re in season work wonders for cutting through the frosting with a little acidity.

  • A savory snack beforehand: If you’re serving this for a casual gathering, a savory dish like pan-seared cod or something similarly light makes a balanced lead-in to the rich dessert.

  • Glass of milk (old school, never wrong): Cold milk plus chocolate cake? It’s comfort, nostalgia, and sheer adult joy in one humble pairing.

9-Inch Chocolate Cake

Frequently Asked Questions

Can I make the batter ahead of time?

It’s not ideal to let the batter sit for hours before baking. As soon as the baking soda and powder meet the liquid, they start working, and if you wait too long, you’ll lose that beautiful rise. Instead, bake the layers ahead and freeze or wrap them tightly and refrigerate for up to two days before frosting.

Can I use a different size pan?

Totally! One 13×9-inch pan works (bake about 35–40 minutes). For cupcakes, it makes about 30—just fill them two-thirds full and bake for around 22–25 minutes. A bundt pan is also great but needs 50–55 minutes in the oven. Or split it into three 8-inch pans for a fancy layered look.

Can I make this cake gluten-free?

You can! Use a cup-for-cup gluten-free flour blend that includes xanthan gum or stabilizers. Something like Bob’s Red Mill or King Arthur’s measure-for-measure usually does the trick. The texture might be a smidge softer, but still delicious and moist.

Why is my cake sinking in the middle?

Ah yes, the dreaded cake crater. That can happen if it’s underbaked (center wasn’t done yet), if the batter was overmixed, or if your oven runs too hot and makes the top set before the inside’s ready. A cheap oven thermometer can save you from all sorts of emotional cake traumas.

9-Inch Chocolate Cake

9-Inch Chocolate Cake

Prep Time 20 minutes
Cook Time 35 minutes
Cooling Time 10 minutes
Total Time 1 hour 15 minutes
Moist, rich, and undeniably dreamy—this 9-inch chocolate cake uses cocoa powder, sugar, flour, and eggs to create a tender, chocolate-sponge perfection, all wrapped with thick, creamy chocolate frosting. Bake it for any occasion (or no reason at all) and revel in the cocoa cloud that fills your kitchen!
12 slices

Ingredients

Chocolate Cake

  • 2 cups (400 g) granulated sugar
  • 1 3/4 cups (220 g) all-purpose flour
  • 3/4 cup (65 g) unsweetened cocoa powder Dutch-processed or natural
  • 2 tsp baking powder
  • 1 1/2 tsp (1.5 tsp) baking soda
  • 1 tsp salt
  • 2 large eggs room temperature
  • 1 cup (240 ml) milk whole or 2% preferred
  • 1/2 cup (120 ml) vegetable oil
  • 2 tsp vanilla extract
  • 1 cup (240 ml) boiling water

Chocolate Frosting

  • 1/2 cup (113 g) unsalted butter softened (or margarine)
  • 2/3 cup (55 g) unsweetened cocoa powder
  • 3 cups (360 g) powdered sugar
  • 1/3 cup (80 ml) milk plus more as needed
  • 1 tsp vanilla extract
  • Pinch of salt to taste

Equipment

  • 2 9-inch round cake pans
  • Large mixing bowl
  • Electric Mixer or Whisk
  • Cooling rack
  • Offset spatula (optional)

Instructions
 

  1. Preheat oven to 350°F (175°C). Grease and flour two 9-inch round cake pans.
  2. Mix dry ingredients: In a large bowl, sift together the sugar, flour, cocoa powder, baking powder, baking soda, and salt. Whisk to combine and break up any lumps.
  3. Add wet ingredients: Add eggs, milk, vegetable oil, and vanilla extract to the bowl. Beat on medium speed for 2 minutes until smooth and thick—batter will be glossy.
  4. Add boiling water: Stir in boiling water (batter will be thin—don’t worry, it’s supposed to be!).
  5. Divide and bake: Pour batter evenly into prepared pans. Bake for 30–35 minutes, or until a toothpick inserted in the center comes out clean or with just a crumb.
  6. Cool the cakes: Let cakes cool in pans for 10 minutes, then turn out onto wire racks and cool completely before frosting.
  7. Make the frosting: In a medium bowl, beat softened butter and cocoa powder until glossy and smooth. Gradually add powdered sugar and milk in turns, mixing on low until creamy; add more milk as needed for spreadable consistency. Beat in vanilla and a pinch of salt to taste.
  8. Assemble the cake: Set one cake layer on a plate. Spread one third of frosting on top. Add the second layer and frost the top and sides with remaining frosting. Use an offset spatula for best results. Slice and serve!
  9. Alternative pans: One 13×9-inch pan: bake 35–40 min. Cupcakes: 24–30 cupcakes, 22–25 min. Bundt pan: 50–55 min. 3×8-inch pans: 22–28 min.

Notes

Storage: Store covered at room temperature for 2 days or in the fridge (well-wrapped) for 4–5 days. For longer storage, freeze layers (wrapped well) for up to 2 months.
Variations: Use coffee instead of boiling water for deeper chocolate flavor; make dairy-free with almond or oat milk plus vegan margarine; add mini chocolate chips, nuts, or berries to the batter or as a topping.
Substitutions: Use cup-for-cup gluten free flour blend if needed; frost with vanilla buttercream if you want a contrast.
See full guide in the FAQ section for pan swaps and troubleshooting tips!

Nutrition

Calories: 420kcal | Carbohydrates: 68g | Protein: 5g | Fat: 18g | Saturated Fat: 5g | Cholesterol: 39mg | Sodium: 420mg | Potassium: 230mg | Fiber: 3g | Sugar: 49g | Vitamin A: 250IU | Calcium: 75mg | Iron: 3.2mg

Cool, creamy, chocolatey, and wildly nostalgic, this McDonald’s chocolate shake made with vanilla ice cream, low-fat milk, and a scoop of Nesquik hits every happy note.

That first sip? Yeah, it’s smooth, frosty heaven. The kind that makes you hum a little without meaning to, and maybe sneak the last slurp when nobody’s looking.

There’s something magic about recreating a fast food classic at home, especially when it takes you, oh… less time than heating up a frozen pizza. This McDonald’s chocolate shake comes together in under five minutes, no drive-thru required, and leaves you with a creamy, dreamy blast of chocolate nostalgia. It’s chilly, luxuriously thick (hello brain freeze), and sweet without tipping into toothache territory.

Best of all, it doesn’t need fancy ingredients. If you’ve got a tub of vanilla ice cream, some milk, and a little bit of Nesquik powder? You’re literally seconds away from shake bliss.

Table of Contents

McDonald’s Chocolate Shake

Why You’ll Love this McDonald’s Chocolate Shake

This one’s a classic. No bells. No whistles. Just pure frozen chocolate nostalgia in a glass.

  • Ridiculously simple to make: You toss three things in a blender, hit the button, and boom—milkshake magic.
  • No fancy gear or exotic ingredients: If your kitchen has a blender and a gallon of ice cream, you’re golden.
  • Smoother than your guy friend trying pickup lines: The texture is lush and silky without being too thick to sip through a straw.
  • Just the right amount of sweet: It’s chocolatey in a throwback, not-too-rich kind of way. Think retro soda shop vibes.
  • Perfect excuse to channel your inner kid: Honestly, why resist? You deserve a milkshake moment.
  • Easy to dress up or tweak: Want whipped cream? A cherry? A bit of boozy swirl? Go wild.

McDonald’s Chocolate Shake

Ingredient Notes

You only need three things, but hey, it’s worth chatting about them because the small stuff matters.

  • Vanilla ice cream: Go full-on classic here. The better the ice cream, the better the shake. That said, I’ve definitely made this with store-brand stuff hiding in the back of the freezer, and it was still very slurpable.
  • Low-fat milk: This keeps things smooth without going overboard on richness. Whole milk works too, but you’ll get a thicker shake (which might require spoon effort).
  • Nestle Nesquik chocolate drink mix: Yep, the old-school powder. It melts right into the shake and gives that unmistakable flavor. Cocoa powder won’t give you the same nostalgia vibe, so stick with the rabbit.

McDonald’s Chocolate Shake

How To Make This McDonald’s Chocolate Shake

Get your blender ready and maybe do a little celebratory dance, because this is gonna be fast and fun.

  • Chill your glasses: Pop two 12-ounce glasses into the freezer for at least 15 minutes. This tiny step seriously amplifies that frosty-first-sip satisfaction. You could skip it, but then… why would you.

  • Add everything to the blender: Scoop in 2 cups of vanilla ice cream, pour 1¼ cups of milk over it, and then add 2 tablespoons of Nesquik. No need to be fussy here—just layer it in and cap the blender.

  • Blend until smooth: Go full throttle, baby. High speed for about 30 seconds to one minute should do it. If your blender’s feeling dramatic or the mix is too thick, add a splash more milk and blend again.

  • Pour into chilled glasses: That cold glass hitting your palm? Yeah, it’s a good moment. Now pour in the shake and marvel at that creamy swirl. Bonus points if you top it with whipped cream or raid the pantry for sprinkles.

McDonald’s Chocolate Shake

Storage Options

Okay, real talk: milkshakes are meant to be gulped right after blending. That’s their prime moment, when the ice cream is still a bit fluffy and the chocolate hits just right. But let’s say you made a little too much (been there), or someone ghosted you at shake o’clock.

Fridge? Not ideal. It’ll melt and separate into a sad, sweet puddle with faint shake memories. You could give it a stir, but the magic’s kinda gone.

Freezer? Better bet. Pour the leftovers into a sealed jar or even an ice cube tray (yes, really). When you’re ready for round two, just let it thaw a bit or blend again with a splash of milk to revive that creamy texture. Smooth operator.

Don’t bother with reheating (unless you’re doing a bizarre milkshake soup experiment, and if so, please report back).

Variations and Substitutions

While the original is dreamy, there are fun ways to riff on this shake if you’re feeling adventurous or pantry-limited.

  • Chocolate ice cream: Double up on chocolate if you’re that kind of person. It’ll be richer and thicker and you won’t hear me complaining.
  • Oat or almond milk: If dairy’s not your pal, swap in a creamy plant-based milk. Go unsweetened or the shake might go into sugar shock.
  • Strawberry Nesquik instead: I know, it’s not chocolate. But if you’re chasing McDonald’s strawberry shake vibes instead, I fully support it.
  • Add a scoop of peanut butter: It swirls in and adds salty-smooth depth. Truly next level. Bonus? Pairs well with a little cookie action, like these Neiman Marcus cookies.
  • Toss in a banana: I do this when I need to convince myself a milkshake is a real snack. Banana + chocolate = a good life choice.
  • Whipped cream and sprinkles: Not required, just fun. Like wearing glitter socks under your jeans. No one sees it but you know.

McDonald’s Chocolate Shake

What to Serve with McDonald’s Chocolate Shake

This shake sits so happily alongside simple food that makes you feel good inside. Think comfort, carbs, and maybe a little salt.

  • If you’re going full-on diner fantasy, serve it with crispy fries still hot from the oven. Yep, dipping fries into shakes is still a thing—sweet, salty, melty magic with every bite. Trust the process.

  • Pair it with a juicy handheld meal, like a classic burger or grilled veggie sandwich. Cold sweet shake meets warm savory bite? It’s the kind of combo that makes your tastebuds do jazz hands.

  • Got something warm and cozy cooking? Surprisingly, this plays well with soup. I’ve sipped this after a bowl of lemon chicken artichoke soup, and the contrast is weirdly satisfying.

  • Keep it retro-dessert meets retro-beverage: try serving it with peanut butter and banana ice cream sandwiches. It’s dessert inception, and it’s fabulous.

McDonald’s Chocolate Shake

Frequently Asked Questions

Can I make this McDonald’s chocolate shake without a blender?

You technically can, but it takes a little elbow grease. Soften the ice cream a bit, then whisk vigorously by hand or use an immersion blender. It won’t be quite as airy, but it’ll still be deliciously sippable. Bonus: upper arm workout.

Is there a dairy-free version of this shake?

Totally! Use a dairy-free vanilla ice cream (like almond or cashew based) and your favorite plant milk. Oat milk makes a great sub because of its creamy texture. Just make sure to use a dairy-free chocolate drink mix, too.

How do I make the shake thicker?

Use less milk or freeze your ice cream extra solid before blending. Adding a few ice cubes can help too, but it may water the flavor just a smidge. Or sneak in a scoop of chocolate protein powder if you want the thickening *and* a power boost.

Can I add alcohol to jazz it up?

Oh yes, grown-up shake time. A splash of Baileys, Kahlua, or chocolate liqueur goes a long way. Just add it after the main blending so you don’t over-dilute the creamy texture. Sip responsibly while texting all your childhood friends about your excellent decisions.

McDonald’s Chocolate Shake

McDonald's Chocolate Shake (Copycat)

Prep Time 5 minutes
Cook Time 0 minutes
Glass Chilling Time 15 minutes
Total Time 5 minutes
Cool, creamy, chocolatey, and wildly nostalgic, this McDonald's chocolate shake made with vanilla ice cream, low-fat milk, and a scoop of Nesquik hits every happy note. Smooth, frosty, and ready in minutes—no drive-thru required.
2 shakes

Ingredients

Main Ingredients

  • 2 cups (470 ml) vanilla ice cream
  • 1 1/4 cups (300 ml) low-fat milk whole milk okay for a thicker shake
  • 2 tbsp (16 g) Nestle Nesquik chocolate drink mix

Optional Toppings

  • whipped cream for topping, optional
  • chocolate sprinkles for topping, optional
  • maraschino cherry for garnish, optional

Equipment

  • Blender
  • Measuring cups
  • Chilled glasses

Instructions
 

  1. Chill two 12-ounce glasses in the freezer for at least 15 minutes before making the shake for extra frosty results.
  2. Add the vanilla ice cream, low-fat milk, and Nesquik chocolate drink mix to your blender. No need to be precise about the order; just add them all in.
  3. Blend on high speed for 30–60 seconds until the mixture is completely smooth. If the shake is too thick for your liking or your blender is struggling, add a splash more milk and blend again.
  4. Pour the shake evenly between the chilled glasses. Top with whipped cream, sprinkles, and a cherry if you want an authentic diner touch. Sip immediately for prime creaminess!

Notes

Milkshake magic is all about the moment—drink right after blending for best texture! To make it vegan or dairy-free, use plant-based milk and dairy-free vanilla ice cream plus a dairy-free chocolate drink mix. For a thicker shake, use less milk, freeze your ice cream extra solid, or toss in a few ice cubes. Want to go deluxe? Add a little Baileys or Kahlua for a grown-up treat.

Nutrition

Calories: 280kcal | Carbohydrates: 46g | Protein: 7g | Fat: 7g | Saturated Fat: 4g | Cholesterol: 35mg | Sodium: 180mg | Potassium: 410mg | Sugar: 39g | Vitamin A: 400IU | Vitamin C: 2mg | Calcium: 250mg | Iron: 1mg

Rich, chewy, and gloriously over-the-top, these neiman marcus cookies are crammed with chocolate chips, oats, butter, brown sugar, and grated Hershey’s. Heaven.

So, here’s what we’ve got: big bakery-style cookies that take your average chocolate chip situation and just sort of… level it up. You’ll smell the nuttiness from the toasted oats and melted chocolate wafting across the kitchen before your timer even dings. These giants are crisp at the edge, soft and doughy in the middle, and full-on indulgent.

Even better? No mysterious “secret ingredient” drama. Just honest-to-goodness cookie mayhem, ready to make your kitchen smell like a dream. Let’s bake.

Table of Contents

Neiman Marcus Cookies

Why You’ll Love this Neiman Marcus Cookies Recipe

Okay, these cookies aren’t new, but they’re new to your oven. And once you make them, I’m pretty sure your regular chocolate chip recipe is heading straight into retirement.

  • Unapologetically overstuffed: With both grated chocolate and chips, it’s like double-trouble in the best way.
  • Oats, but sneaky: Ground oats add texture without screaming “health food” (they’re totally undercover).
  • Big batch, big payoff: You’ll make enough to feed a small village—or keep your freezer stocked for surprise cookie emergencies.
  • Adaptable to your nut mood: Walnuts, pecans, almonds… pick your crunch.
  • No weird stuff: Just pantry staples, a couple power moves, and a blender.

Neiman Marcus Cookies

Ingredient Notes

Okay, let’s talk ingredients. This is less about fancy and more about balance. Each one’s got a job to do, and they pretty much all pull their weight.

  • Steel-cut or whole oats: Blended into a coarse powder, they give the cookies heft and a toasty, almost nutty background vibe.
  • All-purpose flour: Reliable and sturdy, it helps soak up all that butter and keeps things chewy, not cakey.
  • Butter: Go for unsalted so you can control the salt. Softened a bit, it whips up best for that dreamy texture.
  • Granulated sugar and brown sugar: This duo is everything—crispy edges from the white, caramel chew from the brown.
  • Eggs: Room temp eggs mix in smoother and trap more air. Science. Delicious, gooey-cookie science.
  • Vanilla extract: A quiet hero. Don’t skip it. It smooths out the layers of chocolate and warms up the sweetness.
  • Chocolate chips + grated Hershey’s Bar: One melts soft, the other melts completely; together they make the cookie ridiculously rich.
  • Nuts: Totally up to you. I love pecans here, but walnuts or chopped macadamias are dreamy too.

Neiman Marcus Cookies

How To Make This Neiman Marcus Cookies Recipe

These cookies don’t ask much of you—just a little faith, a little folding, a little patience during the cooling window (I know, it’s hard). Here’s what you’ll do:

  • Preheat your oven to 375°F: Get that oven nice and hot. You want it ready to go when your dough’s shaped and your kitchen smells like potential.

  • Powder up those oats: Put your oats in a food processor or a decent blender and blitz till coarse. Not dust, not boulders—something in between. This step gives your cookie its uniquely chewy soul.

  • Whisk the dry stuff: Combine that oat powder with flour, baking soda, baking powder, and salt. Give it a whisk so everything’s evenly distributed. Dry ingredients like mingling, you know?

  • Cream the butter and sugars: With an electric mixer, beat the butter and both sugars until light and fluffy. Really go for it—5 to 7 minutes may feel long, but it builds structure and magic. Don’t skimp.

  • Add eggs and vanilla: One egg at a time, followed by the vanilla. Each one gets a quick little mix in, about 10–15 seconds. It’s like they’re introducing themselves to the party.

  • Mix the wet and dry: Gradually add the dry ingredients to the wet mix. You’re going for cookie dough, not cookie paste, so stop once it looks thick and cohesive.

  • Add all the fun stuff: Fold in the chocolate chips, grated chocolate bar, and nuts with a spatula. Yes, the spatula matters. You want gentleness here, not full-on electric-mixer mayhem.

  • Scoop and bake: Roll the dough into 1-inch balls and space them out on a baking sheet lined with parchment. They will spread, and they’re not shy about it. Bake for 10 minutes until golden around the edges.

  • Cool (as hard as that is): Let them sit on the sheet for 10 minutes before you even think about lifting one. They firm up as they cool, I promise.

Neiman Marcus Cookies

Storage Options

So, you’ve got a pile of these glorious Neiman Marcus cookies and exactly zero self-control. Totally understandable. Here’s how to make them last a little longer.

If you plan to eat them in the next few days (bless your willpower), pop them in an airtight container at room temp. They’ll stay soft and chewy for up to 4 days. Just don’t put them uncovered on the counter unless you like cookie jerky.

Want to stretch out the joy? Freeze the dough! Roll it into balls, then freeze on a sheet pan. Once solid, toss them into a zip-top bag. Bake straight from the freezer at the usual temp—just tack on a couple extra minutes in the oven.

Already baked some and couldn’t finish them all (again, who are you)? You can freeze the fully baked cookies too. Wrap individually in plastic or store in an airtight container. A quick 10 seconds in the microwave will get them soft and delicious again.

Variations and Substitutions

Switching things up is part of the fun. Whether you’re out of something or just in the mood for adventure, here are some ideas.

  • Different chocolate: Swap in white chocolate chips, dark chunks, or M&Ms if that’s your vibe. The base cookie can handle it.
  • Nut-free version: Skip the nuts altogether or sub in sunflower seeds for some crunch without allergens crashing the party.
  • Gluten-free option: Go with a 1:1 gluten-free flour blend plus certified GF oats. The texture changes slightly, but the flavor stays fabulous.
  • Add-ins like coconut or dried cherries: Fold in ½ cup of unsweetened coconut flakes or chopped dried fruit for bonus flavor layers.
  • Espresso powder: Add 1 teaspoon of instant espresso to the dry mix and watch your chocolate flavor sing. Always optional, never boring.

Neiman Marcus Cookies

What to Serve with Neiman Marcus Cookies

Obviously, a cold glass of milk is the cookie’s soulmate, but let’s stretch our imaginations for a second here. These cookies play well with others.

  • A cozy cup of split pea soup makes an unexpected pairing. Why? Because a hearty, savory dinner followed by dessert is never a bad idea. Let the cookie be your reward.

  • Try these cookies crumbled over vanilla ice cream. The grit of oats, the melt of chocolate, the cold creaminess… stop me. It’s too perfect.

  • More of a coffee-in-the-afternoon type? One of these alongside a strong espresso might ruin you for 3 p.m. ever again. Sorry, not sorry.

  • Serving cookies at a gathering? Pair them with a savory nibble, like these bacon basil cornbread muffins. People will talk. Probably in a good way.

Neiman Marcus Cookies

Frequently Asked Questions

Can I make the dough ahead of time?

Totally. This dough chills beautifully. You can make it a day or two ahead, stash it tightly wrapped in the fridge, and scoop when you’re ready. Some say the flavor even improves with the rest time (the oats soak and mellow everything out). Just let it sit at room temp for 20–30 minutes before scooping—unless you want an arm workout.

Why do I need to process the oats?

Great question. Blending the oats gives the cookies a lovely chewy texture without being too obvious about the oatiness. You’re not going for flour-smooth or chunky granola-school. Think tender, toasty grit. If you skip this step and toss them in whole, expect a much rougher texture and more spread in the oven.

Can I leave out the grated Hershey’s bar?

You can, but… hear me out. The grated chocolate adds a sort of creamy chocolate mist throughout the dough that chocolate chips alone can’t do. It melts right into the dough and gives you these barely-there swirls of chocolate. It’s subtle, but it makes a difference. If you skip it, maybe add an extra ½ cup of chips to keep things interesting.

What kind of nuts work best?

Pecans and walnuts are classic—they bring that soft, buttery crunch that hugs the gooey dough just right. Almonds are a little sharper and crisper. I’d skip peanuts, unless you want to pull your cookies into peanut butter cookie territory. Hazelnuts? Go for it. Bonus points if you toast them first.

Neiman Marcus Cookies

Neiman Marcus Cookies

Prep Time 25 minutes
Cook Time 10 minutes
Total Time 45 minutes
Rich, chewy, and gloriously over-the-top, these Neiman Marcus Cookies are crammed with chocolate chips, oats, butter, brown sugar, nuts, and grated Hershey’s. Think crispy edges, soft and doughy centers, and an indulgent bakery-style treat right from your own oven.
36 cookies

Ingredients

  • 2 1/2 cups (225 g) steel-cut or old-fashioned oats blended into coarse powder
  • 2 cups (250 g) all-purpose flour
  • 1 tsp (4 g) baking powder
  • 1 tsp (4 g) baking soda
  • 1/2 tsp (3 g) salt
  • 1 cup (226 g) unsalted butter softened
  • 1 cup (220 g) light brown sugar packed
  • 1/2 cup (100 g) granulated sugar
  • 2 large eggs room temperature
  • 1 tsp (5 ml) vanilla extract
  • 2 cups (340 g) chocolate chips preferably semisweet
  • 1 bar (140 g) Hershey’s milk chocolate bar 5 oz (140g), coarsely grated
  • 1 1/2 cups (175 g) chopped nuts pecans, walnuts, or almonds; optional

Equipment

  • Baking sheet
  • Parchment paper
  • Electric mixer
  • Food Processor or Blender
  • Spatula

Instructions
 

  1. Preheat oven to 375°F (190°C) and line baking sheets with parchment paper.
  2. Place oats in a food processor or blender and pulse until they reach a coarse powder texture (not fine flour).
  3. In a large bowl, whisk together the ground oats, flour, baking powder, baking soda, and salt until evenly combined.
  4. In another large bowl, use an electric mixer to beat the softened butter, brown sugar, and granulated sugar until light and fluffy, about 5–7 minutes.
  5. Add eggs, one at a time, then mix in vanilla, beating just until incorporated after each addition.
  6. Gradually add the dry ingredients to the wet mixture. Mix on low speed just until combined; avoid over-mixing.
  7. Using a spatula, fold in the chocolate chips, grated Hershey’s bar, and nuts (if using) until evenly distributed.
  8. Scoop dough into 1-inch balls (about 2 tablespoons each) and place 2 inches apart on prepared baking sheets.
  9. Bake for 10 minutes, or until cookies are golden around the edges but still soft in the centers.
  10. Cool cookies on the baking sheet for 10 minutes before transferring to wire racks to cool completely.

Notes

For a nut-free version, omit the nuts or replace with sunflower seeds. The dough can be made ahead and refrigerated for up to 2 days. Baked cookies can be stored in an airtight container at room temperature for up to 4 days, or frozen for longer storage. For extra flavor, you can add 1 teaspoon of instant espresso powder to the dry mixture or fold in ½ cup coconut flakes or dried cherries. Gluten-free? Use a 1:1 gluten-free flour blend and certified GF oats.

Nutrition

Calories: 230kcal | Carbohydrates: 29g | Protein: 3g | Fat: 11g | Saturated Fat: 6g | Cholesterol: 23mg | Sodium: 95mg | Potassium: 65mg | Fiber: 2g | Sugar: 15g | Vitamin A: 240IU | Calcium: 31mg | Iron: 1.3mg

Warm, cozy, and savory, this split pea soup simmers green split peas, onion, garlic, carrots, and a smoky ham hock into a silky, stick-to-your-spoon pot of comfort. Let’s be real—it smells like a winter cabin and tastes like a hug with depth.

This isn’t the watery green gruel of cafeteria lore—promise. Think soft, earthy pulses slowly simmering in a herby broth until they melt into something creamy and satisfying, no cream needed. There’s that little smoky-wild kick from the ham hock (or hellooo bacon), bright nibbles of carrot and celery, and a savory richness that builds with each lazy spoonful.

Whether you’re winding down a cold Tuesday or packing a thermos for lunch, this split pea soup plays the long game. It reheats like a champ, it’s cheap as heck, and your kitchen will smell like you’re way fancier than you probably are. Y’know, in a good way.

Table of Contents

Split Pea Soup

Why You’ll Love this Split Pea Soup

It’s not flashy, but that’s honestly the charm. This is one of those soups that just works—simple ingredients, cozy payoff, no drama.

  • Deep, savory comfort: The ham hock adds that smoky richness you can’t fake, and it steeps right into the soul of the broth.
  • Meal-prep gold: It thickens up beautifully by day two and makes you feel like you’ve got your life together.
  • Budget-friendly and humble: A pound of split peas is like, pocket change, and it feeds a small village.
  • Naturally creamy texture: Forget needing cream or flour—a good simmer makes this soup luscious all by itself.
  • Customizable: No ham? No problem. Vegetarian? Covered. You can tweak it endlessly without crashing the whole vibe.
  • Smells like someone’s been cooking all day: And that someone is you, casually crushing it in your slippers.

Split Pea Soup

Ingredient Notes

It doesn’t take much to make major flavor happen here. You’re looking at pantry basics and one little twist—the ham hock—that turns this pot of green goo into actual greatness.

  • Olive oil: Just a tablespoon to sauté your veggies and get things going. Use butter if you’re feeling luxurious.
  • Onion: Classic base flavor. Go yellow or white—just avoid anything too sweet like Vidalia.
  • Garlic: Two cloves, minced and fragrant. Don’t skip it; trust me.
  • Carrots: They add a pop of sweetness and color. Dice them small so they soften nicely.
  • Celery: It brings that essential soup-y background hum—fresh, fragrant, and quietly awesome.
  • Bay leaf: Subtle but grounding. Just one, and don’t forget to fish it out later.
  • Thyme: Dried works great, but if you’ve got fresh, toss in a whole sprig. You’ll smell the difference.
  • Dried green split peas: The star! No soaking needed, just rinse and double-check for rogue pebbles.
  • Smoked ham hock (or diced ham or bacon): The flavor powerhouse. The smoked hock infuses everything, but diced ham works if you want it easy.
  • Chicken or vegetable broth: Your canvas. Homemade is dreamy but store-bought is totally fine.
  • Salt and black pepper: Season with confidence, but taste as you go. The ham will bring some salinity, too.
  • Optional garnish: Fresh parsley for brightness, croutons for crunch, or a cheeky drizzle of olive oil.

Split Pea Soup

How To Make This Split Pea Soup

Okay, ready? Apron on, socks cozy, let’s get a pot bubbling. This is one of those “low and slow” situations—minimal effort, serious payout. Stir occasionally between sips of wine (or tea, or honestly, just taste tests straight from the ladle).

  • Start with the sauté: Heat olive oil in your Dutch oven (or any big ol’ pot). Toss in your chopped onion, celery, carrots, and garlic. Give it a good stir. Let them soften and smell amazing for about 5 to 7 minutes. You’re not going for golden brown—just deliciously fragrant.

  • Flavor boost time: Add in the thyme and bay leaf. Stir it around so they bloom in that warm veg oil. Then sprinkle in your washed split peas. Mix them right in so they get to know the aromatics.

  • Let’s get brothy: Position your ham hock right in the middle like a meaty jewel, then pour in the broth. Bring everything to a gentle boil—this part always smells incredible. Then, reduce heat to low, cover the pot, and settle in. The soup needs to simmer for about 1 to 1 ½ hours. Go about your life. Stir now and then so nothing sticks.

  • Time to assess: Once the peas are super soft and starting to collapse into themselves, it’s check-in time. If the soup looks too thick, splash in extra broth or water. Too thin? Just take off the lid and keep simmering until it thickens up to your liking.

  • Tend to the ham hock: If you used one, lift it out and let it cool for a minute. Pick off the meat and discard the bone and any weird bits. Shred that smoky treasure and stir it back into the pot.

  • Final seasoning moment: Give it a taste. Toss in salt and pepper until it makes you happy. Simmer just a few more minutes so it all clicks.

  • Serve hot: Don’t forget to remove the bay leaf! Then ladle into bowls and top with whatever flair you’re feeling—croutons? Yes. Fresh herbs? Always. A swirl of olive oil? Chef’s kiss.

Split Pea Soup

Storage Options

Ah yes, the soup that keeps on giving. This split pea soup actually gets better overnight—no exaggeration. The flavors deepen, and the texture thickens into true magic.

Start by letting the soup cool to room temp (don’t toss it directly into the fridge while hot, or else you’ll warm up everything around it). Once it’s cooled, transfer it into airtight containers. It’ll keep in the fridge for up to 5 days. And yeah, it might thicken a bit, but a splash of broth or water brings it right back.

Now—freezing. You totally can. Portion the soup into freezer-safe containers or zip-top bags (laid flat, if space is tight). Label those babies. Smile smugly. Frozen split pea soup is good for up to 3 months. When you’re ready, thaw it in the fridge overnight and then reheat gently on the stovetop.

Microwave? Sure. Just go low and slow, and stir halfway through so it heats evenly.

Variations and Substitutions

Whether you’re working with what’s in your fridge or making it veggie-friendly, there are lots of ways to riff on this hearty wonder.

  • No ham hock: Use diced ham, pancetta, or even chopped cooked bacon. Each brings its own smoky charm.
  • Vegetarian version: Skip the ham and use vegetable broth. Add a splash of smoked paprika for that missing smoky vibe.
  • Extra veggies: Toss in diced potatoes, zucchini, or spinach at the end for bonus texture and freshness. Totally allowed.
  • Fresh herbs: Swap dried thyme for fresh rosemary or sage if that’s what’s lurking in your spice rack.
  • Spice it up: Add a pinch of crushed red pepper flakes or a splash of hot sauce to give it a little kick.
  • Creamy twist: Stir in a swirl of coconut milk or cream at the end if you want to luxe it up a bit.

Split Pea Soup

What to Serve with Split Pea Soup

A bowl of this soup is hearty enough to stand alone, but a few sidekicks definitely elevate the scene. “Soup and something” is kind of a mood, right?

  • A buttery, crusty slice of sourdough or rustic bread is an obvious move. Toast it up, swipe it through the soup, and feel ridiculously satisfied. If you’re in the baking spirit, maybe try whipping up bacon basil cornbread muffins for a smoky, savory companion.

  • Pair with a simple green salad—peppery arugula, lemon vinaigrette, maybe a poached egg on top if you’re fancy like that. It adds balance and freshness to all that comfort food coziness.

  • Cheese pretty much always helps. A wedge of aged cheddar or even a melty grilled cheese sandwich turns this meal into something positively nostalgic (and nap-worthy).

  • For a lighter contrast, serve it alongside something seafood-y like this pan seared cod with rainbow chard. The flaky fish balances the thick and hearty soup gorgeously.

  • And if you’re somehow still hungry afterward, follow things up with an easy sweet bite like peanut butter & banana ice cream sandwiches. Just sayin’.

Split Pea Soup

Frequently Asked Questions

Do I need to soak split peas before making soup?

Nope! That’s one of the best things about split peas—they cook relatively quickly, no soak needed. Just rinse them well and poke around for any sneaky pebbles. They’ll break down beautifully with a good simmer.

How thick should my split pea soup be?

Honestly? That’s up to you. Some folks like it super smooth and stew-like, while others prefer it a bit brothy with texture. If it gets too thick for your liking, just add broth or water to loosen it up. Want it thicker? Simmer uncovered a bit longer.

Can I make this soup vegetarian or vegan?

Absolutely. Just skip the ham hock and use vegetable broth. If you miss the smoky flavor, a teaspoon of smoked paprika or a splash of liquid smoke works well. Some crumbled tempeh bacon on top wouldn’t hurt either.

How do I reheat split pea soup without it getting too thick?

It naturally thickens as it sits, especially in the fridge. To reheat, add a little broth or water while warming it gently over medium heat. Stir often so it doesn’t scorch on the bottom. Microwave works too—just stir halfway through and check for hot spots.

Split Pea Soup

Hearty Split Pea Soup

Prep Time 15 minutes
Cook Time 1 hour 15 minutes
Total Time 1 hour 30 minutes
Warm, cozy, and savory, this split pea soup simmers green split peas, vegetables, and a smoky ham hock into a silky, stick-to-your-spoon pot of comfort. With customizable options and deep flavor, it reheats beautifully and brings winter cabin vibes to your kitchen.
6 bowls

Ingredients

Base Ingredients

  • 1 tbsp olive oil or butter
  • 1 onion medium, diced
  • 2 cloves garlic minced
  • 2 carrots medium, diced
  • 2 stalks celery diced
  • 1 bay leaf
  • 1 tsp dried thyme or 1 sprig fresh thyme
  • 1 lb (450 g) dried green split peas rinsed and picked over
  • 1 smoked ham hock or 1 cup diced ham or bacon
  • 8 cups (2 liters) chicken broth or vegetable broth
  • salt and black pepper to taste

For serving (optional)

  • fresh parsley chopped
  • croutons
  • extra olive oil for drizzling

Equipment

  • Dutch Oven
  • Cutting board
  • Chef’s knife
  • Ladle

Instructions
 

  1. Heat olive oil in a Dutch oven over medium heat. Add the onion, carrots, celery, and garlic. Sauté for 5–7 minutes until vegetables are softened and fragrant but not browned.
  2. Add the thyme and bay leaf. Stir to combine, letting the herbs bloom in the heat. Add the rinsed split peas and stir to coat them in the aromatics.
  3. Nestle the ham hock (or stir in diced ham/bacon) in the pot. Pour in the broth. Bring to a gentle boil over medium-high heat. Once boiling, reduce heat to low, cover, and let the soup simmer for 60–90 minutes, stirring occasionally.
  4. Check soup consistency: If too thick, add more broth or a splash of water. If too thin, simmer uncovered to reduce until desired thickness is reached.
  5. If using a ham hock, remove it from the pot and let cool slightly. Shred or chop any ham from the bone and return the meat to the soup. Discard the bay leaf and ham bone.
  6. Season with salt and black pepper to taste. Simmer a few more minutes so flavors meld.
  7. Ladle hot soup into bowls and garnish with fresh parsley, croutons, or an extra swirl of olive oil if desired. Serve with crusty bread for dunking.

Notes

This soup is even better the next day. For a vegetarian version, skip the ham hock and use vegetable broth—add smoked paprika for a little 'smoky' depth. You can freeze leftovers for up to three months; cool completely before freezing. When reheating, add broth or water to loosen if the soup thickens up in storage.
  • Add extra veggies like potatoes, zucchini, or spinach in the last 15 minutes of cooking if you like more texture.
  • Swap in rosemary or sage for thyme if desired. For a spicy kick, stir in crushed red pepper flakes or a dash of hot sauce.
  • To make it creamy, add a splash of coconut milk or cream at the end.

Nutrition

Calories: 325kcal | Carbohydrates: 47g | Protein: 20g | Fat: 5g | Saturated Fat: 1g | Cholesterol: 15mg | Sodium: 950mg | Potassium: 780mg | Fiber: 15g | Sugar: 7g | Vitamin A: 4350IU | Vitamin C: 7mg | Calcium: 60mg | Iron: 3.5mg

Bright, cozy, and full of zing, lemon chicken artichoke soup brings warmth with tender chicken, hearty veggies, and a citrus kick from fresh lemons. The combo of onion, garlic, carrots, and artichokes simmering together smells like you’ve got something special going on in the kitchen.

This pot of comforting, lemony goodness is light without being boring, herby without being bossy, and just delightfully brothy in all the right ways. Think: a rainy Tuesday, your comfiest socks, and a bowl that warms you right down to your bones.

Creamy chowders and cozy stews will always have a place in my heart (and belly), but this lemon chicken artichoke soup is like the refresh button for soup season. It’s brothy but not bland. It’s comforting yet bright. And let me tell you—the lemony zip wakes your taste buds up like “yes hello, we ARE alive and well!”

The artichoke hearts add a quiet richness (they don’t ask for much, but they show up). Toss in some shredded chicken, fragrant herbs, and a big squeeze of lemon at the end, and you’re in business. Whether you’re feeding yourself after a long day or trying to use up that bundle of celery staring at you from the crisper drawer, this soup’s got your back.

Table of Contents

Lemon Chicken Artichoke Soup

Why You’ll Love this Lemon Chicken Artichoke Soup

If cozy met zesty and they had a delicious love child, this soup would be it.

  • Light but satisfying: It’s brothy with just enough orzo to give it body without tipping over into “stew” territory.
  • Zingy citrus magic: A generous splash of lemon juice gives it a bright, happy flavor you don’t usually get from a bowl of soup.
  • Weeknight friendly: Everything simmers in one big pot, and nothing about it is fussy or complicated.
  • Customizable to your mood: You can use rice instead of orzo, swap in kale, or skip the cheese on top (although… why?).
  • Plays well with leftovers: A great way to use up that lone chicken breast or pitiful half-bag of spinach in the fridge.
  • Mediterranean vibes: It scratches that herby, tangy itch when you want something Mediterranean-ish but also spoonable.

Lemon Chicken Artichoke Soup

Ingredient Notes

Not too many groceries to juggle here, just fresh produce, pantry staples, and a few optional boosters if you’re feeling fancy.

  • Olive oil: Helps everything get cozy and aromatic from the start—don’t skip it unless you’re sautéing in butter (also fine!).
  • Onion: Adds mellow savory depth when softened slowly with the carrots and celery.
  • Garlic: Just three cloves, but they’ll fill the kitchen with that magical garlic scent when they hit the hot oil.
  • Carrots & celery: Our trusty soup duo. They keep it grounded and sweet.
  • Chicken (breasts or thighs): Either works. Thighs give a richer flavor, but breasts shred beautifully and stay tender too.
  • Low-sodium chicken broth: Keeps it brothy and slurpable. Go homemade if you want, but boxed works fine.
  • Canned artichoke hearts: Slightly tangy and buttery-soft, they melt in your mouth with each spoonful.
  • Orzo (or rice): Orzo adds a lovely texture, but rice works like a charm too if you’re gluten-free.
  • Lemons (zest + juice): Brightens everything. Start conservatively, then taste and adjust.
  • Oregano, thyme, bay leaf: Dry herbs keep it savory and balanced. A bay leaf makes you feel like a real grown-up.
  • Salt and pepper: Always taste and tweak toward the end—especially after adding the lemon.
  • Spinach or kale (optional): Totally optional, but nice if you want extra greens. Wilts down fast.
  • Parsley & Parmesan (optional): A sprinkle of both at the end adds freshness and a bit of salty richness.

Lemon Chicken Artichoke Soup

How To Make This Lemon Chicken Artichoke Soup

Let’s make a big pot of bright, brothy joy. This all happens in one pot, with a rhythm that’s kind of meditative once you get into it.

  • Start with the aromatics: Heat up a splash of olive oil over medium heat. In go the onions, carrots, and celery for a good 5 to 7 minutes. You’ll know it’s ready when your kitchen starts smelling like you’ve got something legit simmering (ahem, because you do).

  • Add garlic and dried herbs: Stir in the minced garlic, oregano, thyme, and the bay leaf. Let it cook for a minute or two until fragrant. That earthy, garlicky wave? That’s your cue to keep going.

  • Add chicken and broth: Nestle your chicken into the veggies and pour in the broth. Bring it to a gentle boil, then reduce to a simmer. Let things bubble away for 15 to 20 minutes. Chicken should be cooked through and easy to shred.

  • Shred the chicken: Pull the chicken out and shred it with two forks (or with fingers once it cools, if you’re patient). Set it aside for a bit—you’ll bring it home later.

  • Toss in the orzo and artichokes: Stir the orzo directly into the pot and simmer for 8 to 10 minutes. Drop in those quartered artichoke hearts during the last 5 minutes, just so they heat through but don’t fall apart totally.

  • Finish it up: Add the lemon juice and zest, plus the shredded chicken. If you’re sneaking in greens, now’s the time. Spinach wilts in about 2 minutes, kale takes closer to 3.

  • Taste and season: Give it a taste and adjust the salt, pepper, and lemon. Spoon into bowls, scatter parsley on top, and for the love of Parmesan… go ahead and add a few shavings if that’s your thing.

Lemon Chicken Artichoke Soup

Storage Options

Now let’s talk leftovers, because this soup is just as friendly on day two—maybe even cozier.

Store any extra soup in an airtight container in the fridge. It’ll keep well for 4 to 5 days. The orzo can soak up some of the broth over time, though, so feel free to thin it with a splash of water or broth when reheating.

Need to freeze it? Go for it, but leave out the orzo if you’re prepping ahead. Pasta tends to get mushy in the freezer (like, sad-slippery levels of mushy). Instead, freeze the base soup once the chicken is shredded and the artichokes are in. Then add rice or orzo fresh when you reheat it.

To reheat, a saucepan over low heat works best. Stir occasionally so nothing sticks to the bottom. Microwave works fine too, especially if you’re just diving into a bowl for a quick lunch.

Variations and Substitutions

This soup plays nicely with all kinds of tweaks. Got a stray veggie or a different grain hanging out in the pantry? Throw it in.

  • Rice instead of orzo: For a gluten-free version, white rice or even brown rice will work, although brown takes longer to cook.
  • Use rotisserie chicken: Skip the simmering step entirely and stir in shredded rotisserie during the final simmer.
  • Add a swirl of cream: Not traditional, but if you’re after something richer, a splash of cream at the end mellows the lemon.
  • Try different greens: Spinach is easiest, but chopped Swiss chard or baby kale are great and hold up well.
  • Add some spice: Want a little heat? A pinch of red pepper flakes or swirl of harissa gives it a sneaky little kick.
  • No artichokes on hand? You can skip them or try adding chopped zucchini or even asparagus tips near the end for a different twist.

Lemon Chicken Artichoke Soup

What to Serve with Lemon Chicken Artichoke Soup

This soup’s kind of fabulous all on its own, but if you’re in the mood to round things out (or just want an excuse for more carbs), here are a few favorites.

  • A chunk of warm, crusty bread is basically mandatory. Bonus points if it’s toasted with olive oil and a tiny pinch of sea salt. Crouton side hustle? Also encouraged.

  • A simple baby greens salad tossed with lemon vinaigrette echoes the soup’s citrus vibe beautifully without being overwhelming. Add a few shaved almonds or feta if you’re feeling extra.

  • If you’re leaning Mediterranean, a small plate of marinated olives, roasted red peppers, and cheese cubes makes for a fun side situation. Grazing while spooning soup? Living the dream.

  • Don’t sleep on muffins. Something like these bacon basil cornbread muffins would be unexpectedly perfect next to this bowl.

  • Not traditional at all, but I’ve happily followed up a bowl of this with one of these peanut butter banana ice cream sandwiches. No regrets.

Lemon Chicken Artichoke Soup

Frequently Asked Questions

Can I make lemon chicken artichoke soup ahead of time?

Definitely. It actually tastes better the next day, once all the flavors cozy up together even more. Just store it in the fridge in an airtight container. If you’re making it a few days in advance, consider holding off on the orzo until you’re reheating so it doesn’t soak up too much broth.

What can I use instead of artichoke hearts?

If you’re not an artichoke fan or just don’t have them on hand, chopped zucchini or asparagus tips added near the end of cooking work well. You can also just leave them out—it’ll still be tasty and bright with all that lemon and herb action.

Do I have to use orzo, or can I go gluten-free?

Orzo is lovely, but you can absolutely swap in white rice, brown rice (just cook it longer), or even cooked quinoa. Be sure to adjust the cooking time accordingly or add it after it’s been cooked separately and well drained.

How should I reheat leftovers without overcooking the orzo?

Low and slow wins here. Reheat it in a pot over medium-low heat with a splash of extra broth or water to wake it up. Stir occasionally so the orzo doesn’t stick to the bottom. If you’re microwaving, use a medium heat setting and stir halfway through so it heats evenly.

Lemon Chicken Artichoke Soup

Lemon Chicken Artichoke Soup

Prep Time 15 minutes
Cook Time 40 minutes
Total Time 55 minutes
Bright, cozy, and full of zing, this lemon chicken artichoke soup brings warmth with tender chicken, hearty veggies, and a citrus kick from fresh lemons. Brothy but not bland, herby without being bossy, and delightfully warming—this is the refresh button for soup season.
6 bowls

Ingredients

Soup Base

  • 2 tbsp (30 ml) olive oil
  • 1 onion medium, diced
  • 2 carrots peeled and sliced
  • 2 celery stalks sliced
  • 3 cloves garlic minced
  • 1 lb (450 g) boneless, skinless chicken breasts or thighs
  • 8 cups (2 l) low-sodium chicken broth
  • 1 can (400 g) artichoke hearts 14 oz (400g), quartered and drained
  • 3/4 cup (135 g) orzo or sub rice

Seasoning & Finishing

  • 1 tsp dried oregano
  • 1/2 tsp (0.5 tsp) dried thyme
  • 1 bay leaf
  • 2 lemons zested and juiced (about 1/4 cup juice)
  • salt and black pepper to taste

Optional Add-ins

  • 2 cups (60 g) baby spinach or chopped kale
  • 1/4 cup (10 g) fresh parsley chopped, for serving
  • Parmesan cheese shaved, for serving

Equipment

  • Large Soup Pot
  • Knife
  • Cutting board

Instructions
 

  1. Heat the olive oil in a large soup pot over medium heat. Add the diced onion, carrots, and celery. Sauté for 5 to 7 minutes until softened and aromatic.
  2. Add the minced garlic, dried oregano, thyme, and bay leaf. Stir and cook for about 1 minute until fragrant.
  3. Add the chicken breasts or thighs and pour in the chicken broth. Bring to a gentle boil, then reduce heat and let simmer for 15–20 minutes until chicken is cooked through and easily shredded.
  4. Remove the chicken to a plate, shred it with two forks (or your fingers once cool enough to handle), and set aside.
  5. Stir the orzo into the simmering soup and cook for 8–10 minutes until tender. Add the quartered artichoke hearts for the last 5 minutes of cooking to warm through.
  6. Add the shredded chicken back to the pot along with lemon juice and zest. If using, stir in spinach or kale and let wilt (1–3 minutes). Season with salt and pepper to taste.
  7. Ladle into bowls and garnish with chopped parsley and shaved Parmesan, if desired. Serve with crusty bread.

Notes

You can substitute rice for orzo for a gluten-free version. If meal prepping or freezing, leave out the orzo and add it when reheating to avoid mushiness. For extra richness, swirl in a bit of cream before serving or get creative with other greens or spices.

Nutrition

Calories: 320kcal | Carbohydrates: 30g | Protein: 26g | Fat: 10g | Saturated Fat: 2g | Cholesterol: 60mg | Sodium: 800mg | Potassium: 650mg | Fiber: 4g | Sugar: 4g | Vitamin A: 3500IU | Vitamin C: 20mg | Calcium: 80mg | Iron: 2mg

Warm, rich, and layered with buttery shrimp, smoky bacon, and creamy potatoes, this shrimp chowder brings comforting coziness in every spoonful. The tender shrimp and sweet corn mingle with velvety broth like it’s a soup version of a tight-knit dinner party you want to join.

The base starts with bacon (naturally), so from the first sizzle in the pot, the kitchen smells like you’re about to eat something really good. The whole thing comes together with familiar pantry staples, making it just the kind of dish you toss together on a chilly evening—with barely a fuss, but a lot of satisfaction.

So here we are. This shrimp chowder is what I like to call a “sweater weather soup.” You get layers of creamy broth, a whisper of Old Bay, and perfectly cooked shrimp tucked into every bite. It’s rich, but not heavy. Cozy, but not sleepy. Just right for those days when dinner needs to hug you back a little.

Table of Contents

Shrimp Chowder

Why You’ll Love this Shrimp Chowder

No wild personal origin stories or distant culinary pilgrimages here. Just a really lovely bowl of chowder that came together in my kitchen after realizing shrimp and bacon are absolute soulmates.

  • Perfect balance of richness and freshness: The broth is creamy but never cloying, thanks to a swipe of sweet corn and fresh parsley.
  • Built-in bacon bonus: You get crispy bits ON your chowder and the glorious fat IN it, layering deep, smoky flavor.
  • One pot, zero stress: Minimal cleanup, which feels like winning the soup lottery on a Wednesday night.
  • Gets better as it sits: Leftovers practically evolve into something even dreamier by day two.
  • Shrimp cooks in minutes: Which, let’s be honest, is ideal for when hunger is not in the mood to wait around.

Shrimp Chowder

Ingredient Notes

There’s a little bit of everything here—savory, sweet, fresh, creamy—but it all fits together like ingredients at a friendly potluck.

  • Bacon: Smoked and salty, it starts things off by flavoring the base—and finishes with a crunchy final flourish on top.
  • Onion and celery: These form that cozy, familiar aromatic foundation. Cook them gently, let them sigh into the pot.
  • Potatoes: Choose something waxy like Yukon Golds so they hold their shape. Dice them small to make spoonfuls more fun.
  • Chicken broth and milk: This pairing keeps the chowder light in flavor but still hearty. You can use all broth if you’re dairy-sensitive.
  • Shrimp: Medium-size is your friend here. Tail-off and deveined, so they’re ready for the chowder hot tub.
  • Corn kernels: A little burst of sweetness in an otherwise savory soup. Frozen is totally fine (I do it all the time).
  • Heavy cream and butter: For that silky finish that makes you close your eyes after the first spoonful.
  • Flour: Just a spoonful of flour helps the chowder thicken perfectly without turning it into a seafood pudding.
  • Old Bay & garlic powder: Flavor power duo. Add extra Old Bay if you’re a bit bold like that.
  • Salt and pepper: Start slow here—bacon and broth already bring salt to the party. Taste as you go.
  • Fresh parsley: Bright and herby at the end; it cuts through the richness with a little green zing.

Shrimp Chowder

How To Make This Shrimp Chowder

You’re about to become the person who makes chowder from scratch. It sounds fancy, but promise—it’s wildly doable (and kind of a flex).

  • Cook the bacon until crispy: Toss it into your biggest saucepan or Dutch oven and let it do its thing over medium heat. Stir occasionally so it browns evenly. Once golden and irresistible, scoop it out and set it aside. But don’t you dare toss the fat.

  • Sauté the aromatics: Into the shimmering bacon fat (yes, still in the pot), add your diced onion and celery. It’ll smell amazing in under two minutes. Cook until soft and translucent—five-ish minutes will do it.

  • Add flour to make a roux: Sprinkle the flour over the veggies and stir constantly for a minute. Don’t walk away now. You’re cooking off that raw-flour taste and making a lightly thickened base.

  • Whisk in broth and milk: Slowly pour in the chicken broth and milk, whisking or stirring constantly to keep it lump-free. It’ll start looking creamy, which is your welcome sign. Add potatoes, garlic powder, and Old Bay.

  • Simmer till potatoes are tender: Bring the pot to a gentle boil, then lower the heat and simmer it for 15–20 minutes. Pierce a few potatoes with a fork—when you get no resistance, you’re ready for the shrimp.

  • Add shrimp and corn: Stir in the shrimp and corn. Simmer gently—just a few minutes. The second the shrimp go opaque and pink, pull back the heat. Overcooking shrimp = chewy disappointment.

  • Finish with cream and butter: Stir in the heavy cream and butter. Give it a taste—does it need salt? Pepper? A little more Old Bay, if you’re feeling frisky?

  • Serve hot with bacon and parsley: Ladle into bowls, top with those crispy bacon bits and a scatter of fresh parsley. Spoons up.

Shrimp Chowder

Storage Options

Let’s say you made a big pot (nice move). Here’s the good news: this chowder stores like a champ… with one caveat. Shrimp.

In the fridge, leftovers will be happy for up to 3 days. I like to cool my container uncovered for 30 minutes before sealing it—helps avoid condensation and sad separation.

But can you freeze it?

Technically yes, but shrimp can go rubbery when thawed. If freezing is a must, I’d suggest pulling out a portion before adding the shrimp, and freezing that base. Then, just sauté some fresh shrimp when it’s chowder time. It’s an extra step, but your future self will thank you.

To reheat, stovetop is best—over medium-low heat, stirring occasionally until warmed through. If you’re microwaving at work or something, do it in short bursts so the cream doesn’t split and the shrimp stays tender.

Variations and Substitutions

If you want to play around, this chowder’s got range. Cozy but flexible, like your favorite old hoodie.

  • Swap shrimp for other seafood: Chopped clams or chunks of white fish like cod work beautifully. Just adjust cook times slightly.
  • Use dairy alternatives: Unsweetened oat milk plus a splash of cashew cream can give a similar texture for the dairy-free crew.
  • Add extra veg: Dice in some carrots with the celery or stir in spinach near the end for bonus nutrients (and color).
  • Make it spicy: Toss in a minced jalapeño with the onions or a few shakes of hot sauce right before serving.
  • Turn it smokier: Use smoked paprika or add a bit of smoked sausage with the bacon (a move I stole from this kielbasa soup).

Shrimp Chowder

What to Serve with Shrimp Chowder

This shrimp chowder leans cozy, so the sides can stay simple or playful, depending on your mood (and hunger level).

  • Crusty bread or cornbread: Always nice for swiping through the bowl. If you’re feeling fancy-but-not-fancy, try these bacon basil cornbread muffins. Yep. Bacon on bacon. No one’s stopping you.

  • A crisp green salad: You’ll want something fresh to balance the richness. Go clean and lemony, maybe with thin-shaved fennel or apple.

  • Steamed green beans or chard: Tossed in butter, lemon, maybe a pinch of flaky salt? If you’ve got any rainbow chard lying around, give it the spotlight. I’ve got a great way of using it in this pan-seared cod recipe.

  • A cold beer or sauvignon blanc: If it’s dinner and you’re grown, pair it with something crisp. The soup’s hearty but delicate enough to go with either.

Shrimp Chowder

Frequently Asked Questions

Can I use frozen shrimp in chowder?

Absolutely, just thaw it fully first. Let it rest in a colander in the fridge or run it under cool water if you’re in a rush. Pat dry before cooking so it doesn’t water down the broth. The key is to not overcook it—frozen shrimp can get rubbery fast if left too long at heat.

How do I thicken the chowder without making it gluey?

The flour in the beginning takes care of most of that, but stir it really well when adding liquids to avoid clumps. If you want a thicker texture, smash up a few potatoes with the back of your spoon near the end. It’s low-effort, high-payoff trickery.

What type of potatoes work best for shrimp chowder?

Yukon Golds strike the balance perfectly. They hold their shape without turning mushy and add a subtle butteriness. Russets are a bit too starchy (they’ll break down and thicken the soup more than you might want), but in a pinch, they’ll work with some gentle handling.

Can I make this ahead of time?

For sure. Just hold off on stirring in the shrimp until just before serving—it’s easy to overcook when reheating. You can make the entire base of the chowder a day ahead, refrigerate it, and then rewarm and add shrimp just before bringing it to the table.

Shrimp Chowder

Creamy Shrimp Chowder with Bacon & Corn

Prep Time 15 minutes
Cook Time 35 minutes
Total Time 50 minutes
Warm, rich, and layered with buttery shrimp, smoky bacon, and creamy potatoes, this shrimp chowder brings comforting coziness in every spoonful. Sweet corn and velvety broth tie together the classic flavors you crave, and the best part? It all comes together in one pot for a stress-free, soul-warming meal perfect for chilly days or whenever you need a little dinnertime hug.
6 bowls

Ingredients

Base

  • 6 slices bacon diced
  • 1 onion medium, diced
  • 2 stalks celery diced
  • 2 tbsp (16 g) all-purpose flour
  • 3 cups (720 ml) chicken broth low sodium preferred
  • 1 cup (240 ml) whole milk
  • 1.5 pounds (680 g) Yukon Gold potatoes diced small
  • 1 tsp Old Bay seasoning or more to taste
  • 0.5 tsp garlic powder
  • Salt and black pepper to taste

Shrimp & Finishing

  • 1 pound (450 g) medium shrimp peeled, deveined, tails off
  • 1.5 cups (240 g) corn kernels fresh or frozen
  • 0.5 cup (120 ml) heavy cream
  • 2 tbsp (28 g) unsalted butter
  • Fresh parsley chopped, for garnish

Equipment

  • Large pot or Dutch oven
  • Slotted spoon

Instructions
 

  1. Cook the bacon: In a large pot or Dutch oven over medium heat, cook bacon, stirring often, until crispy. Remove with a slotted spoon and set aside, leaving bacon fat in the pot.
  2. Sauté vegetables: Add diced onion and celery to the bacon fat. Cook over medium heat until soft and translucent, about 5 minutes.
  3. Add flour: Sprinkle in the flour and stir constantly for 1 minute to create a roux. This helps thicken the soup.
  4. Add liquids and seasoning: Gradually whisk in chicken broth and milk until smooth. Add diced potatoes, Old Bay, garlic powder, and a good pinch of salt and black pepper.
  5. Simmer: Bring to a gentle boil, then reduce heat and simmer (uncovered) for 15–20 minutes, until potatoes are tender when pierced with a fork.
  6. Add shrimp and corn: Stir in shrimp and corn kernels. Simmer just 3–4 minutes, until shrimp are opaque and pink.
  7. Finish with cream and butter: Stir in heavy cream and butter. Taste and adjust salt, pepper, or Old Bay as desired.
  8. Serve: Ladle chowder into bowls. Top with reserved crispy bacon and chopped parsley. Serve hot.

Notes

Leftovers keep well in the fridge for up to 3 days; to freeze, pull out a portion before adding shrimp, then add fresh shrimp when reheating. For a thicker chowder, mash a few potatoes before adding the shrimp. Try different vegetables or seafood for tasty variations.

Nutrition

Calories: 380kcal | Carbohydrates: 34g | Protein: 27g | Fat: 16g | Saturated Fat: 8g | Cholesterol: 190mg | Sodium: 870mg | Potassium: 950mg | Fiber: 3g | Sugar: 5g | Vitamin A: 730IU | Vitamin C: 18mg | Calcium: 98mg | Iron: 2.1mg

Let's Get Cooking!

100+ Recipes for Busy Nights

In a time crunch? Take a look around and browse plenty of recipes to help you get dinner ready and on the table on those busy nights!

Sweet Recipes

Pumpkin Banana Muffins

Pumpkin Banana Muffins Recipe

Strawberry Pie Bars

Strawberry Pie Bars Easy Oven Recipe

White Chocolate Raspberry Muffins

White Chocolate Raspberry Muffins Recipe

Snickerdoodle Muffins

Snickerdoodle Muffins Recipe for Oven

PIN NOW

Follow KitchenetteBlog on Pinterest

Love cozy recipes that actually make it to the table? On Pinterest, I share new comfort-food ideas every week—desserts, dinners, and those little snack cravings that hit at midnight. Come pin with me and never run out of kitchen inspo.

Savory Recipes

Turkey Tetrazzini

Turkey Tetrazzini Baked Pasta Recipe

Grilled Chicken Panini Sandwich

Grilled Chicken Panini Sandwich Recipe

Sweet Potato Cornbread

Sweet Potato Cornbread Recipe Oven Baked

Classic Waldorf Salad

Waldorf Salad Simple Classic Recipe

Get 5 Recipes to Simplify Your Life!

Delicious, versatile recipes you can make over and over.