Get 5 recipes to simplify your life:

easy, delicious, real food recipes

Latest Recipes

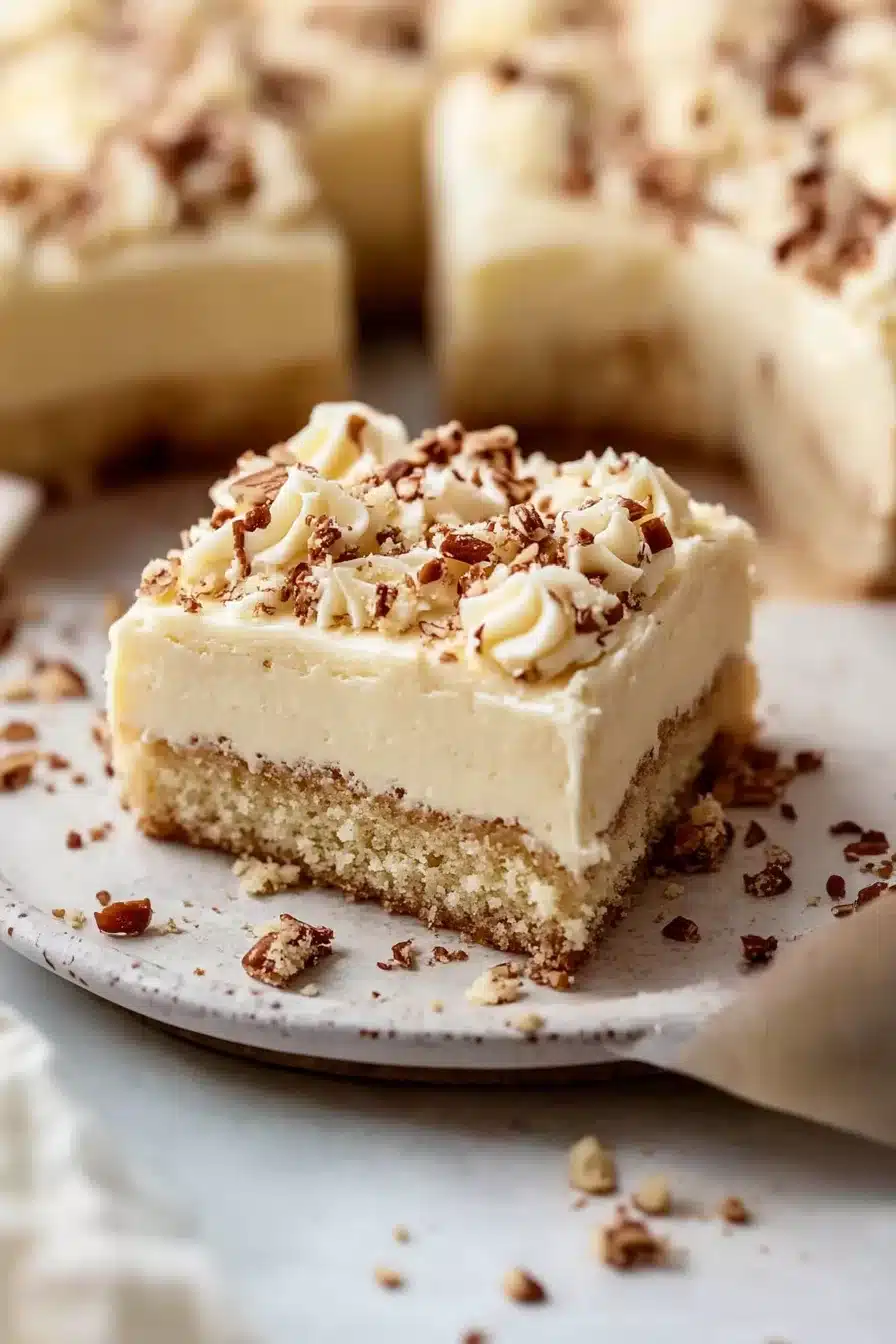
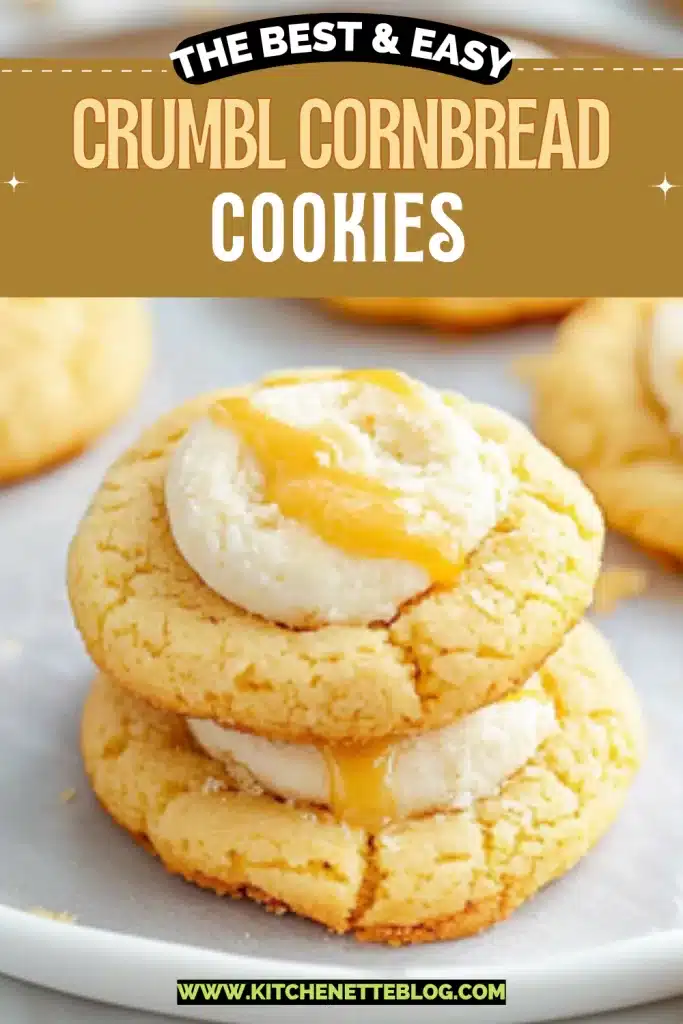
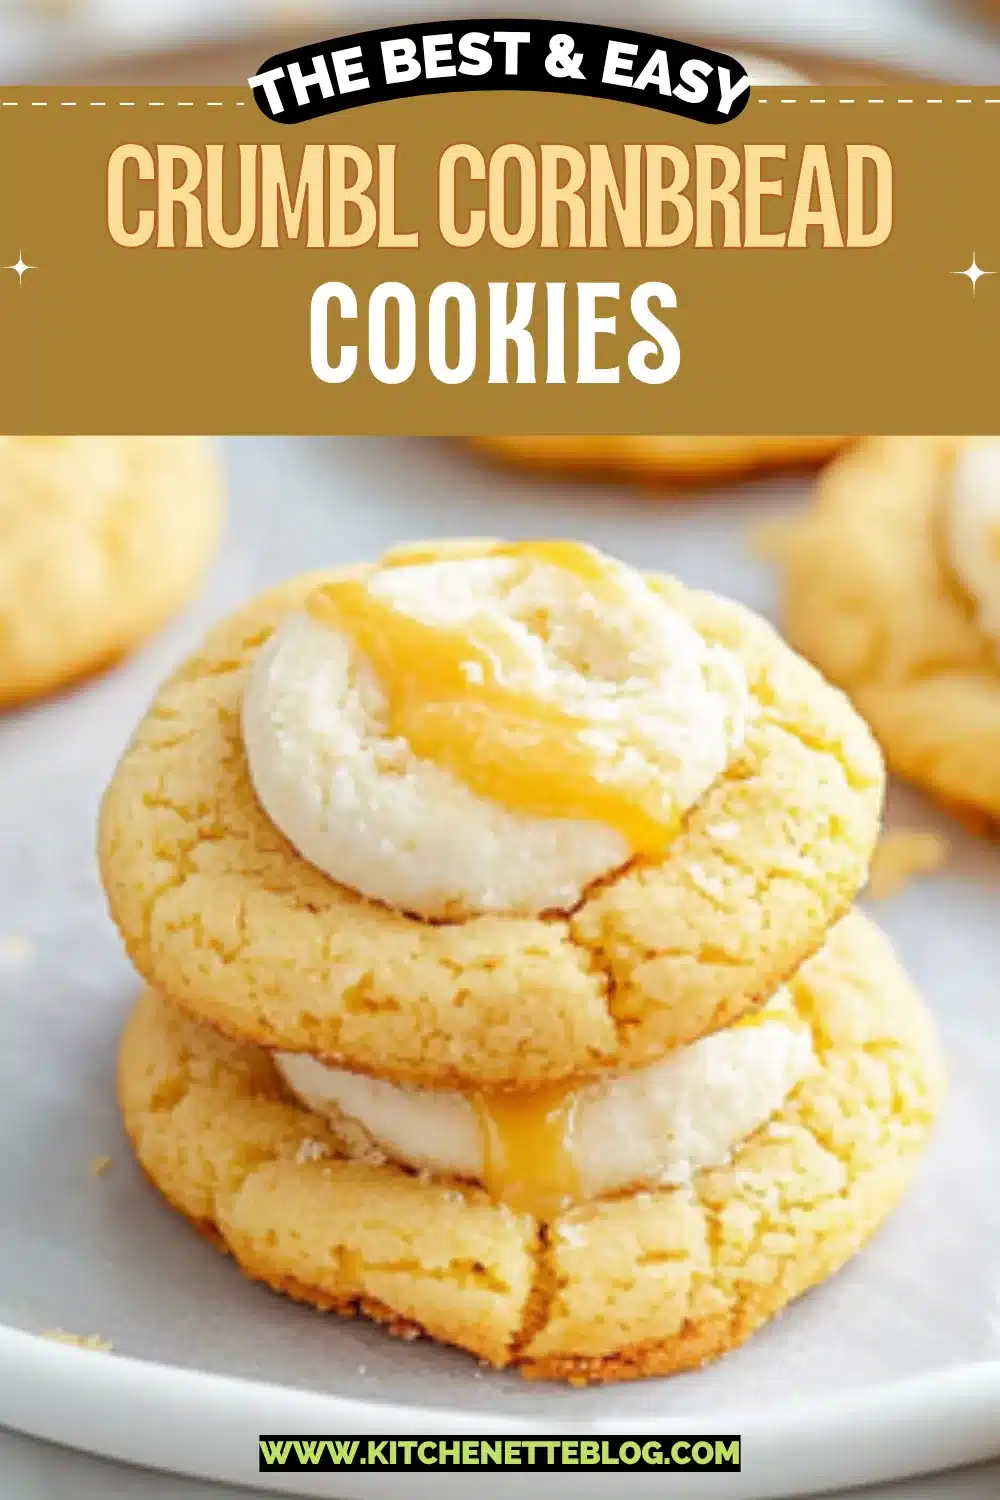
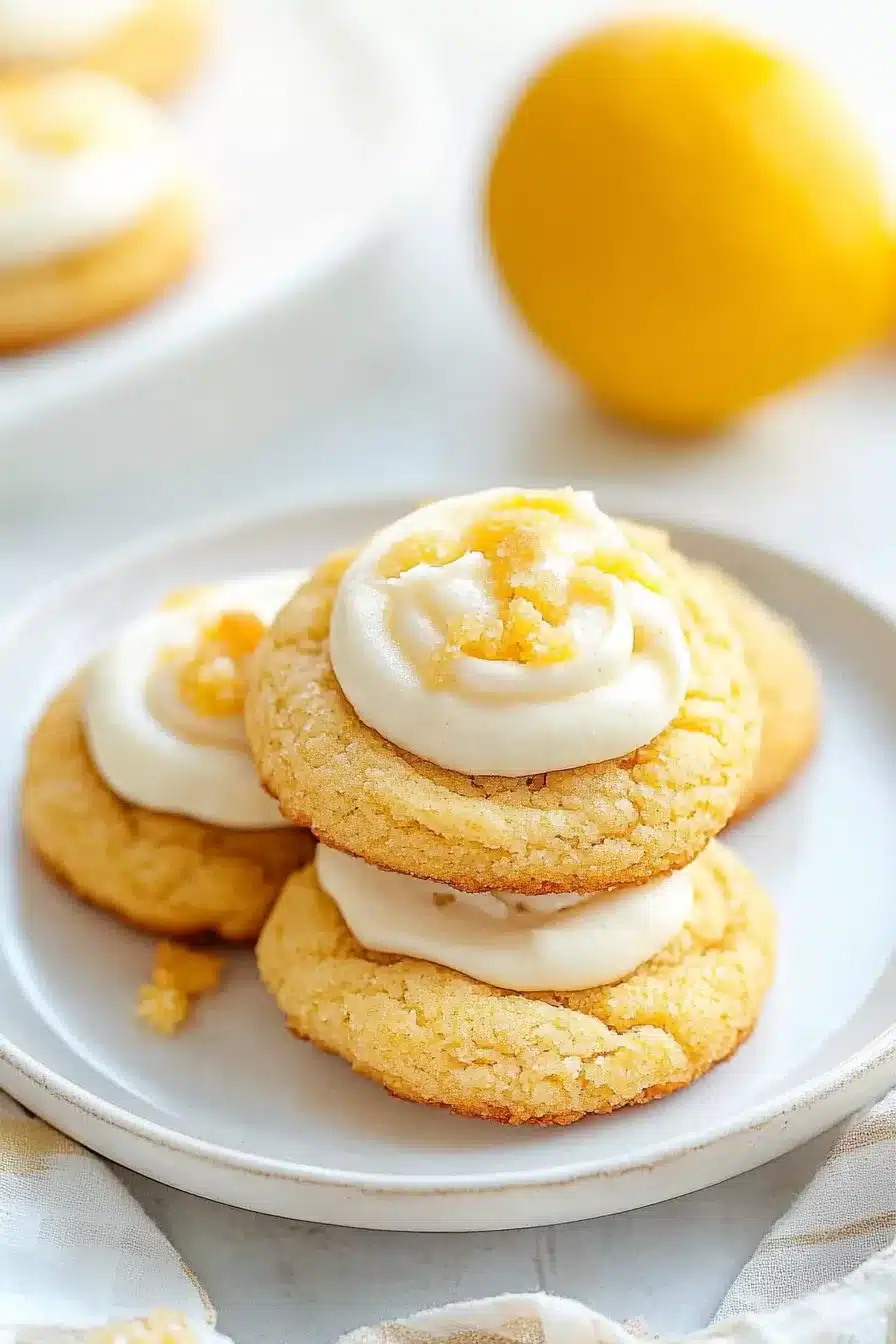
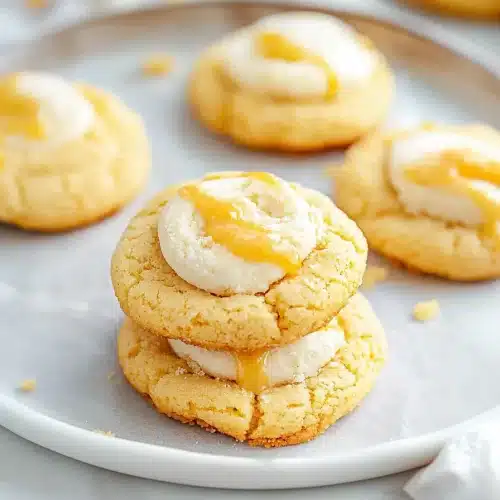
Sweet, golden, and buttery with a rich velvety frosting—the dreamy scent of vanilla and warm cornmeal will hit you before these Crumbl Cornbread Cookies even finish baking. With just butter, honey, brown sugar, and cornmeal, they cozy up to your senses like a favorite sweater that happens to also be edible.

Sometimes you just want a cookie that tastes like comfort food whispered your name. These might look like dessert (and technically, yep, they are), but there’s a dash of Southern side dish baked in. Best of both. The edges are golden and just tender enough to sink your teeth into without a full commitment. The buttercream? Creamy and sweet, with a delicate hint of honey. It’s not trying to be loud. It’s just right. And if you’re the kind of person who loves that little sugary grit from cornmeal and wants frosting alongside it? Buddy, you’re about to meet your match.

Table of Contents

Crumbl Cornbread Cookies

Why You’ll Love this Crumbl Cornbread Cookies

These aren’t your average cookies, but not in a look-at-me kind of way. Just a gentle surprise to your brain and taste buds.

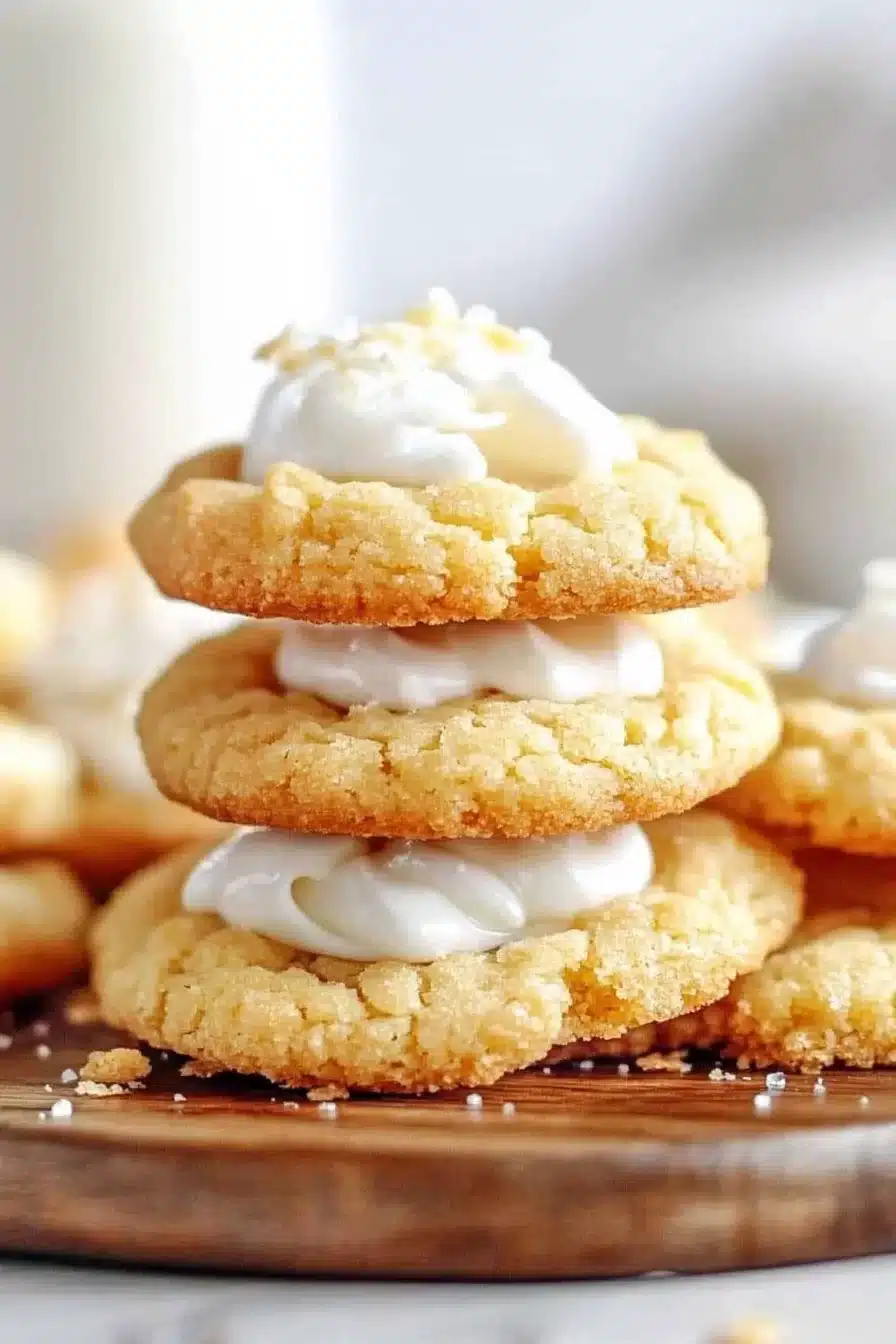
  • That crumbly-meets-chewy texture: Somewhere between a sugar cookie and a warm square of cornbread, but less fussy than either.
  • Honey buttercream frosting magic: It’s luscious without being cloying, and a tiny drizzle of honey brings it all together.
  • Sweet with a savory whisper: The cornmeal keeps things grounded while still letting the sugar shine.
  • Frosted, fancy, yet super chill to make: They look bakery-made, but your stand mixer’s doing half the work (yay for machines).
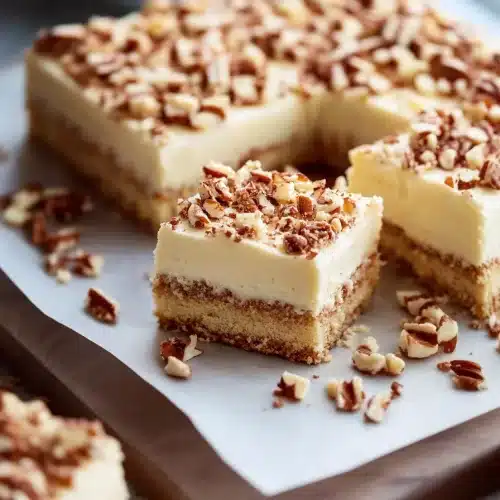
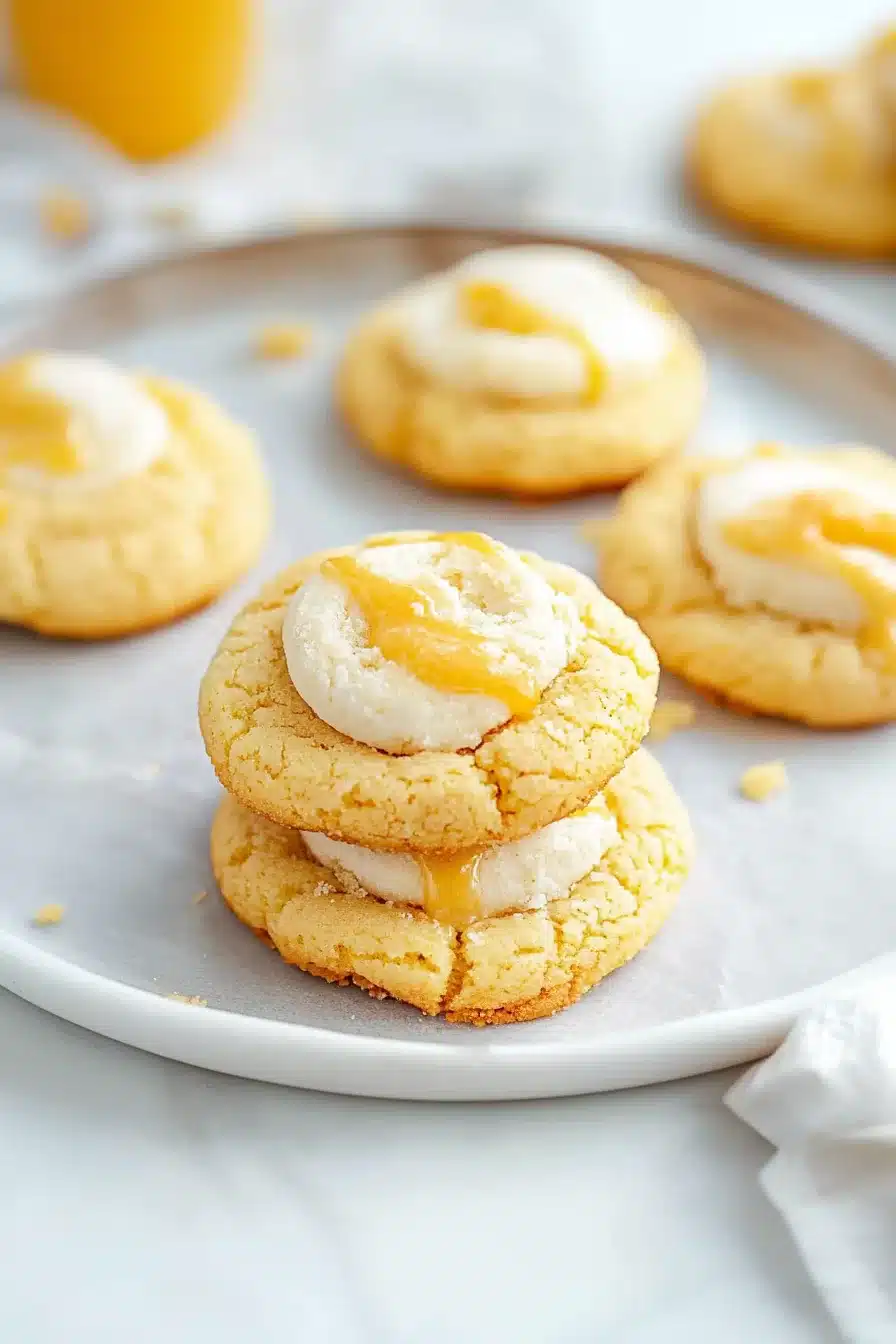
  • Perfect for sharing (or hoarding): That generous frosting swirl turns heads at potlucks, yet they’re humble enough for Tuesday night cravings.
  • Make-ahead friendly: These guys keep well, and that’s saying something for a soft cookie with frosting.

Crumbl Cornbread Cookies

Ingredient Notes

There’s a little pantry-meets-fridge situation going on here, but nothing tricky or overly niche.

  • Unsalted butter: You’ll need it for both the cookie and the buttercream. Make sure it’s softened or you’ll be wrestling lumps.
  • Vegetable oil: Adds extra moisture and a bit of chew. You could sub in melted coconut oil if that’s your style.
  • Light brown sugar and granulated sugar: Both sugars play together to give sweetness plus a touch of caramel depth.
  • Cornmeal: The star player! Go with yellow cornmeal, not coarse or stone-ground. You want that fine texture.
  • Honey: Adds smooth, mellow sweetness and ties the whole cornbread theme together.
  • Butter extract: This one gives buttery depth without extra fat. Optional, but really takes things up a notch.
  • All-purpose flour and cornstarch: The cornstarch softens the bite just enough to make these cloud-like at the center.
  • Cream of tartar, baking soda, baking powder: That trio makes for slight lift and signature “sugar cookie” chew with a soft crumb.

Crumbl Cornbread Cookies

How To Make This Crumbl Cornbread Cookies

Okay, ready? These come together faster than you’d expect for cookies with frosting and flair.

  • Start by preheating that oven: Set it to 350°F (175°C) and line your baking sheets with parchment paper. Silicone mats work too, and they help those cookie bottoms stay golden, not scorched.

  • Cream the fats and sugars: Beat your softened butter, oil, and both sugars till things look fluffy, like sugary clouds. Go for 2–3 minutes on medium-high. Sounds like a workout, but the mixer handles it.

  • Add egg, extracts, and honey: Toss in the egg (room temp is ideal), vanilla, butter extract, and that lovely spoon of honey. Blend until everything looks smooth and smells even smoother.

  • Whisk your dry ingredients: In a bowl, combine flour, cornstarch, baking soda, baking powder, cream of tartar, cornmeal, and salt. Give it a good stir so no baking soda clumps sneak through later.

  • Mix the dry into the wet: Pour the dry mix into the butter mixture a little at a time, blending on low. Don’t overthink or overmix. Once combined, stop.

  • Scoop and space them out: Use a big cookie scoop (3 tablespoons or so) and space the dough balls about 2 inches apart on your sheet. You should get around 14 hefty cookies.

  • Bake (but not too long): Slide those trays in for 8–10 minutes. The edges will be ever-so-slightly golden, and the centers still soft. Don’t be tempted to overbake.

  • Let them cool—yes, really: Give them 5 minutes on the hot sheet, then transfer to a wire rack to cool fully before frosting. Yes, this part matters. Warm cookies plus frosting = slippery goop.

  • Whip the honey buttercream: Beat the softened butter, then gradually mix in powdered sugar. Add honey and vanilla. If it’s thick or stiff, use a splash of cream at a time until you get frosting that feels like soft peaks of birthday wishes.

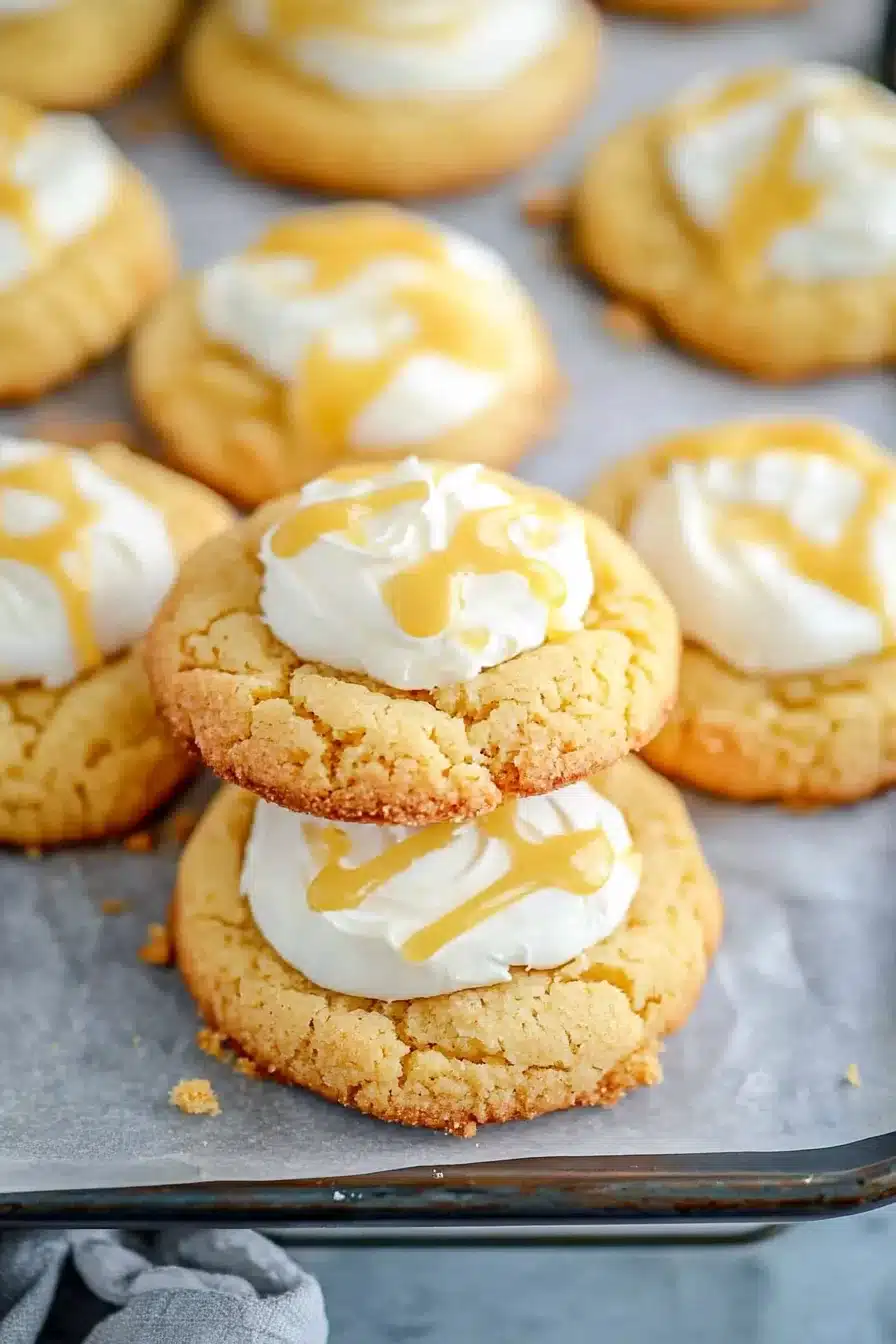
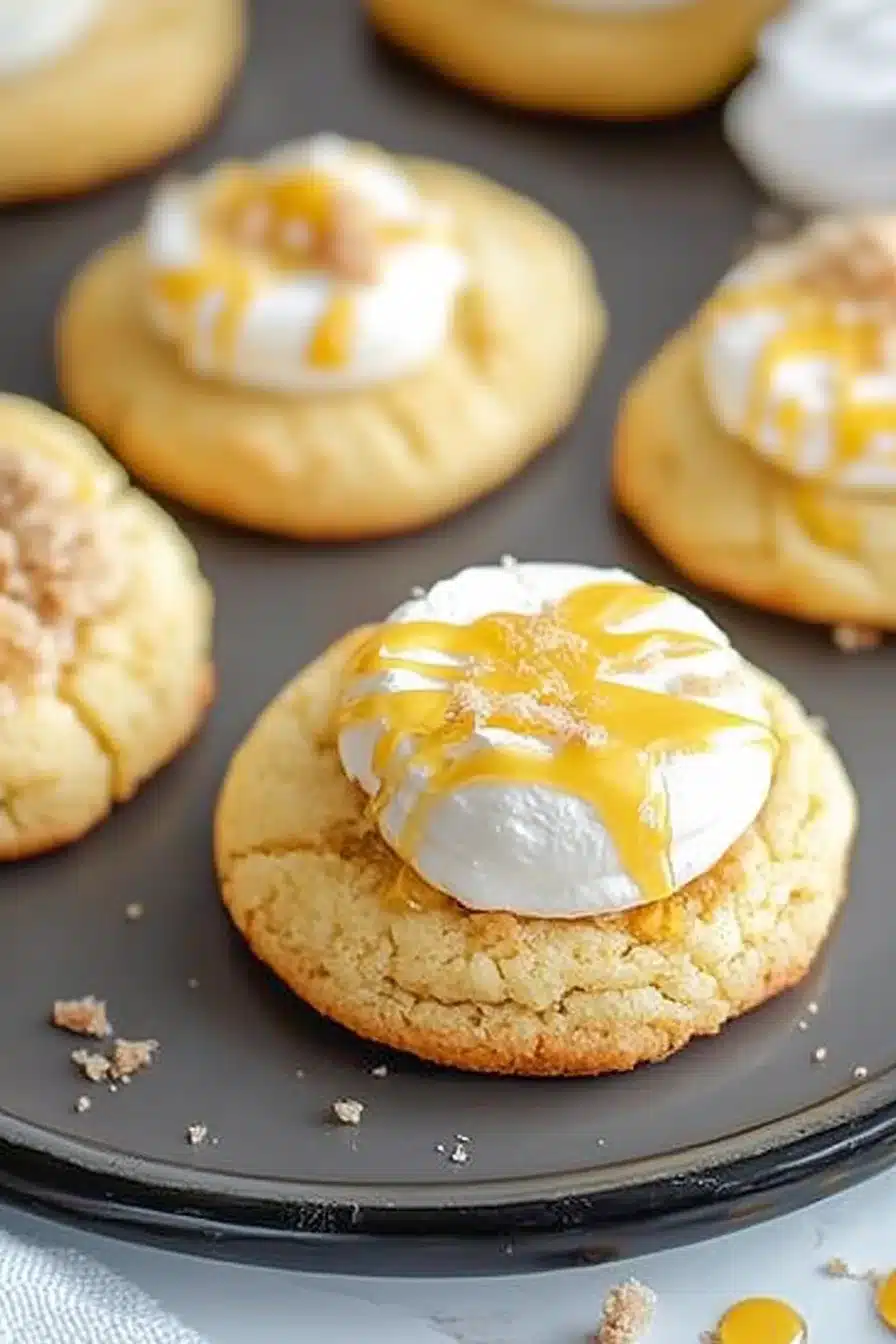
  • Frost and finish: Pipe or shmear your buttercream right on top. For extra charm, drizzle a tiny bit of honey on each cookie. That final flourish? Chefs kiss.

Crumbl Cornbread Cookies

Storage Options

Alright, so you’ve made the cookies (or you will, I believe in you), and now you’ve got frosting under your fingernails and a dozen sweetly golden discs of joy. But what about leftovers?

Let them cool completely before storing. If they’re already frosted, it’s best to keep them in a single layer in an airtight container. Fridge is your friend here! They’ll stay happy and fresh for about 4–5 days. The buttercream firms up slightly, but the cookie itself keeps that soft, pillowy character.

Thinking ahead? You absolutely can freeze the cookies—just freeze without frosting. Stack them with parchment between layers, and they’ll keep in the freezer for about 2 months. When ready to serve, thaw at room temp, make your fresh buttercream, and dress them up. Honestly, the frosting only takes five minutes, and you’ll be glad it’s fresh.

Reheating isn’t necessary, but if you like a slightly warm cookie, give it a few seconds in the microwave (frosting-free).

Variations and Substitutions

If you’re feeling adventurous—or just short that one pesky ingredient—there are a few ways to tweak without turning the whole thing upside-down.

  • Use maple syrup instead of honey: It changes the flavor a tad, but maple plays surprisingly well with cornmeal too.
  • Sub in white whole wheat flour for a nutty edge: You’ll need to scale it back slightly and expect a denser cookie, but it works.
  • Try orange zest in the buttercream: One tiny tweak adds a bright, citrusy contrast that makes things pop.
  • Add a sprinkle of flaky salt on top: Especially if you like your sweets with a savory wink (I do this a lot).
  • Go gluten-free with a 1:1 flour blend: Make sure your cornmeal is also certified GF, and you’re golden.
  • Can’t do dairy? Try using plant-based butter for both cookies and frosting. It may be softer, but still tasty.

Crumbl Cornbread Cookies

What to Serve with Crumbl Cornbread Cookies

These cookies thrive in just about any setting, but here are a few pairings that might surprise you (or at least get you thinking outside the usual cookie-and-milk box).

  • If you’re making them brunch-style, serve them alongside something savory to balance the sweetness. I like them with a light soup or even a cozy plate of pan-seared cod and greens. Sweet cookie dessert after fish? Trust me.

  • Speaking of brunch, coffee and these cookies are a dreamy combo. Go for a strong brew with a nutty roast to play off the cornmeal. A little cream in your cup mellows it all out.

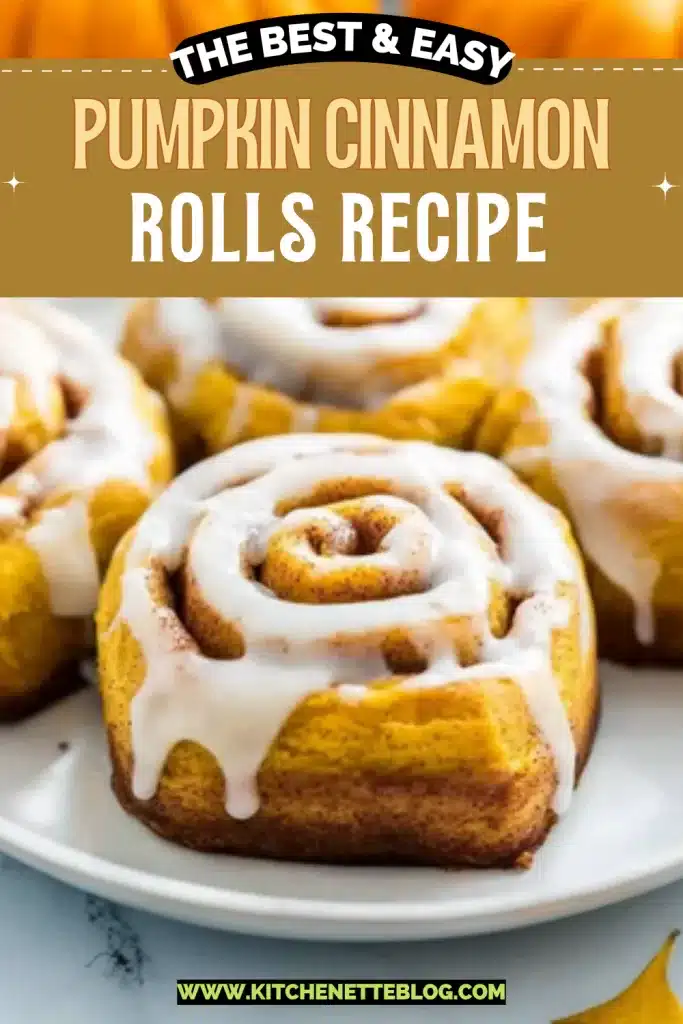
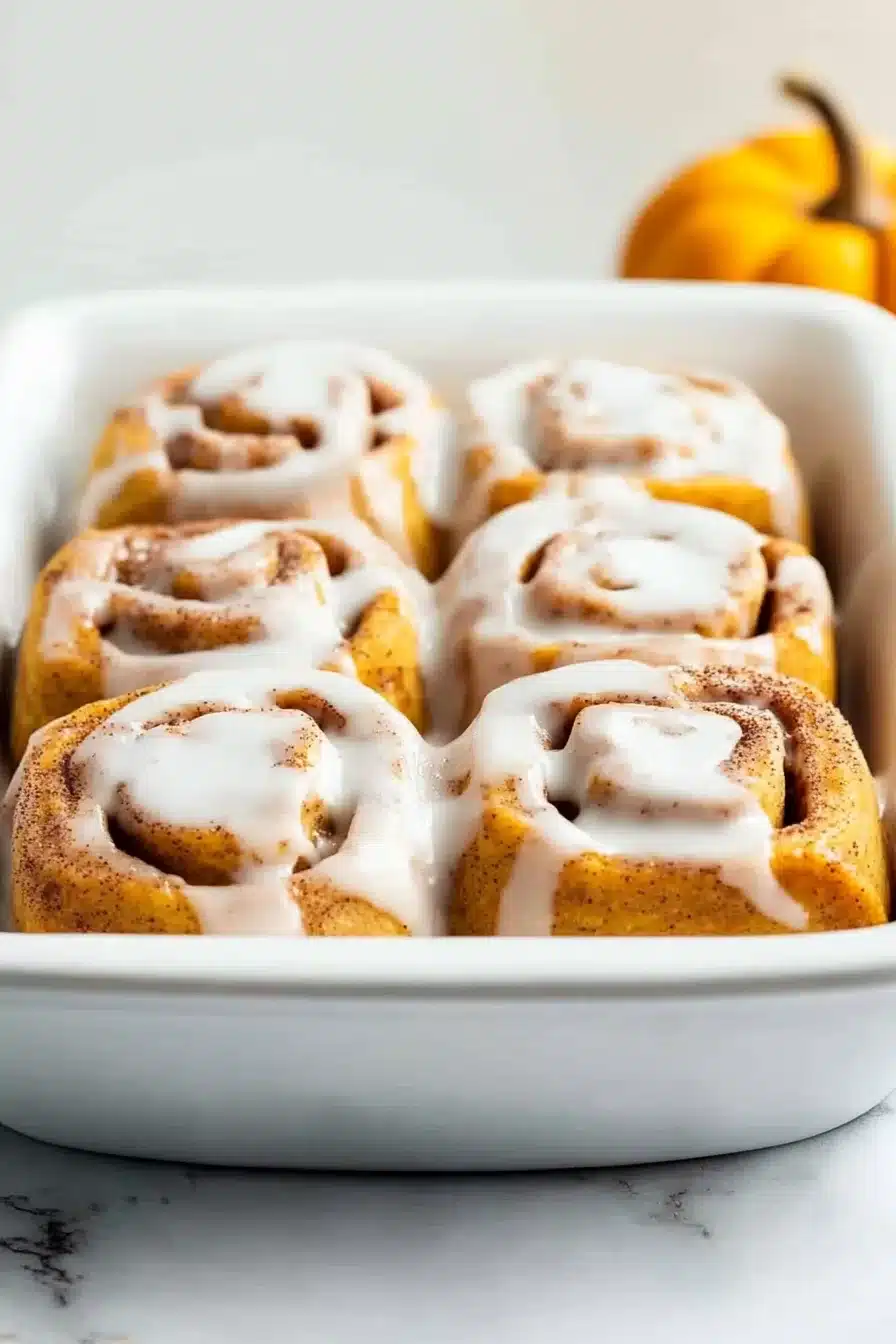
  • Hosting a dinner party or shower? Set these out platter-style next to something lingering with fall spices, like these pumpkin cinnamon rolls. Contrast works every time.

  • For a full-on Southern-inspired spread, serve with bacon, eggs, and maybe something fried on the side. Cornbread cookies aren’t trying to replace biscuits, but… maybe they could?

Crumbl Cornbread Cookies

Frequently Asked Questions

Do I have to use butter extract?

Nope, you can skip it if it’s not hanging out in your pantry already. But if you do have it, or feel like grabbing a tiny bottle, it adds a deeper, almost nostalgic “bake sale” vibe. Totally worth it in my opinion, but your cookies will still be tasty without.

Can I make the dough ahead of time?

Yes! You can chill the dough for up to 2 days. Just wrap it tight or store in an airtight container. Before baking, let the dough sit at room temp for 15–20 minutes so it scoops easily. Or go wild and portion the dough into balls ahead, ready to bake whenever cookie cravings strike.

Why do you use both cornstarch and cream of tartar?

The cornstarch helps create a soft, light interior without too much spread. The cream of tartar adds that teeny-tiny tang while helping the cookies stay chewy and tall. Combined, they basically make the texture magic happen.

Can I freeze these with the frosting?

Technically yes, but I recommend freezing the cookies and frosting separately. The buttercream can pick up weird freezer flavors or texture if frozen on the cookie. If you’re in a pinch, freeze them frosted, but double-wrap and plan to eat them within a month for best results.

Crumbl Cornbread Cookies

Crumbl Cornbread Cookies

Prep Time 20 minutes
Cook Time 10 minutes
Cooling Time 5 minutes
Total Time 35 minutes
Sweet, golden, and buttery with rich, velvety honey buttercream and the nostalgic warmth of vanilla and cornmeal. Crumbl Cornbread Cookies blend the best of a classic cookie and Southern cornbread, topped with luscious honey buttercream that makes every bite dreamy comfort food.
14 cookies

Ingredients

For the Cornbread Cookies

  • 1/2 cup (113 g) unsalted butter softened
  • 1/4 cup (60 ml) vegetable oil
  • 1/2 cup (100 g) light brown sugar packed
  • 1/3 cup (67 g) granulated sugar
  • 1 large egg room temperature
  • 2 tbsp (30 ml) honey
  • 1 tsp vanilla extract
  • 1/2 tsp (0.5 tsp) butter extract optional, but recommended
  • 1 1/2 cups (190 g) all-purpose flour spooned & leveled
  • 1/4 cup (34 g) fine yellow cornmeal not stone-ground or coarse
  • 2 tbsp (16 g) cornstarch
  • 1/2 tsp (0.5 tsp) baking soda
  • 1/2 tsp (0.5 tsp) baking powder
  • 1/2 tsp (0.5 tsp) cream of tartar
  • 1/4 tsp (0.25 tsp) salt

For the Honey Buttercream

  • 6 tbsp (85 g) unsalted butter softened
  • 1 1/4 cups (155 g) powdered sugar
  • 1 tbsp (15 ml) honey
  • 1/2 tsp (0.5 tsp) vanilla extract
  • 1-2 tbsp (15-30 ml) heavy cream or milk as needed for consistency

For Topping

  • honey for drizzling

Equipment

  • Stand Mixer or Hand Mixer
  • Mixing bowls
  • Baking sheet
  • Parchment paper or silicone baking mat
  • Wire Cooling Rack
  • Cookie Scoop

Instructions
 

  1. Preheat oven to 350°F (175°C). Line baking sheets with parchment paper or silicone baking mats.
  2. In a large bowl (or stand mixer), beat softened butter, vegetable oil, brown sugar, and granulated sugar together on medium-high speed until fluffy, about 2–3 minutes.
  3. Add the egg, honey, vanilla extract, and butter extract (if using). Mix until smooth and creamy.
  4. Whisk together flour, cornmeal, cornstarch, baking soda, baking powder, cream of tartar, and salt in a separate bowl.
  5. Gradually add dry ingredients to wet ingredients, mixing on low just until combined. Do not overmix.
  6. Use a large (3-tablespoon) cookie scoop to portion out dough balls. Arrange 2 inches apart on prepared baking sheets (about 14 cookies).
  7. Bake for 8–10 minutes, until edges are lightly golden and centers look set but still soft. Do not overbake.
  8. Cool on the sheet for 5 minutes, then transfer to a wire rack to cool completely before frosting.
  9. For the honey buttercream: Beat softened butter until creamy. Gradually add powdered sugar, then honey and vanilla, beating until fluffy. Add cream/milk a little at a time until smooth and spreadable.
  10. Frost cooled cookies with honey buttercream. Drizzle each with a little extra honey for the perfect finish.

Notes

To store: Let cookies cool completely before storing in an airtight container. If frosted, keep in a single layer and refrigerate for 4–5 days. For longer storage, freeze unfrosted cookies up to 2 months; thaw and frost before serving.
Substitutions: Swap honey for maple syrup, use gluten-free flour if needed, or try orange zest in the buttercream for a citrus twist.

Nutrition

Calories: 290kcal | Carbohydrates: 39g | Protein: 2g | Fat: 14g | Saturated Fat: 8g | Cholesterol: 36mg | Sodium: 86mg | Potassium: 45mg | Fiber: 0.5g | Sugar: 21g | Vitamin A: 355IU | Calcium: 20mg | Iron: 1.2mg

Inviting and just the right amount of decadent, this Italian cream sheet cake brings together butter, sugar, pecans, and shredded coconut into a delightfully rich dessert. The tang of buttermilk and a fluffy cream cheese frosting makes it smell like Sunday baking and taste like something your Aunt Mary would guard the recipe for.

This sheet cake is soft, nutty, slightly tangy from the cream cheese, and graced with that sweet coconut chew that makes each forkful a little adventure. Whether you’re slicing it for a gathering or hoarding it for your afternoon coffee breaks (no shame), it’s got year-round potential to become That Cake everyone requests.

Table of Contents

Italian Cream Cake Recipe

Why You’ll Love this Italian Cream Sheet Cake

Let’s keep it real: sheet cakes are the pajamas of cake. Cozy, no-fuss, and deeply satisfying. This Italian twist just gives it more personality (and, frankly, more pecans).

  • Velvety buttermilk base: Tangy and soft, it gives the cake a tender crumb and subtle depth.
  • Nutty coconut crunch: You get sweet little chewy surprises all throughout, which honestly just makes the texture more fun.
  • Whipped egg whites magic: Folding them in adds airiness without drying things out. It’s a subtle art move without the drama.
  • That cream cheese frosting: Lush and ever-so-slightly tangy, it spreads like a dream and chills to a perfect sliceable finish.
  • Feeds a group, handsomely: One easy pan, no stacking or levelling. Bake it, slice it, don’t stress.
  • Great for make-ahead days: You can chill it overnight and it actually gets better. Bless that.

Italian Cream Cake Recipe

Ingredient Notes

This cake’s ingredient list is classic, with a few flourishes that bring in the signature flavor and texture of Italian cream cake. Nothing too clever, just a thoughtful combination.

  • All-purpose flour: This is your base that holds it all together. No need to sift unless you’re feeling fancy.
  • Unsalted butter: Softened and rich, it makes the cake and frosting smooth and full-bodied. Salted will work in a pinch, just cut back on added salt.
  • Granulated sugar: For sweetness and caramelization. Don’t sub brown sugar—you’d lose that clean vanilla-pecan vibe.
  • Large eggs, separated: The yolks go in early for richness; whipped whites fold in later to fluff up the batter.
  • Vanilla extract: Just enough to add warmth. Use the real stuff if you’ve got it.
  • Buttermilk: A quiet hero. Adds tang and tenderness, and reacts with the baking soda for a lofty rise.
  • Shredded sweetened coconut: Brings sweetness and texture. Toast it slightly first if you’re feeling indulgent.
  • Chopped pecans: Nutty, crunchy bits in each bite. Toasting them first harms no one and makes things even toastier.
  • Cream cheese & powdered sugar: Your frosting kings. Room temp cream cheese is key or you’ll have lumps.
  • Extra pecans & coconut for garnish: The glitter of the cake world. A final little hint of what’s inside.

Italian Cream Cake Recipe

How To Make This Italian Cream Sheet Cake

You don’t need to channel Martha Stewart to make this work beautifully. Just a mixer, a bowl or two, and a tiny bit of patience for folding in egg whites. Here’s how we get to cake town:

  • Prep your pan and preheat: Preheat the oven to 350°F, grease and flour a 9×13-inch pan, and line it with parchment. This helps everything release easily so no cake left behind.

  • Mix the dry ingredients: Whisk together flour, baking soda, and salt in a medium bowl. Set it aside so you don’t forget it and add it all at once later (guilty).

  • Cream butter and sugar: In your largest mixing bowl, beat softened butter and granulated sugar until it’s pale and fluffy. You want little sugar air pockets in there—gives the best texture.

  • Add yolks and vanilla: Reduce the mixer speed to low, then add the egg yolks one at a time. Each yolk should disappear before adding the next. Stir in vanilla once they’re all in.

  • Whip the egg whites: In a clean bowl (no yolk trace or they won’t whip!), beat egg whites to stiff peaks. They should defy gravity just a bit.

  • Combine the batter: Alternate adding the flour mixture and buttermilk to the creamed butter, beginning and ending with flour. Use a gentle hand and go slow-ish—it helps avoid overmixing.

  • Add coconut and pecans: Stir them in gently with the final flour addition. It’ll start to smell good already, especially once the nuts go in.

  • Fold in egg whites: First add one spoonful of whipped whites to loosen the batter. Then gently fold in the rest until it’s evenly light and streak-free. Don’t stir. Think “swirl and lift.”

  • Bake and cool: Pour batter into your prepared pan and bake for 35–40 minutes, until a toothpick comes out clean. Let it cool completely in the pan before frosting.

  • Make the frosting: Beat softened butter and cream cheese until smooth and creamy. Gradually mix in powdered sugar, then stir in some chopped coconut and pecans if you’re feeling generous.

  • Frost and fancy it up: Spread frosting evenly over the cooled cake. Sprinkle the top with extra pecans and coconut garnish. Pop it in the fridge for 15–20 minutes to set, then slice and serve.

Italian Cream Cake Recipe

Storage Options

This cake is surprisingly relaxed when it comes to storage. The frosting holds well and the crumb stays tender even days later.

To refrigerate, store slices (or the whole thing, if you’ve got fridge space) covered in plastic wrap or an airtight container. It’ll keep happily for about 4–5 days. The frosting actually firms up nicely in the fridge, which makes cutting even cleaner on day two or three.

Wondering about freezing? You can absolutely freeze this cake, but hold off on garnishing. Wrap individual unfrosted slices tightly in plastic wrap, then foil, and stick them in a zip-top bag. They’ll keep for up to 2 months. Thaw in the fridge overnight, then frost and top as you please.

Leftovers taste even better chilled, honestly. I may or may not have eaten it straight from the fridge when I thought no one was watching.

Variations and Substitutions

Want to play around a little? This recipe’s flexible enough to handle a few swaps or creative nudges. Still classic, still dreamy.

  • Gluten-free flour blend: A 1-to-1 gluten-free mix works well here. Choose a blend with xanthan gum so the structure holds.
  • Unsweetened coconut: If you’re watching sugar, use the unsweetened kind. The texture’s a bit drier, but fine with the moist cake.
  • Walnuts instead of pecans: Works beautifully. A slightly more bitter bite, but still that toasty nutty vibe.
  • Lemon zest boost: Add a teaspoon of zest to the batter or frosting for a subtle citrus lift. Especially welcome in spring.
  • Make it cupcakes: Pour the batter into lined muffin tins and bake for 20–22 minutes. Same full flavor, individually portioned.
  • Add a fruity drizzle: A spoonful of pomegranate syrup or raspberry coulis makes a stunning finish against the cream cheese topping.

Italian Cream Cake Recipe

What to Serve with Italian Cream Sheet Cake

This cake’s flavor is rich, so anything light or slightly acidic does a nice job of cutting through the creaminess. Or lean right in and make it extra cozy with more sweet things—your call.

  • Coffee with a splash of cream: Strong hot coffee balances the richness of the frosting. I like mine just slightly sweet, so the cake stays the star.

  • Sparkling lemonade or citrus spritz: Cold and fizzy with some tartness makes a super complementary contrast to the creamy sweet profile. Extra points if it’s homemade.

  • Cheese plate starter: Hear me out—mild cheeses, apple slices, and honey make a great pre-dessert course if you’re serving this at a dinner. It sets the tone nicely.

  • Fresh mixed berries: Toss them gently in a tiny bit of lemon juice and sugar. Spoon alongside, and you’ve got a faux-fruit compote vibe without actually cooking.

  • A second dessert (we’re doing it): Something like peanut butter banana ice cream sandwiches for the chocolate crowd. Make it a decadent little dessert bar.

Italian Cream Cake Recipe

Frequently Asked Questions

Can I make Italian cream cake ahead of time?

Absolutely, and honestly, it might even be better that way. The cake stays moist, and the flavors in the frosting settle in perfectly. You can bake the cake a day ahead, cool it completely, and store covered in the fridge. Frost it the next day, or even do the whole thing the night before and refrigerate overnight. Just pull it out 15–20 minutes before serving to take the chill off a little.

Do I have to separate the eggs?

I hear you—extra bowls, extra steps. But yes, separating the eggs is part of what gives this cake that delicate, fluffy lift. The yolks add richness and body, while the whipped whites make the texture airy without being crumbly. If you’re really in a rush, you could just use whole eggs, but expect a slightly denser result. Still tasty, just not as lofty.

What if I don’t have buttermilk?

No buttermilk? No problem. Mix 1 tablespoon of white vinegar or lemon juice with a scant cup of milk. Let it sit for 5–10 minutes until slightly curdled, then use just like regular buttermilk. The tang is key for texture and taste, so don’t skip this part entirely. It helps the cake rise and adds that little zing we love in each bite.

Can I use a different size pan?

Totally possible—just keep an eye on the bake time. A 9×13 is standard for this sheet cake, but you could use two 9-inch rounds for a layered version (although you’ll need more frosting for stacking). If you use a larger pan, the cake will be thinner and bake faster, so start checking at 25 minutes. Just don’t skip the toothpick test in the center.

Italian Cream Cake Recipe

Italian Cream Sheet Cake

Prep Time 30 minutes
Cook Time 40 minutes
Total Time 1 hour 30 minutes
Inviting and decadent, this Italian cream sheet cake combines butter, sugar, pecans, and shredded coconut in a rich, tangy buttermilk cake topped with a luscious cream cheese frosting. Tender, nutty, and perfectly fluffy, it's the sheet cake everyone will request, whether for a crowd or your coffee break.
16 pieces

Ingredients

Cake

  • 2 1/4 cups (280 g) all-purpose flour
  • 1 tsp baking soda
  • 1/2 tsp (0.5 tsp) salt
  • 1 cup (227 g) unsalted butter softened
  • 2 cups (400 g) granulated sugar
  • 5 (5 large) large eggs separated
  • 2 tsp vanilla extract
  • 1 cup (240 ml) buttermilk well-shaken
  • 1 cup (85 g) shredded sweetened coconut
  • 1 cup (120 g) chopped pecans toasted if desired

Cream Cheese Frosting

  • 8 oz (225 g) cream cheese room temperature
  • 1/2 cup (113 g) unsalted butter softened
  • 3 cups (360 g) powdered sugar sifted if lumpy
  • 1 tsp vanilla extract
  • 1/4 cup (21 g) shredded sweetened coconut optional, for frosting or garnish
  • 1/4 cup (30 g) chopped pecans optional, plus more for garnish

Equipment

  • 9x13-inch Baking Pan
  • Parchment paper
  • Mixing bowls
  • Electric mixer
  • Rubber spatula

Instructions
 

  1. Preheat oven to 350°F (175°C). Grease and flour a 9x13-inch pan and line with parchment for easy removal.
  2. In a medium bowl, whisk together flour, baking soda, and salt. Set aside.
  3. In a large mixing bowl, beat the softened butter and granulated sugar until pale and fluffy.
  4. On low speed, add the egg yolks one at a time, beating to incorporate after each. Stir in vanilla extract.
  5. In a clean bowl, whip egg whites to stiff peaks.
  6. Alternately add dry ingredients and buttermilk to the creamed butter, beginning and ending with flour. Do not overmix.
  7. Stir in shredded coconut and chopped pecans with the final addition of flour.
  8. Add a spoonful of whipped egg whites to the batter to lighten it. Then gently fold in the remaining egg whites until just combined and streak-free.
  9. Spread batter evenly into prepared pan. Bake 35–40 minutes, or until a toothpick inserted in the center comes out clean.
  10. Allow cake to cool completely in the pan on a wire rack before frosting.
  11. For the frosting, beat cream cheese and softened butter on medium speed until fluffy and combined. Gradually beat in powdered sugar and vanilla until smooth.
  12. If desired, stir in a handful each of chopped pecans and shredded coconut. Spread over cooled cake.
  13. Sprinkle with extra pecans and coconut. Chill for 15–20 minutes to set, then slice and serve.

Notes

Storage: Store covered in the fridge for up to 4–5 days. The frosting sets nicely when chilled.
Make-ahead: Cake can be baked up to one day ahead; frost before serving or the night before.
Freezing: Wrap unfrosted slices tightly and freeze for up to 2 months. Thaw in fridge, frost, and garnish as desired.
For gluten-free: Use a 1-to-1 gluten-free flour blend with xanthan gum.
Swap pecans for walnuts, or use unsweetened coconut for less sweetness if desired.
To make buttermilk: Combine 1 tbsp lemon juice or vinegar with enough milk to make 1 cup, let stand 5–10 min.

Nutrition

Calories: 480kcal | Carbohydrates: 53g | Protein: 5g | Fat: 29g | Saturated Fat: 17g | Cholesterol: 85mg | Sodium: 290mg | Potassium: 100mg | Fiber: 1g | Sugar: 38g | Vitamin A: 700IU | Calcium: 60mg | Iron: 1.1mg

Soft, fluffy, spiced, and swirled to pumpkiny perfection—these cozy pumpkin cinnamon rolls bring together pumpkin puree, cinnamon, brown sugar, and cream cheese to make your kitchen smell like it’s wearing a sweater. Expect warm spice, gooey centers, and frosting that melts just perfectly over the top.

Whether you’re easing into a chilly weekend or just need fewer decisions and more carbs, these rolls show up ready to hug your taste buds. They’re ideal for brunch-y mornings (hello, stretchy pants) or an afternoon with tea when you “accidentally” bake a dozen and miraculously forget to share. The dough is plush, the filling smells like every candle I hoard in October, and the icing? Tangy, sweet, and fully committed to the swirl life.

Table of Contents

Pumpkin Cinnamon Rolls Recipe

Why You’ll Love this Pumpkin Cinnamon Rolls Recipe

You won’t need a bakery trip after this one. These pumpkin cinnamon rolls bring the goods, and the aroma alone will practically high-five your neighbors.

  • Fluffy and tender dough: Thanks to warm milk, active yeast, and a bit of kneading, the rolls bake up pillowy soft.
  • Pumpkin spice flavor that shows up strong: Real pumpkin puree plus warm spices make these taste unmistakably autumnal (without smacking you in the face).
  • Frosting that melts and marries into the rolls: Cream cheese and cinnamon swirl together into a dreamy, slightly tangy glaze.
  • No special tools needed: A bowl, a rolling pin, and a little dough patience—and you’re golden. Use floss if you’re fancy.
  • Easy to make ahead: These are super freezer-friendly and reheat shockingly well. Like, way too well.
  • Great for brunch or dessert: Or second breakfast. Or that weird post-lunch, need-a-little-something moment.

Pumpkin Cinnamon Rolls Recipe

Ingredient Notes

Let’s talk about what’s going into the doughy, spicy goodness. No obscure ingredients. Just cozy stuff.

  • Warm milk (110°F): This little spa moment wakes up the yeast and gets things rising. Not too hot though, or yeast gets grumpy.
  • Active dry yeast: Gives the rolls their rise and fluff. If it doesn’t foam up, your yeast is probably a couch potato.
  • Pumpkin puree: Adds moisture and that signature fall flavor—use 100% pure, not pumpkin pie filling.
  • Granulated sugar: Just enough for a bit of sweetness in the dough.
  • Melted unsalted butter: Brings richness and softness. Let it cool a bit first so it doesn’t cook the egg.
  • Egg: Enriches the dough and helps bind everything together.
  • Vanilla extract: For warmth and depth. It’s the quiet hero here.
  • All-purpose flour: Standard stuff. Start with 3½ cups but have a little extra for dusting.
  • Pumpkin pie spice: Infuses the dough and filling with that warming, spiced goodness.
  • Salt: Just enough to balance the sweetness and keep things from tasting flat.
  • Brown sugar (filling): Sticky, rich, and the perfect partner to cinnamon.
  • Ground cinnamon & pumpkin pie spice (filling): Double the spice; doubles the cozy factor.
  • Softened butter (filling): Speads easily and helps the sugar stick during baking.
  • Cream cheese: The tangy base for the frosting—don’t skip it unless you’re frosting-averse (who hurt you?).
  • Powdered sugar: Makes the frosting sweet and smooth. Sift it so you don’t end up with sugary pebbles.
  • Ground cinnamon (again): For a little extra oomph in the frosting.

Pumpkin Cinnamon Rolls Recipe

How To Make This Pumpkin Cinnamon Rolls Recipe

Okay, roll up those sleeves, maybe throw on some music, and let’s make your kitchen smell like a bakery. Here’s the comfy, cozy path to pumpkin cinnamon roll joy.

  • Activate the yeast: Combine warm milk and yeast in a big bowl. Stir gently, then walk away for 5 to 10 minutes. You want bubbles and a little foam—this is the “yes, I’m alive” sign from your yeast.

  • Make the dough base: Add pumpkin puree, sugar, melted (and cooled!) butter, egg, and vanilla to the bubbly milk mix. Stir or mix until it’s mostly smooth. Don’t stress if it looks a bit shaggy.

  • Add dry ingredients: Tip in the flour, pumpkin pie spice, and salt. Stir until a loose dough forms. Use a spoon at first, then move to a dough hook or just hands-on kneading if you’re feeling rustic.

  • Knead until smooth: About 7 to 8 minutes of kneading should give you a dough that’s smooth, elastic, and just a little tacky. If it’s super sticky, add tiny bits of flour—don’t go overboard, or the rolls might bake up grumpy and dense.

  • Let it rise: Pop the dough into a greased bowl, cover it with a damp towel or plastic wrap, and let it rise somewhere warm. We’re aiming for doubled in size, usually about an hour. I’ve definitely used the top of my dryer as a proofing area.

  • Mix the filling: Stir together the brown sugar, cinnamon, and pumpkin pie spice in a small bowl. Make sure your butter is nice and spreadable.

  • Roll it out: Punch the dough down gently, then roll it out on a floured surface to an 18×12-inch rectangle. Try to keep the thickness even, like a comfy yoga mat made of dough.

  • Fill and roll: Spread the softened butter all over, all the way to the edges. Then sprinkle your sugary spice mixture and press it in lightly. Starting from the long side, roll it up into a tight log.

  • Slice cleanly: Use unflavored dental floss (yes, floss!) or a really sharp knife to slice into 12 even pieces. Floss works shockingly well—no squishing.

  • Second rise: Place the rolls in a greased 9×13 pan, leaving a little room between each. Cover them again loosely and let them puff up for 30 to 40 minutes.

  • Bake to golden bliss: Preheat the oven to 350°F. Bake the risen rolls for 22 to 25 minutes—until the tops are lightly golden and they smell disturbingly good.

  • Frost while warm: Let them cool for a few minutes first, then slap on the frosting while they’re still warm. It melts just enough to seep into those layers.

Pumpkin Cinnamon Rolls Recipe

Storage Options

If you somehow have leftovers—I mean, okay—you can store them in a few clever ways.

Once the pumpkin cinnamon rolls have cooled completely, pop them into an airtight container. Room temp works for a day or two, but beyond that, I recommend the fridge to keep that cream cheese frosting from wandering into sketchy territory.

To freeze, wrap individual unfrosted rolls tightly in plastic wrap, then stash them in a freezer bag (double wrap if you’re the cautious type). They’ll hold up for about two months. To reheat, thaw overnight in the fridge or give them a little microwave TLC right from frozen—low heat in 20-second bursts does the trick.

If you’re thinking ahead, you can fully prep and shape the rolls, cover them, and pop the pan in the fridge overnight. In the morning, let them rise for 30 to 45 minutes at room temp before baking. Ta-da, fresh-baked magic with no 6 a.m. flour emergencies.

Variations and Substitutions

Feel like spinning the flavor wheel a little? I see you. Here are a few fun switch-ups to keep things interesting.

  • Maple cream cheese frosting: Swap a spoonful of powdered sugar for maple syrup in the frosting. It adds richness, and honestly, it just tastes fancy.

  • Add chopped pecans to the filling: They bring crunch and a toasty flavor that plays so well with the pumpkin and cinnamon.

  • Use whole wheat flour for half the mix: Adds nuttiness and fiber without turning the rolls into hockey pucks. Don’t replace all the flour—just a portion.

  • Drizzle with browned butter before serving: That little extra hit of nuttiness from browned butter over warm rolls is wildly good.

  • Play with the spice blend: Not a pumpkin pie spice fan? Try chai spice or extra cinnamon instead for a different warm kick.

Pumpkin Cinnamon Rolls Recipe

What to Serve with Pumpkin Cinnamon Rolls

These breakfast sweets love a good pairing. Or a good excuse for brunch. Or second breakfast. Here’s what they cozy up to best.

  • A bold mug of coffee with a little splash of cinnamon almond milk hits the perfect just-woke-up note. The rolls take care of dessert. Your coffee takes care of business.

  • For something savory, a plate of scrambled eggs with a sprinkle of sharp cheddar balances out all the sweet. Or go for a small side of these bacon basil cornbread muffins if you’re into full-on brunch feasting.

  • Feeling chilly? Add a scoop of warm cinnamon apples on the side. Almost pie-like, wildly comforting, and it makes one heck of a brunch plate.

  • Not feeling breakfasty? Serve a roll alongside a cozy after-dinner espresso or even a tiny glass of Baileys if you’re going rogue.

  • And if it’s dessert you’re after, chase it with something creamy and cold, like this old-school favorite: homemade Wendy’s Frosty-style shake.

Pumpkin Cinnamon Rolls Recipe

Frequently Asked Questions

Can I make pumpkin cinnamon rolls in advance?

Yep! You can prep the rolls completely (right up to the second rise), cover the pan tightly, and refrigerate overnight. In the morning, pull them out about 30 to 45 minutes before baking so they can come to room temperature and rise a bit more. Then bake as usual. No sleep-deprived measuring required.

Can I freeze these rolls before or after baking?

Totally. You can freeze the unbaked, sliced rolls on a tray, then transfer to a freezer bag once firm. When ready to bake, thaw overnight in the fridge, let rise, and bake. You can also freeze baked (and unfrosted) rolls—they reheat really well in the oven or microwave. Just don’t forget the frosting after reheating.

How do I know if my dough rose enough?

After the first rise, the dough should double in size. A good trick is to gently poke it with a floured finger—if the dent stays, you’re good to go. If it springs back, give it a little more time. Yeast has its own schedule and is not to be rushed.

What if I don’t have pumpkin pie spice?

No worries at all. You can DIY it with 1 tsp cinnamon, 1/4 tsp each ginger and nutmeg, and a pinch of cloves or allspice. Shake it up and you’ve got something close enough to fool even the most devoted fall fanatic.

Pumpkin Cinnamon Rolls Recipe

Pumpkin Cinnamon Rolls

Prep Time 30 minutes
Cook Time 25 minutes
Rising Time 1 hour 30 minutes
Total Time 2 hours
Soft, fluffy, spiced, and swirled to pumpkiny perfection—these cozy pumpkin cinnamon rolls bring together pumpkin puree, cinnamon, brown sugar, and cream cheese to make your kitchen smell like it’s wearing a sweater. Enjoy warm spice, gooey centers, and tangy cream cheese frosting over plush, pillowy dough. The rolls are freezer-friendly, make-ahead approved, brunch-perfect, and dangerously irresistible.
12 rolls

Ingredients

For the Dough

  • 3/4 cup (180 ml) warm milk about 110°F
  • 2 1/4 tsp (7 g) active dry yeast 1 packet
  • 1/2 cup (120 g) pumpkin puree 100% pure, not pumpkin pie filling
  • 1/4 cup (50 g) granulated sugar
  • 1/4 cup (55 g) unsalted butter melted and cooled
  • 1 large egg room temperature
  • 1 tsp (5 ml) vanilla extract
  • 3 1/2 cups (440 g) all-purpose flour plus more for dusting
  • 2 tsp (6 g) pumpkin pie spice
  • 1/2 tsp (3 g) salt

For the Filling

  • 1/3 cup (75 g) unsalted butter softened
  • 3/4 cup (150 g) light brown sugar packed
  • 1 tbsp (8 g) ground cinnamon
  • 1 tsp (3 g) pumpkin pie spice

For the Cream Cheese Frosting

  • 4 oz (113 g) cream cheese softened
  • 2 tbsp (28 g) unsalted butter softened
  • 1 cup (120 g) powdered sugar sifted
  • 1/2 tsp (2.5 ml) vanilla extract
  • 1/2 tsp (1.5 g) ground cinnamon optional, for extra spiced frosting
  • pinch salt to taste

Equipment

  • Large mixing bowl
  • Rolling Pin
  • 9x13 baking pan
  • Small bowl
  • Plastic wrap or damp towel

Instructions
 

  1. Activate the yeast: In a large bowl, combine the warm milk and yeast. Stir gently and let sit for 5–10 minutes until bubbly and foamy.
  2. Make the dough base: Add the pumpkin puree, granulated sugar, melted (and cooled) butter, egg, and vanilla extract to the yeast mixture. Mix until mostly smooth.
  3. Add dry ingredients: Stir in flour, pumpkin pie spice, and salt until a soft dough forms. Knead by hand (or with a mixer dough hook) for 7–8 minutes, adding a little more flour if needed, until the dough is smooth, elastic, and still a bit tacky.
  4. First rise: Transfer the dough to a greased bowl, cover, and let it rise in a warm spot until doubled in size, about 1 hour.
  5. Make the filling: In a small bowl, mix the brown sugar, cinnamon, and pumpkin pie spice together. Ensure butter is soft and spreadable.
  6. Roll out the dough: Gently punch down the dough and transfer it to a lightly floured surface. Roll it into an 18x12-inch rectangle.
  7. Fill and roll: Spread the softened butter over the dough nearly to the edges. Sprinkle the spiced sugar evenly over the butter, pressing gently. Starting from a long edge, tightly roll the dough up into a log.
  8. Slice: Cut into 12 even pieces using unflavored dental floss or a very sharp knife.
  9. Second rise: Arrange the rolls in a greased 9x13-inch pan, cover, and let them rise until puffy, about 30–40 minutes.
  10. Bake: Preheat oven to 350°F (175°C). Bake the rolls for 22–25 minutes, until golden brown on top and bubbling at the edges.
  11. Prepare frosting: While the rolls bake, beat the cream cheese and butter together until smooth. Add powdered sugar, vanilla, cinnamon (if using), and a pinch of salt. Mix until creamy.
  12. Frost and serve: Let rolls cool for 5–10 minutes, then spread frosting over warm rolls. Serve and enjoy!

Notes

Storage: Let rolls cool completely, then keep in an airtight container at room temperature for up to 2 days or refrigerated for up to 5 days. Freeze unfrosted rolls (well wrapped) for up to 2 months; thaw and reheat before frosting. Prep ahead: Rolls can be shaped and refrigerated (unbaked) overnight; let rise 30–45 min at room temp before baking.
Variations: Swap a spoonful of sugar for maple syrup in the frosting for maple cream cheese rolls. Add pecans to the filling for crunch, or swap half the flour for whole wheat. Try brown butter drizzled over top, or adjust the spices to suit your fall cravings.

Nutrition

Calories: 310kcal | Carbohydrates: 51g | Protein: 6g | Fat: 10g | Saturated Fat: 6g | Cholesterol: 37mg | Sodium: 210mg | Potassium: 95mg | Fiber: 2g | Sugar: 21g | Vitamin A: 3110IU | Vitamin C: 1mg | Calcium: 60mg | Iron: 2.4mg

Cool, creamy, and ridiculously nostalgic, this Wendy’s Frosty copycat uses chocolate milk, sweetened condensed milk, and Cool Whip to hit all the right notes. It’s got that soft-serve vibe, rich and velvety with a touch of childhood drive-thru flair.

Honestly, the only thing missing is that iconic red straw—and maybe the fries on the side for dipping (don’t knock it till you’ve tried it).

Let’s not pretend this is a health food. It’s creamy, sweet, and blissfully cold. Basically, a chocolate milkshake that convinced soft serve and mousse to have a delicious baby. The texture lands right in that glorious middle ground between scoopable and sippable.

This recipe’s joy lies in its simplicity. Just three ingredients and a blender, and boom—you’re halfway to Frosty Town. Whether it’s a midnight treat craving, a movie night chill session, or a soft-serve attempt gone deliciously sideways, this one has your back.

Table of Contents

Easy Copycat Frosty Recipe

Why You’ll Love this Wendy’s Frosty

I won’t oversell it, but if you’ve ever wanted a Frosty without leaving your house (or pants), you’re in the right place.

  • Ridiculously simple to make: Just three ingredients, one blender, and maybe the tiniest bit of patience while it chills.
  • Shockingly similar to the real thing: Creamy, smooth, and with that slightly malty chocolate kick we all secretly crave.
  • Ideal for last-minute dessert goals: Keep the ingredients on hand and you’re always 2 hours away from soft-serve happiness.
  • Fun to customize: Toss in a splash of espresso or a pinch of salt and watch your tastebuds perk right up.
  • Cheaper than a drive-thru run: Especially if you’ve got a family of five who all want dessert at once.

Easy Copycat Frosty Recipe

Ingredient Notes

Three things. That’s it. Here’s what each one brings to the frosty party:

  • Chocolate milk: Pick one that’s creamy and rich. If it tastes good cold out of the glass, it’ll shine here. I like whole milk chocolate, but feel free to go 2% or even almond-based if you’re feeling experimental.
  • Sweetened condensed milk: This is the magic glue. It gives body and that milkshake-y sweetness without needing to add sugar or syrup.
  • Cool Whip: Classic. Faux-creaminess at its finest. You can use the name-brand or generic, but keep it thawed. It softens the whole blend into that dreamy Frosty texture.

Easy Copycat Frosty Recipe

How To Make This Wendy’s Frosty

You ready? Deep breath. Let’s do this frosty thing.

  • Blend everything together: Toss the chocolate milk, condensed milk, and Cool Whip into a blender. Fire it up until everything’s silky smooth. It’ll look like a milkshake, but trust the process.
  • Pour and freeze: Transfer that luscious frosty mix into a freezer-safe container (I use an old metal loaf pan). Pop it in the freezer for 2 hours.
  • Stir every 30 minutes: This is important. Set a few timers and stir it well every half hour. It keeps the texture from freezing solid and gives you that dreamy soft-serve consistency.
  • Scoop or sip: Once it’s chilled but still soft and slightly spoonable, it’s ready. Straw optional, spoon required… unless you like a drippy shirt.

Easy Copycat Frosty Recipe

Storage Options

Okay, so maybe you didn’t devour the whole thing in one sitting. Proud of you. Here’s what to do with leftovers.

If you’ve got some extra (or made a double batch… not judging), pop it in an airtight container and keep it in the freezer. It’ll firm up more overnight, but it’s still perfectly scoopable after a few minutes of counter-softening. Give it a stir or a quick blitz in the blender again if you want to mimic that fresh-blended texture.

Fridge? Not your friend here. The consistency turns to liquid chocolate soup pretty fast. Stick to freezing.

And no, microwaving is not a reheat method here. We’ve entered the soft-serve zone, not hot chocolate territory.

Variations and Substitutions

Want to get fancy with your Frosty? I like your style. Here are some ways to mess with success (in a good way):

  • Dark chocolate milk: For a bolder, more grown-up vibe. You’ll get deeper cocoa notes and less sugar.
  • Salted caramel drizzle: Add a swirl before freezing or drizzle on top. The sweet-salty game makes this pop even harder.
  • Espresso shot: A sneaky splash of cooled espresso or coffee turns this into a mocha Frosty that’s honestly way too easy to inhale.
  • Homemade whipped cream: If Cool Whip’s not your jam, fold in homemade whipped cream instead for a fluffier, fresher version.
  • Crushed cookies or candy bits: Stir in some crushed Oreos or chopped peanut butter cups during the freezing step. It becomes a dessert hybrid masterpiece.

Easy Copycat Frosty Recipe

What to Serve with Wendy’s Frosty

Let’s be real. Dipping fries into a Frosty is a lifestyle. But if you want to round this out into more than just a nostalgic treat, try some of these:

  • If you’re making oven fries, the sweet-and-savory move is unstoppable. That warm crunch followed by cold, creamy chocolate? Just… yes. It’s the snack-time balance we didn’t deserve but are lucky to have.

  • For something more substantial, pair your Frosty with these oven-baked beef and cheese chimichangas. The spicy-savory bite followed by a chilly chocolate hit is a vibe.

  • On summer evenings, toss together a fruit plate and serve this Frosty as a dip. Strawberries or frozen banana chunks dipped in this? Instant happiness.

  • Want a finishing touch for a homemade dinner night? Try it after the teriyaki chicken recipe. Sweet, simple finish after a savory meal.

Easy Copycat Frosty Recipe

Frequently Asked Questions

How long does the Frosty need to freeze?

About 2 hours will get you that perfect spoonable (but still soft) Frosty texture. The trick is stirring every 30 minutes during that chill time. It feels fussy, I know, but the payoff is real. If you forget to stir, no big deal—it just gets a little icier, more like a frozen milkshake. Still tasty.

Can I use homemade whipped cream instead of Cool Whip?

Absolutely! Just whip up about 2 cups of heavy cream until soft peaks form and fold it in gently. It’ll be fluffier and a little less stable than Cool Whip, so you might need a slightly longer freeze time—but the flavor? *Chef’s kiss.*

Is it okay to refreeze leftovers?

You can refreeze, just know the texture might get a bit icier. Stirring it again or re-blending helps bring it back to life. For best results though, store in small containers so you’re only pulling out what you’ll actually eat.

Any way to make this dairy-free?

Yep, but it takes some planning. Use a rich nondairy chocolate milk (like oat or almond), a vegan sweetened condensed coconut milk, and a nondairy whipped topping (usually in the freezer section). The result is a little different, but still dreamy enough to pass as a Frosty cousin.

Easy Copycat Frosty Recipe

Wendy's Frosty (Copycat Recipe)

Prep Time 5 minutes
Freezing Time 2 hours
Total Time 2 hours 5 minutes
Cool, creamy, and ridiculously nostalgic—this Wendy’s Frosty copycat delivers the soft-serve, milkshake magic you crave, without a drive-thru run. Just three ingredients, a blender, and pure childhood happiness.
4 servings

Ingredients

Main Ingredients

  • 2 cups (480 ml) chocolate milk whole or 2% recommended
  • 1 can (396 g) sweetened condensed milk 14 oz (396g)
  • 1 container (225 g) Cool Whip 8 oz (thawed)

Optional Add-Ins

  • a pinch of salt optional
  • espresso shot optional, for mocha flavor

Equipment

  • Blender
  • Freezer-safe container
  • Spatula

Instructions
 

  1. Blend everything together: Combine chocolate milk, sweetened condensed milk, and Cool Whip in a blender. Blend until the mixture is completely smooth and creamy.
  2. Pour and freeze: Transfer the mixture into a freezer-safe container, preferably a metal loaf pan for optimal chilling. Cover and place in the freezer.
  3. Stir every 30 minutes: For the next 2 hours, stir the mixture thoroughly every 30 minutes. This keeps the Frosty from freezing solid and ensures that soft-serve, spoonable texture.
  4. Scoop or sip: After about 2 hours, when the Frosty is set but still soft and spoonable, serve immediately. Use a spoon, or a straw if you like it sippable!

Notes

If you have leftovers, store them in an airtight container in the freezer. Allow to soften a few minutes on the counter before scooping. Avoid storing in the fridge, as the consistency will become liquid. Stir, or briefly blend again after freezing to restore the texture if needed.
Variations: Use dark chocolate milk for a richer taste, swirl in caramel, add a splash of cold espresso, swap Cool Whip for homemade whipped cream, or stir in crushed cookies or candy before freezing.

Nutrition

Calories: 340kcal | Carbohydrates: 49g | Protein: 7g | Fat: 12g | Saturated Fat: 8g | Cholesterol: 34mg | Sodium: 135mg | Potassium: 370mg | Sugar: 46g | Vitamin A: 340IU | Vitamin C: 2mg | Calcium: 270mg | Iron: 1.2mg

Savory weeknight magic: this cozy ground turkey pasta simmers with fresh oregano, garlic, and a rich red sauce. Feeds hungry mouths, fast.

Some nights just call for one-pot comfort. You’re tired, you’re hungry, you’re not about to roast anything… enter ground turkey pasta. It’s hearty, saucy, a little herby, and gets dinner on the table in about 30 minutes without dirtying your entire kitchen (hallelujah). The turkey browns up with onions and garlic until it’s fragrant and golden, then everything — even the dry pasta — simmers together in a bubbling pot of joy.

Table of Contents

Ground Turkey Pasta Recipe

Why You’ll Love this Ground Turkey Pasta Recipe

No tricks here, just a very solid meal that checks all the right boxes. Think gentle garlic aroma swirling through the kitchen while rotini noodles soak up every drop of sauce.

  • Ridiculously simple to make: You toss everything — even the pasta — into one big pan and let it do its thing.
  • Minimal cleanup involved: Since you don’t even boil pasta separately, your sink will thank you.
  • Savory and cozy flavors: The turkey, herbs, and sauce blend into this rich, tomato-swirled goodness you’ll want to scoop up with crusty bread.
  • Totally adaptable: Hate oregano? Swap it. Use penne instead of rotini. Your call.
  • Great for leftovers: It reheats like a champ, and you’ll be secretly excited for lunch the next day.
  • Kid and adult approved: It’s not fancy, but it hits the comfort zone for basically everyone.

Ground Turkey Pasta Recipe

Ingredient Notes

We’re not going off the deep end here — this is simple pantry-and-fridge fare — but a few details can make the difference.

  • Ground turkey: Go for lean (93%) if you want less grease, but honestly, even the fattier stuff works beautifully for flavor.
  • Onion: One medium-sized yellow onion adds a sweet savoriness as it softens into the turkey mixture.
  • Garlic (fresh, not powdered here): That lingering warmth and kick comes from a few fresh cloves. You could add more if you’re like me and garlic is a lifestyle.
  • Fresh oregano: Bright and earthy, it adds a lovely herbal punch. Dried works too if that’s what you’ve got.
  • Garlic powder and dried basil: Rounds out the flavor and gives a hint of that classic Italian-American profile.
  • Rotini pasta: The spiral shape traps the sauce like little edible corkscrews. Penne or shells would also work.
  • Jarred pasta sauce: Use your favorite here — chunky, smooth, garlicky, whatever mood you’re in. This is where the dish gets most of its depth.
  • Chicken broth: Thins the sauce and cooks the pasta without plain water. Makes everything taste more… well, more.
  • Parmesan cheese: Freshly grated, salty, and nutty. Sprinkle just before serving and watch it melt into the hot pasta.

Ground Turkey Pasta Recipe

How To Make This Ground Turkey Pasta Recipe

Grab your favorite deep skillet or Dutch oven — the sturdy one that never lets you down — and let’s knock this out together.

  • Brown the turkey, onion, and garlic: Heat a bit of oil in your pan over medium heat, add the turkey, chopped onion, and garlic, and let it all cook down for about 8 minutes. You want the turkey fully cooked and the onion soft and fragrant. Stir occasionally so nothing sticks (and inhale the garlicky aroma, it’s basically edible comfort).

  • Season and stir in pasta: Sprinkle in your dried basil, garlic powder, chopped oregano, some salt and pepper if you’re feeling spicy. Then stir in the dry rotini. Yes, dry. Straight into the pot. Trust.

  • Add sauce and broth, then boil: Pour in the full jar of spaghetti sauce and the chicken broth. Stir it all together and crank the heat just until it hits a rolling boil — not a lazy simmer, I mean a boil-boil.

  • Cover and cook on low: Once it’s bubbling like it means it, pop a lid on, reduce the heat, and let it cook for 7 to 10 minutes. The pasta will absorb the liquid and soften into that perfect al dente bite (check it occasionally so you don’t overdo it).

  • Top and serve: Right before serving, sprinkle with freshly grated Parmesan and maybe a little extra oregano if you’re feeling fancy. Serve it up hot, maybe with a salad or just a fork you’re willing to fight for.

Ground Turkey Pasta Recipe

Storage Options

So, what happens if you made a mountain of pasta (you probably did)? Let’s talk leftovers.

Once it cools, transfer any extras into an airtight container and toss it in the fridge. It’ll keep well for 3 to 4 days — and honestly, the flavors get even cozier overnight. The pasta soaks up some of the sauce, so it becomes thicker and heartier.

For freezing? Totally doable. Let the dish cool completely, portion it into freezer-safe containers, and freeze for up to 2 months. When you’re ready to reheat, defrost overnight in the fridge or microwave it straight from frozen (lower power, go slow). Either way, add a splash of broth or water before reheating to loosen the pasta back up.

Reheat on the stovetop or in the microwave. Stir occasionally to avoid pasta clumps. Top with fresh cheese again because… why not?

Variations and Substitutions

Switch things up based on what’s lurking in your fridge or just the vibe you’re going for tonight. No rules, just pasta.

  • Different ground meat: Swap the turkey for chicken, beef, or pork. Even plant-based crumbles could work if you’re meat-free.
  • Gluten-free pasta: Use your favorite GF rotini or penne, but keep an eye on the cooking time — they tend to behave differently.
  • Add veggies: Spinach, mushrooms, zucchini, or bell peppers would all tuck in nicely. Sauté with the onions or toss in with the sauce.
  • Spicier variation: Add red pepper flakes during cooking, or serve it with hot sauce on the side for a little kick.
  • Chunky or herbed sauce: Try a roasted garlic or arrabbiata-style spaghetti sauce to give it a twist with no extra work.
  • Extra cheesy version: Throw in some mozzarella before serving. It’ll melt into a gooey pocket of dreams.

Ground Turkey Pasta Recipe

What to Serve with Ground Turkey Pasta

Okay, so you’ve got your skillet of steamy, saucy pasta. Let’s round out the table without overshadowing the star.

  • Toss together a quick green salad with arugula, lemon juice, olive oil, and flaky salt. The brightness counterbalances the rich tomato sauce just right — kind of like a palate reset between forkfuls.

  • Warm up garlic bread (or cheat and use a baguette with garlic butter). It’s practically a requirement for swiping up sauce from your plate. Sometimes I purposely leave a little sauce behind just so I can mop it all up.

  • A side of roasted vegetables like broccoli or Brussels sprouts adds balance. Roasting brings out a bit of sweetness that plays surprisingly well with the herb-y-ness of the pasta. Kind of like how this pan-seared cod situation loves a good veg pairing too.

  • In summer, cold tomato and cucumber salad works like a charm. It keeps things fresh and crisp, especially if you’ve turned on the stove and need some cooling contrast.

  • Or just pour a decent glass of wine and call it done. You cooked. That’s enough.

Ground Turkey Pasta Recipe

Frequently Asked Questions

Can I make this recipe ahead of time?

Yes, absolutely. You can cook the whole dish, let it cool, and refrigerate it up to three days in advance. The flavor actually gets deeper as it sits. When you’re ready to serve, just reheat gently with a splash of broth or water to loosen things up. Add a little extra Parmesan on top and it’s like new again.

What’s the best pasta shape to use?

Rotini is great because all its twisty grooves hold onto the sauce like little sauce traps. Penne, fusilli, or even elbow macaroni work too, but keep in mind that cooking time can vary. Just keep an eye on texture and taste a piece as you go — the pasta tells you when it’s ready.

How can I make it more filling?

If you’ve got a big appetite (hi, same), add in a can of drained chickpeas or some chopped spinach near the end of cooking. Want something heartier? Try stirring in some cream cheese or shredded mozzarella — ultra cozy, ultra satisfying.

Is this recipe good for picky eaters?

Honestly, yes. You’ve got soft pasta, mild ground turkey, and a gentle, tomato-y flavor that’s familiar and comforting. If someone’s anti-onion or hates herbs, you can easily adjust or blend the sauce smooth. This one’s pretty forgiving and adaptable to most taste buds.

Ground Turkey Pasta Recipe

Ground Turkey Pasta (One-Pot, Cozy & Hearty)

Prep Time 10 minutes
Cook Time 20 minutes
Total Time 30 minutes
Savory weeknight magic: this cozy ground turkey pasta simmers with fresh oregano, garlic, and a rich red sauce. Feeds hungry mouths, fast.
Everything cooks in one pan, including the pasta! Comforting, saucy, and family-approved, it's a 30-minute dinner hero with minimal cleanup.
4 servings

Ingredients

Main Ingredients

  • 1 lb (454 g) ground turkey (93% lean recommended)
  • 1 medium yellow onion finely chopped
  • 3 cloves garlic minced
  • 2 tsp fresh oregano chopped (or 1 tsp dried oregano)
  • 1 tsp dried basil
  • 1/2 tsp (0.5 tsp) garlic powder
  • 1/2 tsp (0.5 tsp) kosher salt plus more to taste
  • 1/4 tsp (0.25 tsp) black pepper
  • 12 oz (340 g) rotini pasta uncooked (or penne, shells, etc.)
  • 24 oz (680 g) jarred pasta sauce your favorite variety
  • 2 cups (470 ml) chicken broth preferably low-sodium
  • 1 tbsp (15 ml) olive oil
  • 1/2 cup (50 g) Parmesan cheese freshly grated, for serving

Optional Ingredients & Variations

  • crushed red pepper flakes to taste (for heat)
  • extra veggies (spinach, mushrooms, peppers, zucchini)
  • mozzarella cheese for extra cheesiness

Equipment

  • Large deep skillet or Dutch oven
  • wooden spoon
  • Measuring cups and spoons
  • Cheese grater (for Parmesan)

Instructions
 

  1. Brown the turkey, onion, and garlic: In a large deep skillet or Dutch oven, heat olive oil over medium heat. Add ground turkey and chopped onion. Cook, stirring and breaking up turkey, for about 6-8 minutes, until turkey is browned and onions are soft. Add minced garlic and sauté for 1 minute until fragrant.
  2. Season and stir in pasta: Sprinkle in fresh oregano, dried basil, garlic powder, salt, and pepper. Stir to combine. Add uncooked rotini pasta and toss everything together.
  3. Add sauce and broth, then boil: Pour in the jarred pasta sauce and chicken broth. Stir well, increase heat, and bring the mixture to a rolling boil.
  4. Cover and cook on low: Once boiling, reduce heat to low, cover with a lid, and simmer for 7-10 minutes. Stir once or twice; cook until pasta is just al dente and most of the liquid is absorbed.
  5. Top and serve: Remove from heat. Stir well and let sit uncovered 2-3 minutes for sauce to thicken. Sprinkle with freshly grated Parmesan cheese and extra oregano, if desired. Serve hot!

Notes

Storage: Leftovers keep in an airtight container in the fridge for 3-4 days; reheat gently on the stovetop or microwave with a splash of broth or water to loosen.
Freezer: Cooled pasta freezes up to 2 months. Defrost overnight and reheat slowly, adding liquid as needed.
Variations: Substitute ground chicken, beef, or plant crumbles. Toss in extra veggies (spinach, mushrooms, zucchini) with the onion step. Top with mozzarella for a cheesy finish!

Nutrition

Calories: 470kcal | Carbohydrates: 58g | Protein: 33g | Fat: 11g | Saturated Fat: 3g | Cholesterol: 75mg | Sodium: 950mg | Potassium: 870mg | Fiber: 4g | Sugar: 8g | Vitamin A: 380IU | Vitamin C: 7mg | Calcium: 160mg | Iron: 3.5mg

Tender chicken thighs swim in sticky, glossy teriyaki sauce made with soy sauce, brown sugar, mirin, and a little garlic-ginger magic. This teriyaki chicken is savory-sweet, seared to golden perfection, and practically begs to be eaten over a pile of steamy rice.

This is one of those recipes that makes your kitchen smell amazing instantly—like something wildly better than takeout but without the whole “wait 40 minutes while your rice gets cold” thing. Homemade teriyaki chicken has that deep, sweet-salty glaze that clings to seared chicken thighs like it was meant to be. The sauce thickens into this glossy, sticky situation, which is VERY hard not to “quality test” with a spoon. It’s cozy but not fussy, ideal for weeknights or lazy Sundays when you want to feel like a pro without actually trying that hard.

Table of Contents

Homemade Teriyaki Chicken

Why You’ll Love this Teriyaki Chicken

This isn’t a whole big event of a recipe. It’s just satisfying in that sticky-saucy kind of way, which is honestly what I crave midweek.

  • Ridiculously simple to make: You just sear the chicken, stir up the sauce, and reunite everyone in the pan.
  • Better than takeout: It’s not even a competition; the sauce hits deeper and you get to decide how saucy you want it.
  • Minimal cleanup required: One skillet to rule them all (and maybe a rice pot, if we’re being honest).
  • Made with real ingredients: No mystery bottles or preservatives with unreadable labels required.
  • Plays well with others: Serve it over rice, next to stir-fried veggies, or tucked inside a tortilla if you’re ~that~ hungry.
  • Leftovers taste amazing: That sauce clings better on day two. Not science, just truth.

Homemade Teriyaki Chicken

Ingredient Notes

Let’s unpack what makes this glaze so good (and how to tweak if you’re short on something).

  • Boneless, skinless chicken thighs: Juicy and forgiving. They stay tender even if dinner runs late or the toddler hides your spatula again.
  • Low-sodium soy sauce: Keeps the salt under control so the sweetness of the brown sugar shines. Regular will work, but taste as you go.
  • Brown sugar (packed): That molasses-y depth caramelizes beautifully. Light or dark both work, depending on your sweet tooth.
  • Mirin (sweet rice wine): Brings that authentic teriyaki vibe. Can’t find it? A splash of dry sherry or sweet marsala will do in a pinch.
  • Rice vinegar: Brightens things up so the sauce doesn’t get cloying. Apple cider vinegar is an okay swap.
  • Garlic and ginger: Fresh really makes a difference here. That zingy aroma = irresistible.
  • Sesame oil: Tiny ingredient, HUGE flavor. Just a drizzle at the end adds a toasty richness.
  • Cornstarch slurry: The secret to that thick, glossy, coat-the-back-of-a-spoon finish.

Homemade Teriyaki Chicken

How To Make This Teriyaki Chicken

The magic here is in the pan. A quick browning, a bubbling sauce, a saucy reunion… it’s basically a rom-com.

  • Season and sear the chicken: Sprinkle salt and pepper on both sides, then toss them into a hot skillet with olive oil. Sear until they’ve got color on all sides—about 5 to 6 minutes. They don’t need to be cooked through yet, just confidently golden-ish.

  • Mix up the sauce: Grab a small bowl and whisk together soy sauce, brown sugar, mirin, vinegar, garlic, ginger, and sesame oil. It should smell like something you’d wear as perfume if that weren’t totally weird.

  • Simmer the sauce and thicken: Pour your glorious concoction into the now-empty skillet (don’t clean it—those browned bits are flavor gold). Once it starts bubbling, stir in your cornstarch slurry and let it simmer until it thickens to a glossy glaze.

  • Bring chicken back to the party: Slide those seared thighs back in, toss them around so they’re good and coated, and simmer for 2 to 3 more minutes. You want the chicken fully cooked and the sauce attached like peanut butter to a spoon.

  • Garnish and serve: Plate it hot over rice (or not!), and sprinkle with sesame seeds and chopped green onions for that fancy finish.

Homemade Teriyaki Chicken

Storage Options

If you somehow have leftovers, congrats. You’ve just unlocked tier-two flavor.

Store any extras in an airtight container in the fridge, and they’ll hang in there for three to four days. The sauce may thicken up a bit when cold, but warms beautifully. Microwave or stovetop both do the trick—just splash in a tablespoon or so of water to loosen it as you reheat.

Wondering if you can freeze it? You sure can. Let everything cool, then freeze in a tightly sealed container or zip-top bag. It’s best defrosted in the fridge overnight so the chicken doesn’t go rubbery. Stir while heating for even reheating and to revive that glossy shine.

Bonus tip: Freeze it in single-serving portions so Future You can have teriyaki chicken on autopilot.

Variations and Substitutions

Let’s say you’ve got a fridge that’s half full (or half empty, depending on your perspective). These substitutions totally work.

  • Chicken breasts instead of thighs: Go for it! Just be careful not to overcook them so they stay tender and juicy.
  • No mirin: Sub in a teaspoon of honey and a splash of white wine or even just more soy sauce if needed.
  • Coconut aminos or tamari for soy sauce: Great gluten-free substitutes, with a slightly sweeter profile.
  • Add veggies: Broccoli, snap peas, or carrots tossed in during the simmer step make it a whole meal. Just cut small!
  • Make it spicy: Add sriracha, a pinch of red pepper flakes, or a squirt of sambal oelek to the sauce before simmering.

Homemade Teriyaki Chicken

What to Serve with Teriyaki Chicken

Once the chicken’s sauced and ready, you can dress it up or down. Here are some go-to pairings when you’re hungry and tired of guessing.

  • Steamed white or brown rice: Nothing soaks up that teriyaki glaze like fluffy rice. Use a rice cooker and call it a day, or scoop some into one of those cute rice bowls if you’re feeling extra.

  • Stir-fried veggies: I love a quick zucchini, bell pepper, and mushroom mix. A splash of sesame oil after cooking takes it over the top.

  • Noodles: Lo mein, soba, or even plain spaghetti tossed in a light soy-garlic situation. Speaking of pasta, leftovers pair oddly well with this oven-baked Monterey spaghetti for your next fridge clean-out fusion.

  • Crispy lettuce cups: Scoop the chicken into iceberg or butter lettuce for a lighter (and surprisingly satisfying) option.

  • On its own with a side cider: I won’t lie, I’ve eaten this with a mug of copycat Starbucks caramel apple cider and called it dinner. Sweet meets sweet, and I regret nothing.

Homemade Teriyaki Chicken

Frequently Asked Questions

Can I use chicken breast instead of thighs?

Absolutely! Just cut them into bite-sized pieces for even cooking. Keep a close eye on them, since white meat dries out faster than thighs. As long as you’re gentle with the heat and don’t overcook, they’ll soak up the sauce like champions.

How long does teriyaki chicken last in the fridge?

You’re good for about 3 to 4 days, stored in an airtight container. Make sure it’s fully cooled before sealing it up. The sauce might thicken a bit in the fridge, but a quick warm-up returns it to saucy perfection.

Can I make this sauce in advance?

Yes, and it’s actually kind of brilliant to do so. Just whisk everything together (minus the cornstarch) and store in the fridge for up to 5 days. When you’re ready to cook, heat it up and add your cornstarch slurry. Instant homemade teriyaki magic, ready to go.

Why is my sauce too thin or too thick?

If it’s too thin, it probably needed a bit more simmering after adding the cornstarch slurry. Let it bubble a tiny bit longer or add just a smidge more slurry. Too thick? Stir in a splash of water or chicken broth until it loosens into that glossy texture you want.

Homemade Teriyaki Chicken

Homemade Teriyaki Chicken

Prep Time 10 minutes
Cook Time 20 minutes
Total Time 30 minutes
Tender chicken thighs simmer in a sticky, glossy teriyaki sauce infused with soy sauce, brown sugar, mirin, and the irresistible zing of garlic and ginger. This comforting, savory-sweet chicken is simple enough for busy weeknights, yet bold and delicious enough to rival any takeout order.
4 servings

Ingredients

Chicken & Pan Sear

  • 1.5 lb (680 g) boneless, skinless chicken thighs about 6-8 thighs, trimmed of excess fat
  • 1 tbsp (15 ml) olive oil
  • salt and freshly ground black pepper to taste

Teriyaki Sauce

  • 1/3 cup (80 ml) low-sodium soy sauce
  • 1/4 cup (50 g) brown sugar, packed light or dark
  • 2 tbsp (30 ml) mirin (sweet rice wine) or use dry sherry or sweet marsala as a substitute
  • 1 tbsp (15 ml) rice vinegar or apple cider vinegar
  • 2 cloves garlic minced
  • 1 tbsp (15 ml) fresh ginger grated
  • 1 tsp (5 ml) toasted sesame oil

To Thicken

  • 1 tbsp (8 g) cornstarch
  • 2 tbsp (30 ml) water for cornstarch slurry

To Serve

  • steamed white or brown rice for serving
  • sliced green onions garnish
  • toasted sesame seeds garnish

Equipment

  • Large skillet
  • Mixing bowl
  • Whisk

Instructions
 

  1. Season chicken thighs on both sides with salt and freshly ground black pepper.
  2. Heat olive oil in a large skillet over medium-high heat. Add the chicken and sear on all sides until golden brown, about 5-6 minutes. Chicken does not need to be fully cooked through yet. Transfer to a plate.
  3. In a bowl, whisk together soy sauce, brown sugar, mirin, rice vinegar, minced garlic, grated ginger, and sesame oil.
  4. Pour the sauce mixture into the now-empty skillet (don’t clean the pan). Bring to a simmer, scraping any browned bits from the bottom.
  5. In a small bowl, mix cornstarch with water to form a smooth slurry. Stir slurry into simmering sauce. Let bubble, stirring constantly, until thickened and glossy, about 1-2 minutes.
  6. Return the seared chicken thighs (and any juices) to the pan. Toss to coat in the sauce. Simmer another 2-3 minutes, or until chicken is cooked through and coated with the sticky glaze.
  7. Serve hot over steamed rice and sprinkle with sliced green onions and sesame seeds. Enjoy!

Notes

This recipe is flexible: substitute chicken breast, swap mirin for a touch of honey and white wine, or make it gluten-free with coconut aminos or tamari. Love heat? Stir sriracha or red pepper flakes into the sauce. Try stirring in broccoli, carrots, or snap peas during the simmer for extra veggies.

Nutrition

Calories: 335kcal | Carbohydrates: 16g | Protein: 36g | Fat: 13g | Saturated Fat: 3g | Cholesterol: 170mg | Sodium: 750mg | Potassium: 480mg | Sugar: 9g | Vitamin A: 65IU | Vitamin C: 1mg | Calcium: 43mg | Iron: 2.1mg

Let's Get Cooking!

100+ Recipes for Busy Nights

In a time crunch? Take a look around and browse plenty of recipes to help you get dinner ready and on the table on those busy nights!

Sweet Recipes

Pumpkin Banana Muffins

Pumpkin Banana Muffins Recipe

Strawberry Pie Bars

Strawberry Pie Bars Easy Oven Recipe

White Chocolate Raspberry Muffins

White Chocolate Raspberry Muffins Recipe

Snickerdoodle Muffins

Snickerdoodle Muffins Recipe for Oven

PIN NOW

Follow KitchenetteBlog on Pinterest

Love cozy recipes that actually make it to the table? On Pinterest, I share new comfort-food ideas every week—desserts, dinners, and those little snack cravings that hit at midnight. Come pin with me and never run out of kitchen inspo.

Savory Recipes

Turkey Tetrazzini

Turkey Tetrazzini Baked Pasta Recipe

Grilled Chicken Panini Sandwich

Grilled Chicken Panini Sandwich Recipe

Sweet Potato Cornbread

Sweet Potato Cornbread Recipe Oven Baked

Classic Waldorf Salad

Waldorf Salad Simple Classic Recipe

Get 5 Recipes to Simplify Your Life!

Delicious, versatile recipes you can make over and over.