Get 5 recipes to simplify your life:

easy, delicious, real food recipes

Latest Recipes

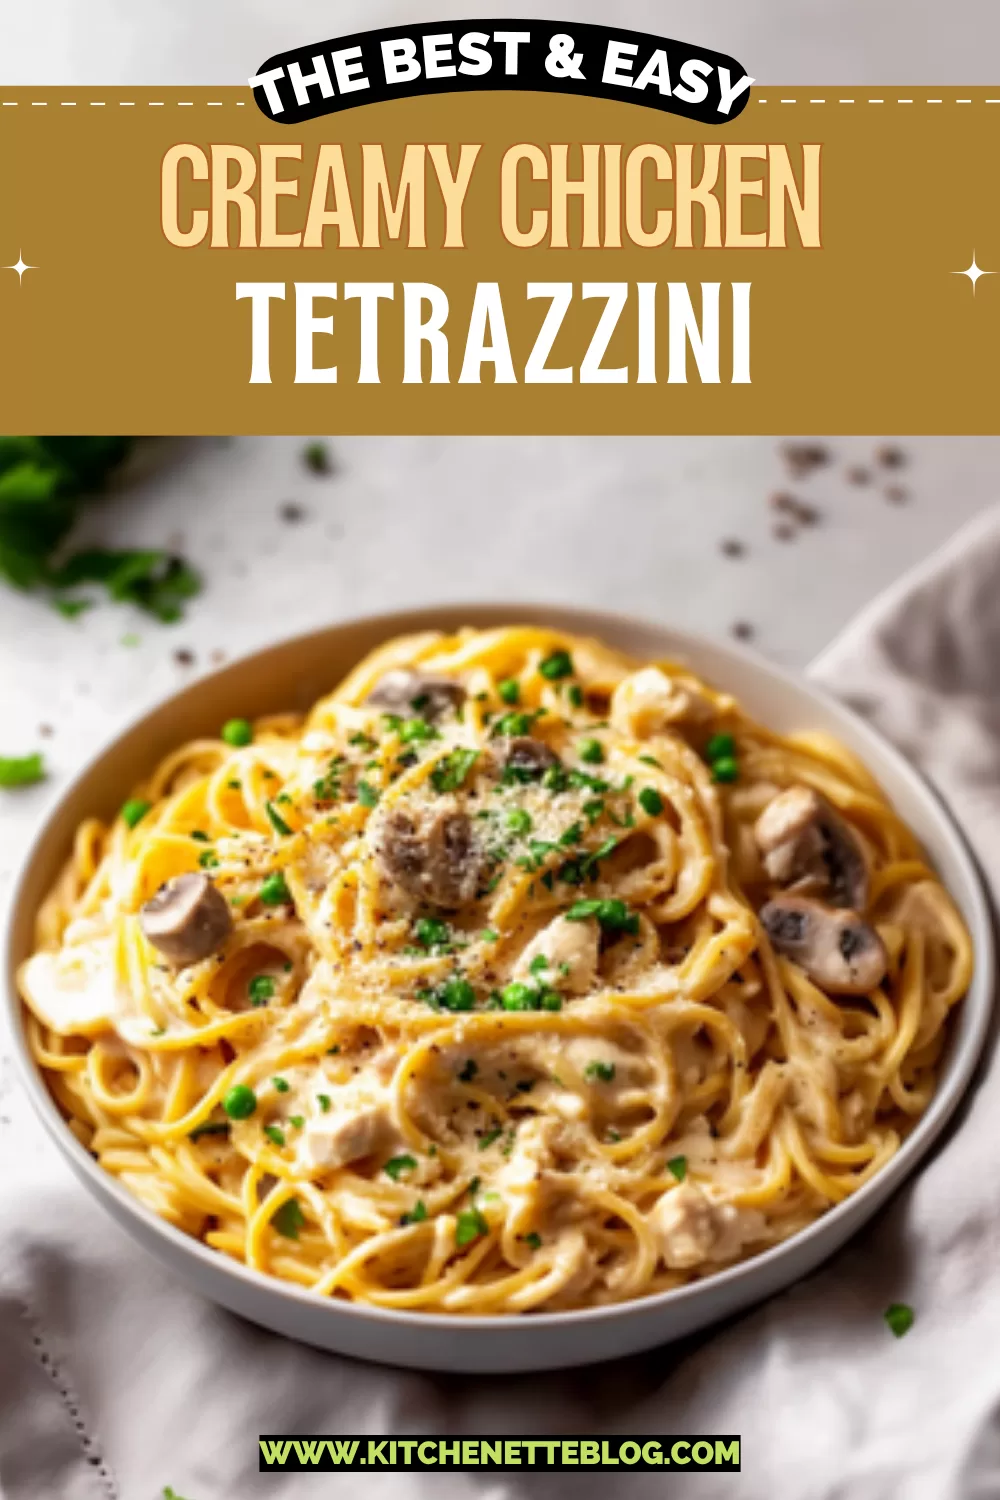
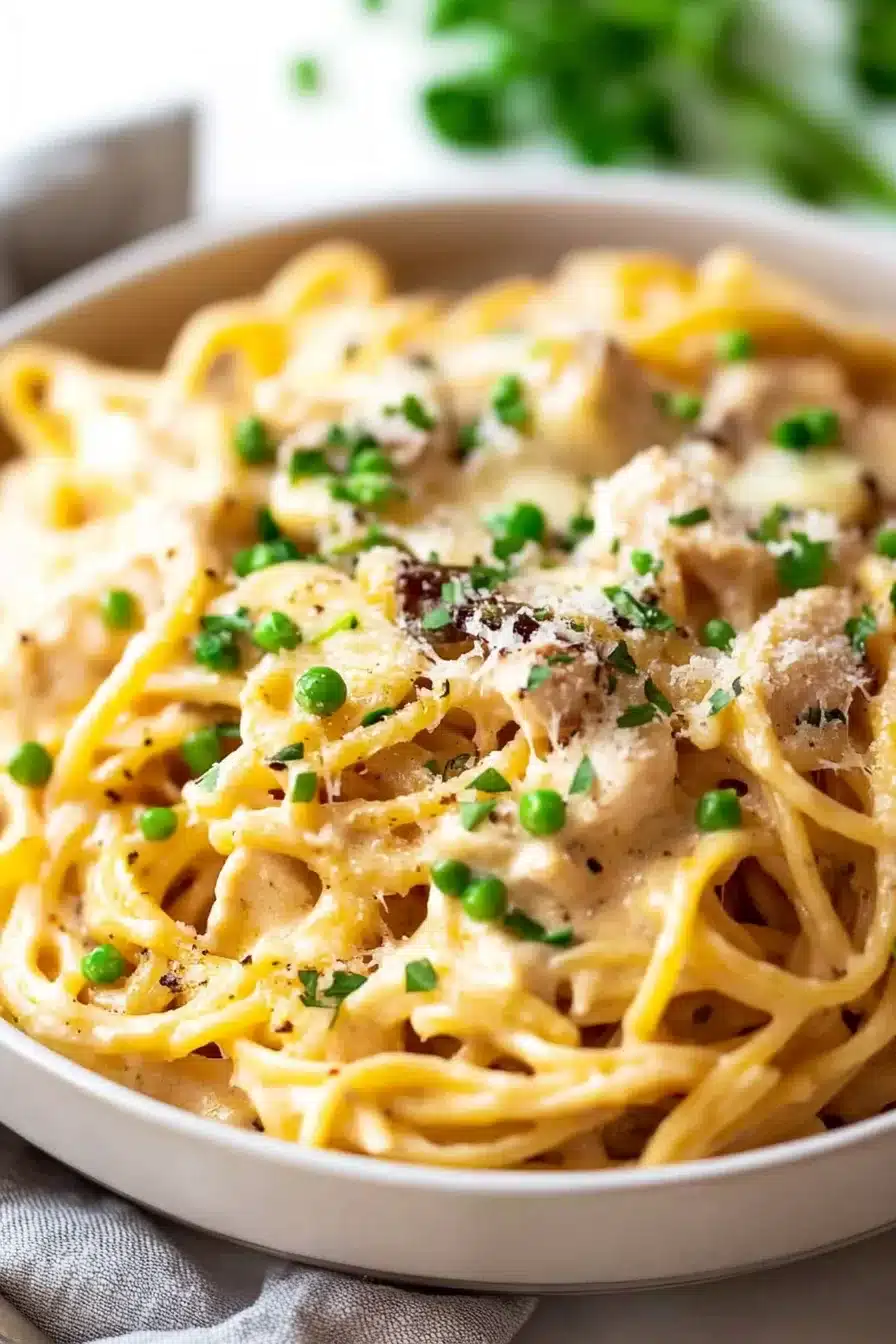
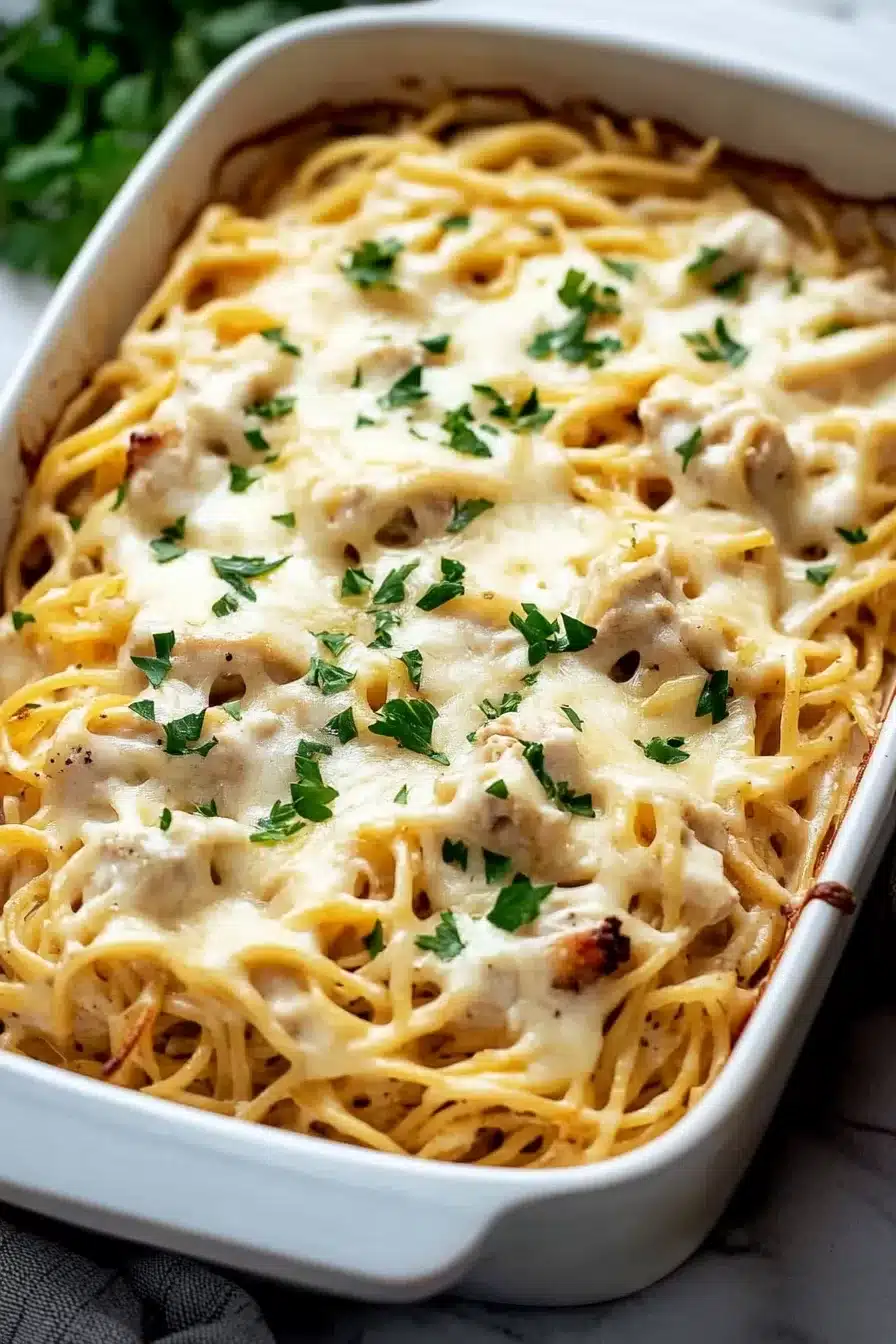
A creamy, cozy dish with tender chicken, sautéed mushrooms, and gooey mozzarella—chicken tetrazzini is pasta comfort at its best. This baked casserole brings together sour cream, garlic, and a gentle Parmesan kick.

You know those meals that smell like “dinner is ready” the second they hit the oven? This is that. With a golden cheesy crust and silky center, it’s the kind of thing people sneak second helpings of straight from the pan. No judgment.

It’s rich, it’s creamy, and it somehow walks the line between comfort food indulgence and “I didn’t totally destroy my kitchen making this.” If you’ve got leftover chicken (or use a rotisserie, no shame), all you really need is a big skillet, a baking dish, and a little time. This is a Sunday dinner kind of vibe that works any day you’re craving something warm, cheesy, and carb-y in the very best way.

Table of Contents

Creamy Chicken Tetrazzini

Why You’ll Love this Chicken Tetrazzini

No need to romanticize—this is straightforward, yummy food with a creamy kick and a clingy cheese situation.

  • Ridiculously simple to make: You basically sauté, mix, layer, and bake until it’s all gooey and bubbly.
  • Great for using up leftover chicken: Got some grilled or roasted chicken hanging out in the fridge? This is how it becomes a hero.
  • Ultimate casserole comfort vibes: That combo of pasta, thick creamy sauce, and melted cheese scratches all the cozy itches.
  • Customizable to the skies: Swap mushrooms, skip the peas, try different pasta… The rules are soft on this one.
  • Freezer and meal prep friendly: Make it now, reheat later. It doesn’t get cranky on round two.
  • Cheesy in the best way: Two layers of mozzarella, plus Parmesan for saltiness—brace your tastebuds.

Creamy Chicken Tetrazzini

Ingredient Notes

Let’s run through what you’ll need and why it matters.

  • Linguine or spaghetti: Long noodles work best here. They cling to the sauce and layer nicely. Cook just to al dente, since they’ll soften more while baking.
  • Boneless, skinless chicken breast or cooked chicken: If you’re starting raw, season well and don’t overcook. Already-cooked leftovers are totally welcome too.
  • Butter: Rich flavor base that cozies up with the garlic and mushrooms. Unsalted is best so you can control salt levels.
  • Garlic: Fresh-minced, please. It perfumes the whole dish and adds depth to the sauce.
  • Button mushrooms: Sautéed until golden. They soak up flavor like tasty little sponges.
  • Chicken broth or white wine: Either works. Wine adds extra interest, broth keeps it full-on comfort.
  • Cream of chicken + cream of mushroom soup: Yes, we’re going old-school here. Trust—it’s creamy nostalgic magic.
  • Sour cream: Adds tang, silkiness, and body to the sauce. Room temp helps it blend better.
  • Frozen peas: Tiny green pops of sweetness in all that creamy goodness. Thawed, please.
  • Parmesan cheese: Brings saltiness and a little funky zing. Grate it fresh if you can.
  • Salt and pepper: Taste and adjust. Especially if your soups are on the saltier side.
  • Shredded mozzarella cheese: Twice, because gooey cheese layers = yes please.
  • Fresh chopped parsley: Optional but pretty. Brightens up the rich flavors.

Creamy Chicken Tetrazzini

How To Make This Chicken Tetrazzini

I know casseroles can look like “a lot” but this one’s not fussy. Once the pasta is cooked and the saucy business is stirred up, it’s just a build-it-and-bake-it operation.

  • Cook the pasta: Boil your linguine until just al dente (firm with a bite). Drain it and set it aside to cool a bit so it doesn’t keep cooking into mush.

  • Cook the chicken, if needed: If you’re starting with raw chicken, grill or pan-sear it with a bit of salt and pepper until fully cooked. Then let it rest before chopping or shredding. This helps keep it juicy, not stringy.

  • Sauté garlic and mushrooms: Melt butter in a big skillet over medium heat. Add the garlic, let it bloom for 30 seconds, then toss in the mushrooms. Stir often, and cook until they’re tender with golden edges—about 5 minutes.

  • Deglaze with broth or wine: Reduce heat to low, pour in your broth or wine, and scrape up those tasty browned bits from the pan. Let it simmer down for a minute so the mushrooms soak it all up.

  • Make the sauce: Stir in both cans of soup, the sour cream, peas, and Parmesan. It’ll look thick and, honestly, not very elegant—but it’s gonna be delicious, trust.

  • Combine with pasta and chicken: Add the drained pasta and chopped chicken into the sauce. Toss until everything’s coated like creamy little noodle soldiers. Taste and season with salt and pepper.

  • Assemble the casserole: Lightly oil a 9×13 baking dish. Layer in half the pasta mixture, sprinkle with 1 cup mozzarella, then layer the rest and top with the other cup of cheese.

  • Bake it up: Cover with foil and bake at 350°F for 30 minutes. Then uncover and bake another 10–15 minutes until golden, bubbly, and slightly unhinged.

  • Cool and serve: Let it hang out for 5–10 minutes so the sauce sets a bit. Sprinkle with parsley and dig in.

Creamy Chicken Tetrazzini

Storage Options

Let’s talk leftovers, because this chicken tetrazzini doesn’t just feed hungry stomachs—it feeds future hungry stomachs.

Pop any extras into an airtight container and they’ll last in the fridge for up to 4 days. When you’re ready to reheat, toss a portion into the microwave with a damp paper towel on top. That little trick keeps the top from drying out. Or warm it in the oven covered with foil until hot.

Freezing? You bet. You can freeze tetrazzini either before baking (just assemble, cover tightly with foil, and label) or after. If freezing pre-baked, let it thaw overnight in the fridge before baking as usual. If it’s already baked, divide into portions, wrap well, and freeze. To reheat, microwave or bake directly from frozen using foil until warmed through.

Honestly, it’s the kind of dish that does lap two beautifully—just as cheesy and creamy the next day.

Variations and Substitutions

Want to make it your own? Absolutely. This dish is one of those “use what ya got” situations.

  • Rotisserie chicken: Skip cooking altogether. Shred that grocery store bird and toss it right in. It actually adds great flavor too.

  • Different pasta shapes: Penne or rotini work if you don’t have long noodles. Just avoid really small ones that disappear into the sauce.

  • Skip mushrooms or swap ’em: Not a fan? Leave ’em out or use diced zucchini or spinach instead. You’ll still get some veggie action.

  • Greek yogurt instead of sour cream: Lower fat and slightly tangier. It blends just as well, especially if you use full-fat.

  • Add crushed red pepper: Want heat to cut through the richness? A little chili flake in the sauce does wonders.

  • Try a different cheese mix: Smoked gouda, provolone, or fontina mix in wonderfully with or instead of mozzarella.

Creamy Chicken Tetrazzini

What to Serve with Chicken Tetrazzini

Since the casserole is creamy and full-flavored, I like serving something fresh and crisp alongside.

  • A bright green salad: Something leafy with tangy vinaigrette or shaved fennel. Basically, anything that lightly punches you in the palate to cut through the richness works. A drizzle of lemon olive oil or a splash of vinegar is your friend.

  • Toasty garlic bread: Or just a slice of good crusty bread with butter. Either way, you’ll want something to grab those last bits of sauce from the pan. Full wipe-the-plate mode.

  • Roasted veggies: Asparagus, brussels, or broccoli charred until roasty balances the creamy pasta really nicely. Plus, tossing frozen peas in the dish doesn’t quite count as a full veggie side… just saying.

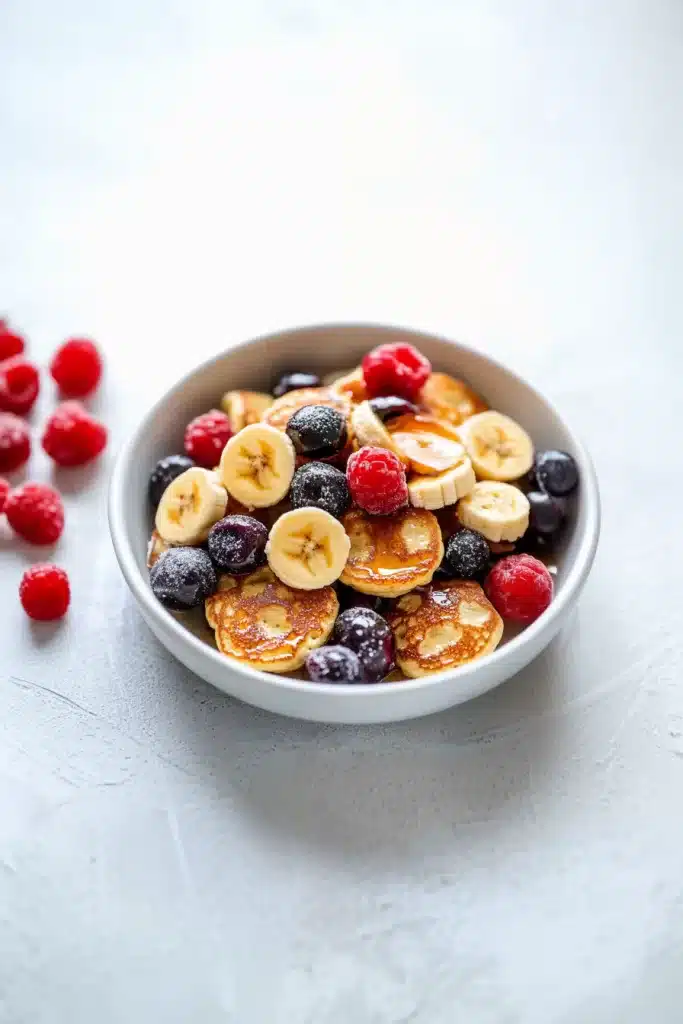
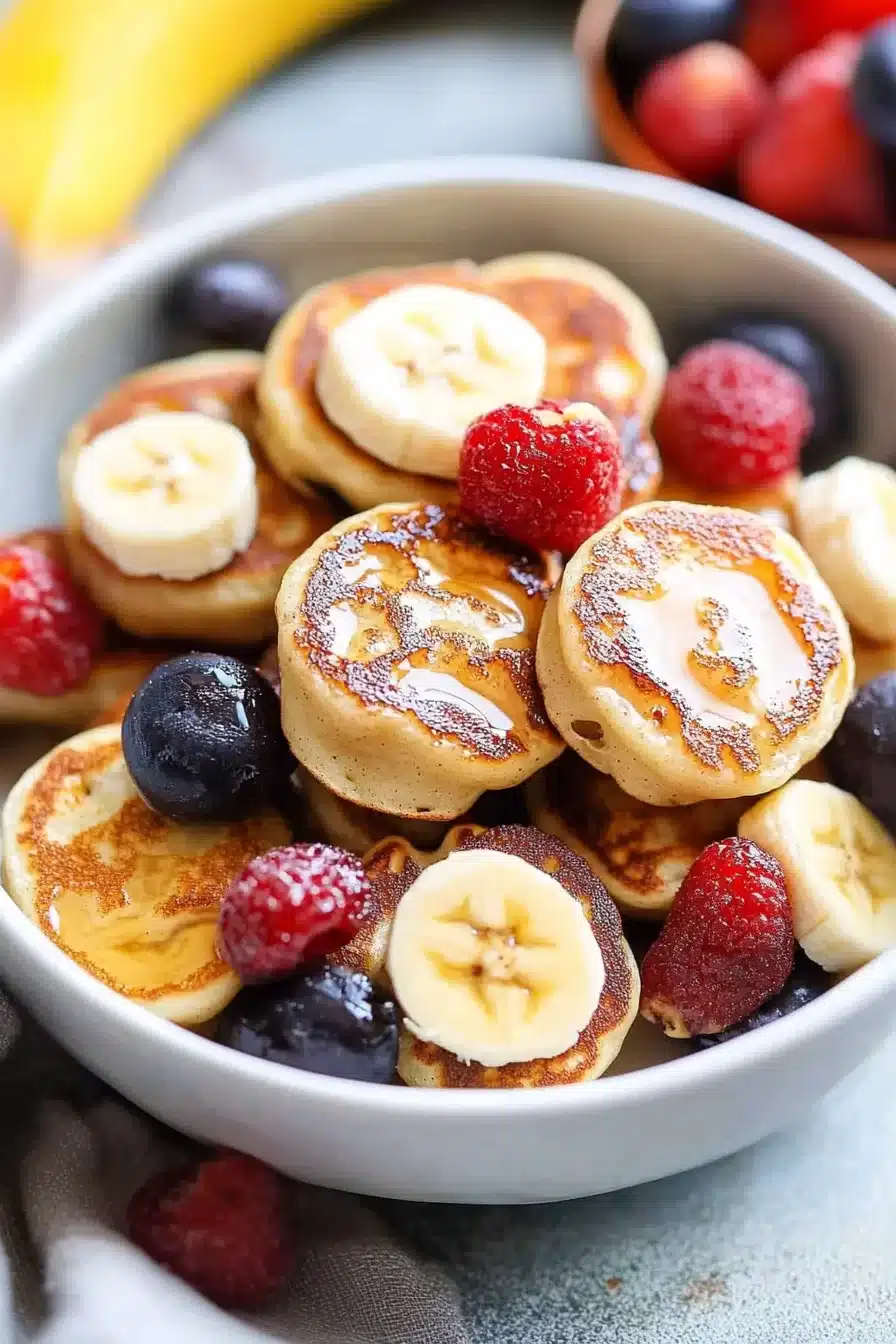
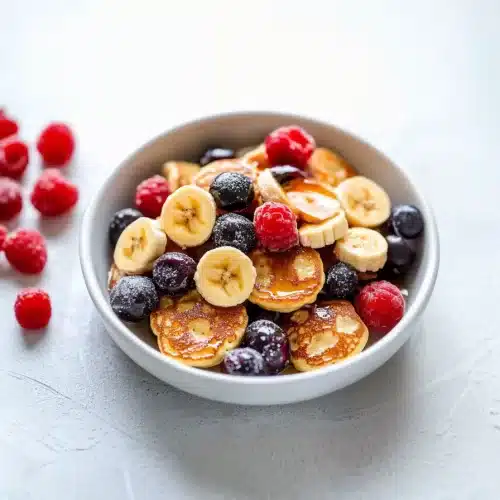
  • Something sweet to finish: After all that cozy, consider one of these fun bites like these banana pancake bites from the oven. A little light, a little sweet… and no, they’re not just for breakfast.

  • A crisp white wine: If you used wine in the sauce, pour a glass alongside. Something dry and minerally like Pinot Grigio or Sauvignon Blanc is lovely here.

Creamy Chicken Tetrazzini

Frequently Asked Questions

Can I make chicken tetrazzini ahead of time?

Absolutely. You can assemble the entire thing up to a day ahead. Just cover it tightly and store it in the fridge until you’re ready to bake. Make sure to let it sit out for 20–30 minutes before baking so it warms up a bit, otherwise you’ll need to add extra time in the oven. If it’s still cold in the middle, pop the foil back on and bake a bit longer.

What’s the best pasta to use for tetrazzini?

Linguine or spaghetti are classics because they’re long and sturdy enough to pull that creamy sauce along for the ride. But other shapes work too. Just stick with ones that aren’t too tiny (macaroni gets lost) or too wide (fettuccine clumps up). Penne, rotini, or even egg noodles would totally work.

Can I freeze leftovers?

Definitely. This dish freezes like a champ. I like slicing it into single portions, wrapping them up, and freezing for quick meals later. You can microwave right from frozen (add a splash of milk for moisture), or cover with foil and rewarm in the oven until hot. Either way, it’s just as cozy and cheesy the second time around.

Can I use cream cheese instead of sour cream?

You can, with a few adjustments. Cream cheese is thicker and richer, so you might want to soften it first and add a little milk or broth to loosen things up. Still totally creamy, just a bit denser. If you like your tetrazzini a bit decadent and slightly tangier, it works great.

Creamy Chicken Tetrazzini

Creamy Chicken Tetrazzini

Prep Time 25 minutes
Cook Time 45 minutes
Total Time 1 hour 10 minutes
A creamy, cozy dish with tender chicken, sautéed mushrooms, gooey mozzarella, and a gentle Parmesan kick—chicken tetrazzini is pasta comfort at its best. This baked casserole brings together sour cream, garlic, and the dreamy nostalgia of classic comfort food.
8 servings

Ingredients

Pasta and Chicken

  • 12 oz (340 g) linguine or spaghetti uncooked
  • 3 cups (425 g) cooked chicken breast chopped or shredded

Creamy Sauce

  • 4 tbsp (56 g) unsalted butter
  • 3 cloves garlic minced
  • 8 oz (225 g) button mushrooms sliced
  • 1 cup (240 ml) chicken broth or dry white wine
  • 1 can (295 g) cream of chicken soup 10.5 oz can
  • 1 can (295 g) cream of mushroom soup 10.5 oz can
  • 1 cup (240 ml) sour cream room temperature
  • 1 cup (140 g) frozen peas thawed
  • 1/2 cup (30 g) freshly grated Parmesan cheese
  • salt and black pepper to taste

Cheese & Garnish

  • 2 cups (200 g) shredded mozzarella cheese divided
  • fresh parsley chopped, for serving (optional)

Equipment

  • Large skillet
  • 9x13 inch Baking Dish
  • Large pot
  • Foil

Instructions
 

  1. Cook the pasta: Boil linguine or spaghetti in salted water just until al dente. Drain and set aside to cool slightly.
  2. Cook the chicken, if needed: If starting with raw chicken, season and cook in a skillet or grill. Cool and chop/shred. If using leftover or rotisserie chicken, skip this step.
  3. Sauté garlic and mushrooms: Melt butter in a large skillet over medium heat. Add minced garlic and cook for 30 seconds until fragrant. Add mushrooms, stir, and cook until golden, about 5 minutes.
  4. Deglaze pan: Reduce heat to low and pour in chicken broth or wine, scraping up any brown bits. Simmer for 1 minute so mushrooms absorb liquid.
  5. Make the sauce: Stir in cream of chicken soup, cream of mushroom soup, sour cream, peas, and Parmesan. Mix until combined (the mixture will be thick).
  6. Combine with pasta and chicken: Add pasta and chicken to the skillet. Toss until everything is evenly coated. Taste and season generously with salt and pepper.
  7. Assemble the casserole: Lightly grease a 9x13-inch baking dish. Layer half of the pasta mixture in the dish, sprinkle with 1 cup mozzarella, then add the rest of the pasta and top with the remaining cup of mozzarella.
  8. Bake: Cover with foil and bake at 350°F (175°C) for 30 minutes. Remove foil and bake another 10–15 minutes until cheese is golden and bubbly.
  9. Cool and serve: Let the casserole rest for 5–10 minutes before serving. Garnish with chopped parsley if desired.

Notes

This recipe is extremely forgiving! Swap in leftover turkey, use any long pasta shape, add extra veggies like spinach or zucchini, or swap sour cream for whole-milk Greek yogurt. For a richer version, stir in a little cream cheese. It freezes well before or after baking; let thaw overnight before baking or reheating and add a splash of milk for extra creaminess.

Nutrition

Calories: 484kcal | Carbohydrates: 43g | Protein: 31g | Fat: 21g | Saturated Fat: 11g | Cholesterol: 91mg | Sodium: 927mg | Potassium: 522mg | Fiber: 3g | Sugar: 4g | Vitamin A: 685IU | Vitamin C: 7mg | Calcium: 270mg | Iron: 2.1mg

Warm, cozy, and lightly crisped at the edges, these banana pancake bites wrap sweet banana rounds in fluffy batter made with milk, cinnamon, and a touch of sugar.

A stack of these on a lazy morning feels like a hug disguised as breakfast. Especially good with syrup, powdered sugar, or—let’s be honest—a spontaneous whipped cream moment.

There’s something very satisfying about these little guys. Each bite gives you golden, mildly crisp edges and a soft, steamy center with that unmistakable banana warmth (like banana bread but speedier). The batter is simple, pantry-based, and friendly toward dairy-free substitutions. These work for casual brunching or mid-afternoon snacking. They’re also oddly therapeutic to flip.

Table of Contents

Banana Pancake Bites Recipe

Why You’ll Love this Banana Pancake Bites Recipe

No drama here—just a truly snackable little treat that comes together in a skillet and smells like Saturday morning.

  • Ridiculously simple to make: You basically dip bananas in pancake batter and cook them. That’s as close to a cooking shortcut as you can get while still feeling like you made something.
  • Pantry-friendly ingredients: The batter is just flour, milk, sugar, and a few extras. No eggs, no weird stuff.
  • Kid-approved and adult-hoarded: Nobody’s ever not reached for another. Their cute size is sneaky like that.
  • Perfectly snackable texture: A little crisp on the edges, tender and warm inside. Like a mini pancake-hug for your tongue.
  • Endlessly customizable: You can cinnamon it up, syrup it down, or toss in chocolate chips if you’re feeling wild.
  • Ready in under 15 minutes: Yep, including the part where you stand over the pan wondering if it’s time to flip yet.

Banana Pancake Bites Recipe

Ingredient Notes

Let’s talk pantry. You probably have most of this stuff floating around already. But just in case you’re staring into your cupboard wondering what role cinnamon actually plays, here’s the rundown:

  • All-purpose flour: This gives the batter its base and a soft-but-structured texture. You could swap in a gluten-free blend if needed—just one that behaves like regular flour.
  • Sugar or maple syrup: Either works. Sugar gives a neutral sweet bite, while maple adds a deeper, breakfast-y flavor. Go with your mood (or whatever plastic bear bottle is half-empty).
  • Baking powder: This is what makes them puff! No puff, no fluff. Make sure it’s fresh, not ancient from last year’s holiday baking blitz.
  • Cinnamon: Just a little, for warmth and depth. Feel free to bump it up a bit if you’re team “spice is life.”
  • Salt: Don’t skip it! A tiny bit boosts all the other flavors and keeps things from tasting flat or bland.
  • Milk (dairy or non-dairy): I’ve used oat and almond milk here with great results. Cow’s milk works too. Use what you have and what you like.
  • Bananas (medium, ripe): Not overly mushy, but not green. They should hold their shape. A little speckled is perfect.

Banana Pancake Bites Recipe

How To Make This Banana Pancake Bites Recipe

You’re practically there already. This is one of those recipes that feels homey and smells amazing while you make it, like cozy nesting in action.

  • Whisk your dry ingredients together: Flour, sugar (or maple), baking powder, cinnamon, and salt go into a bowl. Whisk until everything’s looking evenly sandy and smooth-ish.

  • Add milk and mix: Make a little well in the center of that dry mix. Pour in the milk, then mix gently, just until everything is mostly combined. Few lumps? Fine. Overmixing? Nope. We want tender, not tough.

  • Pat your banana slices dry: This might seem fussy, but hear me out—wet bananas and batter don’t stick together nicely. A quick tap on a paper towel makes all the difference.

  • Dip banana slices and coat them well: One at a time, give those banana rounds a good dunk. Let the extra batter drip off so you don’t end up with gummy pancake puddles.

  • Cook on a lightly greased skillet: Preheat to medium, then add a touch of butter or oil. Place each banana slice gently down without crowding the pan. Cook for 1–2 minutes per side, or until golden and puffed.

  • Flip and finish cooking: Once you see little bubbles forming at the edges, that’s your cue. Flip with a gentle hand and cook the other side until golden brown.

  • Transfer and dress it up: Serve them up warm and ready. Maple syrup, dusted sugar, whipped cream, or all of the above. No judgment here.

Banana Pancake Bites Recipe

Storage Options

Okay, let’s say—hypothetically—you didn’t eat them all in one sitting. It happens. These keep surprisingly well for little pancake bites.

Pop leftovers into an airtight container and stash them in the fridge. They’ll hang out happily for about 2–3 days. The texture will soften a bit but still be tasty. To freshen them up, reheat in a dry skillet over medium heat for a minute or two on each side. Or just microwave them if patience isn’t your thing (been there).

Now, if you’re thinking, “Can I freeze these?”—yes, but do it smartly. Lay them out on a baking sheet, freeze until solid, then transfer to a freezer bag. That way, they don’t stick together in a sad clump. Reheat straight from frozen in a skillet or toaster oven. They won’t be quite as crisp, but still delicious for a busy morning moment.

Variations and Substitutions

This recipe’s pretty flexible, so feel free to riff depending on what you have on hand or what mood swings you’re honoring today.

  • Gluten-free flour: Use a trusted 1:1 baking blend if you’re avoiding gluten. Just double-check it includes xanthan gum or similar binder.

  • Oat milk or almond milk: These both work wonderfully in place of dairy milk. Cashew milk too, if you’re feeling fancy.

  • Chocolate chip upgrade: Press a mini chocolate chip onto each banana slice right after dipping in batter. Kind of like a secret cookie inside your pancake.

  • Add nut butter: Swirl a spoonful of peanut butter or almond butter into the batter before dipping. It’ll be messier but wildly satisfying.

  • Make it savory-ish: Omit the sugar and cinnamon, and add a pinch of garlic powder and chives. Could it be weird? Maybe. Could it be genius with a sprinkle of cheese? Yep.

The vibe sort of reminds me of these peanut butter banana ice cream numbers. Same flavor family, totally different mood.

Banana Pancake Bites Recipe

What to Serve with Banana Pancake Bites

These little guys are fun on their own, but if you’re building a whole brunch spread or just want to zhuzh it up, here are a few ideas.

  • Yogurt and honey drizzle: A bowl of tangy yogurt on the side adds some creamy cool contrast. A quick drizzle of honey (or more syrup, let’s be honest) makes it all feel intentional.

  • Something savory on the side: If you need balance like I do, add some salty bite-sized sausages or bacon. Try these little bacon basil cornbread muffins to round out the sweet-savory party.

  • Fruit salad or berries: A bright bowl of strawberries, blueberries, or orange segments adds freshness and cuts the richness without stealing the spotlight.

  • Vanilla whipped cream: Dollop some lightly sweetened whipped cream on top. Bonus points for adding a tiny scoop of yogurt underneath—it’s like brunch parfait meets warm pancake.

  • Coffee or tea: A strong cup of something helps complete the ritual. Especially if you’re eating straight from the plate with your fingers. It’s still classy with coffee.

Banana Pancake Bites Recipe

Frequently Asked Questions

Can I make the batter ahead of time?

Yes, you can mix the batter the night before and store it in the fridge. Just give it a quick stir before dipping your banana slices. It may thicken a little as it sits, so you might add a splash more milk to loosen it up.

Why is my batter sliding off the bananas?

Ah, the slippery banana situation! Make sure to pat the banana slices dry before dunking. If they’re too wet, the batter won’t stick nicely. Also, be sure your skillet is hot enough before placing the slices down—that helps create that nice seal.

Can I use frozen bananas?

Technically? Yes. But I wouldn’t. Thawed bananas tend to be too soft and mushy for slicing and dipping. If frozen is all you have, save them for smoothies or banana bread instead.

How do I keep these warm for a group?

Easy fix! Place them in a 250°F (about 120°C) oven on a baking sheet while you cook the rest. They’ll stay toasty and crisp-ish, perfect for serving all at once. Just don’t stack them too early or they’ll steam and soften.

Banana Pancake Bites Recipe

Banana Pancake Bites

Prep Time 5 minutes
Cook Time 10 minutes
Total Time 15 minutes
Warm, cozy, and lightly crisped at the edges, these banana pancake bites wrap sweet banana rounds in fluffy batter made with milk, cinnamon, and a touch of sugar. Perfect for breakfast, brunch, or a snack—with endless options for toppings and customizations!
2 generous servings

Ingredients

Pancake Batter

  • 1/2 cup (60 g) all-purpose flour regular or gluten-free 1:1 blend
  • 1 tbsp (13 g) sugar or maple syrup
  • 1 tsp (4 g) baking powder
  • 1/2 tsp (1.5 g) ground cinnamon plus more to taste
  • 1/4 tsp (1.5 g) salt
  • 1/2 cup (120 ml) milk dairy or non-dairy (oat, almond, cow, etc.)

For Cooking & Serving

  • 2 medium ripe bananas not too soft, sliced into 1/2-inch rounds
  • butter or neutral oil for greasing skillet
  • maple syrup, powdered sugar, and/or whipped cream for serving

Equipment

  • Mixing bowl
  • Whisk
  • Sharp knife
  • Paper towels
  • Nonstick Skillet
  • Spatula

Instructions
 

  1. Whisk your dry ingredients together: In a medium bowl, whisk flour, sugar (or maple syrup), baking powder, cinnamon, and salt until well combined.
  2. Add milk and mix: Make a well in the center of the dry ingredients and pour in the milk. Stir gently until just combined; a few lumps are okay. Do not overmix.
  3. Pat your banana slices dry: Slice bananas into 1/2-inch rounds and pat completely dry with a paper towel for best batter adhesion.
  4. Dip banana slices and coat them: Dip each slice into the batter, making sure it’s fully coated. Let excess batter drip off.
  5. Cook on skillet: Heat a nonstick skillet over medium heat and lightly grease with butter or oil. Add the coated banana slices, spacing apart. Cook for 1–2 minutes per side, or until golden and puffed at the edges.
  6. Flip and finish: Flip gently and continue cooking until the second side is golden. Remove to a plate and repeat with remaining banana slices and batter.
  7. Serve: Enjoy warm with maple syrup, powdered sugar, and/or whipped cream.

Notes

For extra fun, press a mini chocolate chip or a dab of peanut butter onto each banana slice before dipping in batter. These are best served fresh but can be stored in the fridge in an airtight container for 2–3 days or frozen for longer storage. Reheat in a skillet or toaster oven for best texture.

Nutrition

Calories: 165kcal | Carbohydrates: 37g | Protein: 3g | Fat: 1g | Sodium: 220mg | Potassium: 320mg | Fiber: 2g | Sugar: 10g | Vitamin A: 60IU | Vitamin C: 5mg | Calcium: 60mg | Iron: 1mg

Buttery, tender, and just the tiniest bit tangy from the buttermilk, this vanilla buttermilk cake fills your kitchen with the kind of warm, nostalgic aroma that makes you forget what time it is. There’s sugar, there’s vanilla, and there’s butter. Do you even need convincing?

It’s soft and fluffy enough to sink a fork into with one hand while the other stirs your coffee. The crumb? Dreamy. The frosting? Light and cloud-like with a sweet little kick. And putting it all together? Easier than finding your phone charger (seriously, where does that go?).

This easy vanilla buttermilk cake is what I like to call low effort–high payout. It uses common pantry staples, yet the texture feels bakery-fancy without trying too hard (unlike me in high school, sigh). It’s lovely for birthdays, cozy little gatherings, or just because Thursdays should have frosting too. The buttermilk keeps it supremely moist, while the vanilla does that quiet soft-shoe routine in the background—nothing flashy, just smooth and comforting. And the frosting? Real-deal stuff that’s whipped with a little more buttermilk, giving it a slight twang to balance the sweet.

Table of Contents

Easy Vanilla Buttermilk Cake

Why You’ll Love this Easy Vanilla Buttermilk Cake

This one comes together easily with zero stress baking. No electric skills required—just a bowl, a spoon (okay, maybe a mixer), and a couple of wild swirls.

  • Ridiculously simple to make: The batter doesn’t fuss, and the frosting practically makes itself while you’re half-distracted.
  • Super moist crumb: Thank the buttermilk for that softly springy, hold-a-fork-just-right texture.
  • Not too sweet: It hits the perfect balance between the rich vanilla and that whisper of tang.
  • Back-pocket versatile: Dress it up with berries, leave it plain, or eat it straight from the pan—I won’t judge.
  • Frosts like a dream: This buttercream spreads like a thick, creamy cloud and actually sets up pretty, too.
  • Crowd-friendly pan size: Bakes in your super chill 9×13, so no need to stack layers like a cake sculptor.

Easy Vanilla Buttermilk Cake

Ingredient Notes

You’ll probably have most of these in your kitchen already—but here’s a little guidance for the curious minds and swap-happy bakers.

  • All-purpose flour: Gives structure without making the cake stiff. Spoon it into your measuring cup so it’s not packed.
  • Baking powder and baking soda: They work their bubbly magic to lift the cake. You need both for balance, so no skipping.
  • Salt: Not optional. Just a pinch sharpens the vanilla and tames the sweetness.
  • Unsalted butter (for both cake and frosting): Adds flavor and richness. Let it come to room temp before you start… pretty please?
  • Granulated sugar: Sweetens but also helps create that light, fluffy crumb when creamed with butter.
  • Vegetable oil: Just a quarter cup, but mighty. It keeps the cake moist even after a day or two.
  • Eggs: Room temp makes for a smoother batter. Nobody likes curdled cake.
  • Pure vanilla extract: Use the good stuff—it really makes a difference here. Smells amazing while mixing!
  • Buttermilk: The hero of this cake. Adds moisture, tenderness, and that iconic subtle zing.
  • Powdered sugar (aka confectioners’): Sweet, fluffy, and key for creamy frosting that smears like a dream.

Easy Vanilla Buttermilk Cake

How To Make This Easy Vanilla Buttermilk Cake

Alright, apron on. Let’s do this step-by-step with a wooden spoon in one hand and your favorite playlist in the background.

  • Preheat and pan prep: Preheat your oven to 350 degrees Fahrenheit. Grease up a 9×13 pan, lay in parchment if you can—it makes life easier when you’re ready to lift out the cake.

  • Mix the dry stuff: In a separate bowl, whisk (or sift if you’re fancy) together the flour, baking soda, baking powder, and salt. Set it aside, ready to mingle.

  • Cream the butter and sugar: In a large mixing bowl, beat softened butter and sugar together until it’s light, fluffy, and you’re vaguely tempted to taste it. Don’t yet. Give it 3 to 4 minutes.

  • Add eggs + flavor: With the mixer running low, drizzle in the oil, crack in the eggs one at a time, and splash in vanilla. The result should look creamy and gloriously thick.

  • Alternate flour and buttermilk: This part’s a little zen. Pour in the dry ingredients and buttermilk in turns, starting and ending with dry. Think: dry, wet, dry, wet, dry. Mix until just combined—you want to keep that batter tender.

  • Bake it off: Pour the batter into your prepared pan and smooth it out gently (I like swiping from the center outward). Bake for 35–40 minutes, until a toothpick comes out mostly clean. Let it cool completely. No cheating!

  • Make the frosting: Beat butter until it looks like frosting already, then slowly add powdered sugar (sifted, if you’re feeling responsible). Pour in vanilla, a pinch of salt, and buttermilk one little splash at a time. You want it light and smooth, not drippy.

  • Frost that cake: Spread the whipped goodness all over the cool cake. Sprinkles? Berries? A quick chill in the fridge will help it firm up just a bit. Then… dig in.

Easy Vanilla Buttermilk Cake

Storage Options

So say you’ve eaten more frosting than intended (relatable), but you’ve still got some cake left. Here’s how to keep it fab.

On the countertop, this cake will last about 2 days, especially if it’s covered snugly with a cake dome or plastic wrap. If your kitchen leans warm or humid, pop it in the fridge to be safe. Just bring it back to room temp before serving, so the butter in the frosting has time to soften a bit.

For longer storage, I’m happy to report this cake freezes brilliantly. Slice it first (unless you enjoy chiseling away at frozen slabs), and wrap tightly in plastic wrap, then foil. You can freeze individual pieces or the whole cake—just know it’s easier to sneak a slice if it’s portioned. It’ll last up to 2 months this way. Thaw overnight in the fridge, then let it come to room temp on the counter.

And yes, you can even freeze it frosted. Just let it set completely in the fridge before wrapping to keep that fluffy top from smooshing.

Variations and Substitutions

If you’re in a cake experiment mood or just missing an ingredient, here are a few low-stress riff ideas to play with.

  • Lemon instead of vanilla: Swap vanilla extract for lemon zest and a splash of juice in both cake and frosting for a bright, sunny twist.

  • Chocolate chips in the batter: Toss in a handful (or two) of mini chips before baking. I won’t fight you on this mix-in.

  • Brown butter frosting: Take that frosting up a notch by browning the butter first. Let it cool before beating, and boom—nutty, toasty frosting magic.

  • Cupcake version: This batter works great in muffin tins. Just reduce the bake time to around 18–22 minutes.

  • Fruit topping: Fresh berries, roasted stone fruits, or even a layer of raspberry jam can go on top of the frosting like a fancy bakery move.

  • Swap buttermilk: If you’re out, stir 1 tablespoon white vinegar or lemon juice into 1 1/4 cups milk and let it sit for 5 minutes. Presto, makeshift buttermilk.

Easy Vanilla Buttermilk Cake

What to Serve with Easy Vanilla Buttermilk Cake

Need something on the side, underneath, or in your other hand? Here are a few ideas that pair nicely with this soft, sweet classic.

  • Pour-over coffee or cold brew: The somewhat bitter edge of good coffee really wakes up the cake’s vanilla flavor. If you’ve got cold brew in the fridge, you’re already halfway to bliss.

  • Fresh berries and whipped cream: Seriously, this combo is like a summer backyard wedding without the drama. Spoon berries over top and thank yourself.

  • Ice cream—for real: Try vanilla bean or, better yet, peanut butter banana for a salty-sweet thing that feels indulgent but still oddly homey.

  • A side of spiced tea or chai: That hint of clove and cinnamon dances beautifully with the soft tang of the buttermilk.

  • Savory main or brunch spread: If you’re somehow serving this with more than just… more cake, a dish like taco spaghetti bake balances things out with warmth and spice.

Easy Vanilla Buttermilk Cake

Frequently Asked Questions

Can I make this cake ahead of time?

Totally. You can bake the cake a day or even two ahead. Just wrap it tightly once it’s fully cooled and pop it in the fridge. Frost it the day you plan to serve, or frost ahead and chill—both work! Just let the whole thing come to room temp before slicing for the best soft, fluffy texture.

What if I don’t have buttermilk?

Don’t worry! You can fake it. Mix 1 tablespoon of lemon juice or white vinegar with 1 1/4 cups of milk and let it sit for 5 to 10 minutes. It curdles slightly and gives you that same tangy magic. Not *exactly* buttermilk, but close enough for baking purposes.

Can I use this batter to make cupcakes?

Yup, and they’re pretty lovely. Divide the batter evenly between paper-lined muffin tins, filling each about 2/3 full. Bake at 350°F for about 18 to 22 minutes. Toothpick test still applies. Frost as you would a full cake, or keep it simple with a swirl on top.

How do I keep the frosting from getting too runny?

Add the buttermilk slowly—like, a tablespoon at a time—while beating. Keep an eye on texture as you go. If things get a little loosey-goosey, toss in more sifted powdered sugar to tighten it back up. And make sure your butter isn’t too warm when you start.

Easy Vanilla Buttermilk Cake

Easy Vanilla Buttermilk Cake

Prep Time 20 minutes
Cook Time 40 minutes
Total Time 1 hour 10 minutes
Buttery, tender, and just the tiniest bit tangy from the buttermilk, this vanilla buttermilk cake fills your kitchen with a warm, nostalgic aroma. Soft, fluffy, and frosted with a light, cloud-like buttercream, it features pantry staples and bakery-level texture with barely any effort. Perfect for birthdays, gatherings, or just-because days—this cake is all about low effort and high reward.
16 slices

Ingredients

For the Cake

  • 2 1/2 cups (315 g) all-purpose flour spooned and leveled
  • 2 tsp baking powder
  • 1/2 tsp (0.5 tsp) baking soda
  • 1/2 tsp (0.5 tsp) salt
  • 1/2 cup (113 g) unsalted butter room temperature
  • 1 1/2 cups (300 g) granulated sugar
  • 1/4 cup (60 ml) vegetable oil
  • 3 eggs room temperature
  • 1 1/2 tsp (1.5 tsp) pure vanilla extract
  • 1 1/4 cups (300 ml) buttermilk room temperature

For the Buttermilk Frosting

  • 3/4 cup (170 g) unsalted butter softened
  • 3 1/2 cups (420 g) powdered sugar sifted
  • 1/4 cup (60 ml) buttermilk plus more if needed, at room temperature
  • 1 tsp pure vanilla extract
  • 1/4 tsp (0.25 tsp) salt

Equipment

  • 9x13-inch Baking Pan
  • Parchment paper (optional)
  • Mixing bowls
  • Hand mixer or stand mixer
  • Measuring cups and spoons
  • Whisk
  • Spatula

Instructions
 

  1. Preheat oven to 350°F (175°C). Grease a 9x13-inch pan and line with parchment if desired.
  2. Mix dry ingredients: In a medium bowl, whisk together flour, baking powder, baking soda, and salt. Set aside.
  3. Cream butter and sugar: In a large bowl, beat softened butter and granulated sugar together on medium-high until pale, light and fluffy, 3–4 minutes.
  4. Add eggs and vanilla: With the mixer running on low, slowly beat in the oil. Add eggs one at a time, then vanilla extract. Beat until well combined and creamy.
  5. Combine wet and dry: Add flour mixture in three parts, alternating with the buttermilk (begin and end with dry ingredients). Mix just until combined after each addition.
  6. Bake: Pour batter into the prepared pan. Smooth top. Bake 35–40 minutes or until a toothpick comes out mostly clean with a few moist crumbs. Cool completely in the pan on a rack.
  7. Make the frosting: Beat softened butter on medium-high until creamy (about 1 minute). Add powdered sugar gradually, then vanilla and salt. Beat in buttermilk 1 tablespoon at a time until light, smooth, and spreadable.
  8. Frost and serve: Spread frosting over cooled cake. Top with sprinkles, berries, or serve as is. Chill for 15 minutes to set before slicing, if desired.

Notes

Storage: Keep covered at room temperature for 2 days, or refrigerate for up to 5 days. Freeze slices well wrapped for up to 2 months.
Variations: Lemon zest, chocolate chips, or brown butter frosting all work beautifully. For cupcakes, bake in lined tins for 18–22 minutes.
Berries and whipped cream, coffee, or ice cream all make perfect partners for this cake.

Nutrition

Calories: 370kcal | Carbohydrates: 55g | Protein: 4g | Fat: 15g | Saturated Fat: 9g | Cholesterol: 63mg | Sodium: 220mg | Potassium: 75mg | Sugar: 38g | Vitamin A: 415IU | Calcium: 55mg | Iron: 1.3mg

Fluffy, rich, and with the kind of fudgy depth you only get from buttermilk and cocoa, this chocolate buttermilk cake is a dream made from flour, sugar, eggs, butter, buttermilk, and hot coffee. You’ll smell it baking before you even peek through the oven door—cozy, warm, and slightly mischievous.

This cake is the kind of bake that doesn’t need an excuse. Dense yet soft, with a silky chocolate frosting that stays just barely firm on top, it’s decadence without too much fuss. If you’ve got a 9×13 pan and a whisk, you’re halfway there.

Table of Contents

Moist Chocolate Buttermilk Cake

Why You’ll Love this Chocolate Buttermilk Cake

No need to hype it up with flowery monologues—this is just a solid, moist chocolate cake with a little extra flair from buttermilk and coffee. It hits that nostalgic spot, but with enough oomph to make you proud if you bring it to a potluck.

  • Craveably moist: The buttermilk and hot coffee combo makes this cake velvety-light but rich at the same time. No dry bits here.
  • Death-by-chocolate vibe (without actually dying): Layers of chocolate flavor come from both the cake and the creamy, cocoa-laced frosting.
  • Forgiving batter: It’s one of those mix-it-all-in jobs. No complicated sifting or creaming or praying to the baking gods.
  • Flexible pan vibes: It works in a 9×13, but you could totally split it into two 8-inch rounds for a layer cake moment.
  • The frosting sets just right: Creamy when you spread it, but it firms up a bit after chilling, so you don’t lose half of it to the knife.
  • Perfect make-ahead dessert: Somehow it tastes even better the next day (and bonus—it slices cleaner too).

Ingredient Notes

There’s not a massive ingredient list here, but every component gets to shine. Let’s break it down the way I’d go over it with a friend poking around my pantry.

  • All-purpose flour: This is the base of the cake. Stick with AP flour for a sturdy, sliceable crumb that’s still tender.
  • Granulated sugar: It keeps things sweet without being too sweet—plus it gives that lovely crackly crust when baked just right.
  • Unsweetened cocoa powder: Go for natural cocoa powder unless you’re adjusting leaveners; it gives the cake its signature deep chocolate color and bold flavor.
  • Baking powder & baking soda: A little duo action for rise. Make sure they’re fresh—those little tins lose their pep over time.
  • Salt: A pinch of salt balances all that rich sweetness. Trust me, it matters more than you think.
  • Eggs (room temp): They bind, they tenderize, they fluff. Room temp really helps everything mix smoothly.
  • Vegetable oil: For moisture and a touch of plushness. Don’t skip or replace with butter—you’ll lose that extra softness.
  • Unsalted butter (melted): Adds richness and a teensy buttery flavor to the base. Melt it, then cool it so it doesn’t scramble the eggs.
  • Buttermilk: This is the real MVP. It keeps things moist, adds tang, and reacts with the leaveners to give lift.
  • Vanilla extract: Rounds out the chocolate flavors without shouting over them.
  • Hot coffee (or hot water): Trick of the trade! Hot coffee enhances cocoa’s intensity. If you’re caffeine-sensitive, go for hot water.

Moist Chocolate Buttermilk Cake

How To Make This Chocolate Buttermilk Cake

Let’s grab bowls and get messily excited about flour and butter, ok? This isn’t a hard cake, but there are a few little quirks that make it extra satisfying to whip up.

  • Preheat and prep the pan: Set your oven to 350°F. Grease a 9×13-inch pan, line it with parchment if you’re fancy (or just paranoid, like me), and set it aside.
  • Mix the dry ingredients: In a big bowl, whisk together the flour, sugar, cocoa, baking powder, baking soda, and salt. Make sure it’s all evenly distributed—no cocoa clumps left behind.
  • Add in the wet stuff (mostly): Make a little well in the center, crack in the eggs, and give them a loose stir. Then bring in the oil, cooled melted butter, buttermilk, and vanilla. Whisk gently until there are no more visible pockets of flour. It’ll be thick, almost awkwardly gloopy at this point.
  • Add the hot coffee (slowly!): Pour in the hot coffee while gently whisking. It’ll seem too thin, but that’s right. The batter should glide off your spoon in a cozy ribbon.
  • Bake it up: Pour that silky batter into the prepared pan. Bake for 30–35 minutes until a toothpick inserted comes out mostly clean (a few crumbs are okay). Let it cool completely in the pan—you’re building patience here.
  • Make the frosting: Beat the softened butter until creamy. Then beat in the cocoa powder until dark and dreamy. Once that’s smooth, alternate adding powdered sugar and buttermilk, starting and ending with the sugar. Finally, toss in the vanilla and salt and beat until fluffy and a little glossy.
  • Frost the cake: Spread that chocolate frosting over the cooled cake. I use an offset spatula, but a butter knife and a good mood work too. Chill for 15–20 minutes to help it set before slicing.

Moist Chocolate Buttermilk Cake

Storage Options

Let’s be real: this isn’t going to last long. But if you must store leftovers (first of all, congrats on your restraint), here’s how to keep it happy.

You can cover the cake and leave it at room temp for up to 2 days, especially if your kitchen isn’t roasting. After that, pop it in the fridge—but wrap it well or use an airtight container so it doesn’t absorb fridge funk.

Yes, you can freeze it! Slice the cake first, then wrap each portion in plastic wrap and freeze in a zip-top bag or container. It’ll keep for a couple of months easy. Defrost at room temp or in the fridge overnight. Pro tip: zap it in the microwave for 10–15 seconds to gently revive that just-baked feel.

Don’t try to frost it before freezing though. The texture gets weird. If you really want to make it ahead, freeze the unfrosted cake and whip up the frosting fresh when you’re ready.

Variations and Substitutions

Want to tweak it a little? I’ve got a few ideas to play with—nothing overcomplicated, but just enough to suit your tastes or whatever’s in the fridge.

  • Swap the coffee for hot water: You’ll lose a bit of that cocoa depth, but it still works and stays plenty moist.
  • Add chocolate chips to the batter: Toss in a cup of mini chips for little melty pockets throughout. They sink a bit, but I kind of like that.
  • Top with fruit: Fresh raspberries or sliced strawberries on top of the frosting add a sweet-tart moment I fully support.
  • Make cupcakes instead: This recipe yields about two dozen cupcakes. Bake time drops to around 18–20 minutes, so keep an eye out.
  • Try a peanut butter frosting twist: Replace 1/4 cup butter in the frosting with creamy peanut butter. Chocolate + peanut = no-brainer heaven.

Moist Chocolate Buttermilk Cake

What to Serve with Chocolate Buttermilk Cake

This cake doesn’t scream for a sidekick, but pairing it up can turn “dessert” into more of an experience. Trust your vibe. Here are a few fun ways to serve it.

  • A scoop of vanilla bean ice cream melts just a little over the warm cake. That creamy contrast? Dreamy. If you’re feeling bold, you could take it next-level and use these banana ice cream sandwiches as inspiration.
  • Brew up a strong dark roast if you’re serving this as an afternoon treat. Something about the bitter notes balances the sweetness beautifully. Add a splash of milk if you like it softer.
  • A simple glass of cold milk still never fails with this cake. Whole milk, oat milk, goat milk—whatever’s in your fridge right now will probably work just fine.
  • Want savory before sweet? A light main like this pan-seared cod with rainbow chard balances things out so dessert feels well-earned.

Moist Chocolate Buttermilk Cake

Frequently Asked Questions

Can I use Dutch-process cocoa instead of natural?

Technically yes, but here’s the thing: Dutch-process cocoa is less acidic, which can mess with how the cake rises. This recipe relies on baking soda and the acidity from natural cocoa and buttermilk. If you swap it, your cake might turn out a bit flatter and denser. Not a cake-ruiner, but definitely a vibe-shifter.

What if I don’t have buttermilk?

You can DIY it! For 1 cup, mix just under a cup of milk with 1 tablespoon of vinegar or lemon juice. Let it sit for 5–10 minutes. It won’t be *exactly* the same, but it’ll get the job done and play nice with the baking soda.

How do I know when the cake is done?

Look for the top to spring back slightly when touched and a toothpick to come out mostly clean. A few moist crumbs are fine (even preferred). If you wait until the toothpick is bone dry, you’ve gone too far and might end up with a dry cake tragedy.

Can I make this cake ahead of time?

Absolutely! This cake honestly tastes better the next day. Bake it, cool it completely, and store (unfrosted) in an airtight container. Whip up the frosting fresh right before serving if you can, though it holds up fine in the fridge for a day, too.

Moist Chocolate Buttermilk Cake

Moist Chocolate Buttermilk Cake

Prep Time 20 minutes
Cook Time 35 minutes
Frosting Chill Time 15 minutes
Total Time 1 hour 15 minutes
Fluffy, rich, and with the kind of fudgy depth you only get from buttermilk and cocoa, this chocolate buttermilk cake is a moist, decadent classic. Hot coffee and buttermilk are the secret behind its velvety crumb and deep chocolate flavor, while the easy cocoa frosting sets just firm enough for perfect slicing. A no-fuss, crowd-pleasing dessert for any occasion!
12 pieces

Ingredients

Chocolate Buttermilk Cake

  • 2 cups (250 g) all-purpose flour
  • 2 cups (400 g) granulated sugar
  • 3/4 cup (65 g) unsweetened cocoa powder natural preferred
  • 2 tsp (8 g) baking powder
  • 1 tsp (5 g) baking soda
  • 1/2 tsp (3 g) salt
  • 2 large eggs room temperature
  • 1/2 cup (120 ml) vegetable oil
  • 1/2 cup (113 g) unsalted butter melted and cooled
  • 1 cup (240 ml) buttermilk well-shaken
  • 2 tsp (10 ml) vanilla extract
  • 1 cup (240 ml) hot coffee or hot water

Chocolate Frosting

  • 3/4 cup (170 g) unsalted butter softened
  • 1/2 cup (45 g) unsweetened cocoa powder
  • 3 cups (360 g) powdered sugar more as needed
  • 1/3 cup (80 ml) buttermilk at room temp, more as needed
  • 1 tsp (5 ml) vanilla extract
  • 1/4 tsp (1.5 g) fine sea salt

Equipment

  • 9x13-inch Baking Pan
  • Large mixing bowl
  • Whisk
  • Electric mixer or stand mixer (for frosting)
  • Offset spatula or butter knife
  • Parchment paper (optional)

Instructions
 

  1. Preheat your oven to 350°F (175°C). Grease a 9x13-inch baking pan and optionally line it with parchment paper. Set aside.
  2. In a large mixing bowl, whisk together the flour, sugar, cocoa powder, baking powder, baking soda, and salt until no clumps remain.
  3. Make a well in the center of the dry ingredients. Add eggs and loosely whisk in the well. Then add vegetable oil, cooled melted butter, buttermilk, and vanilla extract. Whisk gently until just combined and no pockets of dry flour remain (the batter will be thick).
  4. Slowly pour in the hot coffee (or hot water) while gently whisking. The batter will become smooth and somewhat thin—this is correct.
  5. Pour the batter into the prepared pan and smooth into an even layer. Bake for 30–35 minutes, or until a toothpick inserted in the center comes out with moist crumbs (not wet batter).
  6. Let cake cool completely in the pan on a wire rack before frosting.
  7. For the frosting: In a mixing bowl, beat softened butter until creamy. Sift in cocoa powder and beat until fluffy and dark. Alternately add powdered sugar and buttermilk, starting and ending with sugar, beating until smooth and fluffy after each addition. Beat in vanilla and salt until frosting is shiny and spreadable. Add more powdered sugar or buttermilk as needed for desired consistency.
  8. Spread frosting evenly over cooled cake using an offset spatula or butter knife. Chill frosted cake for 15–20 minutes to help set frosting before slicing and serving.

Notes

This cake can be made in advance—if possible, frost the day you serve for best texture. Store at room temperature up to 2 days or covered in the fridge 4–5 days. Freeze slices (unfrosted) for up to 2 months; thaw before frosting and serving.
Variations: Use hot water (instead of coffee), add a cup of mini chocolate chips to the batter, or try a peanut butter twist by substituting 1/4 cup of butter in the frosting with creamy peanut butter.

Nutrition

Calories: 470kcal | Carbohydrates: 68g | Protein: 5g | Fat: 22g | Saturated Fat: 11g | Cholesterol: 70mg | Sodium: 340mg | Potassium: 180mg | Fiber: 3g | Sugar: 49g | Vitamin A: 500IU | Calcium: 70mg | Iron: 2.4mg

Soft buttery crust, swirls of raspberry jam, and that golden crumbly top—these raspberry jam bars are like cozy sweater weather in dessert form. With just butter, flour, sugar, salt, and jam, they fill your kitchen with the smell of childhood snack time (or at least what I wish mine smelled like as a kid). Sweet, rich, tangy, and crunchy at the edges… and yes, they look like something your grandma would keep in a tin.

They’re fuss-free and wildly satisfying. Not overly sweet, just the right amount of jam-to-crust ratio. You could nibble one with coffee in the morning or sneak a piece for dessert after something slightly more “responsible.” Either way, they’re the kind of treat that feels familiar but still earns a little happy dance. Something about that jam peeking through the crumble just gets me.

Table of Contents

Raspberry Jam Bar Recipe

Why You’ll Love this Raspberry Jam Bar Recipe

These won’t win any awards for being showy on a dessert table—but they disappear fast, trust me.

  • Ridiculously simple to make: You just mix, press, smear, sprinkle, and bake. It’s basically adult-approved sandbox play.
  • Zero special equipment required: A bowl, a mixer (or your arm with some determination), and a 9×9 pan.
  • Perfect jam-to-crust ratio: You get that buttery base, jammy middle, and golden crumb on top in each bite.
  • Customizable without stress: Swap the jam, play with spices, add extras like nuts or coconut—go wild(ish).
  • Snack, dessert, or breakfast (yes): I’m not telling you how to live, but these with coffee? Chef’s kiss.
  • They store annoyingly well: Not everything needs to be eaten immediately… although good luck resisting.

Raspberry Jam Bar Recipe

Ingredient Notes

Just five ingredients, which always makes me a little suspicious—but in a good way.

  • Unsalted butter: You want it soft, not melted. That creamy mouthfeel in the crust and the richness in the crumble? Butter’s doing all the heavy lifting.
  • Granulated sugar: Adds sweetness, obviously, but also helps the crust hold together. You could try brown sugar for a cozier flavor, but it’ll make the base a smidge softer.
  • All-purpose flour: Classic and reliable. Spoon and level for accuracy. You could sub half with whole wheat if you’re feeling rustic, but it gets denser.
  • Salt: Just a little bit to balance the sweetness. Don’t skip it; salt gives everything that pop of “ohh yes.”
  • Raspberry jam: Go for a good quality one without too much added sugar. Seedless is smoother (say that three times fast), but I weirdly enjoy the seed crunch.

Raspberry Jam Bar Recipe

How To Make This Raspberry Jam Bar Recipe

This is an ideal lazy-day bake. You don’t have to chill dough or wing any fancy steps, just layer and go.

  • Prep the pan like a pro: Preheat your oven to 350°F. Grease a 9×9-inch pan and line it with parchment. The parchment helps you lift the bars out later without turning it into a crime scene.
  • Cream your butter and sugar: In a big bowl, beat the soft butter and sugar for 2 to 3 minutes. You want it light and fluffy, not dense. Stand mixer’s easiest, but a hand mixer works. Arm-powered mixing… well, bless you.
  • Dump in the dry stuff: Add the flour and salt. Mix on low until it looks crumbly but sticks together when you squeeze it. Like a sandy dough snowball. If it won’t hold at all, your butter might’ve been too cold.
  • Press and spread: Press about two-thirds of that dreamy dough into the bottom of your pan. Get it even-ish. Now, drop spoonfuls of raspberry jam and spread it gently to the corners. It’s sticky, but worth it.
  • Top the crumble: Grab the remaining dough and crumble it over the top. It doesn’t need to be perfect. Gaps are good. Peeks of jam mean bonus texture.
  • Pop it in and bake: Slide the pan into the oven and bake for 25 to 30 minutes, or until the top is golden and the jam is bubbling. Your kitchen will smell like joy.
  • Cool completely: I know, cooling takes forever. But if you cut in too soon, the jam gets gooey and messy. Let it sit on a wire rack until totally cool, then lift and slice.

Raspberry Jam Bar Recipe

Storage Options

These bars are sneaky-good at staying fresh, which makes them dangerously convenient.

If you somehow don’t finish them all on day one, store leftovers in an airtight container at room temp for up to 3 days. They’ll stay crumbly but soft. The crust holds up nicely and doesn’t sog up like some sad fridge cookies.

Want to stretch them out longer? Yep, you can absolutely refrigerate them. Just layer parchment between them in a container and stash them in the fridge where they’ll keep for up to a week. They firm up more when cold, which I kinda love with hot coffee.

And yes, you can freeze them. Wrap squares individually in plastic wrap, drop into a zip-top bag, and you’ve got emergency snack bars for up to 2 months. Let them thaw at room temp or zap in the microwave for 8–10 seconds. You’re welcome.

Variations and Substitutions

Once you nail the base, the options are pretty much endless. Here’s where things get slightly wild.

  • Different jam flavors: Swap raspberry for apricot, blackberry, fig, or whatever you love. Even orange marmalade if you like a bitter edge.
  • Add citrus zest: Lemon or orange zest stirred into the crust brightens everything and adds a little somethin’ without stealing the show.
  • Make them gluten-free: Sub in a 1:1 gluten-free flour blend. Choose one with xanthan gum or add a pinch yourself.
  • Switch sugars: Give the crust some extra depth with light brown sugar, or do half-and-half for best of both worlds.
  • Toss in extras: Finely chopped walnuts, sliced almonds, shredded coconut… all work beautifully crumbled into the top third.
  • Dial up warmth: A tiny pinch of cinnamon or cardamom in the crust gives you that “I smell fall” vibe, even in July.

Raspberry Jam Bar Recipe

What to Serve with Raspberry Jam Bar Recipe

These bars love good company. Whether they’re snacked solo or shared at the end of a meal, here’s how to dress them up or down.

  • A piping-hot cup of black coffee or an oat milk latte is a dreamy pairing. The bitter plus sweet thing just clicks. I also once paired them with cold brew and almond milk and suddenly felt like an organized adult (for about 20 minutes).

  • A scoop of vanilla or lemon ice cream melts a little on top of a just-warmed slice and turns this into straight-up dessert royalty. You could even try ice cream sandwich energy if you’re feeling extra.

  • Serve a few alongside a brunchy spread of cheese, fruit, and mini quiche. Unexpected, but it totally works. Adds a sweet nibble next to savory stuff.

  • Not that you asked, but they’re a deeply fine pairing with a crisp dry rosé. Especially on a porch. With sandals. And a breeze. Okay, getting carried away.

  • If you’re putting these out with party snacks, add a richer treat like this cherry cheesecake dip to round out the sweet-nibble lineup.

Raspberry Jam Bar Recipe

Frequently Asked Questions

Can I use homemade jam instead of store-bought?

Oh absolutely. Homemade jam is perfect here, especially if it’s on the thicker side. Just make sure it’s not too runny or it might seep into the crust and go a bit soggy. If it’s extra loose, you can simmer it for a few minutes beforehand to thicken it up. This is a great way to use up that last jar of summer fruit preserves that’s been eyeing you from the back of the fridge.

Do these bars work with gluten-free flour?

Yes, I’ve done it and they turn out surprisingly well. Use a good quality 1:1 baking blend (with xanthan gum included) and follow the same measurements. The texture’s a little softer and the crumb can be slightly more delicate, but flavor-wise, still amazing. Let them cool completely before slicing so they hold together nicely.

What type of raspberry jam is best for this?

Look for something thick and tangy that doesn’t slide around when spooned. Seeded or seedless is totally your call. I love Bonne Maman for a more homemade vibe, but anything not overly sugary will do. You want the jam to taste like fruit, not just sweetener. If you use a super sweet jam, consider cutting the sugar in the crust just slightly.

Can I double this recipe for a bigger crowd?

Yep, you can double the whole thing and bake it in a 9×13-inch pan instead. Just keep an eye on the bake time—it may need an extra 5 minutes or so. Make sure the jam layer stays even and don’t overbake or the edges will get too crispy. (Unless you love those corner pieces, which… honestly, fair.)

Raspberry Jam Bar Recipe

Raspberry Jam Bars

Prep Time 15 minutes
Cook Time 30 minutes
Cooling Time 10 minutes
Total Time 55 minutes
Soft buttery crust, swirls of tangy raspberry jam, and a golden crumbly top—these raspberry jam bars are the ultimate cozy snack or dessert. Just five ingredients, endless comfort, and that “grandma’s secret recipe” vibe. They’re sweet, rich, a little bit crunchy at the edges, and dangerously easy to make.
16 bars

Ingredients

Main Ingredients

  • 1 cup (226 g) unsalted butter softened (not melted)
  • 2/3 cup (133 g) granulated sugar
  • 2 cups (250 g) all-purpose flour
  • 1/4 tsp (1.5 g) salt
  • 3/4 cup (240 g) raspberry jam good quality, preferably seedless

Equipment

  • 9x9 inch baking pan
  • Mixer (stand or hand)
  • Parchment paper
  • Mixing bowl

Instructions
 

  1. Preheat oven to 350°F (175°C). Grease a 9x9-inch pan and line with parchment, leaving a little overhang for easy removal.
  2. In a large mixing bowl, cream butter and sugar together for 2–3 minutes until light and fluffy. Use a stand mixer for ease, or a hand mixer, or elbow grease.
  3. Add flour and salt to the butter-sugar mixture. Mix on low just until combined and crumbly but sticks together when squeezed.
  4. Press about two-thirds of the crumbly dough evenly into the bottom of your prepared pan to form the base.
  5. Spread raspberry jam gently and evenly over the base, going all the way to the edges.
  6. Crumble the remaining dough evenly over the jam layer, letting some jam peek through.
  7. Bake for 25–30 minutes or until the top is lightly golden and jam is bubbling at the edges.
  8. Remove from oven and cool completely in the pan on a wire rack for at least 10 minutes.
  9. Lift out, slice into bars, and enjoy!

Notes

You can swap raspberry jam for any favorite flavor, add lemon zest or a small pinch of cinnamon for brightness, or crumble in some chopped nuts/coconut to the topping. Store bars in an airtight container at room temperature for 3 days, refrigerate up to a week, or freeze for up to 2 months.

Nutrition

Calories: 180kcal | Carbohydrates: 23g | Protein: 2g | Fat: 9g | Saturated Fat: 5g | Cholesterol: 23mg | Sodium: 56mg | Potassium: 18mg | Sugar: 10g | Vitamin A: 263IU | Vitamin C: 1mg | Calcium: 7mg | Iron: 0.8mg

Rich, creamy, and wildly snackable, this cherry cheesecake dip blends cream cheese, marshmallow creme, whipped topping, and cherry pie filling into a fluffy, dessert-y dream. Spoon it into a bowl, pop open a box of graham crackers, and try not to eat the whole thing standing over the counter.

This one doesn’t ask much of you. There’s no baking, barely any waiting, and you probably have most of the ingredients hiding in your fridge right now. The cherry topping gets delightfully glossy as it chills, and the whole thing feels like cheesecake that kicked off its shoes and got comfy.

Table of Contents

No Bake Cherry Cheesecake Dip

Why You’ll Love this No Bake Cherry Cheesecake Dip

I mean, it’s whipped dairy and fruit in a bowl, right? What’s not to love? But seriously, if you need a little convincing, here’s why this dip earns a permanent spot in my fridge throughout cherry season.

  • Ridiculously simple to make: You just beat, fold, swirl, and chill. No baking, no stress, no apron required (unless you’re feeling fancy).
  • Lusciously creamy texture: It’s like the soft center of a cheesecake married a mousse and they invited cherries to the party.
  • Perfect for last-minute gatherings: You can toss it together 30 minutes before guests arrive, and still have time to clean the dishes in the sink.
  • Plays nicely with all kinds of dippers: Graham crackers, strawberries, even those weird but weirdly good pretzel chips.
  • Sweet without being cloying: The tangy cream cheese balances the cherry pie filling so it’s dessert-y but not over the top.
  • Make-ahead friendly: Chill it earlier in the day, then just spoon the topping on when you’re ready to go.

No Bake Cherry Cheesecake Dip

Ingredient Notes

Only four ingredients stand between you and dessert greatness. Here’s the scoop on each, in case you want to tweak or get a little curious.

  • Cream cheese: Go for full-fat and make sure it’s softened. It makes the dip rich, gently tangy, and super smooth. Skip the low-fat stuff here—texture matters.
  • Marshmallow creme: This adds fluff, sweetness, and a kind of nostalgic charm. (It smells a little like childhood, doesn’t it?)
  • Whipped topping: Thawed Cool Whip (or a generic) lightens the mixture into something spreadable and scoopable. Homemade whipped cream technically works, but make it super stable.
  • Cherry pie filling: You want glossy, ruby-red cherries in syrup. The classic can of filling does the trick here—no need to get fancy.

No Bake Cherry Cheesecake Dip

How To Make This No Bake Cherry Cheesecake Dip

This one comes together faster than you think—even if you get distracted by a spoonful of marshmallow fluff halfway through (it happens).

  • Beat the cream cheese: In a big mixing bowl, use an electric mixer to make it completely smooth. Scrape the edges and bottom so there are no hidden lumps—cream cheese has a sneaky way of hiding dry pockets in the corners.

  • Add the marshmallow creme: Dollop it in and beat again until everything’s fluffy and uniform. It might feel sticky and slightly chaotic but keep going. The magic smooths out after about a minute or two.

  • Fold in whipped topping: Use a spatula (not the mixer!) and gently fold until the whole thing looks like creamy clouds. It should hold shape when you swirl it.

  • Scoop and chill: Transfer to a pie dish, square pan, or just your favorite medium bowl. Smooth the top, cover, and pop it in the fridge for at least 30 minutes so everything sets up nice and luscious.

  • Add the cherry topping: Just before serving, spoon the cherry pie filling right over the top. If you’re feeling fancy, give it a little swirl for marbled vibes. Serve cold with your favorite dippers.

No Bake Cherry Cheesecake Dip

Storage Options

Got leftovers? First of all, congrats on your self-control. This dip keeps nicely in the fridge for up to 4 days. Just stash it in an airtight container or wrap that dish tightly in plastic wrap before popping it back in the fridge. The cherry topping gets a bit juicier over time, but honestly, that’s not a bad thing.

As for freezing? I don’t really recommend it. The whipped topping and marshmallow don’t always thaw gracefully—it turns weepy and grainy, like a cheesecake with a broken heart. So let’s stick to fresh, okay?

If you want to prep ahead, mix the base up to a day in advance and keep the cherry layer separate until serving. That keeps everything perky and picture-perfect when it hits the table.

Variations and Substitutions

This dip is basically your dessert canvas. Stick with the cherry classic or scribble outside the lines a little—I won’t stop you.

  • Other pie fillings: Blueberry, peach, strawberry, or even apple pie filling works beautifully. Peach with cinnamon? Yes please.
  • Greek yogurt instead of whipped topping: For a slightly more tangy, protein-packed twist. The texture won’t be quite as fluffy, but still tasty.
  • Homemade cherry compote: If you’re feeling ambitious and have fresh cherries on hand, simmer some into a lightly sweet sauce and use that instead of canned filling. Gorgeous and a little extra.
  • Swap the base flavor: Add a splash of vanilla or almond extract to the cream cheese mix for an extra note of complexity.
  • Top with extras: A sprinkle of toasted coconut, chocolate shavings, or crushed cookies turns this into the kind of dip that gets whispered about at parties.

No Bake Cherry Cheesecake Dip

What to Serve with No Bake Cherry Cheesecake Dip

This dish shines at potlucks, movie nights, and weekday moments when spooning dessert into your mouth feels deeply correct. Here are a few fun pairing ideas:

  • Graham crackers or Teddy Grahams: The classic for a reason. Their crispness pairs beautifully with the cloud-like dip. You get crunch, tang, sweet, and a little nostalgia in every bite.

  • Vanilla wafers or shortbread cookies: These add a little buttery richness. Vanilla wafers soak up just enough dip without falling apart. Shortbreads bring that dense, crumbly edge that’s strangely satisfying with cherries.

  • Fresh fruit: Strawberries, sliced apples, seedless grapes, or even chunks of pineapple. They add a fresh contrast and make you feel slightly healthier about this whole situation.

  • Pretzel crisps or sticks: Sweet and salty forever. The salt brings out the richness of the cheesecake base, and the crunch is addictive.

  • Peanut butter lovers, take note: I once tried this dip with a few bites of something from my freezer and… oh wow. If you’re into fun freezer desserts like these peanut butter & banana ice cream sandwiches, trust me, you’ll vibe with this pairing.

No Bake Cherry Cheesecake Dip

Frequently Asked Questions

Can I use homemade whipped cream instead of whipped topping?

You can, but with a little caution. Store-bought whipped topping is stabilized, so it holds up better over time. If you go homemade, make sure it’s whipped to stiff peaks and maybe sneak a bit of cornstarch or powdered sugar into it for extra stability. Just know it might deflate a bit faster in the fridge.

How far in advance can I make cherry cheesecake dip?

You can prep the cream cheese base a full day ahead and store it in the fridge (tightly covered). Add the cherry pie filling just before serving so it doesn’t bleed too much into the dip. If you’re making it for a party, this timing works beautifully—low fuss, high reward.

What dippers go best with this kind of dessert dip?

Graham crackers are the go-to, of course, but don’t stop there! Vanilla wafers, fresh fruit, and mini pretzels are all delicious. Want to get playful? Try dipping shortbread cookies or salty crackers. There’s no wrong move when you’re chasing creamy cherry bliss.

Can I add anything to make this dip even more over the top?

Absolutely. A drizzle of hot fudge or melted chocolate is never a bad idea. You could also do a sprinkle of mini chocolate chips, crushed graham crackers, or even chopped pecans if you’re feeling a little nutty. If you really want to wow people, serve it alongside something fun and savory like these Hanky Panky bites for contrast.

No Bake Cherry Cheesecake Dip

No Bake Cherry Cheesecake Dip

Prep Time 10 minutes
Chilling Time 30 minutes
Total Time 40 minutes
Rich, creamy, and wildly snackable, this cherry cheesecake dip blends cream cheese, marshmallow creme, whipped topping, and cherry pie filling into a fluffy, dessert-y dream. No baking required—just beat, fold, chill, and serve with your favorite dippers!
8 servings

Ingredients

Dip Base

  • 8 oz (227 g) cream cheese softened, full-fat recommended
  • 7 oz (198 g) marshmallow creme
  • 8 oz (227 g) whipped topping thawed (such as Cool Whip)

Topping

  • 1 can (595 g) cherry pie filling about 21 oz / 595g

For Serving

  • graham crackers, vanilla wafers, pretzel crisps, or fresh fruit for dipping; optional, to taste

Equipment

  • Mixing bowl
  • Electric mixer
  • Spatula
  • Serving Dish or Bowl

Instructions
 

  1. Beat the cream cheese: In a large mixing bowl, use an electric mixer to beat the softened cream cheese until completely smooth and creamy, scraping down the bowl as needed.
  2. Add marshmallow creme: Dollop in the marshmallow creme and beat until the mixture is fluffy and fully combined.
  3. Fold in whipped topping: Using a spatula, gently fold in the whipped topping until light and uniform. Do not overmix.
  4. Chill: Spoon the mixture into a pie dish, square pan, or bowl. Smooth the top, cover, and refrigerate for at least 30 minutes to set.
  5. Add cherry topping: Just before serving, spoon the cherry pie filling evenly over the top. Give it a gentle swirl if desired for a marbled look. Serve cold with your favorite dippers.

Notes

This dip keeps well, covered, in the fridge for up to 4 days. For best texture, assemble the dip base ahead and add the cherry topping just before serving. Not recommended for freezing, as the texture will change. Variations: try different pie fillings, add a splash of vanilla or almond extract, or top with toasted coconut, chocolate shavings, or cookie crumbs.

Nutrition

Calories: 290kcal | Carbohydrates: 42g | Protein: 2g | Fat: 13g | Saturated Fat: 7g | Cholesterol: 30mg | Sodium: 120mg | Potassium: 45mg | Sugar: 34g | Vitamin A: 350IU | Calcium: 40mg | Iron: 0.3mg

Let's Get Cooking!

100+ Recipes for Busy Nights

In a time crunch? Take a look around and browse plenty of recipes to help you get dinner ready and on the table on those busy nights!

Sweet Recipes

Pumpkin Banana Muffins

Pumpkin Banana Muffins Recipe

Strawberry Pie Bars

Strawberry Pie Bars Easy Oven Recipe

White Chocolate Raspberry Muffins

White Chocolate Raspberry Muffins Recipe

Snickerdoodle Muffins

Snickerdoodle Muffins Recipe for Oven

PIN NOW

Follow KitchenetteBlog on Pinterest

Love cozy recipes that actually make it to the table? On Pinterest, I share new comfort-food ideas every week—desserts, dinners, and those little snack cravings that hit at midnight. Come pin with me and never run out of kitchen inspo.

Savory Recipes

Turkey Tetrazzini

Turkey Tetrazzini Baked Pasta Recipe

Grilled Chicken Panini Sandwich

Grilled Chicken Panini Sandwich Recipe

Sweet Potato Cornbread

Sweet Potato Cornbread Recipe Oven Baked

Classic Waldorf Salad

Waldorf Salad Simple Classic Recipe

Get 5 Recipes to Simplify Your Life!

Delicious, versatile recipes you can make over and over.