Get 5 recipes to simplify your life:

easy, delicious, real food recipes

Latest Recipes

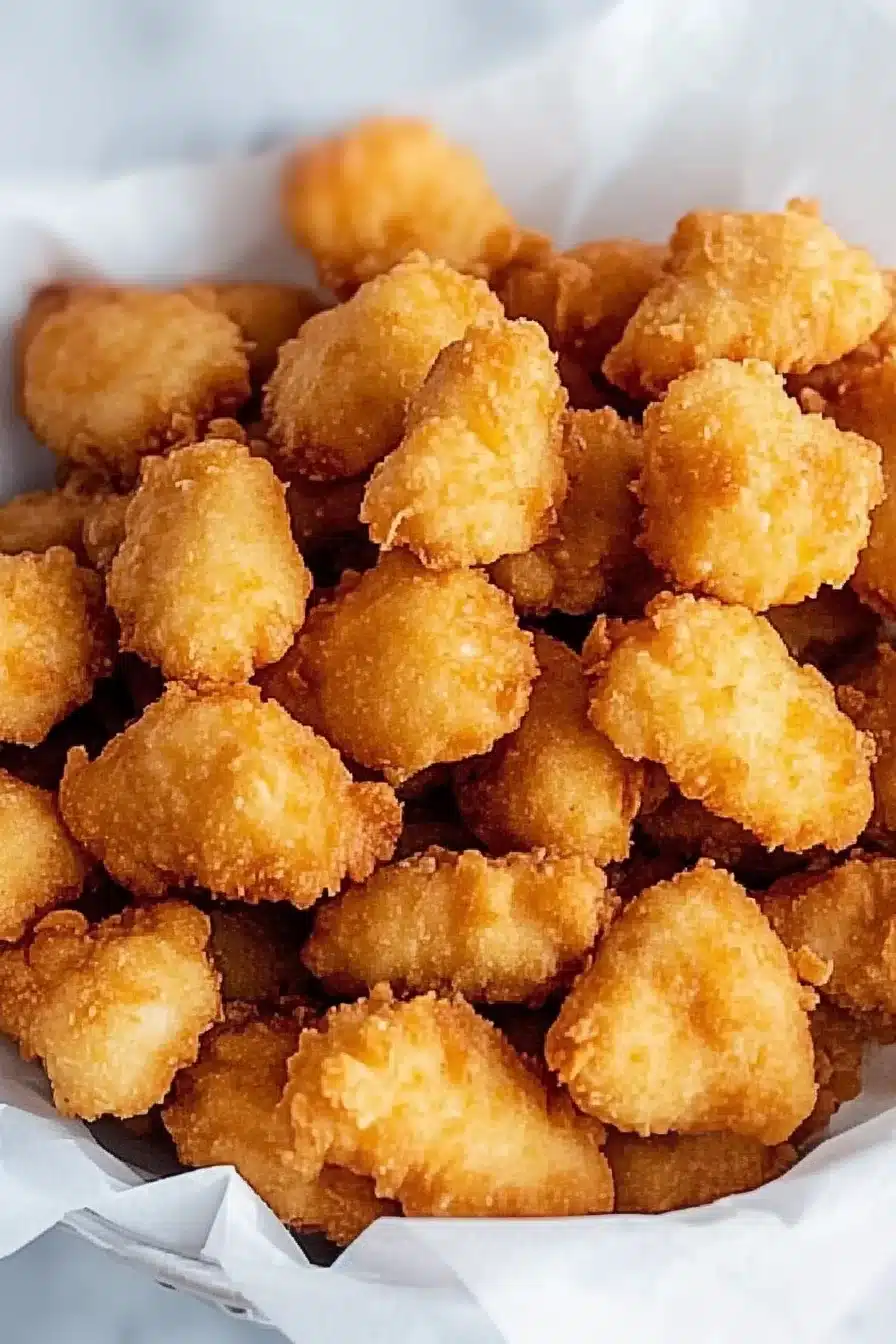
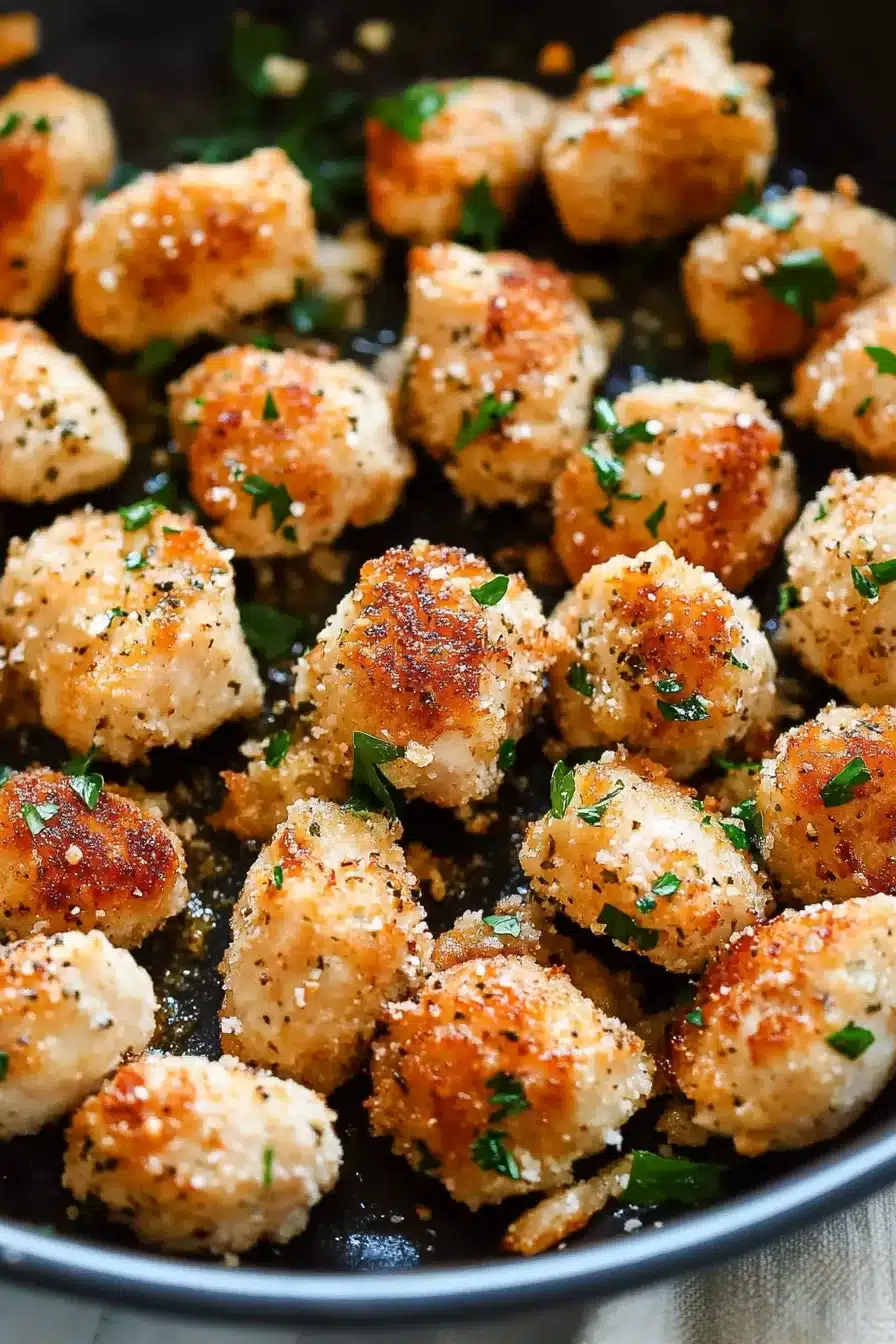
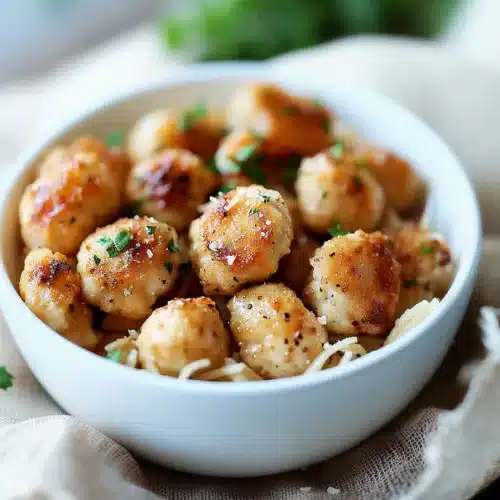
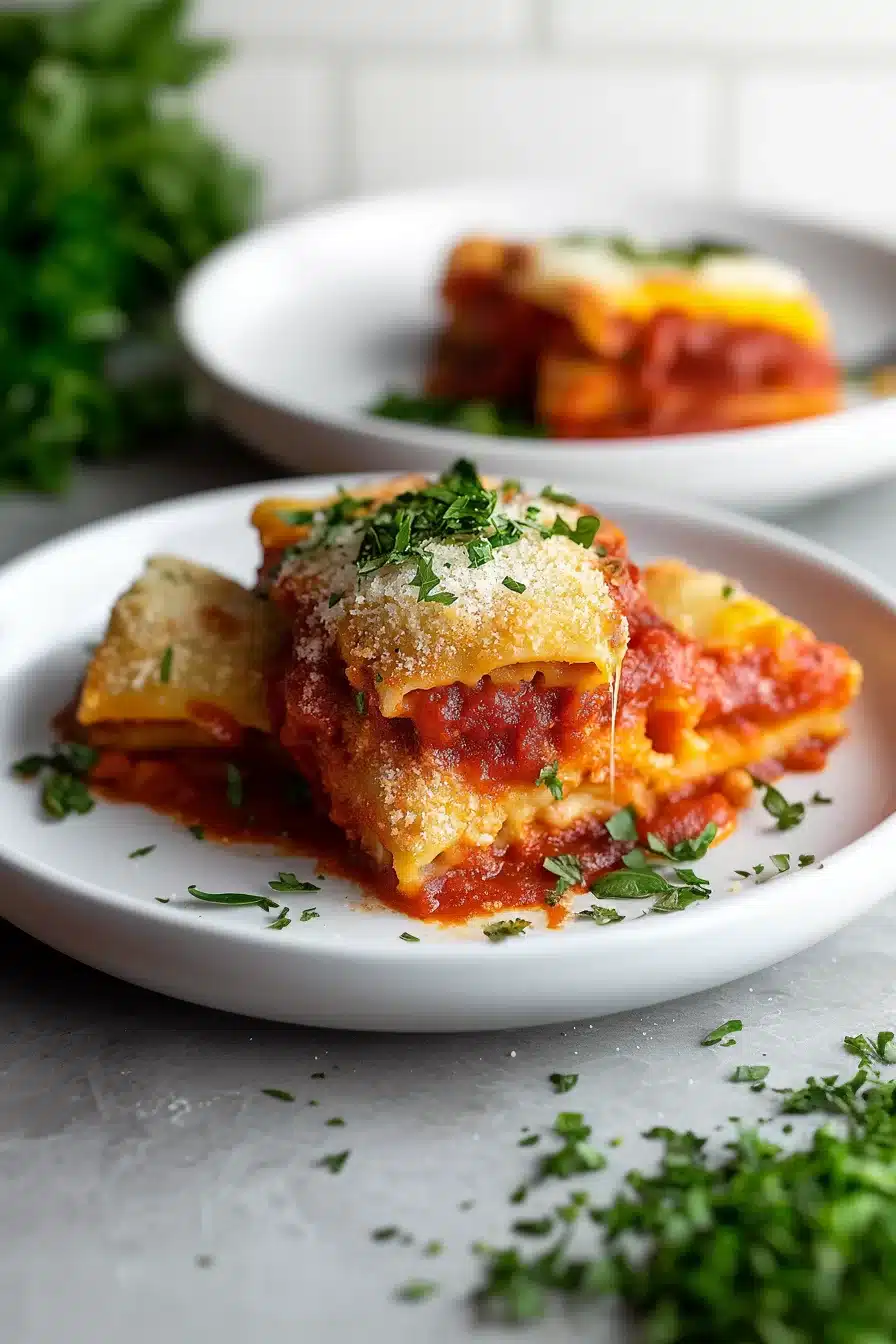
Crispy, cheesy, and wildly comforting, this olive garden fried lasagna layers rich ricotta, parmesan, and asiago inside golden panko bundles. Yes, it’s fried pasta pockets. Yes, they’re as delightful as they sound.

So, picture this: you’re biting into a crispy, golden shell that gives way to warm, melty cheese, a herb-flecked ricotta filling, and… yeah, it’s kind of obscene in the best way. Topped with a tangle of Alfredo and marinara, it hits every craving in one crunchy-cheesy-saucy swoop.

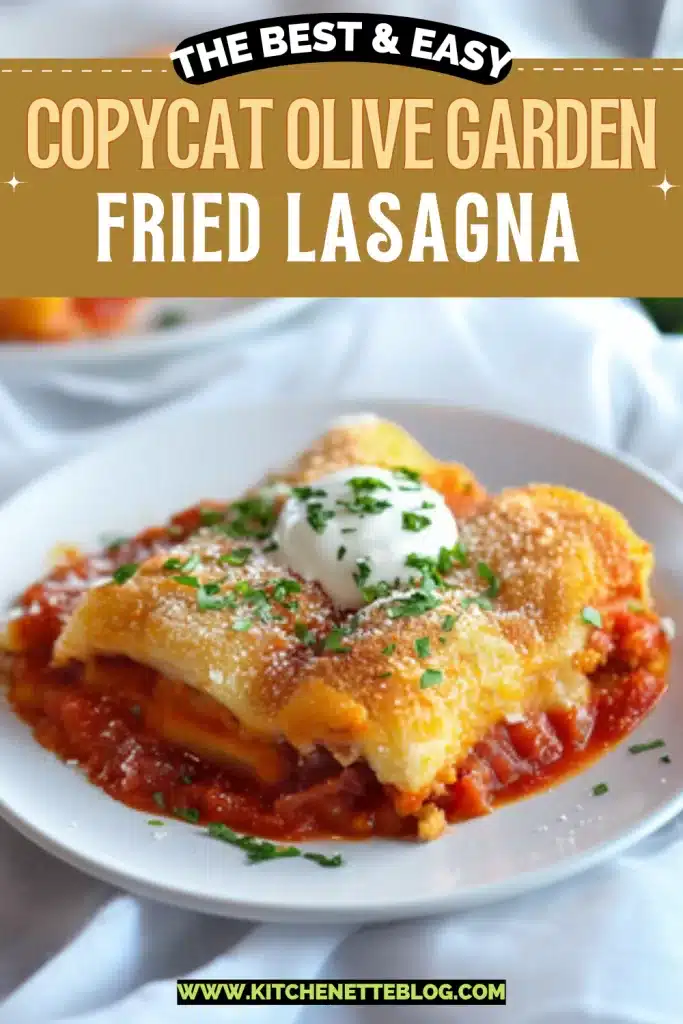
If you’re like me and have occasionally stared a little too long at the appetizer section of certain chain restaurant menus thinking, “But should I just order three of these as my entree?” then welcome. This one’s for you. This copycat Olive Garden fried lasagna grabs everything indulgent about pasta night and cranks it up with a crispy coat and sauce-on-sauce action. It’s a little retro, totally over the top, and 100% built for sharing—or not. No judgment.

Table of Contents

Copycat Olive Garden Fried Lasagna

Why You’ll Love this Olive Garden Fried Lasagna

This is not diet food. Nor is it the time for restraint. But it is stupidly fun to make, very satisfying to eat, and weirdly cathartic to fry pasta in your kitchen just because you can.

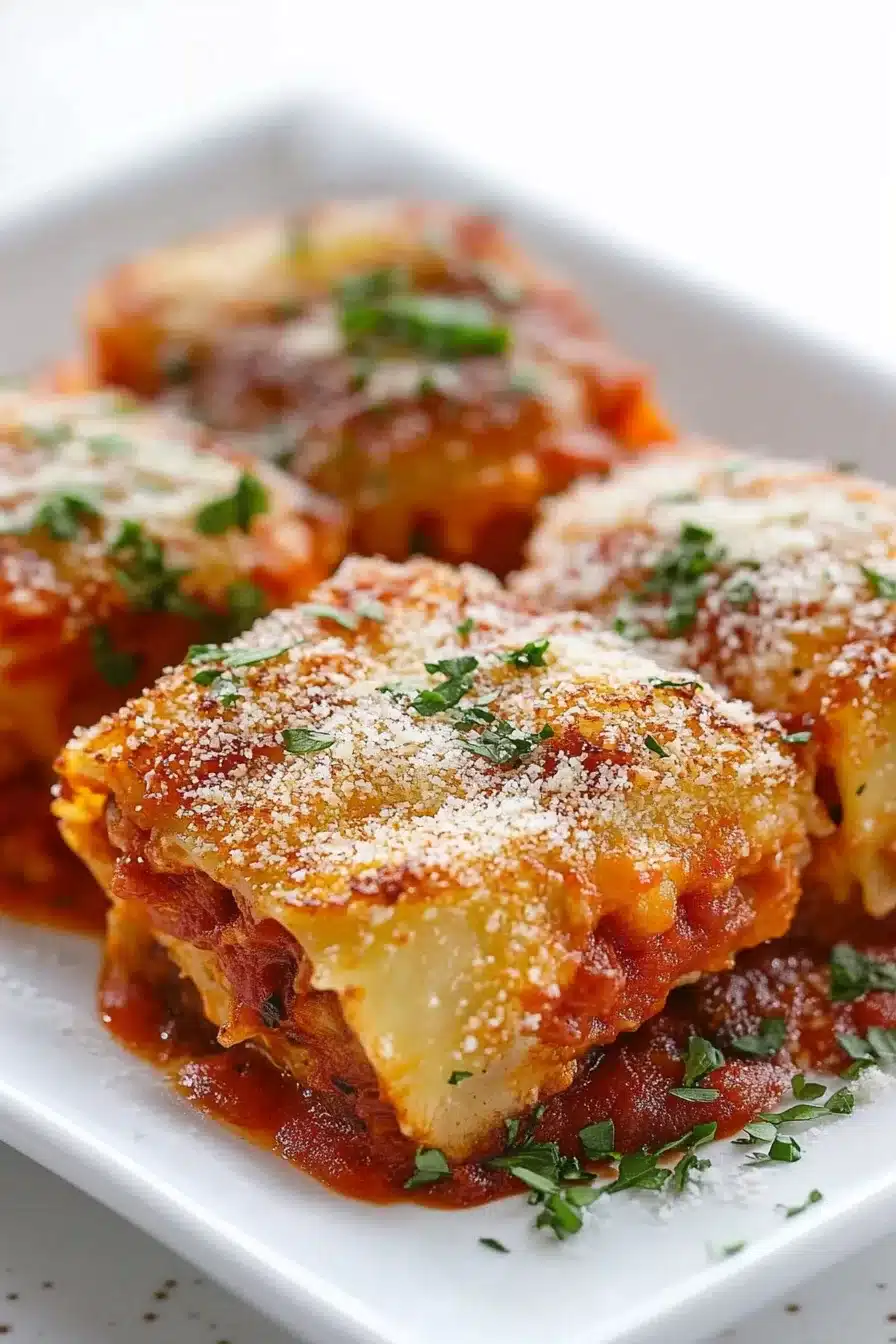
  • Crispy-cheesy contrast magic: That outer golden crunch meets all the melty cheese inside, and somehow it just works.
  • Make-ahead friendly: You freeze the bundles before frying, so they’re perfect to prep days ahead.
  • You get to fry pasta: It’s absurd. It’s excellent. And yes, it totally works.
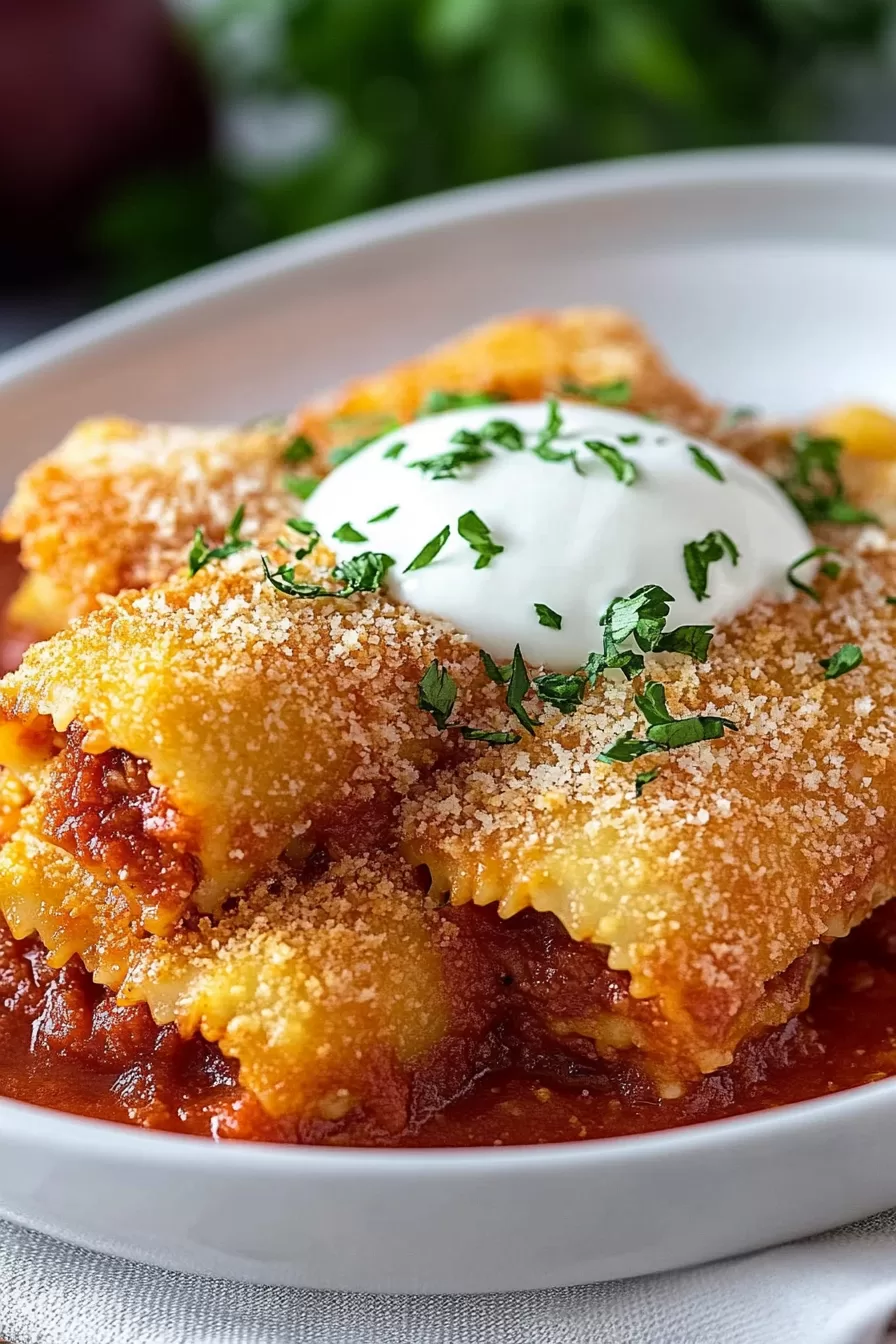
  • Sauce playground: You get Alfredo and marinara, so it’s cheesy and tangy… no need to choose.
  • Ultimate party trick: Serve these at a gathering and watch them vanish. Bonus: they reheat surprisingly well.
  • A little classy, a little trashy: Kind of like that vintage sparkly top you still pull out on Fridays.

Copycat Olive Garden Fried Lasagna

Ingredient Notes

This is an indulgent affair, so don’t skimp on quality here—good cheese and good sauce make a difference! Let’s walk through the key players.

  • Lasagna noodles: Go with the standard boxed kind, not the no-boil ones. We want sturdy noodles that can hold up to folding, freezing, and frying.
  • Ricotta cheese: Whole milk ricotta is creamy and luscious. Avoid the part-skim stuff unless you’re okay with a drier filling.
  • Parmesan cheese: Adds sharp, nutty depth. Use the real deal if you can, not the pre-shredded green can stuff.
  • Asiago cheese: A little tangier than parmesan and melts beautifully. It keeps the filling from being one-note.
  • Italian seasoning + fresh basil: Dried and fresh herbs together keep things interesting. Don’t skip the basil—it gives the filling a bright, clean finish.
  • Eggs + milk: These bind and coat. You’ll need eggs both for the filling and for the breading step.
  • Panko breadcrumbs: These stay crispier than regular ones when fried. You’ll get that signature crackle.
  • Vegetable oil: Neutral and high smoke point—ideal for frying. Canola or peanut oil works great too.
  • Alfredo + marinara sauce: Two textures, two temperatures. I like to warm each separately so you can layer them without a gloopy mess.

Copycat Olive Garden Fried Lasagna

How To Make This Olive Garden Fried Lasagna

Okay, deep breath. It sounds like a process, but it’s honestly kind of meditative once you get into the rhythm. Plus, folding noodles into little cheesy packages is much less fiddly than you’d expect.

  • Boil, cool, and trim the noodles: Bring salted water to a boil and cook the noodles until al dente. Rinse them under cold water to stop the cooking process, then pat them dry like you mean it. Trim off the wavy edges if you’re going for that squared-off, tidy fold.

  • Make the cheesy filling: In a bowl, stir together ricotta, parmesan, asiago, pepper, and herbs. Add your two eggs. Stir until everything’s combined and looking fluffy and spreadable.

  • Fill and fold the noodles: Spread some filling all over each flat noodle, not too thick. Then fold the noodle over itself every two inches or so. Think of it like an accordion or a napkin fan, but way cheesier. Set them on a baking tray as you go.

  • Freeze the bundles: Into the freezer they go—at least an hour. Don’t skip this step or you’ll have melty lava when you try to fry.

  • Bread the frozen bundles: Whisk the remaining egg with milk in one bowl and pour panko into another. Dip each bundle into the egg wash, then into the panko. Press gently to get it into all the folds and corners.

  • Fry until golden: Heat oil to 350°F. Fry 2–3 bundles at a time so the oil temp doesn’t drop like a stone. Flip after 2–3 minutes. You want an even golden brown and a gently puffy appearance. Transfer to paper towels to drain.

  • Warm the sauces (but separately): Heat your Alfredo and marinara in separate pans or bowls. If they get too hot, the Alfredo may break or get weird. Warm, not bubbling, is the move.

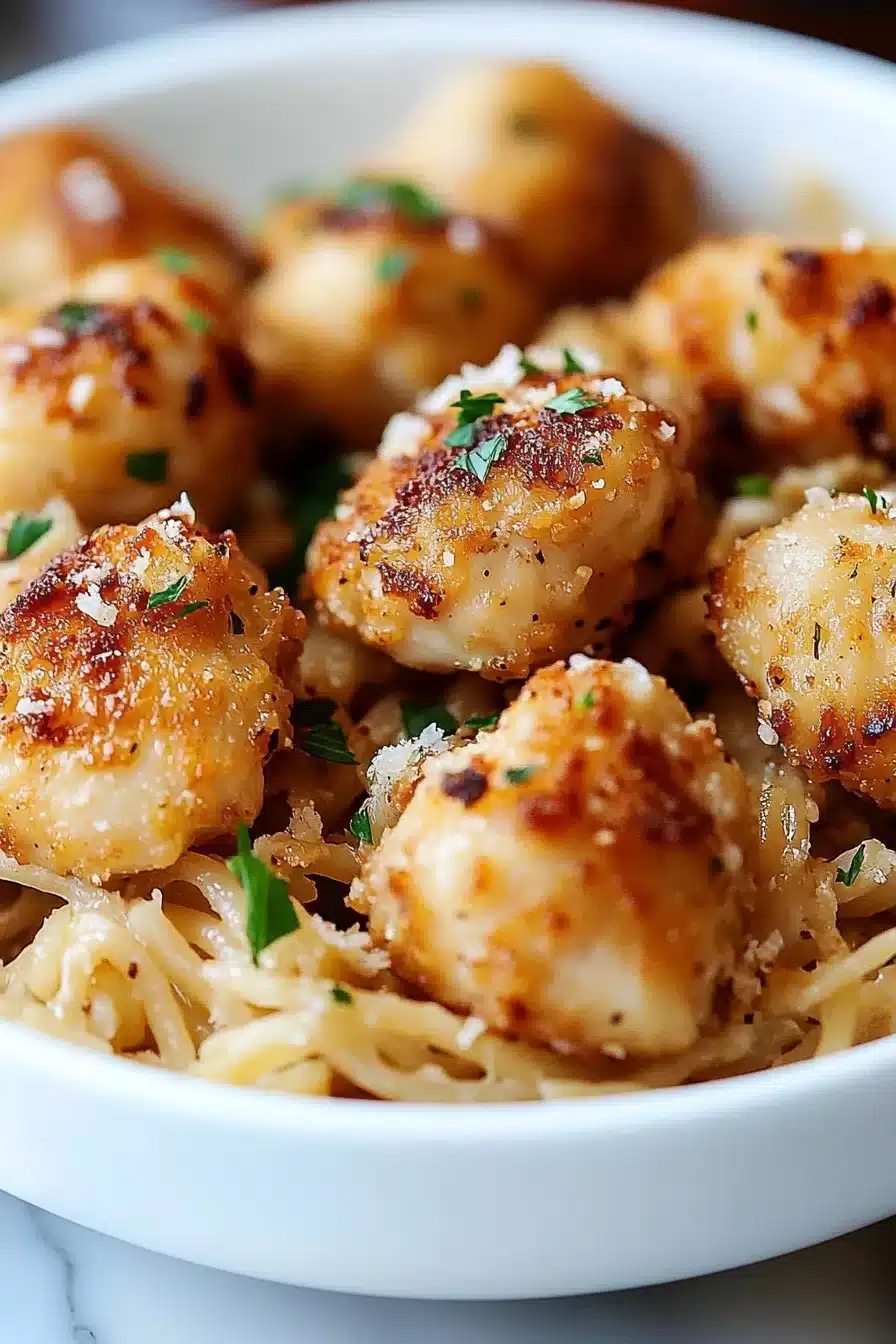
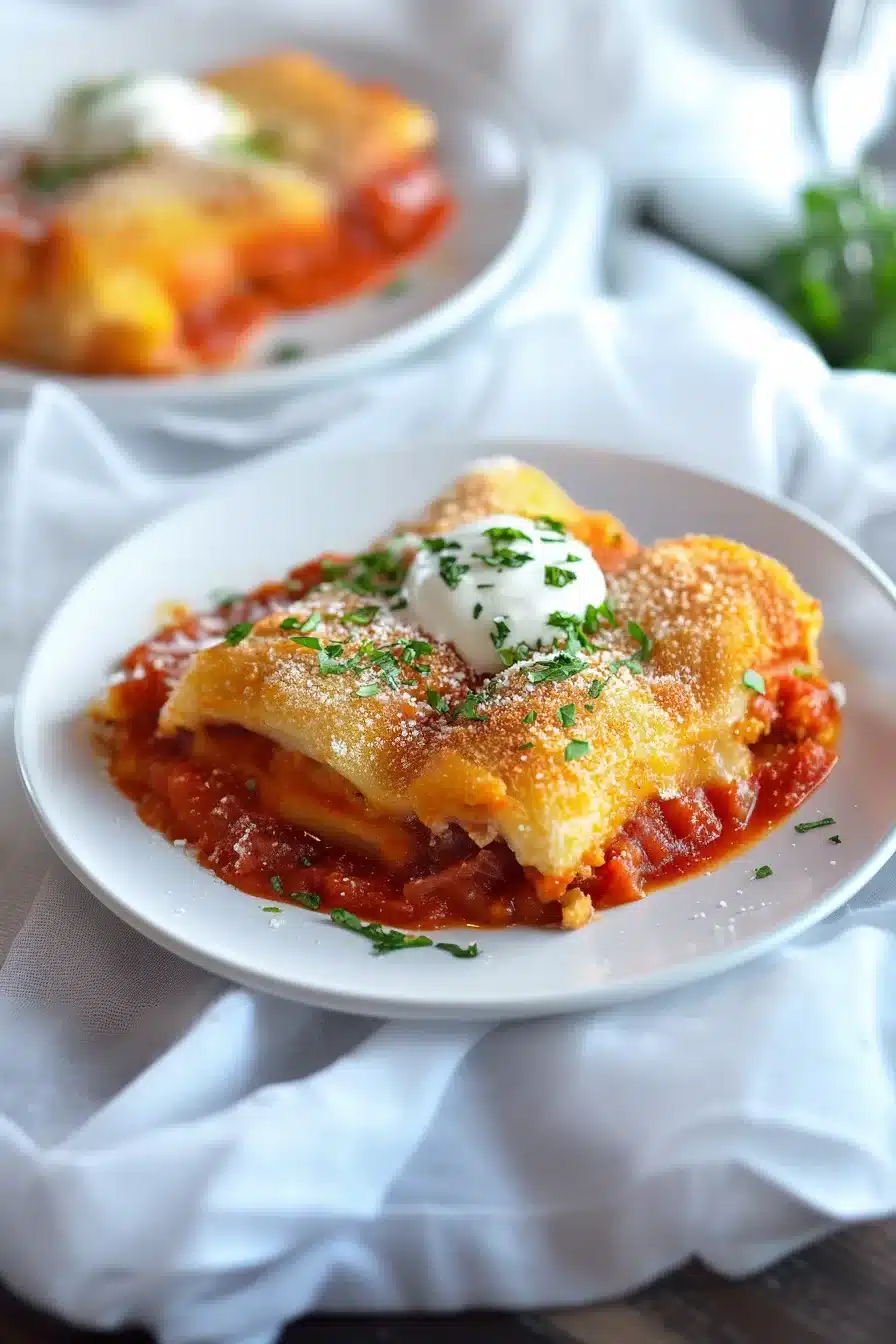
  • Assemble and serve: Spoon Alfredo onto the plate first. Lay your crunchy lasagna bundles on top, then drizzle marinara over everything. Serve right away while the contrast is perfect.

Copycat Olive Garden Fried Lasagna

Storage Options

Okay, so your eyes were bigger than your stomach. It happens. The good news is, this fried lasagna stores and reheats better than you’d think.

Start with refrigeration. If you’ve already fried the bundles, let them cool completely first. Store in an airtight container layered with parchment so they don’t stick. They’ll keep in the fridge for up to 4 days. When you’re ready to reheat, pop them in the oven (or toaster oven!) at 375°F for 10–12 minutes. That’ll bring back most of the crisp.

For freezing, do it before frying. After assembling and breading the bundles, freeze them solid on a tray first, then transfer to a zip-top bag or airtight container. When cravings strike, you can fry directly from frozen—just add an extra minute or so per side.

Microwave? I mean, it’ll work… but the breading may go a bit soggy. If that’s not a dealbreaker for you, go for it. Otherwise, oven > microwave every time here.

Variations and Substitutions

You know I love a good riff in the kitchen. Once you’ve made these once, you’ll start imagining all kinds of cheesy altos and crispy sopranos your own way.

  • Meaty twist: Fold in some cooked and crumbled Italian sausage or finely chopped meatball bits into the cheese mixture for added richness.
  • Spinach-ricotta version: Mix in a few handfuls of thawed, squeezed-dry frozen spinach into the filling. It’s still indulgent but adds a nice earthy note.
  • Gluten-free adaptation: Use gluten-free lasagna noodles and swap the panko for crushed gluten-free rice cereal or GF breadcrumbs.
  • Different cheeses: Swap asiago with fontina, provolone, or even a smoked gouda if you’re feeling bold. Each gives a new personality.
  • Breadcrumb kick: Mix in a bit of crushed red pepper or Italian seasoning into your panko for extra flavor.
  • Single-sauce simplicity: Not a fan of Alfredo? Stick to marinara only, or go all white-sauce. It still slaps.

Copycat Olive Garden Fried Lasagna

What to Serve with Olive Garden Fried Lasagna

This dish can handle some bold pairings—or let it shine with simpler sides. Totally your call. Just don’t forget the napkins and stretchy pants.

  • A crisp green salad with vinaigrette cuts through all the richness. Bonus if there’s something bitter in there, like radicchio or arugula. It resets your palate between bites and makes the whole plate feel more composed.

  • Garlic bread, yes, but hear me out: try your hand at bacon basil cornbread muffins. They’re savory, toasty, and add just the right level of smoky crunch to the plate.

  • Roasted vegetables, maybe broccolini or cauliflower tossed with olive oil and lemon zest, will contrast all that gooey goodness with some crisp-tender balance.

  • Feeling ambitious? A light seafood main like pan-seared cod with rainbow chard could totally work before or alongside this for a fancy twist on surf and turf.

Copycat Olive Garden Fried Lasagna

Frequently Asked Questions

Can I use no-boil lasagna noodles for this?

Honestly, I wouldn’t recommend it. No-boil noodles are thinner and more fragile when cooked, so they don’t fold well and can fall apart during frying. Go for the regular, robust kind that softens up beautifully but still holds its shape after cooking and chilling.

Can I make this ahead of time?

Absolutely, and actually, you kind of have to! These bundles need to be frozen before frying, so they’re great for prepping the day before or even further in advance. You can make and freeze them for up to a month before frying. Just bread them before the freezer trip to save time later.

What’s the best way to reheat leftovers?

The best method is using your oven or toaster oven. Preheat to 375°F and warm for 10–12 minutes until the exterior is crispy and the inside is gooey again. The microwave works in a pinch, but the texture takes a hit. I wouldn’t microwave more than 30–45 seconds at a time if you’re doing it that way.

Do I have to use both Alfredo and marinara?

Nope! The double sauce situation is iconic, sure, but not essential. Some folks love just marinara for a fresher vibe, and others only swear by Alfredo. You can even use pesto or a vodka sauce if that’s more your style. The important thing is to use sauces you actually enjoy—no guilt either way.

Copycat Olive Garden Fried Lasagna

Copycat Olive Garden Fried Lasagna

Prep Time 45 minutes
Cook Time 16 minutes
Freezing Time 1 hour
Total Time 1 hour 30 minutes
Crispy, cheesy, and wildly comforting, this Olive Garden fried lasagna layers rich ricotta, parmesan, and asiago inside golden panko bundles. Fry up these cravable pasta pockets and finish with Alfredo and marinara for the ultimate over-the-top appetizer or main!
6 bundles

Ingredients

Fried Lasagna Bundles

  • 12 regular lasagna noodles not no-boil
  • 1 cup (250 g) whole milk ricotta cheese
  • 3/4 cup (70 g) parmesan cheese freshly grated
  • 1/2 cup (45 g) asiago cheese grated
  • 1 tsp Italian seasoning
  • 1/3 cup (10 g) fresh basil chopped
  • 1/2 tsp (0.5 tsp) black pepper freshly ground
  • 3 large eggs divided (2 for filling, 1 for dredging)
  • 1/3 cup (80 ml) milk
  • 2 cups (120 g) panko breadcrumbs
  • vegetable oil for frying (about 4 cups, enough for 2-inch depth)

For Assembly & Serving

  • 1 cup (240 ml) Alfredo sauce warmed
  • 1 cup (240 ml) marinara sauce warmed
  • fresh basil for garnish (optional)

Equipment

  • Large pot
  • Mixing bowls
  • Baking sheet
  • Plastic Wrap or Foil
  • Deep Frying Pan or Dutch Oven
  • Slotted spoon
  • Paper towels

Instructions
 

  1. Boil, cool, and trim the noodles: Bring a large pot of salted water to a boil. Cook lasagna noodles until just al dente. Drain, rinse well under cold water, and pat dry with paper towels. Trim the wavy edges off if you want perfectly squared bundles (optional).
  2. Make the cheese filling: In a medium bowl, mix together the ricotta, parmesan, asiago, Italian seasoning, fresh basil, black pepper, and two eggs until smooth and spreadable.
  3. Fill and fold: Lay noodles flat. Spread a generous layer of cheese mixture over each, leaving a little border. Fold each noodle over itself every 2 inches accordion-style until you have a compact bundle. Place each on a sheet tray lined with parchment.
  4. Freeze: Freeze the filled bundles uncovered for at least 1 hour (or up to overnight) until firm. This keeps the cheese from oozing out during frying.
  5. Bread the bundles: In a shallow bowl, whisk the third egg with the milk. Place panko in another bowl. Dip each frozen bundle in egg wash, then coat thoroughly in panko, pressing gently so crumbs adhere to all sides and folds.
  6. Fry: Heat 2 inches of vegetable oil in a deep pan to 350°F (175°C). Fry 2–3 bundles at a time for 2–3 minutes per side, turning as needed, until deep golden and puffed. Transfer to a paper towel–lined plate to drain.
  7. Warm the sauces: Separately heat Alfredo and marinara in small saucepans until hot (but not boiling).
  8. Assemble & serve: Spoon Alfredo sauce onto serving plates, place lasagna bundles on top, and drizzle with marinara. Garnish with more fresh basil if desired. Serve immediately for max crispy-cheesy magic.

Notes

Make ahead: Unfried bundles can be frozen up to 1 month—bread them before freezing and fry from frozen, adding a minute per side.
Storage: Store fried bundles in the fridge for up to 4 days and reheat in a 375°F oven for 10–12 minutes for best crisp.
Variations: Try adding cooked sausage, spinach, or your favorite cheeses to the filling, or season the panko with herbs or chili flakes for extra punch.
Skip Alfredo or stick to only marinara if desired—the combos are flexible!

Nutrition

Calories: 410kcal | Carbohydrates: 34g | Protein: 17g | Fat: 23g | Saturated Fat: 10g | Cholesterol: 102mg | Sodium: 735mg | Potassium: 291mg | Fiber: 2g | Sugar: 4g | Vitamin A: 684IU | Vitamin C: 6mg | Calcium: 327mg | Iron: 2.1mg

Crispy on the outside, juicy inside, and that unmistakable hint of pickle magic—these copycat Chick-fil-A nuggets made with chicken breasts, dill pickle juice, and pantry staples are your golden ticket to fast-food joy without the drive-thru.

Golden, savory, and just the right level of craggly crunch, these little nuggets of wonder will make your kitchen smell like a dream and your fingertips gloriously salty. They’re perfect for everything from lazy Sunday cravings to feeding a late-night snack crowd. I won’t lie—I’ve eaten them standing at the counter right off the plate. Don’t judge.

This crispy Chick-fil-A style nugget recipe is everything you want fried chicken to be without venturing beyond your own stovetop setup. The secret? That briny marinade and the sneaky little kiss of sugar in the flour coating. The result is juicy, flavorful bites that practically sing with Southern-fried charm. Plus, it’s surprisingly simple—just a bit of dunking, shaking, and sizzling. If you’re craving that fast-food comfort with a homemade twist (read: no paper bag full of smudged sauces), you’re gonna be very into this.

Table of Contents

Crispy Chick-fil-A Style Nuggets

Why You’ll Love this Copycat Chick-fil-A Nuggets

Okay, so nobody’s pretending this is health food. But there’s something so wildly satisfying about doing this at home—and doing it better.

  • Super juicy and tender: The pickle juice marinade doesn’t just add flavor, it practically guarantees each bite stays moist and happy.
  • Crispy magic exterior: That flour and sugar combo creates a crust that audibly crunches when you bite into it—zero soggy situations here.
  • Smells amazing while it cooks: Imagine the aroma of fried chicken mingled with a little salty-sweet nostalgia wafting through your kitchen.
  • Fun to make with minimal gear: No fancy fryer needed here. Just a big pan, a spatula, and maybe a thermometer if you’re feeling precise.
  • Customizable for dips and sides: Whether you’re into classic honey mustard or something weird and wonderful, these nuggets play nice with any sauce.
  • Honestly better than the takeout version: Fresher, warmer, and you can sneak a few straight from the pan. Win.

Crispy Chick-fil-A Style Nuggets

Ingredient Notes

These nuggets only need a handful of ingredients, but they each pull their weight. Here’s the scoop.

  • Chicken breasts: Go boneless, skinless, and cut into sturdy one-inch pieces. Don’t go dainty—they’ll shrink a little while frying.
  • Dill pickle juice: Trust me, it’s the secret sauce. That tangy brine soaks in and gives the chicken next-level flavor and tenderness.
  • All-purpose flour: Builds your base coating. Make sure it’s dry and fluffy—not lumpy or compact.
  • Powdered sugar: Just a touch to give your crust that signature Chick-fil-A sweetness. I know, it sounds odd—but don’t skip it.
  • Paprika, salt, and black pepper: The holy trinity of nugget seasoning. That subtle warmth and salt boost everything else.
  • Peanut or canola oil: Peanut oil leans more authentic, but canola keeps it budget-basic and still beautifully crispy.
  • Egg and whole milk: The binder duo. Silky, rich, and helps the flour cling like it means it.

Crispy Chick-fil-A Style Nuggets

How To Make This Copycat Chick-fil-A Nuggets

This is not a hard recipe—it’s more of a choose-your-own-fried-adventure with very tasty results. Let me walk you through it.

  • Marinate the chicken: Drop your chicken chunks into a bowl and pour in that dill pickle juice until submerged. Cover it up and pop it in the fridge for at least 30 minutes, but if you’ve got time, overnight is where the magic happens.

  • Prep your dry and wet stations: In a good-sized Ziploc bag, toss together the flour, powdered sugar, paprika, salt, and pepper. Seal it and give it a shake. In a separate bowl, whisk the egg and milk till smooth and happy.

  • Dredge and coat: Grab your chicken from the brine and let the extra drip off. Now dip each piece in the egg mixture until fully coated, then toss into the flour bag. Seal it and shake like you’re mixing a cocktail—enthusiastically and with joy.

  • Heat your oil: Fill a large deep pan or fryer with enough oil to submerge the nuggets. Heat it to 350°F (get a thermometer if you’re unsure). Too low and the coating goes soggy. Too hot and they burn fast.

  • Fry in batches: Don’t overcrowd your pan; that’ll mess with the temperature. Fry each nugget batch for about 3 to 5 minutes until they’re deeply golden and gloriously crispy. Use a slotted spoon or tongs to lift them to a paper towel–lined plate.

  • Serve and devour: Serve hot with your favorite dipping sauces. Chick-fil-A sauce copycat, barbecue, ranch—or all three in ramekins if you’re feeling fancy.

Crispy Chick-fil-A Style Nuggets

Storage Options

So you made a mountain of nuggets. First of all, well done. Now let’s talk about how to stash the extras (assuming there are any).

If you’re storing leftovers for the next day, pop them into an airtight container and stick them in the fridge. They’ll keep well for up to 3 days. When you reheat, I highly recommend using an oven or air fryer instead of the microwave. You want that crust to stay crunchy, not go limp and sad.

Now, the freezer. Oh yes, you can absolutely freeze these bad boys. Once they’re completely cool, spread the nuggets out on a baking sheet and freeze until solid. Then toss them into a freezer bag. That way, they don’t clump together like some deep-fried nugget boulder.

To reheat from frozen, bake them at 375°F for about 15–20 minutes, flipping halfway through. Or air fry for even crispier edges.

Variations and Substitutions

Sometimes you wanna stick to the script, and other times you feel a little spicy or dairy-free. Here’s how you can mix it up without sacrificing the vibe.

  • Chicken thighs: Swap in boneless thighs if you prefer darker meat. It’ll be juicier and a tiny bit richer in flavor.
  • Breadcrumb coating: For extra crunch, add 1/4 cup of unseasoned panko to the flour mix. It’s lightly sinful, but worth it.
  • Non-dairy soak: Sub out the whole milk for almond or oat milk in the egg wash. Keep the same ratios—it works like a charm.
  • Spicy version: Toss in some cayenne or chili powder to the flour mix. Or hit the nuggets with hot honey before serving.
  • Gluten-free twist: Use a 1:1 gluten-free flour blend, and make sure your pickle juice doesn’t have any sneaky additives.
  • Air fried instead of deep fried: Lower oil, less mess. They won’t be quite as golden, but still super crispy. Spray them with oil and cook at 400°F.

Crispy Chick-fil-A Style Nuggets

What to Serve with Copycat Chick-fil-A Nuggets

You’ve got hot, crispy nuggets waiting. Now let’s build the rest of the table, shall we?

  • Cheesy ranch potatoes are honestly a dream sidekick. Creamy and herb-studded with crispy melted cheese bits on top, they’ll fight the nuggets for MVP.

  • Craving something cooling on the side? A quick coleslaw with shredded cabbage, a splash of apple cider vinegar, and mayo hits the crunchy-creamy sweet spot.

  • If you’ve got a little extra energy, whip up some Krispy Kreme-style doughnuts for dessert. Light, yeasty, and sticky-sweet—it’s a Southern feast fitting for a Sunday.

  • For dipping, set out a trio: honey mustard (store-bought is fine), smoky barbecue, and a simple sriracha mayo. People love options, even if they only use one.

Crispy Chick-fil-A Style Nuggets

Frequently Asked Questions

Can I make these nuggets in the air fryer?

Yup, air fryer works great if you’re trying to cut back on oil or just hate deep frying. Bread them the same way, then lightly spray the nuggets with oil. Cook them at 400°F for about 8–10 minutes, shaking the basket halfway through. They won’t be *exactly* like deep fried, but you’ll still get yummy crunch and a golden crust.

Do I really need the pickle juice?

If you’re chasing that classic Chick-fil-A flavor, yes—you absolutely do. That tang from the dill brine makes the chicken super tender and adds that signature salty-savory bite. But if you’re seriously anti-pickle, you can try buttermilk instead. It still gives a great texture, just a different vibe.

What type of oil should I use for frying?

Peanut oil is the classic choice—it handles high heat like a champ and gives you a subtle nutty flavor. Canola oil works fine too and is usually easier on the wallet. Just avoid olive oil or anything too flavorful or with a low smoke point. You want crispiness, not smoke alarms.

Can I make the nuggets ahead of time?

Totally doable. You can coat the nuggets a few hours ahead and keep them on a parchment-lined sheet in the fridge. When you’re ready, just heat up the oil and fry. Or make the full batch, freeze them, and reheat like frozen nuggets whenever a craving hits.

Crispy Chick-fil-A Style Nuggets

Crispy Chick-fil-A Style Nuggets (Copycat)

Prep Time 20 minutes
Cook Time 20 minutes
Marinating Time 30 minutes
Total Time 1 hour
Crispy on the outside, juicy inside, and with an unmistakable hint of pickle magic—these copycat Chick-fil-A nuggets are your ticket to homemade fast-food bliss! Brined in dill pickle juice and coated in a touch of sugar and spice, they are golden, craggly, and addictive, perfect for dipping or snacking right off the plate.
4 servings

Ingredients

Chicken Nuggets

  • 2 large (450 g) boneless, skinless chicken breasts cut into 1-inch pieces (about 1 pound)
  • 1 cup (240 ml) dill pickle juice
  • 1 large egg
  • 1/2 cup (120 ml) whole milk
  • 1 cup (125 g) all-purpose flour
  • 2 tbsp (15 g) powdered sugar
  • 1 tsp (4 g) paprika
  • 1 tsp (6 g) kosher salt
  • 1/2 tsp (1 g) freshly ground black pepper
  • peanut or canola oil for frying (enough to submerge nuggets)

Equipment

  • Large Bowl
  • Ziploc bag
  • Mixing bowl
  • Large deep pan or fryer
  • Slotted spoon or tongs
  • Paper towels
  • Thermometer (optional)

Instructions
 

  1. Marinate the chicken: Place chicken pieces in a large bowl and cover with dill pickle juice. Cover and refrigerate for at least 30 minutes (up to overnight for best flavor and tenderness).
  2. Set up your stations: In a large Ziploc bag, combine flour, powdered sugar, paprika, salt, and black pepper. Seal and shake to mix. In a separate bowl, whisk egg and milk together until smooth.
  3. Dredge and coat: Remove chicken from the brine, letting excess juice drip off. Dip each piece in the egg mixture, then add to the flour bag. Seal and shake to fully coat the chicken in the seasoned flour.
  4. Heat oil: Pour peanut or canola oil into a large pan or fryer (enough to submerge nuggets). Heat to 350°F (175°C).
  5. Fry in batches: Fry chicken nuggets in batches, being careful not to overcrowd the pan. Cook 3–5 minutes per batch, until deep golden and crispy. Use a slotted spoon or tongs to transfer to a paper towel–lined plate.
  6. Serve: Enjoy immediately with dipping sauces of your choice.

Notes

Storage: Refrigerate leftovers in an airtight container for up to 3 days. Reheat in oven or air fryer to restore crispiness. For freezing, place cooled nuggets on a baking sheet until solid, then transfer to a freezer bag. Bake from frozen at 375°F (190°C) for 15–20 minutes, flipping halfway through.
Variations: Try chicken thighs for extra juiciness, add panko to the coating for crunch, make it dairy-free with plant milk, toss in chili powder for spicy heat, or use gluten-free flour as needed. Air fryer directions: spray coated nuggets with oil and cook at 400°F (200°C) for 8–10 minutes, shaking once.
Serving ideas: Pair with cheesy ranch potatoes, crisp coleslaw, or homemade doughnuts. Offer a trio of dipping sauces: honey mustard, barbecue, and sriracha mayo.

Nutrition

Calories: 340kcal | Carbohydrates: 17g | Protein: 34g | Fat: 15g | Saturated Fat: 3g | Cholesterol: 112mg | Sodium: 980mg | Potassium: 470mg | Fiber: 1g | Sugar: 3g | Vitamin A: 360IU | Calcium: 49mg | Iron: 1.3mg

Light, fluffy, and melt-in-your-mouth soft, these copycat Krispy Kreme doughnuts bring all the joy of that first warm, sugary bite. With just milk, sugar, eggs, flour, and a little yeast magic, you’ve got yourself a kitchen smelling like a retro donut shop from heaven.

Imagine this: a golden-fried halo of squishy dough, barely holding itself together under a shiny, crackly glaze. Yeah. That’s what we’re doing here.

So here’s the deal—sometimes you just want a fresh, warm doughnut that tastes like it was handed to you on a white paper hat by someone named Carl. But without the drive, the line, or the weird guilt of eating four before you even get home (just me?). These homemade beauties capture that same irresistible texture: pillowy center, an air-light chew, and a delicate vanilla glaze that sets just slightly as it cools. Great for lazy weekends, spontaneous cravings, or whenever you want to impress your friends but also eat the extras in your pajamas.

Table of Contents

Copycat Krispy Kreme Doughnuts

Why You’ll Love this Krispy Kreme Doughnut

No bells. No whistles. Just honest-to-goodness doughnut joy. If you’ve been craving the ultra-soft vibe of a Krispy Kreme doughnut without leaving the house (and your slippers), this one’s for you.

  • Crazy soft texture: Somehow manages to be fluffy inside yet still hold together just right in every bite.
  • That classic vanilla glaze: Smooth, sweet, and slightly sticky in the best possible way.
  • Simple pantry ingredients: Nothing weird or fancy. You probably have most of this stuff already.
  • Makes plenty to share: Or not. But it’s a fun project for a lazy Saturday or brunch-y Sunday.
  • Totally customizable: Glaze ’em, sugar ’em, dunk ’em in chocolate if you like chaos.
  • Great beginner yeast recipe: It’s way more forgiving than bread and much more rewarding per bite.

Copycat Krispy Kreme Doughnuts

Ingredient Notes

It’s all about getting the dough just right—fluffy, light, and just a little sticky. Let’s peek into the pantry together, shall we?

  • Warm water: Gives your yeast the little jacuzzi moment it needs to wake up and start bubbling.
  • Instant yeast: The unofficial engine of this whole operation. Instant is easy—just stir it in. No proofing drama required.
  • Whole milk: With its extra richness, it helps the dough come out soft, tender, and, dare I say, luxurious.
  • Granulated sugar: Just enough to feed the yeast and sweeten the deal (literally).
  • Salt: Keeps the sweetness from tasting one-note. Yes, even doughnuts need balance.
  • Eggs: Add richness and structure. Think of them as the loyal glue guys of the doughnut squad.
  • Butter: Softened, not melted. Adds major flavor and softness to the final dough.
  • All-purpose flour: Nothing fancy needed here. Start with less, then add more as needed—dough should be soft but not too sticky.
  • Oil for frying: Go neutral. Canola or vegetable oil work just fine without interfering with the magic.
  • Confectioners’ sugar: The base of that dreamy glaze. It melts smoothly and sets with a slight sheen.
  • Vanilla extract: Rounds out the glaze with that comfortingly sweet aroma.
  • Milk (for glaze): Adjust to get that ideal drippiness—runny but not soupy.

Copycat Krispy Kreme Doughnuts

How To Make This Krispy Kreme Doughnut

You’re not just making doughnuts. You’re making tiny rings of joy. And honestly, it’s more fun than it is hard—kind of like adult Play-Doh, but you get to fry it in oil and eat the results.

  • Start with the yeast party: Combine warm water and yeast in your mixer bowl, then let it sit for about 5 minutes. You want to see that foamy, creamy top—kind of like the head on a beer.

  • Warm up that milk: Toss it in the microwave for two minutes, then let it cool slightly. You want warm, not hot—this is doughnut dough, not sauna therapy.

  • Build the base dough: Add the warm milk, sugar, salt, eggs, butter, and 2 cups of flour to the yeast mixture. Mix it up with the paddle attachment until things look smoothish and unified.

  • Knead to impress: Swap in the dough hook, then gradually add the rest of the flour. Let the mixer work its magic on medium speed for about 5–7 minutes. You’re aiming for a soft, slightly tacky dough that feels like a therapy dough ball.

  • First rise: Plop that beauty into a greased bowl, flip it once to coat, and cover loosely. Let it rise in a warm, draft-free nook until doubled in size. This’ll take 1 to 2 hours, so maybe clean the kitchen (or don’t).

  • Roll and cut: On a floured surface, roll the dough out to ¼-inch thick. Use a doughnut cutter, or go old-school with two round objects like a cookie cutter and a shot glass. Scraps? Just re-roll and keep on cutting.

  • Second rise (brief but important): Lay out your cut doughnuts and holes on a parchment-lined sheet. Cover and let them puff for 10–15 minutes while you heat the oil.

  • Fry time: Heat up your oil to 375°F. A thermometer helps a lot here—too hot and they brown too fast, too cool and you’re eating oily sadness. Fry 1–2 mins per side, work in batches, and let the sizzle soothe your soul.

  • Make the glaze: Whisk it all together until smooth. Add milk gradually so you don’t end up with accidental icing soup.

  • Dip it like you mean it: Flip each warm doughnut top-side down into the glaze, let the excess drip off, then move it to a wire rack. The glaze will set slightly after a few minutes (if you can wait that long).

Copycat Krispy Kreme Doughnuts

Storage Options

Fresh is obviously the ideal scenario (they basically whisper to your soul when warm), but let’s talk logistics.

If you have leftovers (rare, but possible if you triple the batch or show restraint), just let them cool completely. Store them in an airtight container at room temp for up to two days. Avoid the fridge—it turns them weirdly dry and sad.

Want to keep them longer? Freeze the unglazed doughnuts. Wrap each one in plastic or foil, then stash in a freezer-safe bag. When you’re ready, warm them in the microwave for 10–15 seconds or in the oven at 300°F for about 5 minutes. Then dip into fresh glaze while warm.

And yes, you can even freeze the dough after the first rise. Shape, cut, and freeze. When you’re craving one, let it come to room temp and do the final proof before frying.

Variations and Substitutions

There’s a lot of playroom here once you’ve got the dough handled. Feel free to riff a little and make it your own.

  • Swap all-purpose for bread flour: Want a slightly chewier inside? Bread flour gives structure without losing that cloudlike bounce.

  • Chocolate glaze instead: Melt ½ cup chocolate chips into your glaze base and voilà—death by doughnut.

  • Infuse the glaze: Add lemon zest, a bit of cinnamon, or even a pinch of espresso powder to tweak the flavor vibe.

  • Try filled doughnuts: Skip the hole (gasp!) and instead inject with pastry cream, jam, or—if you dare—peanut butter mousse. Actually, that would pair beautifully with these peanut butter banana ice cream sandwiches

  • Make mini doughnut holes only: They’re poppable, fry faster, and perfect for spontaneous snacking. Also very toddler-approved.

Copycat Krispy Kreme Doughnuts

What to Serve with Krispy Kreme Doughnut

Whenever you make fried dough, people are going to show up. Here are a few delicious things to round out your table.

  • A strong cup of coffee, obviously. Bonus points for a slightly bitter roast—something to cut through the sweetness and wake up your senses while your mouth is full of glaze.

  • Scrambled eggs or a soft-boiled egg on toast makes a solid savory counterpoint. You’ve got the sweet, you’ve got the salty—this is balance, baby.

  • Fresh fruit works surprisingly well. Berries, melon, or citrus segments bring brightness and keep it from spiraling into full sugar coma territory.

  • You could also pair a few warm doughnuts with something cozy but protein-rich for breakfast, like this honey garlic chicken. Sweet and savory in a very strangely satisfying way.

  • And if you really want to lean into the brunchy chaos, toss together a batch of these bacon basil cornbread muffins. It’s carb-on-carb war, but worth it.

Copycat Krispy Kreme Doughnuts

Frequently Asked Questions

Can I make the dough overnight?

Yep! After kneading, just pop it in a greased bowl, cover tightly, and refrigerate. By morning it’ll be slow-risen perfection. Let it sit at room temp for 30–45 minutes before rolling out so it’s easier to work with. Perfect prep for a Sunday morning fry fest.

Why are my doughnuts dense instead of fluffy?

This usually means the dough didn’t rise fully or long enough. Give it time to double, and don’t rush the second proof either. You’re looking for puffed, slightly jiggly dough before frying. Also double-check your yeast—it might’ve lost its mojo.

Can I bake these instead of frying?

Technically? Yes. But you’ll get more of a sweet roll than a true doughnut. Bake at 375°F for 8–10 minutes if you go that route. They won’t have that classic crisp-meets-melt texture, but still delicious when glazed.

What oil is best for frying doughnuts?

Stick to neutral oils with high smoke points like canola or vegetable oil. Peanut oil works too if you don’t mind the flavor. Avoid olive oil—too low a smoke point, and it’ll mess with the taste and texture of your doughnuts.

Copycat Krispy Kreme Doughnuts

Copycat Krispy Kreme Doughnuts

Prep Time 25 minutes
Cook Time 20 minutes
Rising Time 1 hour 30 minutes
Total Time 2 hours 30 minutes
Light, fluffy, and melt-in-your-mouth soft, these copycat Krispy Kreme doughnuts bring all the joy of that first warm, sugary bite. With just milk, sugar, eggs, flour, and a little yeast magic, you've got yourself a kitchen smelling like a retro donut shop from heaven.
16 doughnuts

Ingredients

Dough

  • 1/3 cup (80 ml) warm water about 110°F
  • 2 1/4 tsp (7 g) instant yeast
  • 3/4 cup (180 ml) whole milk warmed
  • 1/4 cup (50 g) granulated sugar
  • 1 tsp (6 g) salt
  • 2 large eggs room temperature
  • 1/4 cup (57 g) unsalted butter softened
  • 3 1/2 to 4 cups (440-500 g) all-purpose flour plus more as needed

Frying

  • neutral oil such as canola or vegetable, for frying

Glaze

  • 2 cups (240 g) confectioners’ sugar
  • 1/2 tsp (2.5 ml) vanilla extract
  • 3 to 4 tbsp (45-60 ml) milk as needed for glaze consistency

Equipment

  • Stand Mixer with paddle and dough hook
  • Mixing bowls
  • Rolling Pin
  • Doughnut Cutter or Cookie & Shot Glass
  • Baking Sheet and Parchment Paper
  • Wire rack
  • Slotted spoon
  • Heavy Pot or Dutch Oven
  • Thermometer
  • Whisk

Instructions
 

  1. Activate the yeast: In your mixer bowl, combine the warm water and instant yeast. Let stand for about 5 minutes, until foamy on top.
  2. Warm the milk: Heat milk in the microwave or stovetop until just warm (not hot to the touch), then let cool briefly.
  3. Mix the dough: Add the warm milk, sugar, salt, eggs, softened butter, and 2 cups of flour to the yeast mixture. Using your stand mixer’s paddle attachment, mix until smooth and combined.
  4. Knead: Switch to the dough hook and gradually add remaining flour. Knead on medium speed for 5–7 minutes. The dough should be soft and just a bit tacky, but not wet or very sticky—add extra flour a tablespoon at a time as needed.
  5. First rise: Transfer dough to a lightly oiled bowl, flip to coat, and cover loosely. Let rise in a warm spot until doubled in size, about 1 to 2 hours.
  6. Roll and cut: On a well-floured surface, roll the dough out to 1/4-inch thickness. Use a doughnut cutter or two round cutters to make doughnuts and holes. Re-roll scraps and continue cutting.
  7. Second rise: Place cut doughnuts and holes on parchment-lined baking sheets. Cover loosely and let rise for 10–15 minutes, just until puffed.
  8. Fry: Heat oil in a large, heavy pot to 375°F (190°C). Fry doughnuts in batches 1–2 minutes per side, until golden. Fry doughnut holes 1 minute or less. Drain on paper towels or wire racks.
  9. Glaze: Whisk together confectioners’ sugar, vanilla, and 3–4 tablespoons milk until smooth. Adjust milk for desired consistency.
  10. Dip: While doughnuts are still warm, dip tops into glaze. Let excess drip, then set on a wire rack for the glaze to set slightly.
  11. Enjoy immediately for the fluffiest texture!

Notes

Fresh is best! Store leftovers in an airtight container at room temp up to 2 days, or freeze unglazed doughnuts and reheat before glazing.
Try swapping all-purpose flour for bread flour for more chew, or infuse the glaze with lemon zest, cinnamon, or espresso powder for a fun twist. Fill doughnuts with jam or pastry cream by skipping the hole.
For baking: bake at 375°F for 8–10 minutes for a lighter texture. See FAQ for yeast and rising tips.

Nutrition

Calories: 235kcal | Carbohydrates: 38g | Protein: 4g | Fat: 7g | Saturated Fat: 2g | Cholesterol: 29mg | Sodium: 168mg | Potassium: 55mg | Fiber: 1g | Sugar: 14g | Vitamin A: 105IU | Calcium: 24mg | Iron: 1.6mg

Creamy, melty, and full of cozy, savory goodness, these cheesy ranch potatoes bake up with crispy bacon, sharp cheddar, and that ranchy tang everyone quietly loves. With just spiced-up dressing, hearty russets, and golden melted cheese, this dish smells like comfort and tastes like “I need seconds.”

This, my friend, is not a dainty side. It’s a fork-it-right-from-the-skillet, call-it-dinner-if-you-want-to situation. We’ve got the soft bite of perfectly cooked potatoes, a dreamy ranch-sour cream swirl, melty cheddar pooling in the corners, and crispy bacon crumbles that add the salty crunch every good dish deserves.

Table of Contents

Cheesy Ranch Potato Bake

Why You’ll Love this Cheesy Ranch Potato Bake

No fluff here—just creamy, cheesy, bacon-sprinkled satisfaction with every forkful. This bake doesn’t ask for much but delivers hard in the taste department.

  • Ridiculously simple to make: You just boil, stir, bake, sprinkle, and try not to eat it straight from the oven.
  • It’s wildly cozy: Perfect for chilly evenings or days when carbs feel like medicine.
  • Crowd-friendly but not fussy: Works for a party spread or a Wednesday dinner when you’re out of ideas.
  • Bacon and cheddar? Come on: They’re layered in all the right spots—gooey pockets inside, crispy bits on top.
  • Custom vibes welcome: Easy to tweak with different cheeses, herbs, or spice if you’re feeling fancy.
  • Leftovers heat up like a dream: Dare I say… even better the next day?

Cheesy Ranch Potato Bake

Ingredient Notes

Let’s talk about what makes this dish actually sing. A few pantry primaries, a couple fresh toppings, and we’re golden—literally.

  • Russet potatoes: Their fluffy centers make them ideal for soaking up the ranchy, cheesy sauce. Peel them or don’t; I’m not judging.
  • Ranch dressing: Use your fave bottled brand or homemade, but make sure it’s thick and creamy (runny ranch = sad sauce).
  • Sour cream: This adds a cool tangy depth and softens the ranch. Greek yogurt could sub in a pinch.
  • Shredded cheddar cheese: Sharp cheddar melts like a dream and adds salty richness. Pre-shredded is fine, but shredding your own gives a nicer melt.
  • Seasoning blend (salt, garlic powder, onion powder, smoked paprika, pepper): These amp up all the flavors so the potatoes don’t just taste like plain mashed promise.
  • Bacon: Crispy, salty, savory bacon crumbled over bubbling cheese… Just trust the process.
  • Fresh parsley: Technically optional, but a bit of green sass never hurt anyone (and it looks pretty next to all that golden cheese).

Cheesy Ranch Potato Bake

How To Make This Cheesy Ranch Potato Bake

Heads up—it’s more mix-and-bake than a proper “recipe.” Which is all the more reason to make it tonight.

  • Prep the potatoes: Dice your russets into half-inch cubes and toss them into a big pot. Cover with cold water and a good salt pinch. Boil until just tender—about 8 minutes—then drain. Don’t overdo it here, or you’ll end up with mashed potato casserole (unless that’s your endgame, in which case, godspeed).

  • Stir up the sauce: In a large bowl, whisk together ranch, sour cream, half of the cheddar, and all the seasonings until smooth and slightly dreamy. It should smell sharp and herby with a touch of smoke from the paprika.

  • Combine and bake (round one): Toss the warm, drained potatoes into your saucy mixture. Gently stir to coat every single cube, then spread the whole mess into a greased skillet or a 9×13 baking dish. Pop it into a 400°F oven and let it bubble happily for about 15 to 20 minutes.

  • Bacon time: While that’s happening, fry up your bacon until gloriously crisp. Drain and crumble once it’s cool enough to handle (or accidentally eat a few pieces while “testing”).

  • Final cheese layer and bake (round two): Remove the potatoes from the oven, sprinkle on the remaining cheddar and your bacon crumbles. Return to the oven for another few minutes—just until the cheese is fully melted and looking verifiably golden.

  • Serve it up: Finish with a sprinkle of chopped parsley (sprinkle, not dump) and serve it while it’s still bubbling-hot and irresistible.

Cheesy Ranch Potato Bake

Storage Options

Let’s be honest—you might not have leftovers. But if you do, rest easy. This bake keeps like a dream.

Store any extras in an airtight container and refrigerate for up to four days. It reheats well in both the microwave and oven. If you’re going microwave, just cover it with a damp paper towel so it doesn’t get rubbery. Want to crisp up the topping again? Oven’s your friend. 350°F for 10-ish minutes does the trick.

Freezing? Technically yes, although dairy-heavy dishes can get a bit finicky. If you freeze it, wrap tight and freeze up to a month. Reheat straight from frozen in the oven, covered at first to warm it through, then uncovered to let the top crisp up again. Label it or it’ll become “What Is This Mystery Tupperware?” by next Thursday.

Variations and Substitutions

Just because this is the “cheesy ranch classic” doesn’t mean you can’t go rogue. Here are some genuinely solid riff ideas.

  • Greek Yogurt instead of sour cream: It keeps things tangy and creamy, just a bit lighter. Choose full-fat if you want to stay close to the original vibe.

  • Different cheeses: Try pepper jack for spice or smoked gouda for, well, smoky drama. A sprinkle of parm on top works too.

  • Add veggies: Diced red bell pepper or green onion stir-ins bring freshness. Even frozen corn adds a sweet pop that plays well with ranch.

  • Go meat-free: Skip the bacon and stir in sautéed mushrooms for a savory swap. Or just double the cheese and call it a lifestyle.

  • Spice it up: Add diced pickled jalapeños or a shake of hot sauce into the mix if you like a little heat tucked into your comfort carbs.

Cheesy Ranch Potato Bake

What to Serve with Cheesy Ranch Potato Bake

This dish can absolutely stand on its own, but it also plays nice with others. Here’s what I love pairing it with.

  • A simple crisp salad: Think romaine, cherry tomatoes, cucumbers, and a zippy vinaigrette. Something light is a good call when your main dish is positively oozing cheese and bacon.

  • Juicy main meats: It’s especially dreamy alongside roasted chicken or pork. If you’re looking for a next-level pairing, this crispy pork schnitzel brings crunchy contrast and a German beer hall kind of energy.

  • Skillet greens: Garlicky spinach or sautéed rainbow chard would be lovely and bring much-needed balance. Or if you’re fancy, try this pan-seared cod with chard for a legit dinner moment.

  • A fried egg (yes, really): Pop one right on top and tell me it’s not the best brunchy-leftover magic ever.

  • Tangy pickles or slaw: That zippy sharp snap cuts straight through all the creaminess. You’ll thank me later.

Cheesy Ranch Potato Bake

Frequently Asked Questions

Can I make this cheesy ranch potato bake ahead of time?

Absolutely! You can prep and assemble the dish up to the stage before baking, then cover and refrigerate it for up to 24 hours. Just let it sit out for 20 to 30 minutes before popping it in the oven so it’s not ice-cold going in. Add about 5 extra minutes to the initial bake if you’re starting chilled.

Is there a way to make this a full meal?

Sure is. You can stir in shredded rotisserie chicken or browned sausage before baking for some protein heft. Add a handful of steamed broccoli or spinach if you want a one-dish situation with a vegetable—yes, it still counts even if it’s hidden under cheese.

Can I use frozen potatoes instead of fresh?

You can, though I recommend thawing them first and patting them dry. Frozen diced potatoes work in a pinch. Just know they might be a bit softer, so stir gently when mixing to avoid turning it into mash. Still tasty, though.

Can I double this recipe for a crowd?

Definitely! Just use a larger baking dish or two smaller ones, and you’re good to go. Keep an eye on baking time—it might need 5 to 10 extra minutes depending on how deep it’s layered up. The most important thing is getting bubbly cheese and perfectly golden bacon.

Cheesy Ranch Potato Bake

Cheesy Ranch Potato Bake

Prep Time 15 minutes
Cook Time 35 minutes
Total Time 50 minutes
Creamy, cheesy, bacon-sprinkled satisfaction in every forkful! This Cheesy Ranch Potato Bake combines crispy bacon, sharp cheddar, ranch dressing, and tender russet potatoes for the ultimate cozy comfort food. Ridiculously simple to make, easy to customize, and always a crowd-pleaser.
6 servings

Ingredients

Potatoes & Base

  • 2.5 lb (1.13 kg) russet potatoes diced into 1/2-inch cubes
  • 1 salt for boiling potatoes

Creamy Ranch Sauce

  • 1 cup (240 ml) ranch dressing thick and creamy
  • 1 cup (240 ml) sour cream
  • 2 cups (200 g) sharp cheddar cheese shredded, divided
  • 1 tsp salt or to taste
  • 1 tsp garlic powder
  • 1 tsp onion powder
  • 1 tsp smoked paprika
  • 0.5 tsp black pepper freshly ground

Toppings

  • 6 slices (6) bacon cooked and crumbled
  • 2 tbsp (8 g) fresh parsley chopped, for garnish (optional)

Equipment

  • Large pot
  • Large mixing bowl
  • Skillet or 9x13 inch baking dish
  • Frying pan
  • Oven

Instructions
 

  1. Preheat your oven to 400°F (200°C).
  2. Boil the potatoes: Place diced potatoes in a large pot, cover with cold water, and add a generous pinch of salt. Bring to a boil, then simmer for about 8 minutes, or until just fork-tender. Drain well.
  3. Mix the sauce: In a large bowl, whisk together ranch dressing, sour cream, HALF of the cheddar cheese (1 cup), salt, garlic powder, onion powder, smoked paprika, and pepper until smooth.
  4. Combine: Gently fold the drained potatoes into the sauce mixture until every piece is coated.
  5. First bake: Spread the mixture into a greased skillet or 9x13 inch baking dish. Bake for 15–20 minutes, until bubbling around the edges.
  6. Make the bacon: Meanwhile, fry the bacon in a skillet until crispy. Let cool slightly, then crumble.
  7. Final cheese and bake: Remove the pan from the oven, sprinkle over remaining cheddar cheese and the bacon crumbles. Return to oven for another 5–7 minutes, until the cheese is fully melted and golden.
  8. Serve: Sprinkle with chopped parsley, serve immediately while bubbly and hot.

Notes

You can prep this dish ahead and refrigerate (unbaked, covered) for up to 24 hours—just add 5 minutes to the bake time if starting cold. Store leftovers up to 4 days in the fridge in an airtight container. For best reheating results, use oven or microwave with a damp paper towel to maintain creaminess.
  • Substitute Greek yogurt for sour cream for a lighter version.
  • Try smoked gouda or pepper jack for a flavor twist.
  • To make vegetarian, swap bacon for sautéed mushrooms (or skip).
  • Add diced peppers, corn, or green onions for fresh pops of flavor.
  • Frozen, thawed diced potatoes work in a pinch, but stir gently so they don’t mash.

Nutrition

Calories: 390kcal | Carbohydrates: 36g | Protein: 13g | Fat: 22g | Saturated Fat: 10g | Cholesterol: 48mg | Sodium: 700mg | Potassium: 870mg | Fiber: 3g | Sugar: 3g | Vitamin A: 600IU | Vitamin C: 17mg | Calcium: 250mg | Iron: 2.2mg

Tender chicken browned to perfection, kissed with garlicky sweetness and soy-savory magic—this honey garlic chicken comes together with just chicken, garlic, honey, and a few pantry staples. That sticky glaze? Yeah, it’s gonna steal the show.

Imagine cozying up with a plate that smells like a warm, garlicky hug collided with the best part of takeout. This honey garlic chicken situation is one of those dinners you whip up on autopilot once you learn it. The chicken’s got that golden crust, the sauce is glossy and sweet (but not cloying), and everything just sort of melts together in the pan like one big edible team hug.

You’ll hear the sizzle, smell the garlic, slyly “taste-test” the sauce with a spoon (or okay, three). It’s the kind of weeknight miracle that doesn’t feel like work but tastes like you didn’t phone it in.

Table of Contents

Honey Garlic Chicken Recipe

Why You’ll Love this Honey Garlic Chicken

No drama here, just a friendly chicken recipe that does what it promises: sweet, sticky, garlicky goodness in under 30. It’s fast. It smells amazing. It goes with basically anything. Win-win-win.

  • Ridiculously simple to make: You pat, season, dredge, and let the skillet work some magic while you hover, inhaling deeply.
  • That sweet-savory balance: Honey meets garlic, vinegar, and soy in a sauce that’s glossy, balanced, and totally spoon-lickable.
  • Flexible AF: Chicken breasts or thighs, rice vinegar or apple cider—she’s not picky.
  • Better than takeout: But without the mystery oil or waiting 49 minutes because “Kevin just left the restaurant!”
  • Kid-friendly but adult-approved: It’s sweet enough for picky eaters but has enough garlic for grown-ups to feel fancy.
  • Absolutely weeknight-worthy: From fridge to table in about 25 minutes, plus leftovers reheat like a dream.

Honey Garlic Chicken Recipe

Ingredient Notes

Let’s peek into the pantries. Nothing wild here—you probably have half of this already hanging out.

  • Boneless chicken breasts or thighs: Go with what you love. Thighs are juicier and a little more forgiving, but breasts work beautifully too.
  • Salt, pepper, garlic powder: A basic trio that gets the chicken started off right. Garlic powder’s optional, but nice for a little extra oomph.
  • All-purpose flour or cornstarch: Helps give the chicken that lightly crisped coating and helps the sauce cling like a stage-five clinger (in a good way).
  • Honey: This is where the sweet part of “honey garlic” shows up. Floral-y, sticky, cozy vibes.
  • Chicken stock: Adds savory depth to the sauce so it’s not just sweet on sweet.
  • Soy sauce: For umami vibes and a bit of salinity. Even the low-sodium stuff works just fine.
  • Rice vinegar (or apple cider vinegar): Brings brightness to balance the honey. It’s subtle, but if you skip it, you’ll notice.
  • Fresh garlic (4 cloves, hello): This recipe doesn’t hold back. Mince it fine for maximum flavor in the glaze.
  • Olive oil + butter: A mix of both gives us richness and browning power when it’s time to sear.
  • Optional garnishes: Green onions slice through the sweetness, sesame seeds add crunch, and red pepper flakes bring a little kick if you’re into spice.

Honey Garlic Chicken Recipe

How To Make This Honey Garlic Chicken

Okay, let’s bring this beauty to life. Nothing fussy here. One pan, one sauce, one delicious mess by the end.

  • Season and dredge the chicken: Pat those chicken pieces dry. Nobody likes a soggy sear. Sprinkle both sides with salt, pepper, and garlic powder (if you’re using it), then give them a light flour or cornstarch bath. Shake off the extra—you want a whisper, not a whole tuxedo.

  • Whisk the sauce ingredients: In a small bowl or measuring cup (I always go measuring cup—it pours better!), whisk together your honey, stock, soy sauce, vinegar, and that glorious minced garlic. Set it nearby, because things move fast once the skillet’s hot.

  • Sear the chicken in a big skillet: Heat your olive oil over medium-high heat until it’s shimmering. Add the floured chicken pieces and let them sizzle away, about 4 to 5 minutes per side. You’re going for golden brown deliciousness.

  • Pour in the sauce and reduce: Turn the heat down to medium-low so the sauce doesn’t boil away on impact. Pour that whisked honey-garlic combo all over the chicken, add the butter, and gently shimmy the pan so everything gets coated in that glorious glaze.

  • Simmer until sticky and perfect: Let the sauce bubble gently, flipping the chicken now and then. After about 3 to 5 minutes, it should thicken into a shiny, sticky hug around each piece. Internal temp should hit 165°F before you pull them.

  • Garnish and serve: Spoon extra sauce over the top, then go wild with green onions, sesame seeds, or a cheeky sprinkle of red pepper flakes. Serve hot and bask in your pan sauce glory.

Honey Garlic Chicken Recipe

Storage Options

So you didn’t eat it all in one sitting? Honestly, impressive. Here’s how to save your leftovers without losing that sticky charm.

Pop cooled chicken into an airtight container and stick it in the fridge. It’ll keep happily for about 4 days. The sauce may thicken up, but it’s still dreamy once warmed.

If you’re thinking long game, yes, you can totally freeze it. Make sure it’s cooled fully first, then tuck into freezer-safe containers or a big ol’ zip-top bag. Squeeze out the air and freeze for up to 2 months. Thaw overnight in the fridge before going any further.

Reheating? You’ve got two solid options. For best texture, reheat in a skillet over low heat with a splash of water or chicken stock to loosen the sauce. Microwave works too, just cover it so nothing splatters and zap in short bursts.

Variations and Substitutions

This recipe is flexible enough to handle whatever’s in your fridge or pantry. Don’t stress substitutions—let’s make it work.

  • Chicken thighs instead of breasts: They’re extra juicy and hard to overcook, especially with all that sticky sauce to bathe in.
  • Gluten-free option: Swap that all-purpose flour with cornstarch or a 1:1 gluten-free mix. It crisps just fine and clings like a champ.
  • Swap the vinegar: No rice vinegar? Apple cider vinegar steps in easily. White wine vinegar also works, with just a smidge more tang.
  • Dash of heat: Red pepper flakes stirred directly into the glaze add a little punch without overpowering the sweet garlic vibe.
  • Jazz up the sauce: Try adding fresh minced ginger or a bit of hoisin or gochujang for a twist that takes it down the Hunan chicken road.

Honey Garlic Chicken Recipe

What to Serve with Honey Garlic Chicken

A glossy main like this needs something solid (and maybe a little simple) to soak up that honey-garlic goodness. Here’s how to round it out.

  • Steamed jasmine or basmati rice: Nothing tricky here, just fluffy rice doing what it does best—soaking in sauce. A little sesame oil drizzle on top doesn’t hurt either. Or if you’re going low-carb, cauliflower rice totally works.

  • Noodles (soba, ramen, or egg): Toss them in a bowl and spoon extra sauce over the top. Boom. Suddenly you’re eating like it’s Friday night and payday. Throw in edamame or bok choy if you’re feeling green.

  • Roasted or steamed broccoli: It drinks up that glaze like it knows something we don’t. The lil crispy bits? My favorite. Pro tip: toss it under the broiler for the final two minutes.

  • Simple stir-fried veggies: Snap peas, carrots, bell peppers, and a splash of soy. Easy and done. Want another fun option? Try it alongside these garlic parmesan chicken bites for a two-chicken sitch.

  • Crispy potatoes or sweet potato wedges: Not traditional, but extremely what I want when I need grounding carbs. Toss ’em in the oven while the chicken’s doing its thing.

Honey Garlic Chicken Recipe

Frequently Asked Questions

Can I use frozen chicken for this recipe?

Technically yes, but I’d highly recommend thawing it first. Frozen chicken won’t sear properly (hello, extra moisture), and the texture can stay rubbery in the center. Let it thaw overnight in the fridge or use the cold water method if you’re in a pinch. And always pat it dry before dredging.

Can I make the sauce ahead of time?

Absolutely! Whisk it all together and store it in a jar in the fridge. It’ll keep for about a week. Just give it a good shake or stir right before using since the honey can settle a bit at the bottom. Nothing a quick whisk won’t fix.

Is this dish spicy?

Not by default. It leans sweet-savory, not spicy. But if you like a little heat (hi, me too), just add red pepper flakes to the sauce or as a garnish. You can even sneak in a dash of sriracha if you’re feeling bold. Totally optional but fun!

Can I bake the chicken instead of cooking it on the stovetop?

Yes, with a small adjustment. Dredge and season the chicken as written, then bake at 400°F for about 20–25 minutes, flipping once. While that’s in the oven, simmer the sauce separately on the stove until glossy and thick. Pour it over the baked chicken before serving. Still tasty, but no skillet sizzle.

Honey Garlic Chicken Recipe

Honey Garlic Chicken

Prep Time 10 minutes
Cook Time 15 minutes
Total Time 25 minutes
Tender chicken browned to perfection, kissed with garlicky sweetness and soy-savory magic—this honey garlic chicken is a weeknight classic featuring juicy chicken, a sticky, glossy glaze, and deeply satisfying flavor with just a handful of basic pantry ingredients.
4 servings

Ingredients

For the Chicken

  • 1.5-2 lbs (700-900 g) boneless skinless chicken breasts or thighs cut into pieces or left whole, as preferred
  • 1 tsp kosher salt
  • 0.5 tsp black pepper
  • 0.5 tsp garlic powder optional
  • 1/3 cup (40 g) all-purpose flour or cornstarch for dredging
  • 2 tbsp (30 ml) olive oil

For the Honey Garlic Sauce

  • 1/3 cup (110 g) honey
  • 1/4 cup (60 ml) chicken stock
  • 3 tbsp (45 ml) soy sauce regular or low sodium
  • 1.5 tbsp (22 ml) rice vinegar or apple cider vinegar
  • 4 cloves garlic minced
  • 2 tbsp (28 g) unsalted butter

Optional Garnishes

  • sliced green onions
  • toasted sesame seeds
  • red pepper flakes optional, for heat

Equipment

  • Large skillet
  • Measuring cup
  • Mixing bowl
  • Tongs or spatula

Instructions
 

  1. Season and dredge the chicken: Pat chicken pieces dry. Season both sides with salt, pepper, and garlic powder, if using. Lightly dredge in flour or cornstarch, shaking off excess.
  2. Whisk the sauce: In a measuring cup or small bowl, whisk together honey, chicken stock, soy sauce, vinegar, and minced garlic. Set aside.
  3. Sear the chicken: Heat olive oil in a large skillet over medium-high. Add chicken and cook 4–5 minutes per side, until golden brown and mostly cooked through.
  4. Pour in the sauce & reduce: Lower heat to medium-low. Pour in the prepared sauce and add butter. Let sauce bubble gently, flipping chicken once or twice, until thickened and glossy, about 3–5 minutes. Chicken should reach 165°F internally.
  5. Garnish & serve: Spoon extra sauce over the chicken, top with green onions, sesame seeds, and/or red pepper flakes if desired. Enjoy hot!

Notes

Swap flour for cornstarch to keep this gluten-free. Chicken thighs stay extra juicy. Leftovers reheat beautifully—just add a splash of water or stock when reheating. Try adding ginger or a splash of hoisin for fun variations.

Nutrition

Calories: 365kcal | Carbohydrates: 27g | Protein: 32g | Fat: 13g | Saturated Fat: 4g | Cholesterol: 94mg | Sodium: 895mg | Potassium: 480mg | Sugar: 17g | Vitamin A: 210IU | Vitamin C: 1mg | Calcium: 23mg | Iron: 1.2mg

Golden, buttery, and smelling absolutely unreal, these garlic parmesan chicken bites come together with juicy chicken, fresh garlic, parsley, and melty parmesan bliss. They’re crispy on the edges, tender inside, and swoon-worthy straight from the skillet.

Warning: they may never make it to the table. I basically hovered over the stove with a fork, saying I was “taste testing.” We all know that’s a fib.

These garlicky, cheesy nuggets of joy are my kind of magic: no breading, no oven, just a skillet and a few pantry staples joining forces to taste like a fancy weeknight reward. The garlic isn’t shy here (in the best way), and the parmesan clings to every golden-brown bite in a buttery, salty hug. They’re excellent served with almost anything—piled on pasta, nestled next to a salad, snuck cold from the fridge (not that I’ve done that).

Table of Contents

Crispy Garlic Parmesan Chicken Bites

Why You’ll Love this Garlic Parmesan Chicken Bites Recipe

These are one of those “accidentally fancy” recipes, where you look like you tried hard… but didn’t. I love that kind of energy.

  • Ridiculously simple to make: You just sizzle, stir, melt, and sprinkle. No dredging, no deep frying, no drama.
  • Fast enough for a weeknight: From chicken-chopping to mouth-popping in under 30 minutes.
  • Butter + garlic + cheese = no explanation needed: The smell alone is enough to summon hungry people from other rooms.
  • Totally dinner-flexible: Toss them into a grain bowl, stuff them in wraps, or pile them next to rice. Options!
  • Kid-friendly and adult-approved: Soft textures, bold (but not spicy) flavor, and zero mystery ingredients.
  • Leftovers are a snack gift from the universe: Cold or warm, they still taste like victory.

Crispy Garlic Parmesan Chicken Bites

Ingredient Notes

Not many ingredients here, but each one matters. A few tweaks can totally transform the vibe too.

  • Chicken thighs or breasts: Thighs stay juicier, especially in a skillet, but breasts work beautifully if that’s what you have. Just don’t overcook them.
  • Garlic powder: This flavors the chicken before it even hits the pan. It’s like a dry spice rub’s lazier cousin.
  • Salt and pepper: Classic, predictable, but without them you’d taste nothing. Don’t skimp.
  • Unsalted butter: It brings rich flavor without making things too salty (that’s parmesan’s job).
  • Fresh garlic: Adds real fragrance and that “wait, what’s that amazing smell?” moment when it hits the hot butter.
  • Parmesan cheese: Grate it fresh if you can. The pre-grated stuff doesn’t melt the same and usually has added starch.
  • Fresh parsley: A little green for freshness and pop—it’s optional, but nice for presentation and just a teensy brightness.

Crispy Garlic Parmesan Chicken Bites

How To Make This Garlic Parmesan Chicken Bites Recipe

Okay, ready? Grab a big ol’ skillet and a spatula. This recipe moves fast, but it doesn’t ask for perfection—just attention and maybe some good music in the background.

  • Season the chicken: Toss your chicken pieces with garlic powder, salt, and black pepper in a big bowl. Get in there with your hands or a spoon, but make sure it’s all coated evenly. This step smells like the start of something very, very good.

  • Cook the first batch of chicken: Melt 2 tablespoons of butter in a large skillet over medium heat. Lay in half the chicken pieces in a single layer (important for browning). Let them sit there for 4 minutes. Don’t mess with them. They’re crisping up! Then flip, cook 2 more minutes until they’re golden and cooked through, and move them to a plate.

  • Cook the rest: Add another tablespoon of butter, then repeat the process with the rest of the chicken. If you cram the pan, the sear won’t happen and we want that sear.

  • Sauté the garlic: Turn the heat to low. Add your last tablespoon of butter (yes, it’s worth it), and stir in the minced garlic. Let it sizzle gently for a minute until fragrant, but not browned. Keep your nose tuned in—it should smell rich, mellow, and almost nutty.

  • Bring it all together: Return the cooked chicken and any juices to the pan. Toss everything through the garlic butter like you’re coating nuggets of gold. Take it off the heat.

  • Add parmesan and finish: Immediately shower it with grated parmesan and stir while it melts and clings to every piece. Finish with fresh parsley and maybe another pinch of cheese if you’re feeling extra.

Crispy Garlic Parmesan Chicken Bites

Storage Options

These little delights actually store pretty well, which kind of surprised me the first time. You’d think all that butter and cheese would make things weird, but nope!

Pop any leftover garlic parmesan chicken bites into an airtight container and refrigerate them for up to 4 days. Just reheat them gently in a skillet over medium-low, with a tiny pat of butter or a splash of water if they seem dry. They crisp up a bit when reheated, which is honestly a bonus.

Freezer? Yep, you can. Let the chicken bites cool completely, then freeze them on a lined tray until solid. Once frozen, toss them into a zippered bag or container, and they’ll stay good for about 2 months. Reheat right in the skillet from frozen or thaw overnight for best results. They do best re-crisped in a pan rather than microwaved.

Variations and Substitutions

This dish plays well with tweaks. A few easy swaps and flavor twists can put a whole new spin on it.

  • Use lemon zest instead of parsley: Add a bit of brightness by skipping parsley and finishing with fresh lemon zest instead. It’s subtle but refreshing.
  • Try shredded Asiago or Romano: Not a Parmesan loyalist? Other hard cheeses work, just make sure they’re finely grated and salty-savory.
  • Add chili flakes or hot paprika: If you want a gentle kick, a sprinkle of chili flakes in the garlic butter stage does wonders.
  • Sub olive oil for some of the butter: Want it a hair lighter? Use half olive oil, half butter. It’ll still be rich but less creamy.
  • Go herb-crazy: Toss in chopped thyme, oregano, or even a little rosemary with the garlic. It adds a rustic, woodsy vibe.
  • Make it saucy: Stir in a splash of cream or chicken broth just before adding the cheese for a slightly creamy glaze.

Crispy Garlic Parmesan Chicken Bites

What to Serve with Garlic Parmesan Chicken Bites

These are wonderfully open-minded when it comes to sidekicks. Whether you’re keeping it light or going full comfort, there’s room to play.

  • For a cozy classic combo, pile the chicken bites over hot buttered noodles. I like linguine or orzo. Toss it all with a splash of pasta water and a few extra gratings of parmesan. Velvety perfection.

  • A fresh green salad is a great anchor here. Something crisp with sharp vinaigrette to contrast the richness. Add shaved fennel or apples if you’re fancy; otherwise, romaine and vinaigrette totally win.

  • Wanna go starchy without pasta? Rice is great. Jasmine rice or even seasoned cauliflower rice (I know, I know) catch all the buttery bits at the bottom of the plate.

  • If you’re into handhelds, stuff these in slider buns with arugula and a swipe of aioli. Almost like buffalo sliders, just cheese-forward instead of spicy.

  • For a veggie moment, roast up some broccoli or brussels sprouts while the chicken cooks. Toss ’em in any leftover garlic butter from the pan for an easy win.

Crispy Garlic Parmesan Chicken Bites

Frequently Asked Questions

Can I use chicken breasts instead of thighs?

Absolutely, chicken breasts work great in garlic parmesan chicken bites, just make sure not to overcook them. They dry out faster than thighs, so keep an eye especially in the second batch. And yes, slice them into even pieces so they cook at the same speed.

Can I make this ahead of time?

You sure can. The bites reheat well and stay flavorful thanks to all that garlicky butter and parmesan. Store them in the fridge, and when you’re ready to serve, pop them in a skillet over medium heat with a splash of water or butter to revive the sauciness. I wouldn’t recommend making them more than two days in advance for best texture.

Is it okay to freeze the cooked chicken bites?

Yes! Let them cool completely first, then freeze them in a single layer. Once frozen, add them to a freezer bag or container. They’ll keep for up to 2 months. For best results, reheat them in a skillet from frozen or thaw overnight and rewarm gently with a bit of butter or broth.

What can I substitute for parsley?

If parsley isn’t your thing (I get it, it tastes green), try chopped basil, chives, or even a sprinkle of green onion tops. Or skip the herbs altogether and zest a little lemon over the top—it really brightens everything up.

Crispy Garlic Parmesan Chicken Bites

Garlic Parmesan Chicken Bites

Prep Time 10 minutes
Cook Time 15 minutes
Total Time 25 minutes
Golden, buttery, and impossibly good, these garlic parmesan chicken bites come together in one skillet with juicy chicken, loads of fresh garlic, parsley, and melty parmesan. Crispy at the edges, tender inside, and exploding with garlicky, cheesy flavor, they're weeknight magic—no breading, no oven required.
4 people

Ingredients

  • 1.5 lb (680 g) boneless skinless chicken thighs or breasts cut into 1-inch pieces
  • 1 tsp garlic powder
  • 1 tsp kosher salt plus more to taste
  • 0.5 tsp black pepper freshly ground
  • 4 tbsp (56 g) unsalted butter divided
  • 4 cloves garlic minced
  • 0.75 cup (75 g) Parmesan cheese finely grated, plus more for serving
  • 2 tbsp (8 g) fresh parsley chopped, plus more for garnish

Equipment

  • Large skillet
  • Mixing bowl
  • Spatula or tongs
  • Grater (for parmesan)

Instructions
 

  1. In a large bowl, toss the chicken pieces with garlic powder, kosher salt, and black pepper until evenly coated.
  2. Heat 2 tablespoons of butter in a large skillet over medium heat. Add half the chicken in a single layer and let cook undisturbed for 4 minutes, until golden and crisp. Flip and cook another 2 minutes, until cooked through. Transfer to a plate.
  3. Add another 1 tablespoon butter to the skillet. Repeat with remaining chicken, cooking until golden and cooked through. Transfer to the plate once done.
  4. Reduce the heat to low and add the last tablespoon of butter to the skillet. Stir in the minced garlic and cook for about 1 minute, just until fragrant but not browned.
  5. Return all cooked chicken (and any juices) to the skillet. Toss to coat pieces in the garlic butter.
  6. Remove skillet from heat. Immediately add grated Parmesan and parsley, tossing until the cheese melts and clings to the chicken.
  7. Serve immediately, garnished with more parsley and extra parmesan if desired.

Notes

For extra flavor, finish with lemon zest or sub in other hard cheeses like Romano. If using chicken breasts, don't overcook. Serve over rice, pasta, salad, or in a sandwich. Leftovers keep well—reheat in a skillet for best texture.

Nutrition

Calories: 330kcal | Carbohydrates: 2g | Protein: 32g | Fat: 22g | Saturated Fat: 10g | Cholesterol: 140mg | Sodium: 870mg | Potassium: 420mg | Vitamin A: 510IU | Vitamin C: 2mg | Calcium: 210mg | Iron: 1.2mg

Let's Get Cooking!

100+ Recipes for Busy Nights

In a time crunch? Take a look around and browse plenty of recipes to help you get dinner ready and on the table on those busy nights!

Sweet Recipes

Pumpkin Banana Muffins

Pumpkin Banana Muffins Recipe

Strawberry Pie Bars

Strawberry Pie Bars Easy Oven Recipe

White Chocolate Raspberry Muffins

White Chocolate Raspberry Muffins Recipe

Snickerdoodle Muffins

Snickerdoodle Muffins Recipe for Oven

PIN NOW

Follow KitchenetteBlog on Pinterest

Love cozy recipes that actually make it to the table? On Pinterest, I share new comfort-food ideas every week—desserts, dinners, and those little snack cravings that hit at midnight. Come pin with me and never run out of kitchen inspo.

Savory Recipes

Turkey Tetrazzini

Turkey Tetrazzini Baked Pasta Recipe

Grilled Chicken Panini Sandwich

Grilled Chicken Panini Sandwich Recipe

Sweet Potato Cornbread

Sweet Potato Cornbread Recipe Oven Baked

Classic Waldorf Salad

Waldorf Salad Simple Classic Recipe

Get 5 Recipes to Simplify Your Life!

Delicious, versatile recipes you can make over and over.