Get 5 recipes to simplify your life:

easy, delicious, real food recipes

Latest Recipes

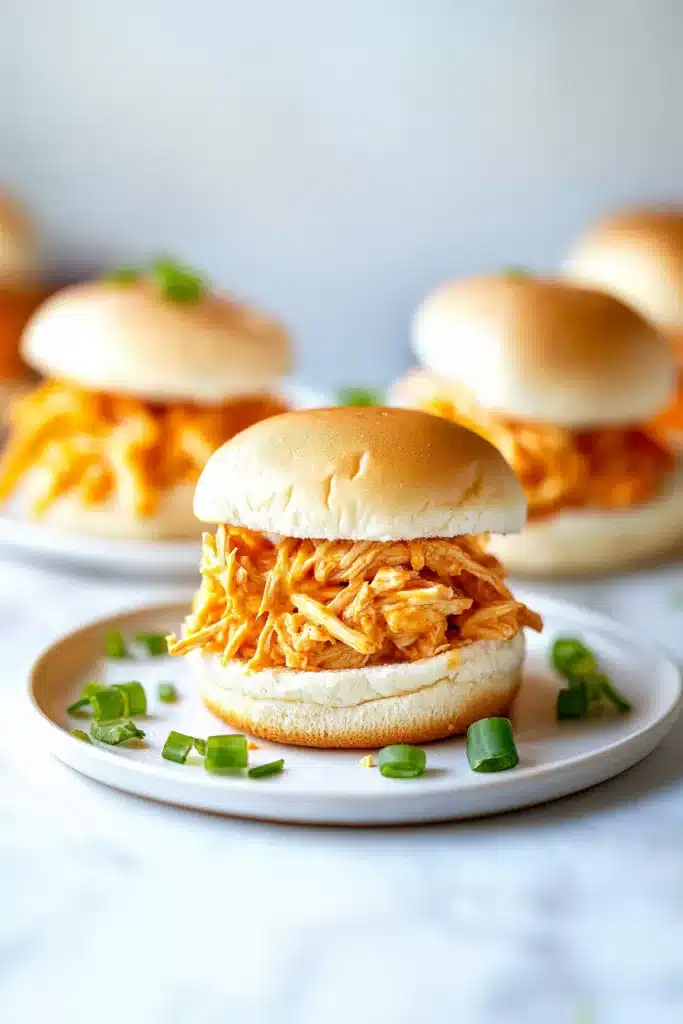
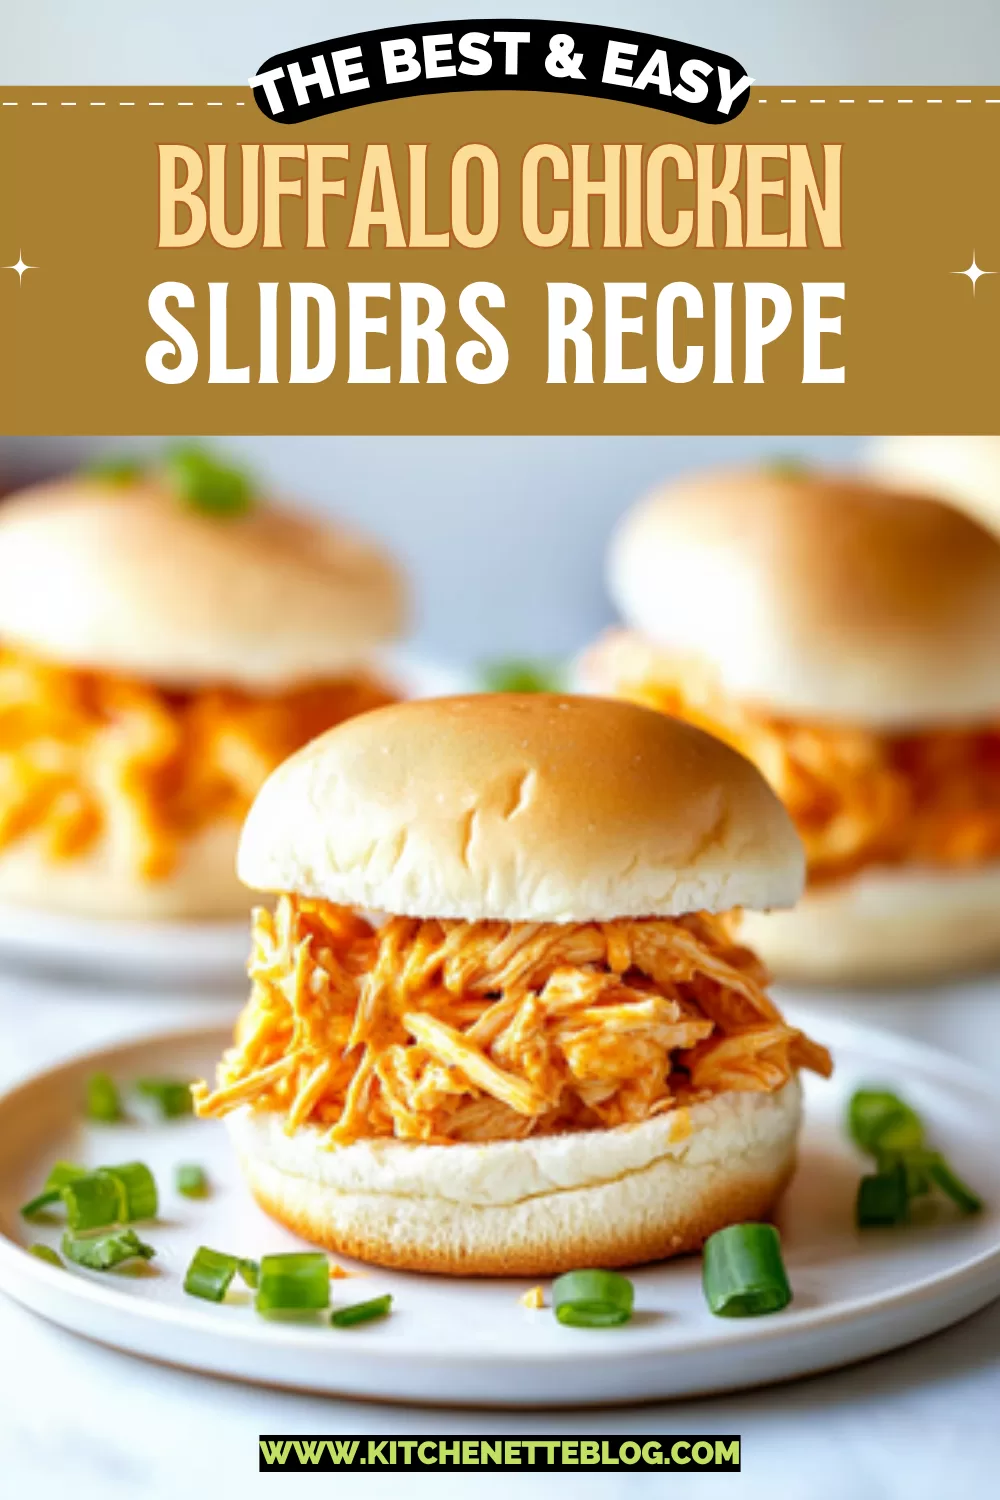
Spicy, cheesy, and buttery in all the right ways, these buffalo chicken sliders deliver big flavor from shredded chicken, buffalo sauce, ranch, and soft buns.

If you like your snacks saucy and your kitchen smelling like game day happiness, grab a napkin and let’s get into it.

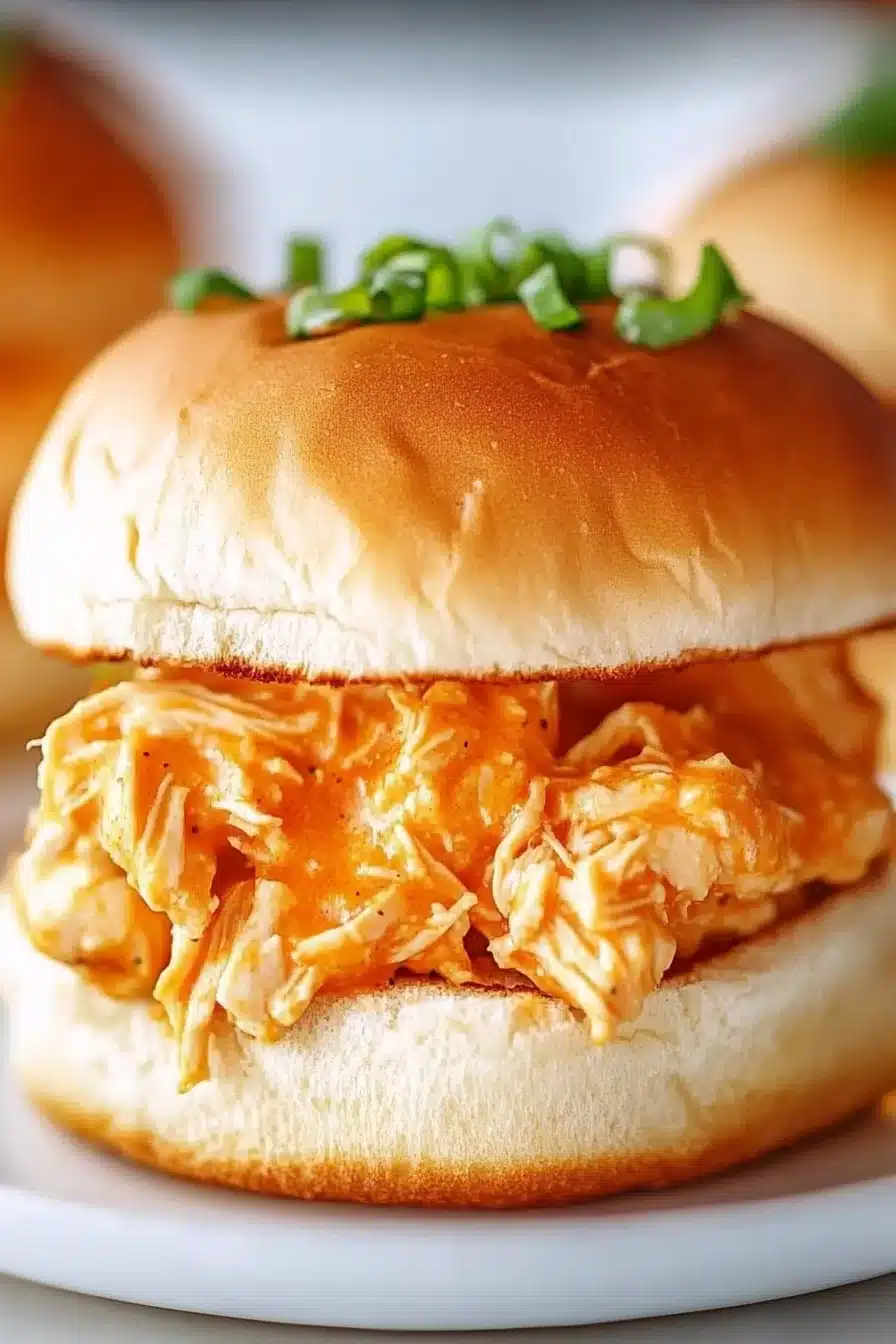
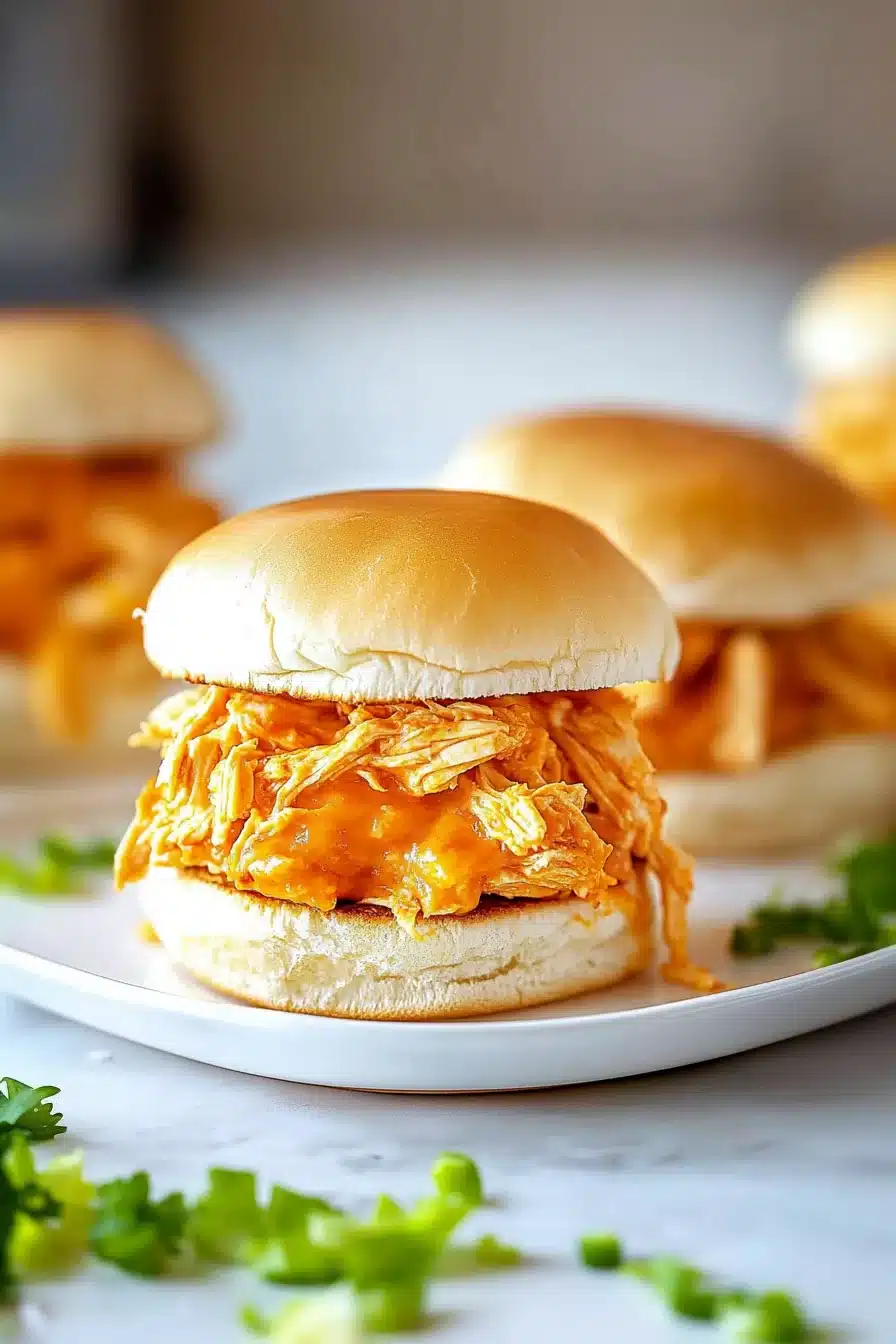
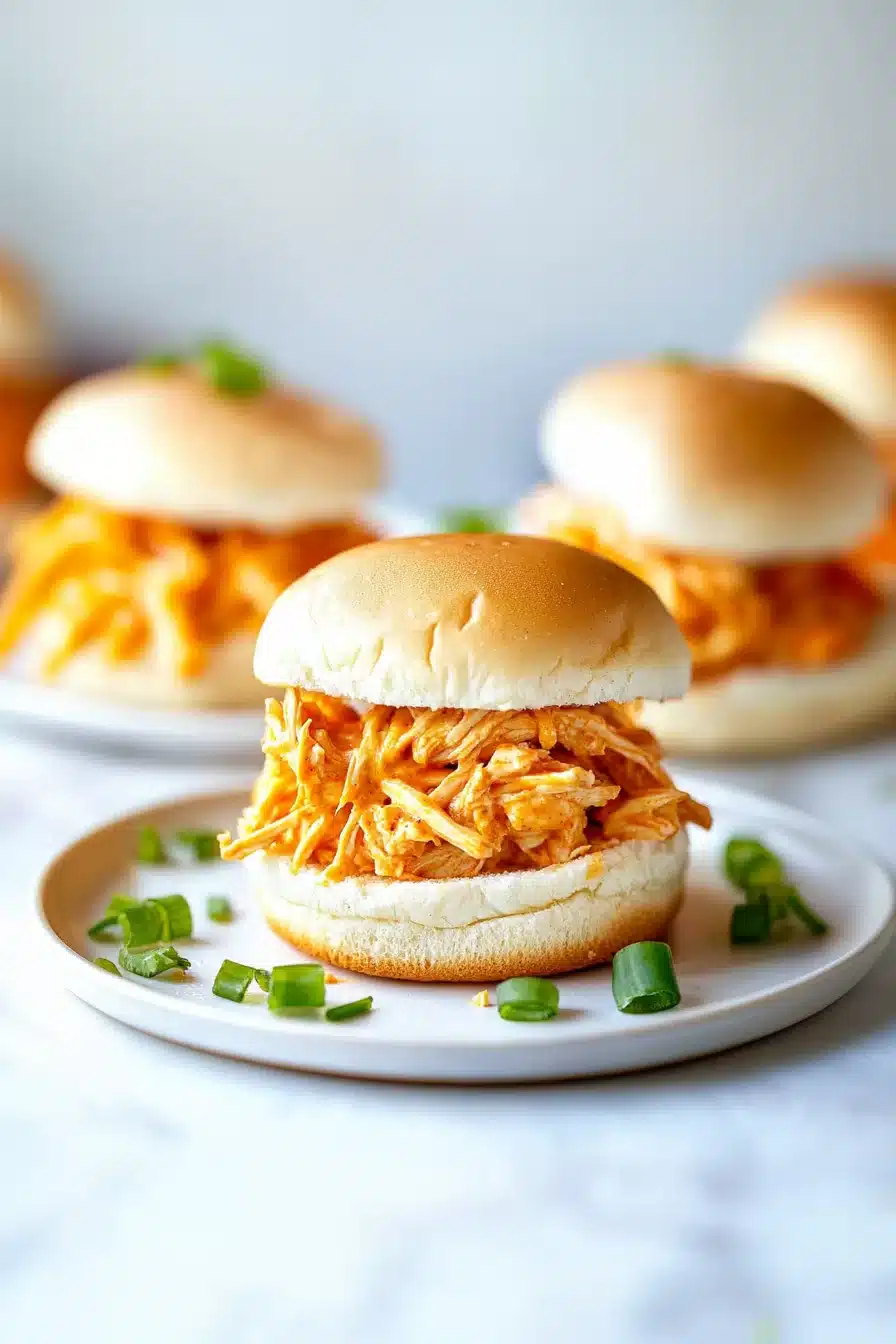
I mean, who wouldn’t want spicy, slightly tangy chicken tucked into warm slider rolls and smothered with melty cheese? These buffalo chicken sliders hit that cozy middle ground between snack and meal—perfect when you’re feeding friends, dodging dishes, or just craving something comforting with a little kick. The texture? Oozy, warm, and golden on top thanks to a buttery garlic brushing. It’s one of those recipes you casually make once and then suddenly, it’s on heavy rotation.

Table of Contents

Buffalo Chicken Sliders Recipe

Why You’ll Love this Buffalo Chicken Sliders Recipe

This one’s not trying to be fancy… but it still gets all the compliments.

  • Ridiculously simple to make: You just squish, smear, melt, and drizzle, then let the oven do its cheesy magic.
  • Great use for leftover or rotisserie chicken: One of those rare cases where being lazy pays off double.
  • Totally customizable: Add more cheese, dial up the heat, or go blue cheese instead of ranch. No one will stop you.
  • Major comfort food energy: Between the soft buns, buttery topping, and warm filling, this dish feels like a hug… but spicier.
  • Perfect party food: Game day? Backyard hang? Tuesday night that got out of hand? These travel well and reheat like champs.
  • Flavor-party in your mouth: Buffalo tang, cool ranch, and gooey cheese get along very well in these little buns.

Buffalo Chicken Sliders Recipe

Ingredient Notes

Not a long list, but each player on the team brings something tasty to the table.

  • Slider buns: Hawaiian rolls are the reigning MVP here; their sweetness balances the spicy buffalo kick. Any soft bun works in a pinch.
  • Shredded cooked chicken: Rotisserie chicken is incredibly handy (seriously, when is it not?)—but if you’ve got leftover grilled or roasted chicken, use it.
  • Buffalo sauce: I went with Frank’s RedHot, because old habits die delicious. Adjust the heat based on your crowd’s tolerance.
  • Ranch dressing: Creamy. Cool. Calms the fire a bit. If you prefer blue cheese, go rogue, I won’t tattletale.
  • Shredded mozzarella cheese: Melts like a dream, stretches in satisfying little cheese pulls, and complements the spice nicely.
  • Shredded cheddar cheese: Totally optional. Adds some sharpness and that golden orange tint if you’re into bonus flavor.
  • Unsalted butter: This is for brushing the tops so they get that glossy, golden glow.
  • Garlic powder: Just a little punch of garlicky warmth for the buttery topping. Skip it if you must, but it adds a lot.
  • Chopped parsley: Optional garnish alert! For looks more than flavor, but hey, green = ✨fancy✨.

Buffalo Chicken Sliders Recipe

How To Make This Buffalo Chicken Sliders Recipe

Let’s walk through it like we’re cooking together, because honestly, this one feels even better when shared.

  • Preheat your oven to 350°F: First thing’s first. If you forget this now, you’ll be side-eyeing your cold oven later while the cheese sulks.

  • Mix the filling: In a big ol’ bowl, stir together your shredded chicken, buffalo sauce, and ranch dressing. Give it a good mix so every bite gets equal zing and creaminess.

  • Prep the buns: Slice the slider rolls in half horizontally, like opening a little bread book. Keep the top attached as one piece if you can; it makes assembly smoother.

  • Layer up the goodness: Place the bottom half in a parchment-lined 9×13 dish. Spread your saucy chicken mixture evenly, no hoarding. Then sprinkle on that shredded mozzarella (and cheddar, if you’re feeling it).

  • Cap it off: Gently place the bun tops back on like you’re tucking them in. If some cheese peeks out the sides, even better.

  • Brush with butter: Melt the butter, stir in garlic powder, and brush it on those bun tops until they glisten. You want buttery edges and that toasty garlic smell filling the kitchen.

  • Bake it in two rounds: Cover the whole dish with foil and bake for 10 minutes. Then uncover and bake 10 more to brown the tops and melt the cheese into delicious lava.

  • Serve and devour: Sprinkle with parsley if you’re feeling a little green today, then serve warm with something cool to dip in.

Buffalo Chicken Sliders Recipe

Storage Options

Got leftovers? (Unlikely, but let’s pretend.) These sliders are pretty forgiving when it comes to storing and reheating.

Pop them into an airtight container and refrigerate for 3 to 4 days. To reheat, I recommend the oven or toaster oven—350°F for about 10 minutes works nicely. That way, the tops get crisp again and the cheese melts back into its rightful place. Microwave works in a pinch, but wrap a damp paper towel around your slider or else the bun turns rubbery faster than you can say “soggy regret.”

Thinking of freezing them? You totally can. Wrap individual sliders in foil or plastic, then stash them all in a freezer bag. They’ll be fine there for up to 2 months. To reheat, you don’t even need to thaw—just loosely wrap in foil and pop in the oven until heated through. Handy for semi-emergency snack situations. We’ve all been there.

Variations and Substitutions

No rigid rules here—these sliders are happy to play along with what you’ve got (or what you forgot to grab at the store).

  • Blue cheese instead of ranch: Great if you love that funk and wanna lean harder into the hot wing vibe.

  • Leftover turkey: Especially post-holidays, shredded turkey steps up with Buffalo sauce like it’s been training for this.

  • Add sliced jalapeños inside: For spice lovers who want to really wake up those taste buds. Your mouth, your rules.

  • Use BBQ sauce instead: OK, not technically buffalo chicken anymore, but BBQ chicken sliders? Suddenly still awesome.

  • Make them vegetarian: Swap chicken for pulled jackfruit or chickpeas mashed with buffalo sauce and ranch. Totally doable and still flavorful.

Buffalo Chicken Sliders Recipe

What to Serve with Buffalo Chicken Sliders

Once these sliders hit the table, you’re halfway to a seriously satisfying spread. Let’s keep the good vibes going.

  • Celery and carrot sticks with ranch: It’s a classic pairing. The crunch and cool dip really do help balance the heat of the sliders—plus, it tricks your brain into thinking you’re being healthy.

  • Bacon Basil Cornbread Muffins: Yep, don’t be surprised if these two wind up best buds. The flavors balance perfectly—plus, bacon.

  • Potato wedges or waffle fries: Crispy, salty, carby… everything these sliders secretly want to hang out with. Toss them with a little garlic powder or Cajun seasoning for extra flair.

  • A vibrant green salad: Just to offset the richness a bit. Something with tangy vinaigrette, lots of crunch, maybe even some chopped apples if you’re feeling wild.

  • French toast for dessert: Not even kidding. If you’re doing a brunch-y thing, imagine finishing up with a sweet plate of warm IHOP-style French toast. Balance is everything, right?

Buffalo Chicken Sliders Recipe

Frequently Asked Questions

Can I make buffalo chicken sliders ahead of time?

Totally! Assemble the sliders (chicken, cheese, buns, buttery topping) and cover with foil. Pop the whole dish in the fridge for up to 24 hours. When ready to bake, you might need to add an extra 5 minutes since it’ll be cold. But it works great for prepping before game day or when friends surprise-text, “on our way.”

How spicy are buffalo chicken sliders?

That depends a little on your buffalo sauce and if you’re a spice fan. Frank’s RedHot gives you that classic tang without too much burn. Want it milder? Use less or temper it with extra ranch. Want it hotter? Add cayenne or chopped jalapeños to the mix. Your sliders, your spice level.

Can I use different cheese for these sliders?

Absolutely. Mozzarella melts cleanly, but if you like more flavor, try pepper jack, provolone, or even smoked gouda. Want something a little more gooey and dramatic? A few dabs of cream cheese stirred into the chicken mixture make it extra rich and dreamy.

What’s the best way to reheat leftover sliders?

An oven or toaster oven is your best bet. Just warm them at 350°F for 10 minutes or until heated through. They’ll come out with crispy tops and melty inside. Microwave works in a pinch, but that buttery bun can get soggy or chewy if over-zapped. Wrap it in a paper towel and heat slowly if you’re going that route.

Buffalo Chicken Sliders Recipe

Buffalo Chicken Sliders

Prep Time 15 minutes
Cook Time 20 minutes
Total Time 35 minutes
Spicy, cheesy, buttery, these buffalo chicken sliders deliver big flavor from shredded chicken, buffalo sauce, ranch, and soft buns. Easy, comforting, and always a hit on game day or for a cozy night in. Customizable and party-ready!
12 sliders

Ingredients

Slider Assembly

  • 12 slider buns Hawaiian rolls or soft buns
  • 3 cups (420 g) shredded cooked chicken rotisserie or leftover
  • 1/2 cup (120 ml) Buffalo sauce such as Frank’s RedHot; adjust to taste
  • 1/3 cup (80 ml) ranch dressing
  • 1 cup (110 g) shredded mozzarella cheese
  • 1/2 cup (55 g) shredded cheddar cheese optional

Topping

  • 3 tbsp (42 g) unsalted butter melted
  • 1/2 tsp (2 g) garlic powder
  • chopped fresh parsley optional, for garnish

Equipment

  • 9x13 inch Baking Dish
  • Mixing bowl
  • small saucepan or microwave-safe bowl
  • basting brush
  • Aluminum foil

Instructions
 

  1. Preheat your oven to 350°F (175°C). Line a 9x13 inch baking dish with parchment paper or lightly grease it.
  2. In a large bowl, mix together the shredded chicken, buffalo sauce, and ranch dressing until well combined and evenly coated.
  3. Slice the slider buns in half horizontally (keep the top and bottom halves attached if possible). Place the bottom half of the buns into the baking dish.
  4. Evenly spread the buffalo chicken mixture over the buns. Sprinkle the mozzarella and cheddar cheese (if using) evenly on top of the chicken.
  5. Place the top half of the buns over the cheese-covered chicken layer.
  6. Melt the butter and stir in the garlic powder. Brush the tops of the buns generously with the garlic butter mixture.
  7. Cover the baking dish with foil and bake for 10 minutes. Remove foil and bake another 10 minutes, or until cheese is melted and buns are golden.
  8. Remove from oven and let cool for 2–3 minutes. Sprinkle with fresh parsley, if desired. Serve warm!

Notes

For extra heat, add chopped jalapeños or a dash of cayenne to the filling. Leftover sliders store well in the fridge (3–4 days) or freezer (up to 2 months) and reheat best in the oven. Swap ranch for blue cheese, or use pulled jackfruit for a vegetarian option. Customize the cheeses, sauces, or garnishes as you like!

Nutrition

Calories: 270kcal | Carbohydrates: 17g | Protein: 17g | Fat: 14g | Saturated Fat: 6g | Cholesterol: 54mg | Sodium: 573mg | Potassium: 185mg | Fiber: 1g | Sugar: 4g | Vitamin A: 333IU | Vitamin C: 1mg | Calcium: 110mg | Iron: 1.2mg

Crispy, juicy, and just the right amount of indulgent, this pork schnitzel recipe uses pork chops, panko, eggs, and a sizzling skillet of oil and butter.

This one’s for those nights when you want something golden and crunchy, in under an hour, with zero complicated moves. The pork comes out tender inside with a fabulously audibly crispy crust—yes, “audibly,” as in you might hear yourself crunching. You’ll need boneless pork chops, a decent mallet, and a bit of kitchen ambition (but not too much). Keep it classic with lemon wedges, or go wild and toss a fried egg on top. Oh, and if the oil splatters a bit? That’s just the schnitzel cheering for you.

Table of Contents

Pork Schnitzel Recipe

Why You’ll Love this Pork Schnitzel Recipe

There’s just something about golden-breaded pork that’s deeply satisfying. Maybe it’s the sizzle in the skillet. Maybe it’s the contrast of crispy outside and juicy inside. Whatever it is, this schnitzel hits that happy spot.

  • Ridiculously simple to make: You just pound, dip, coat, and fry—like edible arts and crafts, but crunchier.
  • That dream-level crispiness: Panko gives you that light, crackly texture you wish every breading had.
  • Pork chop paradise: Boneless pork chops are lean, quick-cooking, and soak up flavor like champs.
  • Customizable galore: Want it spicy? Try a chili oil drizzle. Love herbs? Toss parsley in the crumbs.
  • Crowd neutral: Not too fussy, not too bland. Just right for picky eaters and flavor fanatics alike.
  • Lemon on top? Yes please: The zingy citrus cuts the richness and keeps things lively.

Pork Schnitzel Recipe

Ingredient Notes

No fancy business here—just pantry basics plus a good piece of pork. Here’s what you’ll need and why.

  • Boneless pork chops: They’re easy to pound thin and cook super quickly. Trim the edges so they don’t curl in the pan.
  • All-purpose flour: The first dusting step that helps everything stick (and adds a tiny bit of toasty flavor).
  • Garlic powder & onion powder: Flavor insurance. They sneak in that savory base layer inside the crispy crust.
  • Salt & pepper: Simple, essential. Don’t skimp. The breading needs seasoning love too.
  • Eggs & whole milk: Your breadcrumb glue. Whole milk gives the egg bath richness so it doesn’t just slide off.
  • Panko breadcrumbs: Japanese-style, extra airy, wildly crisp when fried. Regular ones just can’t compete here.
  • Olive or canola oil: You need a neutral oil with a decent smoke point. Olive adds a touch more flavor, though.
  • Unsalted butter: Just a bit for depth. Helps the crust brown up beautifully and adds that buttery “Why is this so good??” finish.
  • Lemon wedges: Don’t skip these. They brighten up every bite and cut through the rich crust like a charm.

Pork Schnitzel Recipe

How To Make This Pork Schnitzel Recipe

Okay, apron on. Let’s go full crunchy comfort mode. This process is actually kind of fun—therapeutic, even.

  • Pound the pork chops: Place the chops between two sheets of plastic wrap (or parchment paper, if that’s your vibe). Grab a meat mallet and give ’em some gentle yet thorough whacks until they’re about 1/4 inch thick. Even thickness is key—it keeps cooking times consistent.

  • Set up the dredge stations: You’ll need three shallow dishes. One has your seasoned flour (don’t forget the onion and garlic powders), one has whisked eggs and milk, and the last stars the crispy hero: panko breadcrumbs.

  • Dredge and coat the pork: One at a time, dip each chop in the flour (shake off extra), then the egg-milk bath (let the drips happen), then press firmly into those breadcrumbs. Treat it like a spa treatment. Panko wants commitment.

  • Let the coating set: Pop the breaded pork chops on a plate or tray and slide them into the fridge for 5 to 10 minutes. This tiny chill helps the coating cling better and not fall apart the second it hits the pan.

  • Fry it up: Heat 3 tablespoons of oil and 1 tablespoon of butter in a big skillet over medium-high. When it’s shimmery and starting to bubble, in go two chops. Don’t crowd them—they need space to crisp. Cook for 2 to 3 minutes per side, adjusting the heat so nothing burns. Transfer to a wire rack (fancy cooling rack on a sheet tray works) while you repeat with the next batch.

  • Serve with lemon wedges: The schnitzels will be golden and glorious. Give them a final squeeze of lemon at the table, and hear some crunch. No really… you’ll hear crunch.

Pork Schnitzel Recipe

Storage Options

Schnitzel leftovers? A small miracle, but let’s talk storage just in case.

Pop any cooled pork schnitzel into an airtight container and keep it in the fridge. It’ll stay crispy-ish for about two days, although that lovely just-fried crackle might fade (a little). But don’t worry—it revives fairly well in the oven.

To reheat, skip the microwave unless you enjoy soggy regrets. Instead, warm it in a 375°F oven for 10 to 12 minutes. You can pop it right on a wire rack over a baking sheet to help the bottom stay crusty too.

And yes, you can freeze it! Just let the schnitzel cool completely, then wrap each piece in foil or wax paper, and tuck them into a freezer bag. To thaw, place them in the fridge overnight, then reheat in the oven the same way (bonus: they actually re-crisp better than you’d expect).

Variations and Substitutions

Feel like improvising? Pork schnitzel’s a blank canvas for all sorts of flavor spins.

  • Chicken instead of pork: Chicken cutlets or tenderized chicken breasts work perfectly and cook just as fast. Bonus: fewer pork-related debates at the dinner table.
  • Spiced-up breadcrumbs: Try adding paprika, cayenne, or dried herbs to the panko for a next-level crust. Even a spoon of Parmesan makes it extra savory.
  • Gluten-free version: Swap in your favorite GF breadcrumbs and a 1:1 gluten-free flour. Panko-style GF crumbs work better texture-wise than the powdery kind.
  • Buttermilk bath: If you’ve got some, use it instead of milk for the egg dip—it adds a subtle tang and helps tenderize.
  • Lighter oven version: Not quite the same crunch, but still good. Brush schnitzels with oil and bake at 425°F until golden and just cooked through. Flip halfway.
  • Garnish upgrades: Top with chopped fresh herbs (think dill or parsley) or a quick slaw if you’re feeling fresh and fancy.

Pork Schnitzel Recipe

What to Serve with Pork Schnitzel

Schnitzel loves company. Whether you go hearty, fresh, or something in-between, there are plenty of plates that play well with it.

  • Potato salad or roasted potatoes: A warm potato salad with mustardy dressing hits differently next to schnitzel. Or, roast some spuds with garlic and herbs—they fill out the plate and soak up that buttery goodness.

  • Cucumber salad or slaw: Something crisp and tangy balances the richness. Think thin-sliced cukes with dill and vinegar, or a slightly sweet cabbage slaw with a bright vinaigrette.

  • Braised greens or sautéed chard: A beautiful plate needs a little green. I like lightly sautéed greens (like in this chard situation) with garlic and olive oil. Earthy, simple, done.

  • Applesauce (no judgment): Yes, the classic. Something about that cool, sweet bite with crispy schnitzel makes full sense, even if you didn’t grow up eating it.

  • A cozy dessert after: Maybe lean into comfy vibes and wrap dinner with something like this gingerbread cake. Trust me, it’s a full comforting loop.

Pork Schnitzel Recipe

Frequently Asked Questions

Can I make pork schnitzel ahead of time?

You can prep the schnitzels ahead by breading them and popping them in the fridge for a few hours, or overnight if needed. Lay them on a tray, uncovered, if possible. This actually helps the coating stick better. Just fry them up when you’re ready—the fresher the sizzle, the better.

Why is my breading falling off during cooking?

Ah, the great schnitzel mystery. It usually happens when the meat isn’t dried properly or if you skip that chill time after breading. Make sure to pat the pork dry first, then let the coated chops rest in the fridge for 5–10 minutes so everything clings like it’s meant to.

How do I know when pork schnitzel is fully cooked?

Use a meat thermometer and look for 145°F right in the center of the pork. It should be golden brown on the outside and just a tiny bit juicy (not pink) inside. The chops are thin, so they cook fast—don’t wander too far from the stove.

What other meat can I use instead of pork?

Chicken works like a charm. Turkey cutlets too, if that’s what you’ve got hanging out in the freezer. You just want something you can flatten out evenly. And if you’re feeling euro-fancy, veal’s the traditional star—but it’s pricier and more delicate to work with.

Pork Schnitzel Recipe

Crispy Pork Schnitzel

Prep Time 15 minutes
Cook Time 20 minutes
Chill Time 5 minutes
Total Time 40 minutes
Crispy, juicy, and just the right amount of indulgent, this pork schnitzel recipe transforms boneless pork chops into a golden, crunchy comfort classic in under an hour. Each bite features tender pork with an audibly crisp crust. A weeknight hero and a serious crowd-pleaser!
4 servings

Ingredients

Pork Schnitzel

  • 4 boneless pork chops trimmed, about 1/2 inch thick
  • 3/4 cup (95 g) all-purpose flour
  • 1 tsp garlic powder
  • 1 tsp onion powder
  • 1 tsp kosher salt plus more for seasoning
  • 1/2 tsp (0.5 tsp) black pepper
  • 2 large eggs
  • 2 tbsp (30 ml) whole milk
  • 2 cups (100 g) panko breadcrumbs
  • 3 tbsp (45 ml) olive oil or canola oil plus more as needed for frying
  • 1 tbsp (14 g) unsalted butter
  • lemon wedges for serving

Equipment

  • Meat mallet
  • Plastic wrap or parchment paper
  • Shallow dishes
  • Large skillet
  • Wire rack

Instructions
 

  1. Pound the pork chops: Place pork chops between sheets of plastic wrap or parchment paper. Use a meat mallet to pound them to about 1/4 inch thick. Pat dry and season lightly with salt and pepper.
  2. Set up dredging dishes: Place flour, garlic powder, onion powder, salt, and pepper in one shallow dish. Whisk eggs and milk in a second dish. Add panko breadcrumbs to a third dish.
  3. Dredge and coat the pork: Dip each pork chop in the seasoned flour (shake off extra), then in egg-milk mixture, then press into panko so fully coated.
  4. Chill the coated pork: Place coated chops on a plate or tray and refrigerate for 5–10 minutes to help the breading set.
  5. Fry the schnitzel: Heat 3 tablespoons oil and 1 tablespoon butter in a large skillet over medium-high. When oil shimmers, fry two chops at a time, 2–3 minutes per side, until golden and crisp. Transfer to rack or paper towels. Repeat with remaining chops, adding oil as needed.
  6. Serve: Plate schnitzels hot with fresh lemon wedges. Enjoy that crunch!

Notes

For an extra crunch, let the breaded pork chill up to 30 minutes before frying. Schnitzel is best fresh, but it reheats nicely in a 375°F oven on a wire rack. Try with chicken or gluten-free breadcrumbs for variations. Go classic or add a fried egg on top!

Nutrition

Calories: 450kcal | Carbohydrates: 29g | Protein: 30g | Fat: 22g | Saturated Fat: 5g | Cholesterol: 155mg | Sodium: 750mg | Potassium: 470mg | Fiber: 1g | Sugar: 2g | Vitamin A: 220IU | Vitamin C: 2mg | Calcium: 70mg | Iron: 2.2mg

Bold, savory, and just the right amount of spicy, this Hunan chicken recipe brings together tender chicken, crisp vegetables, garlic, ginger, soy, and chili paste in a glossy stir-fry sauce. It’s the kind of dish that perfumes your whole kitchen with that sizzling wok aroma and has you sneaking bites straight out of the pan.

You know those weeknights when you want something satisfying but cooking feels like a whole event? This is the opposite of that. It’s fast and forgiving. One pan, no deep frying, tons of bold flavor. The chilies hit you first, then the savoriness from soy and oyster sauce, and finally a whisper of sweetness from honey just to keep you on your toes. If your fridge holds some straggler veggies, toss those in too. Serve it with steaming rice, and you’ve basically got comfort in a bowl—without needing to memorize a recipe or crack open a jar of something mysterious.

Table of Contents

Hunan Chicken Recipe

Why You’ll Love this Hunan Chicken Recipe

You don’t have to be a stir-fry pro to fall for this one. It’s both feisty and minimal fuss, which, honestly, is my ideal combo in dinner form.

  • Ridiculously simple to make: You only need one pan, some pantry staples, and half an hour. Most of that is just chopping.
  • Perfectly spicy-saucy-salty-sweet: The sauce doesn’t mess around. It clings to everything without drowning the veggies.
  • Flexible with veggies: Got half a zucchini? Frozen broccoli? Red onions you forgot about? Into the wok they go.
  • Chicken that actually stays juicy: Thanks to a little cornstarch trickery, it stir-fries up golden, not rubbery.
  • Leftovers are gold: It reheats like a dream and somehow tastes even better the next day—I don’t make the rules.

Hunan Chicken Recipe

Ingredient Notes

Everything in here is easy to find and surprisingly versatile. Here’s a quick close-up on what’s what and why it matters.

  • Chicken thighs or breasts: Thighs hold up juicy with high heat, but breasts work too (just don’t overcook them).
  • Chicken broth: Adds savory depth and helps build that glossy sauce without it tasting flat.
  • Soy sauce + oyster sauce: The savory umami anchors. Use low-sodium soy if you’re sensitive to salt.
  • Chili paste (like sambal oelek): Brings heat and complexity. You can scale it up or down depending on your hot tolerance.
  • Rice vinegar + honey: One punches things up, the other balances it out. Totally harmonious.
  • Cornstarch (twice!): First for velveting the chicken, then again in the sauce to make it clingy and shiny.
  • Fresh garlic and ginger: Stir-fry essentials. They’re what make your kitchen smell instantly amazing.
  • Broccoli, bell pepper, zucchini: Crunchy, colorful, fast-cooking. Use whatever combo makes you happy.
  • Sesame seeds + rice (for serving): Optional, but give your dish that little “finished restaurant plate” vibe.

Hunan Chicken Recipe

How To Make This Hunan Chicken Recipe

Let’s cook! This dish rewards speed and hot pans, so I recommend chopping everything first before the heat goes on.

  • Make the bold and tasty sauce: Whisk together the chicken broth, soy sauce, oyster sauce, chili paste, vinegar, honey, garlic, ginger, and cornstarch. Stir until smooth and cornstarch disappears. That slurry is magic.

  • Coat the chicken in cornstarch: Toss the chicken pieces with cornstarch in a bowl or zip-top bag. This helps them crisp slightly and keep their moisture when you stir-fry.

  • Sear the chicken until golden: Heat a slick of oil in a hot wok or skillet. When it shimmers, toss in the chicken. Stir-fry 5 minutes or until golden, with no pink inside. Scoop it out and set it aside, but don’t clean the pan!

  • Sizzle that garlic and ginger: In the still-hot pan, add another little splash of oil if things got dry. Toss in the minced garlic and ginger. Stir for 30 seconds, just to wake up the flavors (and your appetite).

  • Add all those veggies: Broccoli florets, bell pepper strips, and zucchini slices go in now. Stir-fry for 3–4 minutes. They should stay crisp yet cooked, like snappy little vegetable nuggets.

  • Bring it all together: Return the chicken to the pan, stir it in with the veggies, then pour in that sauce. Stir and cook for about 2 minutes or until the sauce thickens and coats everything with joy.

  • Time to serve: Pile over hot rice, sprinkle sesame seeds if you’re feeling fancy (or forgot anything else), and dig in immediately.

Hunan Chicken Recipe

Storage Options

So maybe you made a double batch on accident (or on purpose). The good news? Leftovers are absolutely worth saving.

Pop any extras into an airtight container and keep them in the fridge for up to 4 days. I love grabbing a scoop for quick lunches, especially when there’s no time to cook (or let’s be honest, energy).

If you’re wondering, “But can I freeze it?” Yep, go for it. Portion the cooled chicken and veggies into freezer-safe containers, then freeze for up to 2 months. The texture of the veggies might soften slightly when reheated, but it still hits the spot.

To reheat, microwave gently or warm it in a skillet over medium heat with a splash of water or extra broth. It wakes the sauce right back up. Rice freezes and reheats well too, so don’t toss those leftovers!

Variations and Substitutions

This dish loves a little remix action. It’s flexible, forgiving, and welcomes whatever oddball produce you’re trying to use up.

  • Swap chicken for tofu or shrimp: Both soak up the sauce beautifully. With shrimp, reduce cooking time so they don’t go rubbery.

  • Level up the veg: Try snow peas, mushrooms, baby corn, or chopped napa cabbage. It’s like a playground for produce lovers.

  • Low-carb tweaks: Replace white rice with cauliflower rice or serve everything in lettuce cups for a lighter vibe.

  • Boost the heat: Stir in a dried chili or two with the garlic and ginger if you want to lean into fiery territory.

  • Gluten-free switches: Use tamari instead of soy sauce, and confirm your oyster sauce is gluten-free (some are, some aren’t).

Hunan Chicken Recipe

What to Serve with Hunan Chicken Recipe

While the chicken + veggies + rice combo is a whole meal, there are fun sides that make things feel fancy without extra stress.

  • If I’m going full takeout mode at home, I’ll make a quick batch of oven-baked sesame chicken to serve alongside this. The contrast in textures is so satisfying: one saucy, one crispy.

  • A chilled cucumber salad with a tangy sesame dressing pairs beautifully. It cools things down just enough and brings a nice crunch to balance the warm dish.

  • Feeling brunch-y after dinner? Heat up leftovers next to a fried egg and steamy jasmine rice for an unholy-but-glorious fusion breakfast.

  • Or hey, just round it out with something sweet after, like these peanut butter banana ice cream sandwiches. Spicy main + creamy dessert = best decision you made all day.

Hunan Chicken Recipe

Frequently Asked Questions

What’s the difference between Hunan chicken and Szechuan chicken?

Great question! While both are spicy Chinese dishes, Hunan chicken leans into a fresher, vinegary heat with bold chilies and garlic, whereas Szechuan chicken typically features that tongue-tingling numbing flavor from Szechuan peppercorns. So if you’re after fiery but not buzzy, Hunan is your pick.

Can I make this recipe vegetarian?

Absolutely! Just sub in firm tofu (pressed and chopped) for the chicken. Stir-fry it until crisp on the outside, then follow the rest of the recipe as is. You could also go full veggie mode and double the vegetables for a colorful plant-based feast.

Do I really need to use oyster sauce?

It definitely adds depth, but if you can’t eat it or don’t have it, swap with hoisin sauce for a touch of sweetness or use mushroom stir-fry sauce (often sold as a vegetarian oyster substitute). Soy sauce alone works too, but you might miss a tiny bit of umami richness.

Can I use frozen vegetables instead of fresh?

Yep! Just toss them straight into the pan—no need to thaw. Know that they might release a little more water, so stir-frying them until that moisture cooks off is the key to keeping your sauce thick and tasty instead of watery.

Hunan Chicken Recipe

Hunan Chicken

Prep Time 15 minutes
Cook Time 15 minutes
Total Time 30 minutes
Bold, savory, and just the right amount of spicy, this Hunan chicken recipe brings together tender chicken, crisp vegetables, garlic, ginger, soy, and chili paste in a glossy stir-fry sauce. It’s fast, loaded with bold flavor, and perfect for busy weeknights. Flexible, forgiving, and absolutely delicious!
4 servings

Ingredients

For the Chicken

  • 1.5 lbs (680 g) boneless skinless chicken thighs or breasts cut into bite-size pieces
  • 2 tbsp (16 g) cornstarch for coating chicken
  • 2 tbsp (30 ml) neutral oil such as vegetable or canola, divided

For the Sauce

  • 1/3 cup (80 ml) chicken broth
  • 3 tbsp (45 ml) soy sauce low-sodium preferred
  • 2 tbsp (30 ml) oyster sauce
  • 1 tbsp (15 ml) chili paste such as sambal oelek, more to taste
  • 1 tbsp (15 ml) rice vinegar
  • 2 tsp (10 ml) honey
  • 2 cloves garlic minced (reserve half for stir-frying)
  • 1 tbsp (8 g) fresh ginger minced (reserve half for stir-frying)
  • 2 tsp (5 g) cornstarch for sauce

For the Vegetables

  • 2 cups (150 g) broccoli florets
  • 1 red bell pepper sliced
  • 1 zucchini sliced

For Serving (optional)

  • hot cooked rice
  • sesame seeds to finish

Equipment

  • Wok or large skillet
  • Mixing bowls
  • Knife
  • Cutting board
  • Whisk

Instructions
 

  1. Make the sauce: In a bowl, whisk together chicken broth, soy sauce, oyster sauce, chili paste, rice vinegar, honey, half the garlic, half the ginger, and 2 tsp cornstarch until smooth. Set aside.
  2. Coat the chicken: In a separate bowl (or zip-top bag), toss the chicken pieces with 2 tbsp cornstarch until evenly coated.
  3. Sear the chicken: Heat 1 tbsp oil in a large wok or skillet over high heat. When the oil is shimmering, add the chicken and stir-fry for about 5 minutes, until golden and cooked through. Transfer chicken to a plate and set aside.
  4. Sauté aromatics: Add the remaining 1 tbsp oil to the pan if needed. Add reserved garlic and ginger; cook for 30 seconds until fragrant.
  5. Stir-fry the vegetables: Add broccoli florets, bell pepper, and zucchini. Stir-fry for 3–4 minutes until just crisp-tender but still bright and vibrant.
  6. Finish the dish: Return cooked chicken to the pan. Stir in sauce and toss everything together. Cook for 2 minutes until sauce thickens and coats all ingredients.
  7. Serve: Scoop Hunan chicken over hot rice and top with sesame seeds, if desired. Enjoy immediately.

Notes

This recipe is super flexible! Use any veggies you like—snap peas, baby corn, or mushrooms all work. For a vegetarian version, substitute firm tofu for the chicken. Store leftovers in the fridge up to 4 days, or freeze up to 2 months. To reheat, warm in a skillet with a splash of broth or microwave until heated through. For more heat, add dried chilies or extra chili paste.

Nutrition

Calories: 340kcal | Carbohydrates: 25g | Protein: 33g | Fat: 12g | Saturated Fat: 2g | Cholesterol: 85mg | Sodium: 870mg | Potassium: 620mg | Fiber: 3g | Sugar: 7g | Vitamin A: 1050IU | Vitamin C: 77mg | Calcium: 60mg | Iron: 2mg

Bring the cozy diner vibe home with this ihop french toast recipe, made with fluffy bread, eggs, milk, and a kiss of vanilla. It’s golden, luscious, and skillet-sizzling good.

Warm, eggy slices that puff up beautifully then crisp ever so slightly at the edges? Yes please. This is French toast that gets it. Whether you’re after a laid-back brunch or just something buttery and golden to pair with coffee and silence on a Sunday morning, this one checks the box. The flour thickens the batter just enough to cling to each slice (bye-bye soggy bread), and that quick hit of vanilla smells like you’ve secretly lit a candle labeled “Breakfast in Paris.” Ready to ditch boxed mix joylessness for something real and pan-to-plate fast? Let’s grab some bread and get things sizzling.

Table of Contents

Homemade IHOP French Toast

Why You’ll Love this IHOP French Toast

We’re not reinventing the wheel here—it’s French toast. But this version hits all the right notes without trying too hard.

  • Golden and crisp on the outside: The flour works magic, giving that picture-perfect texture IHOP fans know by heart.
  • Custardy and tender inside: The egg and milk soak turns plain bread into breakfast royalty (no soggy peasant slices here).
  • No fancy ingredients necessary: If you have eggs, milk, and bread, you’re nearly there. The rest is pantry stuff.
  • Ready in under 15 minutes: Even if someone’s hangry (yourself included), peace is just a skillet away.
  • Fully customizable: Sweet, savory, fruity, nutty—this toast plays well with anything you throw at it.
  • Smells like a Sunday morning dream: Vanilla-scented air, buttery sizzles, and that soft whiff of toasted sugar.

Homemade IHOP French Toast

Ingredient Notes

Let’s take a quick peek at what goes into this golden stack. You don’t need much, but a few smart choices make all the difference.

  • Thick bread: Choose something sturdy, like brioche or Texas toast. It holds the custard without falling apart and gives that plush inside texture.
  • Eggs: These bind and enrich the batter. If your bread’s dry, the eggs help bring it back to glorious life.
  • Milk: Helps loosen the eggs just enough for soaking. Whole milk is ideal, but any kind works (even almond milk, in a pinch).
  • Vanilla extract: Adds warmth and depth and makes the whole kitchen smell like you have a well-loved baking habit.
  • Flour: This little secret thickens the batter so it clings to the bread rather than disappearing into it.
  • Sugar: Just enough to sweeten the toast lightly without turning it into dessert—unless you’re into that.
  • Salt: A tiny pinch balances the sweet and makes all the flavors pop (trust me, don’t skip it).
  • Butter (for the skillet): Gives those crisp, lacy golden edges and adds rich flavor as you fry.

Homemade IHOP French Toast

How To Make This IHOP French Toast

Once you’ve got your ingredients lined up and your skillet heating, this moves faster than you’d think. Just don’t wander off mid-fry. Your toast needs you.

  • Make the batter: In a big bowl, whisk your eggs until they’re smooth and frothy (give them a good minute). Then, stir in the milk, vanilla, flour, sugar, and salt. Whisk until it’s nice and lump-free. This mix should be silky, not runny.

  • Preheat and butter the skillet: Get a large nonstick skillet or griddle going over medium heat. Melt about a teaspoon of butter to coat—when it foams and smells nutty, you’re good to go.

  • Dip the bread: Now for the messy, satisfying part. Dip each slice of bread into the batter and let it hang out for a few seconds per side. Don’t let it drown, just a cozy little soak so it’s thoroughly coated.

  • Cook until golden: Place each slice onto your hot skillet and leave it alone for 2 to 3 minutes. You’ll hear light sizzling and see golden edges forming. Flip gently and repeat on the other side. Do them in batches if needed. Add more butter as you go—it keeps the edges deliciously crisp.

  • Serve warm and enjoy: Stack ’em up, slap on a pat of butter (melty pool optional but encouraged), pour over syrup, and go to town. Or add toppings like fresh berries, chopped pecans, or a dusting of powdered sugar.

Homemade IHOP French Toast

Storage Options

So you went a little wild and made a double batch—first of all, proud of you. Leftover French toast is a blessing in disguise.

Toss cooled slices into an airtight container and stick ’em in the fridge. They’ll keep well for about 3 days—reheat them in a skillet for that fresh-off-the-griddle feel.

Freezing? Totally doable. Let the slices cool completely, then lay them flat on a baking sheet to freeze individually (this prevents weird toast clumps). Once frozen solid, transfer to a zip-top freezer bag. They’ll stay good for a month or two.

To reheat frozen slices, pop them in the toaster or warm them gently in a skillet. The microwave works too, but fair warning—it sacrifices crispness. Desperate mornings call for desperate measures, though.

Variations and Substitutions

Feeling creative? French toast is basically a blank canvas soaked in vanilla dreams. Here are a few ways to remix it.

  • Different bread choices: Swap in challah, cinnamon swirl, or even croissants. Just avoid anything too thin or airy—it’ll fall apart.
  • Dairy-free options: Use oat or almond milk, and sub in oil or plant-based butter for the skillet. Easy and still tasty.
  • Add cinnamon or nutmeg: Half a teaspoon of either will cozy things up instantly. Great in winter or when you’re feelin’ extra.
  • Sweet toppings twist: Think blueberry compote, honeyed ricotta, or a drizzle of tahini and maple syrup (trust me).
  • Savory-style French toast: Skip the sugar and go in with herbs, cheese, and maybe even a tomato topping. Breakfast-for-dinner vibes.
  • Kid-friendly fun: Cut into sticks and serve with little dipping cups of syrup or fruit sauce. Mini forks optional but adorable.

Homemade IHOP French Toast

What to Serve with IHOP French Toast

Now that you’ve got a plateful of golden deliciousness, it helps to have a few sides that round things out. It’s French toast’s party, but here’s how to keep it lively.

  • A crisp smoky slice of bacon makes a nice contrast to the sweet softness of the toast. The saltiness cuts through the syrup in all the right ways. Or if you’re feeling fancy, go for prosciutto—you deserve it.

  • Mornings feel extra special with fresh fruit on the table. Try mixed berries, sliced bananas, or peach wedges. Bonus points for seasonal choices or something like a little crispy smashed potato salad if you like mixing salty and sweet.

  • Coffee, of course. A strong cup cuts the richness and makes the whole experience about 82% more complete. Add a splash of cinnamon to the brew if you really want to lean in.

  • Yogurt or whipped cream works wonders. The tang of yogurt balances the sweetness, and whipped cream? Well, it’s just fun.

  • For dessert-style brunch (because who’s judging?), a little slice of this Neiman Marcus cake fits right in. Sweet meets sweeter, and everyone’s happy about it.

Homemade IHOP French Toast

Frequently Asked Questions

Can I use sandwich bread for this recipe?

Yes, you can use sandwich bread, just try to go with a thicker-cut variety if possible. Standard sliced bread will work, but it might absorb the batter a little too eagerly and fall apart in the pan if soaked too long. Just give it a quick dip and be gentle with the flip.

Why is there flour in the batter?

Great question! The flour thickens the batter just enough to help it cling to the bread, giving you those fluffy, golden edges. Without it, the batter can be a bit runny, which often leads to soggy slices. It’s a small twist that gives big IHOP-style payoff.

Can I make it ahead of time?

Absolutely. You can cook the French toast, let it cool, and then store it in the fridge or freeze it for later. Reheat in a skillet or toaster for the best texture. The batter itself is best used fresh, though, so go ahead and make that part right before you’re ready to cook.

Can I make this gluten-free?

Yes, you can! Just substitute the bread with your favorite gluten-free variety and use gluten-free flour in the batter. It’ll still turn out golden and delicious, though textures may vary slightly depending on your bread choice. A sturdier slice is best here.

Homemade IHOP French Toast

IHOP French Toast

Prep Time 5 minutes
Cook Time 10 minutes
Total Time 15 minutes
Bring the cozy diner vibe home with this IHOP French toast recipe, made with fluffy bread, eggs, milk, and a kiss of vanilla. It’s golden, luscious, and skillet-sizzling good—ready in under 15 minutes, endlessly customizable, and always a comfort.
4 servings

Ingredients

French Toast Batter

  • 6 thick bread slices such as brioche or Texas toast
  • 3 large eggs
  • 1 cup (240 ml) milk whole milk preferred, but any works
  • 2 tbsp (15 g) all-purpose flour
  • 1 tbsp (12 g) granulated sugar
  • 1 tsp (5 ml) vanilla extract
  • 1/4 tsp (1 g) salt

For Cooking

  • 2 tbsp (30 g) butter for skillet

For Serving (optional)

  • maple syrup
  • fresh berries
  • powdered sugar

Equipment

  • Large Bowl
  • Whisk
  • Nonstick Skillet or Griddle
  • Spatula

Instructions
 

  1. Make the batter: In a large bowl, whisk eggs until smooth and frothy for about a minute. Stir in milk, vanilla, flour, sugar, and salt. Whisk thoroughly until the batter is smooth and lump-free.
  2. Preheat and butter the skillet: Heat a large nonstick skillet or griddle over medium. Melt about a teaspoon of butter to coat the surface. When it foams and smells nutty, it's ready.
  3. Dip the bread: Dip each slice of bread into the batter, letting each side sit for a few seconds until coated but not drenched or falling apart.
  4. Cook until golden: Place coated bread slices onto hot skillet. Cook undisturbed for 2–3 minutes until golden brown and edges are crisp. Flip and cook other side for 2–3 minutes. Repeat in batches, adding more butter between as needed.
  5. Serve warm: Stack, add butter if desired, drizzle with syrup, or top with berries or powdered sugar. Enjoy right away.

Notes

For best results, use day-old bread so it soaks up the custard without falling apart. Brioche, Texas toast, and challah work wonderfully. The flour is the secret to that classic IHOP texture.
Leftovers keep up to 3 days in the fridge or can be frozen—reheat in a toaster or skillet for best crispness.

Nutrition

Calories: 250kcal | Carbohydrates: 32g | Protein: 9g | Fat: 9g | Saturated Fat: 4g | Cholesterol: 130mg | Sodium: 325mg | Potassium: 140mg | Fiber: 1g | Sugar: 7g | Vitamin A: 320IU | Calcium: 120mg | Iron: 2mg

Golden baby potatoes, crispy as a pan-fried dream and coated in a creamy, tangy yogurt dressing—this crispy smashed potato salad is not shy on texture. With punchy Dijon, kewpie mayo, and a bit of bite from shallots and pickle, it’s cozy but not boring. Think potato salad’s more stylish cousin who travels a lot and owns good knives.

This one’s the kind of thing you make when you want a warm, comforting side dish but still want it to have a little crunch, a little zest, and a whole lot of personality.

Table of Contents

Roasted Smashed Potato Salad

Why You’ll Love this Crispy Smashed Potato Salad

It’s not your average backyard barbecue situation, but it’s also not fussy. You just roast, whisk, toss, and bam—magic.

  • Crunchy meets creamy: The crispy roasted edges get cozy with a tangy dressing and it’s honestly a party.
  • Ridiculously simple to make: You just squish, roast, whip up the most delightful sauce, and toss it all together.
  • No mayo overload: It’s balanced with Greek yogurt and a pop of lemon, so it’s tangy without being cloying.
  • Plays well with others: Serve it alongside grilled meats, roasted fish, or straight from the bowl while standing over the kitchen sink. No judgment.
  • Textural bliss: Those saved crispy bits on top? Do not skip them. They’re the salty little crown jewels.
  • Easily adaptable: Toss in extra herbs, swap in some spicy mustard, or add capers if you’re feeling briny.

Roasted Smashed Potato Salad

Ingredient Notes

Here’s a quick run-through of what’s going into this bowl—and a couple tips to make it sing.

  • Baby potatoes: Go for golden or yellow ones; they roast beautifully and get that buttery interior with crispy edges.
  • Olive oil: Use the good stuff if you have it. It adds richness and helps those edges crisp up into heaven.
  • Greek yogurt: Tangy, creamy, and light—this keeps the dressing fresh without veering into heavy territory.
  • Kewpie mayo: Ultra-smooth and subtly sweet, it blends beautifully. But regular mayo works just fine too.
  • Dijon mustard: Adds zing and a little bit of fancy. Don’t skimp unless you’re swapping for something equally saucy.
  • Lemon juice: Brightens up the whole bowl. Fresh-squeezed is key here.
  • Garlic: Just a little hit of savory depth. One clove is plenty, unless you’re feeling bold.
  • Fresh parsley: It gives a little lift and freshness; no need to be precise—just chop and toss it in.
  • Dill pickle: This one’s non-negotiable for me. You want those little crunchy, vinegary bites in there.
  • Shallot: Mild and subtly sweet. Finely minced, it adds that whisper of onion without taking over.
  • Scallions (optional): Totally optional, but they bring color and a gentle bite that complements everything else.

Roasted Smashed Potato Salad

How To Make This Crispy Smashed Potato Salad

Let’s dive in. Set your timer, grab your favorite mixing bowl, and get ready to smash some spuds.

  • Start with the potatoes: Fill a big pot with well-salted cold water and drop in the baby potatoes. Bring it to a boil and cook for 7–8 minutes, just until fork-tender. Nothing mushy, OK?

  • Dry and smash: Drain them and give the little guys a short breather. Once cool enough to handle, pat them dry (really dry—no soggy roasties allowed) and place them on a parchment-lined baking sheet. Then, take a glass or potato masher and gently flatten each to about ¼-inch thick.

  • Oil and roast: Brush them generously with 2 tablespoons of olive oil, sprinkle with salt and pepper, and roast at 425°F. Flip them halfway through, and roast until they’re deeply golden and crispy all over—about 45 to 60 minutes.

  • Make the dressing: While the potatoes crisp up, whisk the yogurt, mayo, Dijon, lemon juice, minced garlic, parsley, and that last tablespoon of olive oil. Stir in the chopped dill pickle and shallot. Give it a taste. Add salt and pepper if it needs a bit more pep. Then pop it in the fridge until showtime.

  • Dress and toss: When the potatoes are gorgeously crispy, remove them from the oven and let them cool for 10-ish minutes. Pick off some extra browned bits for garnish (snack on one if you must, I won’t tell). Toss the rest of the potatoes into a bowl, add the dressing, and mix gently so you don’t smush them into oblivion.

  • Garnish and serve: Scatter over scallions and those crunchy bits you saved. Serve warm, and be prepared for second helpings.

Roasted Smashed Potato Salad

Storage Options

Let’s talk leftovers—assuming you’ll have any.

If you’ve got some extra, stash the crispy smashed potato salad in an airtight container in the fridge. It’ll keep for about 2 to 3 days. The texture softens a bit as it sits, but the flavor just keeps getting better. The dressing soaks into those little smashed crevices in all the best ways.

Now, can you freeze it? Technically yes, but I wouldn’t recommend it. The mayonnaise and yogurt base doesn’t love a deep freeze. It can separate when thawed, and the once-crispy potatoes turn kind of sad and flabby. Think “soggy elevator potato” energy. Nobody needs that.

If you want to reheat, I suggest spreading leftovers on a baking sheet, popping them in the oven at 400°F for 10 minutes or so. It revives the crispy magic pretty well. Or just eat it cold from the fridge. Honestly… still really good that way.

Variations and Substitutions

You can definitely shake things up here, depending on what’s loitering in your fridge or pantry.

  • Swap the yogurt: Sour cream or crème fraîche would be dreamy, especially if you’re in a richer mood.
  • Try different herbs: Don’t have parsley? Use dill, chives, or even a little fresh thyme. Mix and match like a salad DJ.
  • Add chopped bacon: If you’re feeling bold (and slightly Southern), toss in crispy bacon bits. Smoky saltiness = instant upgrade.
  • Experiment with mustard: Try grainy or spicy brown mustard for more texture and punch.
  • Go vegan: Sub plant-based mayo and unsweetened non-dairy yogurt, and you’re in business. It still delivers.
  • Use sweet potatoes: They roast differently and won’t get quite as crispy, but the flavor combo with the dressing can totally work.

Roasted Smashed Potato Salad

What to Serve with Crispy Smashed Potato Salad

This salad cozies up to just about anything. It plays well with mains, especially things that are grilled, seared, or equally bold.

  • Grilled skewers or burgers are a happy match. The tanginess of this salad cuts through greasy richness like a culinary palate cleanse. Try it with tender beef or grilled halloumi.

  • Pair it with something simple like roast chicken or even a classic meatloaf. If you’re looking for one, this Cracker Barrel-style meatloaf brings all the comfort vibes you’d want next to this salad.

  • Got fish on the menu? A crisp-skinned cod or salmon works like a charm. Actually, I love this pan-seared cod with rainbow chard with it. The greens parallel the fresh herbs here.

  • At a potluck, let this be your quirky-but-welcome side dish. Just warm it before serving and top off with extra scallions or even a few pickled onions.

  • Or eat it straight from the bowl while watching old sitcom reruns. Not that I’m speaking from experience, of course.

Roasted Smashed Potato Salad

Frequently Asked Questions

Can I make crispy smashed potato salad ahead of time?

Yes, but with a little timing strategy. You can roast the potatoes ahead and make the dressing the day before. Store them separately to keep the potatoes crisp, then toss everything together right before serving. If you mix it too early, the crispy edges will soften up, which isn’t a tragedy—but you’ll lose that fun texture contrast.

Do I need to peel the baby potatoes first?

Nope! That’s the beauty of this recipe. The thin skins crisp up beautifully in the oven and give the salad its delicious texture. Just rinse them well before boiling, pat them dry after cooking, and you’re good to go. Peeling would honestly just slow you down and steal the fun.

What kind of yogurt works best for the dressing?

Plain Greek yogurt is your best bet—it’s thick, creamy, and has that nice tang to balance the mayo and mustard. You could use regular plain yogurt too, but strain it a bit first so the dressing doesn’t get too runny. Avoid anything flavored or sweetened (unless dill pickle mango is your thing, in which case… you do you?).

Can I serve this salad chilled?

You can, but I do think it’s best warm or at room temp. If you serve it cold straight from the fridge, the potatoes lose some crispness and the dressing seizes up a bit. Let it sit out for 20 to 30 minutes before serving if you’re going cold. That way, the flavors mellow and the dressing loosens up just enough.

Roasted Smashed Potato Salad

Crispy Smashed Potato Salad

Prep Time 20 minutes
Cook Time 1 hour
Total Time 1 hour 20 minutes
Golden baby potatoes, crispy as a pan-fried dream and coated in a creamy, tangy yogurt dressing—this crispy smashed potato salad is not shy on texture. Think potato salad’s more stylish cousin: warm, zesty, and totally addictive.
4 side servings

Ingredients

For the potatoes

  • 2 pounds (900 g) baby golden potatoes scrubbed
  • 3 tbsp (45 ml) olive oil divided
  • kosher salt and freshly ground black pepper to taste

For the dressing

  • 1/3 cup (75 g) plain Greek yogurt
  • 3 tbsp (45 g) Kewpie mayonnaise or regular mayo
  • 1 tbsp (15 g) Dijon mustard
  • 1 tbsp (15 ml) fresh lemon juice
  • 1 clove garlic minced
  • 2 tbsp (8 g) fresh parsley chopped
  • 1 medium (30 g) dill pickle finely chopped (about 2 tbsp)
  • 1 small (20 g) shallot finely minced (about 2 tbsp)
  • salt and black pepper to taste

To finish

  • 2 tbsp (8 g) scallions (optional) thinly sliced
  • extra crispy potato bits for garnish

Equipment

  • Large pot
  • Potato masher or sturdy glass
  • Parchment-lined baking sheet
  • Mixing bowls
  • Whisk

Instructions
 

  1. Fill a large pot with well-salted cold water and add the baby potatoes. Bring to a boil and cook for 7–8 minutes until just fork-tender. Drain and let cool until able to handle.
  2. Pat the potatoes very dry and transfer to a parchment-lined baking sheet. Using a potato masher or sturdy glass, gently smash each potato to about 1/4-inch thick.
  3. Brush potatoes generously with 2 tablespoons of olive oil. Season well with salt and pepper. Roast in a preheated 425°F (220°C) oven for 45–60 minutes, flipping halfway, until deep golden brown and crispy.
  4. While potatoes roast, whisk together the Greek yogurt, Kewpie mayo, Dijon mustard, lemon juice, minced garlic, chopped parsley, and remaining 1 tablespoon olive oil in a bowl. Stir in chopped dill pickle and minced shallot. Taste and season with salt and pepper; chill until ready to use.
  5. Let potatoes cool for about 10 minutes. Pick off some ultra-crispy bits for garnish and set aside. Transfer the rest of the potatoes to a bowl, add the dressing, and gently toss to combine without breaking them up too much.
  6. Top with sliced scallions (if using) and the reserved potato crispy bits. Serve warm.

Notes

Store leftovers in an airtight container in the fridge up to 2–3 days; re-crisp in the oven at 400°F for 10 minutes if desired. Swap in sour cream or crème fraîche for yogurt, different herbs to taste, or try plant-based substitutions for a vegan version. This salad delivers textural bliss whether served warm or at room temperature.

Nutrition

Calories: 270kcal | Carbohydrates: 39g | Protein: 5g | Fat: 11g | Saturated Fat: 2g | Cholesterol: 8mg | Sodium: 650mg | Potassium: 700mg | Fiber: 4g | Sugar: 3g | Vitamin A: 240IU | Vitamin C: 32mg | Calcium: 55mg | Iron: 1.5mg

Bold, tender, cheesy, and cozy—cracker barrel meatloaf made with lean ground beef, Ritz crackers, onion, and melty cheddar. Comfort smells incoming.

If I could bottle the aroma that floats from the oven while this meatloaf bakes, I’d probably wear it as perfume. It’s homey, a little nostalgic, and deeply satisfying in that meat + cheese + ketchup-glaze kind of way. This recipe is hearty but not heavy—and has just enough cheese tucked inside to keep things interesting.

What I love is how this copycat Cracker Barrel meatloaf nails that classic diner-meal vibe, right down to the sweet-tangy topping (hello, brown sugar magic). Whether it’s a Sunday family dinner or just another weeknight where you’ve got zero patience for fussy steps, this one hits the spot every time.

Table of Contents

Copycat Cracker Barrel Meatloaf

Why You’ll Love this Cracker Barrel Meatloaf

Let’s not overthink it—sometimes you just want meatloaf that tastes like it came from a warm, well-worn kitchen without… y’know, actually having to leave your house.

  • Ridiculously simple to make: You just smash everything in a bowl, toss it in a pan, then slather it with sauce.
  • Tastes like the real deal: That iconic balance of savory beef, cheesy bits, soft onion, and sweet-ketchupy glaze? It’s here.
  • Cheddar inside, people: Not on top, but inside the loaf—so every bite has a soft, melty treat tucked in.
  • No stale breadcrumbs involved: We’re using Ritz crackers for that buttery crunch and subtle salt kick.
  • Family-approved: Even the picky eaters who “don’t like meatloaf” tend to go back for seconds.
  • Good leftovers (trust me): Pop a slice on toasted sourdough with extra sauce for the best next-day sandwich.

Copycat Cracker Barrel Meatloaf

Ingredient Notes

Everything in this meatloaf has a purpose. No fluff. Just flavorful, comforting ingredients playing supporting roles to the main event.

  • Lean ground beef: Go for 85% lean if you can. It holds together well and gives just enough fat for juicy texture.
  • Onion: I finely dice a small one so it melts into the meat—no awkward crunchy onion surprises.
  • Bell pepper (optional): Adds a gentle sweetness and pop of color. Use red if you like things mellow, green for a sharper bite.
  • Ritz crackers: Skip the breadcrumbs. Ritz gives this a buttery softness and subtle saltiness that balances everything.
  • Shredded sharp cheddar or Colby cheese: The real secret weapon hiding inside. Melts into pockets of happiness.
  • Eggs & milk: These help bind it all together and give the loaf a soft, tender bite rather than a dense brick.
  • Salt & black pepper: A must. The quantities are gentle, so feel free to taste and adjust next time you make it.
  • Ketchup, brown sugar, mustard: This topping combo caramelizes into a sticky glaze that’s tangy-sweet and totally craveable.

Copycat Cracker Barrel Meatloaf

How To Make This Cracker Barrel Meatloaf

So here’s the beauty of this dish: it smells impressive, tastes amazing, and pretty much does most of the work while you scroll your phone or finally fold those two-week-old laundry piles. Let’s get into it.

  • Preheat that oven: Set it to 350°F and don’t forget to grease and line your loaf pan (a little parchment makes lifting easier, but foil works if that’s what’s on hand).

  • Mix the glaze first: In a tiny bowl, combine ketchup, brown sugar, and a dot of mustard. Give it a good stir and set it aside—it hangs out until finale time.

  • Get in the bowl: In a large bowl, crack in the eggs, add the crushed crackers, shredded cheese, milk, diced onion, bell pepper, salt, and pepper. Stir it well so the dry bits get evenly coated.

  • Add the beef last: Drop in the ground beef and mix just ‘til it all comes together. Hands work best here (I know, squishy textures), but try not to overmix unless you enjoy dense meatloaf drama.

  • Shape and bake: Press the whole mix into your prepared pan. Pop it in the oven for 30 minutes and reward yourself with a break.

  • Glaze + finish bake: Pull it out, slather on that saucy topping like you’re painting a delicious masterpiece, and return to bake for another 30–40 minutes. Peek for doneness around the 30-minute mark—it should hit 155°F in the middle.

  • Cool it down: Seriously, let it rest for 15 minutes before slicing. It helps keep its shape and lets all the cozy flavors settle in.

Copycat Cracker Barrel Meatloaf

Storage Options

So, what happens when your meatloaf ambition exceeds your dinnertime hunger? Leftovers!

Once cooled completely, stash leftovers in an airtight container in the fridge. They’ll keep well for up to 4 days, and arguably taste even better the next day. I like to reheat slices in a skillet with a lid over medium-low heat so the edges get a little crispy.

Want to freeze it? Totally doable. Wrap individual slices in foil, then pop them all into a large freezer bag. (Label it! You won’t remember what that foil mystery is in a month.) When you’re ready, thaw overnight in the fridge, then reheat gently in the oven or microwave.

For a real treat, reheat a slice in a hot skillet with butter until the edges caramelize. Throw it between slices of toasted bread with extra ketchup glaze. Instant meatloaf sandwich win.

Variations and Substitutions

This is one of those cozy recipes that welcomes a little creativity. Forgot something? Want to tweak it to suit a picky eater? Easy fixes coming your way.

  • Swap the cheese: Not a cheddar fan? Use Colby-Jack, mozzarella, or even Swiss. Each gives a slightly different melty texture.

  • Ditch the bell pepper: Totally optional here. Leave it out or swap it for grated carrot or zucchini if you want to sneak in veggies.

  • Try different crackers: No Ritz on hand? Club crackers or buttery saltines will work. Even crushed potato chips if you’re feeling bold.

  • Make it smoky: Add a splash of Worcestershire sauce or a dash of smoked paprika to the glaze for more depth.

  • Go gluten-free: Use gluten-free crackers and double-check your condiments, and you’re good to go.

  • Mini loaves or muffin tins: For next-level meal prep, use muffin tins to make individual servings. Bonus: more glaze-to-meat ratio.

Copycat Cracker Barrel Meatloaf

What to Serve with Cracker Barrel Meatloaf

Now, you could just go meatloaf-on-a-plate and call it a day. But if you’re setting the scene for comfort food nirvana, some sides make all the difference.

  • Nothing feels more at home with this meatloaf than a big scoop of creamy mashed potatoes. Buttered, fluffed, and maybe even drizzled with some extra glaze sauce. It’s peak cozy food mode.

  • Roasted green beans or steamed broccoli make a great balance—especially if you’ve got that “need something green” voice in your head. A little lemon zest on top brightens the whole plate.

  • Mac and cheese brings things into classic diner territory. Velvety, cheesy, and kind of indulgent, it pairs like a dream. Or try the baked version from our rigatoni al forno.

  • Need something lighter? A crisp, tangy slaw with a vinegar-based dressing makes a bright, crunchy contrast. It also holds up great as leftovers.

  • And oh! Don’t forget something sweet at the end. You could go all out with chocolate cheesecake bars or sneak one from the freezer and pretend you baked. I won’t tell.

Copycat Cracker Barrel Meatloaf

Frequently Asked Questions

Can I make this cracker barrel meatloaf ahead of time?

Yes, and it’s actually a great idea if evenings get hectic. You can mix everything and shape it into the pan up to 24 hours in advance. Cover tightly and keep it in the fridge. When you’re ready to cook, just bake as directed—adding a few extra minutes if it’s still chilled when it goes in the oven.

What if I don’t have Ritz crackers?

No worries. You can use Club crackers, saltines, or even a combination of bread crumbs and a spoonful of melted butter to mimic that buttery vibe. Honestly, even crushed buttery pretzels would work if you’re in a pinch and like your meatloaf with a twist.

Can I freeze it before baking?

Yep! Assemble the loaf in a foil-lined pan, then wrap it tightly in plastic wrap and foil. Freeze it solid, then pop the whole thing out and store it (wrapped) for up to 3 months. When you’re ready to bake, thaw it overnight in the fridge and bake as usual. Make the glaze fresh before baking.

Why do I need to let it rest before slicing?

It might be tough, but that 15-minute rest helps everything firm up a bit. If you slice it too soon, it may crumble or look sloppy—and while it’ll still taste great, a neat meatloaf slice is just way more satisfying. Plus, it gives time for all those flavors to settle and mingle like meatloaf magic.

Copycat Cracker Barrel Meatloaf

Copycat Cracker Barrel Meatloaf

Prep Time 15 minutes
Cook Time 1 hour 5 minutes
Resting Time 15 minutes
Total Time 1 hour 35 minutes
Bold, tender, cheesy, and cozy—this copycat Cracker Barrel meatloaf delivers diner comfort at home. Made with lean ground beef, buttery Ritz crackers, sweet onion, cheddar inside, and a sweet-tangy glaze. Hearty but not heavy, it's everything you want from a classic meatloaf and then some!
6 servings

Ingredients

Meatloaf

  • 2 lbs (900 g) lean ground beef 85% lean preferred
  • 1 small onion finely diced
  • 1/2 (0.5) bell pepper finely diced, optional
  • 1 sleeve (85 g) Ritz crackers crushed (about 30 crackers, 85g)
  • 1 cup (110 g) shredded cheddar or Colby cheese sharp cheddar or Colby-Jack
  • 2 large eggs
  • 1/2 cup (120 ml) milk
  • 1 tsp (5 g) salt
  • 1/2 tsp (1 g) black pepper freshly ground

Sweet-Tangy Glaze

  • 1/2 cup (120 ml) ketchup
  • 1/4 cup (55 g) brown sugar packed
  • 1 tbsp (15 ml) yellow mustard

Equipment

  • Loaf Pan
  • Mixing bowls
  • Parchment Paper or Foil

Instructions
 

  1. Preheat oven to 350°F (175°C). Grease and line a 9x5-inch loaf pan with parchment or foil for easy removal.
  2. In a small bowl, mix together ketchup, brown sugar, and yellow mustard for the glaze. Set aside.
  3. In a large bowl, whisk eggs, add milk. Stir in crushed Ritz crackers, shredded cheese, onion, bell pepper (if using), salt, and black pepper. Mix well to combine.
  4. Add the ground beef to the bowl. Use your hands to gently mix until just combined—do not overmix.
  5. Press the mixture evenly into your prepared loaf pan.
  6. Bake uncovered for 30 minutes.
  7. Remove from oven and spread the glaze evenly over the top of the meatloaf.
  8. Return to oven and bake for 30–40 minutes more, or until the center reaches 155°F (68°C). If needed, loosely tent with foil to prevent excessive browning.
  9. Let meatloaf rest for 15 minutes before slicing to help it set. Serve warm and enjoy!

Notes

For best texture, try not to overmix the meatloaf once you add the beef. Leftovers make fantastic sandwiches! Store in the fridge for up to 4 days or freeze slices for up to 3 months. To reheat, use a covered skillet over medium-low heat or rewarm gently in the oven or microwave.

Nutrition

Calories: 420kcal | Carbohydrates: 17g | Protein: 30g | Fat: 25g | Saturated Fat: 11g | Cholesterol: 140mg | Sodium: 790mg | Potassium: 500mg | Fiber: 1g | Sugar: 8g | Vitamin A: 470IU | Vitamin C: 14mg | Calcium: 180mg | Iron: 3.2mg

Let's Get Cooking!

100+ Recipes for Busy Nights

In a time crunch? Take a look around and browse plenty of recipes to help you get dinner ready and on the table on those busy nights!

Sweet Recipes

Pumpkin Banana Muffins

Pumpkin Banana Muffins Recipe

Strawberry Pie Bars

Strawberry Pie Bars Easy Oven Recipe

White Chocolate Raspberry Muffins

White Chocolate Raspberry Muffins Recipe

Snickerdoodle Muffins

Snickerdoodle Muffins Recipe for Oven

PIN NOW

Follow KitchenetteBlog on Pinterest

Love cozy recipes that actually make it to the table? On Pinterest, I share new comfort-food ideas every week—desserts, dinners, and those little snack cravings that hit at midnight. Come pin with me and never run out of kitchen inspo.

Savory Recipes

Turkey Tetrazzini

Turkey Tetrazzini Baked Pasta Recipe

Grilled Chicken Panini Sandwich

Grilled Chicken Panini Sandwich Recipe

Sweet Potato Cornbread

Sweet Potato Cornbread Recipe Oven Baked

Classic Waldorf Salad

Waldorf Salad Simple Classic Recipe

Get 5 Recipes to Simplify Your Life!

Delicious, versatile recipes you can make over and over.