Get 5 recipes to simplify your life:

easy, delicious, real food recipes

Latest Recipes

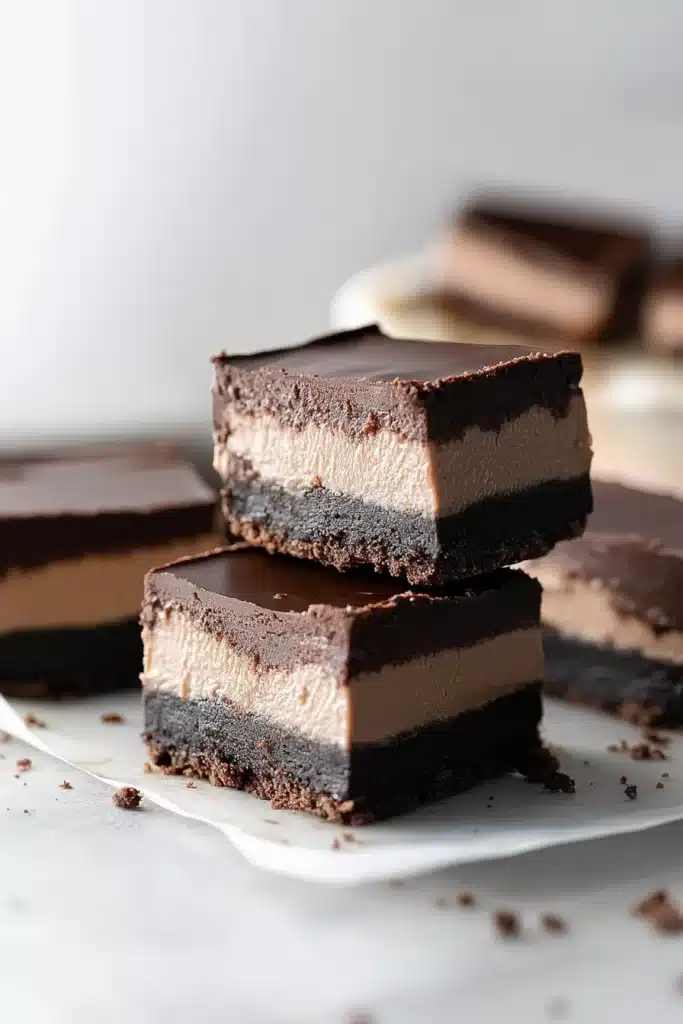
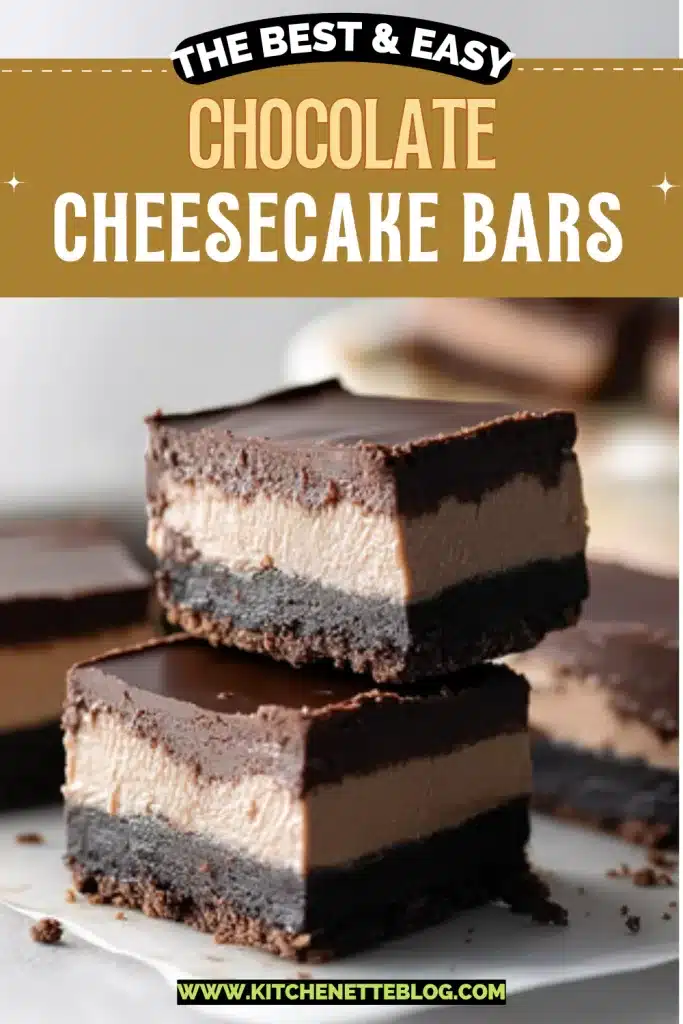
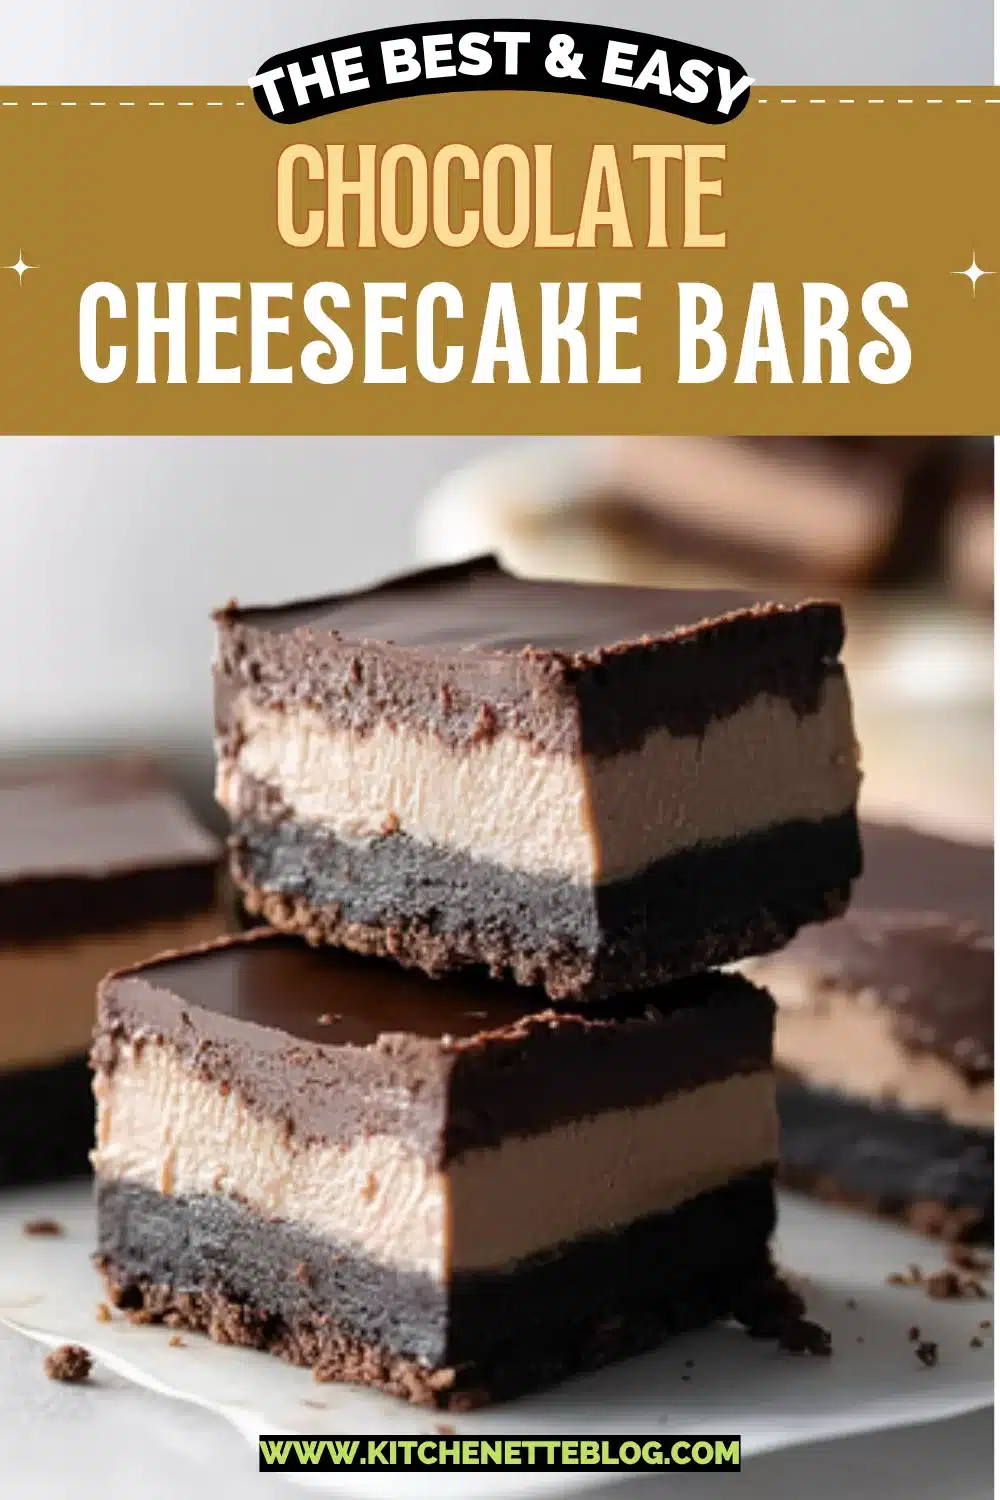
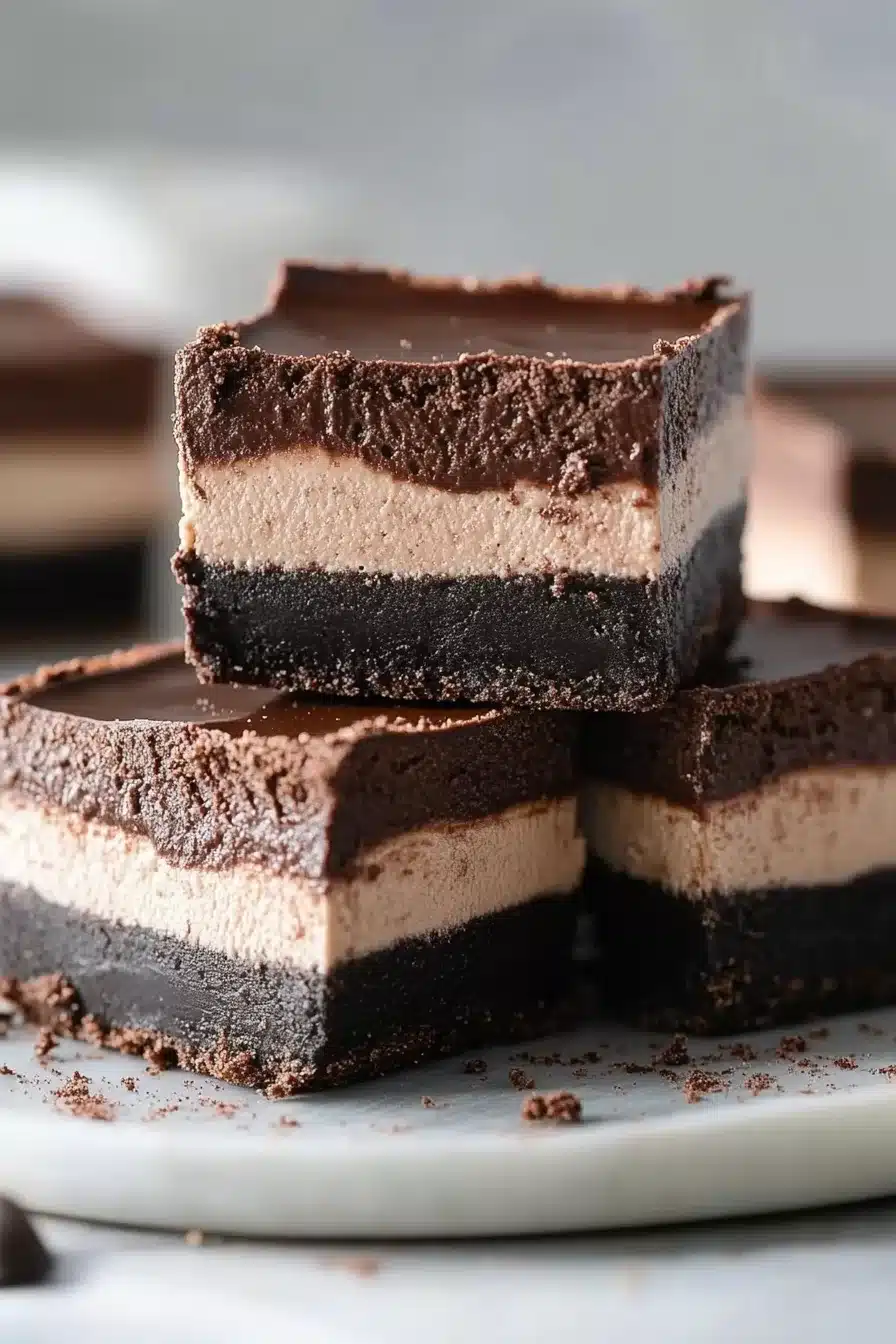
Rich, creamy, and speckled with silky ganache, these chocolate cheesecake bars are the stuff late-night cravings dream of. Crushed Oreos, cream cheese, chopped chocolate, and just a splash of vanilla come together right in your cozy kitchen.

They smell like a bake sale—minus the crowd. Better yet, the texture? Somewhere between decadent truffle and classic cheesecake. A little slice of happiness, chilled and waiting in the fridge.

So here’s the game plan: you’ve got guests coming over, or maybe just a Tuesday night lull that needs a lift. These chocolate cheesecake bars were made for those exact moments. The crust is deeply chocolatey and not too sweet, the filling is velvety but not dense, and then that ganache… oh man. It settles on top like a glossy chocolate hug.

Minimal fuss, maximum flavor, and yes, you can totally eat them with your hands.

Table of Contents

Easy Chocolate Cheesecake Bars

Why You’ll Love this Chocolate Cheesecake Bars Recipe

Alright, no dramatic sales pitch. These bars are cozy, chocolatey, and genuinely easy to throw together. Plus, they look way fancier than the effort they require.

  • Ridiculously simple to make: You just squish, smear, melt, and drizzle. There’s even some microwave action—no water baths here.
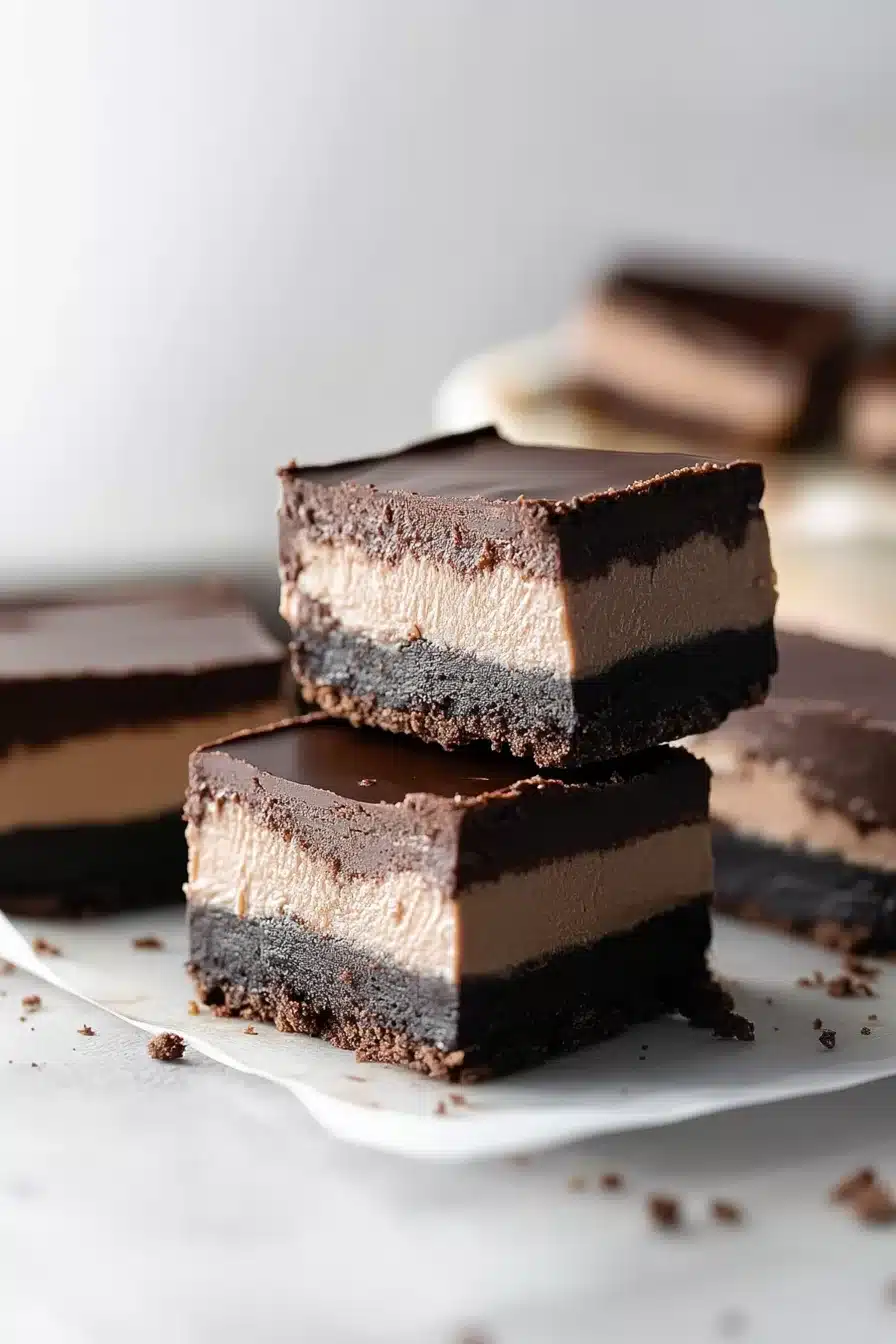
  • Buttery Oreo crust: It’s like a candy bar and a cheesecake got married and made a crunchy chocolate lovechild.
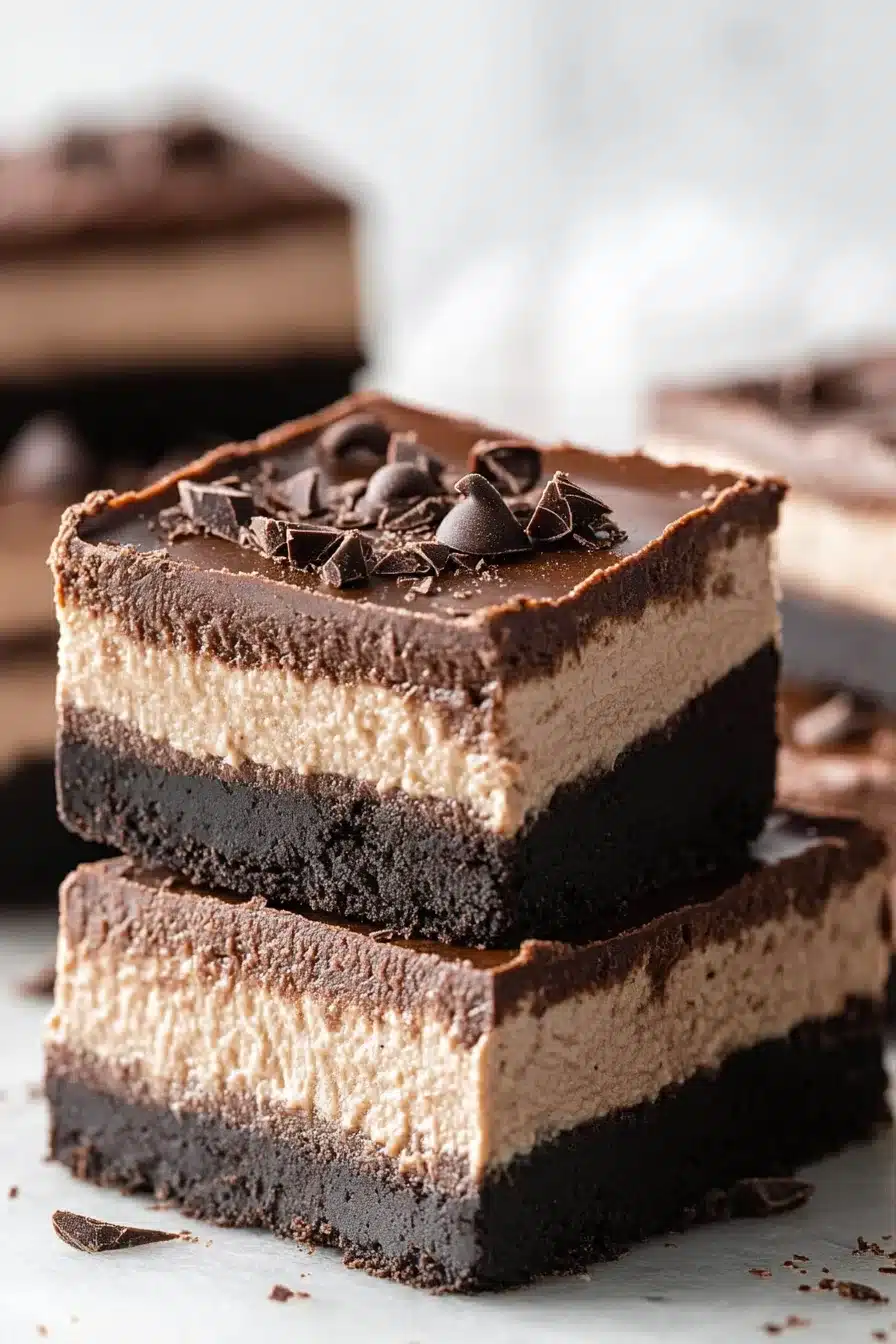
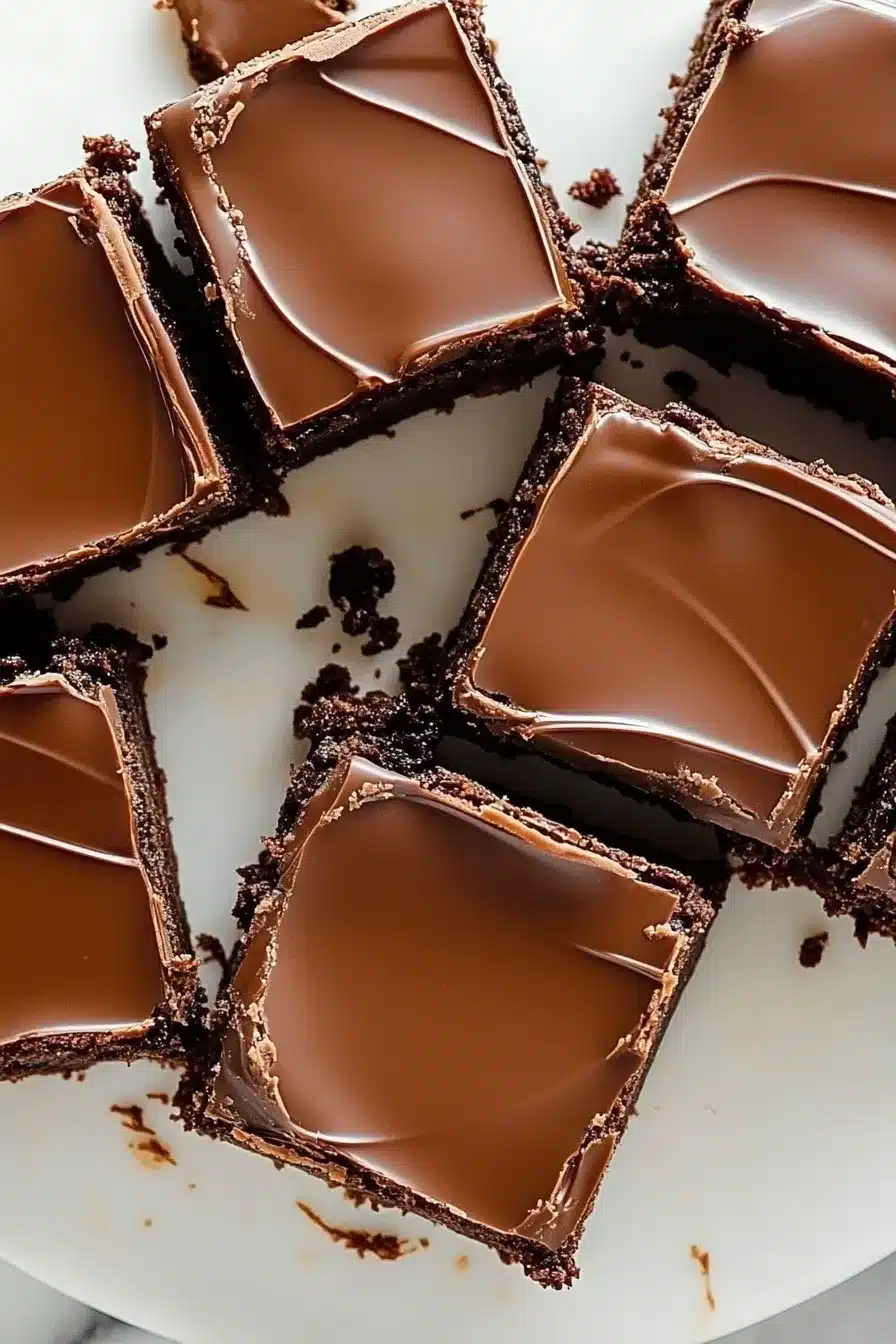
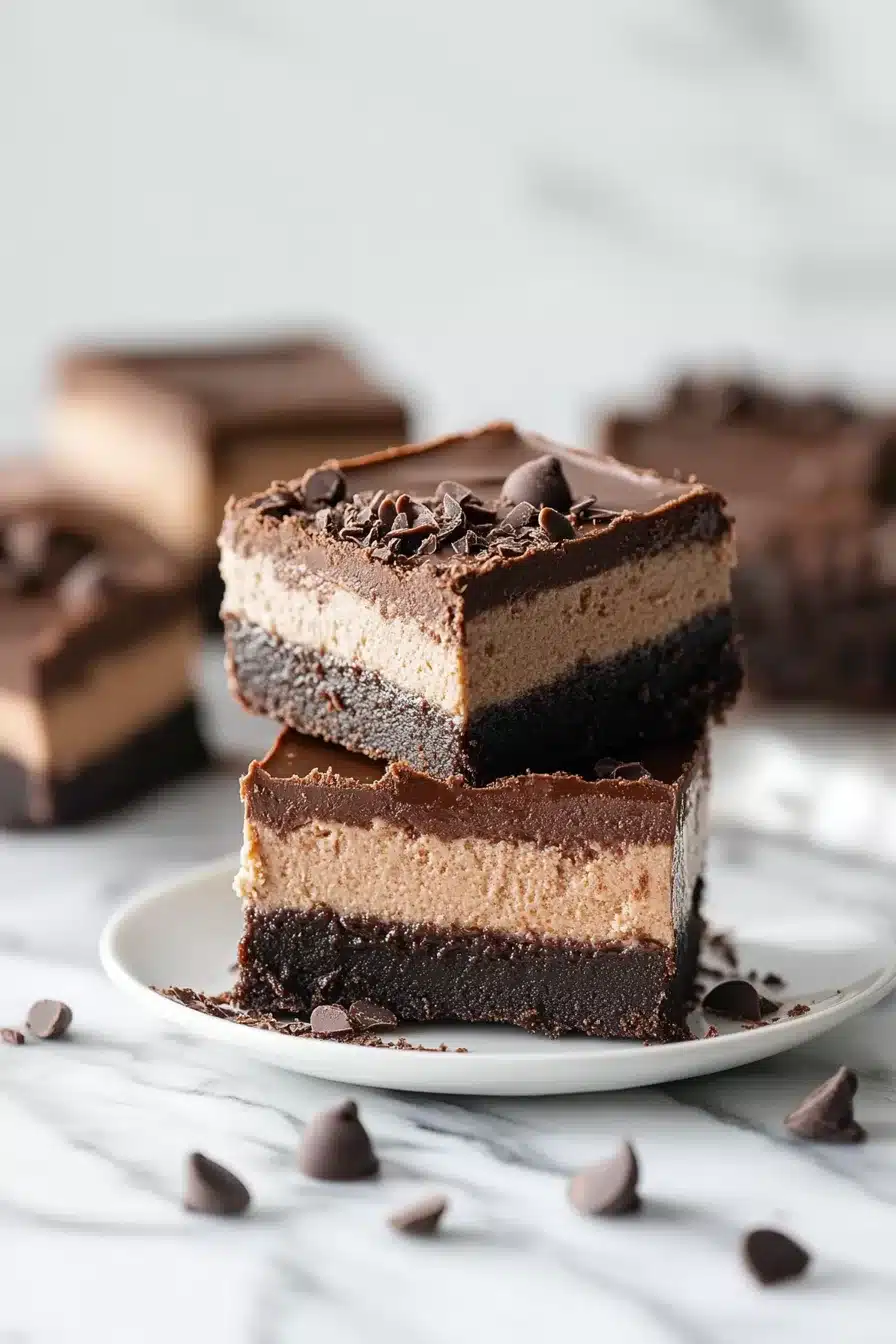
  • Glossy ganache topping: Shiny, silky, sexy chocolate on chocolate. Need I say more?
  • Perfect make-ahead dessert: These bars actually get better after chilling overnight. It’s the rare recipe that improves with procrastination.
  • Rich but not cloying: Thanks to a pinch of sour cream and control over the sugar, the flavor stays balanced.
  • Customizable vibe: Throw on sea salt, chopped nuts, or pretend you’re fancy with a raspberry swirl.

Easy Chocolate Cheesecake Bars

Ingredient Notes

Almost everything here is snack-drawer compatible or standard fridge staples. A lot of chocolate and a few dairy darlings.

  • Oreo cookies: Classic, unapologetic Oreos (filling and all). They make a dark, sweet crust and couldn’t be simpler to crush.
  • Unsalted butter: This glues together the cookie crust. Melt it gently so it mixes evenly with the crumbs.
  • Semisweet chocolate: You’ll use this twice—once in the filling, once in the ganache. Go for bars or chips, just not the dusty stuff in the back of your pantry.
  • Heavy cream: Adds richness to the filling and makes the ganache glossy and spoon-lickable.
  • Full-fat cream cheese: Softened to room temp so it beats smooth. If it’s cold, you’ll have lumps, and no one wants cheesecake freckles.
  • Granulated sugar: Sweetens, of course, but also balances the cocoa and tang in the cheese and sour cream.
  • Unsweetened cocoa powder: Deepens the chocolate flavor in the filling. Dutch-process or natural—either works here.
  • Sour cream: Adds that subtle tang and extra moisture. Makes the texture softer, dreamier, less brick-like.
  • Vanilla extract: Rounds out all the chocolate with a warm, fragrant, cozy bakery vibe.
  • Eggs + yolks: Help the filling set into that creamy, sliceable layer (yolks add richness).
  • Flaky sea salt (optional): Totally optional but highly encouraged. Those little pops of salt make the chocolate sing.

Easy Chocolate Cheesecake Bars

How To Make This Chocolate Cheesecake Bars Recipe

Okay, apron on, oven preheating—it’s go time. I promise this looks like more steps than it feels like when you’re doing it.

  • Preheat the oven and prep the pan: Line a 9×9 pan with parchment, leaving a bit of overhang. This makes lifting the bars out way easier later. Preheat the oven to 350°F while you crush Oreos (therapeutic, honestly).

  • Make the crust: Combine the cookie crumbs with melted butter until they look like damp sand. Press that into the bottom of the pan—use the bottom of a measuring cup to get it even. Bake for 10 minutes, then reduce the temp to 325°F and let the crust cool.

  • Melt the chocolate and cream for the filling: Stick the chopped chocolate and cream in the microwave and melt in 30-second bursts. Stir in between—don’t just set it and hope for the best. You want it smooth, not scorched.

  • Beat the cream cheese: It needs to be soft and smooth. Start on medium speed with your mixer, then scrape down the sides. Nobody likes surprise lumps. Blend in the sugar and cocoa powder next.

  • Add sour cream and vanilla: Mix them in on low speed to keep things smooth and avoid a batter explosion. No one enjoys cleaning chocolate splatter off the ceiling.

  • Add eggs and egg yolks one at a time: Mix until just combined after each one—don’t overbeat or things get oddly bouncy.

  • Mix in melted chocolate mixture: This gives the cheesecake that deep, luscious chocolate vibe. Don’t skip licking the bowl (off the mixer, not your face… I mean, unless you’re alone and feelin’ wild).

  • Pour into crust and bake: Spread the batter evenly over the cooled crust. Bake at 325°F for about 40–45 minutes, until the center is mostly set but slightly jiggly in the middle—like a firm dance move, you know?

  • Cool it down: Let the cheesecake rest in the turned-off oven with the door cracked for an hour. This helps avoid big cracks. Then let it come to room temperature before chilling for at least 3 hours (or overnight if you can wait).

  • Make the ganache topping: Combine the chocolate and cream, melt in the microwave (again, 30-second bursts), and stir until glossy. Pour over the chilled bars and spread into an even layer.

  • Chill again, slice, and sprinkle with flaky salt (if you’re feeling fancy): The bars cut best straight from the fridge. A warm knife helps too!

Easy Chocolate Cheesecake Bars

Storage Options

These bars are practically made for the fridge. Store the sliced bars in an airtight container, layered with parchment if you’re stacking them. They’ll stay lovely for about 4–5 days, though good luck making them last that long.

If you want to freeze them, you absolutely can. Wrap individual bars tightly in plastic wrap, then stash them in a freezer bag or container. They thaw beautifully in the fridge overnight. The crust might lose a tiny bit of crispness, but the flavor? Still top tier.

Want to warm them slightly? Just a few seconds in the microwave brings back that soft, melty vibe in the ganache. Don’t nuke them too long or you’ll have cheesecake lava.

Variations and Substitutions

Once you get the base down, the fun begins. These chocolate cheesecake bars are begging for personal twists.

  • Use different cookies for the crust: Graham crackers, chocolate wafers, or even Biscoff will totally work. Just crush and mix with butter like you would Oreos.

  • Swap the chocolate: Play with bittersweet or dark chocolate for a deeper hit, or try milk chocolate if you like things sweeter and softer.

  • Add crushed fruit or preserves: Swirl in raspberry jam before baking, or fold some chopped cherries into the batter for a black forest vibe.

  • Infuse with spice: Add a pinch of cinnamon or espresso powder to the crust or batter to give it a cozy warmth or mocha note.

  • Top with nuts: Chopped toasted hazelnuts, pecans, or almonds on top of the ganache add crunch and a little nutty surprise.

  • Try a swirl: Marble a bit of peanut butter or caramel into the top of the cheesecake layer before baking. Messy-looking in the best way.

Easy Chocolate Cheesecake Bars

What to Serve with Chocolate Cheesecake Bars

Dessert bars this rich don’t need much… but if you do want to dress up the plate, I’ve got ideas.

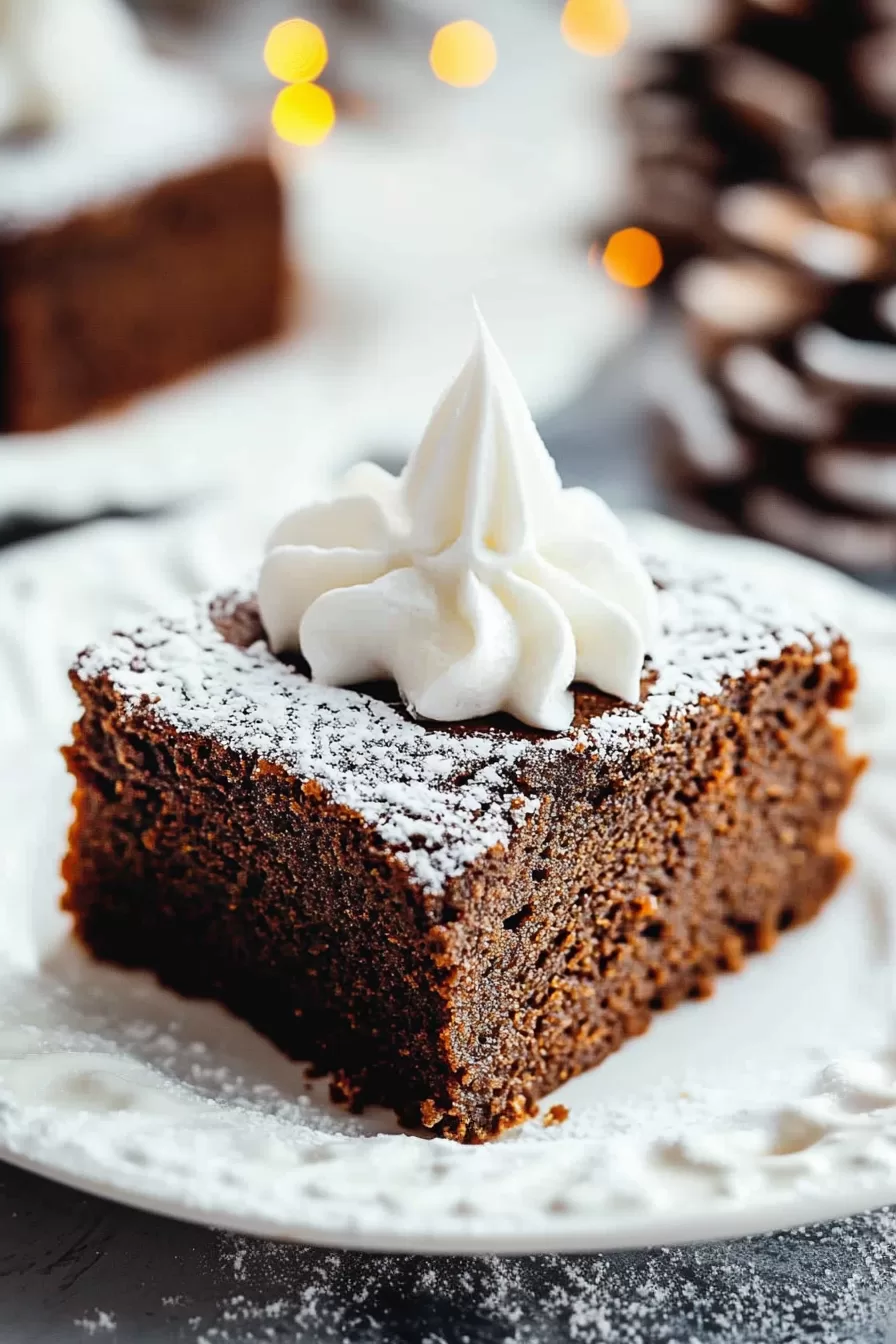
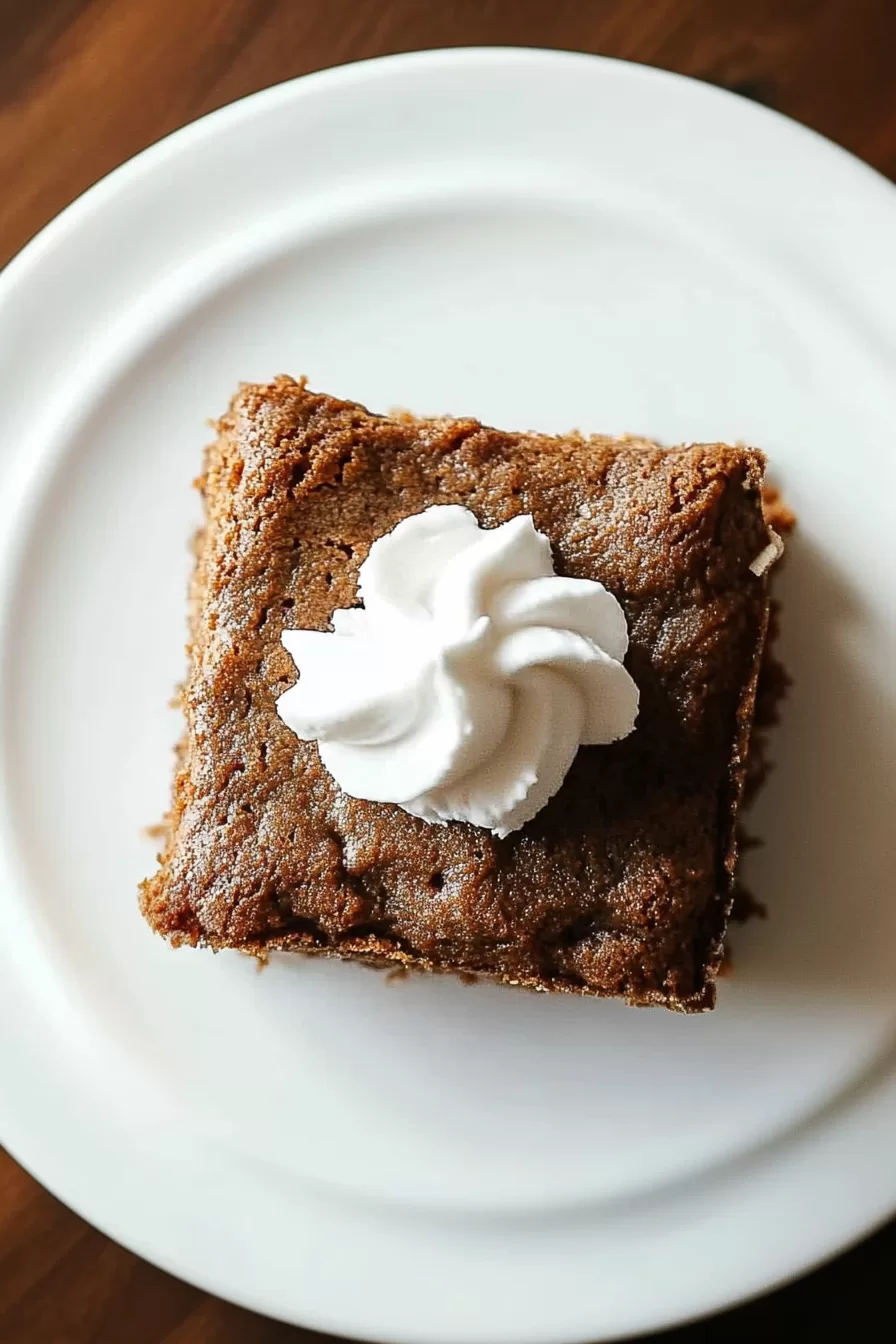
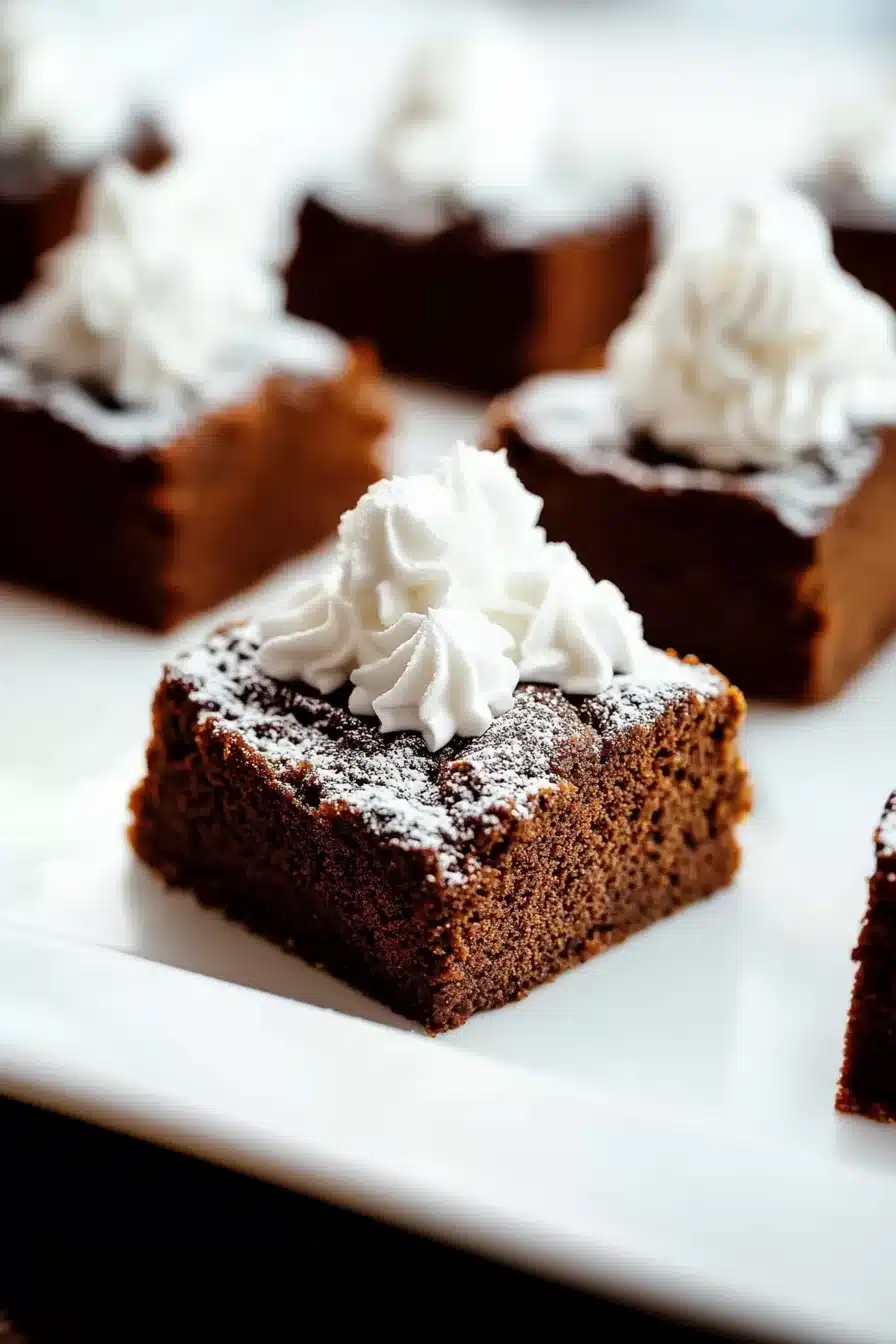
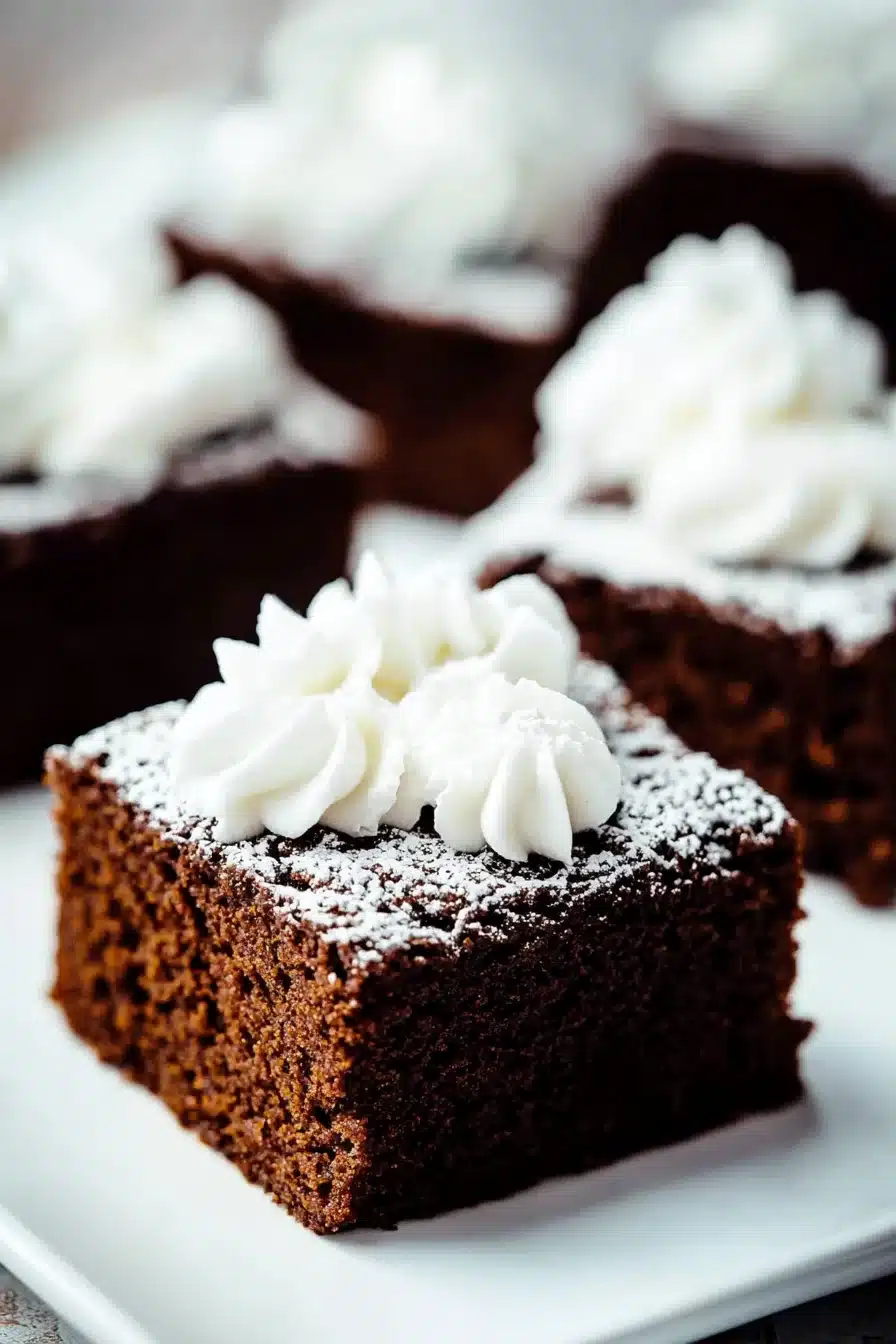
  • For a cozy pairing, serve these with piping hot coffee or an espresso. The bitterness cuts the sweetness, and the whole experience feels café-level chic. You could even add a tiny dollop of whipped cream next to each square if you’re feeling generous.

  • Fresh fruit on the side never hurts. A few berries, or slices of pear or ripe plum, add brightness and contrast to the chocolate depth. Bonus: it makes dessert feel… healthy?

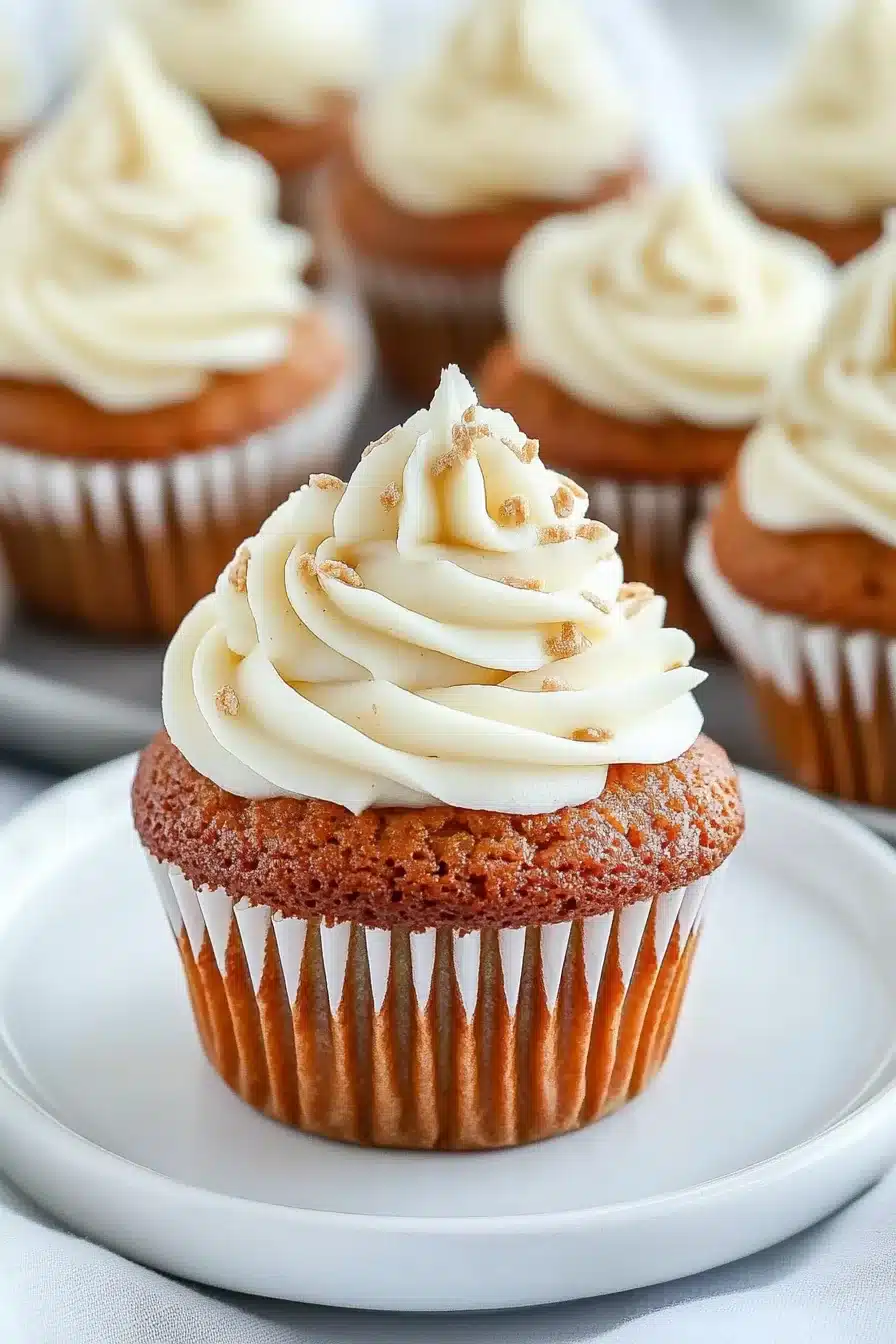
  • If you’re making these as part of a bigger dessert spread, toss in something citrusy like carrot cake cupcakes. The fresh, spiced vibes balance the rich chocolate beautifully.

  • For dinner pairings, I like keeping it elegant-yet-easy. Try them after something like pan seared cod with rainbow chard—light, fresh, and not too filling before the chocolate finale.

Easy Chocolate Cheesecake Bars

Frequently Asked Questions

Can I make chocolate cheesecake bars ahead of time?

Yes, and in fact, they’re even better that way! The flavor deepens and the texture sets perfectly after chilling overnight. Just keep them refrigerated in an airtight container, and slice before serving. I often make them a full day in advance when I’ve got guests or, let’s be honest, just when I’m avoiding last-minute dessert stress.

Do I need a water bath for this cheesecake?

Nope! One of the best parts of these bars is their low-maintenance method. As long as you don’t overmix or overbake, the texture stays creamy without any risky steam setups. Letting them rest in the warm oven with the door slightly open helps them cool down gently, which prevents cracking just as well.

Can I freeze chocolate cheesecake bars?

Absolutely. Slice them up first, then wrap each bar tightly in plastic wrap and pop them into a freezer-safe container. They’ll keep about 1–2 months. When you’re ready to enjoy, just thaw in the fridge overnight. The crust might be slightly softer, but the flavor and structure hold up beautifully.

What kind of chocolate should I use?

Stick with semisweet chocolate for a good balance of deep flavor without overwhelming sweetness. You can use chopped bars or chips, just aim for something in the 50–60% cocoa range. Avoid baking chocolate unless it’s sweetened; unsweetened will throw the flavor off unless you adjust the sugar elsewhere.

Easy Chocolate Cheesecake Bars

Easy Chocolate Cheesecake Bars

Prep Time 25 minutes
Cook Time 55 minutes
Chilling Time 3 hours
Total Time 5 hours
Rich, creamy, and crowned with glossy ganache, these chocolate cheesecake bars are the hands-down best answer to your sweet tooth. Crushed Oreos form a not-too-sweet chocolatey base, and the filling is velvety smooth with plenty of real chocolate flavor. Minimal fuss, maximum reward — plus, you can totally eat them with your hands.
16 bars

Ingredients

For the Oreo Crust

  • 24 Oreo cookies classic, with filling
  • 5 tbsp (70 g) unsalted butter melted

For the Cheesecake Filling

  • 6 oz (170 g) semisweet chocolate chopped (good-quality chocolate or chips)
  • 3 tbsp (45 ml) heavy cream
  • 16 oz (450 g) full-fat cream cheese softened to room temperature
  • 3/4 cup (150 g) granulated sugar
  • 1/4 cup (25 g) unsweetened cocoa powder Dutch-process or natural
  • 1/2 cup (120 g) sour cream
  • 1 tsp (5 ml) vanilla extract
  • 2 large eggs
  • 2 egg yolks

For the Ganache Topping

  • 4 oz (115 g) semisweet chocolate chopped (good-quality chocolate or chips)
  • 1/2 cup (120 ml) heavy cream
  • Flaky sea salt for sprinkling, optional

Equipment

  • 9x9 inch baking pan
  • Parchment paper
  • Electric mixer
  • Mixing bowls
  • Measuring Cups & Spoons
  • Microwave

Instructions
 

  1. Preheat the oven and prep the pan: Line a 9x9 pan with parchment, leaving an overhang. Preheat the oven to 350°F (175°C).
  2. Make the crust: Crush the Oreo cookies (cream filling included) into fine crumbs. Mix with the melted butter until it resembles damp sand. Press evenly into the prepared pan using a measuring cup. Bake for 10 minutes, then reduce oven temp to 325°F (165°C). Let crust cool while preparing filling.
  3. Melt chocolate and cream for filling: Place the chopped chocolate and 3 tbsp cream in a microwave-safe bowl. Microwave in 30 second bursts, stirring until just smooth and melted. Set aside to cool slightly.
  4. Beat the cream cheese: In a large mixing bowl, beat softened cream cheese until very smooth, scraping the sides. Blend in sugar and cocoa powder until fully combined.
  5. Add sour cream and vanilla: Beat in the sour cream and vanilla on low speed until fully blended.
  6. Add eggs and yolks: Add eggs and yolks one at a time, mixing on low until just combined after each to avoid overmixing.
  7. Mix in melted chocolate mixture: Pour in the melted chocolate mixture and blend until batter is smooth and glossy.
  8. Pour into crust and bake: Spread cheesecake batter evenly over cooled crust. Bake at 325°F (165°C) for 40–45 minutes, until center is nearly set (slightly jiggly in center).
  9. Cool in oven, then chill: Let cheesecake rest in the turned-off oven with door cracked for 1 hour. Remove and let come to room temperature, then chill at least 3 hours or overnight.
  10. Make the ganache: Place the chopped chocolate and 1/2 cup cream in a microwave-safe bowl. Microwave in 30 second bursts, stirring until smooth and glossy. Pour over chilled cheesecake bars and spread evenly. Chill for another 30 minutes to set.
  11. Slice and serve: Lift bars from pan with parchment. Slice into 16 squares with a warm knife. Sprinkle with flaky salt if desired and serve chilled.

Notes

For the smoothest texture, always use room temperature cream cheese and avoid overbeating the eggs. Bars store well in the fridge for up to 5 days, and can be frozen for up to 2 months. For best slices, use a sharp knife warmed under hot water and wiped dry between cuts. Top with fruit or whipped cream if desired.

Nutrition

Calories: 370kcal | Carbohydrates: 29g | Protein: 4g | Fat: 26g | Saturated Fat: 15g | Cholesterol: 83mg | Sodium: 178mg | Potassium: 140mg | Fiber: 2g | Sugar: 19g | Vitamin A: 676IU | Calcium: 50mg | Iron: 2.5mg

Crispy on the outside, saucy and sticky in just the right way, this sesame chicken brings together bite-sized chicken breast, soy sauce, garlic, honey, and a little flirt of ginger. It smells like your favorite takeout place, only you’re wearing fuzzy socks and not pants.

This is glossy, crunchy comfort with a sesame sparkle and that sweet tangy punch we all low-key crave on a Tuesday (or, let’s be honest, every day with a “y”). Makes fried chicken feel a little dressed up—like it’s got weekend plans and a passport.

Table of Contents

Crispy Sesame Chicken

Why You’ll Love this Sesame Chicken

This isn’t a fancy-pants dish, but wow, does it pull its weight. I mean, what’s not to love about crispy golden chicken caught in a sticky, savory-sweet situation?

  • Crispy outside, juicy inside: Thanks to double-coating and hot oil, every bite crunches before it melts.
  • Sauce that clings (respectfully): The glossy glaze hugs every morsel without drowning it.
  • No deep fryer needed: A skillet and some hot oil do the trick beautifully.
  • Customizable sweetness level: Honey and brown sugar give options, but you’re totally in control.
  • Easy pantry sauce magic: Most of the sauce ingredients live in your cabinets already. Sneaky convenient.
  • Plays well with others: Pair it with veggies, noodles, or rice—whatever’s hanging out in your fridge.

Crispy Sesame Chicken

Ingredient Notes

Let’s talk ingredients—specifically the ones that make this sesame chicken such a vibe. A few pantry pals, a couple of fridge friends, and some fast-fry action.

  • Chicken breasts: Go for boneless, skinless, cut into bite-sized pieces. Thighs work too; they stay super juicy.
  • Eggs: This gives the coating something to cling to. Think edible glue, but… appetizing.
  • Cornstarch and flour: This magical duo makes that crispy crust. Cornstarch adds that light, crunchy texture.
  • Soy sauce: Adds salty, umami depth. I like low-sodium so the sweetness doesn’t get bullied.
  • Honey and brown sugar: Together, they bring sticky, deep sweetness. You can dial them down if you like things less sweet.
  • Rice vinegar: Just enough acid to balance the sugar—zippy but not harsh.
  • Hoisin sauce: It’s like sweet barbecue sauce’s more complex cousin. Don’t skip this.
  • Garlic and ginger: Fresh is best here. They bring warmth and a little bite.
  • Sesame oil: Toasty, fragrant, and wildly underrated. Just a couple teaspoons brings the whole thing to life.
  • Sesame seeds and green onions: The garnish game matters. These add crunch and brightness at the end.

Crispy Sesame Chicken

How To Make This Sesame Chicken

Alright, roll up those sleeves and get yourself a clean kitchen towel—you’re about to fry, glaze, and toss your way to something great. It’s a few steps, but none of ‘em are hard.

  • Make your egg wash and flour dredge: In one bowl, whisk the eggs with salt, pepper, and garlic powder. In another, mix the cornstarch and flour. Dipping station ready? Good.

  • Coat the chicken: Dip each little chicken piece in the egg, then coat in the flour mix. Press it a bit to make sure it really sticks. Craggy edges mean more crunch.

  • Heat up your oil and fry: You want about 2 inches of vegetable oil in a skillet, heated to 350ºF. Fry the chicken in batches so it stays golden—not soggy. About 4 to 5 minutes each batch should do it. Drain on a paper towel line-up.

  • Make the glorious sauce: In a saucepan, mix together soy sauce, honey, brown sugar, rice vinegar, sesame oil, hoisin, garlic, and ginger. Whisk and heat until it just starts to simmer.

  • Thicken the magic: Stir in your cornstarch slurry (just cornstarch and water whisked together). Let it bubble gently and thicken—it should glaze a spoon when it’s ready.

  • Toss chicken in sauce: Add your fried beauties into a big bowl. Pour the warm sauce over and toss until each piece is shiny and coated.

  • Garnish and serve: Sprinkle with sesame seeds and sliced green onions. Serve while it’s still got that crisp edge. Over rice? Yup. With stir-fried broccoli? Even better.

Crispy Sesame Chicken

Storage Options

Leftovers? You’ll have more control than I do, apparently. But if you do end up with some, here’s how to keep ’em happy.

In the fridge, crispy sesame chicken keeps well for up to 4 days. Store it in an airtight container, and try not to pile other things on top. No one likes a squished chicken.

For the freezer, let the chicken cool completely first. Then flash-freeze the pieces on a baking tray before transferring them to a freezer bag. That way, they don’t stick together and turn into one big chunk o’ chicken. Freeze for up to 2 months.

Reheating? Use the oven or a skillet to keep that crunch alive. Microwaving works too, but it softens the coating. Pop it in a 375ºF oven for 8–10 minutes or until hot through. Or warm it in a pan with just a touch of oil.

Variations and Substitutions

There’s always room for tweaks based on what’s in your fridge or what your taste buds are feeling today. Here’s how you can switch things up:

  • Chicken thighs instead of breasts: They’re juicier, slightly more forgiving, and perfect if you want a richer bite. Just trim the fat first.

  • Swap honey for maple syrup: Still sweet and sticky, but with that extra woodsy oomph. Ideal for fall-vibe dinners.

  • Make it spicy: Add a spoonful of chili garlic sauce or a squirt of sriracha to the glaze. Boom—sweet heat.

  • Gluten-free version: Use gluten-free flour and tamari instead of soy sauce. Double-check your hoisin, but most major brands have a GF version.

  • Vegetarian twist: Try it with cauliflower florets or pressed tofu instead. Fry the same way, saucy results guaranteed.

Crispy Sesame Chicken

What to Serve with Sesame Chicken

Once you’ve got your chicken crisped and glazed, it’s time to bring in the supporting cast. And trust me, this chicken makes everyone else look good.

  • Steamed jasmine rice is the no-brainer bestie here. It soaks up that extra sauce like a sponge, turning what could’ve been “just rice” into something you’ll actually fight over. Pro tip: add a pinch of salt and a splash of sesame oil to your rice water.

  • Stir-fried green veggies (looking at you, broccoli and bok choy) give a fresh, slightly bitter foil to the sweetness of the chicken. Toss them in garlic and a little soy sauce for a quick, snappy side.

  • Noodle bowls! A pile of lo mein or rice noodles with a quick sesame-soy sauce makes a speedy dinner feel restaurant-ish. Bonus: it’s fun to twirl.

  • A cool, crunchy cucumber salad can balance all that glaze. Think rice vinegar, a pinch of sugar, sesame seeds, and thin cucumber ribbons. Refreshing and fast.

  • And if you’re digging out your fryer anyway, consider making a side of bacon basil cornbread muffins. Sounds odd? Try one bite with the sticky chicken and thank me later.

Crispy Sesame Chicken

Frequently Asked Questions

Can I bake the chicken instead of frying it?

Yes, you can! It won’t be quite as crispy, but it’ll still taste amazing. Preheat your oven to 425ºF, lay the coated chicken pieces on a greased baking rack set over a sheet pan, and bake for about 20–25 minutes, flipping halfway through. Spritzing the tops with oil spray helps boost crispness. Just be sure not to overcrowd or they’ll steam instead of brown.

What’s the best oil for frying?

Vegetable oil works great here because it has a high smoke point and neutral flavor. Canola is fine too. Avoid olive oil—it smokes too easily and has too much flavor for this kind of frying. If you’re fancy and have peanut oil, that’ll give the crispiest finish of all.

How do I keep the coating from falling off?

Great question! Make sure the chicken is dry before you start dipping (no slippery moisture). Also, press the flour mixture onto the chicken really well—it shouldn’t look patchy. Lastly, let it sit for a few minutes after coating before frying. That helps the coating cling better during its hot oil spa treatment.

Can I make the sauce ahead of time?

Totally. Make it a day or two ahead and store it in the fridge in a jar or container with a lid. When you’re ready, warm it on the stove over low heat, stirring occasionally. If it gets too thick in the fridge, a splash of water or broth will help loosen it back up.

Crispy Sesame Chicken

Crispy Sesame Chicken

Prep Time 20 minutes
Cook Time 25 minutes
Total Time 45 minutes
Crispy on the outside, saucy and sticky in just the right way, this sesame chicken brings together bite-sized chicken breast, soy sauce, garlic, honey, and a little flirt of ginger. Smells like your favorite takeout, but from the comfort of home—and fuzzy socks.
4 servings

Ingredients

For the Chicken

  • 1.5 pounds (680 g) boneless skinless chicken breasts cut into bite-sized pieces
  • 2 eggs beaten
  • 1 tsp salt divided
  • 1/2 tsp (0.5 tsp) black pepper
  • 1 tsp garlic powder
  • 1/2 cup (60 g) cornstarch
  • 1/2 cup (60 g) all-purpose flour
  • 2 cups (480 ml) vegetable oil for frying (approximate)

For the Sauce

  • 1/3 cup (80 ml) soy sauce low-sodium preferred
  • 1/3 cup (115 g) honey
  • 2 tbsp (25 g) brown sugar
  • 2 tbsp (30 ml) rice vinegar
  • 2 tbsp (30 g) hoisin sauce
  • 2 cloves (2) garlic minced
  • 1 tbsp (10 g) fresh ginger grated
  • 2 tsp (10 ml) toasted sesame oil
  • 1 tbsp (8 g) cornstarch for slurry
  • 1 tbsp (15 ml) water for slurry

For Garnish

  • 1 tbsp (8 g) toasted sesame seeds
  • 2 green onions thinly sliced

Equipment

  • Large Skillet or Dutch Oven
  • Mixing bowls
  • Tongs
  • Paper towels
  • Measuring cups and spoons

Instructions
 

  1. Prepare the dredging station: In one bowl, whisk eggs with 1/2 tsp salt, pepper, and garlic powder. In a second bowl, combine cornstarch, flour, and remaining 1/2 tsp salt.
  2. Dip each chicken piece first into the egg wash, then dredge thoroughly in the cornstarch-flour mix, pressing to adhere. Set aside on a plate until all pieces are coated.
  3. Heat vegetable oil in a large skillet (about 2 inches deep) over medium-high heat until it reaches 350ºF (175ºC). Fry chicken in batches, turning as needed, until deep golden and cooked through, about 4–5 minutes per batch. Remove and drain on paper towels.
  4. Make the sauce: In a saucepan, combine soy sauce, honey, brown sugar, rice vinegar, hoisin, garlic, ginger, and sesame oil. Whisk well and heat over medium until simmering.
  5. In a small bowl, mix 1 tbsp cornstarch with 1 tbsp water to form a slurry. Stir into the sauce, simmer for 1–2 minutes until thick and glossy. Remove from heat.
  6. Transfer fried chicken to a large bowl. Pour warm sauce over the chicken and toss to coat every piece evenly.
  7. Garnish with sesame seeds and sliced green onions. Serve immediately with steamed rice and veggies if you like.

Notes

Store leftovers in an airtight container in the fridge for up to 4 days. To freeze, let cool, then freeze chicken pieces separately before transferring to a freezer bag. Reheat in an oven or skillet for maximum crispness. For a spicy kick, add sriracha or chili garlic sauce to the glaze. Substitute thighs for juicier results, or try pressed tofu/cauliflower for a vegetarian spin. Gluten-free? Use tamari and GF flour.

Nutrition

Calories: 590kcal | Carbohydrates: 54g | Protein: 35g | Fat: 26g | Saturated Fat: 4g | Cholesterol: 145mg | Sodium: 1200mg | Potassium: 650mg | Fiber: 1g | Sugar: 19g | Vitamin A: 140IU | Vitamin C: 2mg | Calcium: 75mg | Iron: 2.2mg

Rich with spice, sweet carrots, and a swoosh of tangy cream cheese frosting, these carrot cake cupcakes are built from cozy essentials like flour, sugar, oil, eggs, and (yup) carrots. Baked till just golden with hints of cinnamon and nutmeg floating through your kitchen.

If you’re craving that carrot cake goodness but don’t want to wrangle with layers or springform pans, I’ve got you. These cupcakes are tender, lightly spiced, and pretend to be healthy because, you know, carrots.

They’re the kind of treat that looks cute on a brunch table but also works as a “just because it’s Tuesday” snack. Each bite is moist, buttery, and full of warm spice, with just the right fluff-to-denseness ratio. Plus, let’s not forget that silky cream cheese swirl on top. It hugs the cupcake like it means it.

Table of Contents

Easy Carrot Cake Cupcakes

Why You’ll Love this Carrot Cake Cupcakes

No frills, no fondant, just solid cupcake energy.

  • Ridiculously simple to make: One bowl here, a whisk there… no fancy mixers or steps that require a degree in pastry science.
  • Supremely soft and moist: Grated carrots, just the right amount of oil, and a gentle mix keep things tender (read: not dry cardboard).
  • Just sweet enough: The brown sugar adds depth while carrots bring a subtle earthy sweetness. Nothing cloying. Your dentist says thanks.
  • Warm, comforting spices: Cinnamon, ginger, and nutmeg show up like your favorite sweater once fall hits. Cozy, familiar, lovely.
  • Flexible fillings: Raisins or no raisins. Pecans if you’re feeling nutty. You get to play cupcake boss.
  • That frosting though: Lightly tangy, super fluffy cream cheese frosting—yes, you can eat it with a spoon (and probably will).

Easy Carrot Cake Cupcakes

Ingredient Notes

These carrot cake cupcakes are built from everyday pantry pals, but there’s a little nuance in each one.

  • All-purpose flour: Stick with the classic here. It provides just enough structure without making things dense or muffin-y.
  • Baking powder + baking soda: A combo, because science. The soda reacts with brown sugar for nice rise while the powder fluffs things up.
  • Cinnamon, ginger, and nutmeg: Together, they make up the warm spice trifecta. Don’t skip—the whole cupcake vibe hinges on this.
  • Vegetable oil or melted coconut oil: Oil gives the cupcakes that plush, velvety crumb. Coconut brings a hint of flavor, if you’re into that.
  • Granulated + brown sugar: The brown sugar gives a deeper caramel vibe, while granulated keeps the structure clean and light.
  • Eggs: They bind and lift. Just hang tight and bring them to room temp so the batter doesn’t freak out.
  • Vanilla extract: A touch makes everything sing. That background note you might not notice till it’s missing.
  • Finely grated carrots: Please, for the love of cupcake sanity, grate these fresh. Pre-shredded carrots don’t soften properly in the oven.
  • Walnuts or pecans (optional): Totally your call. They add great crunch and a toasty counterbalance to the soft crumb.
  • Raisins (optional): Controversial, I know. But for those who love that chewy-sweet burst, toss ’em in with zero shame.
  • Cream cheese and butter: Both need to be soft—think just barely squishable—for a smooth, dreamy frosting.
  • Powdered sugar: Sift it. You’ll thank me when it doesn’t clump up your frosting like a sugared avalanche.
  • Pinch of salt: Yes, even in frosting. That little pop keeps it from tasting flat or overly sweet.

Easy Carrot Cake Cupcakes

How To Make This Carrot Cake Cupcakes

We’re talking simple steps and forgiving batter here, so don’t worry if your whisking isn’t Michelin-star sharp today.

  • Preheat and prep the pan: Set your oven to 350°F and line a 12-cup muffin tin with liners because no one wants to scrape stuck-on cupcake bits later.

  • Mix dry ingredients: In a medium bowl, whisk together your flour, leaveners (baking powder and soda), salt, and those dreamy spices. Your kitchen already smells like fall and we haven’t even started baking yet.

  • Whisk your wet ingredients: Grab a large bowl and whisk together the oil, granulated sugar, and brown sugar until smooth. Then beat in the eggs, one at a time. Add the vanilla too because… always vanilla.

  • Bring it together: Gently fold the dry stuff into the wet using a rubber spatula. You don’t want to beat the joy out of it. Stir just until combined. Then fold in your grated carrots, and if the mood strikes, those nuts and raisins too.

  • Bake it up: Divide the batter evenly between the liners. About 2/3 full is your goal. Bake for 20–25 minutes until a toothpick poked in the center comes out mostly clean.

  • Cool down: Let them sit in the pan for 5 minutes (they’re still tender, let them settle into their cupcake existence), then carefully transfer to a wire rack. Cool completely before frosting. This is the hard part, I know.

  • Whip the frosting: Beat your softened cream cheese and butter together until smooth and happy. Then slowly add in powdered sugar. Go low speed at first unless you enjoy sugar clouds in your face. Add vanilla and salt, then beat the whole thing till it’s fluffy and swoon-worthy.

  • Frost and finesse: Use a piping bag or spatula to get generous swirls on those cooled cupcakes. Sprinkle with crushed pecans or a dash of cinnamon if you’re feeling extra.

Easy Carrot Cake Cupcakes

Storage Options

If you somehow have leftovers (teach me your ways), here’s how to keep them fresh and fabulous.

First off, since they’re frosted with cream cheese, store these cupcakes in the fridge. Use an airtight container to protect them from fridge-funk and frosting smears. They’ll last for about 4 to 5 days chilled.

Want to freeze them? Go for it! You can freeze the unfrosted cupcakes—just let them fully cool, wrap tightly in plastic wrap, then stash in a freezer-safe bag or container. They’ll keep their charm for up to 3 months. When ready to use, let them thaw at room temperature. Then you can frost fresh or thaw some of that buttercream magic ahead of time too.

Refrigerated frosting behaves nicely if beaten again briefly before using. And yes, you can totally eat one cold straight from the fridge like a secret snack elf.

Variations and Substitutions

You can easily riff on these depending on your spice rack or grocery situation (looking at you, half-used bag of shredded coconut).

  • Coconut oil instead of vegetable oil: Adds a subtle tropical sweetness and makes things feel a little fancier. Just be sure it’s melted and slightly cooled first.

  • Gluten-free flour blend: Use a 1-to-1 GF flour blend if needed—just expect a slightly heartier texture. Still very cupcake-y.

  • Maple syrup instead of sugar (in part): Sub out part of the granulated sugar for natural maple syrup and get that lovely woodsy vibe. Maybe cut back on other liquids just a smidge.

  • No nuts or raisins: Totally optional. Skip both for a cleaner bite, or replace with mini chocolate chips if you’re chaos-in-a-good-way like that.

  • Orange zest in the batter: Adds a fresh citrus lift that pairs beautifully with all the spice and sweetness. Highly recommend a sprinkle in the frosting too.

  • Turn them into mini cupcakes: Shorten the bake time to 10–12 minutes and make the cutest little pop-in treats for tea or snacking.

Easy Carrot Cake Cupcakes

What to Serve with Carrot Cake Cupcakes

Once these little spice-kissed cakes hit the table, here’s what to serve alongside to round things out (especially if you’re planning a brunch spread or dessert trio kind of night).

  • A bright, citrusy tea (like Earl Grey or orange rooibos) makes a perfect match. The warmth of the spices with zingy tea? Simple joy. Cold brew fans, try it with a splash of cinnamon cream.

  • Need something savory to balance out the sweetness? These bacon basil cornbread muffins bring in a salty, herby bite. Basically, brunch MVPs.

  • For a dreamy soft-and-sweet combo, serve with a scoop of peanut butter banana ice cream. Cool, creamy, and just indulgent enough without stealing the show.

  • A handful of fresh berries or a simple berry compote over top (warm or cold!) adds tart contrast and color. Strawberries or blackberries are lovely here.

  • If you’re making this for a gathering, a gently spiced cocktail—maybe bourbon with a splash of ginger syrup—will make everyone extra friendly.

Easy Carrot Cake Cupcakes

Frequently Asked Questions

Can I make these carrot cake cupcakes ahead of time?

Absolutely. You can bake the cupcakes a day or two in advance. Just keep them unfrosted in an airtight container at room temperature, or in the fridge if your kitchen’s really warm. The frosting can also be made ahead and chilled—just give it a quick whip before slathering it on. You can even freeze the unfrosted cupcakes for longer storage.

Can I turn this recipe into a full carrot cake instead?

Yes, these cupcakes adapt really well to a cake! Just pour the batter into a greased 8-inch square or round pan and bake at 350°F for around 30 to 35 minutes. Be sure to check with a toothpick to see when it’s ready. The cream cheese frosting spreads beautifully across the top too—no layering fuss required.

How do I make sure my cupcakes are moist, not dry?

The secret is in the oil, carrots, and not overmixing. Use freshly grated carrots (they hold more moisture than pre-shred), and don’t overbake! Ovens vary, so start checking at the 20-minute mark. If they spring back lightly when touched and a toothpick comes out clean-ish (a few moist crumbs are okay), they’re good to go.

Can I make these without cream cheese frosting?

Sure thing. While I totally recommend the tangy cream cheese situation, you can also go with a vanilla buttercream, whipped cream topping, or even a dusting of powdered sugar if you’re going minimalist. If you still want that tang but dairy-free, try a cream cheese–style plant-based frosting.

Easy Carrot Cake Cupcakes

Easy Carrot Cake Cupcakes

Prep Time 20 minutes
Cook Time 25 minutes
Total Time 1 hour
Rich with spice, sweet carrots, and a swoosh of tangy cream cheese frosting, these carrot cake cupcakes are built from cozy essentials and finished with a silky, tangy swirl. Moist, buttery, and full of warm, comforting spices, these cupcakes are simple to make and always crowd-pleasing.
12 cupcakes

Ingredients

Cupcakes

  • 1 1/4 cups (155 g) all-purpose flour
  • 1 tsp baking powder
  • 1/2 tsp (0.5 tsp) baking soda
  • 1/2 tsp (0.5 tsp) salt
  • 1 tsp ground cinnamon
  • 1/4 tsp (0.25 tsp) ground ginger
  • 1/8 tsp (0.13 tsp) ground nutmeg
  • 1/2 cup (120 ml) vegetable oil or melted coconut oil
  • 1/2 cup (100 g) granulated sugar
  • 1/2 cup (100 g) brown sugar light or dark, packed
  • 2 eggs at room temperature
  • 1 tsp vanilla extract
  • 1 1/4 cups (140 g) finely grated carrots about 2 medium carrots, freshly grated
  • 1/2 cup (60 g) chopped walnuts or pecans optional
  • 1/3 cup (45 g) raisins optional

Cream Cheese Frosting

  • 4 oz (113 g) cream cheese softened
  • 1/4 cup (57 g) unsalted butter softened
  • 1 1/2 cups (180 g) powdered sugar sifted
  • 1/2 tsp (0.5 tsp) vanilla extract
  • pinch salt

Equipment

  • 12-cup muffin tin
  • muffin liners
  • Whisk
  • Mixing bowls
  • Rubber spatula
  • grater
  • Wire rack

Instructions
 

  1. Preheat your oven to 350°F (177°C). Line a 12-cup muffin tin with liners.
  2. Whisk together flour, baking powder, baking soda, salt, cinnamon, ginger, and nutmeg in a medium bowl.
  3. In a large bowl, whisk oil, granulated sugar, and brown sugar until well combined. Beat in eggs one at a time, then stir in vanilla extract.
  4. Gently fold the dry ingredients into the wet mixture using a rubber spatula until just combined.
  5. Fold in grated carrots, and if desired, the nuts and raisins.
  6. Divide batter evenly among prepared liners, filling each about 2/3 full.
  7. Bake for 20–25 minutes, or until a toothpick inserted into the center of a cupcake comes out mostly clean.
  8. Cool in the pan for 5 minutes, then transfer cupcakes to a wire rack to cool completely before frosting.
  9. To make the cream cheese frosting: Beat softened cream cheese and butter together until smooth. Gradually add powdered sugar, mixing on low. Add vanilla and salt, then beat until fluffy.
  10. Frost cooled cupcakes with the cream cheese frosting. Garnish with crushed nuts or a dusting of cinnamon if desired.

Notes

You can store frosted cupcakes in an airtight container in the fridge for 4–5 days. Unfrosted cupcakes freeze well—wrap and freeze for up to 3 months. To refresh frosting, beat briefly if chilled. For different vibes, add orange zest or swap in mini chocolate chips.

Nutrition

Calories: 260kcal | Carbohydrates: 35g | Protein: 3g | Fat: 12g | Saturated Fat: 4g | Cholesterol: 30mg | Sodium: 170mg | Potassium: 90mg | Fiber: 1g | Sugar: 22g | Vitamin A: 1750IU | Vitamin C: 1mg | Calcium: 65mg | Iron: 1mg

Sweetly spiced with dark brown sugar, buttery molasses, and warm ground ginger, this gingerbread cake smells like winter magic and tastes even cozier.

Creamy butter, a hint of cinnamon, and just enough nutmeg swirl into a tender, rich crumb that begs for whipped cream (or a little glaze, if you’re feeling fancy).

There’s something that happens when you mix molasses and spice into cake batter and slide it into a warm oven. The kitchen transforms. It smells like comfort. And curiosity. And maybe a tiny bit like nostalgia, even if gingerbread cake never graced your childhood—which, let’s be honest, it didn’t grace mine either. But now? It’s here, steaming gently on a wire rack, practically begging for a dusting of sugar snow.

This one isn’t dry or fussy. It’s plush. Moist (yes, I said it), gently sweet, not overly sticky. You can whip this up on a lazy Sunday, serve it on a chilly Tuesday night, or sneak forkfuls while standing over the sink—there’s no wrong way.

Table of Contents

Moist Gingerbread Cake

Why You’ll Love this Gingerbread Cake

Let’s not overcomplicate things—this is a simple, spice-kissed cake that leans into coziness with zero apology.

  • Ridiculously simple to make: You just mix, pour, bake, and boom—your kitchen smells like a festive candle but better (and edible).
  • Texture for days: The crumb stays soft and tender from the molasses and hot water combo—zero dryness, scout’s honor.
  • Warm spice balance: It’s not one-note ginger; you get cloves, cinnamon, a whisper of nutmeg. Like a tiny spice committee made excellent choices.
  • Flexible topping options: Dust it with powdered sugar, drizzle with vanilla glaze, or plop some whipped cream on top—she’s low-maintenance but stunning.
  • Winter-perfect flavor: One bite and you’ll want flannel, fairy lights, and possibly a second piece.
  • Make ahead friendly: Tastes even dreamier the next day, if it survives that long.

Moist Gingerbread Cake

Ingredient Notes

You don’t need anything fancy, but each piece of the puzzle really pulls its weight here.

  • All-purpose flour: Nothing special here, just your pantry MVP providing structure with a soft, fluffy crumb.
  • Baking soda + baking powder: The classic leavening duo. Baking soda reacts with the molasses for lift, and the powder gives extra rise insurance.
  • Salt: It won’t make the cake salty—just balanced. Without it, the spices fall flat.
  • Ground ginger + other spices: Go for fresh-ish spices if you can. The ginger brings the heat, cinnamon adds warmth, and the cloves and nutmeg keep things cozy and complex.
  • Unsalted butter: Softened butter makes creaming with sugar a breeze and gives the cake richness without making it greasy.
  • Dark brown sugar: Adds a deep, caramel-like sweetness that plays beautifully with molasses.
  • Egg: It holds everything together without turning the texture bready. Room temp is key.
  • Unsulphured molasses: Don’t use blackstrap—it’s too bitter. Regular molasses gives that signature gingerbread color and flavor.
  • Hot water (or coffee): Weirdly magical. The heat helps everything blend smoothly, and coffee deepens the spice notes without tasting like, well, coffee.

Moist Gingerbread Cake

How To Make This Gingerbread Cake

Let’s bake. You don’t need special tools, just a little stirring, a spoon to taste the batter (who’s judging?), and a prepared pan.

  • Prep the oven and pan: Preheat to 350°F, then grease a 9-inch square baking pan and line it with parchment if you don’t want sticky sides later. I do this Grease+Line maneuver for almost all cakes. It just makes life easier.

  • Whisk dry ingredients: In a separate bowl, mix your flour, leaveners, spices, and salt. It’s a good way to evenly distribute the spices, so you don’t get one rogue clove-heavy bite.

  • Cream the butter and sugar: Use an electric mixer to beat the softened butter and dark brown sugar until light and fluffy. This usually takes at least 2–3 minutes, so don’t rush. It should look like delicious ginger sand.

  • Add egg and molasses: Crack that egg in and mix it up, then drizzle in your molasses and beat until smooth. The mixture will look glossy and dark and smell incredible already.

  • Alternate dry mix and hot liquid: Pour in the dry ingredients gradually, in three batches, alternating with hot water or coffee. Always start and end with dry. Mix just until combined (don’t beat it to death—it’s a cake, not whipped cream).

  • Bake: Pour the batter into your prepared pan, smoothing the top. Bake for 30–40 minutes—but start checking around 30. A toothpick should come out mostly clean, maybe with a few crumbs clinging.

  • Cool and serve: Let it hang out in the pan for about 10 minutes, then lift it onto a cooling rack. Once cool, dust with powdered sugar or pile on whipped cream. Maybe both.

Moist Gingerbread Cake

Storage Options

So let’s say, against all odds, you don’t eat the entire gingerbread cake in one sitting. Here’s how to store it.

Wrap any leftovers tightly or stash pieces in an airtight container. At room temp, they’ll stay soft for 2–3 days. If your kitchen runs warm and gets humid, just pop it into the fridge. It’ll hang out happily for up to 5 days there.

To freeze, slice the cake into squares and wrap them individually. Then place those little spice parcels into a zip-top bag or freezer container. They’ll keep well for up to 2 months. Reheat straight from frozen in the microwave for about 30 seconds, or let thaw at room temp.

Warming it a little brings back the soft texture and makes it smell like you just baked it (magic). Bonus tip? Toast it lightly and add whipped cream for a faux gingerbread shortcake moment. Not traditional. Very tasty.

Variations and Substitutions

Want to make it your own? Here are a few swaps and twists that play nicely.

  • Brewed coffee instead of water: If you didn’t try this version yet—do it! Coffee deepens the flavor without tasting “coffee-ish.” It’s subtle but wildly good.
  • Olive oil instead of butter: You’ll get a slightly more rustic texture, a little more moisture, and it stays soft longer. Great if you’re skipping dairy.
  • Add chopped crystallized ginger: Stir this into the batter for ginger-on-ginger action and chewy little surprises in every bite.
  • Top with lemon glaze: Whisk powdered sugar with lemon juice for a zingy finish that cuts the richness.
  • Use cake flour: If you prefer a lighter, almost spongy crumb, cake flour gives it a soft bakery-style vibe.

Moist Gingerbread Cake

What to Serve with Gingerbread Cake

This cake plays well with others—and brings just enough spice to be the star without stealing the whole show.

  • A warm cup of black tea or holiday chai is dreamy here. The cake’s sweetness meets the tannic bite and the whole thing feels extremely cozy, like a knit sweater you can eat with.

  • A scoop of vanilla ice cream (melting slowly into a slice) turns this into dessert-dessert, especially if the cake is still warm. Little gingerbread lava vibe.

  • For a savory swing, I once paired a slice of this alongside a bowl of Pasta Fagioli on a snow day, and wow—spicy soup and spiced cake? A surprisingly lovely contrast.

  • Pair with breakfast if you dare. Seriously. Think thick coffee, a slab of butter on top, maybe next to some bacon cornbread muffins. It’s not health food, but it’s happy-making food.

  • A final curveball: try it with a drizzle of slightly tangy yogurt and some toasted nuts. It skews more sophisticated brunch and less straight-up dessert.

Moist Gingerbread Cake

Frequently Asked Questions

Can I make this gingerbread cake ahead of time?

Yes, and honestly, the flavor gets even better on day two. You can bake it the night before, cool it completely, then cover tightly. The spices deepen overnight, and the crumb stays soft. Just hold off on any powdered sugar dusting until you’re ready to serve so it doesn’t melt in.

Can I use blackstrap molasses for this cake?

I really wouldn’t. Blackstrap molasses is intensely bitter and not the vibe we’re going for here. Stick to regular unsulphured molasses—it brings that dark, syrupy richness without turning the cake into a burned-spice experience.

What should I do if I don’t have ground cloves?

No worries. You can leave them out, or use a pinch of allspice instead. The cake will still taste great; cloves are strong, and a little goes a long way anyway. Don’t overdo the replacement—less is more with that spice family.

Why is my cake too dense or gummy?

This usually happens if the batter is overmixed or if it sits too long before baking. Once you add the flour, stir gently until just combined. Also, make sure the hot water or coffee is truly hot when added—it helps dissolve the molasses, which smooths everything out.

Moist Gingerbread Cake

Moist Gingerbread Cake

Prep Time 15 minutes
Cook Time 35 minutes
Total Time 50 minutes
Sweetly spiced with dark brown sugar, buttery molasses, and warm ground ginger, this gingerbread cake smells like winter magic and tastes even cozier. Tender, plush, never dry, and easy enough for a weeknight—dust with powdered sugar, or dollop with whipped cream, and enjoy every nostalgic, spiced bite.
9 squares

Ingredients

  • 2 cups (250 g) all-purpose flour spooned and leveled
  • 1 tsp baking soda
  • 1 tsp baking powder
  • 1/2 tsp (0.5 tsp) salt
  • 2 tsp ground ginger fresh if possible
  • 1 tsp ground cinnamon
  • 1/4 tsp (0.25 tsp) ground cloves or allspice
  • 1/8 tsp (0.125 tsp) ground nutmeg
  • 113 g (0.5 cup) unsalted butter softened (1/2 cup)
  • 3/4 cup (150 g) dark brown sugar packed
  • 1 large egg room temperature
  • 1/2 cup (120 ml) unsulphured molasses not blackstrap
  • 3/4 cup (180 ml) hot water or brewed coffee just off the boil
  • powdered sugar or whipped cream for serving, optional

Equipment

  • 9-inch square baking pan
  • Mixing bowls
  • Electric mixer
  • Whisk
  • Spatula
  • Parchment paper

Instructions
 

  1. Preheat oven to 350°F (175°C). Grease a 9-inch square baking pan and line with parchment paper for easier removal.
  2. In a bowl, whisk together the flour, baking soda, baking powder, salt, ginger, cinnamon, cloves, and nutmeg until well combined. Set aside.
  3. In a large bowl, use an electric mixer to beat the softened butter and dark brown sugar until very light and fluffy, about 2–3 minutes.
  4. Add the egg and mix well. Drizzle in the molasses and beat until mixture is smooth and glossy.
  5. Alternate adding the dry ingredients and hot water (or coffee) to the butter mixture in three additions, starting and ending with the dry ingredients. Mix each addition just until incorporated—do not overmix.
  6. Pour batter into prepared pan and smooth the surface. Bake for 30–40 minutes, or until a toothpick inserted into the center comes out mostly clean with just a few moist crumbs.
  7. Let cake cool in the pan for about 10 minutes, then lift out and transfer to a wire rack to cool completely. Dust with powdered sugar or top with whipped cream, if desired, before serving.

Notes

This gingerbread cake is wildly flexible: swap hot coffee for water for deeper flavor, or add chopped crystallized ginger for bursts of chew and spice. Slices freeze beautifully—just wrap well. And yes, it’s even better the next day as the flavors develop. Don’t use blackstrap molasses for this recipe; it will be too bitter.

Nutrition

Calories: 270kcal | Carbohydrates: 47g | Protein: 3g | Fat: 8g | Saturated Fat: 5g | Cholesterol: 40mg | Sodium: 270mg | Potassium: 155mg | Fiber: 1g | Sugar: 23g | Vitamin A: 260IU | Calcium: 65mg | Iron: 1.8mg

Hearty and cozy, this pasta fagioli simmers carrots, zucchini, beans, and pasta in a rich tomato broth with basil and garlic. Pure comfort in a bowl.

This is one of those “grab a spoon and settle in” soups. Italian pasta fagioli is warm, brothy, a little spicy if you want it to be, and full of earthy beans and tender pasta. Maybe the best part? Your kitchen will smell like someone’s been cooking for hours (you, my friend, in just about 30 minutes). There’s not a lot of overthinking here—just good, honest flavors layered in a way that makes you want to dip your bread in the bowl before it hits the table.

Table of Contents

Italian Pasta Fagioli

Why You’ll Love this Pasta Fagioli

This isn’t fancy. It’s not trying to impress your in-laws with foam or frills. But it’s really satisfying.

  • Ridiculously simple to make: No need to babysit it for hours—chop, sauté, simmer, stir. Boom. Done.
  • It’s weekday dinner gold: Quick enough for Tuesday, cozy enough for Sunday.
  • Customizable warmth: Want it spicier? Toss in more red pepper. Softer beans? Let them linger longer.
  • One pot, not a pile of dishes: Yep, we love her. Even the pasta sneaks in at the end.
  • Vegetarian-flexible: Just swap in veggie broth, and boom—you’ve got a meatless main.
  • It freezes like a champ: Hello future lunch, already made and waiting like a loyal sidekick.

Italian Pasta Fagioli

Ingredient Notes

Nothing here is complicated, but a few things are worth calling out. Each one adds its little twist in flavor, texture, or soul.

  • Olive oil: That first sizzle of veggies hitting hot oil? It sets the whole tone.
  • Carrot and zucchini: They add color, a little sweetness, and that soft bite that makes you feel like you’re eating something nurturing.
  • Onion and garlic: These are your aromatic backbone. Don’t skimp. That almost-sweet garlic scent? Chef’s kiss.
  • Tomato sauce and diced tomatoes: Together, they give depth. The diced add texture, the sauce smooths it out into a cozy broth.
  • Chicken broth: Base flavor. Salty, savory, and just enough to bathe your pasta without drowning it.
  • Herbs and spices: Dried parsley and basil lean Italian, while red pepper flakes give it a low-key kick (or a high-key one, if you’re heavy-handed).
  • Ditalini pasta: Tiny tubes that soak up broth like little sponges. They hold up, but don’t hog the spotlight.
  • Cannellini beans: Creamy, mild, and comforting. Drain and rinse them well so they don’t bring any tinned weirdness to the party.

Italian Pasta Fagioli

How To Make This Pasta Fagioli

Okay, let’s talk process. This is more of a “sip wine while you stir” sort of thing than a high-stakes mission. That’s the vibe we want.

  • Start with the aromatics: In your favorite saucepan, heat a good slick of olive oil over medium. Add the diced carrots, zucchini, and onion, and stir them around until they soften. Give it 7–8 minutes. You want “tender enough to bite,” not “melting into mush.” Garlic goes in last—just a quick 30-second sauté so it doesn’t burn. Burnt garlic smells… crunchy and regretful.

  • Build your broth: Add in your tomato sauce, diced tomatoes, chicken broth, parsley, basil, red pepper flakes, salt, and pepper. Go easy on the salt at first, you can always adjust. Let that all come to a calm simmer—think “hot tub” not “rolling boil”—and let it hang out for a good 20 minutes. Stir occasionally if you’re feeling attentive. Or don’t. It’ll survive.

  • Cook the pasta: While the soup does its thing, boil your ditalini separately. It’s tempting to just throw the uncooked pasta in the broth, but it’ll soak up too much liquid and get bloated. Cook it al dente—those little tubes should still have some chew.

  • Bring it all together: Drain the pasta, add it to the pot of soup along with the drained and rinsed cannellini beans. Let it all simmer together for another minute or two. That’s it! You’re one ladle away from warm comfort.

Italian Pasta Fagioli

Storage Options

Leftovers? Oh yes, and they might even taste better the next day.

Once cooled, pop your pasta fagioli into an airtight container and store it in the fridge. It’ll keep beautifully for up to four days. In fact, the beans and veggies kind of… mingle overnight. The flavors marry. (But there’s no paperwork involved.)

If you’re thinking long-term, yes, you can totally freeze it. Just a tip though, you might wanna freeze the soup without the pasta. Why? Pasta turns kind of mealy when frozen. If you know you’re heading to the freezer, scoop out a portion before you mix the ditalini in. When you reheat it, just toss in fresh pasta. Easy.

To reheat, a quick simmer on the stovetop works best. If it seems a bit thick (it happens, soup gets clingy), just add a splash of broth or water to loosen it up.

Variations and Substitutions

Life’s too short not to make this your own. Got some odds and ends in your fridge? Let’s play.

  • Use veggie broth instead of chicken: It shifts easily into a vegetarian version. Maybe even vegan if you skip the cheese garnish (but I’m not judging either way).
  • Add greens: A handful of spinach or kale stirred in at the end wilts just enough and gives it a slightly peppery edge.
  • Swap cannellini beans for another type: Navy beans or great northerns do the trick. Even chickpeas work, though the texture’s a bit firmer.
  • Switch the pasta: No ditalini? No prob. Try small shells, elbow macaroni, or use up that last half cup of broken spaghetti.
  • Boost the heat level: Want it spicier? Add a pinch more red pepper flakes or even a spoonful of Calabrian chili paste. No kidding.

Italian Pasta Fagioli

What to Serve with Pasta Fagioli

This soup pretty much holds its own, but if you want to make an evening of it (or need something to mop up the bowl), here are a few ideas.

  • A slice of crusty bread—like one of those bakery loaves with a crackly shell and fluffy middle—makes it easy to do some very intentional bowl-wiping. A little olive oil and flaky salt on the side doesn’t hurt either.

  • You could pull together a bright green salad. Something crunchy and acidic, like arugula or romaine tossed with balsamic vinaigrette. It helps cut through the richness a bit.

  • A wedge of savory cornbread would feel right too. If you happen to have the ingredients, these bacon basil cornbread muffins are kind of perfect alongside.

  • Feeling fancy? Serve a smaller bowl as a starter before a main dish like pan seared cod with rainbow chard. It works beautifully for a cozy dinner where soup is just the intro act.

Italian Pasta Fagioli

Frequently Asked Questions

Can I make pasta fagioli ahead of time?

Absolutely. It’s actually one of those soups that tastes better a day or two later. Just keep the pasta separate if you’re storing the soup for more than a day. That way the noodles won’t soak up all the broth and go mushy in the fridge. Reheat gently on the stove, and add a splash of extra broth or water if it thickens too much.

What kind of beans work best for pasta fagioli?

Cannellini beans are the traditional go-to, and for good reason—they’re creamy, mild, and hold their shape well. But if you’re in a pinch, navy beans, great northern beans, or even borlotti beans (if you can find them) all do the job. Just make sure they’re drained and rinsed if canned.

Is there a way to make it gluten-free?

Yes! Just swap the ditalini out for your favorite gluten-free pasta. They’ve come a long way, honestly. Brown rice pasta holds up nicely, or try chickpea pasta for extra protein. Cook it separately so it doesn’t disintegrate in the soup, then stir it in right before serving.

Can I use fresh herbs instead of dried?

Of course. Fresh parsley and basil add a bright pop of flavor—just add them at the very end of cooking so they don’t lose their… herbiness. If substituting dried with fresh, triple the amount (so 1 tablespoon dried = 3 tablespoons fresh). Go heavy handed if you’re feeling green-fingered.

Italian Pasta Fagioli

Italian Pasta Fagioli

Prep Time 10 minutes
Cook Time 25 minutes
Total Time 35 minutes
Hearty and cozy, this pasta fagioli simmers carrots, zucchini, beans, and pasta in a rich tomato broth with basil and garlic. Pure comfort in a bowl—ready in about 30 minutes.
6 bowls

Ingredients

Soup Base

  • 2 tbsp (30 ml) olive oil
  • 2 carrots diced
  • 1 zucchini diced
  • 1 yellow onion diced
  • 3 cloves garlic minced

Broth & Tomatoes

  • 2 cups (480 ml) chicken broth or vegetable broth for vegetarian
  • 1 can (400 g) diced tomatoes 14 oz (400g), with juices
  • 1 cup (240 ml) tomato sauce

Herbs & Seasoning

  • 1 tsp dried parsley
  • 1 tsp dried basil
  • 1/4 tsp (0.25 tsp) red pepper flakes or more to taste
  • 1/2 tsp (0.5 tsp) salt to taste
  • 1/2 tsp (0.5 tsp) black pepper to taste

Pasta & Beans

  • 3/4 cup (90 g) ditalini pasta or other small pasta
  • 1 can (425 g) cannellini beans 15 oz (425g), drained and rinsed

Equipment

  • Large pot or Dutch oven
  • Saucepan

Instructions
 

  1. Heat the olive oil in a large pot over medium heat. Add carrots, zucchini, and onion. Sauté 7–8 minutes until softened. Add garlic and cook for 30 seconds, just until fragrant.
  2. Stir in chicken broth (or vegetable broth), diced tomatoes (with juices), tomato sauce, parsley, basil, red pepper flakes, salt, and pepper. Bring to a gentle simmer. Cook uncovered about 20 minutes, stirring occasionally.
  3. Meanwhile, bring a saucepan of salted water to a boil. Add ditalini pasta and cook al dente according to package instructions. Drain well.
  4. Add cooked pasta and rinsed cannellini beans to the soup. Simmer for 2-3 minutes to heat through and meld flavors. Taste and adjust salt or pepper if needed.
  5. Ladle into bowls. Serve hot, with crusty bread or a green salad if desired.

Notes

This soup is super customizable! Swap in your favorite small pasta, use navy beans or chickpeas instead of cannellini, or toss in a handful of spinach at the end. For a vegetarian version, simply use vegetable broth.
Leftovers keep well for 4 days in the fridge. If freezing, store without the pasta and add fresh pasta when reheating.

Nutrition

Calories: 320kcal | Carbohydrates: 54g | Protein: 11g | Fat: 6g | Saturated Fat: 1g | Sodium: 970mg | Potassium: 704mg | Fiber: 8g | Sugar: 10g | Vitamin A: 5150IU | Vitamin C: 21mg | Calcium: 90mg | Iron: 4mg

Baked rigatoni al forno with Italian sausage, crushed tomatoes, gooey mozzarella, and creamy ricotta—it’s cozy, melty, and smells like home.

Rigatoni al forno is what I reach for when pasta night needs just a little more. More comfort, more cheese, more of that bubbling, golden top that makes you reach for seconds before your fork hits the plate. It’s the pasta bake you sort of forget about until you smell it in someone else’s oven and suddenly—yep, you need it. The sauce is hearty and herby, the cheese layer is creamy and rich (thanks ricotta!), and the rigatoni holds it all together like the champ it is. Whether you’re feeding people you love or just yourself on a Tuesday night, this is one of those dishes that makes the table feel warmer. Especially when paired with a glass of red and, dare I say, stretchy pants.

Table of Contents

Baked Rigatoni al Forno

Why You’ll Love this Baked Rigatoni al Forno

Okay, let’s get real for a sec. This isn’t a delicate little pasta salad or a quick toss-and-go dish. This is hearty, fork-stabbing, bubbling-hot-from-the-oven pasta greatness. And sometimes that’s exactly what we want.

  • Ridiculously simple to make: You sauté, stir, boil, layer, and bake—no culinary gymnastics required.
  • Super comforting flavor: Think saucy, cheesy, meaty pasta with all the nostalgic coziness of lasagna, but way less effort.
  • Make-ahead friendly: You can prep this earlier in the day and stash it in the fridge until you’re ready to bake.
  • Leftovers are champion-tier: It somehow tastes even better the next day if you ask me (and my fridge).
  • Customizable for picky palates: Don’t eat meat? Swap it out. Hate ricotta? Honestly, it’ll still be good.
  • Crowd-approved format: Whether you’re feeding a hungry crew or meal-prepping like a pro, this dish holds up beautifully.

Baked Rigatoni al Forno

Ingredient Notes

Let’s break down the essentials. Nothing too fancy, but a few well-timed upgrades and tricks go a long way here.

  • Olive oil: Just a bit at the start for sautéing. A good one adds that peppery richness that sets the stage.
  • Onion and garlic: These build the punchy flavor base of your sauce. Don’t skip browning the onions until soft—they’re worth the five minutes.
  • Italian sausage (or ground beef): I’m partial to sausage for that built-in seasoning boost, but beef totally works too. Want extra heat? Go spicy sausage.
  • Crushed tomatoes and tomato paste: These give that rich, deep tomato flavor. The paste adds a nice velvety body to the sauce.
  • Dried oregano and basil: Classic Italian herb energy. If you’ve got fresh on hand, go for it, but dried absolutely does the job.
  • Red pepper flakes: Totally optional, but adds a whisper of heat. I like a pinch—nothing crazy.
  • Granulated sugar: Not a sweet sauce, but just a pinch rounds out the acidity of the tomatoes beautifully.
  • Rigatoni: Perfect shape for this dish—it’s sturdy, hollow, and holds sauce like a champ. Penne works if needed.
  • Ricotta cheese: Makes the creamy middle layer super luscious. Don’t worry, it firms up as it bakes.
  • Parmesan cheese: Salty, nutty, and sharp—adds a lot of depth. Fresh grated if possible.
  • Mozzarella cheese: Melty, stretchy comfort food magic. Save some for the topping so it gets all golden and bubbly.
  • Egg and nutmeg: The egg binds the ricotta layer. Nutmeg? One small pinch adds cozy warmth—it won’t taste “nutmeg-y.”
  • Fresh parsley: Optional but brightens things up at the end. The little green bits really do something.

Baked Rigatoni al Forno

How To Make This Baked Rigatoni al Forno

Let’s bring it together, shall we? Nothing here is hard. Just a few simple steps and some layering love. I promise, your kitchen’s gonna smell like an Italian grandmother stopped by.

  • Boil the pasta: Cook your rigatoni in salted water until just shy of al dente. It should still be a little firm, since it’ll cook more in the oven. Drain and set aside (try not to eat half by the handful while you prep everything else… it’s a struggle).

  • Make the sauce base: In a big skillet, warm up your olive oil and toss in the chopped onion. Cook until soft and translucent, about 5 minutes. Then add the garlic and stir it for about a minute, until people start saying “What are you making?! It smells amazing!”

  • Brown the meat: Add your sausage or beef. Break it up as it cooks; you want golden brown bits all over. Make sure it’s fully cooked through with no pink lingering.

  • Simmer that tomato goodness: Stir in the crushed tomatoes, tomato paste, oregano, basil, sugar, and red pepper flakes if using. Let everything simmer gently for 10–15 minutes, stirring now and then. Give it a taste and adjust the seasoning with salt and pepper as needed.

  • Mix up the ricotta filling: In a separate bowl, combine ricotta, Parmesan, egg, half the mozzarella, and nutmeg. Mix well until it’s smooth and speckled with cheese.

  • Preheat & layer: Turn your oven to 375ºF. Lightly oil a 9×13-inch baking dish, then spoon a little sauce on the bottom (just enough for a thin layer). Mix the cooked rigatoni with the rest of the sauce. Spoon in half the sauced pasta, layer all of the ricotta-cheese mix evenly across, then pile on the remaining pasta.

  • Top and bake: Sprinkle the remaining mozzarella all over the top. Cover with foil and bake for 20 minutes. Then remove the foil and bake another 10–15 minutes until the cheese bubbles and turns golden in spots.

  • Rest & serve: This part’s hard, but let it rest for 5–10 minutes before slicing in. Sprinkle with parsley and a few extra flecks of Parmesan. Chef’s kiss.

Baked Rigatoni al Forno

Storage Options

If you’ve ended up with extra (lucky you), here’s how to keep the pasta magic alive.

In the fridge: Cool the rigatoni completely, then transfer leftovers to an airtight container. It holds up for about 4 days. Reheat portions in the microwave or in the oven at 350ºF covered in foil until warmed through. A splash of water can help revive the sauciness if things seem dry.

Freezer-friendly? Totally. Assemble the dish but don’t bake it yet. Wrap tightly in foil (and maybe a freezer bag if you’re extra cautious) and freeze for up to 2 months. When you’re ready to live your best baked-rigatoni life, let it thaw overnight in the fridge and then bake as usual, adding an extra 10–15 minutes to compensate for the chill.

Already baked it and want to freeze that? You can, just know the texture gets a little softer after reheating. But flavor-wise? Still very worth it.

Variations and Substitutions

You can absolutely play around with this dish. It’s pasta, not rocket science. Swaps and tweaks are encouraged.

  • Vegetarian version: Skip the meat and sauté some chopped mushrooms or zucchini with the onions instead. That keeps it hearty and flavorful without the meat.

  • Spicier kick: Use hot Italian sausage and double down on the red pepper flakes. I’ve even added Calabrian chili paste once and wow, hello heat.

  • No ricotta? No problem: Try cottage cheese or a béchamel-style white sauce. Different but still creamy and satisfying.

  • Short on time? Use store-bought marinara instead of making the sauce from scratch. Just doctor it with extra garlic and herbs.

  • Gluten-free version: Swap in your favorite GF pasta. Rigatoni can be a little tricky to find gluten-free, but penne works great too.

  • More greens: Stir in a few handfuls of baby spinach or cooked kale with the pasta before baking. Bonus nutrients without messing up the vibe.

Baked Rigatoni al Forno

What to Serve with Baked Rigatoni al Forno

Okay, you’ve got a bubbling pan of pasta perfection. Now what? Serve it up with one (or two) of these and dinner is officially handled.

  • A crisp green salad: Bright, crunchy lettuces tossed with a tangy vinaigrette are the perfect contrast to the cheesy, tomatoey richness of the pasta. Arugula and lemon are especially nice here.

  • Garlic bread (or something close): No one’s mad at warm, buttery bread to swipe that last bit of sauce. I like mine with a little Parmesan sprinkled on top before toasting.

  • A simple roasted veggie: Think broccoli, Brussels sprouts, or even ribbons of rainbow chard. Roast ’em with olive oil and salt and let that charred edge do its thing.

  • Something fizzy or fruity: A glass of chilled sparkling water or red wine with a hint of cherry notes balances out the richness surprisingly well.

  • End with something sweet: If you’re feeling giddy and in need of dessert, peanut butter & banana ice cream sandwiches are a fun, chill finish after all that bubbling cheese business.

Baked Rigatoni al Forno

Frequently Asked Questions

Can I make baked rigatoni al forno ahead of time?

Absolutely! You can assemble the entire dish up to a day ahead—just cover it tightly and pop it in the fridge. When you’re ready to bake, take it out about 20 minutes beforehand to take the chill off. You may need to tack on an extra 10 minutes or so of baking time if it’s still cold when it goes in.

What’s the best pasta shape if I don’t have rigatoni?

If you’re out of rigatoni, go with another sturdy, tube-shaped pasta like penne or ziti. The key is using something that holds sauce well and doesn’t fall apart after baking. Just avoid long noodles—they don’t layer nicely and tend to get clumpy.

What’s the difference between rigatoni al forno and lasagna?

They’re kind of cousins in the baked pasta family. Lasagna is layered with sheets and usually a béchamel or structured layers. Rigatoni al forno is more of a saucy, rustic pile of pasta goodness—less precise, but just as satisfying. Sort of a “log off, relax” version of lasagna.

How do I keep baked rigatoni from drying out?

Make sure your pasta isn’t overcooked before it hits the oven—it should still have a little bite. Also, keep enough sauce mixed into the pasta so it stays moist as it bakes. And don’t skip that foil covering for the first part of baking. It traps the steam and keeps everything cozy until it’s time to brown.

Baked Rigatoni al Forno

Baked Rigatoni al Forno

Prep Time 20 minutes
Cook Time 45 minutes
Resting Time 10 minutes
Total Time 1 hour 15 minutes
Baked rigatoni al forno with Italian sausage, crushed tomatoes, gooey mozzarella, and creamy ricotta—it's cozy, melty, and smells like home. Think saucy, cheesy, meaty pasta with all the nostalgic coziness of lasagna, but way less effort. This is hearty, fork-stabbing, bubbling-hot-from-the-oven pasta greatness, perfect for family dinners or a comforting solo meal.
8 servings

Ingredients

Pasta & Sauce

  • 1 lb (450 g) rigatoni or penne, uncooked
  • 2 tbsp (30 ml) olive oil
  • 1 onion medium, finely chopped
  • 3 cloves garlic minced
  • 1 lb (450 g) Italian sausage casings removed, or ground beef
  • 1 can (800 g) crushed tomatoes 28 oz (800 g)
  • 2 tbsp (30 g) tomato paste
  • 1 tsp dried oregano
  • 1 tsp dried basil
  • 1 pinch red pepper flakes optional, to taste
  • 1 pinch granulated sugar
  • Kosher salt and black pepper to taste

Ricotta Cheese Layer

  • 1 1/2 cups (375 g) ricotta cheese
  • 1 cup (90 g) Parmesan cheese freshly grated, divided
  • 2 cups (200 g) shredded mozzarella cheese divided
  • 1 large egg
  • 1 small pinch nutmeg freshly grated, optional
  • 2 tbsp (8 g) fresh parsley chopped, for garnish (optional)

Equipment

  • Large skillet
  • 9x13 inch Baking Dish
  • Large pot
  • Mixing bowl
  • Foil

Instructions
 

  1. Cook rigatoni in a large pot of salted boiling water until just barely al dente, about 2 minutes less than package instructions. Drain and set aside.
  2. While pasta cooks, heat olive oil in a large skillet over medium heat. Add onion and cook until soft and translucent, about 5 minutes. Stir in garlic and cook until fragrant, about 1 minute.
  3. Add sausage (or ground beef) to the skillet. Cook, breaking it up, until browned and fully cooked. Drain excess fat if needed.
  4. Stir in crushed tomatoes, tomato paste, oregano, basil, sugar, red pepper flakes (if using), and season generously with salt and pepper. Simmer on low for 10–15 minutes, stirring occasionally. Taste and adjust seasoning.
  5. In a large bowl, mix together ricotta, half of the mozzarella, half of the Parmesan, egg, and nutmeg until smooth.
  6. Preheat oven to 375ºF (190ºC). Lightly grease a 9x13-inch baking dish. Spread a thin layer of sauce across bottom.
  7. Toss cooked rigatoni with remaining sauce. Layer half the pasta mixture into the baking dish, then spread all the ricotta mixture evenly over. Top with the rest of the pasta mixture.
  8. Sprinkle top with remaining mozzarella and Parmesan. Cover tightly with foil and bake for 20 minutes. Remove foil and bake 10–15 minutes more, until cheese is bubbling and golden.
  9. Let rest 5–10 minutes before serving. Garnish with chopped parsley and extra Parmesan, if desired.

Notes

Customize to your taste! Try mushrooms or spinach for a vegetarian version, or swap ricotta for cottage cheese. Can be assembled ahead and baked later. Leftovers reheat well and taste even better the next day.

Nutrition

Calories: 540kcal | Carbohydrates: 55g | Protein: 28g | Fat: 24g | Saturated Fat: 10g | Cholesterol: 100mg | Sodium: 1040mg | Potassium: 800mg | Fiber: 4g | Sugar: 7g | Vitamin A: 850IU | Vitamin C: 12mg | Calcium: 420mg | Iron: 4mg

Let's Get Cooking!

100+ Recipes for Busy Nights

In a time crunch? Take a look around and browse plenty of recipes to help you get dinner ready and on the table on those busy nights!

Sweet Recipes

Pumpkin Banana Muffins

Pumpkin Banana Muffins Recipe

Strawberry Pie Bars

Strawberry Pie Bars Easy Oven Recipe

White Chocolate Raspberry Muffins

White Chocolate Raspberry Muffins Recipe

Snickerdoodle Muffins

Snickerdoodle Muffins Recipe for Oven

PIN NOW

Follow KitchenetteBlog on Pinterest

Love cozy recipes that actually make it to the table? On Pinterest, I share new comfort-food ideas every week—desserts, dinners, and those little snack cravings that hit at midnight. Come pin with me and never run out of kitchen inspo.

Savory Recipes

Turkey Tetrazzini

Turkey Tetrazzini Baked Pasta Recipe

Grilled Chicken Panini Sandwich

Grilled Chicken Panini Sandwich Recipe

Sweet Potato Cornbread

Sweet Potato Cornbread Recipe Oven Baked

Classic Waldorf Salad

Waldorf Salad Simple Classic Recipe

Get 5 Recipes to Simplify Your Life!

Delicious, versatile recipes you can make over and over.