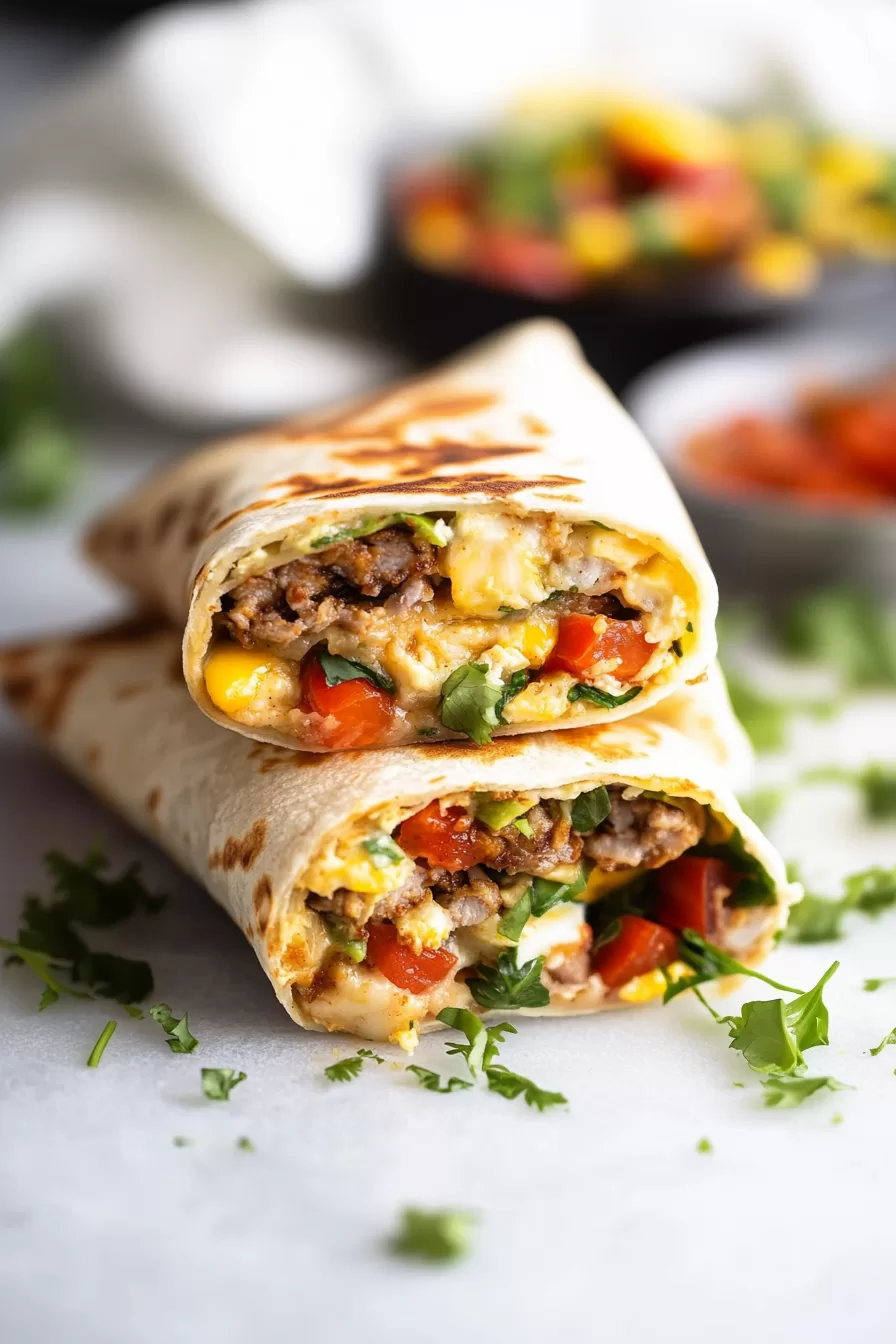
Sizzling sausage, fluffy eggs, and melty cheese all wrapped up in a warm tortilla—these breakfast burritos are everything cozy mornings smell like. No fuss, just hearty staples done right.
Whether you’re rolling out of bed late or feeding a hungry crew, this combo of sausage, eggs, cheese, tomatoes, and avocado hits that savory, satisfying spot (you know the one). Let’s get cooking.
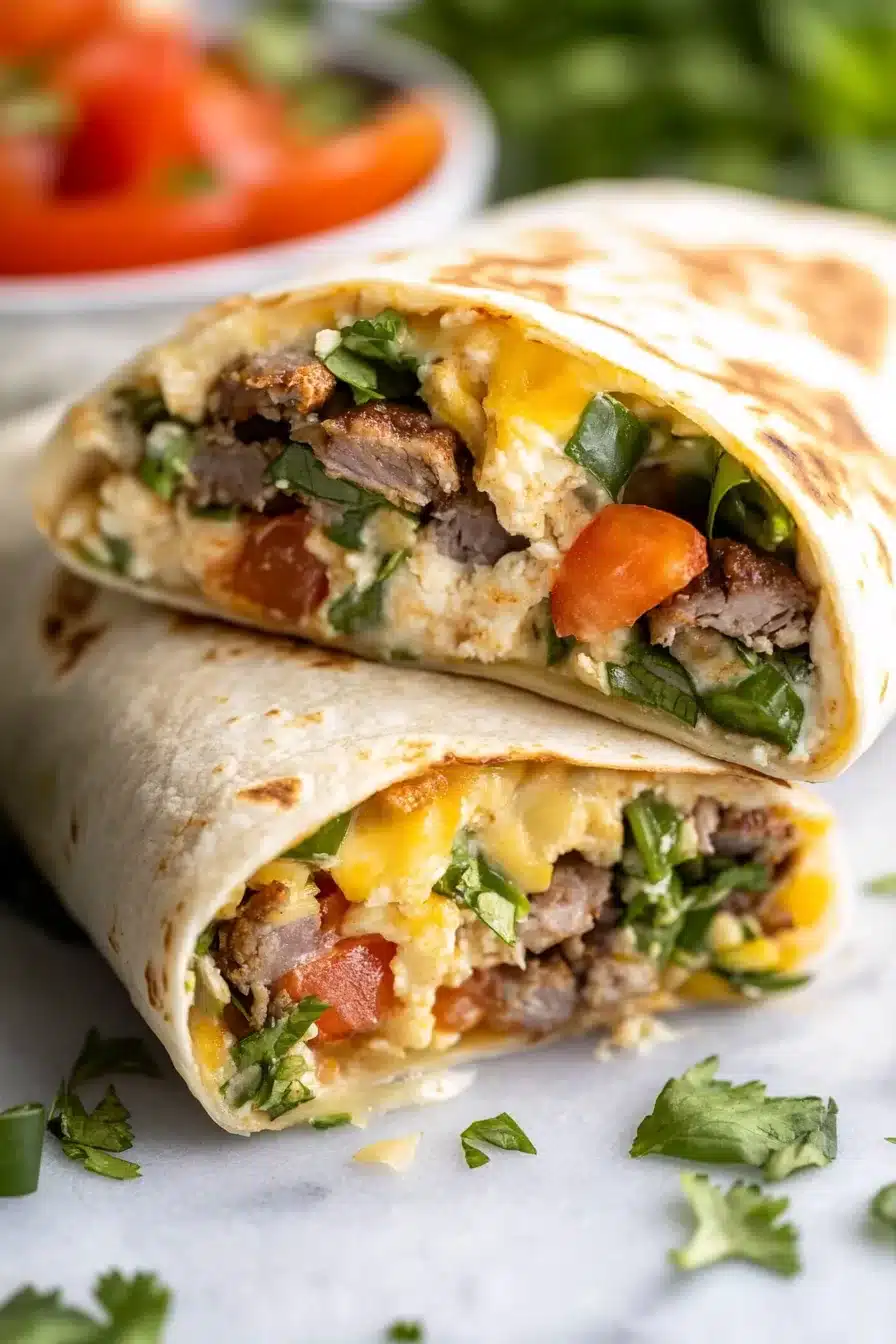
You know those mornings when your stomach is louder than your alarm clock? Yeah, these burritos were made for those. They’re soft and cheesy at the core, with salty sausage crumbles and a fresh hit of tomato and avocado on top. There’s something about biting into that warm, toasty wrap that just makes a morning feel sorted.
And honestly, they’re not just for breakfast. I’ve wrapped one up for lunch, split one for dinner, even eaten a cold one straight from the fridge while standing over the sink. No shame. Because when something tastes this good? It works on its own schedule.

Why You’ll Love this Breakfast Burritos
This isn’t a complicated breakfast situation, and that’s the point. Just solid ingredients, a skillet, and maybe a little hot sauce on the side.
- Ridiculously simple to make: You just cook, scramble, toss, and wrap. A real low-effort, high-reward type of situation.
- Make-ahead friendly goodness: Cool them down, wrap them up, and stash in the fridge or freezer. They’re still tasty days later.
- Customizable like a dream: Swap in bacon, throw in spinach, use whatever cheese you’ve got lounging in the crisper drawer.
- Balanced for the soul (and stomach): There’s protein, fat, fiber, and flavor, all piled into one cozy tortilla hug.
- Hands-on but chill: This is the kind of recipe where you can sip coffee while stirring your eggs. No panic required.

Ingredient Notes
There’s no need to get precious here—use what you have and make swaps where it makes sense. But here’s what’s going into the mix.
- Sausage meat: Go spicy with chorizo, mellow with breakfast sausage, or even veg-style crumbles if that’s more your vibe. All good.
- Eggs: Eight eggs make everything satisfyingly filling and pillowy. Scramble them hard or soft, however you like.
- Salt and black pepper: Just a pinch of each to round out the flavor. You can dial it up if your sausage is milder.
- Cheddar cheese: Use sharp for tangy oomph or mild for gooeyness. Half goes in the eggs, half gets sprinkled straight onto the tortilla.
- Flour tortillas: The big, burrito-sized ones (10 to 12 inches) are great here. Anything smaller and it gets a bit awkward to roll.
- Tomatoes: Diced fresh and juicy, they add brightness and that cold-meets-hot magic in each bite.
- Avocados: Soft, buttery, a little messy—and completely essential (in my opinion).
- Fresh cilantro (optional): Personally, I vote yes. But if it tastes like soap to you, skip it or try chopped green onions instead.
How To Make This Breakfast Burritos
You won’t need fancy gadgets or culinary gymnastics here. Just a skillet, a spatula, and an appetite. Burrito-making is more of a rhythm than a science—let’s do this.
-
Brown the sausage meat: Heat a big skillet over medium-high heat and crumble in the sausage. Let it sizzle until it smells irresistible and looks nice and browned. Don’t rush it—this part builds all the flavor. Once it’s cooked, scoop it out and set it aside (try not to snack on it—I definitely did).
-
Scramble the eggs with cheese: In that same skillet (don’t wipe it out, flavor lives there), add the eggs, salt, pepper, and ½ cup of cheese. Stir gently until the eggs are just set and the cheese is melted throughout. Remove from heat so they don’t overcook and get rubbery.
-
Warm the tortillas: If they’re feeling stiff or crackly, microwave each one for 15 to 20 seconds wrapped in a damp paper towel. They should be bendy enough to hug your fillings without falling apart.
-
Layer the fillings: On each tortilla, sprinkle a little of the remaining cheese in the center. Then pile on the cheesy eggs and sausage. Top with diced tomatoes and avocado chunks. Sprinkle cilantro if you’re using it.
-
Roll your burritos: Fold in the sides, pull the bottom up over the filling, then roll it tightly like you’ve done this a hundred times (you will). Serve with salsa, sour cream, and something spicy if that’s your thing. Take a bite. Try not to moan too loudly.

Storage Options
If you’ve got leftovers (or you’re just smart and made extra), you’ll be thrilled to know these wrap up beautifully for later. Let them cool completely, then wrap each burrito tightly in foil or parchment.
For the fridge, they’ll stay happy for about 3–4 days. I like to reheat them in a skillet over low heat until everything inside is warm, or toss them (still wrapped) into a 350°F oven for 10–15 minutes.
Now, the freezer—yes, you can absolutely freeze these. Just add a layer of plastic wrap under the foil to protect from freezer burn. Label with a date and pop them in. They’re best within 1–2 months, but let’s be real—they probably won’t stick around that long.
To reheat from frozen, unwrap, then microwave with a paper towel around it for 2–3 minutes on medium power, or bake (unwrapped) at 375°F until heated through. Don’t you love a breakfast you barely have to think about?
Variations and Substitutions
Once you’ve got the basic formula down, these are easy to tweak based on what you’ve got hanging out in your fridge. Here are a few combos worth trying out:
- Switch up the meat: Try crumbled bacon, leftover roast chicken, or even vegan sausage if that’s what’s calling your name.
- Spice it up: Toss in chopped jalapeños, pepper jack cheese, or even hot sauce mixed right into the eggs.
- Add some greens: A handful of baby spinach or sautéed kale melts right into the eggs without changing the flavor too much.
- Different cheese, different vibe: Monterey Jack is super melty and mild, feta is salty and punchy, and smoked gouda? Fancy.
- Roasted veggies: Leftover roasted sweet potatoes or bell peppers bring a cozy, earthy sweetness to the mix.

What to Serve with Breakfast Burritos
If you’re feeding a crew or just vibing with a more elaborate breakfast plate, here’s how to round things out:
-
A big bowl of fruit salad is a great contrast to the rich and savory burrito. Something like citrus, pineapple, and berries tossed with mint adds brightness without being too fussy.
-
Try roasted potatoes or hash browns on the side for maximum comfort. Bonus points if they’re golden and crispy with little charred edges.
-
A green salad with something sweet and crunchy, like in this fall harvest number, doubles as a midday lunch option if you’re stretching brunch into the afternoon.
-
Coffee, obviously. Or if you’re feeling it, an iced horchata or matcha latte for something delightfully unexpected.
-
Need a sweet bite after? You could totally make a batch of these glazed lemon cookies and call it a morning well spent.
Frequently Asked Questions
Can I make breakfast burritos ahead of time?
Yes, absolutely! These burritos are ideal for meal prep. You can make a full batch, let them cool, then wrap and refrigerate or freeze them. For the fridge, they’ll keep for 3–4 days. For the freezer, they’ll last up to 2 months. Reheat in the microwave or oven when hunger strikes.
How do I keep my burritos from getting soggy?
The trick is to let the fillings cool a little before wrapping. Hot eggs straight onto cheese and fresh veggies can create steam, which leads to sogginess. Also, don’t overload with juicy toppings like tomatoes—pat them dry with a paper towel if they’re extra watery.
Can I use corn tortillas instead of flour?
You can, but it’s a different experience. Corn tortillas tend to be smaller and more delicate, so they’re trickier to wrap into full burritos. If you’re okay with more of a taco vibe, go for it. Warm them before filling to keep them pliable and less likely to tear.
Is there a dairy-free option?
Totally! Use a plant-based cheese or skip it entirely (the eggs and sausage still carry the flavor). For added richness, mash a little more avocado into the filling. And yep, there are some fantastic dairy-free tortillas and sausages out there too if you’re going fully plant-based.

Breakfast Burritos
Ingredients
Filling
- 12 oz (340 g) sausage meat spicy or mild, or plant-based alternative
- 8 large eggs beaten
- 0.5 tsp salt or to taste
- 0.25 tsp black pepper or to taste
- 1 cup (120 g) cheddar cheese shredded, divided
To Assemble
- 6 large flour tortillas 10-12 inches each
- 2 tomatoes diced
- 1 avocado pitted, sliced or diced
- fresh cilantro optional, chopped
To Serve (optional)
- salsa
- sour cream
- hot sauce
Equipment
- Large skillet
- Spatula
- Foil or parchment (for storage)
Instructions
- Heat a large skillet over medium-high heat. Add the sausage meat, crumbling it as it cooks. Sauté until browned and cooked through. Transfer to a plate and set aside.
- In the same skillet (do not wipe clean), add the beaten eggs, salt, black pepper, and half of the shredded cheddar cheese. Gently scramble until the eggs are just set and cheese is melted. Remove from heat.
- If tortillas are stiff, wrap them in a damp paper towel and microwave for 15–20 seconds until soft and pliable.
- To assemble, lay a tortilla flat and sprinkle a little of the remaining cheese in the center. Top with a portion of the cheesy scrambled eggs, browned sausage, diced tomatoes, avocado, and cilantro if using.
- Fold in the sides, pull the bottom over the filling, and roll into a tight burrito. Repeat with the remaining tortillas and fillings.
- Serve warm with salsa, sour cream, and hot sauce if desired.