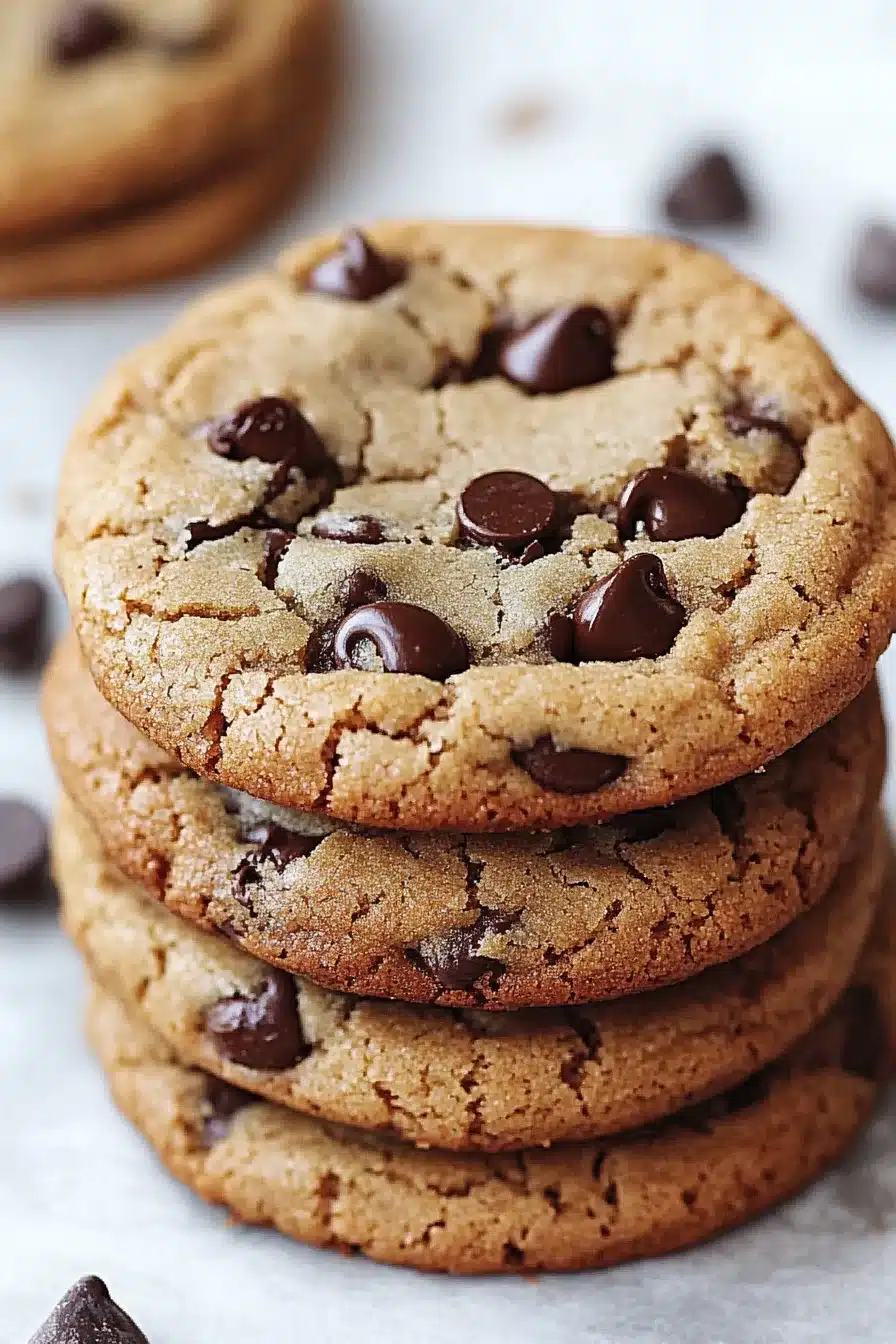
Buttery, crisp-edged, and melt-in-your-mouth soft inside, these Jacques Torres chocolate chip cookies use bread flour, cake flour, and loads of rich chocolate. Just the right hit of salt, too.
You know that bakery smell? The warm, sweet, slightly nutty one that makes you pause mid-stride? Yeah, that’s what’s about to roll through your kitchen. These are no plain ol’ cookies—they’re deep in flavor, slightly chewy with tender middles, and studded with glossy shards of bittersweet chocolate. You’ll need a bit of patience with the chilling time (I know, I know), but trust me, it’s so very worth it.

Why You’ll Love this Jacques Torres Chocolate Chip Cookies
Okay, no wild stories here—just a seriously solid cookie recipe that lives up to the hype. It’s Jacques Freaking Torres, after all.
- Two flours = cookie magic: Using both cake flour and bread flour gives you delicate lift plus that chewy center we all chase.
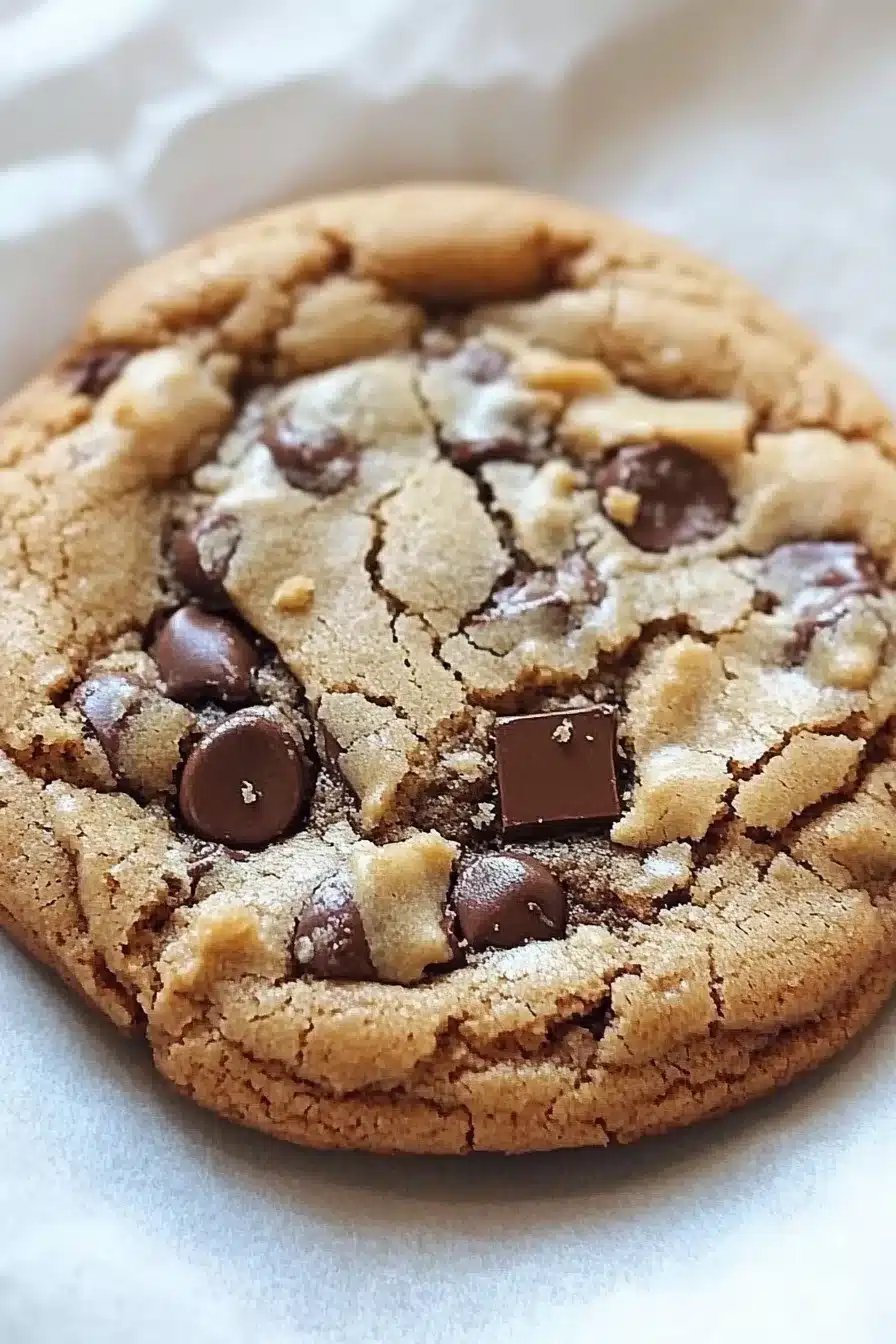
- Bittersweet chocolate chunks: No basic chips allowed. These melt into silky pockets, especially if you turn ’em sideways before baking.
- Rested dough, richer flavor: That overnight chill makes everything deeper, toastier, just… more cookie-ish.
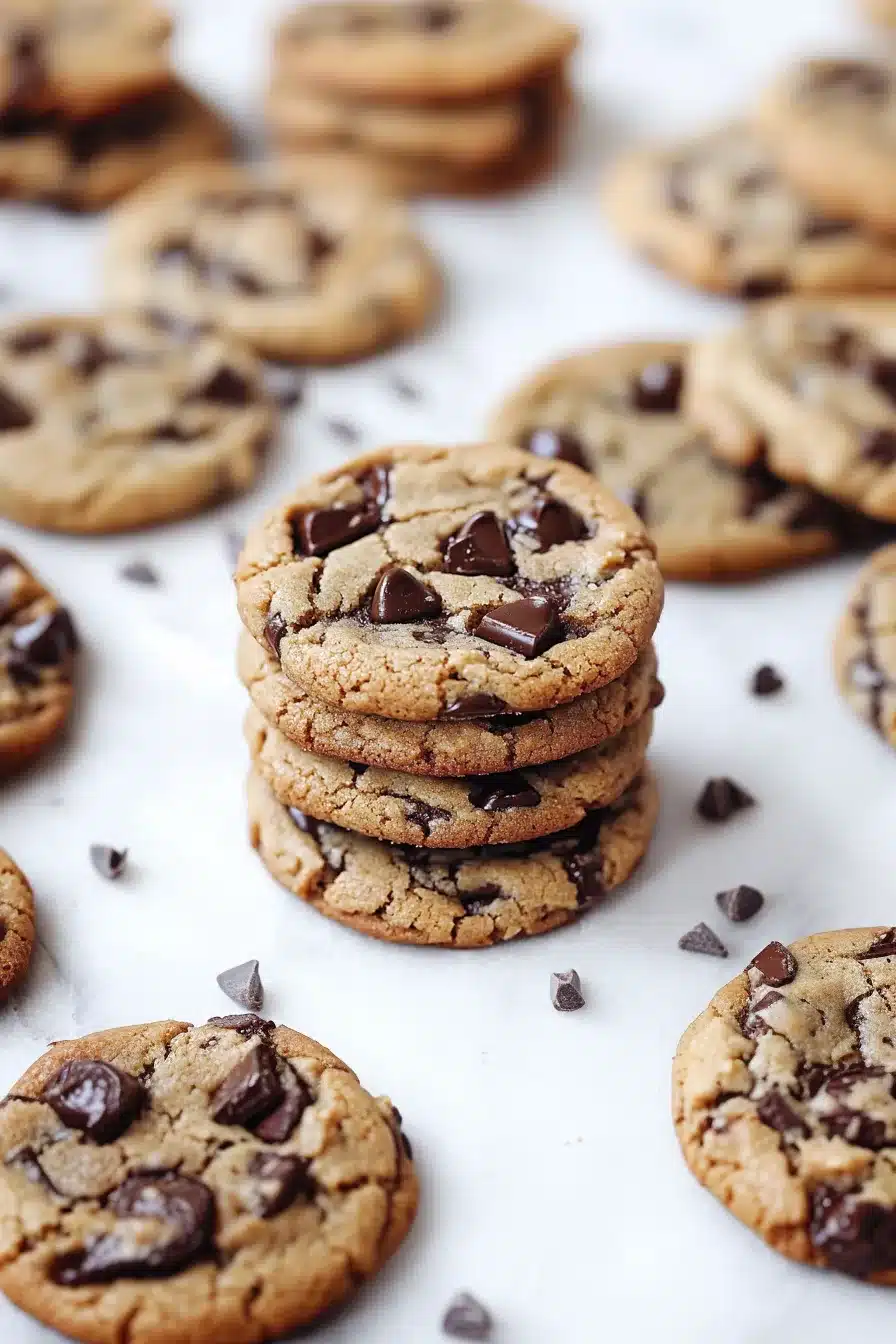
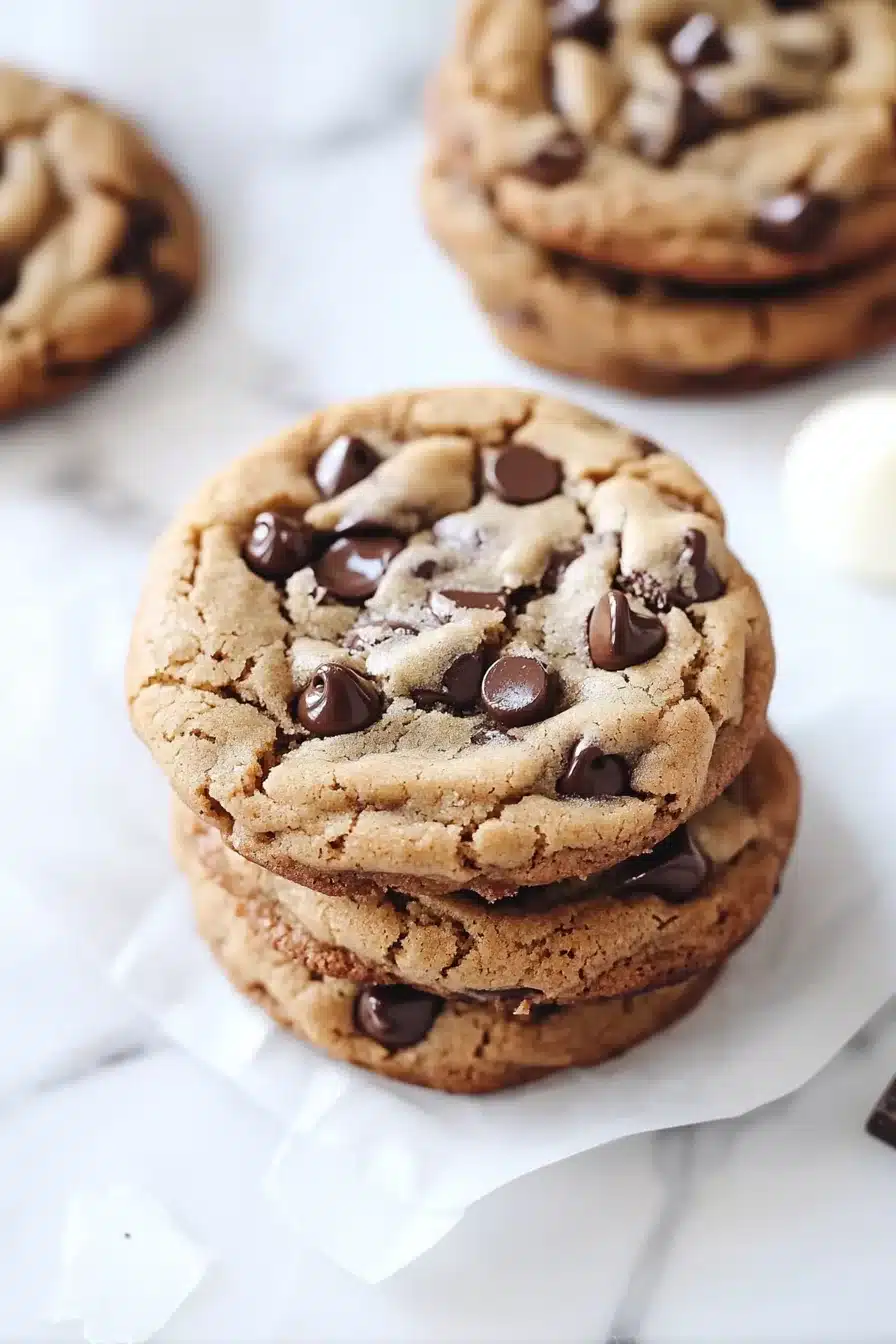
- Texture heaven in every bite: Crisp edges, chewy middle, melty chocolate, a little salt on your lips—yep, the whole shebang.
- Make ’em massive or mini: Giant bakery-style or palm-sized for sharing. Says who you have to choose?
Ingredient Notes
These Jacques Torres chocolate chip cookies are all about quality and contrast—rich, light, chewy, crisp, sweet, salty.
- Cake flour: This brings tenderness! Its low protein keeps the cookie from getting tough. Don’t have it? In a pinch, sub 1 cup all-purpose minus 2 tablespoons plus 2 tablespoons cornstarch.
- Bread flour: The opposite of cake flour, it gives chew and structure. A little unusual for cookies, but it makes a big difference.
- Baking soda & baking powder: They work together for just the right lift and spread. We love a cookie that puffs then settles with crackly promise.
- Unsalted butter: Softened butter beats up into a creamy dream that helps the cookie brown and turn nutty around the edges.
- Light brown sugar: Adds moisture, a touch of molasses flavor, and helps that chewy texture along.
- Granulated sugar: For crisp edges and contrast, working right alongside its brown sugary buddy.
- Eggs: Binding, richness, a bit of puff—eggs do a lot more than we give them credit for. Room temp helps them mix more smoothly.
- Vanilla extract: Use good stuff if you can. It elevates everything and adds backbone to the chocolate.
- Bittersweet chocolate discs or fèves: These melt slowly into wide, glossy puddles. They’re luxe. Use at least 60% cacao or go darker if you like drama.
- Flaky sea salt: That final sprinkle balances the sweet. Maldon is a fave—for flavor and for the satisfying crunch.
How To Make This Jacques Torres Chocolate Chip Cookies
Once your butter is softened and your chocolate is standing by, the whole thing comes together pretty easily. We mix, chill, scoop, bake, and then do that “just staring at them while they cool” moment.
-
Mix the dry ingredients: Sift your cake flour, bread flour, baking soda, baking powder, and salt into a big bowl. This gives the cookie a more even, pillowy texture and helps avoid weird lumps of leaveners later.
-
Cream the butter and sugars: In your stand mixer (or with a hand mixer and a bit of patience), beat the butter with both sugars until light and very fluffy. Like pale and pillowy. This can take up to 5 minutes—scrape the sides a couple times as you go.
-
Add the eggs and vanilla: Beat in the eggs one at a time, making sure each one disappears completely before adding the next. Add the vanilla, and let that mix in until the batter smells like heaven.
-
Add the dry to the wet: With the mixer on low (don’t rush this), slowly add in the dry mix. Let it just barely combine. You don’t need a perfect mix—actually, stop mixing before it looks perfect and finish folding by hand.
-
Fold in the chocolate: Use a spatula to gently fold in the chocolate discs. Try not to break them. We want big, dramatic melts, not a chocolatey smear.
-
Cover and rest the dough: Press plastic wrap directly against the dough’s surface. Pop it in the fridge for at least 24 hours. Yep, this sounds like a pain. But it’s so worth it. The texture, the depth, the golden magic—it all depends on that chill.
-
Preheat and prep: Once you’re finally ready (yay!), preheat the oven to 350°F and line a sheet with parchment or a silicone mat.
-
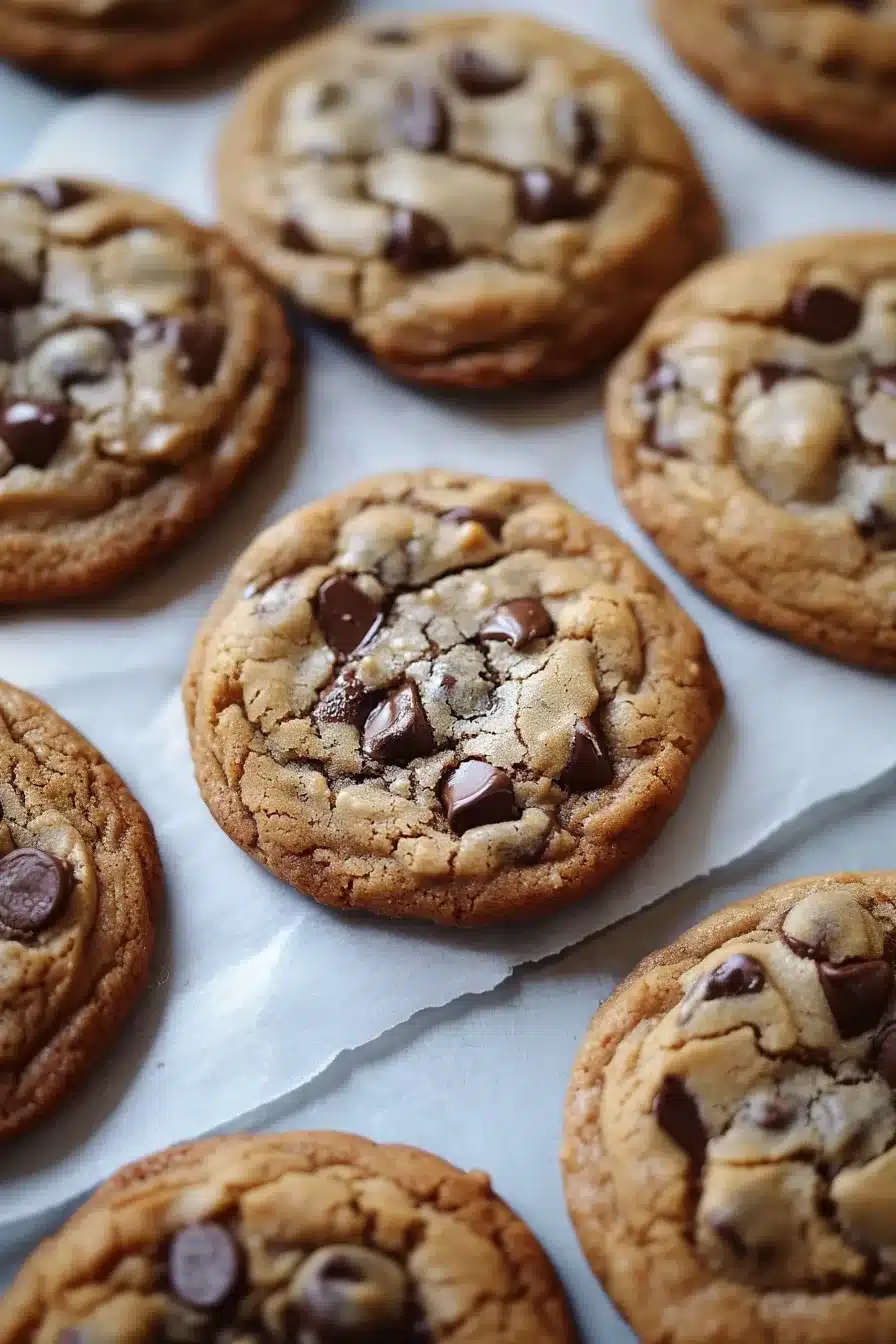
Scoop and shape: Use a scale if you’ve got one. These are hefty cookies—3½ ounces for big bakery style. Roll smooth balls and space them out well. Turn any peeking chocolate to face up for swoon-worthy puddles.
-
Sprinkle and bake: Sprinkle each ball with flaky sea salt, then bake until the edges are browned and the center looks set but soft—about 18–20 minutes for big guys, or 10–12 for minis.
-
Cool and devour: Let them sit on the tray for about 10 minutes before transferring to a wire rack. Or don’t. I mean, who’s really waiting that long?
Storage Options
These cookies store beautifully, assuming you don’t eat the whole batch in one sitting (no judgment if you do).
If you’ve baked them, let them cool completely. Then stash them in an airtight container at room temp—they’ll be soft and perfect for about 3–4 days. You can pop a slice of bread in the container to help keep them moist.
Want to freeze them for later? Totally doable. Shape the dough balls and place them on a baking sheet. Freeze until solid, then transfer to a freezer bag. When ready to bake, you can pop them straight into the oven—just tack on an extra 1–2 minutes.
And yes, baked cookies freeze well too. Let them cool fully first. Wrap them individually or layer with parchment in a container so they don’t stick. Then reheat in a 300°F oven for 4–5 minutes if you want that fresh-out-of-the-oven gooeyness back.
Variations and Substitutions
There’s room to play! If you feel like tweaking or have some pantry limitations, these ideas might help.
-
Different chocolate: Swap out bittersweet disks for semi-sweet chunks, chopped bars, or even white chocolate. Just avoid regular chips if you want those dramatic pools.
-
Nut addition: Toasted pecans or walnuts go beautifully here. Roughly chop and fold in about 1 cup with the chocolate.
-
Make ’em smaller: Instead of jumbo bakery size, scoop 1¾-ounce portions. Bake a bit shorter, and enjoy twice as many.
-
Add espresso powder: Just ½ teaspoon really deepens the chocolate flavor without making it taste like coffee.
-
Gluten-free swap: Sub in a 1:1 gluten-free flour blend for both flours. The texture shifts a little, but they still turn out delicious.
Looking for a savory contrast? These bacon basil cornbread muffins would be an absolutely quirky (but delightful) sidekick.
What to Serve with Jacques Torres Chocolate Chip Cookies
You don’t need much to go with these, truly—but here are a few pairings that just make sense (or at least feel fun).
-
Milk, obviously: Hot or cold, classic or oat, something about milk and cookies just works. The creamy sip cuts the rich chew beautifully. It’s comfort, squared.
-
Coffee station treat: I love these with a cup of pour-over or espresso. The cookie brings sweetness, the coffee hits bitter—everyone wins. Bonus if you warm the cookie just a bit so it gets extra gooey.
-
Movie night sidekick: Popcorn in one hand, cookie in the other. Especially good with a salty-sweet combo like this TikTok-famous cheddar biscuit chicken bake to round out the snacky vibe.
-
A scoop of ice cream on top: I mean, is it still a cookie if it’s also dessert? Vanilla or caramel swirl, nestled on a warm cookie? Irresistible.
-
For brunch (hear me out): Can you imagine one of these next to soft scrambled eggs, bacon, and fruit? It’s indulgent, yes. It’s also joy.
Frequently Asked Questions
Can I skip the 24-hour dough rest?
You can, but it truly changes the cookie’s character. Without the rest, they’re still good—but less nuanced. That rest time hydrates the flour, deepens flavor, and helps the cookies bake up with better texture: chewy centers, crispy edges, all that good stuff. So if you’re short on time, bake a few right away, but keep the rest chilling. You’ll notice the difference.
What if I can’t find cake flour or bread flour?
If you’re in a pinch, you can fake cake flour by replacing 2 tablespoons per cup of all-purpose flour with cornstarch. For bread flour, you can sub all-purpose, but just know the cookies will be a little less chewy and structured. The combo of both flours is part of what makes this recipe stand out, but your cookies will still be tasty without it.
Can I make the cookie dough in advance and freeze it?
Absolutely—and I highly recommend it. Portion the dough into mounds, set them on a tray, freeze until solid, then pop them into a zip-top bag. When the craving strikes, bake from frozen, just add an extra minute or two. You’ll always have warm cookies on demand, which feels like a tiny life upgrade.
Why are chocolate discs better than chips?
Chocolate chips are made to hold their shape, which means they don’t melt as beautifully. Discs (or fèves) melt into wide pools that blend into the dough and create fudgy bites. Plus, they look super elegant when they peek through the surface. Those glossy lakes of chocolate? That’s thanks to the discs.

Jacques Torres Chocolate Chip Cookies
Ingredients
Dry Ingredients
- 2 cups (240 g) cake flour sifted
- 1 2/3 cups (210 g) bread flour sifted
- 1.25 tsp baking soda
- 1.5 tsp baking powder
- 1.5 tsp kosher salt
Wet Ingredients
- 1.25 cups (284 g) unsalted butter softened (2 1/2 sticks, 284g)
- 1.25 cups (250 g) light brown sugar packed
- 1 cup (200 g) granulated sugar
- 2 large eggs room temperature
- 2 tsp pure vanilla extract
Mix-Ins & Topping
- 1.25 pounds (570 g) bittersweet chocolate discs or fèves at least 60% cacao, or use chopped bars (about 570g)
- flaky sea salt for finishing (such as Maldon)
Equipment
- Stand Mixer or Hand Mixer
- Large mixing bowls
- Parchment or silicone baking mats
- Baking sheet
- Spatula
- Plastic Wrap
Instructions
- Sift together the cake flour, bread flour, baking soda, baking powder, and salt into a large bowl. Set aside.
- In a stand mixer fitted with the paddle attachment (or using a hand mixer), cream the softened butter with brown sugar and granulated sugar until very light and fluffy, about 5 minutes, scraping sides as needed.
- Add eggs, one at a time, beating well after each addition. Beat in the vanilla extract until combined and the batter smells fragrant.
- With mixer on low, gradually add the sifted dry ingredients. Mix until just combined—stop before fully mixed, then finish the last bit of folding by hand with a spatula.
- Gently fold in the chocolate discs or fèves, being careful not to break them so the cookies have large, dramatic chocolate pools.
- Press plastic wrap directly onto the dough's surface and refrigerate for at least 24 hours—36 is even better, but 24 is the minimum for best results.
- When ready to bake, preheat oven to 350°F (175°C). Line a baking sheet with parchment paper or a silicone mat.
- Scoop dough into large balls about 3½ ounces each for bakery size (use a scale if possible), or around 1¾ ounces for smaller cookies. Leave plenty of space between cookies. Face up any chocolate pieces showing for dramatic puddles.
- Sprinkle each dough ball lightly with flaky sea salt.
- Bake in the preheated oven until edges are golden and centers look set but soft—about 18–20 minutes for large cookies, 10–12 minutes for smaller ones.
- Allow cookies to cool on the baking sheet for 10 minutes, then transfer to a wire rack to finish cooling, if you can wait. Enjoy warm!