

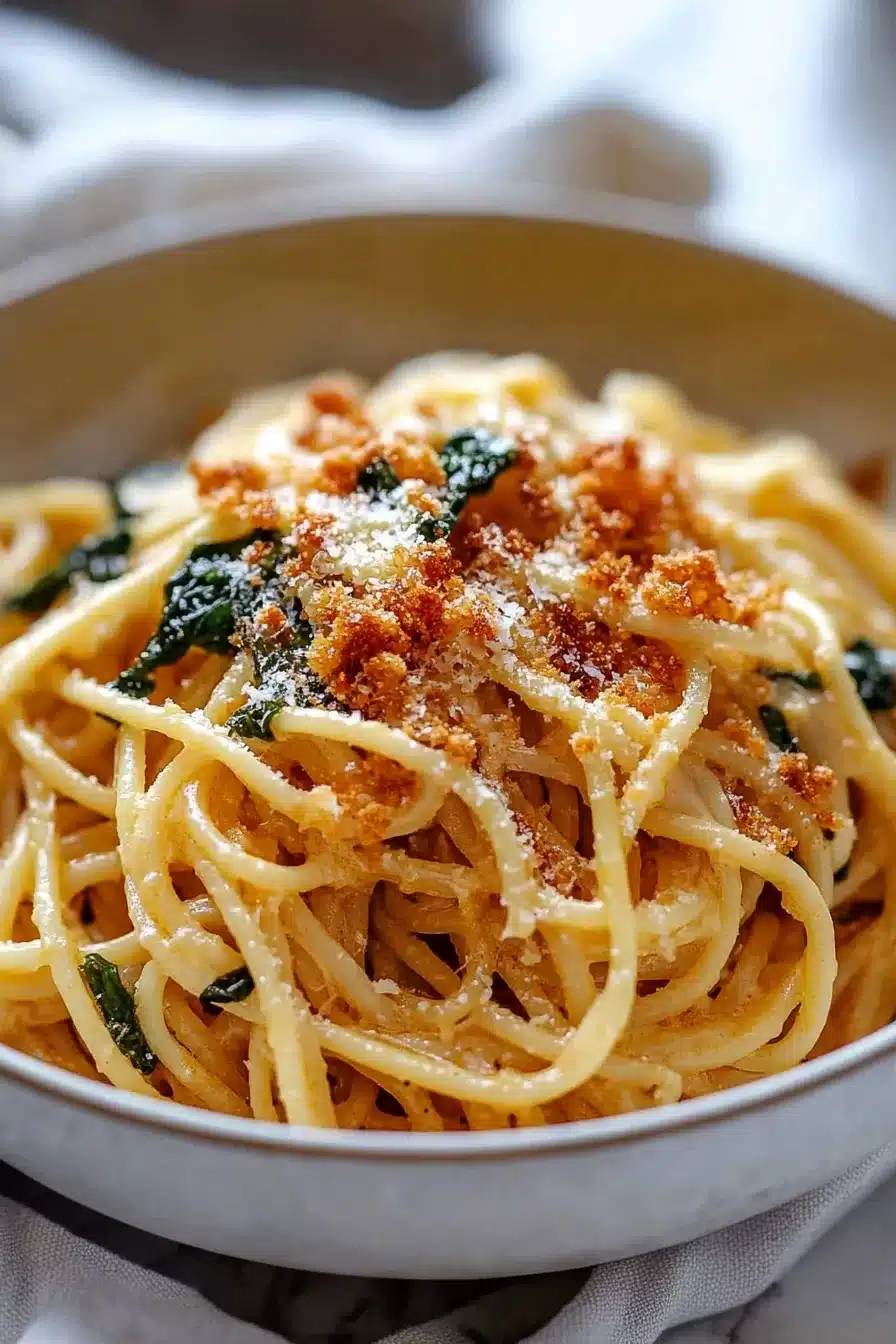
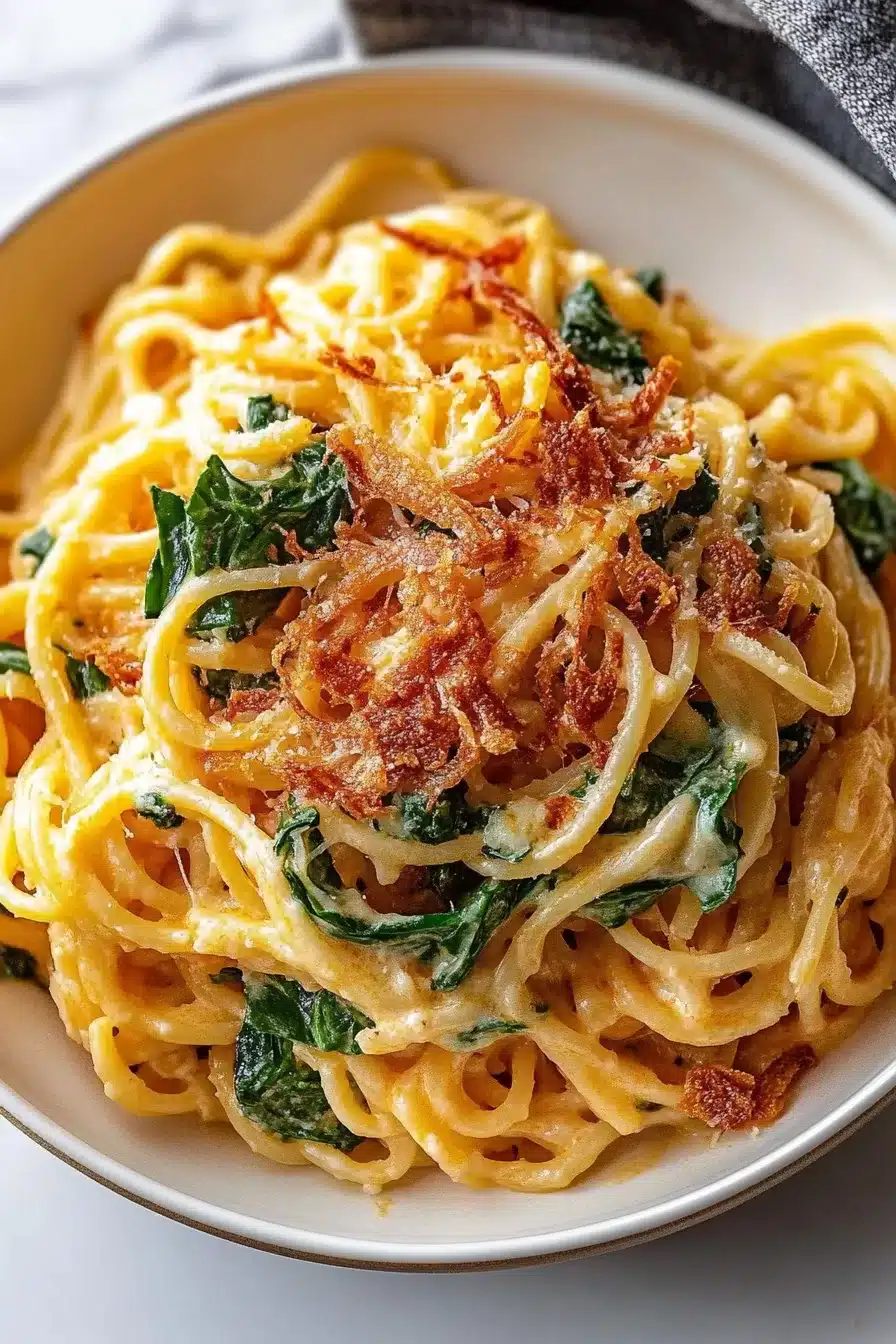
Bubbly cheese, garlicky sour cream, buttery noodles, and a crisp onion topping—this Monterey Spaghetti Casserole is pure comfort. With spaghetti, sour cream, spinach, and Monterey Jack, it’s like cozy sweater weather in a baking dish.
We’re talking layers of creamy, cheesy, crunchy-gooey goodness here. This one’s right at home on a chilly weeknight or when you’re feeding people who just drove four hours for dinner and brought nothing but a bottle of merlot and opinions. Respect.
Let’s talk about this gloriously gooey thing called Monterey Spaghetti Casserole. It’s unapologetically creamy. A little retro in all the best ways. The kind of dish that wafts garlic and bubbling cheese through your entire kitchen while you yell “Dinner’s almost ready!” for the third time. There’s a sweet-soft tangle of spaghetti in there, held together by tangy sour cream and stretchy Monterey Jack, plus spinach for just enough green to convince yourself it qualifies as balanced.

Why You’ll Love this Monterey Spaghetti Casserole
This is the kind of casserole that doesn’t make any big speeches. It just shows up, does its melty-cheesy thing, and quietly becomes everybody’s favorite.
- Ridiculously simple to make: You just boil, mix, layer, pop it in the oven, then bask in crispy-onion glory.
- Cheesy and rich without being overkill: Monterey Jack brings the melty comfort, but the sour cream balances it out.
- Satisfies picky eaters discreetly: I mean… there’s spinach, but it’s smuggled in under a thick blanket of cheese.
- Perfect for feeding a crowd: This casserole fills a big 9×13 pan, and no one leaves hungry. Ever.
- Flexible and forgiving: You can tweak it with what’s in the fridge, and it still turns out dreamy.
Ingredient Notes
Nothing complicated here—just a few fridge and pantry staples teaming up to make something way greater than the sum of its parts.
- Spaghetti: Go for the classic long noodles, regular or whole wheat. Break ’em in half if you like manageable bites.
- Eggs: These help bind everything together and make the whole casserole rich and custardy.
- Sour cream: Adds a tangy, creamy element that keeps things moist and luscious without getting too heavy.
- Parmesan cheese: Just a little sharp nuttiness to give some depth. Use real Parm if you’ve got it.
- Garlic: Fresh and minced is best, but 1/2 teaspoon of garlic powder will pinch-hit in a rush.
- Monterey Jack cheese: Creamy, buttery, and super melty. You could use pepper jack for a soft heat nudge.
- Frozen chopped spinach: Thaw it and squeeze it dry like it owes you money. Adds a little veg and color.
- French-fried onions: In the mix and on top for that salty, golden crunch. Try not to eat the whole can before it even hits the casserole.
How To Make This Monterey Spaghetti Casserole
This is the kind of recipe that lets you feel accomplished without requiring a culinary degree or seven different spatulas.
-
Prep your oven and dish: Preheat to 350°F, grease your 9×13-inch pan, and give yourself a pat on the back for starting dinner ahead of hanger o’clock.
-
Boil the spaghetti: Salt the water like your ancestors are watching, then cook the noodles until just al dente. Drain and let it cool a bit so it doesn’t scramble the eggs later.
-
Make the creamy base: In a big mixing bowl, whisk the eggs until smooth. Stir in the sour cream, Parmesan, and minced garlic. Yes, it’s going to smell awesome already.
-
Mix the noodles with the sauce: Toss the slightly cooled spaghetti into that creamy, garlicky mixture. Get everything coated. Use tongs, a fork, your (clean) fingers—whatever feels right.
-
Add cheese, spinach, and onions: Fold in the Monterey Jack, the well-drained spinach (seriously, squeeze it dry), and one can of the crispy fried onions. Don’t overmix, just let things evenly mingle.
-
Build the casserole: Transfer all that goodness to your prepared baking dish. Smooth it out, give it a little wiggle, then cover with foil.
-
Bake it covered: Pop it into the oven for 30 minutes, until it’s heated through and the cheese is totally melted and cozy.
-
Finish with crispy onion magic: Take off the foil, sprinkle over the second can of fried onions, and return it to the oven for 5 minutes. Just enough time for those onions to get golden and dramatic.
-
Cool, then serve: Give it a few minutes to settle before dishing it out. You want structure, not lava.

Storage Options
Have some leftovers? Lucky you. This Monterey Spaghetti Casserole keeps pretty well, and you’ve got options.
In the fridge, cover it tightly (or transfer slices to containers). It holds up for 3 to 4 days, and the flavors actually mellow and mingle after a day or two, which is kind of delightful. Just reheat it in the oven or microwave—try 350°F for 15 minutes or microwave individual slices about 1–2 minutes, depending on how powerful your unit is (and how impatient you are).
Can you freeze it? You bet. Wrap cooled portions in foil, then slide into a freezer-safe bag or container. It’ll hang out in the freezer up to 2 months. To reheat, thaw overnight in the fridge and bake at 350°F until warmed through.
One thing, though: the crispy onion top? It loses a little crunch after freezing. If you’re a texture fanatic, toss on fresh onions before reheating.
Variations and Substitutions
Feel like riffing on it? Monterey Spaghetti Casserole plays very well with others.
- Pepper Jack instead of Monterey Jack: Want a little kick? Swap in pepper jack for a bit of gentle heat and extra flavor.
- Add sautéed mushrooms or onions: For those earthy, sweet-savory notes that instantly make it feel fancy with zero effort.
- Swap spinach for kale or broccoli: Just chop fine and cook it first. It’ll still sneak in those good-for-you greens.
- Try different pasta shapes: Penne, rotini, or bowties hold the sauce a little differently but work just as well.
- Add cooked chicken or sausage: Fold in protein if you’re feeding a crowd or just want it heartier. Rotisserie chicken works like a charm.

What to Serve with Monterey Spaghetti Casserole
So what do you serve with a big ol’ pan of cheesy spaghetti goodness? Keep it simple, but thoughtful.
-
A crisp green salad never fails. Something peppery like arugula or just a pile of romaine dressed with lemony vinaigrette to cut through the richness. Bonus points if you throw in some shaved fennel or radishes for crunch.
-
Garlicky roasted broccoli or simple sautéed greens make you feel suspiciously healthy in contrast. If you happen to have some rainbow chard, this quick chard side is sneaky-good.
-
A slice of crusty bread or garlic knots wouldn’t be frowned upon. You’ll want something to swipe through the gooey corners left on the plate.
-
An easy dessert with a nostalgic streak works wonderfully. These peanut butter and banana ice cream sandwiches hit that creamy-sweet spot.

Frequently Asked Questions
Can I assemble this recipe ahead of time?
Yes, absolutely! You can mix everything together, spread it into the baking dish, and cover it tightly with foil. Keep it in the fridge for up to 24 hours before baking. Just let it sit on the counter for about 20–30 minutes before popping it in the oven, or add a few more minutes to the baking time if it goes in cold.
Does it matter if I use full-fat or light sour cream?
You can use either, but full-fat sour cream will give you that rich, velvety texture that really works for this kind of casserole. Light sour cream will be a little less indulgent, but the dish still holds up. I wouldn’t recommend fat-free—it just doesn’t bake the same way and can get a little… sad.
Is there a gluten-free version of this recipe?
Totally doable! Just use gluten-free spaghetti and double-check your French-fried onions—many brands contain wheat, but there are gluten-free options out there. Same goes for your Parmesan (but that’s usually safe). It’s still cheesy, cozy, and wonderful, just with a gluten-free passport.
Can I use fresh spinach instead of frozen?
Yes, and you might actually prefer it. Just make sure to cook it down first and chop it well. You’ll want about 1 cup of cooked fresh spinach to replace the frozen version. Too much raw spinach will release excess moisture, which can turn your lovely casserole into a watery mishap.

Monterey Spaghetti Casserole
Ingredients
Main Ingredients
- 12 oz (340 g) spaghetti regular or whole wheat
- 2 large eggs lightly beaten
- 1 cup (240 ml) sour cream
- 1/2 cup (50 g) grated Parmesan cheese preferably freshly grated
- 2 cloves garlic minced (or 1/2 tsp garlic powder)
- 2 cups (200 g) shredded Monterey Jack cheese
- 10 oz (280 g) frozen chopped spinach thawed and squeezed dry
- 2 cans (2 cans (140g each)) French-fried onions 5 oz each, divided
- salt and freshly ground black pepper to taste
Equipment
- Large pot
- 9x13 inch Baking Dish
- Mixing bowls
- Colander
- Whisk
- Aluminum foil
Instructions
- Preheat oven to 350°F (175°C). Grease a 9x13-inch baking dish and set aside.
- Bring a large pot of salted water to a boil. Cook the spaghetti until just al dente. Drain and let cool slightly.
- In a large mixing bowl, whisk the eggs until smooth. Stir in the sour cream, Parmesan cheese, and minced garlic.
- Add the cooked, slightly cooled spaghetti to the egg mixture and toss to coat thoroughly.
- Fold in the Monterey Jack cheese, thawed and well-drained spinach, and one can of French-fried onions. Season with salt and black pepper to taste.
- Transfer the mixture to the prepared baking dish and spread evenly. Cover with foil.
- Bake, covered, for 30 minutes until heated through and the cheese is melted.
- Remove the foil, sprinkle the second can of French-fried onions evenly over the top, and bake for another 5 minutes until the onions turn golden and crisp.
- Cool for 5 minutes before serving to allow the casserole to set. Enjoy warm.