Get 5 recipes to simplify your life:

easy, delicious, real food recipes

Latest Recipes

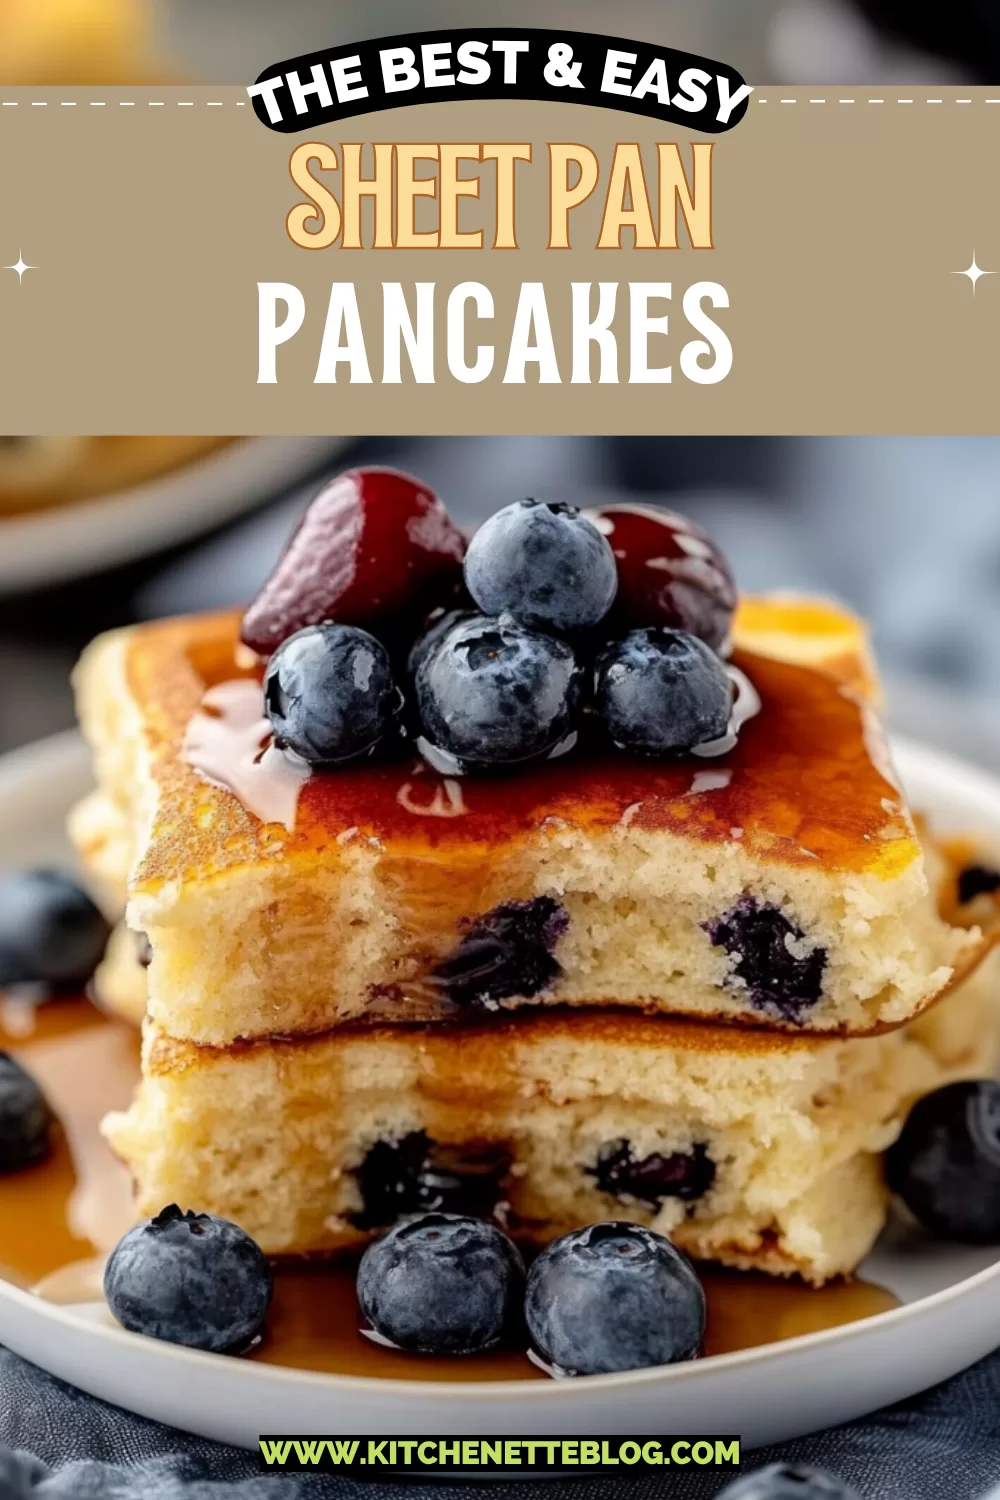
Sweet, golden sheet pan pancakes made with flour, milk, eggs, and butter—plus a jammy swirl and fruit on top—just waiting to be sliced and devoured.

Crispy on the edges, fluffy in the middle, and baked in one cozy tray, these sheet pan pancakes save you from standing at the stove flipping your breakfast life away.

Imagine that warm, buttery smell drifting through your kitchen as this tray-sized beauty puffs up in the oven. You’ve got golden pancake goodness in just 15 minutes—and not a spatula in sight. These are the pancakes you make when you’d rather sip coffee in fuzzy socks than scrape batter off the stovetop.

They’re still fluffy. Still comforting. But now they’re way easier to share, stack, and smother in peanut butter. Whether it’s a lazy weekend brunch or breakfast-for-dinner Tuesday (because cereal feels too sad), this is the hero sheet pan you didn’t know your mornings needed.

Table of Contents

Sheet Pan Pancakes

Why You’ll Love this Sheet Pan Pancakes Recipe

I won’t lie—this is one of those “Why didn’t I always make pancakes like this?” moments. It’s streamlined, it’s fun, and bonus: everyone gets a corner piece if they want one.

  • Ridiculously simple to make: You throw the batter in a pan, bake it, and boom—breakfast. No flipping, no fuss.
  • Super customizable: You can top one half with berries, one corner with chocolate, and the rest with bananas. Everyone wins.
  • Fluffy and golden: It’s still everything you want in a pancake—just in rectangle form. Puffy in the center, golden on the edges.
  • Easy to prep ahead: Slice it and stash it for weekday mornings. It reheats like a dream.
  • No babysitting the stove: Go make coffee, hug your dog, or two-step to the playlist while it bakes.

Sheet Pan Pancakes

Ingredient Notes

Nothing fancy here—just a few pantry basics and some fun toppings to swirl in at the end.

  • All-purpose flour: This gives the pancakes that classic, fluffy structure. If you’re feeling oat flour or gluten-free blends, go for it, but the texture may vary.
  • Granulated sugar: A touch of sweetness that complements all those topping shenanigans. You can tweak it down if you’re going fruit-heavy.
  • Baking powder: The rise-maker. This ensures a lovely puff instead of a sad, flat slab.
  • Salt: Just a pinch to keep things balanced. It makes the sweet pop.
  • Milk: Whole milk makes it tender and rich, but really, any milk you have works—dairy or not.
  • Eggs: These help bind everything and give your pancake some lift.
  • Butter (melted): Adds richness and also that cozy golden color when baked. I usually let it cool just a bit before mixing.
  • Vanilla extract: Optional, but lovely. Think warm, sweet bakery vibes.
  • Raspberry jam and fresh fruit (like strawberries, blueberries, bananas): These turn your pancake into a flavor patchwork quilt. Tart meets sweet, meets juicy.
  • Chocolate chips: Optional but, honestly, why not? They get melty in the oven and make it feel treat-y.
  • Warmed peanut butter or spreads (Nutella, Biscoff, more jam): Drizzle them on top or after baking for an extra bit of magic.

Sheet Pan Pancakes

How To Make This Sheet Pan Pancakes Recipe

There’s something a little thrilling about pouring pancake batter into a huge pan. It feels rebellious. Here’s how to make it happen.

  • Preheat your oven to 425°F: I know, that’s hotter than usual—but it’s the sweet spot for golden edges and a puffed center. Line a 13×18-inch sheet pan with parchment paper or a silicone mat and give it a generous spritz of cooking spray.

  • Mix your dry ingredients first: Whisk together the flour, sugar, baking powder, and salt in a large bowl. It’s like building the dry team before the wet squad shows up.

  • Now the wet ingredients: In a separate bowl, combine the milk, eggs, melted butter, and vanilla. Whisk it so it’s smooth and dreamy, but don’t overthink it.

  • Combine wet and dry: Pour the wet mixture into the dry one and gently fold it together with a spatula. Don’t overmix here—some lumps are totally fine, even charming. Overmixing gives you chewy and dense rather than fluff-central.

  • Pour and swirl: Scrape the batter into your lined sheet pan and spread it evenly. Give the tray a few gentle taps on the counter to shake out air bubbles. Swirl in your preferred toppings—spoonfuls of jam, scattered blueberries, banana slices, or chocolate chips.

  • Bake those babies: Slide it into the oven and bake for 12 to 15 minutes. The top should be golden brown, and the middle should gently spring back when pressed.

  • Slice, serve, enjoy: Let it cool for a minute or two (I know, torture) before cutting into squares. Then drizzle with peanut butter, smear with jam, or just dunk it in syrup like a proper rebel.

Sheet Pan Pancakes

Storage Options

So, you’ve made a full tray. Maybe you’re feeding a crowd. Or maybe it’s just you and your cat and a surprising amount of leftover pancake squares. Either way, here’s how to keep things fresh.

If you’re saving a few for the week, just let them cool completely, then stack the squares between pieces of parchment or wax paper. Pop them into an airtight container in the fridge. They’ll stay tender and lovely for up to 4 days.

Wanna go longer? Freeze ’em. Wrap individual squares tightly in plastic wrap or foil, then stash them in a freezer bag. They freeze beautifully for up to two months. On a busy morning, grab one and warm it in the toaster oven—or microwave for 30 seconds, then pop it in the toaster to crisp the edges a bit.

Reheating is easy too. Oven, skillet, toaster oven—they’re all fair game. I do recommend avoiding the microwave only technique unless you’re in a serious time crunch; the texture gets a bit rubber-ducky.

Variations and Substitutions

Ready to riff on it? Here’s where things get fun. This recipe’s a blank pancake canvas, just waiting for your edible doodles.

  • Buttermilk instead of milk: This will add a tang that makes everything taste more bakery-worthy. Just dial back the baking powder a smidge if you like.
  • Almond or oat milk instead of dairy: Go plant-based! Just keep an eye on sweetness—some milks are flavored so you may want to adjust the sugar.
  • Fruit puree swirl: Try mashed raspberry or mango instead of jam. Or that lonely spoonful of apple butter hiding in the back of the fridge.
  • Savory spin: Skip the sugar and vanilla, and top with chopped bacon and herbs. Or better yet, go wild and top it with bits of bacon basil cornbread muffins for a pancake-cornbread hybrid.
  • Add-ins like nuts or seeds: Sunflower seeds, chopped pecans, even hemp hearts if you’re feeling virtuous. Little nuggets of texture in every bite.

Sheet Pan Pancakes

What to Serve with Sheet Pan Pancakes

Whether you’re putting together a low-key brunch table or just want something extra to make your pancake square feel fancy, these sides round it out nicely.

  • Greek yogurt and drippy honey: Plop a scoop on your plate with a drizzle of honey and some chopped pistachios. The cool tang is a dreamy contrast to the warm sweetness of the pancake.

  • Scrambled eggs with chives: If you’re in breakfast sandwich mode, slice a pancake square, fill it with scrambled eggs, and maybe a smear of softened brie? That’s a moment.

  • Fruit salad or compote: Berries, mint, maybe a balsamic splash if you’re fancy. I like serving it chilled so every bite feels like it’s got contrast and snap.

  • Coffee (obviously) and nitro cold brew: These humble pancakes get surprisingly elegant when sipped with smooth, strong cold brew. Try it once and thank your future self.

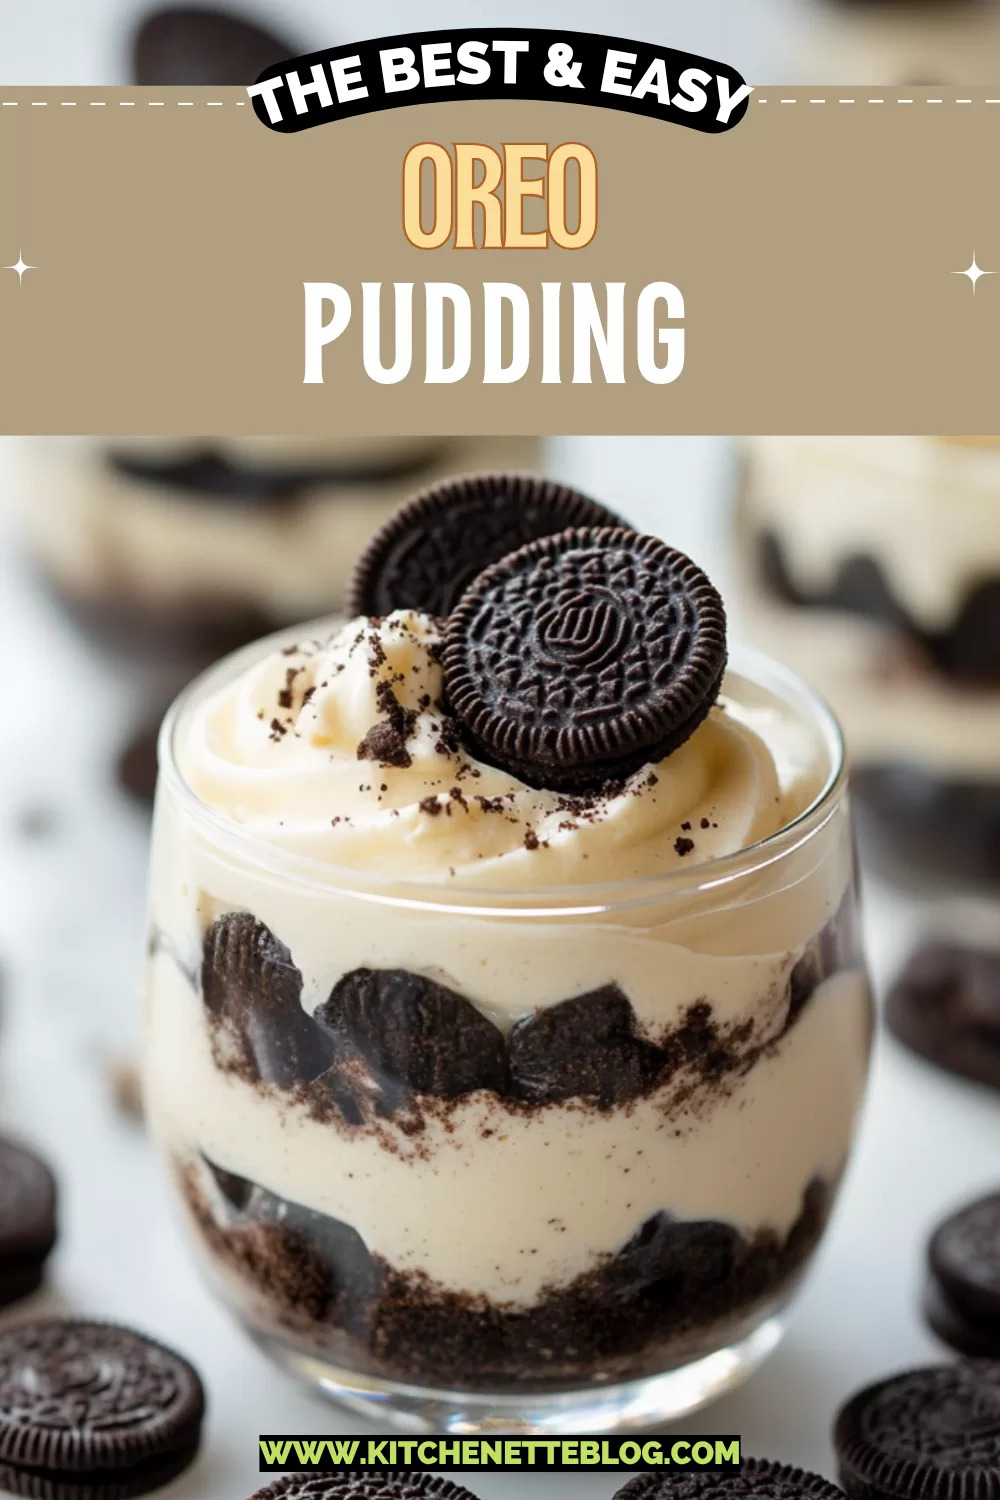
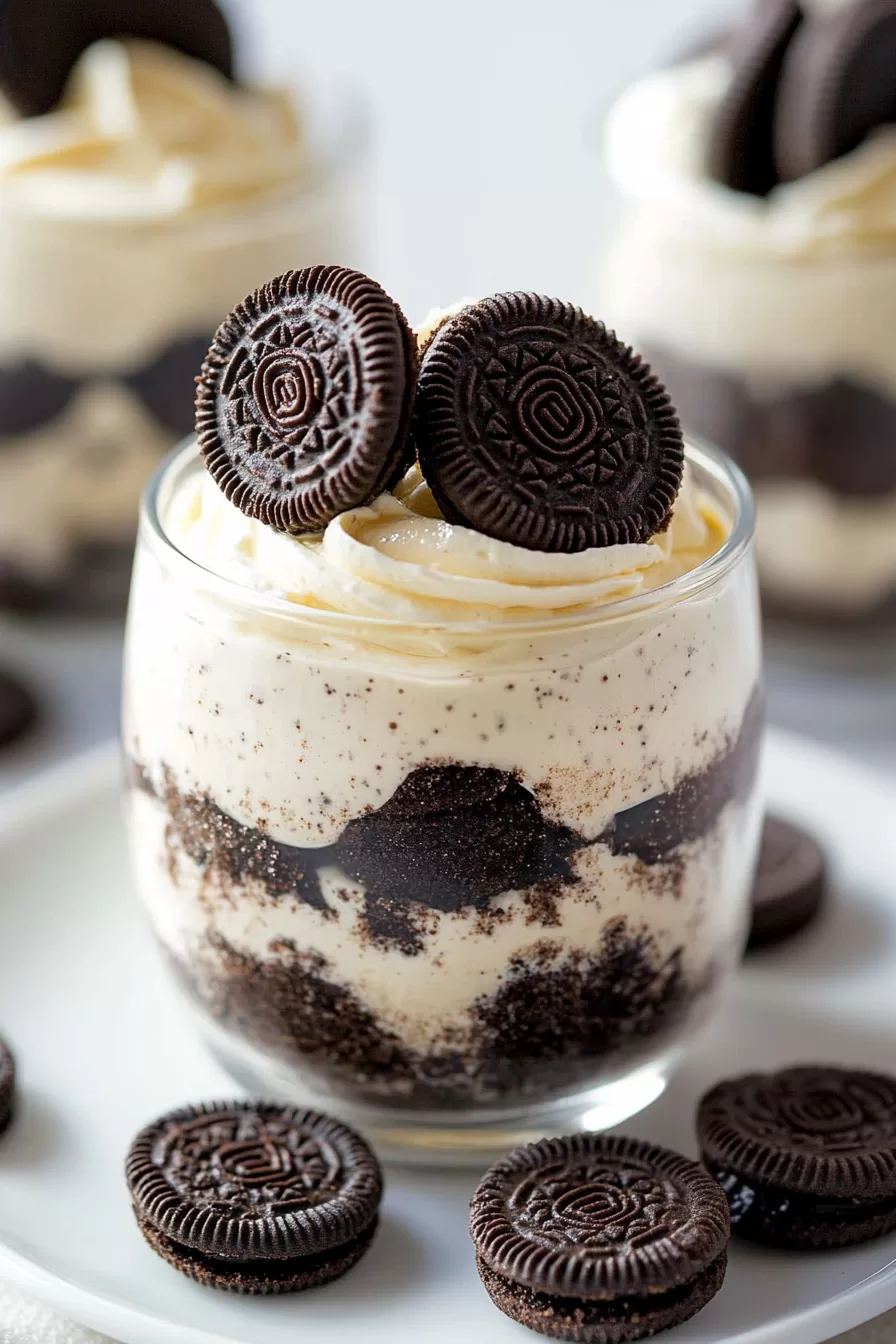
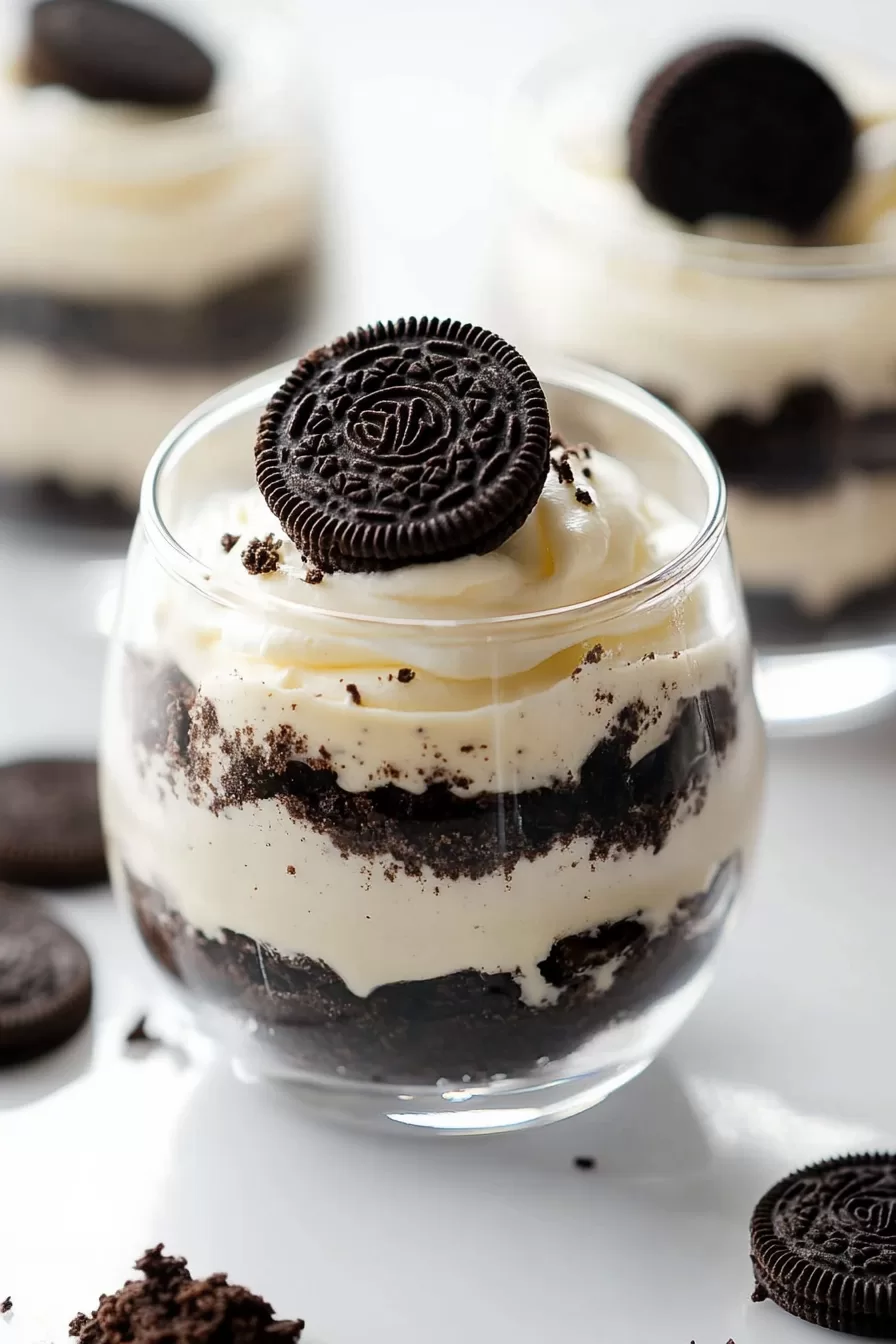
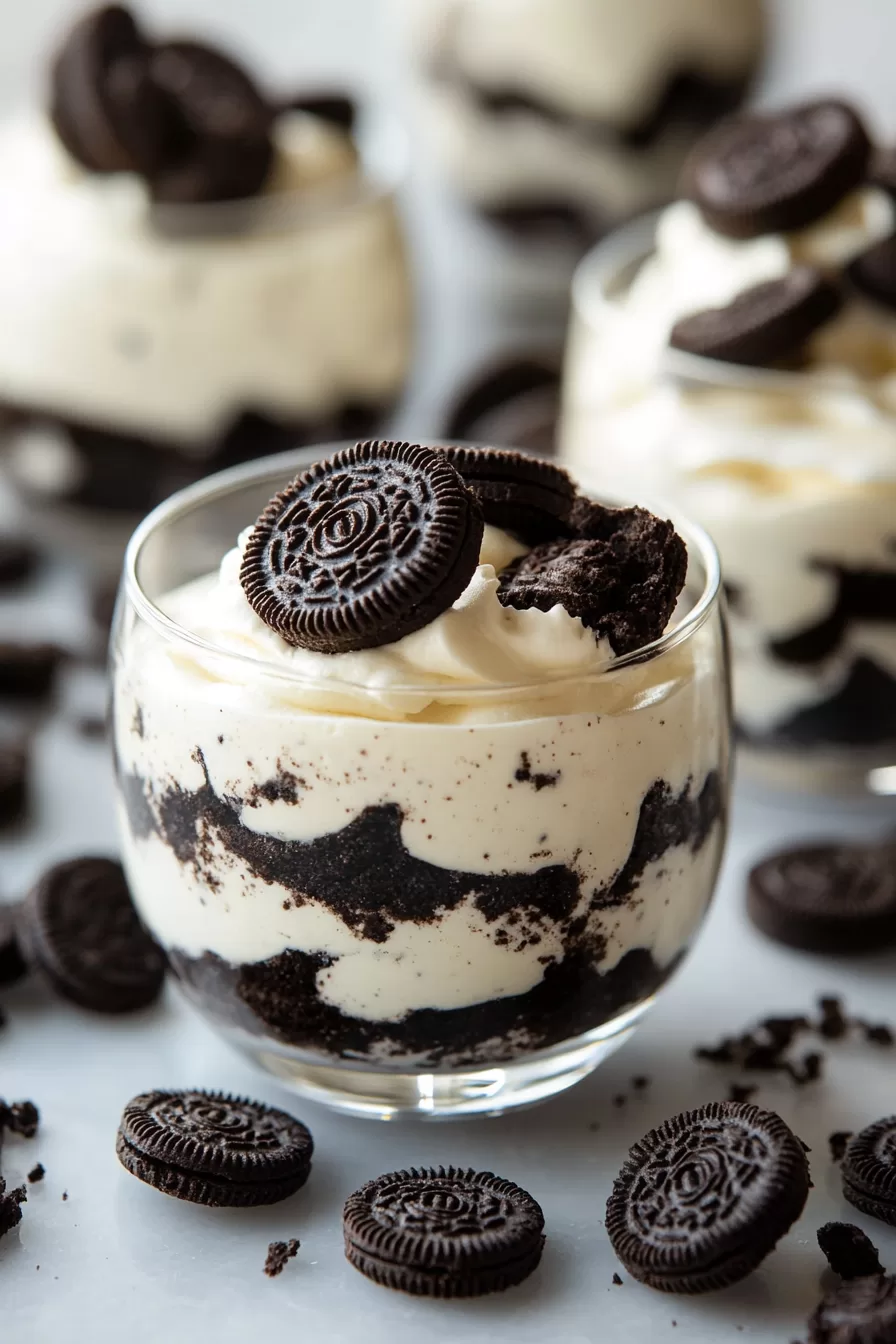
  • Something chocolatey on the side: Like a square of easy Oreo pudding for dessert brunch. Is that a thing? It should be.

Sheet Pan Pancakes

Frequently Asked Questions

Can I make sheet pan pancakes ahead of time?

Absolutely! Once baked and cooled, you can slice them into squares and stash them in the fridge for up to 4 days. They’re great for meal prepping—just reheat individual pieces as needed. I love tossing one in the toaster oven to crisp it a little. Easy breakfast, sorted.

Do I need parchment paper or a silicone mat?

Yes, it really makes a difference. Parchment or a silicone baking mat keeps the pancake from sticking, which is key when you’re lifting out nice clean squares. Plus it makes cleanup dreamy. If you’re all out, a serious greasing will do in a pinch, but expect some clingy corners.

What if I don’t have a half-sheet tray?

You can divide the batter between two smaller pans, or use a 9×13 baking dish—just note the pancake will be a bit thicker and may need an extra minute or two in the oven. Keep an eye on the top; when it’s golden and springs back, you’re set.

Can I freeze leftovers?

Yes, and you absolutely should. Let the pancake squares cool, wrap them tightly, and freeze them for up to two months. To reheat, you can microwave and then toast, or just go straight into a toaster oven. The edges get golden again, and it tastes fresh-baked. Perfect for mornings when you’re running on coffee and vibes.

Sheet Pan Pancakes

Sheet Pan Pancakes

Prep Time 10 minutes
Cook Time 15 minutes
Total Time 25 minutes
These golden, fluffy sheet pan pancakes are baked in one tray—no flipping required! Customize each batch with swirls of jam, fruit, chocolate chips, or nut butter on top. Perfect for brunch, feeding a crowd, or prepping easy breakfasts in advance.
8 squares

Ingredients

Sheet Pan Pancakes

  • 2 cups (240 g) all-purpose flour
  • 2 tbsp (25 g) granulated sugar
  • 1 tbsp (15 g) baking powder
  • 1/2 tsp (2.5 g) salt
  • 2 cups (480 ml) milk whole milk preferred, but any milk works
  • 2 large eggs
  • 4 tbsp (56 g) unsalted butter melted and slightly cooled
  • 1 tsp (5 ml) vanilla extract optional

Topping Options

  • raspberry jam for swirling on top
  • fresh berries like blueberries, sliced strawberries, or banana
  • chocolate chips optional
  • warmed peanut butter or spreads Nutella, Biscoff, or additional jam; for drizzling

Equipment

  • sheet pan (13x18-inch)
  • Parchment Paper or Silicone Mat
  • Mixing bowls
  • Whisk
  • Spatula

Instructions
 

  1. Preheat your oven to 425°F (220°C). Line a 13x18-inch sheet pan with parchment paper or a silicone mat and coat with nonstick spray.
  2. In a large bowl, whisk together the all-purpose flour, granulated sugar, baking powder, and salt.
  3. In another bowl, whisk together the milk, eggs, melted butter, and vanilla extract (if using) until smooth.
  4. Pour the wet mixture into the dry ingredients. Gently fold together with a spatula—some small lumps are fine.
  5. Scrape the batter into the prepared sheet pan. Spread in an even layer. Tap the pan gently to release air bubbles.
  6. Swirl in dollops of raspberry jam, scatter fruit, and/or sprinkle with chocolate chips as desired.
  7. Bake in the preheated oven for 12–15 minutes, or until golden brown and the center springs back lightly when pressed.
  8. Let it cool slightly, then slice into squares. Serve with more jam, warmed peanut butter, syrup, or your favorite toppings.

Notes

Feel free to substitute buttermilk, oat or almond milk, or swirl in mashed fruit or fruit puree instead of jam. The recipe works great for meal prep—just refrigerate or freeze individual squares and reheat as needed. For a savory take, omit the sugar and vanilla and top with cooked bacon and herbs.

Nutrition

Calories: 235kcal | Carbohydrates: 31g | Protein: 6g | Fat: 9g | Saturated Fat: 5g | Cholesterol: 70mg | Sodium: 300mg | Potassium: 180mg | Fiber: 1g | Sugar: 6g | Vitamin A: 350IU | Vitamin C: 1mg | Calcium: 160mg | Iron: 1.6mg

Rich, creamy, and completely over-the-top in the best way—oreo pudding layers sweet Cool Whip, soft cream cheese, and crunchy cookies all in one dreamy bite.

If you love desserts that feel like eating nostalgia with a spoon, this creamy concoction of Oreos, vanilla pudding, and whipped topping is ready to swoop in and steal your dessert heart.

This is the kind of dessert that doesn’t wait for holidays or special occasions. It’s got that soft, cool, creamy texture that goes down easy after dinner (or mid-afternoon, no judgment). You’ll get a sweet blend of tangy cream cheese and whipped fluff paired with those gloriously soft-crunch cookie bits… ugh, I’m describing it and now I want another spoonful. You can serve it in jars for a cute touch at your next hangout, or just keep some in the fridge for sneaky spoon dives throughout the week. Either way, oreo pudding is wildly satisfying in that comforting, chill-this-in-the-fridge-and-feel-like-a-genius kind of way.

Table of Contents

Oreo Pudding

Why You’ll Love this Oreo Pudding

We’re not trying to change lives here, just end dinner with something dreamy and a little indulgent.

  • Ridiculously simple to make: You just blend, whisk, fold, and layer. No baking. No candy thermometers. Zero stress.
  • Creamy and cool: Like cheesecake and pudding had a fluffy little baby who loves cookies.
  • Make-ahead magic: Toss it in the fridge, and it practically gets tastier overnight.
  • Custom vibes: Cups, jars, trifle dish… whatever you’ve got works, and it always looks cute.
  • Perfect balance of textures: Crunchy cookie crumbles, silky pudding, airy whipped topping—it’s all happening in one spoon.
  • Crowd-smart portions: Serve it in individual cups and avoid the whole “oops, I might’ve double-dipped” dilemma.

Oreo Pudding

Ingredient Notes

Just a short, sweet list of grocery-stuff you probably already know. Let’s peek inside the bowl.

  • Whole milk: Cold is key. It helps the pudding thicken quickly and get that silky texture we’re after.
  • Instant pudding mix: Vanilla or chocolate both work. Vanilla lets the Oreos shine more, but chocolate’s a classic pudding pairing.
  • Cream cheese: Room temp makes all the difference. Cold cream cheese is not a friend of blending (unless lumps are your thing).
  • Powdered sugar: Gives the cream cheese mixture its sweetness without the gritty feel of granulated.
  • Cool Whip (or whipped topping): Adds fluffiness and lightness. No need to get fussy with homemade whipped cream here.
  • Oreo cookies: Smash ’em up, but leave some chunks for bite and texture. Save a few beauties for garnish if you’re feeling extra.

Oreo Pudding

How To Make This Oreo Pudding

Layered desserts always look fancier than they are, right? This one’s no exception. It’s basically a no-bake trifle with a cookie obsession.

  • Whisk the pudding: In a big bowl, whisk that cold milk and instant pudding mix until it thickens up. It should take about 2 minutes. Bonus tip: ignore the box instructions and skip any firm setting time. The texture from the cream cheese will hold this together just fine.

  • Beat the cream cheese and sugar: In a separate bowl (and yes, I use my hand mixer here), beat the softened cream cheese with the powdered sugar until smooth. It’ll look fluffy and smell that sweet dairy-rich kind of way.

  • Loosen things up: Add just a scoop (about half a cup) of the pudding into the cream cheese mixture. Stir to loosen it up and avoid streaks when you mix it all together. Then add the rest of the pudding and mix until smooth.

  • Fold in the Cool Whip: Gently stir in about 3/4 of the Cool Whip. Don’t overmix—it’s okay if it’s not completely uniform. A little swirl of fluff is soul-soothing.

  • Crush the Oreos: I throw them into a zip-top bag and give them a good whack with a rolling pin. Sounds dramatic, but it’s wildly effective (and kinda fun). Some chunks, some crumbs—that’s the vibe.

  • Layer it up: Grab your serving cups (or bowls, or small jars). Start with a spoonful of crushed Oreos, then layer the pudding mix, then more Oreos. Repeat if you want double layers. Totally your call whether to get all fancy or go for comfort.

  • Chill time: Cover with plastic wrap and pop them in the fridge for at least 4 hours, or overnight if you’ve got time. The cookies soften just enough to become dreamy.

  • Top and serve: Right before serving, add a dollop of the remaining Cool Whip, sprinkle over any extra Oreos saved for garnish, and tuck a whole cookie in there for good measure. Serve cold and enjoy the love.

Oreo Pudding

Storage Options

This creamy beauty holds up pretty well—for a dessert with layers of dairy and cookies, at least.

Pop your pudding cups or dish into the fridge, covered tightly in plastic wrap or with lids if they’re in jars. It’ll stay good for about 3 to 4 days. The cookies will soften over time, but not in a soggy way. It’s more like they become part of the pudding world, soft little bits nestled in velvety goodness.

Now for the freezer question: technically yes, you can freeze oreo pudding. Will I do it often? Probably not. Freezing tends to mess with the texture—especially of the whipped topping—and makes the cookie bits lose their bite. But if you have leftovers you want to save, freeze them in individual airtight containers and thaw overnight in the fridge. The flavor will still be solid, just expect a softer texture.

Oh! And maybe don’t try to microwave this. Warm Cool Whip and pudding is kind of a nope.

Variations and Substitutions

Feeling adventurous or just out of something? You’ve got options. Consider this your pudding playground.

  • Chocolate pudding instead of vanilla: Gives more of a cookies-and-chocolate vibe, moodier and rich. Think Oreo-fudge fusion.
  • Golden Oreos: A totally different twist, creamier and a little more mellow. Kinda like faux banana pudding’s sultry cousin.
  • Homemade whipped cream: Swap the Cool Whip for freshly whipped cream if you prefer a less sweet, airier texture. But keep it chilled so it holds up.
  • Add-ins like peanut butter cups or chopped candy bars: This can go full dessert bar chaos, and we’re not mad about it.
  • Make it a trifle: Double or triple the recipe and layer it in a big ol’ trifle dish. Makes a pretty centerpiece for dessert tables (or just a Monday night).
  • Dairy-free pudding mix and coconut whip: For a vegan-friendly version. Just double-check the cookies and your mix to make sure they’re dairy-free too.

Oreo Pudding

What to Serve with Oreo Pudding

Truthfully, this could be dessert all on its own. But sometimes, you’re in the mood for a dreamy little duo.

  • A cup of espresso or strong coffee balances the sweet creaminess of the pudding and brings out those chocolate cookie notes like magic. Got decaf? Still works.

  • To boldly double-down on comfort, pair oreo pudding with a slice of something warm, like sweet potato soufflé. Weird combo? Maybe. But the contrast is oddly satisfying.

  • It’s also seriously cute served alongside some funfetti shortbread or sugar cookies for a DIY dessert buffet. Kids and adults will both lose their minds.

  • If you’re doing a dessert table for a brunch or party, this is a perfect mini addition alongside fresh berries or citrus-sweet tarts to keep things balanced. That sweet-acid thing really works.

  • For summer nights, plop a spoonful between graham crackers, freeze, and make impromptu frozen sandwich treats. Not classic, but definitely fun.

Oreo Pudding

Frequently Asked Questions

Can I make this recipe ahead of time?

Yes, and honestly, it gets even better! Oreo pudding loves a good chill. You can prep it up to 24 hours in advance, and those flavors have time to meld beautifully. The cookies soften just enough to become part of the pudding party without turning mushy. Just be sure to wait on the final toppings like Cool Whip and garnishes until right before serving so they stay fresh and fluffy.

Can I use homemade whipped cream instead of Cool Whip?

Absolutely, though you’ll want to stabilize it a bit so it holds up in the fridge. A spoonful of powdered sugar or a little mascarpone folded into your homemade whipped cream helps keep it from deflating too fast. But yes, real whipped cream works beautifully here if you like a fresher flavor and slightly less sweetness.

What’s the best way to crush the Oreos?

I usually throw them in a zip-top bag and lightly smash them with a rolling pin. You want a mix of crumbly bits and bigger chunks for that great texture difference. If you blitz them in a food processor, it can turn to dust quickly, so pulse with care. And a few whole ones on top never hurt anybody.

Can I freeze oreo pudding cups?

You can, but it’s a textural gamble. Freezing changes how the whipped topping behaves and makes the pudding denser. That said, if you’re okay with a softer, fudgier consistency after thawing, go ahead and pop them in a freezer-safe container. Just let them thaw in the fridge overnight instead of microwaving.

Oreo Pudding

Oreo Pudding

Prep Time 20 minutes
Chill Time 4 hours
Total Time 4 hours 20 minutes
Rich, creamy, and over-the-top in all the best ways, Oreo pudding is a cold layered dessert featuring Cool Whip, tangy cream cheese, silky pudding, and plenty of crunchy Oreo cookies. No baking required—just blend, whisk, layer, chill, and enjoy every dreamy bite!
8 cups

Ingredients

Pudding Layer

  • 2 cups (480 ml) whole milk cold
  • 1 box (96 g) instant pudding mix vanilla or chocolate, 3.4 oz (96g) box

Cream Cheese Layer

  • 8 oz (226 g) cream cheese softened to room temperature
  • 1 cup (120 g) powdered sugar

Assembly

  • 8 oz (226 g) Cool Whip or whipped topping, thawed
  • 25 Oreo cookies crushed, plus extra for garnish

Equipment

  • Mixing bowls
  • Hand mixer or stand mixer
  • Whisk
  • Spatula
  • Zip-top Bag
  • Rolling Pin
  • Serving cups, bowls, or jars

Instructions
 

  1. Whisk the pudding: In a large bowl, whisk the cold milk and the instant pudding mix together vigorously for about 2 minutes until it thickens. Set aside.
  2. Beat the cream cheese and sugar: In a separate bowl, beat the softened cream cheese and powdered sugar with a hand mixer until completely smooth and fluffy, about 2 minutes.
  3. Loosen the cream cheese mixture: Add about 1/2 cup of the prepared pudding to the cream cheese bowl. Stir until smooth and fully combined. Then add the remaining pudding and beat until just mixed and smooth.
  4. Fold in Cool Whip: Gently fold in about 3/4 of the Cool Whip (reserve some for topping), being careful not to overmix. Swirls are fine!
  5. Crush the Oreos: Place the Oreos in a zip-top bag and roughly crush them using a rolling pin. Some chunks and some smaller pieces create the best texture.
  6. Layer the dessert: In serving cups, bowls, or jars, add a layer of crushed Oreos, then a generous scoop of the pudding mixture. Repeat with another layer, if desired. Finish with a final sprinkle of Oreos on top.
  7. Chill: Cover and refrigerate for at least 4 hours, or overnight, so the cookies soften a bit and flavors meld.
  8. Serve: Just before serving, top each cup with a dollop of reserved Cool Whip, sprinkle with extra crushed Oreos, and garnish with a whole cookie if you like. Serve cold and enjoy!

Notes

This recipe can be doubled or tripled and layered in a large trifle dish for serving a crowd. Store covered in the fridge for 3–4 days. Try using chocolate pudding, Golden Oreos, or homemade whipped cream for easy variations. Don’t skip the chill time—the flavor and texture improve as it sits.

Nutrition

Calories: 390kcal | Carbohydrates: 41g | Protein: 5g | Fat: 23g | Saturated Fat: 12g | Cholesterol: 35mg | Sodium: 357mg | Potassium: 177mg | Fiber: 1g | Sugar: 31g | Vitamin A: 525IU | Calcium: 97mg | Iron: 2.6mg

Graham cracker crust, buttery caramel, fluffy whipped cream, and bananas; yep, this banoffee pie hits all the comfort notes. A sweet, sticky, crunchy, creamy dream.

The aroma of homemade toffee warming on the stove, the gentle hum of a mixer whipping up clouds of cream—this pie’s a little slice of happy chaos.

So, we need to talk about this gooey, creamy marvel called banoffee pie. It’s a British classic, though you don’t need to say it with an accent—it won’t improve the taste (I tried). You get crumbly graham crust, thick layers of banana slices, and that golden caramel that refuses to stay neatly in its lane. Top it all off with a soft cloud of vanilla whipped cream and a flurry of chocolate shavings. It’s comfort food masquerading as a fancy dessert.

It’s wonderful after dinner with coffee or, let’s be honest, as breakfast when no one’s watching.

Table of Contents

Banoffee Pie

Why You’ll Love this Banoffee Pie

This isn’t a “wait all day and babysit a double boiler” kind of dessert. It’s more of a “melt this, whip that, boom—done” situation.

  • Ridiculously simple to make: You just squish, smear, melt, and drizzle. A few bowls and zero rolling pins required.
  • No baking needed: Unless toasting your face in the fridge light counts as cook time, your oven gets the day off.
  • Big texture payoff: Crunchy crust, gooey caramel, soft bananas, and airy whipped cream all fighting for the top spot.
  • Scales well for gatherings: Want to double it for a party? Just use a bigger dish. Want a solo version? I will not judge.
  • Satisfies the sweet tooth hard: That brown sugar toffee layer is basically emotional support.
  • Make-ahead friendly: Chill it down and let the flavors get cozy while you do literally anything else.

Banoffee Pie

Ingredient Notes

You probably have most of these hanging out in the pantry or fridge already, which is always a small blessing after a long day.

  • Graham cracker crumbs: Lightly sweet with the perfect crunch. You can use Digestive biscuits if you’re feeling fancy or live somewhere graham-less.
  • Granulated sugar (optional): Toss it in if you like the base with a little extra crisp and sweetness. Totally skippable though.
  • Unsalted butter: Held together my teenage years and this crust. Use it melty for the base.
  • Dark brown sugar: That deep molasses note brings out a rich toffee flavor in the caramel layer.
  • Sweetened condensed milk: This is your golden ticket to silky homemade dulce de leche. Don’t swap for evaporated milk—trust me.
  • Heavy whipping cream: Make sure it’s cold or it might scoff at your attempts to whip it into peaks.
  • Powdered sugar: Sweetens the whipped cream without making it gritty. Don’t get clever and toss in granulated—gritty cream is nobody’s friend.
  • Vanilla extract: Balances all the sweet layers with a soft, floral note. Go real, not imitation, if you can.
  • Ripe bananas: Slice just before assembling so they don’t go premature avocado-brown. Spotty and sweet is the goal.
  • Chocolate shavings or cocoa powder: Totally optional, but highly encouraged. Adds a grown-up feel (and distracts from your uneven whipped cream peaks).

Banoffee Pie

How To Make This Banoffee Pie

Okay, tie your apron loosely (we aren’t baking cookies here) and let’s get a bit sticky.

  • Start the crust: Mix the graham crumbs, melted butter, and the granulated sugar if you’re using it. It honestly looks like dessert sand when it’s right and should vaguely smell like a cookie beach. Press this evenly into a 9-inch pie plate and pop it in the fridge to firm up—30 minutes should do the trick.
  • Make the caramel (dulce de leche): Combine the butter and dark brown sugar in a medium pot over medium-low heat. Stir gently until it’s melted and smooth, like half-baked fudge. Add the sweetened condensed milk, stir continuously, and raise the heat to medium-high. You’ll want to babysit this like it’s the last batch of holiday fudge—stir constantly and boil for about a minute. It should thicken and take on a soft gold color.
  • Cool the caramel: Take it off the heat and pour that molten joy straight into your chilled crust. Carefully smooth it out (don’t burn yourself, it’s enthusiastic stuff). Back to the fridge it goes for at least an hour.
  • Whip the cream: Grab a chilled bowl and your mixer. Start slow with the cream, powdered sugar, and vanilla. Once it foams up, increase the speed until stiff peaks form. Peaks means you can scoop it and it doesn’t slump over like a sad pancake.
  • Assemble everything: Slice your bananas and arrange them over the cooled caramel. Don’t skimp—you want every bite to hit banana. Then dollop and spread your whipped cream on top, making sure to cover all those banana slices like a fluffy snowbank.
  • Garnish time: Sprinkle chocolate shavings or dust a bit of cocoa powder on top if you’re feeling decorative.

Banoffee Pie

Storage Options

Banoffee pie might look high-maintenance, but it’s surprisingly chill when it comes to storage.

In the fridge, it holds up beautifully for about 3 days. That caramel layer helps protect the bananas a bit, but they’ll eventually soften and brown. If you want to delay that browning, add a light squeeze of lemon juice to the banana slices before layering them in. Just don’t go overboard—lemon-banana-toffee sounds like a smoothie that regrets its choices.

Freezing? Mmm… technically, yes—but only if absolutely necessary. The crust and caramel will freeze fine, but whipped cream and bananas? Not their scene. If you really want to prep ahead, freeze just the crust and cooled caramel layer. Add fresh bananas and whipped cream once it’s thawed (it’s worth the extra step).

Reheating is a no. This pie isn’t meant to be warm. It’s creamy, chilled, and melt-in-your-mouth from the fridge. Don’t microwave it unless you’re trying to create caramel soup. (Which… might not be the worst thing.)

Variations and Substitutions

You don’t have to follow every rule here—banoffee pie has room for little detours and switch-ups.

  • Cookie crust base: Crushed Biscoff, Oreos, or even gingersnaps make a wilder crust. Think of it as shaking the pie up without scandal.
  • Use store-bought dulce de leche: If you’re short on time (or attention span), store-bought works fine. Just warm it slightly to pour.
  • Coconut whipped cream: Need a dairy-free version? Full-fat coconut milk, chilled overnight, whips up beautifully as a sub.
  • Add espresso powder: Mix a tiny pinch into the caramel for a whisper of coffee flavor. It’s subtle but so lovely.
  • Layer in peanut butter: Add thin dollops between the banana and the whipped cream. Like a nod to these epic ice cream sandwiches.
  • Go mini: Make individual pies in small mason jars or muffin tins. Great for parties or… hoarding pie servings solo.

Banoffee Pie

What to Serve with Banoffee Pie

This pie pretty much steals the dessert spotlight, but if you’re building a whole spread or just want balance, offer some contrast.

  • A little espresso or strong black coffee on the side is a dream pairing. The bitterness cuts through the sweetness like a hero in a romantic comedy—unexpected but wholly welcome.
  • I love adding something citrusy beforehand: maybe a late lunch with a slice of lemon zucchini bread or a bright salad. Balances the sugar rollercoaster that follows.
  • Skip traditional vanilla ice cream. Instead, try plain Greek yogurt with a tiny drizzle of honey—it adds tang and texture that complements the sticky caramel in really nice ways.
  • If you’re serving it at a dinner party, keep the entrée light and modern. Something like this pan-seared cod would leave room in the belly for dessert glory.

Frequently Asked Questions

Can I make this banoffee pie ahead of time?

Yes! In fact, it’s better that way. You can make the crust and caramel layer a day ahead and keep them chilled. Add the bananas and whipped cream closer to serving time so everything stays fresh and pretty. If you’re really pressed, do the whole thing in advance, just know the bananas might darken slightly. No one’s ever turned it down because of a brown edge, though.

What’s the best way to prevent the bananas from browning?

The easiest trick is a light sprinkle of lemon juice on the banana slices before layering. Not enough to make it taste lemony, just enough to slow oxidation. And as always, covering them completely with whipped cream helps lock out the air, so don’t go skimpy on the fluff layer.

Can I use store-bought whipped cream or Cool Whip?

You sure can. I will say homemade whipped cream tastes richer and fresher (and only takes 5 minutes), but if you’re short on time or energy, Cool Whip totally works. Just make sure it’s fully thawed so it spreads easily and doesn’t peel off the banana layer like a tired sticker.

Why did my caramel layer turn grainy or seize up?

This usually happens if the sugar didn’t dissolve completely before adding the condensed milk, or if the heat got too high too fast. Go slow, stir constantly, and be patient with that sugar-butter melt phase. Once you’ve added the condensed milk, boil just for 1 minute—no longer. Too much boil time can make the caramel split or thicken weirdly.

Banoffee Pie

Banoffee Pie

Prep Time 20 minutes
Cook Time 10 minutes
Chilling Time 1 hour
Total Time 1 hour 30 minutes
Graham cracker crust, buttery caramel, fluffy whipped cream, and bananas—this banoffee pie is a gooey, creamy, British-inspired comfort dessert. Simple to make with sweet, sticky, crunchy, and creamy layers, it’s the perfect no-bake treat for any occasion.
8 slices

Ingredients

Graham Cracker Crust

  • 1 1/2 cups (150 g) graham cracker crumbs or Digestive biscuits
  • 2 tbsp (25 g) granulated sugar optional, for extra crunch
  • 7 tbsp (100 g) unsalted butter melted

Toffee Caramel Layer

  • 4 tbsp (56 g) unsalted butter
  • 1/2 cup (100 g) dark brown sugar packed
  • 1 can (400 g) sweetened condensed milk 14 oz (400g)

Toppings & Whipped Cream

  • 1 1/4 cups (300 ml) heavy whipping cream chilled
  • 2 tbsp (16 g) powdered sugar
  • 1 tsp (5 ml) vanilla extract
  • 3–4 ripe bananas sliced
  • chocolate shavings or cocoa powder for garnish, optional

Equipment

  • 9-inch pie plate
  • Medium saucepan
  • Mixing bowls
  • Electric Mixer or Whisk

Instructions
 

  1. Prepare the crust: Mix graham cracker crumbs, melted butter, and optional sugar in a bowl until well combined. Press evenly into the bottom and up the sides of a 9-inch pie plate. Chill in the refrigerator for at least 30 minutes to set.
  2. Make the caramel: In a medium saucepan over medium-low heat, melt the butter and stir in the brown sugar until smooth. Add the sweetened condensed milk and stir constantly. Raise heat to medium-high and bring to a gentle boil, continuing to stir for about 1 minute until thickened and golden.
  3. Assemble base: Remove the chilled crust from the fridge and pour the hot caramel over it, smoothing into an even layer. Return to the fridge and cool for at least 1 hour, until set.
  4. Make the whipped cream: In a chilled mixing bowl, beat the heavy cream, powdered sugar, and vanilla extract together until stiff peaks form.
  5. Assemble the pie: Slice the bananas and arrange evenly on top of the cooled caramel layer. Spread the whipped cream over the bananas, covering them completely.
  6. Finish and garnish: Sprinkle chocolate shavings or dust with cocoa powder, if desired. Chill until ready to serve.

Notes

  • Add a light squeeze of lemon juice to banana slices if preparing ahead to help prevent browning.
  • Store covered in the fridge for up to 3 days. For longer storage, freeze the crust and caramel layer only; add bananas and whipped cream after thawing.

Nutrition

Calories: 455kcal | Carbohydrates: 56g | Protein: 5g | Fat: 24g | Saturated Fat: 14g | Cholesterol: 76mg | Sodium: 177mg | Potassium: 355mg | Fiber: 2g | Sugar: 41g | Vitamin A: 875IU | Vitamin C: 5mg | Calcium: 130mg | Iron: 1.5mg

Warm and citrusy with a light, moist crumb, this lemon zucchini bread gets its brightness from fresh lemon zest and juice and its tender texture from freshly grated zucchini and buttermilk. It’s the kind of thing that makes your kitchen smell like a little slice of spring, even if you’re still wearing wool socks.

There’s something deeply satisfying about using zucchini for something sweet. Yeah sure, it sounds odd at first… but the end result? Incredibly soft baked goodness with just the right crackly-glazed top. This loaf leans heavily into lemon (because restraint is overrated) and doesn’t hold back on the moisture either. It’s perfect for a slow breakfast moment, or unashamed snacking between loads of laundry. Let the simple prep fool you—it bakes into one of those bake-it-once, crave-it-again breads.

Table of Contents

Lemon Zucchini Bread

Why You’ll Love this Lemon Zucchini Bread

This isn’t your average quick bread (read: dry and forgotten on the counter within a day).

  • Whispers of summer in every bite: The lemon zest and juice bring a citrusy zing that tastes like sunshine and brunch.
  • So soft it almost slices itself: The zucchini keeps it ridiculously moist without being wet or heavy. Magic.
  • The no-mixer miracle: Everything comes together with just a bowl, a spoon, and a little wrist action.
  • Not too sweet, not too plain: It’s lightly sweet with enough lemon punch to keep it interesting. Like if pound cake and lemon bars had a zucchini-flavored baby.
  • Great use of that lonely zucchini: You know the one. The one giving you judgement eyes from the crisper drawer.

Lemon Zucchini Bread

Ingredient Notes

This bread keeps things pretty simple, but each ingredient does some behind-the-scenes heavy lifting.

  • Zucchini: Adds wonderful moisture without making the loaf taste vegetable-y. Just make sure to wring it out well so you don’t end up with a soggy situation. You want damp, not dripping.
  • All-purpose flour: Classic and reliable. No need for anything fancy.
  • Baking powder & baking soda: A double lift combo that keeps things airy and not too dense. Balance is everything.
  • Salt: Just a touch to bring the lemon flavor forward and give everything a bit more pop.
  • Granulated sugar: It sweetens things up without stealing the spotlight from the lemon.
  • Lemon (zest and juice): This is where all that citrus magic comes from. Zest first, then juice—trust me, it’s easier that way.
  • Eggs: These are your structure builders. Make sure they’re at room temperature so they blend right in.
  • Vegetable oil: Keeps the bread moist for days and doesn’t muddy the lemon flavor like butter sometimes can.
  • Buttermilk: Adds a hint of tang and tenderness. No buttermilk? A mix of milk and lemon juice works in a pinch.
  • Powdered sugar (for the glaze): Makes a smooth, shiny lemon glaze that’s not optional in my opinion.
  • Extra lemon zest (for topping): Totally optional but highly encouraged for extra zing and a pop of color.

Lemon Zucchini Bread

How To Make This Lemon Zucchini Bread

This recipe is delightfully straightforward, which makes it even more dangerous… You’ll be making it a lot, I’m just saying.

  • Prep the zucchini: Grate it onto a clean kitchen towel, then channel your inner strongman and wring out as much liquid as you can over the sink. Lay it out and pat dry a bit more if it still looks like it’s crying. Let that chill while you get everything else ready.
  • Preheat and prep your pan: Set your oven to 350°F. Line a 9×5-inch loaf pan with parchment (leave some overhang so you can lift it out later) and give it a quick grease for good measure.
  • Mix the dry ingredients: In a medium bowl, whisk together the flour, baking powder, baking soda, and salt. Nothing fancy here—just get it nice and combined.
  • Work the lemon into your sugar: In a large bowl, rub the zest into the sugar with your fingers until it’s fragrant and slightly damp. It’s weirdly satisfying. Then whisk in the eggs until smooth, followed by the oil, buttermilk, and lemon juice.
  • Bring it all together: Add about ¾ of the dry mix to your wet ingredients and stir gently, just until you stop seeing big streaks of flour. Don’t overmix. Toss the shredded zucchini with the remaining dry mixture, then fold it all into the bowl. This helps distribute the zucchini without clumps.
  • Bake: Pour the batter into the pan, smooth out the top if needed, and bake for 50 to 60 minutes. You’re looking for golden brown with a crisp top and a toothpick that comes out clean-ish.
  • Cool it down: Let the loaf sit in the pan for 10 minutes, then lift it out and let it fully cool on a wire rack. Resist slicing until it’s cool or you’ll smoosh everything.
  • Glaze and zest: Whisk together powdered sugar and lemon juice until you get a thick but pourable glaze. Drizzle generously over the cooled loaf, sprinkle with lemon zest, and step back to admire your work.

Lemon Zucchini Bread

Storage Options

This lemon zucchini bread is surprisingly durable, which makes it a really good candidate for make-ahead baking (or gifting, if you’re into that sort of thing).

On the countertop, keep it wrapped tightly or sealed in an airtight container. It’ll stay moist and lovely for up to three days, though good luck making it last that long.

Want to refrigerate it? Go for it, especially if your kitchen runs warm. Just wrap slices individually or store the whole loaf in a plastic wrap cocoon to keep it from drying out. Though honestly, I find the fridge makes the texture slightly firmer (in a good way) the next day.

Freezing? Yes, absolutely. Once the loaf cools completely, wrap it in a couple of layers of plastic wrap and tuck it into a freezer-safe bag. It’ll keep for a good 2 to 3 months. When you’re ready, thaw it overnight in the fridge or just leave a slice out on the counter for an hour or two. If you want, you can even revive it in the toaster oven for that fresh-baked edge.

Variations and Substitutions

This loaf has range. It’s one of those flexible recipes you can tweak based on your pantry or your personal vibe.

  • Swap zucchini with yellow squash: If you’ve got yellow squash instead of green zucchini, it works just fine and tastes nearly identical.
  • Use Greek yogurt instead of buttermilk: If you’re out of buttermilk, plain Greek yogurt thinned with a splash of milk will do the trick.
  • Try orange zest instead of lemon: For a different citrus twist, orange zest works beautifully and plays well with the sugar glaze.
  • Add poppy seeds: If you’re a texture person like me, poppy seeds make a fun little crunch and give it a lemon poppy seed bread vibe.
  • Make it gluten-free: Use a cup-for-cup gluten-free flour blend that includes xanthan gum. I’ve done this once and it was still wonderfully moist.
  • Add a hint of spice: A pinch of cardamom or ginger adds depth, especially if you’re making a loaf during cooler months.

Lemon Zucchini Bread

What to Serve with Lemon Zucchini Bread

This loaf is dreamy all on its own, but it doesn’t mind some company. Here are a few ways to dress up your lemony slice.

  • A hot mug of coffee or tea: There’s something about a slice of citrusy quick bread and a warm drink that feels especially luxurious at 10 AM on a Sunday. Or honestly, 10 PM. I don’t judge.
  • A dollop of whipped mascarpone or yogurt: If you’re feeling fancy (or just have extra dairy in the fridge), a soft swipe on top takes it from snack to plated pastry vibes.
  • Vanilla yogurt and granola: I know this sounds like breakfast-y behavior, but it’s a beautiful trio. A generous slice with creamy yogurt and something crunchy turns it into a full meal. Kind of like a deconstructed parfait that decided to be bread.
  • Fruit salad or fresh berries: Especially when the loaf is chilled, a handful of cold berries or citrus segments alongside makes it feel extra bright.
  • For dessert: You could totally serve this at brunch with other fresh baked options like these pumpkin cornbread muffins. It gives early fall meets late summer… and I’m here for it.

Frequently Asked Questions

Can I use frozen zucchini for this bread?

Yes, but make sure it’s fully thawed and very well drained. Frozen zucchini hangs onto a ton of water, so once it’s defrosted, wring it out like you’re mad at it. Then pat dry until it doesn’t feel wet to the touch. It’s not quite the same texture as fresh, but it works surprisingly well when you’re in a pinch.

Is the glaze absolutely necessary?

Nope, but it does add that sweet-tart pop that makes the loaf feel complete. Without it, the bread is still lovely—lighter and more snacky. Think of the glaze as the little lemony crown. You’ll survive without it, but you’ll probably miss it a little.

Can I make this lemon zucchini bread ahead of time?

Totally. In fact, it might even be better the next day. Let it cool completely, then wrap it tightly in plastic wrap or foil. You can store it at room temp for a day or two, or in the fridge for up to five days. It also freezes really well. Just slice, wrap, and freeze, then defrost slices as needed like a little lemony gift to your future self.

How do I know when the bread is done?

Good question—it’s easy to underbake quick bread, especially when it’s this moist. Look for a deep golden top and a toothpick (or skewer) stuck in the center coming out clean or with just a few crumbs. If it’s wet, give it another 5–10 minutes and check again. The top might crack a little and that’s totally fine—it’s part of the charm.

Lemon Zucchini Bread

Lemon Zucchini Bread

Prep Time 20 minutes
Cook Time 55 minutes
Total Time 1 hour 25 minutes
Warm and citrusy with a light, moist crumb, this lemon zucchini bread gets its brightness from fresh lemon zest and juice and its tender texture from freshly grated zucchini and buttermilk. Perfect for breakfast, a snack, or dessert, it bakes up with the best crackly lemon glaze and stays soft for days.
1 loaf

Ingredients

For the Bread

  • 1 (1 cup) medium zucchini about 1 cup shredded; excess moisture wrung out
  • 1 3/4 cups (220 g) all-purpose flour
  • 1 tsp (4 g) baking powder
  • 1/2 tsp (2 g) baking soda
  • 1/2 tsp (2 g) salt
  • 2/3 cup (135 g) granulated sugar
  • 2 tbsp lemon zest from about 2 lemons
  • 2 large eggs room temperature
  • 1/3 cup (80 ml) vegetable oil (or canola oil)
  • 1/3 cup (80 ml) buttermilk see notes for substitution
  • 3 tbsp (45 ml) lemon juice freshly squeezed, from about 1 lemon

For the Glaze

  • 2/3 cup (80 g) powdered sugar
  • 1-2 tbsp (15-30 ml) lemon juice as needed, freshly squeezed
  • extra lemon zest for topping (optional)

Equipment

  • 9x5-inch loaf pan
  • Mixing bowls
  • Whisk
  • Box grater
  • Kitchen towel
  • Wire rack
  • Parchment paper

Instructions
 

  1. Prep the zucchini: Grate zucchini onto a clean kitchen towel, then wring out as much liquid as possible over the sink. Lay out and pat dry, set aside.
  2. Prep oven and pan: Preheat oven to 350°F (176°C). Line a 9x5-inch loaf pan with parchment (with overhang) and lightly grease.
  3. Mix dry ingredients: In a medium bowl, whisk together flour, baking powder, baking soda, and salt. Set aside.
  4. Combine sugar and zest: In a large bowl, rub the lemon zest into the sugar with your fingers until fragrant. Whisk in eggs until smooth, then whisk in oil, buttermilk, and lemon juice.
  5. Mix batter: Add about ¾ of the dry mixture to the wet, stirring gently just until no large streaks of flour remain. Toss grated zucchini with remaining dry mix, then fold into batter until just combined. Do not overmix.
  6. Bake: Pour batter into prepared pan and smooth the top. Bake for 50–60 minutes, until golden brown and a toothpick comes out clean or with a few moist crumbs.
  7. Cool: Let bread cool in the pan for 10 minutes, then lift out and cool fully on a wire rack. Wait until cool to slice.
  8. Glaze: Whisk powdered sugar with lemon juice until a thick, pourable glaze forms. Drizzle over cooled loaf and sprinkle with extra zest, if using. Let set before slicing.

Notes

You can substitute buttermilk with the same amount of milk plus 1 tsp lemon juice or vinegar (let stand 5 minutes). For a citrus twist, swap in orange zest/juice. Add poppy seeds for crunch or a pinch of cardamom for warmth. To make gluten-free, use a cup-for-cup gluten-free flour blend. Store airtight at room temp for up to 3 days, refrigerate up to 5 days, or freeze (wrapped well) for 2–3 months.

Nutrition

Calories: 220kcal | Carbohydrates: 36g | Protein: 3g | Fat: 7g | Saturated Fat: 1g | Cholesterol: 30mg | Sodium: 180mg | Potassium: 80mg | Fiber: 1g | Sugar: 19g | Vitamin A: 50IU | Vitamin C: 2mg | Calcium: 30mg | Iron: 1mg

Cozy, fluffy, and gently sweet, this sweet potato soufflé blends roasted sweet potatoes, warm spices, butter, and brown sugar into one creamy dream. A bit of chopped pecan crunch on top and whispers of cinnamon make the whole kitchen smell like autumn in a baking dish.

Imagine scooping warm clouds of velvety sweet potato puff from the oven, the top just golden and crisp at the edges, steaming gently. This soufflé has that just-right balance of cozy and festive. It’s not precious or fussy—just a hug in casserole form.

You know those recipes that wiggle their way into your rotation and then quietly never leave? This is one of those. Sweet enough to make you feel like you’re treating yourself, but somehow still fits on the dinner plate (especially next to savory mains). The sweet potato soufflé is rich but light, rustic but tender, slightly nostalgic and very “eat me again soon.” Make it once, and you’ll likely find yourself, fork in hand, deciding whether it even needs a main course at all.

Table of Contents

Sweet Potato Soufflé

Why You’ll Love this Sweet Potato Soufflé

So, very plainly put: this is not your waxy diner-style sweet potato casserole. It’s smooth and pillowy, with a little whisper of spice and crunch on top for flair.

  • The texture is dreamy: Think somewhere between cake and custard—light, airy, and just a little creamy beneath a golden top.
  • Mildly sweet, not toothache sweet: The brown sugar sings backup, not lead; the sweet potato is the real star.
  • Great make-ahead potential: One less thing to fuss over day-of. The soufflé holds beautifully in the fridge pre-bake.
  • No fancy techniques involved: Just a little egg-whipping magic. You don’t need to be Julia Child.
  • Smells like a cozy candle, but edible: There’s cinnamon, nutmeg, and roasted sweet potatoes. Enough said.
  • Customizable topping: Pecans and brown sugar are great, but toss in oats or crushed gingersnaps if you’re feisty.

Sweet Potato Soufflé

Ingredient Notes

Every layer in this soufflé has a tiny job to do. Here’s what makes it tick.

  • Sweet potatoes: Roasted until tender and sweet on their own, they’re the base flavor and texture of the whole dish.
  • Brown sugar (both kinds): Adds a deep, caramel-like warmth that plays up the natural sweetness of the potatoes.
  • Granulated sugar: Just a little helps round out the sweetness without going overboard.
  • Eggs (separated): Yolks make it rich, whites make it fluff. This is where the soufflé gets its magic lift.
  • All-purpose flour: Thickens just enough for structure without turning it into a brick.
  • Milk or heavy cream: Either works, but cream makes it lush. Use what you’ve got chilled.
  • Unsalted butter: Melted into the mix and cubed for that crumbly topping. Salted works in a pinch, but you may want to reduce added salt.
  • Baking powder: Gives a gentle puff alongside the whipped egg whites.
  • Cinnamon, allspice, nutmeg: These cozy warm spices give it that autumn nuzzle without veering into dessert territory.
  • Pecans: Add crunch and a little toasted depth in the crisp topping. Walnuts work too, just chop ’em fine.

Sweet Potato Soufflé

How To Make This Sweet Potato Soufflé

It’s not complicated, pinky swear. Just one of those puttery, delightfully old-school recipes that rewards a bit of patience (and a touch of butter).

  • Roast the sweet potatoes: Give them a good scrub, poke a few fork vents, and bake at 375°F for about an hour. They should feel totally soft and slump a little when you poke them. Let these cool just enough to handle, then scoop out the insides. The skins practically slide off.
  • Make the topping (optional but very worth it): Mix brown sugar, flour, and cold butter in a bowl. You can use a pastry cutter, two forks, or your impatient fingers. When it resembles lumpy wet sand, stir in the pecans and cinnamon. Set aside and try not to nibble too much.
  • Prepare the soufflé base: Mash your warm sweet potatoes in a big mixing bowl. Add the sugars, egg yolks, milk (or cream), and vanilla. Whip it all together into a gorgeous fluffy golden mush. Then blend in the melted butter, flour, baking powder, spices, and salt.
  • Whip the egg whites: In a separate clean bowl, beat the whites until stiff peaks form. This takes about 4 minutes with an electric mixer on high—don’t overdo it or they’ll start to look dry. You want glossy peaks that hold their shape.
  • Combine & fold: Whisk a scoop of beaten whites into the sweet potato mixture to lighten it up. Then, using a spatula, gently fold the rest in. The idea is to keep it as airy as possible. A few specks of white are totally fine.
  • Bake the soufflé: Pour the batter into a greased 9×13 pan. Smooth the top, then scatter your topping if using. Bake at 350°F for 25–30 minutes until puffed and slightly browned on top. Serve right away while it’s warm and still a little jiggly in the center.

Sweet Potato Soufflé

Storage Options

If you somehow have leftovers (I salute your restraint), pop them in the fridge once fully cooled. They’ll keep nicely for 2 to 3 days. Just cover the dish with foil or store portions in airtight containers. The texture might deflate a bit overnight, but it’ll still taste amazing.

Want to freeze it? Totally doable. Bake it first, let it cool fully, then wrap portions well in freezer-safe bags or containers. It’ll last about a month. When ready to eat, thaw in the fridge overnight, then reheat gently in the oven at 300°F until warmed through. The topping might lose a little crunch, but the flavor’s all still there.

Reheating tip? A low oven keeps things fluffy rather than rubbery. Microwave in a pinch, but cover it and go slow.

Variations and Substitutions

Depending on your pantry, preference, or slightly rebellious mood, here are a few twists you might try.

  • Dairy-free options: Swap in full-fat coconut milk and a plant-based butter to keep things just as creamy but fully dairy-free.
  • Less sweet variation: If you’re planning to serve it with ham or something savory, try cutting the sugar by a third and skip the topping.
  • Savory-spiced version: Add a little sage or smoked paprika instead of the sweet spices. Sounds odd, tastes cool.
  • More texture: Stir in chopped nuts or even a handful of crushed pumpkin snickerdoodle cookie crumbs into the topping for extra flair.
  • Mini soufflés: Pour into ramekins for individual portions and reduce bake time to about 18–22 minutes.
  • No topping at all: Totally allowed! The soufflé beneath holds its own.

Sweet Potato Soufflé

What to Serve with Sweet Potato Soufflé

This soufflé happily sidekicks a big old meal, but you can also build a whole cozy plate around it.

  • For a classic comfort meal, serve it alongside roasted chicken or turkey with gravy. Scoop of soufflé, swipe of meat, maybe something green? It’ll all work.
  • If you’re going plant-based or just want balance, a crisp salad with lemony vinaigrette cuts the richness perfectly. Throw in walnuts or apple slices for good measure.
  • Pairs beautifully with pork chops or glazed ham. The soufflé adds a soft, sweet balance to anything seared or smoky.
  • Want a cozy vegetarian moment? Serve it with something hearty like pan-seared cod and rainbow chard or even a lentil stew spooned nearby.

Frequently Asked Questions

Can I make sweet potato soufflé ahead of time?

Absolutely! Mix up the batter the night before and keep it covered in the fridge. When you’re ready to bake, just fold in the whipped egg whites (do this fresh for best puff) and pop it in the oven. If you want to do the whole thing in advance, you can fully bake it, then reheat gently before serving. Works like a charm!

Can I use canned sweet potatoes instead of fresh?

Technically, yes—but try to find canned sweet potatoes or yams with no added syrup or spices. Drain them well and mash until totally smooth. The flavor won’t be quite as deep as roasted fresh sweet potatoes, but it’ll save a chunk of time and still taste lovely.

Why did my soufflé deflate after baking?

Ah, the soufflé slump is real. It’s totally normal for it to puff in the oven then settle a bit as it cools. It’s the nature of whipped egg white magic. That said, you can reduce deflation by not overmixing when folding in the egg whites and serving it soon after baking.

Can I freeze leftovers of this soufflé?

Yep! Let the soufflé cool completely, cut it into individual portions, and place in freezer-safe containers. Thaw in the fridge overnight, then reheat gently in the oven (300°F does the trick) until warmed through. The texture holds up surprisingly well, and the flavor is still great.

Sweet Potato Soufflé

Cozy Sweet Potato Soufflé

Prep Time 30 minutes
Cook Time 1 hour 30 minutes
Total Time 2 hours
This sweet potato soufflé is fluffy, gently sweet, and scented with cinnamon and nutmeg. Roasted sweet potatoes, brown sugar, and whipped egg whites are baked under a buttery pecan crumble for a sublime autumn side. Perfect for the holidays or any time you want cozy, comforting baking.
8 servings

Ingredients

For the Soufflé

  • 3 pounds (1.4 kg) sweet potatoes about 4 medium, scrubbed
  • 3 tablespoons (36 g) light brown sugar packed
  • 2 tablespoons (24 g) dark brown sugar
  • 2 tablespoons (25 g) granulated sugar
  • 4 eggs separated
  • 3 tablespoons (23 g) all-purpose flour
  • 1/3 cup (80 ml) milk or heavy cream
  • 4 tablespoons (57 g) unsalted butter melted
  • 1 teaspoon (4 g) baking powder
  • 1 teaspoon (5 ml) vanilla extract
  • 1 teaspoon (2.6 g) ground cinnamon
  • 1/4 teaspoon (0.5 g) ground nutmeg
  • 1/4 teaspoon (0.5 g) ground allspice
  • 1/2 teaspoon (2.5 g) kosher salt

Topping (optional, but recommended)

  • 1/2 cup (60 g) pecans chopped
  • 1/4 cup (55 g) light brown sugar packed
  • 2 tablespoons (15 g) all-purpose flour
  • 2 tablespoons (28 g) unsalted butter cold and cubed
  • 1/4 teaspoon (0.6 g) ground cinnamon

Equipment

  • 9x13 inch Baking Dish
  • Electric mixer
  • Mixing bowls
  • Spatula
  • Oven

Instructions
 

  1. Roast the sweet potatoes: Heat oven to 375°F (190°C). Pierce sweet potatoes a few times with a fork and place on a baking sheet. Roast for about 1 hour, until completely tender. Let cool slightly, then peel and scoop out the flesh.
  2. Make the topping (optional): In a bowl, combine brown sugar, flour, and cubed cold butter. Use a pastry cutter, forks, or your fingers to blend until clumpy. Stir in pecans and cinnamon. Set aside.
  3. Prepare the soufflé base: Mash roasted sweet potatoes in a large mixing bowl until very smooth. Add brown sugars, granulated sugar, egg yolks, milk or cream, and vanilla. Beat together until fluffy. Mix in melted butter, flour, baking powder, cinnamon, nutmeg, allspice, and salt.
  4. Whip the egg whites: In a clean bowl, beat egg whites with an electric mixer on high until stiff, glossy peaks form (about 4 minutes).
  5. Fold together: Whisk a dollop of whipped whites into the sweet potato mixture to lighten. Gently fold in remaining egg whites with a spatula, just until incorporated.
  6. Bake: Pour mixture into a buttered 9x13-inch baking dish and smooth the top. Scatter topping over the surface if using. Bake at 350°F (175°C) for 25–30 minutes, until puffed and golden at the edges. Serve warm.

Notes

Storage: Leftovers keep refrigerated for 2–3 days and can be reheated in the oven at 300°F until warmed through. Freeze fully baked soufflé for up to a month; thaw and gently reheat before serving. For dairy-free, use coconut milk and plant-based butter. Cut sugar for a more savory side. The soufflé will deflate a bit as it cools—that’s normal!

Nutrition

Calories: 295kcal | Carbohydrates: 38g | Protein: 5g | Fat: 15g | Saturated Fat: 7g | Cholesterol: 79mg | Sodium: 216mg | Potassium: 444mg | Fiber: 3g | Sugar: 16g | Vitamin A: 15180IU | Vitamin C: 21mg | Calcium: 76mg | Iron: 1.7mg

Sweet, tender, and full of fall spice, these pumpkin cornbread muffins are loaded with real pumpkin, cornmeal, warm cinnamon, and buttermilk. Bake up a cozy batch!

There’s something deeply satisfying about the scent of warm spices drifting from the oven, right? These pumpkin cornbread muffins are a little savory, a little sweet, and completely irresistible with a swipe of butter or a drizzle of honey. Perfect for those days when you need a soft sidekick for soup or chili… or just a snack that makes you feel like you’ve got your life (somewhat) together. The crumb is moist thanks to the pumpkin, the edges get just the right hint of golden crisp, and if you eat one warm, I promise it’ll spark instant joy. Plus, they come together easily, which is always a yes for me.

Table of Contents

Pumpkin Cornbread Muffins

Why You’ll Love this Pumpkin Cornbread Muffins Recipe

No dramatic backstory here—just a really solid muffin that knows who it is. Pumpkin meets cornbread, and it just works.

  • Cozy fall flavor in every bite: Think cinnamon, nutmeg, a whisper of clove… it smells like your kitchen lit a pumpkin-scented candle, but edible.
  • Moist, tender texture: The pumpkin makes them soft and fluffy, not dry and crumbly like some cornbreads out there. (We’ve all met that guy.)
  • Slightly sweet, perfectly balanced: Just enough brown sugar and honey to keep it interesting, but it still plays well with savory dishes.
  • Holds up to butter and soup dunking: These aren’t crumbly quitters. They handle a butter slather and a plunge into chili like champs.
  • Easy enough for a weeknight batch: One bowl for wet, one for dry. Stir, scoop, bake. Boom. You’re a muffin hero.

Pumpkin Cornbread Muffins

Ingredient Notes

Let’s chat ingredients for a sec. Each one earns its spot on stage here—nothing fussy, but a couple spots for flair if you’re feelin’ it.

  • Yellow cornmeal: Gives that classic cornbread texture—gritty in the good way. Opt for medium-ground if possible; it threads the needle between “sand” and “cake.”
  • All-purpose flour: Balances out the cornmeal and keeps the muffins tender. Pure cornmeal would be too dry on its own.
  • Baking powder + baking soda: These tag-team for maximum lift and softness. Especially important when pumpkin’s hanging around, since it can get heavy.
  • Salt: Just a smidge, but don’t skip it—it sharpens all the sweet and spice happening in the background.
  • Warm spices (cinnamon, nutmeg, cloves): This trio gives major autumn hug energy. You could add a pinch of ginger too, if you’re a spice maximalist.
  • Brown sugar: Adds molasses-y depth and works well with the pumpkin. If you only have white sugar, it’ll still work, but the flavor will be simpler.
  • Pumpkin puree: Make sure it’s 100% pure pumpkin, not pie filling. We’re building our own flavor here, thank you very much.
  • Eggs: They help hold everything together. Room temp is best for confident mixing.
  • Buttermilk: Adds tang and softness—plus, I just love how it sizzles when it meets the pan.
  • Melted butter: It adds richness without overpowering. Just let it cool a bit so it doesn’t scramble the eggs.
  • Honey (optional): Adds a floral sweetness and a shiny top, but totally skippable if you’re going less sweet.

Pumpkin Cornbread Muffins

How To Make This Pumpkin Cornbread Muffins Recipe

Okay, grab two bowls and your favorite wooden spoon—we’re not reinventing the wheel here, but we’re making it extra tasty.

  • Preheat the oven and prep the tin: Crank that oven to 425°F and either grease your muffin tin or drop in some paper liners. I like to give both a light spray, just in case the batter wants to be clingy.
  • Mix the dry stuff: In a big bowl, whisk up your cornmeal, flour, leaveners, salt, spices, and brown sugar. Take a second here—this is your aroma preview. Smells like October, doesn’t it?
  • Whisk the wet ingredients: In another bowl, stir together the pumpkin, eggs, buttermilk, melted butter, and honey (if you’re using it). You want everything super smooth and pourable.
  • Combine wet and dry: Pour wet into dry. Stir gently just until the flour disappears—don’t overmix! Lumps are totally fine here. Overworking the batter makes for tough muffins, and no one’s looking for jaw workouts.
  • Fill those muffin cups: Use a scoop or spoon to fill each cup right up to the top. It might feel like too much batter, but trust me, the rise is modest.
  • Bake hot, then cool it down: Start with 5 minutes at 425°F to give the muffins a lift, then lower the oven to 350°F and bake for 15–18 minutes. If the tops spring back and a toothpick comes out clean, you’re golden.
  • Cool and snack: Let them hang out in the tin for 5 minutes (they’re still setting up), then transfer to a wire rack. They’re especially dreamy warm with a little butter melting into the tops.

Pumpkin Cornbread Muffins

Storage Options

Muffin leftovers? Rare, but let’s be prepared.

Once cool, stash these in an airtight container at room temperature for up to 2 days. I usually pop a paper towel in the bottom to absorb moisture so they don’t get soggy. You can keep them in the fridge for up to 5 days if you prefer them chilled, but I like to reheat mine just a bit so they get back that cozy just-baked fluff.

Now, freezing. Yes, you absolutely can freeze these pumpkin cornbread muffins. Let them cool completely, wrap individually in plastic wrap or foil, then toss into a freezer bag. They’ll keep for about 2 months. When you’re ready to eat, just microwave for 30–45 seconds or warm them in a 300°F oven for a few minutes so they crisp up a bit on the edges again.

Perfect grab-and-go comfort snack stash. Also good to serve next to this hamburger potato casserole if you’re making a fall meal spread.

Variations and Substitutions

Want to play around a little in the dough sandbox? Here’s where you can tweak without chaos ensuing.

  • Gluten-free flour: Use a 1:1 gluten-free baking blend in place of the all-purpose. Just make sure it includes a binder like xanthan gum.
  • Extra spice kick: Add ⅛ teaspoon of ground ginger. It gives a little warmth behind the scenes without stealing the show.
  • Maple syrup swap: No honey? A tablespoon or two of maple syrup works like a charm and gives lovely depth. The real stuff if you’ve got it.
  • Add chopped nuts or seeds: Pecans or pumpkin seeds (pepitas) add a little crunch. Stir in ¼ cup with the dry mix.
  • Make it savory-sweet: Crumble in crispy bacon before baking. Yes, I’m serious. It’s like a distant (delicious) cousin of these bacon basil cornbread muffins.
  • Turn them into minis: Bake in a mini muffin tin. Reduce baking time to about 10–12 minutes total (no temp changes needed).

Pumpkin Cornbread Muffins

What to Serve with Pumpkin Cornbread Muffins

These little guys are flexible—they don’t mind being sweet or savory neighbors.

  • Big bowl of soup or chili: This one’s a no-brainer. A bowl of spicy chili or creamy squash soup with a warm muffin on the side? Chef’s kiss. Scoop, dunk, repeat. (And maybe add more butter, just saying.)
  • Brunch with eggs and bacon: Serve these muffins alongside scrambled eggs and crispy bacon and suddenly it’s a fall-themed brunch party. Bonus points for apple butter or fig jam on the side.
  • Fall potluck MVP: Bring these to share and watch them disappear from the basket first. You don’t even have to tell anyone how easy they were.
  • Late-night snack with tea or milk: When the post-dinner cravings sneak up, one of these with a hot drink feels downright cozy. Especially if you lightly toast it and add a schmear of cream cheese.
  • Paired with a crisp salad and fish: Might sound weird at first, but a hearty green salad and something like this pan-seared salmon with pomegranate reduction makes a fancy-little-weeknight type of thing.

Frequently Asked Questions

Can I use canned pumpkin pie filling instead of puree?

I’d skip it, honestly! Pumpkin pie filling already has sugar and spices added, which could throw off the sweetness and essential muffin balance. Pure canned pumpkin is what you’re after—just double-check that the label says 100% pumpkin. No extras. Gives you full flavor control and better texture.

How do I know when the muffins are done baking?

Great question and important too—no one wants gummy muffins. Check for golden tops that spring back when lightly pressed. A toothpick inserted in the center should come out clean or with just a few moist crumbs. Avoid overbaking or they’ll dry out. Start checking around 15 minutes in, just to be safe.

Can I make these muffins without buttermilk?

Yes, and I’ve done it more than once. Stir 1 tablespoon of lemon juice or white vinegar into regular milk, let it sit for 5 minutes, and boom—you’ve got a quick buttermilk stand-in. Whole milk works best, but any milk with fat will do the job. You’ll still get that soft texture and tanginess.

How should I reheat frozen pumpkin cornbread muffins?

You’ve got options! For best results with frozen muffins, thaw overnight in the fridge or on the counter for a few hours. Then rewarm them in a 300°F oven for 8–10 minutes to get that just-baked taste. Short on time? Microwave one for 30–45 seconds. Either way, adding a bit of butter while warm is never wrong.

Pumpkin Cornbread Muffins

Pumpkin Cornbread Muffins

Prep Time 15 minutes
Cook Time 20 minutes
Total Time 35 minutes
Sweet, tender, and full of fall spice, these pumpkin cornbread muffins are loaded with real pumpkin, cornmeal, warm cinnamon, and buttermilk. Bake up a cozy batch for a snack, side, or cozy breakfast treat—delicious warm with butter or honey.
12 muffins

Ingredients

Dry Ingredients

  • 1 cup (155 g) yellow cornmeal medium ground preferred
  • 1 cup (125 g) all-purpose flour
  • 1 tbsp baking powder
  • 1/2 tsp (0.5 tsp) baking soda
  • 1/2 tsp (0.5 tsp) salt
  • 1 tsp ground cinnamon
  • 1/4 tsp (0.25 tsp) ground nutmeg
  • 1/8 tsp (0.13 tsp) ground cloves
  • 1/2 cup (100 g) brown sugar light or dark, packed

Wet Ingredients

  • 1 cup (245 g) pumpkin puree 100% pure, not pie filling
  • 2 large eggs room temperature
  • 2/3 cup (160 ml) buttermilk well-shaken
  • 1/3 cup (75 g) unsalted butter melted and cooled
  • 2 tbsp (30 ml) honey optional, plus more for drizzling

Equipment

  • Muffin tin
  • Mixing bowls
  • Whisk
  • Wire rack

Instructions
 

  1. Preheat your oven to 425°F (218°C). Grease a 12-cup muffin tin or line with paper liners and spray lightly to prevent sticking.
  2. In a large bowl, whisk together the cornmeal, flour, baking powder, baking soda, salt, cinnamon, nutmeg, cloves, and brown sugar until very well combined.
  3. In a separate bowl, whisk the pumpkin puree, eggs, buttermilk, melted butter, and (optional) honey until smooth and fully incorporated.
  4. Pour the wet ingredients into the dry. Stir gently with a spatula or wooden spoon until just combined—no visible flour, but some lumps are fine. Don’t overmix.
  5. Evenly divide the batter among the muffin cups, filling each almost to the top.
  6. Bake at 425°F for 5 minutes, then reduce oven temperature to 350°F (175°C) and continue baking for 15–18 minutes, until the tops spring back and a toothpick inserted into the center comes out clean or with just a few moist crumbs.
  7. Cool in the pan for 5 minutes, then transfer muffins to a wire rack. Enjoy warm with butter or honey.

Notes

You can store cooled muffins in an airtight container at room temperature for up to 2 days, or refrigerate for up to 5 days. To freeze, wrap individually and store in a freezer bag for up to 2 months. Reheat in the microwave or a 300°F oven. Add-ins like nuts or seeds are delicious—try stirring in 1/4 cup chopped pecans or pumpkin seeds with the dry mixture.

Nutrition

Calories: 185kcal | Carbohydrates: 28g | Protein: 3g | Fat: 6g | Saturated Fat: 3g | Cholesterol: 35mg | Sodium: 185mg | Potassium: 90mg | Fiber: 1g | Sugar: 8g | Vitamin A: 3500IU | Vitamin C: 1mg | Calcium: 60mg | Iron: 1.2mg

Let's Get Cooking!

100+ Recipes for Busy Nights

In a time crunch? Take a look around and browse plenty of recipes to help you get dinner ready and on the table on those busy nights!

Sweet Recipes

Pumpkin Banana Muffins

Pumpkin Banana Muffins Recipe

Strawberry Pie Bars

Strawberry Pie Bars Easy Oven Recipe

White Chocolate Raspberry Muffins

White Chocolate Raspberry Muffins Recipe

Snickerdoodle Muffins

Snickerdoodle Muffins Recipe for Oven

PIN NOW

Follow KitchenetteBlog on Pinterest

Love cozy recipes that actually make it to the table? On Pinterest, I share new comfort-food ideas every week—desserts, dinners, and those little snack cravings that hit at midnight. Come pin with me and never run out of kitchen inspo.

Savory Recipes

Turkey Tetrazzini

Turkey Tetrazzini Baked Pasta Recipe

Grilled Chicken Panini Sandwich

Grilled Chicken Panini Sandwich Recipe

Sweet Potato Cornbread

Sweet Potato Cornbread Recipe Oven Baked

Classic Waldorf Salad

Waldorf Salad Simple Classic Recipe

Get 5 Recipes to Simplify Your Life!

Delicious, versatile recipes you can make over and over.