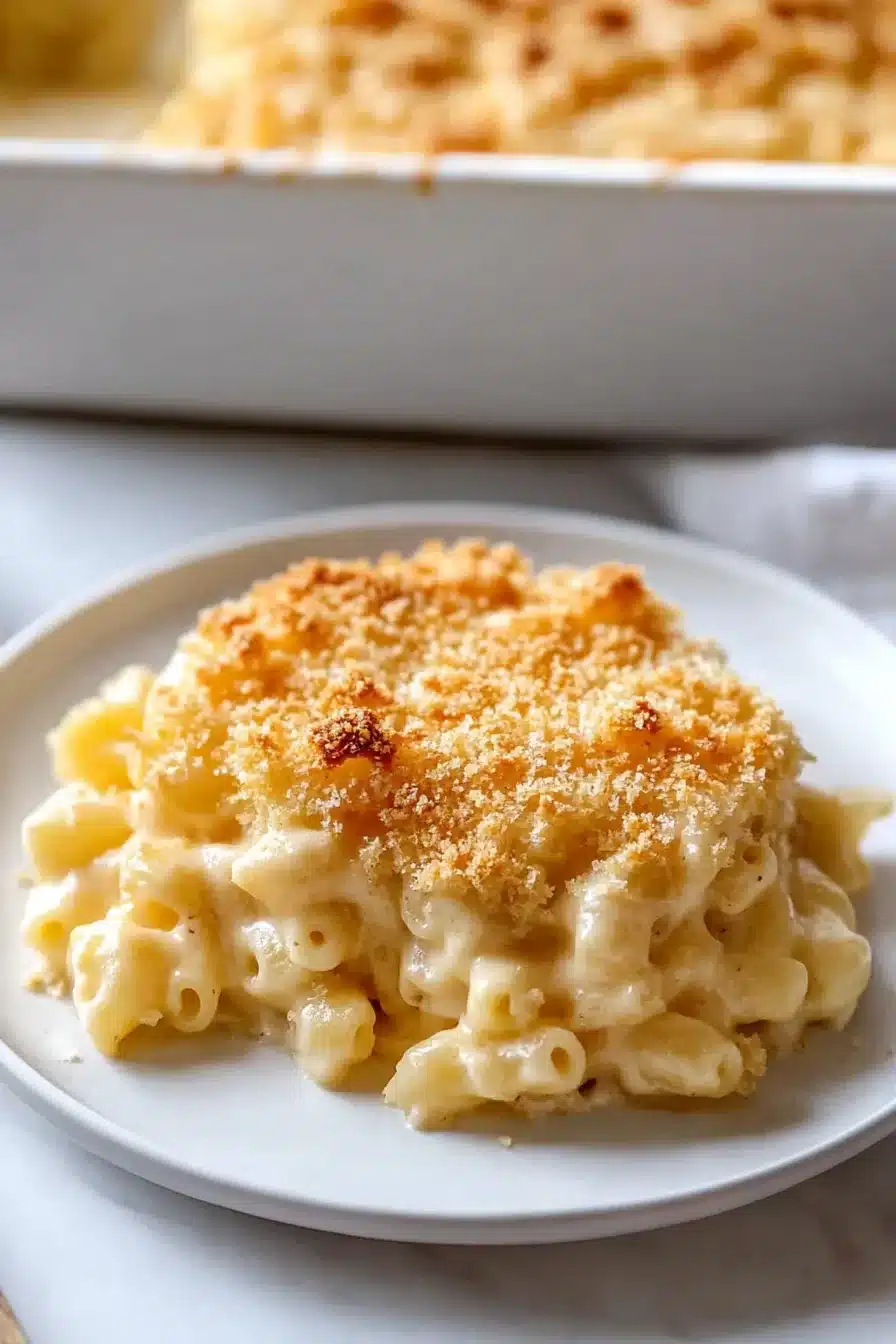
The creamiest bite of comfort food magic? That’d be this million dollar mac and cheese with cheddar, Gruyère, and a buttery panko topping. Cozy, golden, gooey bliss.
We’re talking layer-upon-layer of molten cheese, tangy sour cream tucked in the middle, and crisp-edged topping action that audibly crunches when your fork dives in. It’s indulgent, yes, but in that “treat-yourself-on-a-Tuesday” kind of way.
Sometimes you just need a big ol’ dish of cheesy wonder to make the world sit down and hush for a second. And this million dollar mac and cheese brings the goods in every layer. Silky cheddar and Monterey Jack cradle each noodle (hello, cavatappi curves). Then, right when you think it couldn’t possibly get richer, there’s a swipe of sour cream in the middle like a creamy plot twist. And that golden, crispy panko top? Yeah, you’re gonna want a corner piece. Probably both corner pieces. Grab a spoon. It’s time.

Why You’ll Love this Million Dollar Mac and Cheese
This one’s not shy—it’s bold, cheesy, and shockingly easy once you’ve got everything out on the counter. No drama, no fifteen-step prep. Just cozy, creamy excellence.
- Ridiculously creamy layers: The sour cream nestled in the middle gives everything a velvety heft that’s borderline luxurious.
- Crispy, buttery topping: That panko crust is golden, garlicky, and frankly one of the best parts (don’t skip it).
- Melty triple-cheese blend: Sharp cheddar, Monterey Jack, and Gruyère each bring a different cheesy personality—and they all get along great.
- Totally make-ahead friendly: You can prep the whole dish early, stash it, then slide it in the oven come dinnertime.
- Surprisingly flexible: Missing thyme? Only have elbow macaroni? It’s cool. This recipe welcomes easy swaps.

Ingredient Notes
Let’s break down what matters in this cheesy equation. A few bits you don’t wanna skip, and a couple you can wing if needed.
- Cavatappi or elbow macaroni: Cavatappi holds sauce like a pro, but elbow macaroni still totally works. Just avoid something too delicate—it’s a hearty dish.
- Unsalted butter and all-purpose flour: These two are your roux team. Butter adds richness; flour thickens the cheesy magic.
- Whole milk and half & half: Room temp helps them mix better into the roux. Use full-fat for that lush, “million dollar” texture.
- Dijon mustard: Adds a gentle tang that sharpens the cheese flavor without being obvious.
- Shredded cheddar and Monterey Jack: Cheddar brings sharpness, Jack melts like a dream. Freshly shredded works way better than bagged.
- Sour cream: It sneaks into the center like a creamy middle layer and honestly, I’d fight for it.
- Gruyère cheese: Nutty, melty, and rich. It’s the crown jewel in this triple-cheese castle.
- Panko breadcrumbs and melted butter: Panko = extra crisp, and butter ties it together for that golden finish.
- Garlic powder, onion powder, paprika, thyme: These are your low-key flavor crew in the background, working the magic quietly.
- Parsley: Mostly for color and just a hint of freshness. Use dried if you must, but fresh is lovely.
How To Make This Million Dollar Mac and Cheese
You really don’t need fancy tricks here—just some whisking, layering, and maybe a little self-control around the cheese.
-
Boil the pasta: Cook your cavatappi just shy of al dente. I usually knock off 2 minutes from whatever the box says. Don’t forget to salt the water; it should taste like a lazy ocean.
-
Make the roux: In a big saucepan, melt the butter over medium heat, then sprinkle in the flour slowly while whisking like your life depends on it. Keep whisking for a couple minutes until it smells a bit nutty and looks smooth.
-
Add dairy and spices: Slowly drizzle in your room temp milk and half & half, still whisking. This part’s about patience. Once it’s smooth, toss in all your seasonings and cook a few more minutes until thick. It should slide off the whisk like melted ice cream.
-
Melt the cheese: Kill the heat and add cheddar and Monterey Jack, a small handful at a time. Stir until each is melted before adding the next—you want silky sauce, not clump city.
-
Coat the pasta: Gently stir your cooked pasta into the cheese sauce. The smell at this point? Honestly unfair. Taste and adjust salt and pepper now so you don’t weep later.
-
Layer it up: In your greased baking dish, spread half the cheesy pasta. Then dot and spread the sour cream over it like frosting. Sprinkle on half the Gruyère. Repeat with the rest of the mac and cheese and top with the remaining Gruyère.
-
Top it and bake: Mix your panko topping in a bowl (panko, butter, garlic powder, salt, parsley), then sprinkle it lovingly over the dish. Bake at 350°F for 25–30 minutes, until bubbly and golden.
-
Let it rest… then dig in: Give it 5–10 minutes to rest out of the oven. It sets up just enough to slice beautifully—like lasagna, but cheesier.
Storage Options
Let’s be honest, this dish might steal the spotlight, but it also makes leftovers that are dangerously tempting.
Pop any extra into an airtight container and keep it in the fridge for up to 4 days. When you reheat, I like to splash in just a touch of milk before microwaving so the pasta stays creamy instead of turning gluey. Stir halfway through if you have the patience (I don’t always).
Freezing? You totally can. Ideally, freeze it before baking. Assemble everything, then wrap the whole dish tightly in foil and plastic wrap. Label it (trust me), and freeze up to 2 months. When ready, bake from frozen at 350°F. You’ll want to cover it for the first 30 minutes, then uncover to crisp up that topping for another 20–25.
Already baked a full pan and still have way too much? Portion it into individual servings to freeze, and reheat gently with a splash of milk.
Variations and Substitutions
You can totally adapt this to whatever’s lurking in your fridge or pantry. Million dollar? Sure. But it doesn’t have to be complicated.
- Different cheeses: Try Fontina, Havarti, or even brie if you’re feeling fancy. More melt = more happy.
- Add-ins like bacon or ham: A handful of crispy bacon or chopped leftover ham is downright dreamy tucked inside.
- Swap the pasta: Penne, rotini, shells—they all work. Just stick with a shape that can hold sauce like a champ.
- Go spicy: Kick it up with diced jalapeños, a splash of hot sauce, or extra cayenne in the mix.
- Make it vegetarian-meal-worthy: Toss in some sautéed mushrooms or roasted broccoli to add veggies without losing comfort.
What to Serve with Million Dollar Mac and Cheese
You’ve got the star of the night already, but every diva needs their backup dancers. Here are some sidekicks that hold their own.
-
A crisp green salad with a sharp vinaigrette cuts right through the richness. I like to pile on arugula with some lemon juice and olive oil—let it zing.
-
Some kind of green veg balances things out too. Think pan-seared broccolini or even roasted Brussels sprouts. Not boring steamed stuff. Roasty, crispy edges are key.
-
For brunchy vibes (yes, brunch), pair this with something hearty like a potatoes O’Brien breakfast skillet. Seriously, serve this mac and cheese as the main event at brunch and just watch eyes widen.
-
Crusty bread is a classic copilot. You’ll want something to swipe up the last of the cheese from your plate (or the pan, no judgment).
-
Need contrast? Whip up some sweet-savory bites like bacon basil cornbread muffins. A little sweet, a little smoky, and totally welcome at this cheesy party.
Frequently Asked Questions
Can I make million dollar mac and cheese ahead of time?
Yes! You can make the whole dish up to the baking step, then cover and stash it in the fridge for up to 24 hours before baking. Just remember to pull it out of the fridge while the oven preheats so it doesn’t go in ice-cold. You may need to add 5–10 extra minutes to the baking time if it’s starting cold.
What’s the best cheese combo for this recipe?
Sharp cheddar gives it that nostalgic mac and cheese vibe, Monterey Jack creates super melty texture, and Gruyère adds a nutty twist that takes it next level. But if you’re missing one, just aim for a mix of sharp (like cheddar), melty (like Jack), and flavorful (like Gruyère).
Can I freeze it after baking?
You can, though the texture might change slightly. Let it cool fully first, then portion it into freezer-safe containers. Wrap well, freeze, and when you’re ready to eat, reheat it gently with a splash of milk to bring back the creaminess. For full-pan freezing, cover with foil, then bake straight from frozen (add time).
Is there a gluten-free version?
Totally doable. Swap the pasta for a sturdy gluten-free variety—chickpea pasta and rice-based elbows hold up well. Use a 1:1 GF flour blend for the roux, and make sure your panko and spices are certified gluten-free. With all those cheeses, no one’s going to notice.

Million Dollar Mac and Cheese
Ingredients
Pasta and Cheese Layers
- 1 lb (450 g) cavatappi or elbow macaroni
- 6 tbsp (85 g) unsalted butter
- 1/3 cup (40 g) all-purpose flour
- 2 cups (480 ml) whole milk room temperature preferred
- 1 cup (240 ml) half & half room temperature preferred
- 1/2 tsp (2.5 ml) Dijon mustard
- 2 cups (200 g) sharp cheddar cheese freshly shredded, divided
- 2 cups (200 g) Monterey Jack cheese freshly shredded, divided
- 1 cup (230 g) sour cream
- 1 cup (100 g) Gruyère cheese shredded, divided
- kosher salt and black pepper to taste
- 1 tsp (4 g) garlic powder
- 1 tsp (3 g) onion powder
- 1/2 tsp (2 g) paprika
- 1/2 tsp (1 g) dried thyme
- fresh parsley chopped, for garnish (optional)
Panko Topping
- 1 cup (60 g) panko breadcrumbs
- 3 tbsp (42 g) unsalted butter melted
- 1/2 tsp (2 g) garlic powder
- 1/4 tsp (1 g) kosher salt
- 1 tbsp (4 g) fresh parsley chopped (or 1 tsp dried)
Equipment
- Large pot
- Large saucepan
- Whisk
- 9x13 inch Baking Dish
- Mixing bowls
Instructions
- Boil the pasta: Bring a large pot of salted water to a boil. Cook cavatappi just shy of al dente (about 2 minutes less than package instructions). Drain, set aside.
- Make the roux: In a large saucepan over medium heat, melt 6 tbsp butter. Sprinkle in the flour while whisking, and cook for 1–2 minutes until lightly golden and nutty.
- Add dairy and spices: Gradually whisk in milk and half & half (room temp), then add Dijon, garlic powder, onion powder, paprika, thyme, plus salt & pepper. Cook, whisking, until thickened (about 2–3 minutes).
- Melt the cheese: Remove from heat. Stir in cheddar and Monterey Jack, a handful at a time, letting each fully melt before adding more. Taste and adjust seasonings.
- Coat the pasta: Gently fold cooked pasta into the cheese sauce. Mix until noodles are fully coated.
- Assemble the layers: Grease a 9x13-inch baking dish. Spread half of the cheesy pasta in the dish. Dollop and gently spread the sour cream over the top. Sprinkle with half of the Gruyère. Repeat with remaining pasta and Gruyère.
- Make the panko topping: In a bowl, combine panko, 3 tbsp melted butter, 1/2 tsp garlic powder, salt, and parsley. Mix until well combined and clumpy.
- Top and bake: Sprinkle panko mixture evenly over the macaroni. Bake at 350°F (177°C) for 25–30 minutes, until bubbly and golden on top.
- Rest, garnish, and serve: Let the mac and cheese rest 5–10 minutes out of the oven before digging in. Garnish with parsley if desired and enjoy.