Get 5 recipes to simplify your life:

easy, delicious, real food recipes

Latest Recipes

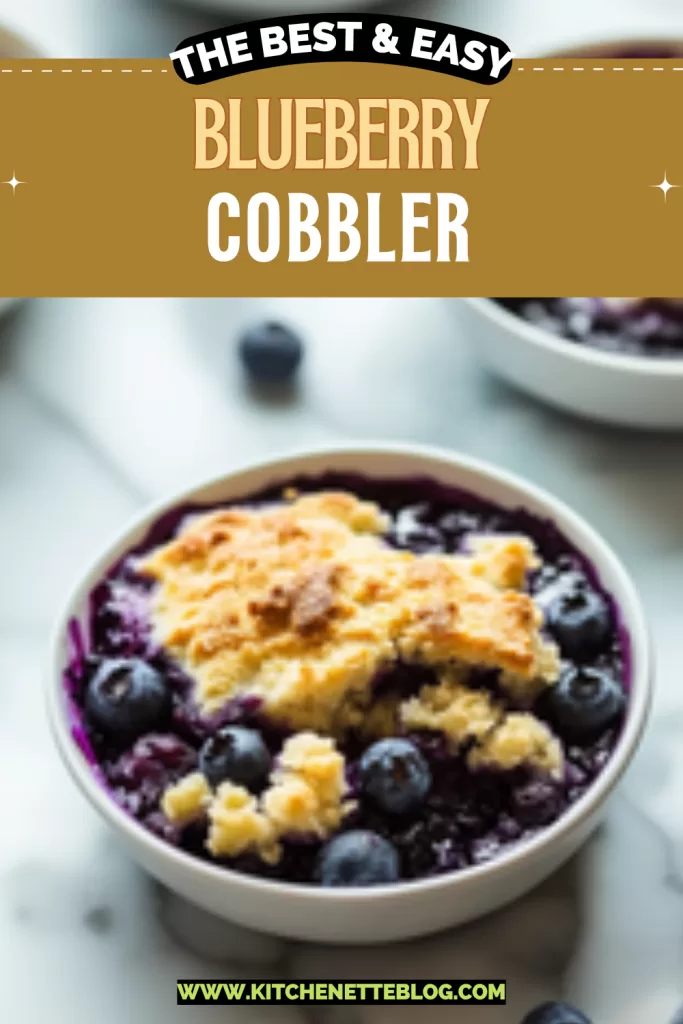
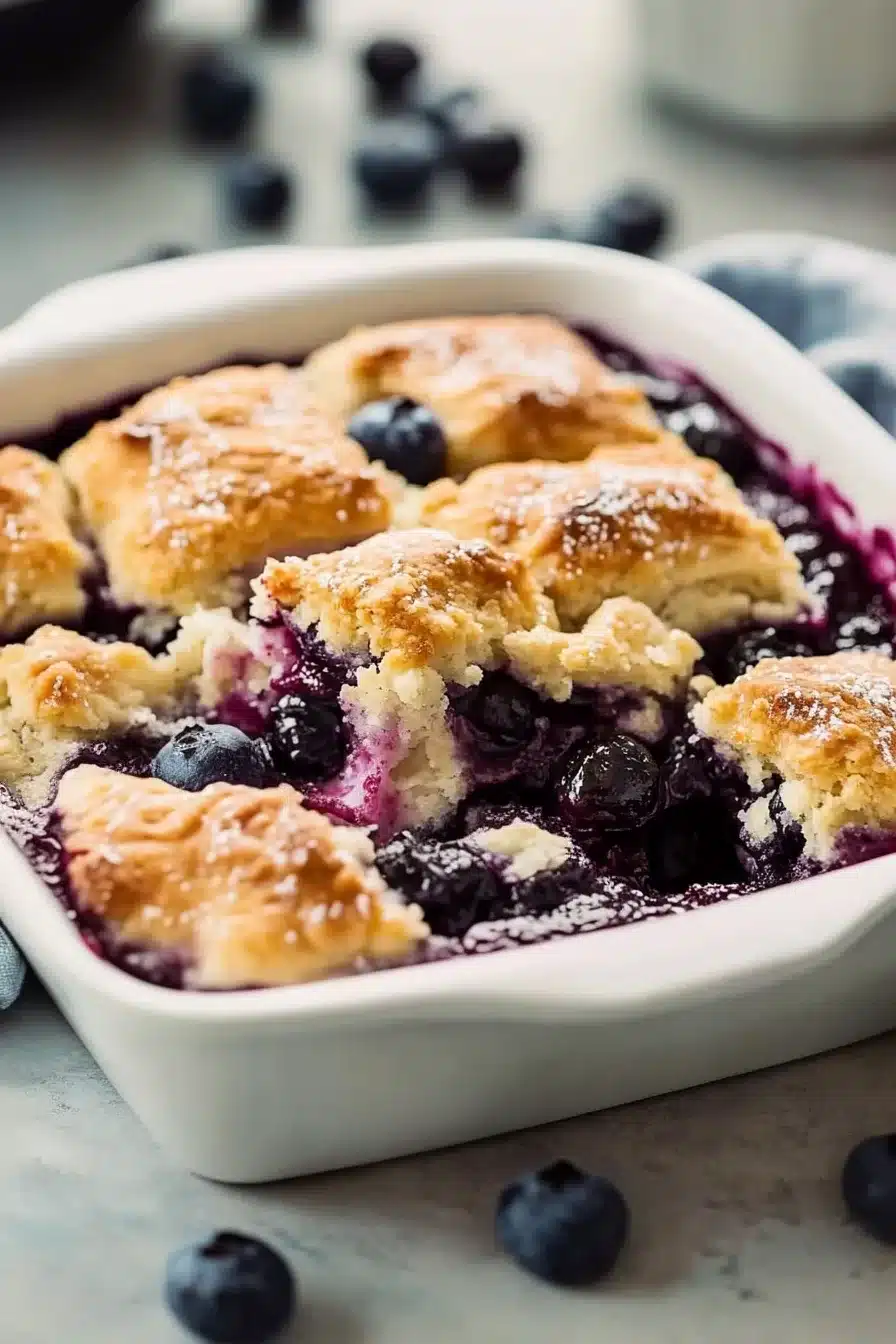
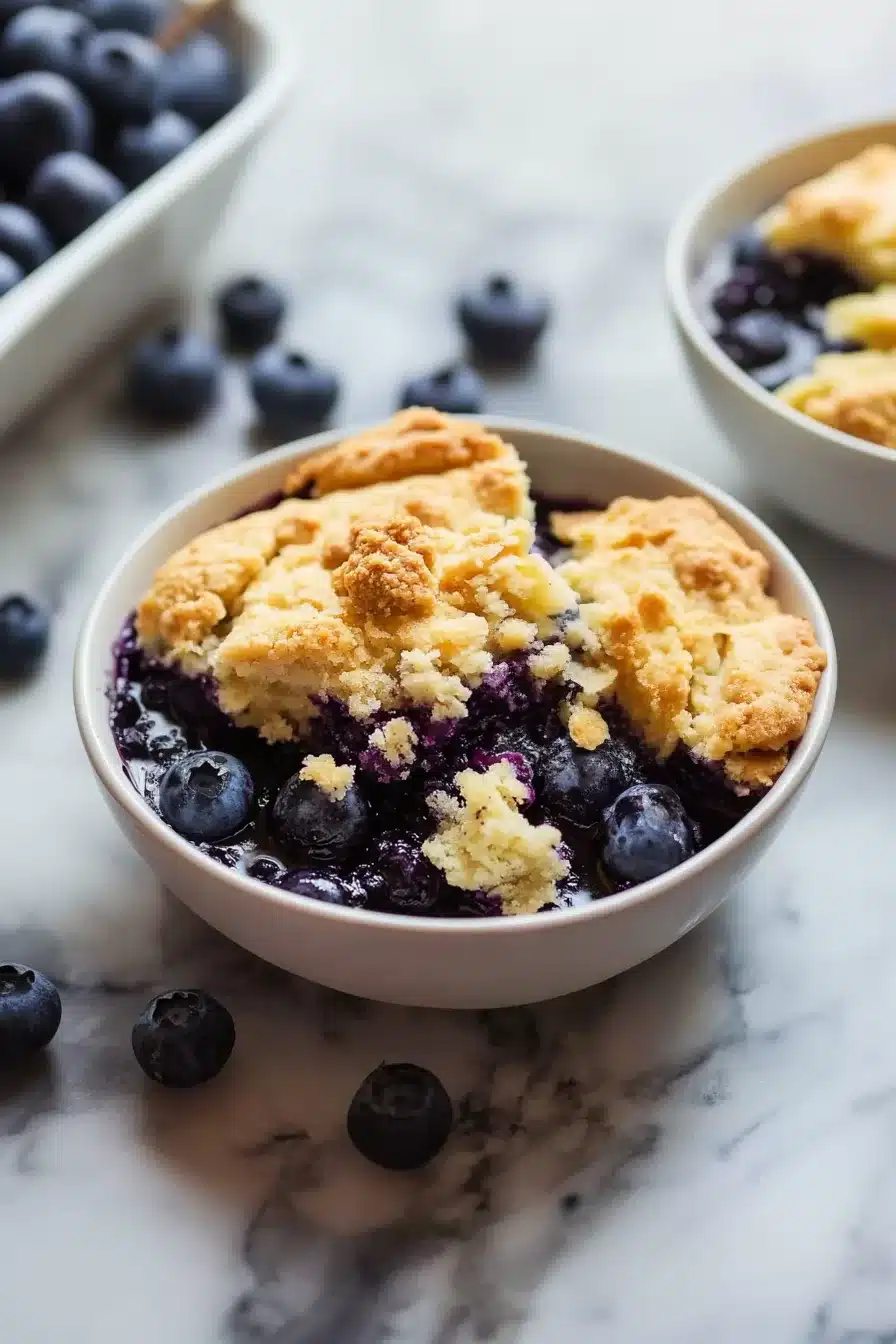
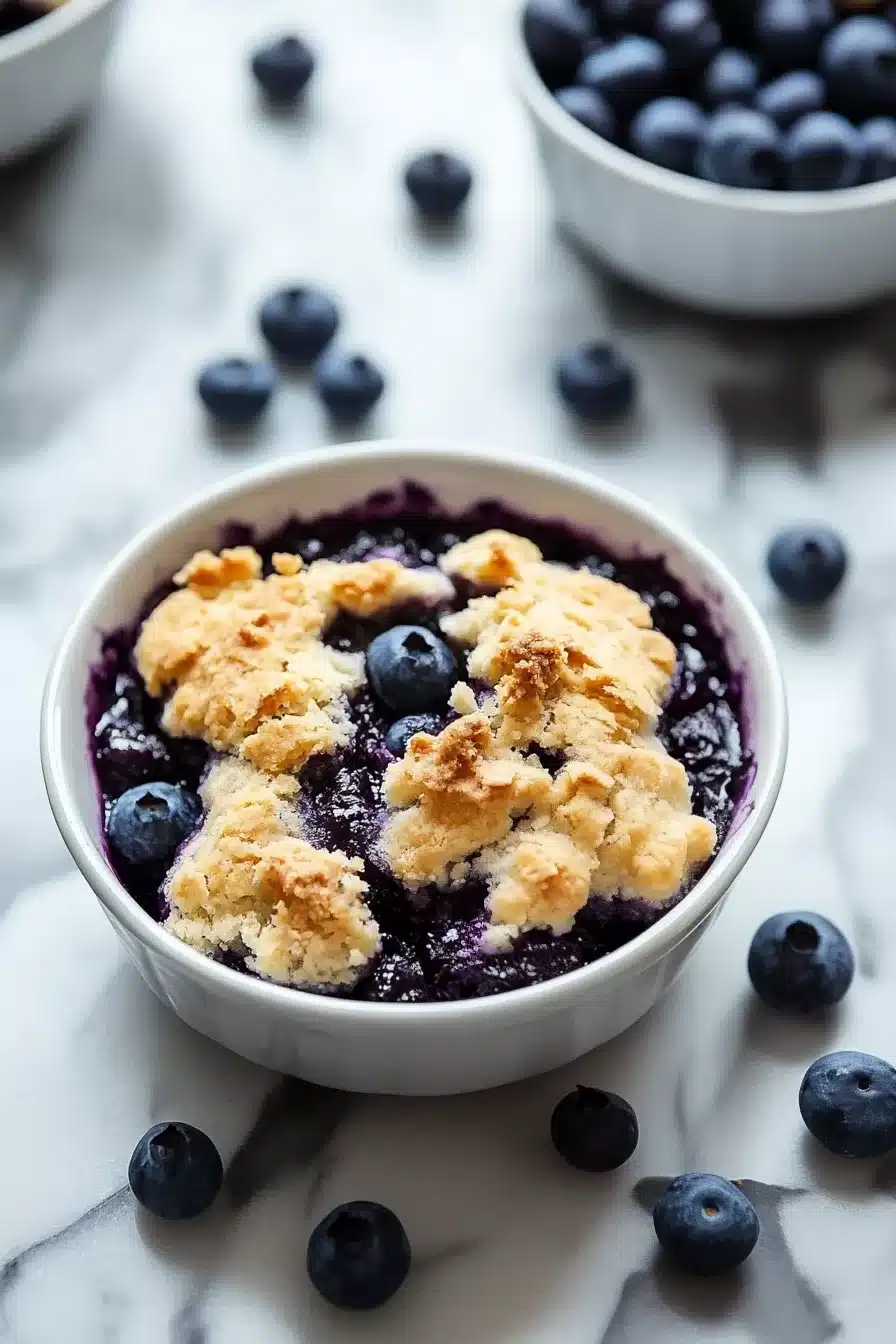
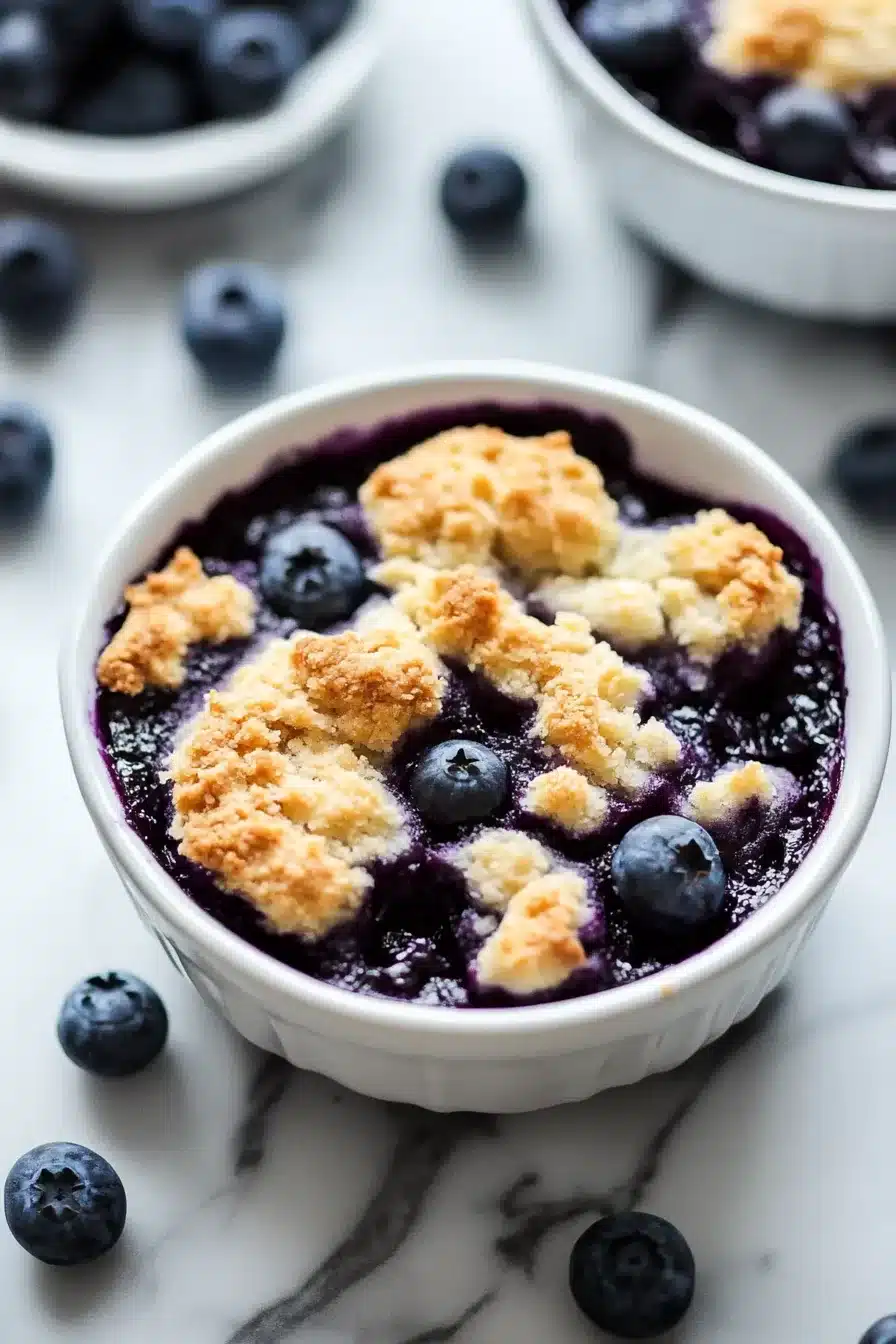
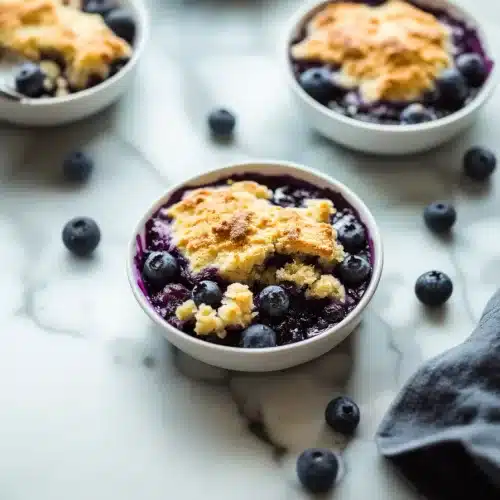
Warm, bubbling, and just a tiny bit messy—in that irresistible, good cobbler kind of way. This blueberry cobbler is all about juicy fresh blueberries, sugar, butter, flour, and a soft golden topping that smells like the best part of summer baked itself into your kitchen.

Spoon into it while it’s warm and the syrupy berries will sigh against the crisp edges of the crust. It’s cozy. It’s buttery. And yes, a scoop of ice cream is highly encouraged (though not required for happiness).

Some desserts just feel like a hug in a bowl, don’t they? This blueberry cobbler delivers that kind of comfort. It’s got the jammy center, the biscuity topping, and the somehow-magical way it turns the simplest ingredients into something… extra. Bake it up on a weekday evening or serve it after a laid-back dinner with friends—basically, whenever your soul wants something warm and fruit-laden.

Table of Contents

Blueberry Cobbler

Why You’ll Love this Blueberry Cobbler

No big sales pitch here, promise. Just good fruit, a few pantry staples, and a no-fuss process that ends in cobbler.

  • Ridiculously simple to make: You mix, you pour, you bake. No chilling, layering, or whisking egg whites like you’re on a cooking show.
  • Messy in the best way: The bubbling blueberries sneak into the golden topping and make those gooey, purple-edged corners that are frankly elite.
  • Smells like a buttery blueberry dream: Between the lemon zest and vanilla, your kitchen is about to smell like you’re running a small pastry shop.
  • Flexible enough for flair: Want to toss in a few raspberries or swap flours? This cobbler won’t mind at all.
  • Great warm, cold, or lukewarm while standing in the fridge with a fork at midnight: I mean, just saying.

Blueberry Cobbler

Ingredient Notes

This recipe leans into simplicity, but a few little tips can make it sing. Here’s what each star player brings to the show:

  • Fresh blueberries: Juicy and poppy, they hold their shape while cooking down into sweet-tart syrup. Frozen also works, but thaw and drain first unless you’re into purple soup.
  • Granulated sugar: Divided use—half sweetens the fruit, half sweetens the batter. You could swap part of it for brown sugar for a deeper molasses note.
  • Cornstarch: Just a spoonful thickens the berry juice into a dreamy, jammy situation. Without it, you’ll have a cobbler puddle.
  • Lemon zest: Brightens things up. That tiny bit of citrus makes the blueberries taste even more… blue, somehow.
  • Butter (melted): Adds richness and creates this magical base where the batter and berry juices meet and get crispy at the edges.
  • All-purpose flour: Classic and sturdy, it’s your topping’s backbone. A 50/50 split with whole wheat also works, if you’re going rustic.
  • Baking powder: Gives the topping lift. Skip it and you’re flatlining (literally).
  • Salt: Just a pinch, rounding out flavors like a behind-the-scenes flavor ninja.
  • Whole milk: Lends moisture and richness to the batter. You could try buttermilk for tang, or a plant milk if that’s your vibe.
  • Vanilla extract: Adds warmth and depth to the topping. Honestly? Don’t skip it. Small thing, big reward.

Blueberry Cobbler

How To Make This Blueberry Cobbler

This is one of those recipes that almost feels like cheating. It’s so much payoff for so little effort. Here’s how it all goes down:

  • Preheat the oven: Set it to 375°F and lightly grease a 9×13-inch baking dish. You can use butter or a quick spray—just don’t skip it unless you’re into scraping corners.

  • Mix the fruit filling: In a large bowl, toss the blueberries with ½ cup of the sugar, the cornstarch, and the lemon zest. Give it a gentle stir; you want them coated, not smashed. Then pour that whole purple speckled situation into your prepped dish.

  • Add the melted butter: Just pour it straight over the blueberries. Don’t stir. This creates a golden base where berry meets butter meets magic.

  • Make the batter: In a medium bowl, whisk together the flour, remaining 1 cup sugar, baking powder, and salt. Now stir in the milk and vanilla. Don’t overmix it. You’re aiming for “lumpy pancake batter,” not “gym class arm workout.”

  • Pour the batter over the berries and butter: Yes, you read that right—pour it over. Do. Not. Stir. The layers will sort themselves out in the oven like grown-ups.

  • Bake: Slide the dish into the oven and bake for 40 to 45 minutes. You’ll know it’s ready when the top is golden and a toothpick poked into the topping comes out clean (except for a little jam—jam is fine).

  • Cool slightly, then serve: Let it rest for 10 to 15 minutes so it sets up a bit. Then scoop it into bowls and top with ice cream if you’re feeling extra (you are).

Blueberry Cobbler

Storage Options

Cool leftovers? You’ve got options.

First, store any extra blueberry cobbler in the fridge once it’s cooled to room temp. Just transfer it into an airtight container, or cover the baking dish tightly with foil. It’ll hold happily in the fridge for up to 4 days.

Got a mountain of leftovers (no judgment) and want to save some for later-later? Yup, you can freeze it too. Scoop individual portions into freezer-safe containers or wrap up slices with plastic wrap then foil. Freeze up to 3 months. Thaw overnight in the fridge before reheating.

Speaking of reheating, the microwave works fine for solo portions—just nuke for 30 to 60 seconds. But if you’ve got a bit more and want the topping to crisp back up, toss it in a 350°F oven for around 10–15 minutes. Keep an eye on it though; you want to warm it, not deep-fry it.

Can you eat it cold from the fridge? Honestly, yes. No judgment here.

Variations and Substitutions

If you’re feeling a little adventurous or missing an ingredient (ugh, always the milk), here are some ideas to keep things fruity and fabulous:

  • Frozen berries instead of fresh: Go for it, but let them thaw and drain a bit first so your cobbler doesn’t turn into berry soup.

  • Brown sugar instead of white: This adds warmth and caramel-ish depth, especially in the topping. Try half-and-half for balance.

  • Add other fruits: A handful of raspberries, blackberries, or even chopped peaches plays very well with blueberries.

  • Almond extract instead of vanilla: Just a few drops will turn the topping into something a little nutty and springy.

  • Use buttermilk: Swap it in for the whole milk to get a tiny tang and an even fluffier crust.

Blueberry Cobbler

What to Serve with Blueberry Cobbler

Cobbler is cozy on its own, but it lives for the right companions. Here’s what to serve on the side or after, depending on the occasion.

  • Vanilla ice cream. This is the obvious choice—and for a reason. The warm berries mixed with cold, melty vanilla? You basically get a summertime sundae in every bite. If you’re feeling creative, try a scoop of something like honey or lemon ice cream instead.

  • Whipped cream. Not the canned stuff (unless that’s all you’ve got—zero shade). I mean soft peaks, gently whipped, maybe with a dash of vanilla. It adds just the right amount of cloud-light contrast to the warm, dense cobbler.

  • A fizzy drink. Whether it’s sparkling lemonade, hard cider, or even pink hot chocolate if you’re feeling whimsical, a bit of fizz balances the syrupy richness nicely.

  • Savory balance. Got guests? Serve this after something like pan-seared cod with rainbow chard. The clean flavors make the sweet, gooey cobbler shine even more.

  • A second helping. No explanation needed.

Blueberry Cobbler

Frequently Asked Questions

Can I use frozen blueberries instead of fresh?

Yes, absolutely! Just thaw them first and give them a good drain to remove any excess liquid. Frozen berries tend to release more juice, which can make the cobbler a bit too runny if you toss them in straight from the freezer. If you’re in a hurry and forget to thaw them, add a tiny bit more cornstarch to help balance the extra moisture.

Why can’t I stir the batter once it’s in the dish?

Great question—and one that trips people up sometimes! The not-stirring part is key to that classic cobbler texture. When you pour the batter over the butter and berries without mixing, the batter rises up during baking and turns into a soft, fluffy topping. If you stir it all together, you’ll just get a weird purple cake. Still edible, but not nearly as good.

What’s the best way to reheat leftovers?

If you’ve got time, reheat a portion in the oven at 350°F for about 10–15 minutes to revive the crisp topping. For a speedier option, the microwave works well (just be ready for a softer, gooier crust). Add a spoonful of ice cream or fresh whipped cream and nobody’s complaining either way.

Can I make this blueberry cobbler ahead of time?

You bet. I wouldn’t fully assemble it ahead (that can affect the texture), but you can mix the filling and dry topping ingredients separately a day in advance. When you’re ready to serve, melt the butter, stir the wet into the dry, layer everything, and bake. Fresh from the oven is really the best way to enjoy it anyway.

Blueberry Cobbler

Blueberry Cobbler

Prep Time 15 minutes
Cook Time 45 minutes
Cooling Time 10 minutes
Total Time 1 hour
Warm, bubbling, and just a little bit messy (in the best way), this blueberry cobbler celebrates fresh blueberries beneath a golden, buttery topping. Cue the jammy fruit, crisp edges, and cozy comfort. Serve warm with a scoop of ice cream for summer-in-a-bowl happiness!
8 servings

Ingredients

For the Blueberry Filling

  • 6 cups (900 g) fresh blueberries about 2 pints; thawed and drained if using frozen
  • 1/2 cup (100 g) granulated sugar
  • 1 tbsp (8 g) cornstarch
  • 1 tsp lemon zest from about 1 lemon
  • 1/2 cup (113 g) unsalted butter melted

For the Cobbler Topping

  • 1 cup (120 g) all-purpose flour
  • 1 cup (200 g) granulated sugar
  • 2 tsp (8 g) baking powder
  • 1/4 tsp (1 g) salt
  • 1 cup (240 ml) whole milk or buttermilk for tangier flavor
  • 1 tsp (5 ml) vanilla extract

Equipment

  • 9x13 inch Baking Dish
  • Large mixing bowl
  • Medium mixing bowl

Instructions
 

  1. Preheat your oven to 375°F (190°C). Lightly grease a 9x13-inch baking dish with butter or nonstick spray.
  2. In a large bowl, combine the blueberries, 1/2 cup sugar, cornstarch, and lemon zest. Gently toss to coat the berries but don't smash them. Pour this mixture into the prepared baking dish.
  3. Drizzle the melted butter evenly over the blueberry filling. Do not stir.
  4. In a medium bowl, whisk together the flour, remaining 1 cup sugar, baking powder, and salt. Add the milk and vanilla extract, stirring until just combined (it's fine if the batter is a little lumpy).
  5. Pour the batter evenly over the blueberries and butter in the baking dish. Do not stir or mix—leave the layers as they are.
  6. Bake for 40–45 minutes, until the topping is golden and set and the blueberry juices are bubbling around the sides. A toothpick inserted in the center of the topping should come out mostly clean.
  7. Let the cobbler cool for 10–15 minutes before serving. Spoon warm into bowls and top with ice cream or whipped cream if desired.

Notes

Storage: Cool leftovers, then store in an airtight container in the fridge for up to 4 days or freeze for up to 3 months. To reheat, microwave individual portions or bake at 350°F for 10–15 minutes to revive the crisp topping.
Variations: Use a mix of berries, swap buttermilk for milk, sprinkle a little brown sugar over the topping before baking, or sub almond extract for vanilla.
Topping ideas: Serve with vanilla ice cream, softly whipped cream, or a drizzle of lemon glaze.
Tip: For a more rustic, textured topping, use half whole wheat flour, or add a pinch of cinnamon to the batter.

Nutrition

Calories: 315kcal | Carbohydrates: 63g | Protein: 3g | Fat: 7g | Saturated Fat: 4g | Cholesterol: 20mg | Sodium: 110mg | Potassium: 105mg | Fiber: 3g | Sugar: 40g | Vitamin A: 320IU | Vitamin C: 10mg | Calcium: 80mg | Iron: 0.9mg

Light, fluffy, and buttery with a teeny zip from sour cream and lemon-lime soda, these 7-Up biscuits are all comfort. You need just sour cream, soda, baking mix, and butter to pull this off.

If a biscuit and a cloud had a delicious baby, it’d be this tender, golden beauty. These come together so fast, smell like heaven while baking, and feel like the perfect mix of lazy and fancy. Spoonful of honey on top? Maybe. Dusted with flour all over your shirt? Definitely.

There’s something wildly satisfying about taking a few humble fridge and pantry staples—oh hi, sour cream and lemon-lime soda—and pulling them into fluffy biscuit form with barely a whisper of effort on your part. Perfect for those evenings when you’re definitely not making a five-course meal but still want some buttery carb joy to swipe through your pot of stew or nestle beside a slab of roast. These squishy-tender 7-Up biscuits bake up golden on the outside, pillowy on the inside, and just slightly tangy in the best way. I sometimes eat them straight out of the dish with my fingers like a caveperson.

Table of Contents

Fluffy 7-Up Biscuits

Why You’ll Love this 7-Up Biscuits Recipe

These fluffy little biscuits didn’t come to play—they came to practically make themselves. Let’s just say this recipe has lazy elegance written all over it.

  • Ridiculously simple to make: You just stir, sort of smush, and then toss them in a pool of butter. Done and done.
  • Fluffy, tangy, buttery magic: They puff up in the oven like little golden clouds with just enough sharp twang from the sour cream.
  • Uses pantry + fridge basics: You probably have a dusty box of baking mix and a random soda somewhere, right? Let’s go.
  • Saves your sad weeknight dinner plate: Suddenly your soup has flair. Your leftover pork looks fancy. You look like a biscuit wizard.
  • No mixer or rolling pin required: Seriously, you can do this half-awake. (I actually have.)
  • Plays nice with sweet or savory: Honey? Yup. Hot sauce and ham? That too.

Fluffy 7-Up Biscuits

Ingredient Notes

You only need four ingredients, which sounds suspiciously easy. It is. The trick is knowing how each one shines.

  • Butter: This is your golden crisp magic. It pools under the biscuits as they bake, giving that ultra-rich, sizzly bottom crust. Salted’s fine. Unsalted? Just add a pinch of salt yourself.
  • Baking mix (like Bisquick): The structure of our biscuit baby. It’s basically pre-mixed flour, fat, and leavening, so it brings everything together without fuss.
  • Lemon-lime soda (like 7-Up): Adds lightness, sweetness, and a subtle zing. Don’t worry, you won’t taste a soda pop; you’ll taste fluff.
  • Sour cream: This is the moisture queen. It binds the dough, adds tang, and makes the biscuits feel extra rich without needing cream.

Fluffy 7-Up Biscuits

How To Make This 7-Up Biscuits Recipe

Honestly, if you can stir things in a bowl and turn on the oven, you’re wildly overqualified for this recipe. Here’s how we biscuit.

  • Get your oven hot: Preheat to 425°F and pop your baking dish filled with butter in there so it melts into a glorious, golden puddle.

  • Make the dough: In a big bowl, mix the sour cream, lemon-lime soda, and baking mix until it’s cohesive. The dough should weirdly resemble sticky mashed potatoes. That’s right! Sticky is good here.

  • Flour up and press out: Sprinkle a generous scoop of flour on your countertop (don’t be shy) and gently press the dough until it’s about an inch thick. No kneading. This isn’t bread bootcamp.

  • Cut your biscuit shapes: Use a round cutter, glass, or just press it into one layer and cut squares directly in the pan. Think rustic.

  • Nestle into butter bath: Place those little pucks into the hot buttered baking dish. They should be cozy but not packed like sardines.

  • Bake until golden: Slide them into the oven about 10 to 12 minutes. Once they’re puffed and beautifully brown on top, pull them out and try not to burn yourself grabbing one immediately. (Guilty.)

Fluffy 7-Up Biscuits

Storage Options

Okay, so… say you somehow didn’t eat all of them warm from the pan. It happens. Once cooled, keep your leftover biscuits in an airtight container at room temp for up to two days. They lose a bit of their crispness but keep that signature soft middle.

For longer storage, pop them in the fridge. Wrap them up or stick in a container so they don’t get weirdly dried out. They’ll hold up for about 5 days.

Yes, you can freeze them! Place the cooked biscuits on a tray in the freezer until they’re solid (a couple of hours), then transfer to a freezer bag. Boom—single-serve biscuit stash. To reheat, just warm in a 300°F oven for about 10 minutes, or microwave for 30–40 seconds. Oven makes them toastier, but microwave is that quick lazy fix.

Variations and Substitutions

The base recipe is begging you to riff. Truly, these are the sweatpants of biscuit recipes—comfy, forgiving, and make you feel good.

  • Greek yogurt instead of sour cream: It keeps the tang and texture, and honestly, I’ve done this mid-grocery drought. Worked like a charm.
  • Sprite, Sierra Mist, or even ginger ale: Any mild soda will do, though the lemon-lime ones keep that clean light flavor.
  • Frozen herbs tossed into the dough: A little chopped rosemary or chive wouldn’t hurt. Just don’t go full-on stuffing mix.
  • Add shredded cheese to the dough: Oh yes, a sharp cheddar works beautifully here. You get that salty bite and melty surprises.
  • Sweeten things slightly: Toss a tablespoon of sugar into the mix and brush baked tops with honey butter—especially dreamy for breakfast.

Fluffy 7-Up Biscuits

What to Serve with 7-Up Biscuits

Let’s be realistic, you could eat these solo and still be delighted. But if you’re feeling all menu-planny, here’s what they cuddle up nicely with:

  • A pot of chili, gumbo, or stew: Biscuit meets brothy bite, gets dunked, and basically becomes its best self. I once made these to go with slow-cooked pork, like this Cuban mojo pork, and it was a ridiculously good move.

  • For breakfast with fried eggs and jam: Biscuits plus bacon plus eggs? You already knew this. Bonus points if you slide a biscuit sandwich into your weekday rotation.

  • Alongside roasted fish or something citrusy: Try a bright meal like pan-seared cod and greens. The biscuit becomes your buttery contrast.

  • As a sidekick to coffee cake or sweets: Balance salty with sweet. Pair one with something like this cinnamon roll coffee cake and throw a brunch party for one.

  • Slathered with pimento cheese or honey butter: I mean, do I really need to explain? Fluff on fluff, with a bonus funk/sweet moment.

Fluffy 7-Up Biscuits

Frequently Asked Questions

Can I use homemade biscuit mix instead of Bisquick?

Absolutely! If you’re the make-it-from-scratch type (and I admire that deeply), you can sub in a homemade biscuit mix. Just be sure it includes flour, baking powder, salt, and fat (like shortening or butter). Keep the ratios close to your typical Bisquick-style base, and the recipe won’t even blink.

Is the soda flavor noticeable in the finished biscuits?

Not at all. You won’t bite in and think, “Whoa, this tastes like soda!” Promise. The carbonation lifts the dough and adds a teensy bit of sweetness, but no one will guess these biscuits used lemon-lime pop unless you spill the tea.

Can I make the dough ahead of time?

I wouldn’t recommend letting this dough sit too long. It’s super sticky and best baked right away after mixing. If you do need to prep ahead, cut and freeze the unbaked biscuits so you can pop them directly into the hot oven later and get that same puff and color.

What if I don’t have a biscuit cutter?

No cutter, no problem! You can use a drinking glass or just skip the cutting and press the dough straight into the pan. Then use a knife or bench scraper to cut squares. They might not win a beauty contest, but they’ll still taste like soft buttery heaven.

Fluffy 7-Up Biscuits

Fluffy 7-Up Biscuits

Prep Time 10 minutes
Cook Time 12 minutes
Total Time 25 minutes
Light, fluffy, and impossibly tender, these 7-Up biscuits are the quickest route to buttery, golden comfort. With just four humble ingredients—baking mix, sour cream, lemon-lime soda, and butter—you’ll be pulling pillow-soft biscuits straight from the oven in record time. Perfect for dunking, snacking, or just eating straight from the pan.
9 biscuits

Ingredients

Main Ingredients

  • 1/4 cup (60 g) butter melted (salted or unsalted, see notes)
  • 2 cups (250 g) baking mix such as Bisquick
  • 1/2 cup (120 g) sour cream
  • 1/2 cup (120 ml) lemon-lime soda such as 7-Up (Sprite or ginger ale also work)

To Flour Surface

  • all-purpose flour for dusting countertop

Equipment

  • Mixing bowl
  • 9-inch square baking dish
  • Oven
  • Biscuit cutter or glass

Instructions
 

  1. Preheat your oven to 425°F (220°C). Place the butter into a 9-inch square baking dish and set it in the oven while preheating so the butter melts. Watch carefully so it doesn't brown or burn; remove the dish once the butter is melted.
  2. In a large mixing bowl, combine the baking mix, sour cream, and lemon-lime soda. Stir just until combined—a few lumps are fine. The dough will be very sticky, like thick mashed potatoes.
  3. Generously flour a clean countertop. Turn out the dough and lightly pat or press it to about 1-inch thickness. Do not knead.
  4. Cut biscuits using a round cutter, glass, or by cutting squares. Gently gather scraps and re-press to use all dough.
  5. Place biscuits into the hot baking dish with melted butter, nesting them closely but not packed tight. The butter should pool around and under each biscuit.
  6. Bake for 10–12 minutes, or until biscuits are golden brown on top and puffed. Remove from oven, let cool slightly, then serve warm.

Notes

You can use unsalted butter—just add a pinch of salt to your dough if you like your biscuits a bit salty. Biscuits are best served fresh and hot from the oven. Brush with honey butter or top with jam for a sweet twist, or add a sprinkle of shredded cheese and chopped herbs for savory flavors. Leftovers keep in an airtight container for up to 2 days at room temperature or 5 days in the fridge. Reheat in the oven for best results.

Nutrition

Calories: 180kcal | Carbohydrates: 22g | Protein: 2g | Fat: 9g | Saturated Fat: 5g | Cholesterol: 20mg | Sodium: 340mg | Potassium: 52mg | Sugar: 3g | Vitamin A: 210IU | Calcium: 54mg | Iron: 0.7mg

Savory citrus, garlic warmth, and melt-in-your-mouth pork collide in Slow Cooker Cuban Mojo Pork. Fresh orange and lime juices, oregano, cumin, and tender pork butt make your kitchen smell like a Havana backyard party (minus the humidity).

Honestly, this one’s a flavor bomb in disguise. The slow cooker does basically all the work while you go live your life, and then voilà—moist, citrusy pork that practically begs for a crispy broiled finish. Tug it apart with forks. Toss it onto rice bowls, sandwiches, or alongside plump black beans. And yes, it reheats like a dream. Honestly, it’s kind of magical.

Table of Contents

Slow Cooker Cuban Mojo Pork

Why You’ll Love this Slow Cooker Cuban Mojo Pork

No fluff here, just pork that’s been marinating in sunshine and garlic dreams. Let’s get to the good stuff.

  • Ridiculously simple to make: The slow cooker quietly does most of the heavy lifting while you just toss, stir, and wait.
  • Citrusy, garlicky joy: The orange and lime juice soak into every crevice of the pork, and that garlic… oh, the garlic.
  • Broiled finish equals magic: That quick broil step? It turns the top into crispy, caramelized, golden perfection.
  • Versatile for any meal vibe: Bowl it over rice, tuck it in crusty rolls, or serve it fancy-style with roasted veggies.
  • Make-ahead friendly: This pork gets even better as it rests. Yes, it’s one of those dreamy leftover situations.
  • Easy to feed a crowd: Or just feed yourself all week without getting bored (been there, loved that).

Slow Cooker Cuban Mojo Pork

Ingredient Notes

A solid marinade is like a good playlist—it sets the tone. These ingredients hit savory, aromatic, and zesty notes with zero pretense.

  • Pork butt roast: Also known as Boston butt. It’s marbled, juicy, and ideal for shredding. Don’t trim too much fat—it crisps later.
  • Fresh orange juice: Sweet and aromatic, this balances all the tang and salt. Bottled juice won’t hit the same, so go fresh.
  • Fresh lime juice: Adds that unmistakable zing. It wakes everything up (including your sinuses a little, honestly).
  • Extra-virgin olive oil: Carries all that citrus, garlic, and spice into the meat while keeping things lush and smooth.
  • Garlic cloves: Six to eight sounds right, but honestly, no one’s judging if you sneak in a tenth.
  • Zest of two oranges and a lime: Adds extra layer of citrus oils—don’t skip, they make everything pop.
  • Oregano, cumin, and red pepper flakes: Earthy with a hint of heat. Think warm breezes and spice markets.
  • Bay leaves: Subtle but vital. They add depth without shouting.
  • Salt and black pepper: Generous seasoning is key here. It’s a big cut of meat!
  • Chopped cilantro (for serving): Adds a peppery freshness at the end—like the final sprinkle of magic.

Slow Cooker Cuban Mojo Pork

How To Make This Slow Cooker Cuban Mojo Pork

Okay, let’s get to it. Your kitchen’s about to smell incredible, and you barely have to do anything complicated. Grab your apron (or let’s be real, your pajama pants) and let’s go.

  • Score the pork: Using a sharp knife, make shallow crisscross cuts on the fatty side. We’re not going full butcher here—just light scoring to help the marinade sink in.

  • Whisk the marinade together: In a big bowl, mix orange juice, lime juice, olive oil, garlic, both zests, oregano, cumin, salt, pepper, and red pepper flakes. Toss in the bay leaves like you’re casually dropping knowledge. Stir it all up until it’s vibing.

  • Coat the pork: Place the pork in the slow cooker, fat side up. Pour the marinade over it and gently turn the meat to coat. Fat side should stay facing up—it bastes itself that way.

  • Optional marinade nap: If you’ve got time, pop the lid on and refrigerate the whole slow cooker insert for 6–8 hours (or overnight). It’s a bonus step but worth it.

  • Cook low and slow: Let it do its thing on LOW for 7–8 hours. When a fork goes in and the pork sighs and shreds back at you, it’s ready.

  • Broil for that crispy top: Carefully lift the pork into a roasting pan, fat side up. Slide it under the broiler for 4–5 minutes. Watch like a hawk—this is the part where it goes from “yum” to “YES.”

  • Let it rest, then shred: Rest a few minutes before pulling it apart. Toss with a bit of the slow cooker juices, top with cilantro, and serve warm.

Slow Cooker Cuban Mojo Pork

Storage Options

So now you’ve got a mountain of tender pork and zero regrets. But maybe you don’t want to eat it every meal for the next four days.

To store in the fridge, let it cool to about room temp first. Then pop it into an airtight container and spoon a bit of the reserved liquid over the top. This keeps it juicy. It’ll last up to 4 days chilling out in the fridge.

Freezer? Absolutely. Divide it into portions (bags or small containers work) and pour a spoonful of juices in each. Freeze for up to 2 months. Pro-tip: flatten the freezer bags so they stack neatly—hello, open shelf space.

Reheating’s easy. Microwave with a splash of the juice or heat gently on the stovetop in a pan with a lid. If you’ve got time, a little broil again revives the crisp factor like magic. Just don’t microwave it dry and sad—no one deserves that.

Variations and Substitutions

Want to keep the flavor train rolling but switch things up? There are some fun spins on this mojo-y goodness.

  • Swap the pork butt for pork shoulder: Close cousins. Shoulder’s a bit leaner, so keep an eye on it—it’ll still shred beautifully.

  • Skip the broil (if you must): It won’t be crispy, but if you’re in a hurry or your broiler’s wonky, it’s still juicy and satisfying.

  • No fresh citrus? Not ideal, but in a pinch, use a decent not-from-concentrate OJ and bottled lime juice. Go easy—taste and adjust.

  • Add sliced onions or jalapeños: Toss them in the slow cooker. You’ll get a sweet, spicy bite alongside all that pork.

  • Use this pork in tacos or sliders: It’s a great base for remixes. Hello little brioche buns, slaw, and happy hands.

  • Not a cilantro fan? No biggie. Fresh parsley or a tiny handful of green onions are a solid swap at serving time.

Slow Cooker Cuban Mojo Pork

What to Serve with Slow Cooker Cuban Mojo Pork

This pork doesn’t need a lot of fuss—just good company on the plate. That said, a few excellent pairings bring out its full shine.

  • A big scoop of white rice is never wrong. It soaks up all those bright, juicy drippings, and keeps each bite grounded. Add black beans and you’ve got a near-perfect bowl.

  • Crispy fried plantains or baked sweet potatoes give a sweet contrast to the pork’s zing. Also, the combination smells like vacation. You’ll thank yourself.

  • A bright, crunchy slaw—maybe cabbage, carrots, and a vinegar-based dressing—brings fresh crunch and balances the richness.

  • For a cozy plate, try it with garlicky roasted potatoes and green beans. It’s hearty but still sings with that citrusy marinade.

  • Want something light? A leafy salad with avocado, lime vinaigrette, and cotija or feta cheese plays really well here. And if dessert follows, even better. May I recommend these slightly outrageous Peanut Butter & Banana Ice Cream Sandwiches?

Slow Cooker Cuban Mojo Pork

Frequently Asked Questions

Can I use a different cut of pork for this recipe?

Yes, you can! Pork shoulder is a great substitute and behaves almost the same in the slow cooker. You’ll want a cut that’s well-marbled and suited for low-and-slow cooking. Pork loin, on the other hand, is too lean and might dry out. If that’s all you’ve got, keep an eye on it and shorten the cook time.

Do I need to marinate the pork overnight?

Technically, no—but emotionally, yes. Giving it 6–8 hours in the fridge really lets all those citrusy, garlicky flavors soak in deep. If time’s tight, even an hour on the counter as the slow cooker comes to room temp helps. But overnight is the sweet spot for mojo magic.

What should I do with leftovers?

Oh, the possibilities! Tuck leftovers into tacos, layer them on sandwiches, or toss into grain bowls with roasted veggies. You could even try them in pasta bakes, like this cozy Ham Tetrazzini riff (swapping in mojo pork, obviously). Don’t forget to drizzle extra juice when reheating to keep it moist!

What if I don’t have a slow cooker?

No slow cooker? No problem. You can use a Dutch oven or covered roasting pan in the oven at 300°F for about 3–4 hours, or until the pork is fork-tender. Just keep an eye on the liquid and add a bit more citrus or water if things get dry partway through.

Slow Cooker Cuban Mojo Pork

Slow Cooker Cuban Mojo Pork

Prep Time 20 minutes
Cook Time 8 hours
Slow Cooking Time 8 hours
Total Time 8 hours 20 minutes
Savory citrus, garlic warmth, and melt-in-your-mouth pork collide in this Slow Cooker Cuban Mojo Pork. Fresh orange and lime juices, oregano, cumin, and tender pork butt make your kitchen smell like a Havana backyard party. An easy, flavor-packed meal perfect for feeding a crowd or meal prepping for the week!
8 servings

Ingredients

For the Pork

  • 4-5 lb (1.8-2.3 kg) pork butt (Boston butt) roast untrimmed or lightly trimmed
  • 1 cup (240 ml) fresh orange juice from about 2–3 oranges
  • 1/3 cup (80 ml) fresh lime juice from about 3–4 limes
  • 1/4 cup (60 ml) extra-virgin olive oil
  • 8 cloves garlic crushed or minced, add extra for more flavor
  • zest of 2 (zest of 2 oranges) oranges
  • zest of 1 (zest of 1 lime) lime
  • 2 tsp dried oregano
  • 2 tsp ground cumin
  • 1 tsp red pepper flakes or more, to taste
  • 2 bay leaves
  • 2 tsp (10 g) kosher salt plus more to taste
  • 1 tsp fresh black pepper plus more to taste

For Serving

  • chopped cilantro for garnish

Equipment

  • Slow cooker
  • Roasting pan
  • Mixing bowl
  • Knife

Instructions
 

  1. Score the pork: Using a sharp knife, make shallow crisscross cuts on the fatty side of the pork butt to help the marinade penetrate.
  2. Prepare the marinade: In a large bowl, whisk together the orange juice, lime juice, olive oil, garlic, orange zest, lime zest, oregano, cumin, salt, black pepper, and red pepper flakes. Add the bay leaves.
  3. Coat the pork: Place the pork in the slow cooker, fat side up. Pour the marinade over the pork, turning to coat thoroughly. Ensure the fat side remains facing up so it bastes the pork while cooking.
  4. Marinate (optional): For best flavor, cover and refrigerate the whole slow cooker insert for 6–8 hours or overnight. If short on time, you can proceed to cooking.
  5. Cook: Cover and cook on LOW for 7–8 hours, or until the pork is fork-tender and shreds easily.
  6. Broil for crispy finish: Carefully transfer the cooked pork (fat side up) to a roasting pan. Broil for 4–5 minutes until the top is crisp and caramelized. Watch closely to prevent burning.
  7. Rest and shred: Let the pork rest for a few minutes, then shred with two forks. Toss shredded pork with a bit of the slow cooker juices.
  8. Serve: Top with chopped cilantro and enjoy warm, alongside rice, beans, or tucked into rolls or tacos.

Notes

For the best flavor, use fresh citrus juices and lots of garlic. Leftovers keep well refrigerated up to 4 days or frozen up to 2 months with some juices to keep the pork moist. Serve with rice, black beans, crispy plantains, slaws, or as taco or sandwich filling. Not a cilantro fan? Substitute with chopped parsley or green onions.

Nutrition

Calories: 370kcal | Carbohydrates: 5g | Protein: 37g | Fat: 22g | Saturated Fat: 7g | Cholesterol: 115mg | Sodium: 580mg | Potassium: 600mg | Fiber: 1g | Sugar: 2g | Vitamin A: 120IU | Vitamin C: 18mg | Calcium: 40mg | Iron: 2.5mg

Soft, rich, and swirled to cinnamon-sugar perfection, this cinnamon roll coffee cake brings together butter, brown sugar, and vanilla in every gooey bite. It smells like Saturday morning and tastes like a cozy hug in cake form.

There’s this delightful zone between a quick bake and a full-on elaborate brunch, and this cake lives right there. You get that classic cinnamon roll flavor—warm spices, soft crumb, buttery swirls—but with way less effort (no yeast, no rolling, no praying to the dough gods). It bakes up golden and friendly while filling your kitchen with the kind of aroma that makes everyone suspiciously wander in asking “Whatcha makin’?” Works for brunch, dessert, or just snacking at 3 PM with coffee when your emails start getting passive-aggressive.

Table of Contents

Cinnamon Roll Coffee Cake

Why You’ll Love this Cinnamon Roll Coffee Cake

No fancy intro needed here. This cake’s charm speaks for itself once you catch that cinnamon-butter scent wafting out of the oven.

  • Ridiculously simple to make: You just cream, mix, swirl, and bake. No yeast, no kneading, no patience required.
  • Tastes like cinnamon rolls without the effort: All that comforting, swirly goodness, minus the dough drama.
  • Great for sharing (or hoarding): Sliced up in a dish, it shines at brunch tables—or just quietly on your desk.
  • Stays soft and moist for days: Thanks to the milk and buttery batter, it doesn’t dry out fast.
  • Perfect canvas for your twists: Want raisins, pecans, chocolate chips? Toss ’em in, no sweat.

Cinnamon Roll Coffee Cake

Ingredient Notes

No shocking secret ingredients here, but each one plays a pretty specific role in the cake’s success. Let’s give them their moment.

  • Unsalted butter: You’ll use it twice—once creamed into the batter for richness and structure, and again melted for that cinnamon swirl magic.
  • Granulated sugar: This sweetens the base of the cake and helps it get that light golden crust.
  • Brown sugar: Adds depth and chewiness to the swirl—more molasses flavor than white sugar gives.
  • Eggs: These make the cake tender and help it rise and hold together. Room temp eggs work best here, by the way.
  • Vanilla extract: It gives warm, mellow sweetness and pulls everything together (use the real stuff, if possible).
  • All-purpose flour: Keeps it friendly and approachable texture-wise—soft but sturdy enough to hold those luscious cinnamon rivers.
  • Baking powder: Lots of it! Since we’re skipping yeast, this gives the rise we need.
  • Salt: Just a bit. Helps balance the sweetness and bolster flavor—don’t skip it.
  • Whole milk: Adds moisture and richness. Lower-fat milk works in a pinch, but the texture won’t be as plush.
  • Powdered sugar + milk (again!): This team brings the classic glaze drizzle. You control how thick or thin you want it.

Cinnamon Roll Coffee Cake

How To Make This Cinnamon Roll Coffee Cake

Okay, ready? Things move fast once you start, so maybe cue up your favorite playlist, tie on a cute apron (or your ugliest hoodie), and let’s bake.

  • Preheat and prep your pan: Start with a 350°F oven and a brushed or parchment-lined 9×13-inch pan. I like parchment because it makes release and cleanup blissfully easy.
  • Make the cake batter: Beat your softened butter and granulated sugar until fluffy—you want it to look pale and a little whipped. Add eggs, one at a time, then splash in vanilla.
  • Mix the dry stuff separately: Combine your flour, baking powder, and salt in another bowl. This keeps things light and evenly mixed.
  • Alternate dry and milk: Add the dry mixture to the butter mix, alternating with milk. Always begin and end with the dry. Mix until just combined (a few streaks are okay).
  • Spread that batter: Spoon it into the pan and give it a gentle spread to make it even. Resist packing it down—it’ll smooth out in the oven.
  • Swirl in the cinnamon layer: Stir together melted butter, brown sugar, flour, and cinnamon. Drop dollops over the batter, then swirl with a butter knife or skewer. Don’t overdo it—think marble, not tornado.
  • Bake it up: Toss it into the oven for 30 to 35 minutes, or until a toothpick poked in the center comes out clean (a few crumbs are okay—wet batter is not).
  • Drizzle the glaze: Once it’s out and a little cooler but still warm, whisk up your glaze and drizzle all over. Let it set just enough to firm up before slicing… or don’t and embrace the mess.

Cinnamon Roll Coffee Cake

Storage Options

I’ve got good news: cinnamon roll coffee cake keeps beautifully. Like, almost suspiciously well.

If you’ve got leftovers (which, honestly, what kind of willpower do you have?), just cover the pan with foil or transfer slices to an airtight container. It’ll hang out happily on your counter for about 2 days, and in the fridge for up to 5.

Wanna save some for the long haul? Absolutely, you can freeze this. Wrap cooled slices individually in plastic wrap and pop them into a freezer bag. They’ll be good for about 2–3 months. When you’re ready to eat, reheat in the microwave for about 15–30 seconds until warm and soft again—or use the oven if you’re feeling fancier.

One thing, though: if you know you’ll freeze some, wait to glaze those portions. The icing can get weirdly opaque and slightly flaky after a deep freeze. Add fresh glaze when thawing and reheating instead.

Variations and Substitutions

Once you nail down the base recipe, your options get wildly fun (and kinda endless). No wrong turns here—just different kinds of tasty.

  • Add chopped pecans or walnuts: Stir them into the swirl mix for some satisfying crunch and toasty flavor.
  • Use oat milk or almond milk: Need a dairy-free twist? These plant milks work smoothly, though the texture might be just a little lighter.
  • Try cardamom or nutmeg: Swapping or mixing spices with cinnamon can give the swirl an exotic twist. Cardamom especially makes things feel extra cozy.
  • Top with cream cheese drizzle instead: Whip up a tangy cream cheese glaze instead of the powdered sugar one for a richer vibe.
  • Add chopped apples or pears: Gently fold into the batter before baking for a sweet-tart autumn version that’s basically half coffee cake, half pie.

Cinnamon Roll Coffee Cake

What to Serve with Cinnamon Roll Coffee Cake

This cake’s pretty self-sufficient, but if you’re feeling extra (or hosting people you want to impress just a little), here’s how to round it out.

  • A big mug of coffee or chai is the classic choice. The cake’s sweetness melts beautifully with the slight bitterness of a strong brew, especially if it’s got cream and spice. Bonus points if your mug is chipped but well-loved.

  • Want to make it brunch-worthy? Pair it with eggs (scrambled, soft-boiled, you do you) and maybe something savory like bacon basil cornbread muffins. The salty balance makes the cake even better.

  • A glass of cold milk hits differently if you’re eating a warm, gooey square straight out of the oven. Sometimes you just want childhood nostalgia on a plate.

  • Fruit on the side—especially citrus or berries—adds freshness that cuts through the rich swirl. A little grapefruit or some strawberries can genuinely elevate this from snack to full scene.

  • Or go unhinged and do dessert-for-dessert: a warm square of this with a scoop of peanut butter & banana ice cream turns “coffee cake” into your new favorite sundae anchor.

Cinnamon Roll Coffee Cake

Frequently Asked Questions

Can I make this cinnamon roll coffee cake ahead of time?

Yup, you can absolutely make it a day or two in advance. After it cools, just cover the dish tightly and keep it at room temp or stash it in the fridge. The glaze may absorb a little if you keep it too long, but flavor-wise, it just gets better with time. You can even reheat slices in the microwave for that fresh-from-the-oven feel.

Is it possible to make a gluten-free version?

You can! Just swap the all-purpose flour for a 1:1 gluten-free baking blend that includes xanthan gum. Be sure to check your baking powder and other ingredients for sneaky gluten, too. The texture might be a bit more crumbly, but the cinnamon swirl still brings the magic.

What if I don’t have whole milk?

No stress. You can use 2%, skim, or even a milk alternative like oat milk or almond milk. Just know that the richer the milk, the softer and more tender the crumb. You could also add a spoonful of sour cream or yogurt for a little moisture boost if your milk is on the lighter side.

How do I know when the cake is done baking?

Check at the 30-minute mark by inserting a toothpick in the center—it should come out clean or with a few moist crumbs (not raw batter). The top should be golden, and if you lightly touch the center, it should spring back. Ovens vary, though, so don’t be afraid to give it an extra 5 minutes if needed.

Cinnamon Roll Coffee Cake

Cinnamon Roll Coffee Cake

Prep Time 15 minutes
Cook Time 35 minutes
Total Time 55 minutes
Soft, rich, and cinnamon-sugar swirled, this easy cinnamon roll coffee cake tastes like a cozy morning in a single bite. Buttery, fluffy, and warmly spiced—no yeast or kneading required. Perfect for brunch, dessert, or anytime snacking with coffee!
12 squares

Ingredients

Cake Batter

  • 1 cup (226 g) unsalted butter softened
  • 1 cup (200 g) granulated sugar
  • 2 large eggs room temperature
  • 2 tsp (10 ml) vanilla extract
  • 2 1/2 cups (313 g) all-purpose flour
  • 2 1/2 tsp (10 g) baking powder
  • 1/2 tsp (3 g) salt
  • 1 cup (240 ml) whole milk room temperature

Cinnamon Swirl

  • 1/2 cup (113 g) unsalted butter melted
  • 1 cup (200 g) brown sugar packed
  • 2 tbsp (16 g) all-purpose flour
  • 1 1/2 tbsp (12 g) ground cinnamon

Glaze

  • 1 cup (120 g) powdered sugar
  • 1-2 tbsp (15-30 ml) milk as needed for desired consistency

Equipment

  • 9x13-inch Baking Pan
  • Mixer (stand or hand)
  • Mixing bowls
  • Whisk
  • Spatula

Instructions
 

  1. Preheat the oven to 350°F (175°C). Grease or line a 9x13-inch pan with parchment paper for easy release.
  2. With a mixer, cream softened butter and granulated sugar together until fluffy and slightly pale, about 2-3 minutes.
  3. Add eggs one at a time, beating well after each. Beat in vanilla extract.
  4. In a separate bowl, whisk together the flour, baking powder, and salt.
  5. Add dry ingredients to the butter mixture in three parts, alternating with the milk (begin and end with dry). Mix just until smooth; don’t over-mix.
  6. Spread the batter evenly in the prepared pan (it will be thick).
  7. For the cinnamon swirl, stir together melted butter, brown sugar, flour, and cinnamon in a bowl until smooth and thick.
  8. Drop spoonfuls of the cinnamon mixture all over the cake batter. Use a butter knife or skewer to gently swirl the mixture throughout the cake—don’t over-mix; aim for a marbled effect.
  9. Bake for 30–35 minutes, or until a toothpick inserted in the center comes out clean or with a few moist crumbs (not wet batter).
  10. Let the cake cool for about 15 minutes. For the glaze, whisk powdered sugar with enough milk to make a thick but pourable icing. Drizzle over the still-warm cake. Let set slightly, then slice and serve.

Notes

Storage: Store covered at room temperature for up to 2 days, or refrigerate up to 5 days. For freezing, wrap cooled slices tightly and freeze up to 3 months. 
Variations: Add chopped pecans or walnuts to the swirl, stir in raisins, or swap in oat/almond milk for dairy-free. Try a cream cheese glaze for richer flavor. Fold in diced apples or pears for autumnal vibes.

Nutrition

Calories: 380kcal | Carbohydrates: 54g | Protein: 4g | Fat: 17g | Saturated Fat: 10g | Cholesterol: 62mg | Sodium: 170mg | Potassium: 110mg | Fiber: 1g | Sugar: 31g | Vitamin A: 510IU | Calcium: 80mg | Iron: 1.5mg

Sweet, creamy white chocolate meets a cozy swirl of whole milk in this pink hot chocolate made with sweetened condensed milk, white chocolate chips, and food coloring. Velvety, rich, and ridiculously cute, it’s like sipping a hug in a mug.

If you’ve ever wanted your drink to taste like a melted white chocolate truffle and look like pastel party magic, well, friend… you’re in the right kitchen.

You know that moment you want hot cocoa but also want to feel like a daydream from a vintage Valentine’s card? This is it. This pink hot chocolate is warm, rich, and softer than a baby alpaca’s forehead. You start with gently melted white chocolate and condensed milk (yes, it smells like a candy shop), blend in steamy whole milk, and tint it rosy with a bit of food coloring—stir slowly, admire the swirls. It’s fun in the way banana splits and confetti cake are fun. The flavor? Creamy, buttery sweet with just enough depth to feel soothing, not cloying.

Table of Contents

Pink Hot Chocolate

Why You’ll Love this Pink Hot Chocolate

Okay, so this isn’t your average cocoa. It’s white chocolate. It’s pink. And it comes topped with whipped cream and sprinkles.

  • Ridiculously simple to make: Toss ingredients in a pan, stir gently, and boom—Barbie-level beverage in ten minutes.
  • Customizable shade levels: Whether you want soft blush or “My Little Pony’s birthday,” you’re in control of the pink.
  • Creamy and indulgent: Thanks to the combo of whole milk and condensed milk, this is smooth, sweet, and ultra-cozy.
  • Perfect for parties or cozy nights in: Valentine’s, baby showers, random Tuesdays… all valid reasons to make it.
  • Crowd-wowing presentation: Whipped cream and heart sprinkles transform your mug into something you almost don’t want to sip. (Almost.)
  • Kid-approved and adult-sneaky: It’s adorable for kids, but feels like a secret treat for grown-ups too.

Pink Hot Chocolate

Ingredient Notes

Let’s talk ingredients—only a small handful here, but each brings its own magic to the mug.

  • Sweetened condensed milk: This acts like liquid gold. It sweetens and thickens, giving the cocoa a creamy, caramelly backbone.
  • White chocolate chips: Use a good brand if possible—the flavor really shines. They melt beautifully and add that rich, buttery base.
  • Whole milk: You want the full stuff here. It balances the sweetness and keeps the drink luscious but not cloying.
  • Red food coloring: A drop at a time! You control the vibe. Gel or liquid both work, but gel is more punchy.
  • Whipped cream (for topping): Optional, but… is it really? It adds cloud-like fluff and a milky balance to the cocoa richness.
  • Heart sprinkles (for garnish): Totally extra and entirely worth it. Makes it feel festive and photo-ready in seconds.

Pink Hot Chocolate

How To Make This Pink Hot Chocolate

This comes together so quickly, it might take longer to find your sprinkles than to make the drink.

  • Heat the condensed milk and white chocolate: In a medium saucepan over medium-low heat, stir them together until the chips melt fully. It’ll go from lumpy to glossy in a few minutes, and it smells amazing. Keep that heat low and steady.

  • Whisk in the whole milk: Slowly pour it in while whisking. This helps blend the thick, sweet base into a dreamy mixture. The whisk is key—gets everything smooth and silky without any weird lumps.

  • Heat until steamy (not boiling!): Turn up the heat just a notch and stir often. You want it hot and comforting, not bubbling over like a chocolate geyser.

  • Add food coloring: Pull it off the heat and stir in red food coloring, a little at a time. Start with one drop, stir, and keep going until it looks how you want. (The fun bit.)

  • Serve it up: Pour into mugs or mason jars, top with a hearty swirl of whipped cream, and hello, sprinkles! Now you’re living your best cozy life.

Pink Hot Chocolate

Storage Options

Leftover pink hot chocolate—if that miracle ever happens—can be saved. Just pour the rest into a glass jar or airtight container and pop it in the fridge. It’ll keep well for about 3 days.

To reheat, pour it into a saucepan over low heat and stir until warm. You could microwave it too (30–40 seconds, then stir, then another burst if needed), but stovetop gives you more control. Don’t let it boil or you’ll lose that silky texture.

Wondering “Wait, can I freeze this?” Technically, yes, but white chocolate has trust issues with freezing. The texture may split or get grainy. So unless you’re planning to turn it into a fancy frozen coffee cube situation (which… not a bad idea, honestly), I’d stick to refrigerating what you’ll use soon.

Variations and Substitutions

Want to tweak or fancy this up? Absolutely. It’s super flexible and fun to personalize.

  • Almond extract or vanilla: A tiny splash adds a warm, cozy complexity. Vanilla pairs naturally, but almond gives it a subtle bakery vibe.

  • Oat or almond milk instead of whole milk: Works great if you need it dairy-free (just use vegan white chocolate too). The flavor will shift slightly, but it’s lovely.

  • Add a touch of strawberry syrup: For a fruity twist (especially fun if you want it to taste a bit like a strawberry milkshake with a diploma).

  • Make it a mocha: Stir in a shot of espresso or some strong brewed coffee—hello, pink latte dreams.

  • Spice it up: A pinch of cinnamon or cardamom gives it a quietly exotic spin without taking it overboard.

Pink Hot Chocolate

What to Serve with Pink Hot Chocolate

Drinks deserve snacks too, right? Here are a few fun cozy pairings to go with your pink mug of joy.

  • If you’re feeling brunchy or just want something cheesy to counter all that sweet, try these warm, savory bacon basil cornbread muffins. They balance the richness beautifully and make the whole thing feel like a vibe.

  • A light sandwich plate, maybe with cucumber tea sandwiches or finger snacks, turns this into a cute dessert tea moment—even if it’s just Tuesday afternoon.

  • For full treat mode, pair with peanut butter & banana ice cream sandwiches. Cool, chewy, nostalgic… aka, you’ve got yourself a sugar dream.

  • Cookies always work. Shortbread, snickerdoodles, or even heart-shaped sugar cookies (you see where this is going). Something buttery and crisp alongside that frothy chocolate works wonders.

Pink Hot Chocolate

Frequently Asked Questions

Can I use white chocolate bars instead of chips?

Absolutely, just chop them fairly small so they melt evenly. Sometimes bars melt even more smoothly than chips, especially if you splurged on a nicer brand—go you. Measure by weight or just estimate close to 12 oz and you’re golden.

How do I make this without food coloring?

No worries! You’ll just end up with a creamy white hot chocolate instead, which is still dreamy and cozy. If you’re looking for a natural tint, try a teaspoon or two of beet juice or freeze-dried strawberry powder. Both give a subtle hue without weird flavors.

Can I make this ahead and reheat later?

Yep—you can make it earlier the same day or even the day before. Let it cool, stash it in the fridge, then slowly reheat in a saucepan. Stir frequently and don’t let it boil, so it stays smooth. Add whipped cream and sprinkles just before serving.

Is this super sweet?

It’s definitely in the treat zone—but not sickly sweet, thanks to the whole milk balancing out the condensed milk and chocolate. If you’re sensitive to sweetness, try using a little less condensed milk or even diluting with extra milk. Still creamy, just lighter on sugar.

Pink Hot Chocolate

Pink Hot Chocolate

Prep Time 5 minutes
Cook Time 10 minutes
Total Time 15 minutes
Sweet, creamy white chocolate meets a cozy swirl of whole milk in this pink hot chocolate made with sweetened condensed milk, white chocolate chips, and food coloring. Velvety, rich, and ridiculously cute, it’s like sipping a hug in a mug—a treat for both kids and grown-ups, perfect for cozy nights or festive gatherings.
4 mugs

Ingredients

Pink Hot Chocolate

  • 1 cup (315 ml) sweetened condensed milk
  • 12 oz (340 g) white chocolate chips use a good quality brand for best flavor
  • 4 cups (950 ml) whole milk
  • red food coloring start with 1-2 drops; adjust for desired pinkness

For Topping

  • whipped cream for serving (optional but recommended)
  • heart sprinkles for garnish; or any colorful sprinkles

Equipment

  • Medium saucepan
  • Whisk
  • Measuring cups and spoons

Instructions
 

  1. In a medium saucepan over medium-low heat, combine the sweetened condensed milk and white chocolate chips. Stir gently until the chips have fully melted and the mixture turns smooth and glossy.
  2. Gradually whisk in the whole milk, pouring slowly and whisking constantly, until fully mixed and silky-smooth.
  3. Continue heating until the mixture is steaming hot but not boiling. Stir frequently to prevent burning or sticking.
  4. Remove from heat and add red food coloring, starting with 1–2 drops; stir and add more as needed to reach your desired shade of pink.
  5. Pour hot chocolate into mugs. Top generously with whipped cream and sprinkle with heart sprinkles. Serve immediately and enjoy!

Notes

You can use chopped white chocolate bars instead of chips—just measure by weight. To make ahead, refrigerate and gently reheat on the stove (avoid boiling). For dairy-free, use vegan white chocolate and plant-based milk. Adjust food coloring for paler or more vibrant pink. Optional add-ins include a dash of vanilla or almond extract, a swirl of strawberry syrup, or even a shot of espresso for a pink mocha treat.

Nutrition

Calories: 510kcal | Carbohydrates: 58g | Protein: 11g | Fat: 27g | Saturated Fat: 17g | Cholesterol: 50mg | Sodium: 160mg | Potassium: 400mg | Sugar: 58g | Vitamin A: 400IU | Vitamin C: 2mg | Calcium: 340mg | Iron: 0.2mg

Buttery noodles, creamy cheese, sweet green peas, and savory ham come together in this cozy ham tetrazzini dish with spaghetti, mushrooms, and cheddar.

Cheesy, bubbly, and just slightly crisp on top, this ham tetrazzini is the kind of comfort food that wraps around you like a warm blanket.

Table of Contents

Baked Ham Tetrazzini

There’s something about a forkful of tender spaghetti wrapped in creamy sauce with hunks of salty ham and little bright bursts of peas that just feels like home. This baked ham tetrazzini has the coziness of a Sunday casserole but comes together on a Tuesday night with chilled-out ease. The thyme adds just enough herby depth, and the golden Parmesan crust (if you go for the broil finish, which… why not?) brings it all to life.

Serve it straight out of the skillet or baked to bubbling perfection in a dish. Either way, this one’s a weeknight soft pants kind of dinner, and I’m here for it.

Why You’ll Love this Ham Tetrazzini

This one doesn’t try too hard, but wow does it deliver. It’s as low-pressure as a can of peas and a leftover ham situation should be.

  • Ridiculously simple to make: You boil some noodles, stir a few things, and let the oven (or stovetop) do the magic.
  • Leftover ham MVP: This is where that holiday ham shines again, in melty-cheesy glory.
  • Cheese lovers, unite: That cheddar melts right into the sauce, and the Parmesan on top? Optional but highly encouraged.
  • Crowd-friendly (but not fussy): Scoop it onto plates or let folks dig into the baking dish. No judgment.
  • Customizable as heck: Got broccoli instead of peas? You’re the boss now.

Baked Ham Tetrazzini

Ingredient Notes

No weird stuff here—just pantry pals and fridge friends coming together like a potluck at your favorite aunt’s.

  • Spaghetti: Classic, cozy, and perfect at holding onto sauce. But feel free to swap in linguine or fettuccine if that’s what’s rattling around in your pantry.
  • Butter: Adds richness and helps build a creamy, velvety base for the sauce. Don’t skimp, it’s worth it.
  • Onion and mushrooms: These bring that deep, savory warmth that makes the whole thing feel a little more grown-up.
  • Garlic: Three cloves, because we’re not animals. It makes the kitchen smell like you know what you’re doing.
  • Flour: This is what thickens the sauce—it turns butter into a roux, which sounds fancy but is essentially just stirring.
  • Whole milk and chicken broth: A one-two punch of creaminess and flavor. Broth lightens it up just a bit so it’s not overly heavy.
  • Dried thyme: Don’t overdo it, but a touch really carries that cozy winter vibe.
  • Cheddar cheese: Melty and sharp, it gives the dish that comforting, slightly indulgent kick.
  • Diced ham: Briny, hearty, and perfect for soaking up all that cheesy goodness.
  • Frozen peas: Tiny green gems that add sweetness and a bit of texture pop. Just thaw ’em first.
  • Salt and pepper: Taste often and season with your heart (and a spoon).
  • Parmesan cheese (optional): For that golden-bubbly broiled top we all sneak spoonfuls from.
  • Fresh parsley (optional): Scattered over the top, it adds a little herbaceous brightness (and makes it look vaguely professional).

Baked Ham Tetrazzini

How To Make This Ham Tetrazzini

We’re basically making a cheesy sauce party and inviting spaghetti, ham, and peas to the celebration. It’s chill, and you can’t mess it up.

  • Cook the spaghetti: Bring that water to a bubbly boil, salt it generously (like “salty as the sea” kind of generous), and cook your spaghetti just until al dente. Drain and set it aside. If you’re nervous about the sauce tightening up too much, save half a cup of the pasta water, just in case.

  • Sauté the veggies: Melt 2 tablespoons of butter in a big skillet and toss in your onion and mushrooms. Cook them down for about 5–6 minutes until they’re soft and smell good enough to eat on their own (though don’t, they’re not done yet). Add garlic and cook just one minute more, until your kitchen smells amazing.

  • Make the roux: Add that last tablespoon of butter and sprinkle in the flour. Stir constantly for 1–2 minutes. It should look like a paste and smell a bit nutty—that’s the good stuff.

  • Add liquids and season: Slowly whisk in the milk and broth, making sure things stay smooth. Dump too fast and you’ll get lumpy regrets. Stir in the thyme and cook gently until the sauce thiccens (you know, creamy but still pourable). Usually takes 3–4 minutes.

  • Melt in the cheese: Turn the heat down low and stir in the shredded cheddar until it’s all melty, dreamy, and unified. Then fold in the ham and thawed peas. Season with salt and pepper until it tastes well-balanced and just-right.

  • Combine with spaghetti: Add the cooked noodles and gently toss to coat everything in that velvety, cheesy goodness. Do a little noodle dance—it helps.

  • Optional broil finish: If you’re feeling fancy (or like cheese crusts), transfer everything to a greased baking dish. Shower it with Parmesan and stick it under the broiler for 2–3 minutes until deeply golden and bubbling.

  • Serve and soak in the praise: Dish it up warm with a flutter of chopped parsley, if you like that sort of thing.

Baked Ham Tetrazzini

Storage Options

Okay, so you made a giant skillet’s worth, and now your fridge is giving you judgy looks. But good news: this ham tetrazzini is an absolute champ in the leftover department.

Once it’s cooled down a bit (we’re talking warm but not steaming), transfer it into an airtight container. It’ll keep in the fridge for about 3 to 4 days. When you’re ready to reheat, you can microwave individual portions, or warm the whole thing in a 350°F oven until it’s heated through. Add a splash of milk or broth if it feels dry—the pasta tends to soak up sauce as it chills.

Now, can you freeze it? Yep. Let it cool completely, then wrap it up tight (double-layered foil and plastic wrap if you’re not messing around). It’ll keep in the freezer for up to 2 months. Thaw in the fridge overnight, then reheat like above. It might lose a little creaminess, but honestly, it still tastes like comfort.

Variations and Substitutions

You know the vibe: use what you’ve got. This recipe forgives almost everything except an empty cheese drawer.

  • Pasta shape: Swap spaghetti out for penne, rotini, or even egg noodles. Anything with ridges will hug the sauce beautifully.
  • Different cheese: Not into cheddar? Go with Gruyère, Swiss, mozzarella, or a combo. Just make sure it melts well and fits your flavor goals.
  • Vegetable swap: Broccoli, chopped spinach, or even diced bell peppers would all be happy in this creamy setup.
  • Ham stand-ins: Leftover turkey (hi Thanksgiving survivors), rotisserie chicken, or even sautéed mushrooms if you’re going meatless.
  • Gluten-free option: Use rice noodles or GF spaghetti and sub in your favorite all-purpose gluten-free flour. Easy.
  • Spice it up: Like a little heat? A pinch of red pepper flakes or a spoonful of Dijon mustard stirred into the sauce gives a sneaky little lift.

Baked Ham Tetrazzini

What to Serve with Ham Tetrazzini

Okay, it’s creamy. It’s carby. It’s got veggies in it. But if you’re looking to round things out, here are a few ideas that play nice.

  • If you’re into contrasts, try a crisp green salad with a zippy vinaigrette. The freshness cuts through the richness and makes you feel like you’re living your best balanced-life fantasy.
  • Toasty garlic bread or bacon basil cornbread muffins? Carbs on carbs, but sometimes that’s exactly the kind of day it is.
  • Go full cozy mode and sip something warm—maybe a light broth-based soup or even just hot tea. They play a good background role here.
  • Need something bright for dessert? These peanut butter & banana ice cream sandwiches might just be the satisfying, slightly nostalgic bite to close it out.

Baked Ham Tetrazzini

Frequently Asked Questions

Can I make this ahead of time?

Yes, absolutely. You can assemble the whole tetrazzini up to a day ahead. Just cover it tightly and refrigerate. When you’re ready to eat, pull it out while the oven preheats (so it’s not ice cold straight from the fridge), then bake until hot and bubbly. You might need to add 5–10 extra minutes to the time if it’s coming out cold.

What type of ham works best in this recipe?

Any fully cooked ham works here—leftover spiral ham, deli ham cut thick, or even a ham steak you’ve diced up yourself. If your ham is smoky or glazed, even better; it adds depth to the final dish. Just be sure it’s diced small enough to spread joy in every bite.

Can I skip the baking and serve straight from the stovetop?

Totally. If you’re in a hurry (or just like your cheese molten, not crispy), serve it straight out of the skillet once everything’s hot and well mixed. The broil step just gives it that golden crown and a little extra texture, but it’s by no means mandatory.

How can I make this dish a little lighter?

You can use reduced-fat cheese and milk, skip the Parmesan topping, and load up on extra vegetables like spinach or mushrooms. Using whole-wheat pasta or legume-based noodles adds a nutty chew and extra fiber too—so you feel a little virtuous while still enjoying that creamy comfort.

Baked Ham Tetrazzini

Baked Ham Tetrazzini

Prep Time 15 minutes
Cook Time 30 minutes
Total Time 45 minutes
Buttery noodles, creamy cheese, sweet green peas, and savory ham come together in this cozy baked ham tetrazzini with spaghetti, mushrooms, and cheddar. Bubbly, creamy, and slightly crisp on top—this is weeknight comfort food that wraps around you like a warm blanket.
6 servings

Ingredients

Pasta and Sauce

  • 12 oz (340 g) spaghetti uncooked
  • 3 tbsp (42 g) unsalted butter divided
  • 1 yellow onion small, diced
  • 8 oz (225 g) cremini mushrooms sliced (or white button mushrooms)
  • 3 cloves garlic minced
  • 3 tbsp (24 g) all-purpose flour
  • 2 cups (475 ml) whole milk
  • 1 cup (240 ml) chicken broth preferably low-sodium
  • 1 tsp dried thyme
  • 2 cups (170 g) shredded sharp cheddar cheese
  • 2 cups (250 g) diced cooked ham
  • 1 cup (140 g) frozen green peas thawed
  • kosher salt to taste
  • black pepper to taste

Topping (Optional)

  • 1/3 cup (30 g) finely grated Parmesan cheese for broiling
  • fresh parsley chopped, for garnish

Equipment

  • Large skillet
  • Large pot
  • Baking Dish
  • wooden spoon
  • Colander

Instructions
 

  1. Bring a large pot of salted water to a boil. Cook the spaghetti until just al dente. Reserve 1/2 cup of pasta water (optional), then drain and set aside.
  2. In a large skillet over medium heat, melt 2 tablespoons of butter. Add onion and mushrooms, and sauté for about 5–6 minutes, until softened. Stir in the garlic and cook for 1 minute more, just until fragrant.
  3. Add the remaining 1 tablespoon butter to the pan. Once melted, sprinkle in the flour. Stir constantly for 1–2 minutes until a golden paste forms.
  4. Gradually whisk in the milk and then the chicken broth, ensuring the mixture stays smooth. Stir in thyme. Simmer for 3–4 minutes, stirring, until the sauce thickens but is still pourable.
  5. Turn heat to low. Add shredded cheddar cheese and stir until fully melted and the sauce is creamy. Fold in the diced ham and thawed peas. Season generously with salt and black pepper, tasting as you go.
  6. Add the cooked spaghetti to the pan and gently toss until evenly coated in sauce. If the mixture seems too thick, add a splash of reserved pasta water to loosen.
  7. If desired, transfer to a greased 9x13-inch baking dish. Sprinkle Parmesan evenly on top. Broil for 2–3 minutes or until bubbly, golden, and crisp at the edges.
  8. Let rest for 5 minutes, then sprinkle with fresh parsley. Serve warm, straight from the skillet or baking dish.

Notes

This recipe is endlessly customizable: swap peas for broccoli, use a different pasta shape, or try turkey or chicken instead of ham. To make ahead, assemble up to a day in advance and refrigerate. Bake until hot and bubbly, adding 5–10 minutes to the bake time if cold.
For leftovers, store in an airtight container in the fridge for 3–4 days. To reheat, add a splash of milk or broth if needed.

Nutrition

Calories: 510kcal | Carbohydrates: 48g | Protein: 28g | Fat: 22g | Saturated Fat: 12g | Cholesterol: 75mg | Sodium: 820mg | Potassium: 538mg | Fiber: 3g | Sugar: 6g | Vitamin A: 570IU | Vitamin C: 7mg | Calcium: 320mg | Iron: 2.5mg

Let's Get Cooking!

100+ Recipes for Busy Nights

In a time crunch? Take a look around and browse plenty of recipes to help you get dinner ready and on the table on those busy nights!

Sweet Recipes

Pumpkin Banana Muffins

Pumpkin Banana Muffins Recipe

Strawberry Pie Bars

Strawberry Pie Bars Easy Oven Recipe

White Chocolate Raspberry Muffins

White Chocolate Raspberry Muffins Recipe

Snickerdoodle Muffins

Snickerdoodle Muffins Recipe for Oven

PIN NOW

Follow KitchenetteBlog on Pinterest

Love cozy recipes that actually make it to the table? On Pinterest, I share new comfort-food ideas every week—desserts, dinners, and those little snack cravings that hit at midnight. Come pin with me and never run out of kitchen inspo.

Savory Recipes

Turkey Tetrazzini

Turkey Tetrazzini Baked Pasta Recipe

Grilled Chicken Panini Sandwich

Grilled Chicken Panini Sandwich Recipe

Sweet Potato Cornbread

Sweet Potato Cornbread Recipe Oven Baked

Classic Waldorf Salad

Waldorf Salad Simple Classic Recipe

Get 5 Recipes to Simplify Your Life!

Delicious, versatile recipes you can make over and over.