Get 5 recipes to simplify your life:

easy, delicious, real food recipes

Latest Recipes

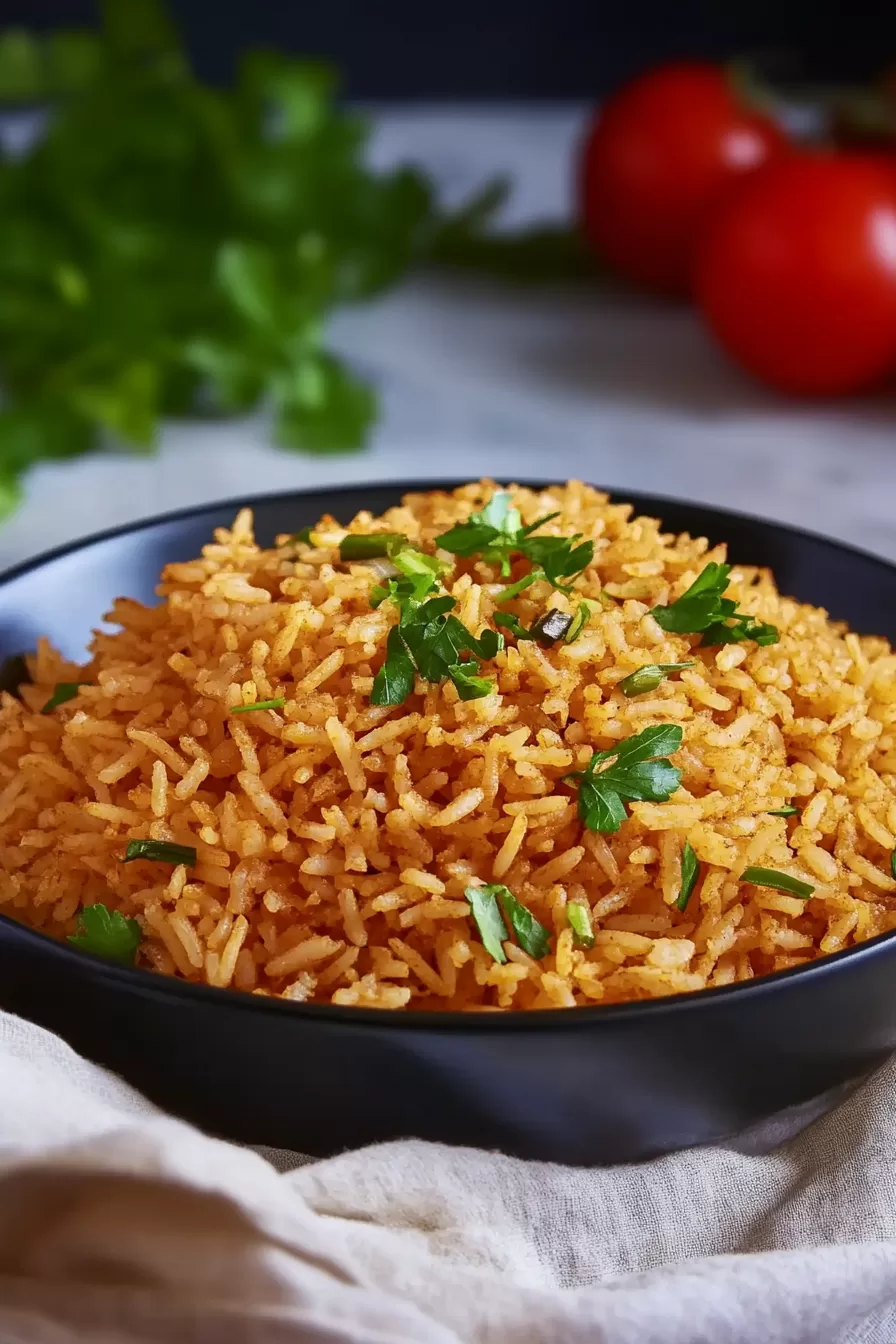
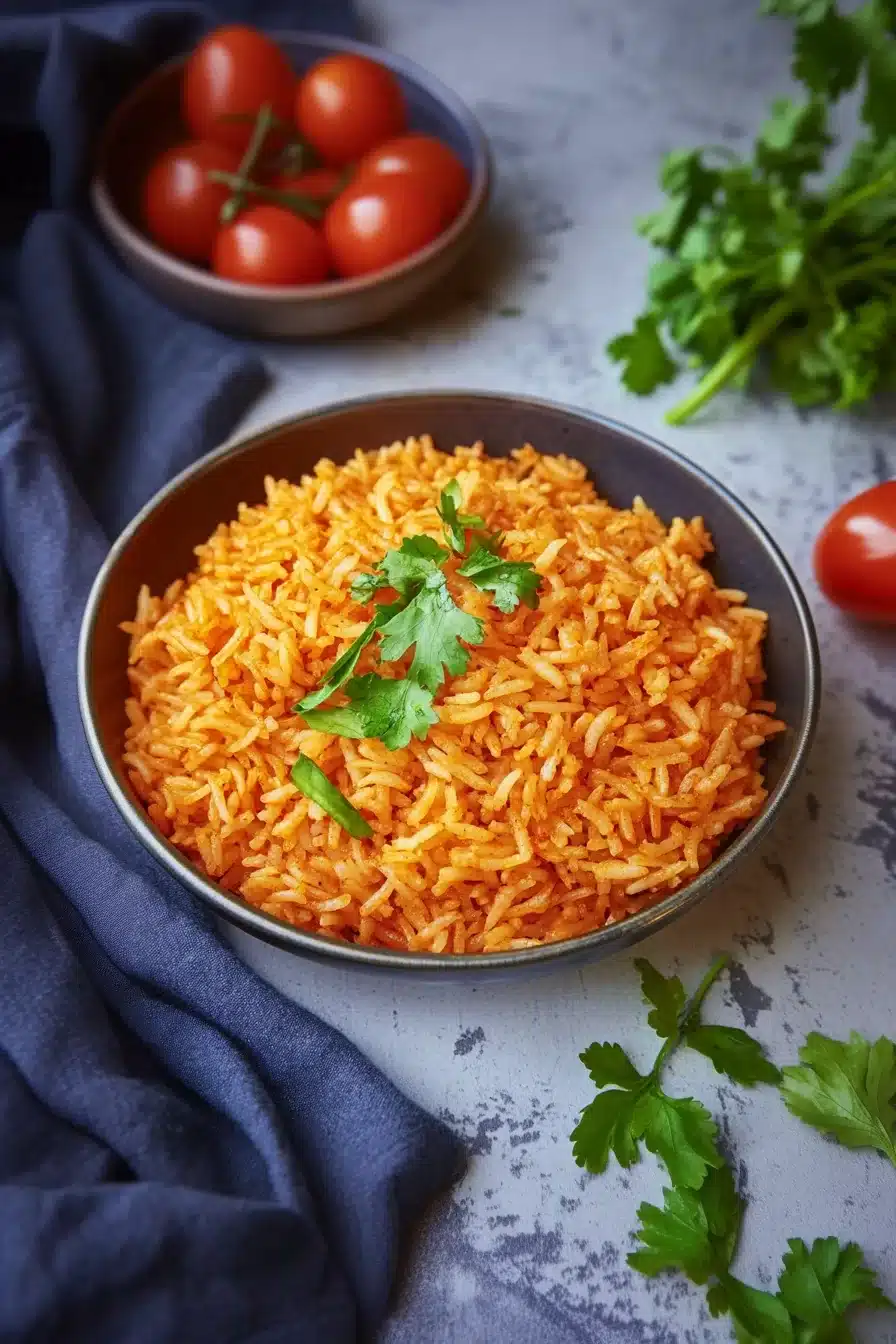
Buttery, savory, and just the right touch of heat—this Texas Roadhouse seasoned rice brings together butter, long-grain rice, onions, and a cozy blend of spices. It’s warm, fragrant, and ridiculously satisfying.

This seasoned rice has that golden, slightly toasty edge that makes it feel a bit more special than your average side. The paprika smells smoky and rich as it cooks, and the butter… oh, the butter makes everything silky. It’s the kind of rice that doesn’t just sit on the plate quietly next to your main dish. It speaks up. Whether it’s a Tuesday with rotisserie chicken or a grill-out Saturday with seared salmon, this one fits right in—and maybe even steals the show.

Table of Contents

Texas Roadhouse–Style Seasoned Rice

Why You’ll Love this Texas Roadhouse Seasoned Rice

Let’s be honest, plain rice sometimes feels like that shy guest at the party. But not this one! This rice shows up with flavor, shimmying in with paprika, garlic, and a whisper of heat.

  • Ridiculously simple to make: You sauté, stir, and simmer. No fuss, no fancy steps—just cozy stovetop vibes.
  • Cozy, buttery aroma: That hit of melting butter and toasting rice will have everyone peeking into your kitchen.
  • Pairs with basically everything: Chicken? Sure. Fish? Yep. Or just spoon it straight from the pot. No judgment.
  • Customize it endlessly: Toss in veggies, chopped herbs, even shrimp if you’re feeling saucy.
  • Holds up for leftovers: It reheats beautifully, which means tomorrow-you is already winning.

Texas Roadhouse–Style Seasoned Rice

Ingredient Notes

There’s nothing sneaky going on here. Just bold pantry basics doing their flavorful thing.

  • Butter: This is where the magic starts. It gives everything a silky texture and nutty aroma as it browns slightly.
  • Long-grain white rice: Rinsed well to get rid of excess starch. It cooks up fluffy with just a hint of chew.
  • Yellow onion: Adds sweetness and depth. Dice it fine for even cooking.
  • Paprika: Smoky or sweet, either works! It gives that signature warm color and mellow spice.
  • Dried parsley: Don’t skip it—it brings a fresh, earthy whisper. You can toss in fresh at the end for bonus pop.
  • Garlic powder: Adds savoriness without overpowering. Think of it as rice’s favorite seasoning.
  • Crushed red pepper: Just enough for gentle heat. You can tame or boost it to your liking.
  • Chicken stock (or veggie): The liquid gold that infuses flavor into every grain. Use low-sodium so you stay in control.

Texas Roadhouse–Style Seasoned Rice

How To Make This Texas Roadhouse Seasoned Rice

Let’s do this. Grab a saucepan, your favorite spoon, and maybe that playlist you forgot about from 2013. This rice basically cooks itself once you get it started.

  • Melt the butter: In a large saucepan over medium-high heat, melt all that glorious butter. Give the pan a swirl and wait until it smells nutty—but don’t let it brown too much unless you’re aiming for extra toasty vibes.

  • Toast the rice: Add the rinsed rice right into the butter. Stir constantly for 5 to 7 minutes. You’ll see it turn a little golden and start to smell kind of popcorn-y. That’s what we want.

  • Spice it up: Toss in the diced onion, paprika, garlic powder, parsley, and crushed red pepper. Keep stirring so everything mingles. At this point, it’ll smell like you ordered takeout from somewhere (but better).

  • Add stock and simmer: Pour in the chicken stock, stir, and bring it to a quick boil. As soon as it hits a gentle bubble, drop the heat to low, slap on a lid, and let it do its thing for 25 to 30 minutes.

  • Fluff and serve: When the liquid’s mostly gone and the rice is tender, turn off the heat and let it sit for a few minutes with the lid on. Fluff with a fork and sprinkle with fresh parsley if you’re feeling a little fancy.

Texas Roadhouse–Style Seasoned Rice

Storage Options

So you’ve got leftovers (or you made a double batch—clever you). Let’s talk about keeping them happy.

Once it’s cool, pop the rice into an airtight container and store it in the fridge. It’ll keep for up to 4 days. Just be sure to give it a sniff after day three, especially if your fridge plays mystery odor games.

Freezer? Yep, this rice freezes just fine. Let it cool completely, then seal portions in freezer-safe bags or containers. Try to press out the air if you can. It’ll hold for about 2 months, though I rarely let it live that long.

To reheat, the microwave is your friend. Just sprinkle a splash of water over the rice and cover it loosely so it steams back to life, not dryness. You can also reheat on the stove with a dash of broth. Oh, and if it clumps a bit? That’s normal. A quick fork fluff will fix it.

Variations and Substitutions

Got a spice rack begging for attention? Or maybe you’re craving something a little different today? Let’s play with it.

  • Veggie stock option: If you’re skipping meat, use vegetable stock instead of chicken. It still gives a nice savory backbone but keeps things plant-forward.
  • Add veggies: Stir in frozen peas, corn, or sautéed bell peppers with the onion for a bit of color and crunch.
  • Use brown rice: You’ll need to adjust the cook time (closer to 45–50 minutes), but it brings nuttier flavor and extra fiber.
  • Make it citrusy: Stir in a squeeze of lemon or lime juice just before serving if you want a little zing. Add zest if you’re feeling high-energy.
  • Leave out the heat: If spice isn’t your style, skip the red pepper. Or sub in smoked paprika for flavor without the fire.
  • Toss in protein: Chopped chicken, pan-fried tofu, or even shrimp can turn this side into a full-on meal.

Texas Roadhouse–Style Seasoned Rice

What to Serve with Texas Roadhouse Seasoned Rice

This seasoned rice doesn’t ask for much. It’s perfectly content being the MVP sidekick. But when paired just right? Oh boy.

  • If you’re doing grilled meats or pan-seared wonders, this rice is magic next to them. Something like a pan-seared cod brings a clean, flaky contrast that’s hard to beat.

  • Roasted veggies also do that thing where they look earthy and smell incredible. Toss some broccoli, carrots, or zucchini in the oven with olive oil and garlic. Pile it next to this rice and call it dinner.

  • Try it with skewers or kabobs—especially anything with a smoky or spicy twist. Chicken, beef, or even veggie skewers love a rice bed like this. Give everything a quick brush of glaze, and you’ve got a summer-y plate no matter the season.

  • Think about generous saucey mains like braised short ribs or curry tofu. This rice holds up and soaks up all the juice without turning to mush.

  • For a fun little contrast, serve it alongside something like bacon basil cornbread muffins. Sweet-salty, crumbly rice-and-cornbread heaven.

Texas Roadhouse–Style Seasoned Rice

Frequently Asked Questions

Can I make this rice in advance?

Totally. You can cook it a day or two ahead, let it cool completely, then store it in the fridge. When you’re ready to serve, just reheat gently. A splash of water or broth helps re-fluff it. I even think it tastes better the next day—like the flavors had a sleepover and got closer overnight.

What’s the best rice to use for this recipe?

I stick with long-grain white rice because it stays fluffy and separate once cooked, which works best here. Short grain gets stickier, and jasmine or basmati could work too if you like those slightly perfumey vibes. Just don’t use instant—it won’t hold up to the toasting step.

Can I use oil instead of butter?

You can, yes—but the buttery flavor is kind of the soul of this dish. If you do swap it, go for a neutral oil or olive oil. It’ll still taste good, but you might miss that richer, slightly nutty background flavor that butter brings to the party. A mix of butter and oil is also fair game.

Is this rice spicy?

It’s got a subtle kick, thanks to the crushed red pepper. Nothing wild. If you’re spice-sensitive or cooking for kids, you can leave that out or reduce it. Want more heat? Add a dash of cayenne or a few dabs of hot sauce when serving. Customizable heat for the win.

Texas Roadhouse–Style Seasoned Rice

Texas Roadhouse–Style Seasoned Rice

Prep Time 5 minutes
Cook Time 30 minutes
Total Time 35 minutes
Buttery, savory, and just the right touch of heat—this Texas Roadhouse–Style Seasoned Rice combines fluffy long-grain rice, onions, rich butter, and a cozy blend of spices. With a smoky kick from paprika and a gentle pop of red pepper, every bite is packed with flavor and perfect alongside just about any main.
6 servings

Ingredients

Main Ingredients

  • 1/4 cup (60 g) unsalted butter
  • 2 cups (400 g) long-grain white rice rinsed well
  • 1 yellow onion finely diced (about 1 cup)
  • 2 1/2 cups (600 ml) chicken stock or low-sodium vegetable broth

Spices & Seasonings

  • 2 tsp paprika smoked or sweet
  • 2 tsp dried parsley
  • 1 tsp garlic powder
  • 1/2 tsp (0.5 tsp) crushed red pepper flakes more or less to taste
  • 1 tsp kosher salt plus more to taste
  • 1/2 tsp (0.5 tsp) black pepper freshly ground

Optional for serving

  • fresh parsley chopped, for garnish

Equipment

  • Large saucepan
  • Cutting board
  • Chef’s knife
  • Measuring cups and spoons
  • Wooden spoon or spatula

Instructions
 

  1. Melt the butter in a large saucepan over medium-high heat. Swirl the pan until the butter smells nutty, but don’t let it brown.
  2. Add the rinsed rice to the pan. Stir constantly for 5–7 minutes, or until the rice turns lightly golden and smells toasty.
  3. Add the diced onion, paprika, dried parsley, garlic powder, crushed red pepper, salt, and black pepper. Stir for another 1–2 minutes until the onion softens and everything is fragrant.
  4. Pour in the chicken stock. Stir, bring to a gentle boil, then reduce the heat to low. Cover with a lid and simmer for 25–30 minutes, or until the liquid is mostly absorbed and the rice is tender.
  5. Turn off the heat. Let the rice rest, covered, for 5 minutes. Fluff with a fork and garnish with fresh parsley if desired. Serve warm.

Notes

This Texas Roadhouse–style rice stands up well to hearty mains and works with veggies, seafood, or even as a base for stir-fries. For a meatless version, substitute vegetable broth. Add other vegetables or protein, or finish with a squeeze of lemon for a citrusy twist.
Leftovers keep in the fridge for 4 days or can be frozen up to 2 months. Reheat with a splash of broth or water to restore moisture.

Nutrition

Calories: 245kcal | Carbohydrates: 42g | Protein: 4g | Fat: 7g | Saturated Fat: 4g | Cholesterol: 15mg | Sodium: 480mg | Potassium: 105mg | Fiber: 1g | Sugar: 1g | Vitamin A: 580IU | Vitamin C: 2mg | Calcium: 18mg | Iron: 1.2mg

Butter, garlic, rice, and soy sauce come together in this cozy, sizzling Benihana fried rice knockoff. Savory, buttery, and loaded with texture.

If you’ve ever sat at one of those big hibachi tables, watching a chef flip a shrimp into his pocket (I still don’t know how they do that), you know that Benihana fried rice is honestly half the reason you’re there. That buttery garlic aroma? Dangerously good. This copycat version ditches the show theatrics and gets straight to the part where your whole kitchen starts smelling like you’re five minutes from a table-side volcano onion stack. It’s fast, carby, and wildly satisfying—exactly the kind of thing I love to throw together after a long day. Maybe with a lazy fried egg on top, if I’m feeling fancy.

Table of Contents

Copycat Benihana Fried Rice

Why You’ll Love this Benihana Fried Rice

This recipe is all about buttery garlic bliss, crispy rice bits, and a big pan of sizzle. No wok tossing skills required (unless you’re into that).

  • Buttery garlic magic: That homemade garlic butter hits you with huge flavor even before it hits the pan.
  • Satisfying texture plays: You get soft scrambled egg, crispy rice edges, and tender-crunchy veggies all in one bite.
  • No hibachi grill? No problem: A regular skillet gets the job done beautifully—no onion volcano required.
  • Great for leftovers: In fact, you literally want cold, day-old rice for this. It fries way better.
  • Customizable for your mood: Add chicken, shrimp, or just extra scallions and pretend that counts as healthy.
  • Unapologetically carby: Let’s not pretend we’re here for a salad. This is comfort in a bowl.

Copycat Benihana Fried Rice

Ingredient Notes

You don’t need anything fancy, but a few quirks make this taste just right. Here’s the lowdown on the major players:

  • Butter: This is where the flavor party starts. Use unsalted so you can control how salty your final rice gets.
  • Garlic (lots of it): The recipe calls for garlic twice and there’s a reason. Half goes into the butter, the rest joins the veggies for an aromatic wallop.
  • Soy sauce: Just enough for a savory base. Taste as you go—some soy sauces are saltier than others.
  • Neutral oil: Use something with a high smoke point like vegetable or canola. Save the olive oil for another day.
  • Eggs: Soft scrambled is key. You want them fluffy, not rubbery. Pull them out before they’re totally set—trust the process.
  • Carrots and onions: Classic crunchy duo. Dice them small so they soften quick and don’t overwhelm the rice.
  • Scallions: Stir them in at the end for that hit of sharp freshness.
  • Cold, cooked rice: Day-old rice is the golden rule. It’s dry, firm, and ready to soak up all the flavor without turning to mush.
  • Sesame oil: A little splash at the end unlocks that final whiff of toasty depth. Don’t skip it.

Copycat Benihana Fried Rice

How To Make This Benihana Fried Rice

You’re basically building layers of flavor and texture—and honestly, it’s pretty fun. You only need one pan and fifteen-ish minutes.

  • Make the garlic butter: In a bowl, beat softened butter with minced garlic until it looks creamy and fluffy. Stir in soy sauce. That’s it. Wrap it up and stash it in the fridge while you deal with the rest.

  • Scramble the eggs: Heat half a tablespoon of oil in your biggest skillet or wok over medium heat. Pour in the beaten eggs and stir constantly until they’re just set and slightly glossy. Don’t worry if they’re underdone—they’ll cook a little more later. Transfer them to a plate.

  • Sauté the veggies: Crank the heat to high. Add the rest of the oil, then toss in the diced carrots and onions. Stir constantly, let them soften and get a little caramelized. This takes around 5 to 7 minutes. Once they’re tender, add scallions and remaining garlic and stir for about 30 seconds—it’ll smell amazing.

  • Add the rice: Break up the cold rice with your hands if needed. Add it to the pan, and gently toss it with the veggies so everything combines. Let it sizzle for a couple minutes; you want some crispy bits, trust me.

  • Butter it up: Dollop in half of your garlic butter. Stir until shiny and fragrant. Taste! Add more garlic butter if you want (I always do). You’re the boss of your own buttery destiny.

  • Finish and serve: Toss the eggs back into the pan along with soy sauce and that final swoop of sesame oil. Mix gently, then serve immediately and pat yourself on the back.

Copycat Benihana Fried Rice

Storage Options

Got leftover fried rice? First of all, nice restraint. It keeps well!

Pop it in an airtight container and stash it in the fridge for up to 4 days. I recommend reheating it in a skillet over medium heat with a tiny splash of water or oil—it revives the rice without drying it out. The microwave works too, especially if you’re starving, but you’ll miss out on those crispy edges.

And yes, you can absolutely freeze it. Fried rice freezes surprisingly well. Spread it out on a baking sheet, freeze until firm, then transfer to a bag or container. It keeps for about a month. Reheat from frozen or let it thaw in the fridge overnight before warming it up.

Oh, and if you’ve already mixed in shrimp or meat, just check that those are still good when reheating. Safety first!

Variations and Substitutions

This base recipe is pretty flexible, so feel free to riff depending on what your fridge looks like today.

  • Add meat or tofu: Toss in diced chicken, shrimp, tofu, or even bacon for extra protein. Just pre-cook them before adding to the pan.

  • More veggies please: Peas, corn, zucchini, or even finely chopped bell peppers work well. Keep the pieces small so they cook fast.

  • Spice it up: A dash of sriracha, chili oil, or even red pepper flakes can add a fun kick if you like a little heat.

  • Make it vegan: Use plant-based butter, skip the eggs, and make sure your soy sauce is vegan-friendly (some aren’t, oddly).

  • Swap the rice: Try it with jasmine, basmati, or even a mix of cooked brown rice and quinoa. Anything a day old and dry-ish works.

Copycat Benihana Fried Rice

What to Serve with Benihana Fried Rice

This rice is a meal on its own, but it also loves company. Whether you’re going for a full-on teppanyaki spread or just rounding things out, here are a few ideas:

  • A crisp protein like pan-seared cod is a nice contrast to the richness of the rice. It keeps things balanced and feels just a little fancy, which I like.

  • Steamed or stir-fried greens with a bit of garlic and soy sauce add freshness and cut the butter nicely. Bok choy, spinach, or kale are all good fits.

  • Miso soup is a classic pairing for a reason—it’s warm, savory, and gently offsets the hearty rice without overwhelming it.

  • Pickled cucumbers or radishes bring zing and crunch. You can do a quick pickle with vinegar and sugar in under 10 minutes.

  • And for dessert? Go a little playful with these peanut butter banana ice cream sandwiches. Trust me, it works.

Copycat Benihana Fried Rice

Frequently Asked Questions

Can I use freshly cooked rice instead of day-old?

Technically yes, you can, but it’s a bit of a gamble. Fresh rice is still moist and steamy and can go mushy when you fry it. If you’re in a rush, spread the hot rice out on a parchment-lined baking sheet and let it cool completely—stick it in the fridge for 30 minutes to dry out a bit if you can. But honestly, day-old rice gives you the best texture every time.

What kind of rice works best for this recipe?

I love using medium or long grain white rice, like jasmine or plain white rice. It holds its shape well and gets a little crispy when fried. Short grain rice tends to clump, and brown rice works, but it’s a bit chewier and doesn’t crisp quite as well. Use what you have, but avoid sticky sushi-style rice.

How do I keep the rice from sticking to the pan?

First, make sure the rice is cold and a little dry from being stored overnight. That really helps. Then use a nonstick skillet or a well-seasoned wok if you have one. And don’t be shy with the oil—rice needs a little lubrication to fry properly. Let it sit for short bursts without stirring too much so it can form crispy bits instead of steaming.

Can I make a big batch and reheat it for meal prep?

Absolutely! This fried rice holds up well in the fridge and actually gets more flavorful over time. Just store it in portioned containers so reheating is easy. When it’s time, either warm it in a skillet (best option) or microwave with a damp paper towel over the top. You’ll have buttery, garlicky magic all week long.

Copycat Benihana Fried Rice

Copycat Benihana Fried Rice

Prep Time 10 minutes
Cook Time 15 minutes
Total Time 25 minutes
Butter, garlic, rice, and soy sauce come together in this cozy, sizzling Benihana fried rice knockoff. Savory, buttery, and loaded with texture—this is buttery garlic magic with crispy edges and classic veggies. No hibachi grill required.
4 servings

Ingredients

Garlic Butter

  • 4 tbsp (56 g) unsalted butter softened
  • 3 cloves garlic minced (divided)
  • 2 tsp soy sauce

Fried Rice

  • 1 1/2 tbsp (22.5 ml) neutral oil such as vegetable or canola, divided
  • 2 large eggs beaten
  • 1 medium carrot finely diced
  • 1/2 (0.5) small onion finely diced
  • 3 scallions sliced, plus extra for garnish
  • 3 cups (600 g) cold, day-old cooked rice preferably jasmine or white rice
  • 2 tbsp (30 ml) soy sauce plus more to taste
  • 1 tsp (5 ml) toasted sesame oil
  • Salt and pepper to taste

Equipment

  • Large skillet or wok
  • Mixing bowl
  • Spatula

Instructions
 

  1. Make the garlic butter: In a small bowl, beat together softened butter and half of the minced garlic until creamy. Stir in 2 teaspoons soy sauce. Cover and chill while you prep everything else.
  2. Scramble the eggs: Heat 1/2 tablespoon oil in a large skillet or wok over medium heat. Add the beaten eggs and stir constantly until just set and slightly glossy, then transfer to a plate. Don’t overcook; they’ll finish with the rice later.
  3. Sauté the veggies: Increase heat to high. Add remaining tablespoon oil, carrots, and onion. Stir constantly until softened and starting to caramelize, about 5–7 minutes. Add the scallions and remaining garlic and stir for 30 seconds until very fragrant.
  4. Add the rice: Break up any clumps of cold rice with your hands. Add rice to skillet; toss with veggies and let cook for 2–3 minutes, stirring occasionally to let some rice get crispy.
  5. Butter it up: Add half of the garlic butter and stir until melted and shiny. Taste and add more garlic butter as desired. Season with salt and pepper if needed.
  6. Finish and serve: Add scrambled eggs, 2 tablespoons soy sauce, and sesame oil. Gently toss everything to combine and heat through. Serve immediately with extra scallions for garnish.

Notes

Change it up by adding shrimp, bacon, chicken, tofu, or other diced veggies like peas, corn, or bell pepper.
Leftovers keep in the fridge up to 4 days. For best reheating, use a skillet with a splash of water or oil to revive the rice and preserve crispy bits.
Dish can be made vegan with plant-based butter and egg substitute.

Nutrition

Calories: 320kcal | Carbohydrates: 46g | Protein: 8g | Fat: 11g | Saturated Fat: 4g | Cholesterol: 80mg | Sodium: 780mg | Potassium: 180mg | Fiber: 2g | Sugar: 3g | Vitamin A: 1750IU | Vitamin C: 4mg | Calcium: 48mg | Iron: 2.1mg

Rich and warmly spiced, this soft and tender gingerbread sheet cake pairs cozy molasses with dark brown sugar and a swoop of tangy cream cheese frosting. The smell alone is worth preheating your oven.

The kind of cake that makes your kitchen smell like December and your counter look like a bakery window, this one’s thick, plush, and oh-so snackable. Moist without being too dense, and just spiced enough to feel festive without needing a holiday as an excuse.

This gingerbread sheet cake means business. It’s heavy on warm holiday spice, mellowed out with molasses and soft butter. Then, just when you think you’ve leveled out the coziness, you slather on an unapologetically creamy layer of frosting. It’s sweet, tangy, fluffy—like cream cheese’s version of a weighted blanket. You can eat this with coffee, gift it to that one friend who always forgets dessert for the potluck, or slice a square for yourself at 8 a.m. because honestly, it’s cake. With spice. And frosting. So… yes.

Table of Contents

Cream Cheese–Frosted Gingerbread Cake

Why You’ll Love this Gingerbread Sheet Cake

Let’s be real. Some days you just want one pan, one cozy cake, and enough frosting to distract you from your inbox.

  • Moist but not too dense: That sweet spot of sturdy-and-soft where it slices clean but melts in your mouth.
  • Spices that smell like winter magic: Ginger, cinnamon, nutmeg, and their iconic friends warm things up without smacking you in the face.
  • Frosting that deserves its own fan club: Cream cheese and butter whipped fluffy with just enough sugar. Are you drooling yet?
  • Feeds a whole table (or fridge grazers for days): It’s a sturdy 9×13 situation—snack now, snack later, repeat.
  • Make-ahead friendly: In fact, it might be even better the next day. Spices settle in like they’ve claimed a timeshare.
  • Totally freezer friendly: Yep, this baby freezes like a dream. Mid-week cake emergency? You’re covered.

Cream Cheese–Frosted Gingerbread Cake

Ingredient Notes

Everything in this cake plays a role, like a very well-spiced ensemble cast. Here’s who’s who and why they matter.

  • All-purpose flour: Just your standard hero holding everything together. Too much can make the cake tough, so measure carefully.
  • Ground ginger, cinnamon, nutmeg, cloves, and allspice: This squad brings the gingerbread soul. Don’t skip or skimp—this is where the cozy lives.
  • Baking soda and baking powder: The leavening dream team. They give the cake lift and keep it soft. No weird science, just whisk and go.
  • Salt: It’s subtle, but it sharpens the sweet and spices so they don’t flatline.
  • Molasses: The dark, sticky backbone of the whole thing. Make sure it’s not blackstrap unless you like bitter cake (no shame if you do).
  • Unsalted butter: For richness and that dreamy soft crumb. Use room temp butter so it creams like it should.
  • Dark brown sugar: Adds depth and a hint of caramel flavor that regular white sugar just can’t touch.
  • Eggs: They bind and fluff. Room temp eggs blend better, just FYI.
  • Vanilla extract: It softens the edges of those spices and pulls everything together like a cozy blanket.
  • Cream cheese: Full fat, please and thank you. This isn’t the time for anything labeled “lite.”
  • Powdered sugar: Controls the sweetness in the frosting and gives it that plush pipe-it-onto-everything texture.
  • Pinch of salt (in the frosting): Trust me. Just a pinch. It makes the sweet and tangy sing.

Cream Cheese–Frosted Gingerbread Cake

How To Make This Gingerbread Sheet Cake

This is a straightforward bake, truly. Some measuring. Some mixing. Some dreamy frosting swirling. You’ve got this.

  • Prep your pan and oven: Get that oven heating to 350°F and line a 9×13 pan with parchment. A little grease underneath keeps parchment from sliding (ask me how I know).
  • Mix the dry stuff: Whisk together the flour, baking soda, baking powder, spices, and salt. Take a second to breathe it in. It smells like holiday morning.
  • Make the molasses mixture: Stir the molasses and hot water in a bowl or measuring cup until smooth. It’ll look dark and glossy—kind of like warm syrupy ink.
  • Cream the butter and sugar: Beat ‘em until fluffy and light, which takes around 2–3 minutes. It’s ready when you want to eat it with a spoon (but don’t, raw flour and all).
  • Add eggs and vanilla: Blend them in, but keep the mixer low. Or better yet, switch to a spatula and mix by hand to avoid overmixing.
  • Alternate the dry and wet: Pour in the flour and molasses mixtures bit by bit, starting and ending with the dry. Gently does it—fold until just combined.
  • Bake the cake: Pour it into the pan, smooth out the top, and let it bake for 30–35 minutes. Your kitchen will smell like a cozy spice shop halfway through.
  • Cool completely: Don’t rush this part. Warm cake and cream cheese frosting are not friends.
  • Frost it up: Beat the cream cheese and butter until smooth, then add powdered sugar slowly. Add more sugar if it’s loose, or a splash of cream if it’s stiff.
  • Chill it down: Pop the frosted cake in the fridge for 15–20 minutes to set the frosting slightly. Easier to slice, prettier on the plate.

Cream Cheese–Frosted Gingerbread Cake

Storage Options

Got leftovers? Lucky you.

Once frosted, this gingerbread sheet cake keeps well in the fridge for up to 5 days. Just store it in an airtight container or wrap the pan tightly with foil or plastic wrap. The frosting may firm up, but a quick 10-minute sit on the counter brings it back to fluffy perfection.

Now, about freezing: yes, you can absolutely freeze this cake. If you’re planning ahead, freeze the cake unfrosted, tightly wrapped in plastic, then foil. It’ll keep for up to 2 months. You can also freeze individual frosted slices—just flash-freeze them on a sheet tray, then wrap and stash them. Thaw overnight in the fridge (or sneak one from the freezer and let it warm on the counter like a little secret treat… your call).

If you’re saving some for later, I highly recommend slicing and freezing a few pieces for when you need a fast sweet fix between Zoom calls or while waiting for your casserole to bake. Win-win.

Variations and Substitutions

You’ve got options, friends. Swaps and tweaks are totally fair game.

  • Gluten-free flour mix: Use your favorite 1:1 gluten-free blend. Just make sure it includes xanthan gum for structure.
  • Skip the cream cheese frosting: Use a simple vanilla glaze or even powdered sugar sifted on top. Lighter, but still lovely.
  • Add citrus: A little orange zest in the batter or frosting tips it toward bright and zingy instead of full spice.
  • Extra spice kick: Add a pinch of black pepper or a smidge more ginger if you like your gingerbread bold.
  • Go fancy with toppings: Chopped pecans, sugared cranberries, or even a sprinkle of flaky salt on the frosting take it from “weeknight bake” to “giftable stunner.”
  • Molasses swap: If you’re out, try using dark corn syrup with a spoonful of brown sugar. Not exactly the same, but close enough in a pinch.

Cream Cheese–Frosted Gingerbread Cake

What to Serve with Gingerbread Sheet Cake

Once you’ve got this cake on the table, it doesn’t ask for much. But a few things go ridiculously well alongside it.

  • Hot coffee or espresso: Bold and strong brews complement the deep molasses-y sweetness of the cake. Bonus points if your mug is oversized and your socks are fuzzy.
  • Cold milk (or oat milk): The classic cake-and-cold-milk move holds strong here. It’s especially dreamy next to the tangy frosting.
  • Dark roasted fruit compote: A small spoonful of warm stewed plums or cherries on the side adds contrast. Fancy? Sure. But also delicious.
  • This cozy soup moment: For a full comfort-food night, follow a warm bowl of Marry Me Chicken Soup with a slice of this. You’ll be emotionally nourished.
  • Vanilla ice cream: Especially if you skimped on frosting or left it off altogether. Ice cream provides the creamy balance in the best way.

Cream Cheese–Frosted Gingerbread Cake

Frequently Asked Questions

Can I make this gingerbread cake ahead of time?

Yes, absolutely. You can bake the cake a day ahead and store it tightly wrapped at room temperature. Frost it the next day or go all-in and frost it early—just refrigerate the whole thing. The flavors actually deepen with time, so it might taste even better on day two.

Can I use light brown sugar or white sugar instead of dark brown?

You can, but it will slightly change the flavor. Dark brown sugar gives a deeper molasses note, which really plays well with the spices, while light brown sugar is milder. White sugar will make it sweeter but less rich. If it’s all you’ve got, go for it—it’ll still be tasty, just a bit different.

How do I know when the cake is done baking?

Check around the 30-minute mark. The top should spring back lightly under your finger and a toothpick in the center should come out mostly clean. A few moist crumbs are okay, but wet batter means it needs more time. Don’t overbake—it’ll dry out faster than your winter skin.

Is there a lactose-free version of the frosting?

Totally. You can use lactose-free cream cheese and plant-based butter (like Miyoko’s) for the frosting. It’ll still whip up nicely and be spreadable. Taste as you go to balance sweetness and don’t skimp on the pinch of salt—it brings balance without lactose.

Cream Cheese–Frosted Gingerbread Cake

Cream Cheese–Frosted Gingerbread Sheet Cake

Prep Time 25 minutes
Cook Time 35 minutes
Frosting Chill Time 20 minutes
Total Time 1 hour 15 minutes
Rich, soft, and warmly spiced, this tender gingerbread sheet cake is full of cozy molasses, dark brown sugar, and topped with a swoop of tangy cream cheese frosting. It’s a one-pan, make-ahead, freezer-friendly cake that’ll make your kitchen smell like December and your counter look like a bakery window.
16 slices

Ingredients

Gingerbread Cake

  • 2 1/2 cups (315 g) all-purpose flour measured correctly
  • 2 tsp ground ginger
  • 2 tsp ground cinnamon
  • 1/2 tsp (0.5 tsp) ground nutmeg
  • 1/4 tsp (0.25 tsp) ground cloves
  • 1/4 tsp (0.25 tsp) allspice
  • 1 tsp baking soda
  • 1 tsp baking powder
  • 1/2 tsp (0.5 tsp) salt
  • 3/4 cup (180 ml) unsulfured molasses not blackstrap
  • 3/4 cup (180 ml) hot water
  • 3/4 cup (170 g) unsalted butter room temperature
  • 1 1/4 cups (250 g) dark brown sugar packed
  • 3 large eggs room temperature
  • 2 tsp vanilla extract

Cream Cheese Frosting

  • 8 oz (226 g) cream cheese full-fat, brick-style, room temperature
  • 1/2 cup (115 g) unsalted butter room temperature
  • 2 1/2 cups (300 g) powdered sugar sifted if lumpy
  • 2 tsp vanilla extract
  • pinch salt to taste

Equipment

  • 9x13-inch Baking Pan
  • Parchment paper
  • Mixing bowls
  • Electric mixer or hand mixer
  • Whisk

Instructions
 

  1. Preheat your oven to 350°F (177°C). Line a 9x13 inch baking pan with parchment paper and lightly grease. Set aside.
  2. In a medium bowl, whisk together the flour, baking soda, baking powder, salt, ginger, cinnamon, nutmeg, cloves, and allspice. Set aside.
  3. In a separate bowl or large measuring cup, whisk the molasses and hot water together until smooth and combined. Set aside.
  4. In a large bowl with a hand mixer or stand mixer, beat the butter and dark brown sugar together on medium-high speed until light and fluffy, about 2–3 minutes. Scrape down the bowl as needed.
  5. Add the eggs one at a time, mixing well after each. Add vanilla and mix until combined.
  6. With the mixer on low, add the flour mixture and molasses mixture in batches, alternating, beginning and ending with the flour. Gently fold until just combined — don’t overmix.
  7. Pour batter into the prepared pan. Smooth the top. Bake for 30–35 minutes until the cake is set, springs back gently when touched, and a toothpick inserted in the center comes out clean or with a few moist crumbs.
  8. Remove from oven and allow to cool completely in the pan on a rack before frosting.
  9. For the frosting, beat the cream cheese and butter together on high speed until smooth and creamy, about 2 minutes. Gradually add powdered sugar, beating until well combined. Add vanilla and a pinch of salt; beat until light, fluffy, and spreadable. If too stiff, add a splash of cream; if too loose, add more powdered sugar.
  10. Spread frosting evenly over the cooled cake. Chill for 15–20 minutes to set the frosting slightly before slicing and serving. Enjoy!

Notes

This cake is fabulously make-ahead: simply bake, cool, and frost up to one day in advance. It keeps well in the fridge for 5 days, tightly wrapped. For freezing, wrap unfrosted cake tightly and freeze up to 2 months, or freeze individual frosted pieces for grab-and-thaw treats. Swaps: use a 1:1 gluten-free flour blend, or a vanilla glaze in place of cream cheese frosting. Try a little orange zest, chopped pecans, or sugared cranberries for a twist!

Nutrition

Calories: 400kcal | Carbohydrates: 59g | Protein: 4g | Fat: 16g | Saturated Fat: 10g | Cholesterol: 65mg | Sodium: 230mg | Potassium: 260mg | Fiber: 1g | Sugar: 37g | Vitamin A: 540IU | Calcium: 90mg | Iron: 2.2mg

Creamy, cozy, and loaded with golden chicken, tender penne, and garlicky Alfredo sauce, this chicken alfredo casserole bubbles to cheesy, melty perfection. With just chicken, penne pasta, Alfredo sauce, and cheese, it smells like comfort and tastes like a warm hug in casserole form.

Let’s talk comfort food, shall we? This one’s creamy, melty, garlicky (but not in a burn-your-eyebrows way), and full of golden chicken and pasta—that “scoopy pasta bake” energy we all crave after a long day. The sauce is rich but not heavy; the top gets this golden, bubbly cheese crust that makes you want to hover near the oven. It’s the kind of dish I’d serve on a Wednesday night when I want to eat something that feels special without making a mess of every pan and spatula I own. Honestly, all it needs is a simple salad and maybe a glass of something chilled.

Table of Contents

Chicken Alfredo Pasta

Why You’ll Love this Chicken Alfredo Casserole

Okay listen, it’s not groundbreaking, but sometimes comfort shouldn’t be. Chicken Alfredo Pasta is warm, cheesy goodness in a pan. That’s it. That’s the promise.

  • Ridiculously simple to make: You’ll simmer, sauté, stir, then toss in the oven and wander off for 35 minutes while it does its cheesy thing.
  • Perfect weeknight indulgence: It tastes special, but it uses pantry staples and pre-made Alfredo sauce; always a plus.
  • Customizable comfort food: Toss in broccoli, swap cheeses, or add spice to suit your vibe—zero judgment here.
  • Kid-approved, adult-devoured: Creamy pasta plus melty cheese? The universal love language of dinner.
  • Great for leftovers: Somehow it tastes even better the next day, like lasagna’s cozy cousin.
  • That top cheese layer though: Bubbling mozzarella and crispy corners of Parmesan are absolutely worth a dreamy sigh.

Chicken Alfredo Pasta

Ingredient Notes

Let’s break down these ingredients real quick, because yes, I have feelings about store-bought Alfredo and whether you need two cheeses (yes, yes you do).

  • Penne pasta: Holds sauce like a champ and doesn’t turn to mush after baking. But honestly, sub with rigatoni or ziti if that’s what you’ve got.
  • Olive oil: Helps sear the chicken to golden, juicy goodness. Don’t skip the salt and pepper too—trust me, they matter.
  • Chicken breasts: Cubed and sautéed till just done. Got leftover rotisserie chicken? That sneaky shortcut works here too.
  • Alfredo sauce (jarred): Go with something you actually like the taste of, because it’s doing a lot of flavor heavy lifting.
  • Cream cheese: Makes the sauce ultra-rich and silky, like a luxe bathrobe for your pasta.
  • Whole milk: Loosens the sauce just enough to coat everything beautifully without being runny.
  • Garlic: Fresh minced is best for that mellow punch (and yes, you’ll smell amazing afterward).
  • Italian seasoning, salt, pepper: Basic seasoning squad—but they show up strong once it’s all baked together.
  • Mozzarella cheese: Melts like a dream into pools of gooey glory both inside and on top.
  • Parmesan cheese: Adds salty, nutty depth and helps crisp up the top like a golden crown.
  • Parsley: Optional, but adds a pop of green so your brain knows there’s some balance happening.

Chicken Alfredo Pasta

How To Make This Chicken Alfredo Casserole

You don’t need culinary school. You just need a few bowls, a pan, and the willpower not to eat cheese straight from the bag (no judgment if you do).

  • Prep your baking dish and heat the oven: Preheat to 350°F and spray your 9×13 with cooking spray. Ignore the urge to skip this. Sticky pasta is no one’s friend.

  • Boil the penne until al dente: Follow the package, but taste a piece early. It’s going into the oven next, so we don’t want mushy noodle sadness.

  • Cook the chicken until golden: In a pan over medium heat, cook your salted and peppered chicken in olive oil. Stir now and then until the outside turns golden and the inside’s not pink anymore. Set it aside without eating half of it—again, guilty.

  • Get that sauce going: In the biggest bowl you own, combine Alfredo sauce, softened cream cheese, milk, garlic, Italian seasoning, salt, and pepper. Whisk or stir like your life depends on it until it’s mostly smooth.

  • Add pasta and chicken to sauce: Scoop in the drained pasta and cooked chicken, then mix until everything’s glossy and smug with creaminess.

  • Mix in half the cheese: Stir in 1 cup of shredded mozzarella and ½ cup of Parmesan. You’ll feel very powerful doing this.

  • Assemble and bake: Pour everything into your prepared dish. Top with the rest of the mozzarella and Parmesan. Cover snugly with foil so the steam does its magic, and bake 25 minutes.

  • Final bake without foil: Uncover and bake 10 more minutes until the top is bubbly, golden brown here and there, and way too hot to dive into yet. Garnish with parsley if you’re feeling fancy.

Chicken Alfredo Pasta

Storage Options

Leftovers? You’re in luck. This casserole was practically made for making too much.

Once cooled, cover the baking dish with foil or scoop everything into an airtight container. It’ll keep in the fridge for 3 to 4 days. I actually think it tastes better after the flavors mingle a bit overnight—like a pasta sleepover party.

To reheat, microwave individual portions with a splash of milk or water stirred in to loosen things up. Oven reheat? 350°F for about 15 to 20 minutes, covered with foil to avoid drying out.

Now, for the freezer lovers: Yes, you can freeze this beauty. I recommend freezing it before baking, especially if you’re meal prepping. Wrap tightly in foil and freeze up to two months. When ready, thaw overnight in the fridge and bake as directed, maybe adding 10 extra minutes since it’ll be chilly to start. Already baked and now freezing leftovers? Still doable. Just remember that the texture of the pasta might soften a bit more—but honestly, it still hits the spot.

Variations and Substitutions

Feeling creative? Got random fridge bits begging for adoption? This casserole’s pretty accommodating.

  • Add vegetables: Stir in steamed broccoli, frozen peas, or sautéed mushrooms before baking. It helps stretch the serving size and adds a little green for balance.

  • Swap the protein: Leftover turkey, shredded rotisserie chicken, or sautéed shrimp all play nice in this creamy sauce.

  • Go gluten-free: Use your favorite GF penne or spirals, just boil it slightly under al dente so it doesn’t over-soften while baking.

  • Try other cheeses: Fontina, gouda, or smoked provolone bring serious flair. Just keep mozzarella as the melty base.

  • Make it spicy: Add red pepper flakes or a dash of hot sauce to the Alfredo mixture. It gives the cozy flavors a tiny wake-up call.

Chicken Alfredo Pasta

What to Serve with Chicken Alfredo Casserole

This creamy, dreamy pasta wants a little something-something on the side. You don’t need to get too fancy—just a bit of contrast goes a long way.

  • A crisp, garlicky Caesar salad is probably the most obvious date for this dish, but that’s because it works. The crunch of romaine next to the meltiness of the casserole? Perfection. And if you make your own croutons? You deserve a medal.

  • Roasted veggies are always a win. Think asparagus, Brussels sprouts, or even carrots with a little balsamic glaze. They cut through the richness like a polite but firm dinner guest saying “Let’s balance this out.”

  • If you’re going carb-on-carb (we’ve all been there), garlic bread or a warm hunk of homemade focaccia pairs beautifully. For even more of that Italian-American nostalgia, this cheesy baked ziti would make a fun pasta-night duo.

  • A simple glass of white wine or sparkling water with lemon works too. Something light to sip between bites makes this feel a little more special (and helps your fork pause for a second).

Chicken Alfredo Pasta

Frequently Asked Questions

Can I use homemade Alfredo sauce instead of jarred?

Absolutely you can! If you’ve got a go-to homemade Alfredo that calls out your name, swap it in. Just make sure it yields around 3 cups total for this recipe. Oh, and if it’s thicker or more garlicky than jarred, adjust the cream cheese and seasoning slightly so it all balances out. Taste and tweak as needed.

Can I make this ahead of time?

Yup, this dish has excellent make-ahead vibes. You can assemble the entire thing up to a day in advance. Just cover tightly and refrigerate it. When you’re ready to bake, let it sit at room temp for about 30 minutes while the oven preheats. You might need to add an extra 10 minutes of baking since it’ll start off chilled.

Does this freeze well?

Sure does. If you’re prepping it ahead as a freezer meal, I recommend freezing before baking—just wrap well, label it, and stash it up to two months. Let it defrost in the fridge overnight before baking, then go ahead with the normal bake time. Already baked? You can freeze portions, though the texture might get softer after thawing and reheating.

How do I reheat leftovers without drying it out?

Great question! When microwaving a portion, add a little splash of milk or even water and stir it in before reheating. That’ll loosen up the sauce and bring back the creaminess. For oven reheating, cover the casserole with foil and warm it at 350°F for about 15–20 minutes. If it’s extra dry, drizzle a few tablespoons of cream or milk over the top before reheating.

Chicken Alfredo Pasta

Chicken Alfredo Casserole

Prep Time 20 minutes
Cook Time 35 minutes
Total Time 1 hour
Creamy, cozy, and loaded with golden chicken, tender penne, and garlicky Alfredo sauce, this chicken alfredo casserole bubbles to cheesy, melty perfection. With just chicken, penne pasta, Alfredo sauce, and cheese, it smells like comfort and tastes like a warm hug in casserole form.
6 servings

Ingredients

Main Ingredients

  • 12 oz (340 g) penne pasta (or rigatoni or ziti)
  • 1 tbsp (15 ml) olive oil
  • 1.5 lbs (680 g) chicken breasts cubed (or 3 cups cooked, cubed chicken)
  • salt and black pepper to taste (for chicken)
  • 3 cups (710 ml) Alfredo sauce jarred or homemade (~2 jars / 24 oz total)
  • 4 oz (113 g) cream cheese softened
  • 1 cup (240 ml) whole milk
  • 3 cloves garlic minced
  • 1 tsp Italian seasoning
  • salt and black pepper to taste (for sauce)
  • 2 cups (180 g) mozzarella cheese shredded, divided
  • 1 cup (90 g) Parmesan cheese grated, divided
  • fresh parsley chopped, for garnish (optional)

Equipment

  • 9x13 inch Baking Dish
  • Large pot
  • Large skillet
  • Mixing bowl
  • Foil

Instructions
 

  1. Preheat oven to 350°F (175°C). Spray a 9x13-inch baking dish with nonstick cooking spray and set aside.
  2. Cook the penne pasta in a large pot of salted boiling water until just al dente. Drain and set aside.
  3. Pat chicken cubes dry and season with salt and pepper. Heat olive oil in a large skillet over medium heat. Add chicken and cook, stirring occasionally, until golden and just cooked through (about 6–8 minutes). Remove from heat and set aside.
  4. In a large mixing bowl, combine alfredo sauce, softened cream cheese, milk, minced garlic, Italian seasoning, salt, and pepper. Whisk or stir until mostly smooth.
  5. Add cooked penne and chicken to the sauce bowl. Mix until everything is evenly coated.
  6. Stir in 1 cup of shredded mozzarella and ½ cup Parmesan cheese.
  7. Pour the mixture evenly into the prepared baking dish. Sprinkle remaining 1 cup mozzarella and ½ cup Parmesan over the top.
  8. Cover dish with foil and bake for 25 minutes. Remove foil and bake an additional 10 minutes, or until the cheese is bubbling and the top is golden brown.
  9. Remove from oven and let sit for 5–10 minutes before serving. Garnish with fresh parsley if desired.

Notes

This dish is very flexible! You can add vegetables (such as steamed broccoli or peas), swap in other proteins like rotisserie chicken or turkey, and experiment with other cheeses for extra flavor. For best leftovers, store in an airtight container and add a splash of milk when reheating. Can be frozen before baking for up to 2 months.

Nutrition

Calories: 610kcal | Carbohydrates: 47g | Protein: 42g | Fat: 29g | Saturated Fat: 13g | Cholesterol: 122mg | Sodium: 1240mg | Potassium: 655mg | Fiber: 2g | Sugar: 5g | Vitamin A: 790IU | Vitamin C: 2mg | Calcium: 540mg | Iron: 2.2mg

Cozy up with this creamy, savory marry me chicken soup full of tender chicken, sun-dried tomatoes, garlic, and herbs. It smells divine and tastes even better.

Silky, garlicky, and absolutely slurp-worthy, this soup is like a hug in a bowl. You’ve got the herby warmth of thyme and rosemary, tang from sun-dried tomatoes, and that unapologetic richness from a swirl of cream and Parmesan. It’s not flashy, but it’s a full-on sensory situation—with browned chicken, buttery veggies, and a finish of fresh basil and spinach that makes it somehow feel both indulgent and kind of virtuous. You could easily serve this on a lazy Sunday, or sneak it into a Tuesday just because it feels like a Monday in disguise.

Table of Contents

Marry Me Chicken Soup

Why You’ll Love this Marry Me Chicken Soup

This isn’t a fancy soup, but it is the kind that gets recipe card status. You know, printed and splattered with broth in five years.

  • Ridiculously simple to make: You just brown things, stir them around, simmer, then swirl in cream like yes, I’m that fancy.
  • Layered and aromatic: Between the sun-dried tomato oil, garlic, and herbs, your kitchen will smell like you’ve been cooking all day (in the best way).
  • Comforting with a twist: It’s creamy and savory, but there’s tang, heat, and herbs to keep it interesting. No bland vibes here.
  • Great way to use chicken thighs or breasts: No stress if you’ve got one or the other, both work beautifully.
  • Even better the next day: Something magical happens overnight. Trust me, lunch leftovers are going to steal the show.

Marry Me Chicken Soup

Ingredient Notes

A few notes before we jump into soup central. We’re keeping it cozy, but there’s room to riff if needed.

  • Boneless, skinless chicken thighs or breasts: Thighs bring that juicy depth, while breasts stay lean. Go with what you’ve got or what’s on sale.
  • Sun-dried tomato oil (from the jar): This is liquid chef’s kiss. Don’t skip it—it adds flavor before we even begin.
  • Butter: Just a tablespoon mellows the tomato richness and softens those veggies like a silky orchestra conductor.
  • Onion, carrots, celery: A classic trifecta. They get soft and sweet and make the base taste like home.
  • Tomato paste: It boosts umami and adds depth. Let it sizzle a bit to wake up the flavor.
  • Sun-dried tomatoes: Chewy, punchy, and rich. They melt into the soup and bring that signature tang.
  • Garlic, herbs, red pepper flakes: You can skip the flakes if you don’t do heat, but the herbs are non-negotiable.
  • Chicken broth: Go low-sodium if you can. Gives you wiggle room for seasoning at the end.
  • Heavy cream: Adds body and luxury. Room temp helps it blend in without curdling.
  • Parmesan cheese: Salty and melty. Add a small handful at a time or it clumps. Learned that the goopy way.
  • Fresh rosemary and basil: If you’ve got sad herbs in the fridge, revive them in this. They shine here.
  • Spinach: Wilts down into little ribbons of green goodness.
  • Lemon juice: Just a squeeze brightens all that richness without screaming “I’m citrus!”
  • Parsley (garnish): Optional, but makes it feel like you did something special.

Marry Me Chicken Soup

How To Make This Marry Me Chicken Soup

Alright, grab that big pot or Dutch oven and let’s turn your kitchen into a warm, steamy dream.

  • Brown the chicken: Cut it into bite-sized chunks, pat it dry, salt and pepper it like you mean it, then sear in that glorious sun-dried tomato oil. Let it get golden brown (around 5 minutes), then set it aside to rest while we veggie-magic the pot.

  • Sauté the vegetables: Toss in the butter, then the onion, carrots, and celery. Stir around until they get soft and start to smell like “Oh wow, what’s cooking?” vibes, about 5 to 7 minutes.

  • Build the flavor party: Add tomato paste, chopped sun-dried tomatoes, minced garlic, thyme, oregano, and if you’re bold, those red pepper flakes. Stir constantly—give it a minute or two to get fragrant and toasty.

  • Add broth and simmer: Pour in the chicken broth, scrape the bottom a bit if needed, and bring to a gentle boil. Add the chicken back in, drop the heat to medium-low, and let it simmer for 10-ish minutes until everything’s cozy and cooked through.

  • Creamy finish: Turn off the heat before slowly pouring in the heavy cream. Then add the Parmesan a handful at a time, stirring until each melts in. This is the “oh wow” stage.

  • Greens and herbs: Add in rosemary, basil, spinach, and a squeeze of lemon juice. Stir gently until the spinach wilts—your soup will look (and smell) like it came from a little Italian café.

  • Taste and adjust: Need more salt? Maybe a pinch of pepper or a touch more lemon? You’re the boss here.

  • Serve it up: Ladle into big bowls, top with a sprinkle of fresh parsley, and serve with crusty bread. Don’t forget the spoon—or the napkins.

Marry Me Chicken Soup

Storage Options

Let’s talk leftovers, because you’re gonna want them.

This marry me chicken soup holds up like a champ in the fridge for about 3 to 4 days. Store it in an airtight container and maybe give it a little stir before reheating. The cream keeps things soft and luscious, while the herbs deepen in flavor over time.

Freezing? Totally doable, though I’d recommend skipping the spinach until after thawing if you don’t love slightly squishy greens. The dairy can separate a tiny bit in the freezer, but it’ll perk right up with a gentle stovetop reheat and a splash of fresh cream or broth.

Reheating’s best on the stove over low heat, giving it a calm stir here and there. Microwave works too—just cover it, and heat in short bursts to avoid splatters and hot spots (learned that one… the messy way).

Variations and Substitutions

If your fridge is giving you “surprise me” energy, don’t worry. This soup is flexible enough to roll with it.

  • Rotisserie chicken: Short on time? Shred some store-bought rotisserie and add it during the simmer stage. Easy and still tasty.
  • Dairy-free version: Skip the cream and Parmesan, and stir in a little full-fat coconut milk and nutritional yeast instead. Totally changes the vibe, but still super warming.
  • Add pasta or rice: Stir in cooked orzo or white rice for more of a hearty stew situation. Just add extra broth to keep things soup-ish.
  • Leafy green swap: No spinach? No problem. You can use kale or Swiss chard (in fact, this rainbow chard recipe has inspired many a southern soup riff in this kitchen).
  • Make it spicier: Go wild with the red pepper flakes or add a swirl of Calabrian chili paste if you’ve got it hiding in the back of your fridge.

Marry Me Chicken Soup

What to Serve with Marry Me Chicken Soup

Okay, soup’s on—but what else? Here’s what I’d plop on the table beside it.

  • Crusty sourdough or garlic bread: This soup asks for something to dunk. Go with something hearty and chewy, or rub a warm slice with a little garlic and olive oil. Life-changing.

  • A bright veg side: A sharply dressed arugula salad cuts through the richness beautifully. Lemon vinaigrette, maybe a few shaved carrots, call it a moment.

  • Something cozy and carby: If you’ve got time for baking, these bacon basil cornbread muffins taste like Sunday afternoon joy. Sweet-salty-crumbly heaven.

  • Wine or a fancy soda: A chilled white wine like a grassy Sauvignon Blanc works wonders. Or go the fizzy elderflower route for something non-alcoholic but still delightful.

  • A little sweet treat: If dinner’s mellow, dessert can be playful. Maybe split a couple of these blueberry scones for a not-too-sweet finish.

Marry Me Chicken Soup

Frequently Asked Questions

Can I use chicken breasts instead of thighs?

Absolutely. Chicken breasts work just as well, though they cook slightly faster and stay a bit leaner. I recommend cutting them into bite-sized chunks and watching them closely so they don’t overcook in the broth. Thighs have more richness, but both play nice in this soup playground.

Is this soup spicy?

The base recipe has just a whisper of heat from optional red pepper flakes. If you’re spice-sensitive, skip them. If you love heat, go nuts. Toss in extra flakes, or swirl in a spicy paste later—it’s totally adjustable to your spice chill level.

Can I make this soup ahead of time?

Oh yes, in fact it gets even better with a little rest time. Make it a day in advance and store it in the fridge. The flavors settle and mingle overnight. Just reheat gently on the stove or in the microwave. You may need to stir in a splash of broth to loosen it up again.

Can I freeze marry me chicken soup?

You sure can. The cream may separate slightly but a good stir during reheating brings it back together. Just thaw it in the fridge overnight or warm from frozen on low. If using spinach, consider adding it fresh after thawing for the nicest texture.

Marry Me Chicken Soup

Marry Me Chicken Soup

Prep Time 15 minutes
Cook Time 35 minutes
Total Time 50 minutes
Cozy up with this creamy, savory marry me chicken soup full of tender chicken, sun-dried tomatoes, garlic, and herbs. Silky, garlicky, and absolutely slurp-worthy, this soup is like a hug in a bowl—layered with herby warmth, tang from sun-dried tomatoes, and bold richness from cream and Parmesan. It only gets better the next day!
6 bowls

Ingredients

Soup Base

  • 1 1/2 lbs (680 g) boneless skinless chicken thighs or breasts cut into bite-sized chunks
  • 2 tbsp (30 ml) sun-dried tomato oil (from jar)
  • 1 tbsp (14 g) unsalted butter
  • 1 yellow onion chopped
  • 2 carrots peeled and diced
  • 2 stalks (2) celery diced
  • 2 tbsp (32 g) tomato paste
  • 1/2 cup (60 g) sun-dried tomatoes chopped
  • 4 cloves (4) garlic minced
  • 1 tsp dried thyme
  • 1 tsp dried oregano
  • 1/4 tsp (0.25 tsp) red pepper flakes optional
  • 5 cups (1200 ml) low-sodium chicken broth

Creamy Finish

  • 3/4 cup (180 ml) heavy cream room temperature
  • 3/4 cup (60 g) Parmesan cheese freshly grated, divided
  • 1 tsp fresh rosemary minced
  • 1/4 cup (10 g) fresh basil thinly sliced or torn
  • 3 cups (90 g) baby spinach packed
  • 2 tbsp (30 ml) lemon juice fresh
  • kosher salt and black pepper to taste
  • fresh parsley for garnish, optional

Equipment

  • Large pot or Dutch oven
  • Cutting board
  • Chef’s knife
  • wooden spoon
  • Ladle

Instructions
 

  1. Brown the chicken: Pat chicken dry and season with salt and pepper. In a large pot or Dutch oven, heat sun-dried tomato oil over medium-high. Add chicken in a single layer and sear, turning as needed, until golden brown (about 5 minutes). Transfer chicken to a plate.
  2. Sauté the vegetables: Reduce heat to medium, add butter, onion, carrots, and celery. Cook, stirring, until softened and fragrant, about 5 to 7 minutes.
  3. Build the flavor: Stir in tomato paste, sun-dried tomatoes, garlic, thyme, oregano, and red pepper flakes (if using). Cook for 1–2 minutes, stirring constantly, until fragrant and starting to darken.
  4. Add broth and simmer: Pour in chicken broth, scraping up any golden bits from the pot. Return chicken (and juices) to the pot. Bring to a boil, reduce to a simmer, and cook for about 10 minutes until chicken is just cooked through.
  5. Creamy finish: Remove from heat, then stir in cream. Add Parmesan a small handful at a time, stirring after each until melted and smooth.
  6. Greens and herbs: Add rosemary, basil, spinach, and lemon juice. Stir until spinach is wilted and everything is combined.
  7. Taste and adjust: Season with more salt, pepper, or lemon juice as desired. Ladle into bowls, garnish with parsley, and serve hot with crusty bread.

Notes

This soup stores well for up to 4 days in the fridge. Freeze before adding spinach for best texture, and add fresh after reheating if desired. Dairy may separate after freezing—just stir well while reheating. For a dairy-free version, use full-fat coconut milk and nutritional yeast instead of cream and Parmesan. To make it heartier, add cooked pasta or rice. Both chicken thighs and breasts work; thighs will have a richer flavor.

Nutrition

Calories: 370kcal | Carbohydrates: 13g | Protein: 30g | Fat: 22g | Saturated Fat: 11g | Cholesterol: 120mg | Sodium: 960mg | Potassium: 810mg | Fiber: 2g | Sugar: 6g | Vitamin A: 4200IU | Vitamin C: 16mg | Calcium: 250mg | Iron: 2mg

Baked ziti but fancier, creamier, and richer—in the dreamiest way. This olive garden five-cheese ziti al forno brings marinara, Alfredo, ricotta, and not one but four oozy cheeses into your kitchen. It smells like Italian comfort and tastes like a hug with extra Parmesan.

Think: layers of saucy pasta, melty cheese, a crisp topping, and just enough garlic to keep things interesting without scaring off your coworkers. This is the dish you make when you “don’t feel like cooking” but still want to low-key impress yourself. You can serve it straight from the oven, spoon it into leftover containers for days, or be that person who brings it to the potluck and leaves with an empty dish. Just trust the cheeses (all five of them), and don’t skip the crispy topping—it’s half the magic.

Table of Contents

Copycat Olive Garden Ziti al Forno

Why You’ll Love this Olive Garden Five-Cheese Ziti al Forno

Let’s be honest: there’s something magical about bubbling cheese and pasta baked to golden perfection. No drama here, just pasta doing its thing, and that thing is glorious.

  • Ridiculously simple to make: You just mix the sauces, toss in the pasta, sprinkle the topping, and bake. Done and done.
  • Cheesy in the best way: You get creamy ricotta, stretchy mozzarella, nutty Fontina, sharp Parmesan, and salty Romano all in one bite.
  • Cozy meal vibes: Perfect for when your day has been Very Much and all you want is a hot cheesy situation.
  • Customizable without chaos: Don’t like heat? Skip the pepper flakes. Want it saucier? Go wild with the Alfredo. No rules.
  • That topping though: The toasty panko and garlic layer gets all golden and crunchy—I could eat it off a spoon.
  • Leftovers are dreamy: Actually, it tastes even better after a night in the fridge. Something magical happens in there.

Copycat Olive Garden Ziti al Forno

Ingredient Notes

You don’t need anything fancy to make this, just the usual suspects dressed up a little. Let’s peek into the pantry, shall we?

  • Ziti or rigatoni: Ziti is classic, but if rigatoni’s what you’ve got, it’ll hold more sauce in those ridges (delightful surprise pockets).
  • Marinara sauce: The tangy tomato base keeps things balanced. Use a store-bought one you love or go homemade if you’re feeling it.
  • Alfredo sauce: This adds creaminess and a big flavor boost. Jarred is fine, just check for one with garlic and cheese front and center.
  • Ricotta cheese: Soft and mellow, it melts into the sauce and makes everything feel lush. Don’t skip it, even if it seems subtle.
  • Fontina cheese: Melts like a dream with a mild nuttiness. If you can’t find it, provolone is a decent swap.
  • Italian seasoning: A bit of dried herb action goes a long way. You could also use just oregano and basil if needed.
  • Red pepper flakes (optional): Adds low-key heat without overpowering. Great for folks who like things mildly spicy.
  • Mozzarella cheese: Stringy, stretchy goodness. Pile it on—no one’s ever said “too much mozzarella.”
  • Panko breadcrumbs: Crunchy magic dust. These toast up better than regular breadcrumbs for that bakery-style topping.
  • Romano cheese: Salty and sharp, it plays well with the Parmesan. If you’re missing it, just add a bit more Parm.
  • Parmesan cheese: Brings the salty umami punch. Grate your own for a better melt and flavor.
  • Garlic: Adds depth and a tiny bit of bite to that crispy topping. Mince it fresh if you can.
  • Fresh parsley and extra Parmesan (for garnish): Completely optional, totally nice. Adds a pop of freshness and a bit of flair.

Copycat Olive Garden Ziti al Forno

How To Make This Olive Garden Five-Cheese Ziti al Forno

Okay, let’s do this. Prepping the pasta is the only real “effort” part here, and even that’s chill. The rest involves mixing, layering, and letting the oven work its cozy magic.

  • Boil the pasta: Bring a big pot of salted water to a boil and cook the pasta until it’s just shy of al dente—about two minutes before the package says it’s ready. We want it a little underdone so it doesn’t turn to mush in the oven.

  • Rinse and cool the pasta: Once drained, rinse under cold water to stop the cooking. This also keeps it from sticking into one massive carb blob while we get everything else together.

  • Mix the saucy base: In a large bowl, combine the marinara, Alfredo, ricotta, Fontina, Italian seasoning, and red pepper flakes (if you’re using them). Stir it really well—it’ll look thick and smell amazing already.

  • Add pasta to the mix: Toss the cooked pasta into that cheesy sauce bucket, making sure every noodle gets coated. Don’t be shy with the spoon here—give it some love.

  • Spread into the dish: Transfer everything to a greased or sprayed 9×13-inch baking dish. Smooth it out but don’t fuss too much. A few pasta peaks and valleys are welcome here.

  • Mix the crunchy topping: In a bowl, stir together mozzarella, panko, Romano, Parmesan, and the minced garlic. Sprinkle this glorious mixture evenly over the top of your ziti pile.

  • Bake to golden bliss: Into the oven it goes, uncovered, at 375°F for about 30 to 35 minutes. You’ll know it’s ready when the top looks perfectly golden and you hear a gentle bubbling from the edges.

  • Let it rest: Just five minutes. I know, it’s hard to wait when the cheese smells like the inside of a pizzeria, but it helps everything settle.

  • Garnish and serve: Sprinkle with fresh parsley, extra Parm if you like, and serve it up while it’s still hot and melty.

Copycat Olive Garden Ziti al Forno

Storage Options

This dish is a total champ when it comes to leftovers. Honestly, it’s one of those meals that tastes even better the next day. Must be the way the cheese and sauce get extra cozy in the fridge.

Once cooled, store any leftovers in an airtight container in the fridge. It’ll keep well for up to 4 days. Just reheat a portion in the microwave or warm it in the oven at 350°F for about 10-15 minutes, covered loosely with foil, so it doesn’t dry out.

Now, let’s talk freezing. Can you freeze this? Oh, absolutely. Assemble the dish but don’t bake it. Wrap it tightly with plastic wrap and foil, then stash it in the freezer for up to 3 months. When you’re ready to bake, let it thaw overnight in the fridge, remove the plastic wrap (yes, please do that part), and bake as normal.

Or make a double batch—one for now, one for the freezer. Genius move.

Variations and Substitutions

Part of what makes this so weeknight-friendly is how easy it is to tweak. Cheese is forgiving, and so is pasta—bless them both.

  • Gluten-free pasta: Just swap in your favorite gluten-free ziti or penne. Watch the cook time though; some varieties get a little mushy if overbaked.

  • Different cheeses: Can’t find Fontina? Provolone, Asiago, or even a sharp white cheddar can step in. Mix and match what you have.

  • Add protein: Want to bulk it up? Shredded rotisserie chicken or cooked Italian sausage make great additions.

  • Skip the Alfredo: If you’re not into cream sauces, just use all marinara and a splash of reserved pasta water to loosen things up.

  • Make it spicy: Double the pepper flakes or toss in some chopped Calabrian chilies for serious heat lovers.

  • Go vegetarian-forward: Throw in sautéed mushrooms, spinach, or roasted red peppers for extra veggies and flavor depth. (And speaking of veggie power, this rainbow chard situation would pair pretty wonderfully on the side.)

Copycat Olive Garden Ziti al Forno

What to Serve with Olive Garden Five-Cheese Ziti al Forno

This dish doesn’t technically need anything more than a fork and a comfy chair, but let’s round it out if you’re feeling extra.

  • A crisp green salad: Something light and lemony to balance the richness. Think arugula, shaved fennel, or peppery greens with a vinaigrette. If you’re into lighter sides, try this citrusy lemon potato salad. No mayo in sight, but tons of flavor.

  • Garlic bread (obviously): Toasted, buttery, crusty bread to scoop up the leftover sauce puddles. If carbs on carbs is wrong, I don’t want to be right.

  • Roasted veggies: Broccoli florets or Brussels sprouts tossed in olive oil with a bit of garlic and hit with lemon juice after roasting.

  • Wine or sparkling water: A chilled glass of something crisp cuts through the cheese like a polite little palate cleanser. Fancy or not, we’re here for good sips.

  • Dessert (why not?): Maybe wrap it up with something sweet like snickerdoodle cake mix cookies. They’re soft, cinnamony, and dangerously easy to make.

Copycat Olive Garden Ziti al Forno

Frequently Asked Questions

Can I make this Olive Garden Ziti al Forno ahead of time?

Totally, and it’s kind of the best way to do it. Just assemble everything ahead (sauce, pasta, topping), cover the dish tightly with foil or wrap, and park it in the fridge for up to 24 hours. When you’re ready to bake, take it out while the oven preheats so it loses the chill a bit. You might need to tack on a few extra baking minutes—just check that the middle is hot and bubbly.

What’s a good substitute for Fontina cheese?

If you can’t find Fontina, go for provolone, gouda, or any mild, melty cheese with a bit of character. Even a decent mozzarella or Monterey Jack will work in a pinch. The key is meltability plus a bit of flavor, so skip anything super sharp like aged cheddar—it’ll overpower the other cheeses.

How spicy is it with red pepper flakes?

It’s gentle heat—more of a nudge than a punch. Totally manageable. If spice isn’t your thing, just leave them out, no biggie. On the flip side, if you’re a spice fan, you can always add more flakes or even roasted jalapeños for a twist. It’s your ziti now, spice as you please.

Can I freeze leftovers of the baked dish?

Yes, you can. Portion leftovers into airtight containers and pop them in the freezer for up to 2 months. When you’re ready for round two, thaw overnight in the fridge and reheat in the oven or microwave. The topping may soften a bit in the freezer, but the flavor holds up beautifully.

Copycat Olive Garden Ziti al Forno

Olive Garden Five-Cheese Ziti al Forno

Prep Time 20 minutes
Cook Time 35 minutes
Resting Time 5 minutes
Total Time 1 hour
Baked ziti, leveled up—creamy, comforting, and covered in a crispy, cheesy topping. This Olive Garden-inspired five-cheese ziti al forno is loaded with marinara, Alfredo, ricotta, mozzarella, Fontina, Parmesan, and Romano, all baked until bubbly. Serve right from the oven or enjoy leftovers—the flavor only gets better with time!
8 servings

Ingredients

Pasta

  • 1 pound (450 g) ziti or rigatoni

Sauce Mixture

  • 2 cups (475 ml) marinara sauce store-bought or homemade
  • 1 cup (240 ml) Alfredo sauce
  • 1 cup (250 g) ricotta cheese
  • 1 cup (110 g) Fontina cheese shredded (or provolone)
  • 2 tsp Italian seasoning
  • 1/2 tsp (0.5 tsp) red pepper flakes optional

Crunchy Topping

  • 1 cup (110 g) shredded mozzarella cheese
  • 1 cup (50 g) panko breadcrumbs
  • 1/3 cup (33 g) grated Romano cheese
  • 1/3 cup (33 g) grated Parmesan cheese
  • 2 cloves garlic minced

For Garnish

  • chopped fresh parsley optional
  • extra grated Parmesan optional, for serving

Equipment

  • Large pot
  • Colander
  • Large mixing bowl
  • 9x13 inch Baking Dish
  • Oven

Instructions
 

  1. Boil the pasta: Bring a large pot of salted water to a boil. Add ziti (or rigatoni) and cook until just shy of al dente—about 2 minutes less than package directions. Drain and rinse with cold water to stop cooking.
  2. Prep the oven and dish: Preheat oven to 375°F (190°C). Grease or spray a 9x13-inch baking dish.
  3. Mix the saucy base: In a large bowl, combine marinara, Alfredo, ricotta, Fontina, Italian seasoning, and red pepper flakes (if using). Stir well to mix.
  4. Add pasta to the mix: Toss cooked, cooled pasta into the sauce mixture, coating all noodles evenly.
  5. Spread into the dish: Transfer everything to the prepared baking dish and smooth out the top.
  6. Mix the crunchy topping: In a bowl, combine mozzarella, panko, Romano, Parmesan, and minced garlic. Sprinkle evenly over the ziti mixture in the dish.
  7. Bake: Bake uncovered at 375°F (190°C) for 30–35 minutes, until golden brown on top and bubbling at the edges.
  8. Rest: Let the dish rest for 5 minutes after removing from the oven to let everything set.
  9. Garnish and serve: Sprinkle with chopped parsley and extra Parmesan if desired. Serve hot and enjoy!

Notes

This pasta bake is forgiving—substitute cheeses as needed (provolone or Asiago work well for Fontina). Add rotisserie chicken or sausage for protein, or toss in sautéed spinach, mushrooms, or roasted peppers for extra veggies. It keeps well in the fridge for 4 days or can be assembled unbaked and frozen for up to 3 months. To freeze: wrap tightly, thaw overnight, and bake as directed.

Nutrition

Calories: 540kcal | Carbohydrates: 60g | Protein: 28g | Fat: 22g | Saturated Fat: 12g | Cholesterol: 60mg | Sodium: 1200mg | Potassium: 500mg | Fiber: 3g | Sugar: 7g | Vitamin A: 650IU | Vitamin C: 6mg | Calcium: 410mg | Iron: 4mg

Let's Get Cooking!

100+ Recipes for Busy Nights

In a time crunch? Take a look around and browse plenty of recipes to help you get dinner ready and on the table on those busy nights!

Sweet Recipes

Pumpkin Banana Muffins

Pumpkin Banana Muffins Recipe

Strawberry Pie Bars

Strawberry Pie Bars Easy Oven Recipe

White Chocolate Raspberry Muffins

White Chocolate Raspberry Muffins Recipe

Snickerdoodle Muffins

Snickerdoodle Muffins Recipe for Oven

PIN NOW

Follow KitchenetteBlog on Pinterest

Love cozy recipes that actually make it to the table? On Pinterest, I share new comfort-food ideas every week—desserts, dinners, and those little snack cravings that hit at midnight. Come pin with me and never run out of kitchen inspo.

Savory Recipes

Turkey Tetrazzini

Turkey Tetrazzini Baked Pasta Recipe

Grilled Chicken Panini Sandwich

Grilled Chicken Panini Sandwich Recipe

Sweet Potato Cornbread

Sweet Potato Cornbread Recipe Oven Baked

Classic Waldorf Salad

Waldorf Salad Simple Classic Recipe

Get 5 Recipes to Simplify Your Life!

Delicious, versatile recipes you can make over and over.