Get 5 recipes to simplify your life:

easy, delicious, real food recipes

Latest Recipes

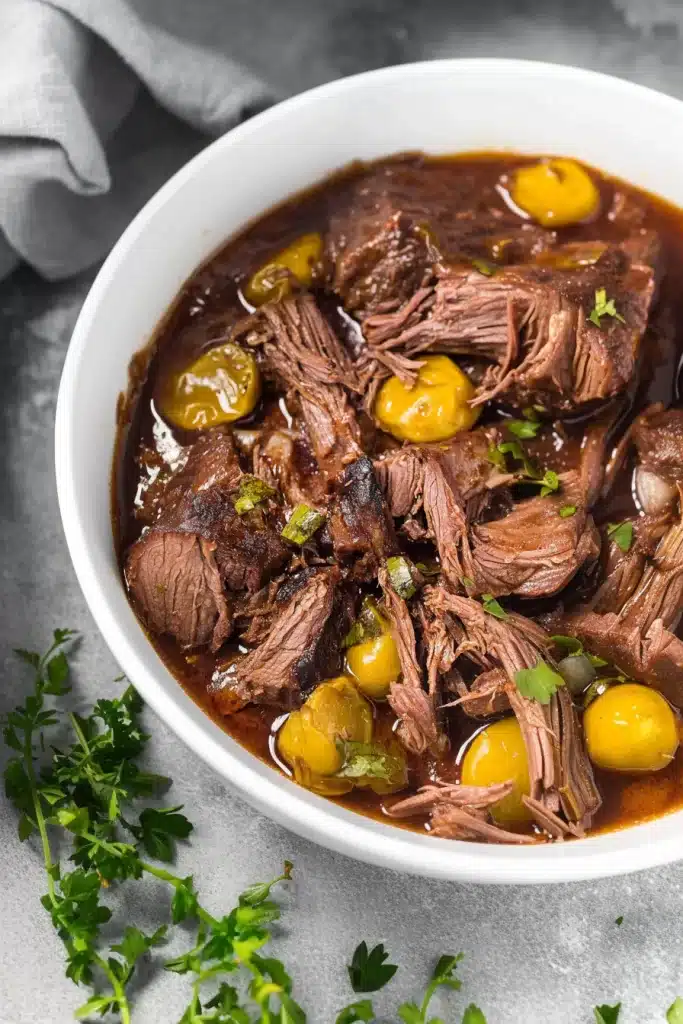
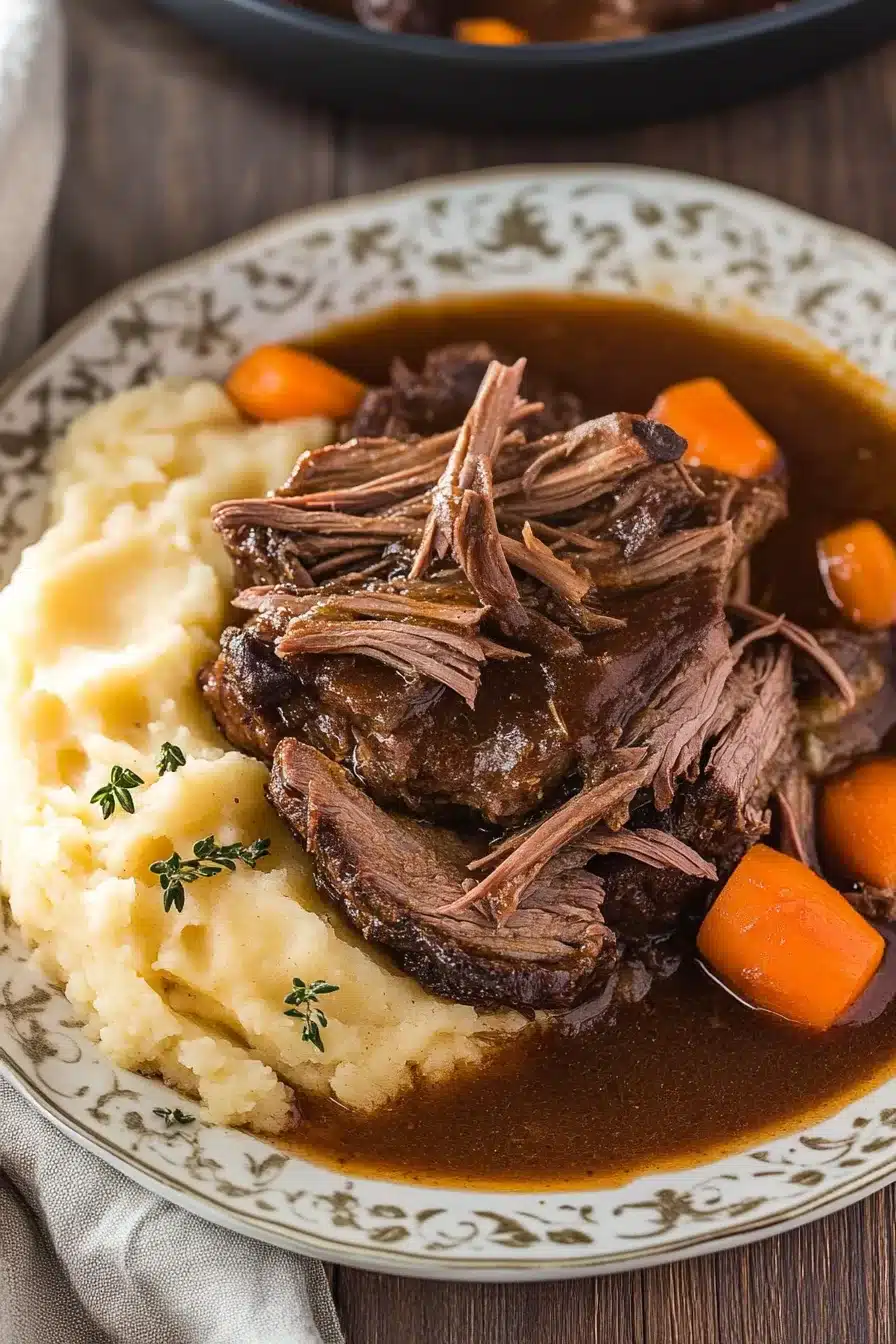
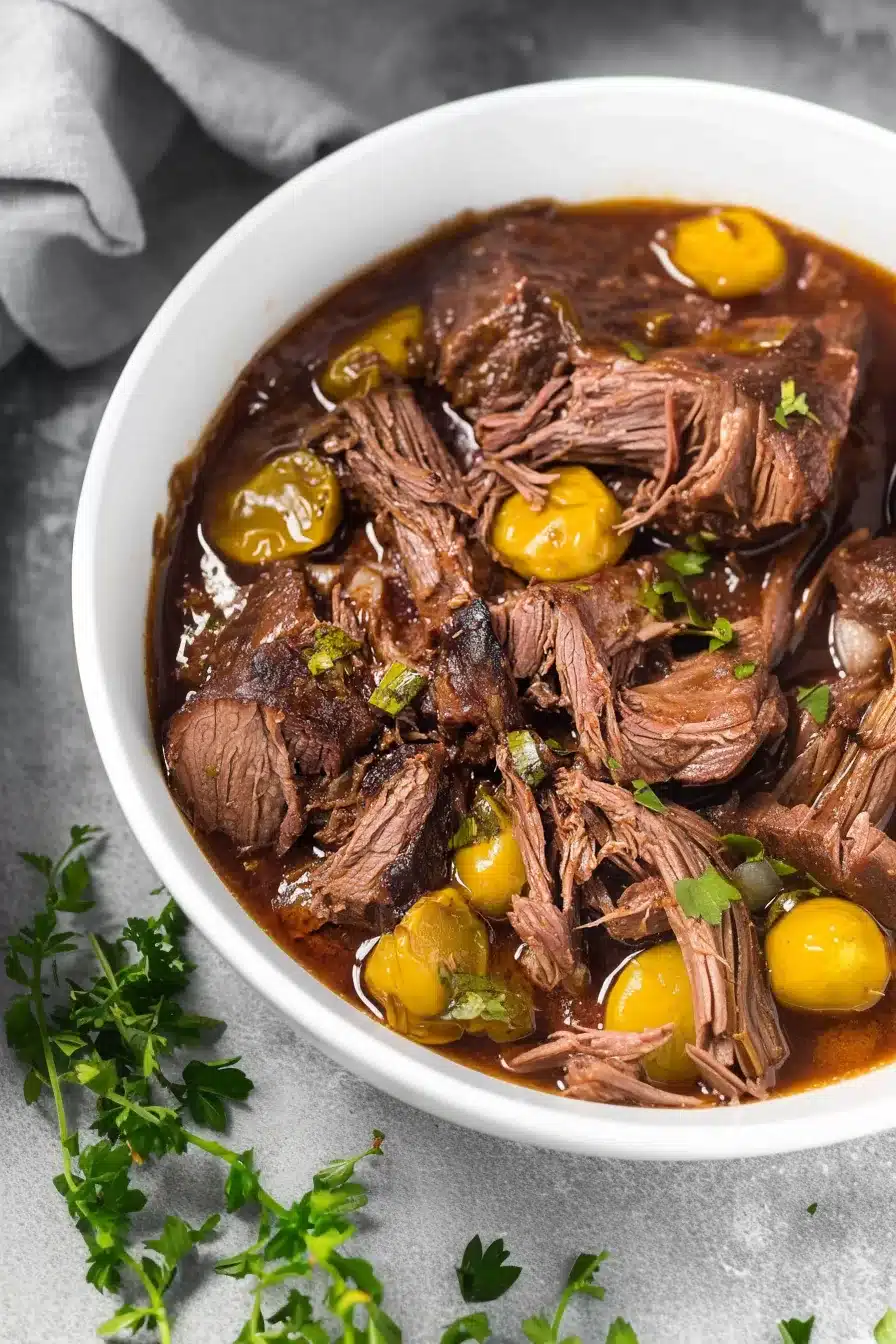
Tender, tangy, and soaked with buttery goodness, this slow cooker Mississippi pot roast combines chuck roast, pepperoncini, ranch mix, and savory au jus for the coziest comfort food.

You know that moment when the house smells like slow-cooked magic and your tummy starts growling before you even realize you’re hungry? That’s the vibe here. This Mississippi pot roast isn’t fussy, just ridiculously flavorful. It’s built for when you want hearty comfort with minimal work—like Sunday dinner without the stress. Fork-tender roast bathes in its own juicy, buttery bath (yep, it’s unapologetically rich). But don’t be fooled by the name—this works just as well on a Thursday night as it does for a laid-back weekend dinner.

Table of Contents

Slow Cooker Mississippi Pot Roast

Why You’ll Love this Slow Cooker Mississippi Pot Roast

This pot roast has no ego. It’s not trying to be fancy. It just sort of waltzes in, makes your kitchen smell incredible, and feeds your soul (preferably with mashed potatoes involved).

  • Ridiculously simple to make: You basically pile it into a slow cooker and forget about it until your house smells amazing.
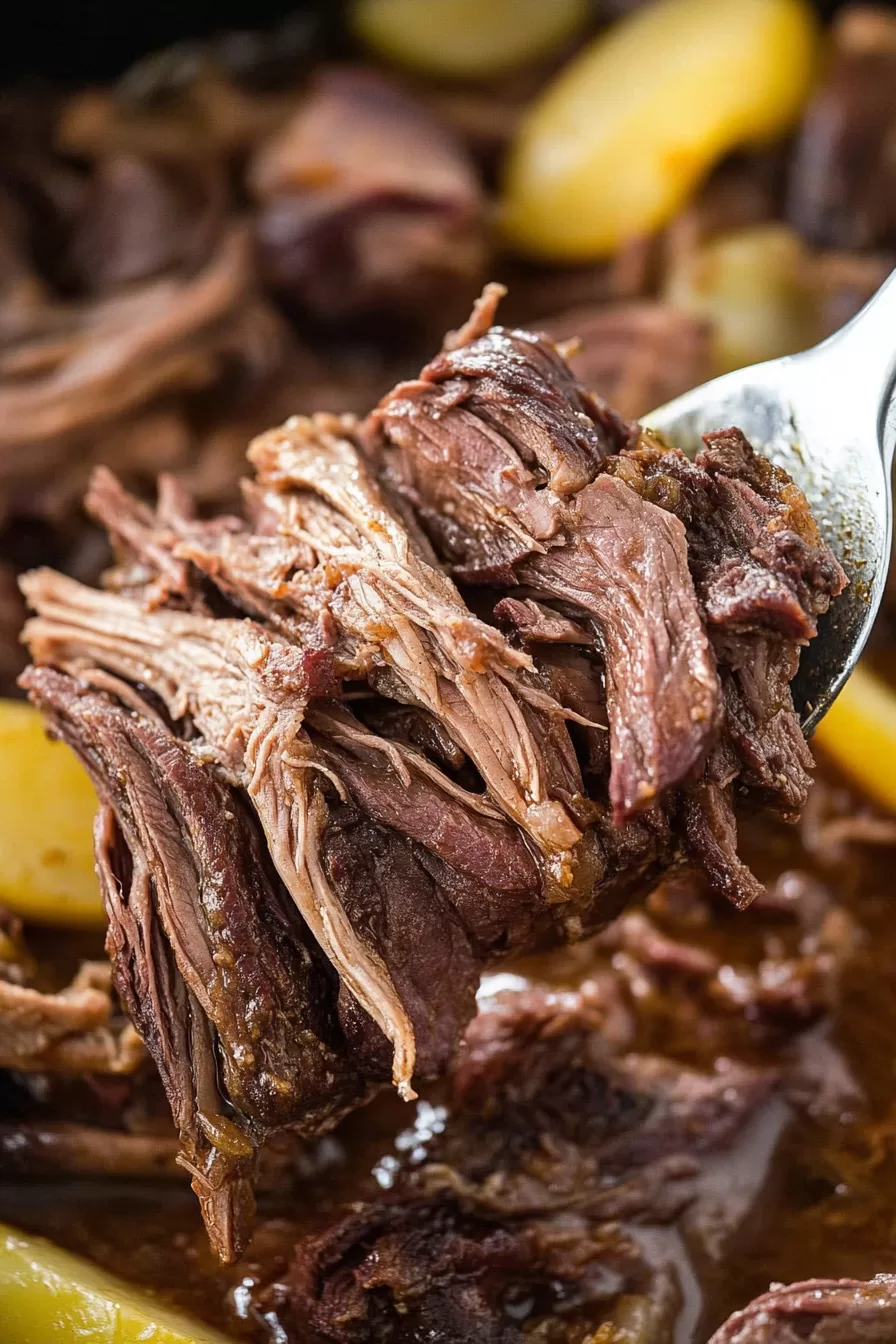
  • Incredibly tender: The slow simmer breaks it down into juicy, melt-apart shreds—no knife necessary.
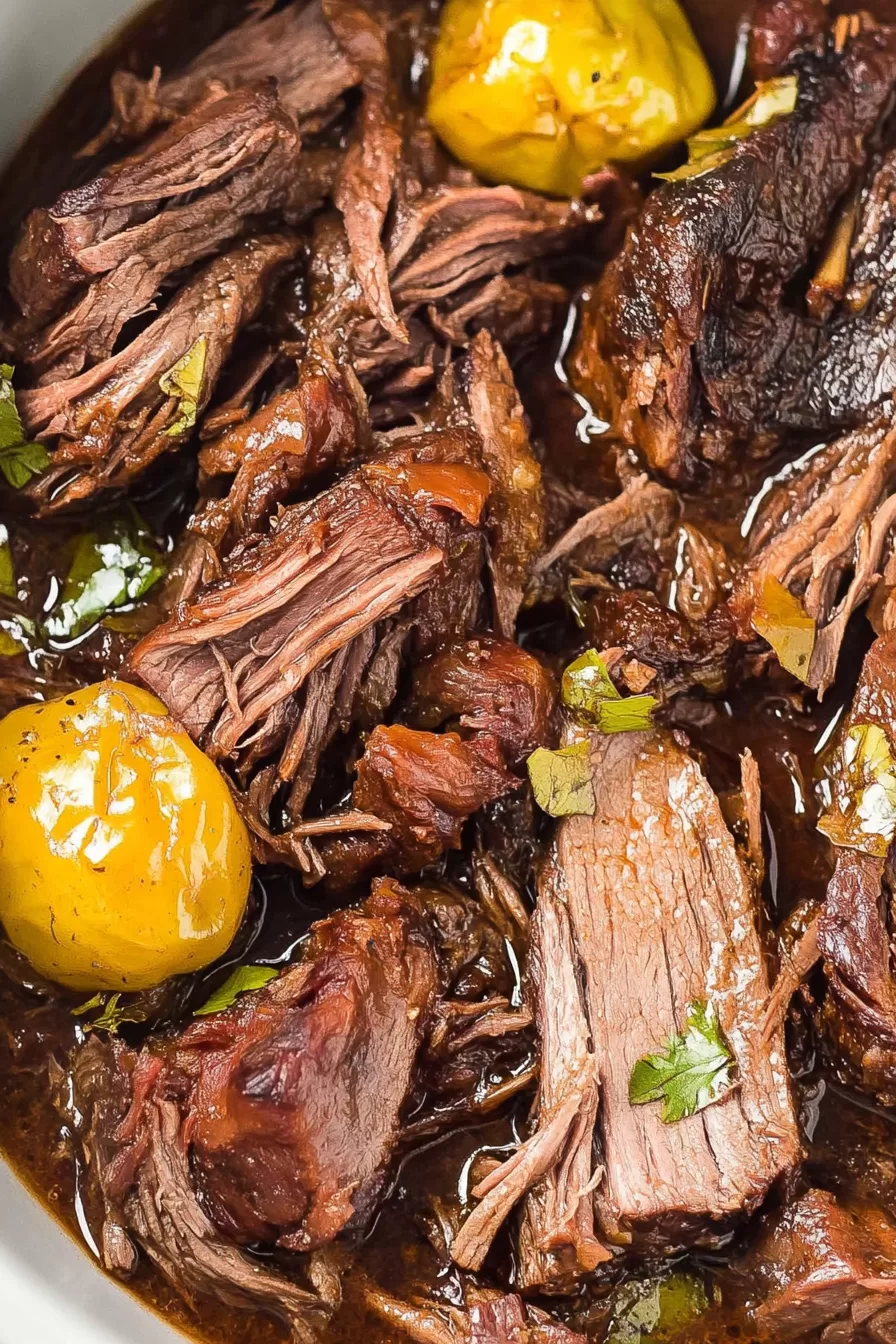
  • Flavor bomb in a pot: Tangy pepperoncini, rich butter, and those savory ranch and gravy packets do all the heavy lifting.
  • Hard to mess up: You’d have to try pretty hard to ruin this, and even then it’d probably still taste good.
  • Leftovers that don’t feel like leftovers: Pop it into sandwiches, sliders, tacos, or just straight into your face. Zero complaint potential.

Slow Cooker Mississippi Pot Roast

Ingredient Notes

Here’s what we’re working with. Nothing too wild—just a few familiar items that come together in comforting harmony.

  • Chuck roast: This cut has the perfect amount of marbling, which turns into juicy softness after slow cooking. Look for one around 3–4 pounds.
  • Pepperoncini: These little tangy peppers bring a bright, acidic note that makes everything else pop. A half jar gives just the right zing.
  • Pepperoncini juice: Don’t skip it! It amplifies the flavor and tenderizes the meat. It’s not spicy, just zesty-sour in the best way.
  • Unsalted butter: Adds richness and helps meld the flavors. Cube it so it melts evenly throughout.
  • Au jus gravy mix: This adds a deep beefy taste and helps create that luscious cooking sauce. Keep a spare packet on hand—you’ll want to make this again.
  • Buttermilk ranch dressing mix: It’s not just for salad. This gives an herby, salty lift without having to chop a single thing.

Slow Cooker Mississippi Pot Roast

How To Make This Slow Cooker Mississippi Pot Roast

If you can press a button and walk away without burning the house down, you’re 98% qualified to make this. Let’s do it.

  • Optional sear for extra flavor: Warm up a heavy skillet, add a slick of oil, and brown that chuck roast on all sides, about 3–4 minutes per side. This adds depth, but if you’re in a hurry (or just don’t feel like cleaning another pan), it’s not essential.

  • Load up your slow cooker: Plop the roast into the slow cooker first. Then scatter the pepperoncini over top, pour in about half the jar of juice, and scatter cubed butter around it like little golden gifts.

  • Add the magic powder: Sprinkle the au jus mix and the ranch dressing mix evenly over it all. No stirring required—it’s like seasoning rain.

  • Slow cook the magic: Set it to LOW (not high) and let it do its thing for 8–10 hours. When you can pull it apart with a fork and it looks like it’s giving up on life in the best way, it’s ready.

  • Rest and shred: Carefully lift the roast onto a cutting board, cover loosely with foil, and let it chill for 10 minutes. Then pull it apart with two forks like a winner at a BBQ competition.

  • Back in the bath: Return that shredded goodness to the slow cooker and stir it into the remaining juices. Let it soak up the flavor like a cozy meat sponge for another 15–20 minutes.

  • Serve and sigh happily: Dish it up with whatever makes you smile—mashed potatoes, soft rolls, or even over rice. No judgment if you eat it with just a spoon.

Slow Cooker Mississippi Pot Roast

Storage Options

Once you’ve devoured your first hot plate (and maybe seconds), you might wonder what to do with the rest. Good news; this roast loves a second act.

Pop leftovers into an airtight container and stash ’em in the fridge for up to 4 days. I like to spoon a bit of the extra juice over the meat before closing the lid—it keeps it from drying out. Trust me, dry pot roast is sadness on a plate.

Yes, you can absolutely freeze this. Just wait until it’s completely cooled, then portion it into freezer bags or containers (bonus points if you flatten the bags for easy stacking). It’ll keep happily for 2–3 months.

When it’s time to reheat, thaw overnight in the fridge or use the microwave on half power. You can heat it directly from frozen on the stovetop too—just add a splash of broth or water and gently warm until steamy and tender again.

Variations and Substitutions

This roast is pretty flexible. If you don’t have one ingredient, don’t panic—there’s room to improvise.

  • Different cut of beef: No chuck roast? A brisket or rump roast will also melt nicely, though they might need a little more time.
  • Add veggies: Toss in some thick-cut carrots or quartered potatoes halfway through cooking. They’ll soak up that saucy goodness.
  • Spice it up: Want more kick? Throw in a few extra pepperoncini or splash in a little hot sauce. Totally up to you.
  • Use a homemade spice blend: If you want to skip the packets, you can make your own ranch seasoning. But that’s another rabbit hole.
  • Dairy-free option: Swap butter for a plant-based version if needed. The flavor still holds up like a champ.

Slow Cooker Mississippi Pot Roast

What to Serve with Slow Cooker Mississippi Pot Roast

Once your pot roast is juicy and ready, it begs for a worthy sidekick (or two). Cozy carbs, fresh veg, and a bit of crunch are always welcome.

  • Mashed potatoes: This is the classic move for a reason. The rich, buttery mash is ideal for catching all those savory juices. It’s the kind of combo that makes you close your eyes a little while chewing.

  • Soft dinner rolls or slider buns: Whether you’re sopping up sauce or making handheld sliders, bread turns this into finger food heaven. Bonus points if they’re lightly toasted and buttered.

  • Roasted green beans or carrots: Something green (or orange) adds a fresh pop to balance the richness. Just toss ’em in olive oil, sprinkle with salt, roast until crispy on the edges. Done.

  • Baked mac and cheese: Over-the-top? Maybe. Worth it? Absolutely. It’s indulgence squared and nobody will complain, least of all you.

  • A light salad with zing: Try a crisp romaine salad with lemon vinaigrette or even a tangy slaw. Even carnivores like a little crunch contrast, right?

If you’re looking for more hearty meal ideas, this baked manicotti would also hit the spot, especially if you’re feeding a group.

Slow Cooker Mississippi Pot Roast

Frequently Asked Questions

Can I use a different type of roast for Mississippi pot roast?

Yes, definitely! If you can’t find a chuck roast, a rump roast or bottom round will work too. Just keep in mind, different cuts vary in fat and connective tissue. Chuck is typically the most tender when slow cooked because of its marbling, but others will still shred nicely with enough time. If it feels a little tough when you check it, just keep cooking—it’s not done with its spa treatment yet.

Is Mississippi pot roast spicy?

Not really. Despite the pepperoncini, it’s more tangy than spicy. The peppers mellow during cooking and blend into the rich sauce without bringing heat. If you’re spice-sensitive, don’t worry—you won’t need a glass of milk. Want more bite? Just toss in a few extra peppers or even a pinch of crushed red pepper flakes.

Can I make this in the oven or Instant Pot instead?

Absolutely. For the oven, pop everything into a Dutch oven and bake covered at 300°F for about 4 hours, or until it’s fall-apart tender. For the Instant Pot, set it on high pressure for about 80–90 minutes with natural release. Just make sure there’s enough liquid in there (about 1 cup total) so it builds pressure properly.

What can I do with leftovers?

Honestly, leftovers might be the best part. Make sandwiches, sliders, quesadillas, or even stir it into cooked pasta or rice. If you’re in a soup mood, toss some into a broth with potatoes and veggies for a cozy riff on pot roast soup. You win dinner again without cooking twice.

Slow Cooker Mississippi Pot Roast

Slow Cooker Mississippi Pot Roast

Prep Time 10 minutes
Cook Time 8 hours
Rest & Soak Time 20 minutes
Total Time 8 hours 10 minutes
Tender, tangy, and unapologetically rich, this slow cooker Mississippi pot roast combines chuck roast, pepperoncini, ranch mix, and savory au jus for the coziest comfort food. Just pile everything into the slow cooker and let the magic happen—deliciously simple, fork-shreddable, and loaded with buttery sauce.
6 servings

Ingredients

Main Ingredients

  • 3–4 lb (1.5–1.8 kg) chuck roast well-marbled
  • 1/2 jar whole pepperoncini peppers plus some juice
  • 1/4–1/3 cup (60–80 ml) pepperoncini juice from the jar
  • 1/2 cup (113 g) unsalted butter cubed (1 stick)
  • 1 packet (28 g) au jus gravy mix about 1 oz or 28g
  • 1 packet (28 g) buttermilk ranch dressing mix about 1 oz or 28g

Optional Add-ons

  • 1 tbsp (15 ml) cooking oil for searing, optional
  • Thick-cut carrots or quartered potatoes optional, add halfway through

Equipment

  • Slow cooker
  • Large Skillet (optional for searing)
  • Cutting board
  • Forks

Instructions
 

  1. Optional Sear for Flavor: If desired, heat oil in a heavy skillet. Sear the chuck roast on all sides until browned, about 3–4 minutes per side. Set aside.
  2. Layer the Ingredients: Place the chuck roast in the slow cooker. Scatter the pepperoncini peppers on top, then pour in the pepperoncini juice. Arrange cubed butter around the roast.
  3. Add the Seasonings: Sprinkle the au jus gravy mix and ranch dressing mix evenly over everything. No need to stir.
  4. Slow Cook: Cover and cook on LOW for 8–10 hours, until the roast is fall-apart tender and shreds easily with a fork.
  5. Rest: Transfer the roast to a cutting board, lightly cover with foil, and let it rest for 10 minutes.
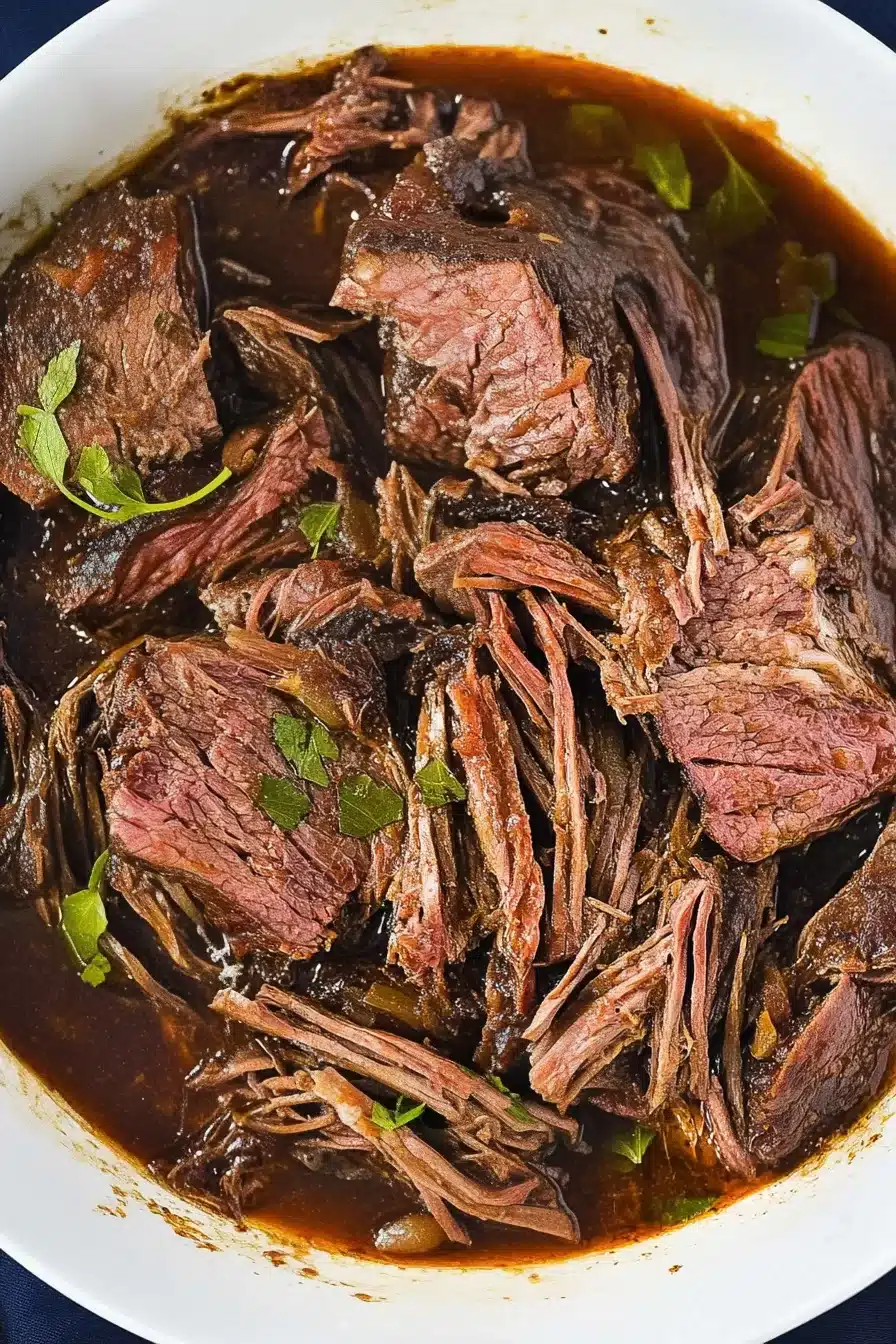
  6. Shred: Using two forks, pull the beef into shreds.
  7. Return & Soak: Return the shredded meat to the slow cooker, stirring it into the juices. Let soak for another 15–20 minutes on warm or low.
  8. Serve: Spoon the meat and juices over mashed potatoes, soft rolls, rice, or as desired.

Notes

Leftovers store beautifully in an airtight container in the fridge for up to 4 days (add a little extra juice to keep it moist). Freeze cooled portions for 2–3 months. Reheat gently on the stove or in the microwave with a splash of water or broth.
You can swap out the roast for brisket or rump roast (cooking time may increase slightly). For extra veggies, add carrots or potatoes halfway through. Dairy-free? Use plant-based butter.

Nutrition

Calories: 495kcal | Carbohydrates: 3g | Protein: 38g | Fat: 36g | Saturated Fat: 16g | Cholesterol: 155mg | Sodium: 1090mg | Potassium: 700mg | Sugar: 1g | Vitamin A: 415IU | Vitamin C: 2mg | Calcium: 38mg | Iron: 4.5mg

Creamy, cozy, and full of good stuff, this ham and potato soup brings together tender potatoes, savory ham, sweet onion, and rich broth. It’s got everything you want simmering away on the stove—comfort, warmth, and that rich, homey smell that makes you pause mid-scroll and go, “Yeah, I need that.”

You get creamy richness without heavy cream (hello, milk and butter magic), and it’s hearty enough to make you sit back in your chair afterward and just… sigh a little. In the best way.


There’s something solidly comforting about this creamy ham potato soup. The kind of soup you want after a long chilly walk, or when dinner needs to happen fast but you’re craving more than just toast. It starts with humble ingredients—potatoes, celery, onion, leftover ham—and turns into a pot of thick, savory goodness that practically begs for a hunk of crusty bread. The broth gets buttery and rich (without being gluey), and the whole thing comes together in one of those perfect stovetop symphonies: steam rising, wooden spoon tapping against the side, the scent of onions and butter mingling like a warm hug.

Table of Contents

Creamy Ham Potato Soup

Why You’ll Love this Creamy Ham Potato Soup

If we’re being honest, this is the kind of soup that earns a spot in the regular winter rotation without trying too hard.

  • Ridiculously simple to make: You just chop, simmer, whisk, and pour—no fuss, no fancy equipment, just a decent-sized spoon.
  • Great use for leftover ham: Finally, a reason to actually be excited about ham showing up in your fridge again.
  • Creamy, but not too rich: Thanks to whole milk instead of cream, it’s luxuriously smooth without turning into a brick in your belly.
  • Totally customizable: Add cheese, bacon, chives, hot sauce—this soup is cool with whatever vibe you’re feeling.
  • Ready in about 30 minutes: Honestly, the hardest part is peeling the potatoes, and even that’s negotiable.
  • Freezer-friendly possibilities: Make a big batch and tuck some away for a lazy future-you to enjoy.

Creamy Ham Potato Soup

Ingredient Notes

This soup does not try to be complicated. Each ingredient plays its part, and together, they’re cozy magic in a bowl.

  • Potatoes: Go with Yukon Gold or russets. They get tender but still hold their shape, and they thicken the soup a bit once cooked.
  • Celery: Adds that little snap of freshness and gives flavor balance to a creamy soup.
  • Onion: Finely chopped so it melts softly into the broth and becomes a subtle flavor backdrop.
  • Cooked ham: Leftovers work perfectly here. Dice it small so every bite gets a little salty-savory something.
  • Chicken broth: Use low-sodium so you can control the salt level. The base flavor really shines through.
  • Salt and pepper: White pepper is lovely here—mild, slightly floral—but regular black works just fine too.
  • Butter: The start of the creamy base. It adds richness and that satisfying “something smells amazing” aroma.
  • Flour: Whisked into the butter to make a quick roux—a gentle thickener that keeps the soup smooth and silky.
  • Whole milk: Brings creaminess without overwhelming everything. Skim would be sad. Go full-fat.

Creamy Ham Potato Soup

How To Make This Creamy Ham Potato Soup

No special skills required here—just a pot, a stove, and maybe a whisk if yours hasn’t mysteriously gone missing like mine always does.

  • Combine veggies, ham, and broth: In a large pot, toss in your diced potatoes, celery, onion, ham, and broth. Set it over medium-high heat and bring it to a gentle boil. Let it simmer until the potatoes are fork-tender, about 10 to 15 minutes. Stir occasionally and enjoy the smells—you’re halfway there.

  • Season the base: Add a little salt and a few grinds of pepper. Taste as you go. Remember, the ham adds salt too, so just enough to coax everything awake.

  • Make the roux: In a separate small saucepan, melt the butter over medium-low heat. Sprinkle in the flour and whisk constantly (picture your arm doing some gentle cardio) for about a minute until the mix thickens and loses that raw flour smell.

  • Add milk and thicken: Slowly drizzle in the milk, whisking constantly so no lumps form. Keep stirring over medium-low heat until the sauce thickens. Think creamy gravy vibes—coats the back of a spoon but isn’t gloppy.

  • Combine and finish: Pour the thickened milk mixture into the main pot with the soup. Stir well to combine and heat through gently. If it’s too thick, splash in a little more broth or milk until it feels just right to you.

  • Garnish and serve: Serve hot, topped with shredded cheddar, crispy bacon bits, or chives if you’re feeling fancy… or just hungry.

Creamy Ham Potato Soup

Storage Options

So you’ve made a big bubbling pot of this creamy ham potato soup and now you’re full and sleepy. What now?

Let it cool down first. Don’t shove hot soup into the fridge—your leftovers will sulk and the other food might start resenting you.

Once cooled, transfer the soup into an airtight container and refrigerate. It’ll keep beautifully in the fridge for up to four days. The flavors meld together even more overnight, which, honestly, might make tomorrow’s lunch even better than dinner.

Can you freeze it? You can, but here’s where I get fussy. Since there’s milk in it, the texture may change slightly—milk-based soups sometimes separate or go a bit grainy when thawed and reheated. If you’re okay with a little texture weirdness (or plan to blitz it a bit after reheating), you’re good.

To reheat, use a stovetop over low heat, adding a splash of broth or milk if things get too thick. Microwaving works too—just do it in short bursts, stirring in between.

Variations and Substitutions

Want to make this your own? There’s a lot of room to play here. Below are just a few ideas you can steal or build on.

  • Smoked sausage instead of ham: Adds extra depth and a little spice, especially if you go with andouille or kielbasa.
  • Heavy cream swap: If you want a soup that feels uber decadent, swap half the milk for cream. Just know it’ll be richer.
  • Add carrots or corn: Sweet corn brings a nice texture, and carrots add color and subtle sweetness—dice ‘em small for even cooking.
  • Vegetarian version: Skip the ham and use veggie broth. Add smoked paprika or a splash of liquid smoke to bring that savory vibe.
  • Cheesy upgrade: Stir in shredded sharp cheddar right before serving. Or try gouda if you’re feeling fancy.
  • Potato mash-in: Mash some of the cooked potatoes in the pot before adding the milk mixture for extra thickness and a rustic feel.

Creamy Ham Potato Soup

What to Serve with Creamy Ham Potato Soup

Let’s be real: this soup can stand on its own. But if you’re looking for some partners? Oh, I’ve got some good ones.

  • A wedge of warm, crusty sourdough or a thick slice of country bread is an obvious companion. Tear it apart and dunk straight in. No manners required.

  • It also plays incredibly well with a bright veggie side. If you’re looking for ideas, these oven-roasted Brussels sprouts bring crispy, garlicky contrast without stealing the spotlight.

  • Feeling like soup needs dessert? Same. A slice of this persimmon bread pudding hits the sweet-and-cozy mark right after a savory bowl of soup.

  • Cheese and crackers are a solid low-effort side. Just set out a little plate and let everyone snack between spoonfuls.

  • Oh, and salad! A sharp, lemony arugula salad with shaved parmesan would cut the creaminess and pep things up nicely.

Creamy Ham Potato Soup

Frequently Asked Questions

Can I use leftover holiday ham?

Absolutely. In fact, that’s when this soup really shines. Leftover spiral ham, country ham, even those ham steaks lurking in the freezer all work beautifully. Just dice it small so every spoonful gets some of that salty, smoky richness. If your ham is very salty, ease up on the soup’s added salt and taste as you go.

Can I make this soup ahead of time?

Yes, and honestly, I recommend it. The flavors get even cozier after a night in the fridge. Just let it cool, store it right, and reheat over low heat on the stove with a splash of milk or broth to loosen it up. Avoid letting it boil again—that can mess with the creamy texture.

What kind of potatoes work best for this soup?

Yukon Gold and russet potatoes are both excellent choices. Yukon Golds hold their shape well and have a natural buttery taste. Russets break down more and help thicken the soup a bit. If you like it chunkier, go with Yukons. Creamier and thicker? Russets are your friend.

Is it okay to freeze this soup?

Technically yes, but here’s the deal: milk-based soups can separate a little after freezing. If texture isn’t a dealbreaker for you, stash some in the freezer. When reheating, stir it gently and maybe give it a whisk to smooth things out. A little potato blender magic doesn’t hurt.

Creamy Ham Potato Soup

Creamy Ham and Potato Soup

Prep Time 10 minutes
Cook Time 20 minutes
Total Time 30 minutes
Creamy, cozy, and full of goodness, this ham and potato soup brings together tender potatoes, savory ham, sweet onion, and rich broth. It’s hearty and satisfying with a luscious, creamy base thanks to whole milk and butter—no heavy cream needed. Perfect for chilly nights, quick weeknight meals, or using up leftover ham. Ready in about 30 minutes, customizable, and deeply comforting.
6 bowls

Ingredients

Soup Base

  • 4 cups (950 g) potatoes diced (Yukon Gold or russet, about 4 medium potatoes)
  • 1 cup (120 g) celery diced (about 2-3 stalks)
  • 1 cup (150 g) onion finely chopped
  • 1 1/2 cups (200 g) cooked ham diced
  • 4 cups (950 ml) low-sodium chicken broth
  • salt and pepper to taste; white pepper preferred but black is fine

Creamy Roux

  • 4 tbsp (56 g) butter
  • 1/4 cup (30 g) all-purpose flour
  • 2 cups (475 ml) whole milk do not substitute skim

Optional Garnishes

  • shredded cheddar cheese for serving
  • crispy bacon bits
  • chopped chives

Equipment

  • Large pot
  • Small Saucepan
  • Whisk
  • Knife
  • Cutting board

Instructions
 

  1. In a large pot, combine diced potatoes, celery, onion, ham, and chicken broth. Set over medium-high heat and bring to a gentle boil. Simmer until potatoes are fork-tender, about 10–15 minutes, stirring occasionally.
  2. Season soup with salt and freshly ground pepper to taste. Ham can be salty, so season gradually and taste as you go.
  3. Meanwhile, in a separate small saucepan over medium-low heat, melt butter. Sprinkle in flour, whisking constantly for about 1 minute until cooked and smooth.
  4. Slowly pour in the milk, whisking constantly to prevent lumps. Continue cooking over medium-low heat, whisking often, until the sauce thickens enough to coat the back of a spoon.
  5. Pour the thickened milk mixture into the soup pot. Stir to combine and heat gently for another 2–3 minutes. If soup is too thick, add additional broth or milk until desired consistency is reached.
  6. Serve hot, garnished with shredded cheddar, bacon bits, or chopped chives if desired.

Notes

This soup is perfect for using up leftover ham. You can add more veggies like diced carrots or corn, or swap ham for smoked sausage for a new twist. For extra richness, substitute part of the milk with heavy cream, or add shredded cheese near the end.
Soup thickens as it sits—thin with more broth or milk as needed. For a rustic texture, lightly mash some of the potatoes before adding the cream mixture.

Nutrition

Calories: 320kcal | Carbohydrates: 31g | Protein: 13g | Fat: 15g | Saturated Fat: 8g | Cholesterol: 50mg | Sodium: 950mg | Potassium: 900mg | Fiber: 3g | Sugar: 6g | Vitamin A: 500IU | Vitamin C: 20mg | Calcium: 150mg | Iron: 2mg

Sweet and crispy roasted magic—these Red Lobster brussels sprouts combine soy sauce, ginger, and garlic into a sticky-salty glaze that’ll make your kitchen smell like a cozy little bistro. The crunchy French fried onions on top? Yeah, they seal the deal.

Each bite is golden-edged and caramelized, a little smoky, a little sweet, and just… so good. You’ll want to pluck these straight from the pan (and maybe burn your tongue—we’ve all done it).

Crispy Brussels sprouts on their own? Lovely. But drizzle on that glossy soy-ginger glaze, toss in some crispy fried onions, and suddenly we’re talking serious flavor drama. This dish has the kind of umami-sweet combo that makes your oven look like a wizard. Honestly, it’s just one of those things you serve as a side and then five minutes later you’re wondering where they all went. Bonus: it’s super fun to say “Red Lobster–Style Crispy Brussels Sprouts” out loud.

Table of Contents

Red Lobster–Style Crispy Brussels Sprouts

Why You’ll Love this Red Lobster brussels sprouts

There’s just something deeply satisfying about roasted Brussels sprouts when they’re treated right. Nothing fancy, no drama—just really good sprouts done well.

  • Unreasonably addictive glaze: That soy-ginger-sugar blend clings to every crispy surface like a sweet-savory hug.
  • The perfect roast texture: Crispy outer leaves, tender middle, and the little charred bits? Chef’s kiss.
  • Minimal prep work: If you can halve a sprout and stir a glaze, you’ve basically got this down.
  • Weeknight-to-party flexible: Serve ‘em on a Tuesday or dress them up for a holiday table.
  • Unexpected crunch factor: French fried onions bring salty crunch that kicks things into snack territory.
  • Great with all kinds of mains: These sprouts are total team players on your plate.

Red Lobster–Style Crispy Brussels Sprouts

Ingredient Notes

Everything here plays an important role, but you can tweak it just enough to make it your own and still get that rich, sticky-salty-sweet payoff.

  • Brown sugar: Adds deep, molassessy richness that helps the glaze caramelize beautifully. Dark brown sugar works best here.
  • Granulated sugar: Balances things out with a lighter sweetness that keeps the glaze from being too heavy.
  • Soy sauce: Go for low-sodium so the glaze doesn’t get too salty as it reduces. We want flavor, not salt-bomb.
  • Fresh ginger: That zippy bite cuts through the sweetness and adds warmth. It’s bright and earthy—don’t skip it.
  • Garlic: Just a touch, but enough to nudge the glaze into savory territory.
  • Brussels sprouts: Pick firm ones with tight leaves. Halving them gives the flat side a chance to crisp up beautifully.
  • Olive oil: Helps the sprouts brown evenly. Avocado oil works too, if that’s your jam.
  • French fried onions: Store-bought and salty-crunchy. They’re the finishing explosion your tastebuds didn’t know they needed.

Red Lobster–Style Crispy Brussels Sprouts

How To Make This Red Lobster brussels sprouts

You’ve got this. We’re not julienning daikon or spinning sugar here. This is all roast, reduce, drizzle, done.

  • Make the glaze: In a small saucepan over medium heat, stir brown sugar, granulated sugar, and soy sauce together. Keep stirring. We want the sugars to dissolve fully and the mixture to start thickening—don’t just leave it to bubble angrily on its own.

  • Add the flavor punch: Toss in the ginger and garlic. Let them mingle with the glaze for 30 seconds or so. You’ll smell when it’s ready—warm and gingery and amazing. Then take it off the heat.

  • Let the glaze rest: This part requires patience (ugh, I know), but trust me. It needs at least 2 hours to cool and thicken. Overnight deepens the flavor even more if you’re thinking ahead.

  • Preheat and prep: Oven at 400°F. While it’s coming to temp, wash, trim, and halve your Brussels sprouts. A little loose leaf shedding is normal. No panic.

  • Toss and roast: Drizzle your halved sprouts with olive oil and toss till well coated. Spread them out on a rimmed baking sheet in one even layer—no crowding, or they’ll steam instead of crisp.

  • Roast till golden and crispy: Slide ’em in the oven for 35–40 minutes. Shake the pan halfway through so both sides get some love. By the end, you should see seriously golden edges and delicious dark bits.

  • Finish like a boss: Transfer the crispy sprouts to a serving dish. Give them a generous drizzle of your cooled glaze, and hit with a shower of French fried onions. Try not to eat the whole plate before it hits the table.

Red Lobster–Style Crispy Brussels Sprouts

Storage Options

Okay, so you somehow have leftovers. First of all, I’m impressed. Second, here’s what to do.

Cool the sprouts completely before storing. Pop them in an airtight container and stick them in the fridge. They’ll stay decent for up to 3 days, though their crispiness does mellow.

Reheating? Use the oven or a skillet for best results. A quick toss on a hot pan with a splash of oil brings back a bit of their glory. Avoid microwaving if crisp edges matter to you (which… they probably do).

Can you freeze them? Technically, yes. But the texture goes a little mushy after thawing. If you do freeze them, wrap them tight and reheat in the oven from frozen for the best chance at a rebound.

Variations and Substitutions

Want to riff on these sprouts a little? Here are a few places you can play without totally reinventing the wheel.

  • Honey instead of brown sugar: Adds a lighter floral sweetness. Just reduce the amount a bit so the glaze doesn’t get too sticky.
  • Tamari for soy sauce: Great gluten-free swap. It’s slightly richer too, so watch saltiness.
  • Roasted garlic: Swap out the fresh garlic for some mellow, sweet roasted cloves for a darker garlic flavor.
  • Add a chili kick: Toss in a pinch of crushed red pepper flakes while the glaze simmers, if you like it spicy-sweet.
  • No fried onions? Toasted sesame seeds or crushed pecans give a crunchy twist without the onion vibes.
  • Bacon it up: Add chopped, crispy bacon to the mix before serving. It’s never not good, let’s be honest.

Red Lobster–Style Crispy Brussels Sprouts

What to Serve with Red Lobster brussels sprouts

These sprouts can pair up with all kinds of mains. Fish, pasta, or even finger foods—they’re totally loyal like that.

  • Try them next to a buttery fish dish like pan-seared cod with rainbow chard. The savory-sweet glaze plays up lighter seafood beautifully without overpowering.

  • They also tag along great with creamy pasta. If you’re feeling extra, serve them beside chicken scampi for a truly indulgent dinner that dips into both comfort and sophistication.

  • Roasted meats are total besties with these guys. Think simple pork tenderloin, grilled sausages, or even leftover rotisserie chicken.

  • For a plant-forward plate, mix them into a grain bowl with quinoa, avocado, and a fried egg. Suddenly, Tuesday looks very chic.

  • Want to get cozy-weird with it? They’re a surprisingly awesome side for something sweet-savory like bacon basil cornbread muffins. Trust your gut (and your belly).

Red Lobster–Style Crispy Brussels Sprouts

Frequently Asked Questions

Can I use frozen Brussels sprouts?

You technically can, but they won’t roast the same way. Frozen sprouts tend to release extra water, so you miss out on that crispy outer shell and golden caramelization. If it’s what you’ve got, try roasting them a bit longer to drive off moisture, but fresh really gives you the best texture here.

Is it okay to make the glaze ahead of time?

Yes, and you’ll actually get a deeper flavor if you do. Make it a day in advance and stash it in the fridge. Just bring it to room temp before drizzling so it’s pourable. It thickens a lot as it cools—that’s a good thing!

What’s the best way to reheat leftovers?

The oven or stovetop is your friend here. Pop the sprouts on a hot skillet with a touch of oil or toss them in a 400°F oven for 8–10 minutes. They’ll re-crisp a bit that way. Microwave if you’re in a serious rush, but expect mushier results.

Are these good for a potluck or party?

Absolutely—they’re flavorful, easy to scale, and fun to eat. Just keep them warm if you can, since they’re crispiest fresh from the oven. If you need to prep ahead, roast them first and warm them quickly before drizzling with the glaze and adding onions right before serving.

Red Lobster–Style Crispy Brussels Sprouts

Red Lobster–Style Crispy Brussels Sprouts

Prep Time 10 minutes
Cook Time 40 minutes
Glaze Cooling Time 2 hours
Total Time 2 hours 50 minutes
Sweet, salty, and gloriously crispy, these Red Lobster–style Brussels sprouts are roasted to golden perfection, glazed with a sticky soy-ginger sauce, and finished with a shower of crunchy French fried onions for the ultimate umami-loaded veggie side. They're simple enough for weeknights and impressive enough for your holiday table.
4 side servings

Ingredients

Soy-Ginger Glaze

  • 2 tbsp (30 g) dark brown sugar packed
  • 1 tbsp (12 g) granulated sugar
  • 2 tbsp (30 ml) low-sodium soy sauce
  • 1 tsp (5 ml) fresh ginger finely grated or minced
  • 1 clove garlic minced

Brussels Sprouts & Toppings

  • 1 lb (450 g) Brussels sprouts trimmed and halved
  • 2 tbsp (30 ml) olive oil or avocado oil
  • 1/2 cup (30 g) French fried onions
  • kosher salt and black pepper to taste

Equipment

  • Small Saucepan
  • Rimmed Baking Sheet
  • Large mixing bowl

Instructions
 

  1. Make the glaze: In a small saucepan over medium heat, combine the brown sugar, granulated sugar, and soy sauce. Stir constantly until sugars dissolve and the glaze starts to thicken, about 2–4 minutes.
  2. Add ginger and minced garlic. Stir for about 30 seconds until fragrant. Remove pan from heat and let the glaze cool completely—at least 2 hours (or overnight for deepest flavor).
  3. Prep Brussels sprouts: Preheat oven to 400°F (200°C). Wash, trim, and halve the Brussels sprouts, removing any tough outer leaves as needed.
  4. In a large bowl, toss halved Brussels sprouts with olive oil, salt, and pepper until well coated.
  5. Spread sprouts cut-side down on a rimmed baking sheet in a single, even layer (do not crowd).
  6. Roast: Roast Brussels sprouts in preheated oven for 35–40 minutes, shaking pan halfway through, until crispy and deeply golden on the edges.
  7. Finish: Transfer roasted sprouts to a serving platter. Drizzle generously with the cooled soy-ginger glaze. Top with French fried onions right before serving. Enjoy immediately!

Notes

If making ahead, store the cooled glaze in the fridge and bring to room temperature before drizzling. Fried onions are best added right before serving so they stay crisp. For a spicy kick, add a pinch of crushed red pepper flakes to the glaze as it cooks.

Nutrition

Calories: 210kcal | Carbohydrates: 25g | Protein: 5g | Fat: 11g | Saturated Fat: 2g | Sodium: 480mg | Potassium: 480mg | Fiber: 5g | Sugar: 10g | Vitamin A: 930IU | Vitamin C: 96mg | Calcium: 58mg | Iron: 2.3mg

Cheesy, saucy, and perfectly cozy! This three-cheese manicotti recipe wraps ricotta, mozzarella, and parmesan in tender pasta shells, baked with marinara.

If you’re wondering what’s bubbling in the oven that smells like a warm hug, it’s this three-cheese manicotti. It’s every bit as comforting as it sounds: tender pasta tubes, creamy ricotta filling, and a marinara situation that practically sings. When the cheese puffs up and the edges crisp just so, you’ll know you’re in for something good. It’s kind of the pasta version of slipping into fuzzy socks. Great for a cozy night in, a Sunday dinner you actually look forward to, or even meal prep if you’re thinking ahead (look at you being responsible). And let’s be honest, cheese-baked anything is never the wrong answer.

Table of Contents

Three-Cheese Manicotti

Why You’ll Love this Three-Cheese Manicotti

No theatrics here, just honest-to-goodness pasta comfort. It’s cheesy, yes. But it’s also easy, satisfying, and weekend-supper worthy.

  • Creamy, savory filling: Ricotta and mozzarella mingle like old friends, tucked into every noodle like a secret.
  • No boiling needed: That’s right. The shells cook right in the oven. Less mess, fewer pots, more yay.
  • Bakes up bubbly and golden: The top gets that irresistible crispy-cheesy thing going on.
  • Leftovers? Even better: The flavors cozy up overnight and taste even more amazing the next day.
  • Easy to customize: Swap sauces, cheeses, or even sneak in greens (shh, they won’t know).
  • That tomato-cheese smell: You’ll know it when you smell it. The good kind. The deeply ‘someone’s cooking something amazing’ smell.

Three-Cheese Manicotti

Ingredient Notes

Not a long shopping list, which we love. Just a few star players doing what they do best.

  • Manicotti shells: These are the big tubes, not to be confused with cannelloni. No need to pre-cook them here, which is my favorite part.
  • Ricotta cheese: Whole milk ricotta gives you the most luscious result. If it seems very wet, it’s okay to drain it a bit.
  • Mozzarella cheese: Shredded and generous. It melts beautifully into the filling and forms that oozy top layer.
  • Parmesan cheese: Adds depth and sharpness. Save the good stuff for the topping, but pre-grated works just fine mixed in.
  • Eggs: They help bind the filling so it holds together as it bakes. You don’t notice them, but you’d miss them if they were gone.
  • Dried parsley: Just a touch for color and light herby flavor. Totally optional, but I like that little speckled green in the filling.
  • Marinara sauce: Grab your favorite jarred sauce or make it homemade if you’re feeling extra. Either way, the sauce sets the vibe here.
  • Water: Mixing water with the sauce helps cook the uncooked shells as they bake under foil—trust the process.

Three-Cheese Manicotti

How To Make This Three-Cheese Manicotti

This is a “pour yourself a glass of something and take it easy” kind of recipe. It smells good while it bakes and feels oddly therapeutic to pipe things into tiny tubes. Ready?

  • Preheat and prep: Set your oven to 350°F (175°C) and grab a 9×13-inch baking dish. Spray that baby with cooking spray and set it aside.

  • Water down the sauce: In a bowl, stir together your marinara and water. It’ll look a little soupy, which is exactly the point. Pour half into the dish to make a lovely sauce bed.

  • Make the cheese filling: In a separate bowl (I know, more bowls, but it’s worth it), mix the ricotta, half the mozzarella, ½ cup of the parmesan, both eggs, parsley, salt, and pepper. Give it a good stir until it looks creamy and fluffy.

  • Stuff the shells: Transfer that filling into a large zip-top bag and snip the tip—or use a piping bag if you’re fancy. Carefully squeeze the filling into each uncooked manicotti shell. Mildly satisfying, mildly messy, deeply worth it.

  • Nestle and sauce again: Lay the filled shells over the marinara in the dish. Keep them snug but not squished. Pour the rest of the marinara-water mix over the top.

  • Cover and bake: Foil tightly, pop in the oven, and bake for 50 minutes. The shells need that steam to cook through, so don’t peek. You’re not sneaking a look at presents here.

  • Uncover and cheese it: Pull off the foil, sprinkle on the remaining mozzarella and parmesan, and return to the oven for 10–15 more minutes. Watch for the top to bubble and get golden.

  • Let it rest: Wait 5–10 minutes before serving. It helps the cheese settle and gives you burn-free forks.

Three-Cheese Manicotti

Storage Options

Alright, maybe you made too much. Maybe you’re secretly hoping for leftovers. Either way, here’s how to keep this manicotti situation working in your favor.

Fridge storage is super simple. Just cover the baking dish with foil or transfer leftovers to a container with a tight-fitting lid. It’ll last up to 4 days. The sauce keeps the pasta nice and soft without going weird or dry.

Freezer? Yes, double yes. Assemble the manicotti ahead but stop before baking. Wrap the dish tightly in plastic wrap and foil (double up, trust me). Freeze for up to 2 months. When ready to bake, thaw overnight in the fridge and bake as normal. Or bake straight from frozen, just add 20–30 minutes extra time and cover with foil until gooey.

To reheat, a microwave works in a pinch but the oven is your best bet. Cover with foil and warm at 350°F until heated through—about 20 minutes if it’s a small portion, longer for a full pan.

Variations and Substitutions

Feel like switching it up? Good news: manicotti is surprisingly chill about that.

  • Spinach: Stir in a cup of thawed and squeezed-dry frozen spinach to the cheese filling for a pop of green and an extra excuse to eat more.
  • Meaty version: Mix cooked ground beef or Italian sausage into the sauce layer for serious hearty vibes.
  • Gluten-free pasta: Look for gluten-free manicotti or use large gluten-free shells. They’ll need a little extra sauce and maybe a few extra minutes to soften.
  • Alfredo sauce: Swap half (or all) of the marinara for Alfredo if you’re on a creamy kick. It’s wildly rich but also wildly awesome.
  • Different cheeses: Go wild! Try fontina, provolone, or a dollop of goat cheese mixed into the filling for a tangy twist.

Three-Cheese Manicotti

What to Serve with Three-Cheese Manicotti

This is definitely a main character dish, but a few clever sides can elevate the whole meal without stealing the spotlight.

  • A big leafy salad with a zippy vinaigrette cuts through all that creamy-cheesy richness like a champ. Bitter greens like arugula or radicchio are especially good here.

  • Garlic bread or soft dinner rolls make great sauce-sopping tools. No one’s judging bread-on-pasta choices here. Carb harmony is real.

  • Roasted broccoli or broccolini adds color, crunch, and that slightly charred thing that pairs perfectly with melty baked cheese. I like it with just olive oil and sea salt.

  • Feeling fancy? A little protein on the side, like this pan-seared salmon in pomegranate reduction, makes it look like you tried very hard (even if you didn’t).

  • And for dessert, something nostalgic but special, like homemade Tagalong cookies. Trust me, nobody’s mad about it.

Three-Cheese Manicotti

Frequently Asked Questions

Can I use no-boil manicotti shells?

Actually, this recipe assumes you’re using regular dry manicotti shells—no boiling needed because they soften in the oven thanks to that saucy bath. No-boil versions can work too, but check the package; they sometimes cook faster or may get too mushy. Just be sure the shells are fully covered in sauce before baking for best results.

How do I keep the filling from spilling out while stuffing?

That’s where the zip-top or piping bag method comes in clutch. Cut a reasonably small opening in the corner and gently squeeze from one end of the noodle while supporting the other. If the shell cracks a bit, just patch it together inside the dish—it’ll still bake up melty and wonderful. Nobody’s inspecting the insides.

Can I make this manicotti ahead of time?

Yes, definitely. Assemble the whole dish (stuff, layer, sauce) and store it tightly covered in the fridge for up to 24 hours before baking. It might need a few extra minutes in the oven if it’s cold from the fridge. Or assemble and freeze the whole thing for a future “I don’t feel like cooking” evening.

My sauce looks too watery—did I mess up?

Not at all. That watered-down marinara is working overtime here. It steams the pasta from the inside out, cooking the shells right in the dish. Once baked, most of the liquid gets absorbed, and what’s left just keeps everything nice and juicy. It’s like magic, but saucy.

Three-Cheese Manicotti

Three-Cheese Manicotti

Prep Time 25 minutes
Cook Time 1 hour 5 minutes
Total Time 1 hour 30 minutes
Cheesy, saucy, and perfectly cozy! Tender manicotti tubes are stuffed with a dreamy mix of ricotta, mozzarella, and parmesan, then baked with marinara until gorgeously golden and bubbly. All the joy of baked pasta, no pre-boiling required.
6 servings

Ingredients

Main Ingredients

  • 12 manicotti shells uncooked
  • 2 cups (450 g) ricotta cheese whole milk preferred; drain if watery
  • 2 cups (200 g) mozzarella cheese shredded, divided
  • 1 cup (90 g) parmesan cheese grated, divided
  • 2 eggs large
  • 1 tbsp dried parsley optional
  • 1 tsp kosher salt
  • 1/2 tsp (0.5 tsp) black pepper
  • 3 cups (700 ml) marinara sauce store-bought or homemade
  • 1/2 cup (120 ml) water

Equipment

  • 9x13 inch Baking Dish
  • Mixing bowls
  • Aluminum foil
  • Piping Bag or Zip-top Bag

Instructions
 

  1. Preheat your oven to 350°F (175°C) and spray a 9x13-inch baking dish with cooking spray.
  2. In a bowl, combine marinara sauce and water. Pour half of this mixture into your baking dish to coat the bottom.
  3. In a separate bowl, mix together ricotta, 1 cup mozzarella, 1/2 cup parmesan, eggs, dried parsley, salt, and pepper until smooth.
  4. Transfer the filling to a piping bag or a large zip-top bag with the corner snipped off.
  5. Pipe cheese filling into each uncooked manicotti shell, filling fully but gently.
  6. Place the stuffed shells in a single layer in the prepared baking dish over the sauce.
  7. Pour the remaining marinara-water mixture evenly over the shells.
  8. Cover the baking dish tightly with aluminum foil and bake for 50 minutes.
  9. Remove the foil, sprinkle the remaining mozzarella (1 cup) and remaining parmesan (1/2 cup) over the top.
  10. Bake uncovered for 10–15 minutes, until the cheese is golden and bubbling.
  11. Let rest for 5–10 minutes before serving.

Notes

For a pop of color and nutrients, stir thawed and squeezed-dry frozen spinach into the filling. The filling can be made ahead and refrigerated. To freeze: assemble but do not bake, cover tightly, and freeze for up to 2 months. Bake from thawed or add 20–30 minutes to bake time if cooking from frozen.

Nutrition

Calories: 440kcal | Carbohydrates: 37g | Protein: 25g | Fat: 22g | Saturated Fat: 13g | Cholesterol: 110mg | Sodium: 1160mg | Potassium: 410mg | Fiber: 3g | Sugar: 7g | Vitamin A: 830IU | Vitamin C: 6mg | Calcium: 590mg | Iron: 2.3mg

Buttery shortbread, creamy peanut butter, and silky chocolate come together in these homemade Tagalong cookies. Just six main ingredients, all cozy and crave-worthy.

They taste like your Girl Scout faves, but even fudgier and more peanut buttery (yes, that’s a word now). The kitchen will smell like a warm hug.

There’s something completely satisfying about recreating your favorite store-bought treats in your own kitchen. No fancy tricks. No food coloring. Just buttery shortbread, a generous swipe of peanut butter that’s secretly sweetened, and a dip in glossy, melty chocolate. And because you’re making them by hand, you get to decide how much peanut butter is “enough.” Spoiler: there is no such thing. These homemade Tagalong cookies are perfect for stashing in your fridge for casual weeknight cravings—or showing off to very impressed guests who think you bought them from a boutique bakery. (Let them believe it.)

Table of Contents

Homemade Tagalong Cookies

Why You’ll Love this Homemade Tagalong Cookies

If you’ve ever eaten a Tagalong slowly to savor every layer, you’re in good company.

  • You only need basic pantry players: Butter, flour, sugar, peanut butter, and chocolate. We respect a minimal grocery run.
  • Ridiculously simple to make: You just squish, smear, melt, and drizzle—truly, the most satisfying verbs.
  • Freezer stash approved: They keep beautifully, which means future-you will be grateful.
  • Can flex casual or fancy: Stack them on a rustic plate, or line them in a pretty tin like you’re running a holiday cookie operation.
  • They taste like childhood nostalgia: But richer, crispier, and with way more peanut butter swagger.

Homemade Tagalong Cookies

Ingredient Notes

These are breezy pantry ingredients, but here’s the breakdown so we don’t miss a beat.

  • Unsalted butter: This is the base of our shortbread. Softened works best—you want it yielding, not melted. Salted is fine too if it’s all you’ve got; just skip the added salt later.
  • Granulated sugar: This brings the sweetness and helps that butter cream up nice and fluffy. Don’t skimp on this part—it lays the foundation for shortbread’s texture.
  • Vanilla extract: Just a splash, but it makes the shortbread taste a little warmer, a little cozier.
  • All-purpose flour: Nothing too fancy here, just your standard flour doing all the structural heavy lifting.
  • Salt: It’s just a pinch, but oh, it matters. Helps balance flavor and keeps things from leaning too sweet.
  • Creamy peanut butter: Choose your fave brand, but aim for the sturdier kind (not natural or too oily). It holds its shape better.
  • Powdered sugar: This gets stirred into the peanut butter for that soft, meltaway filling vibe.
  • Chocolate melting wafers: Go for semisweet or milk chocolate! Melting wafers give that smooth dip without tempering fuss.

Homemade Tagalong Cookies

How To Make This Homemade Tagalong Cookies

Alright, deep breath. This is a three-part build—shortbread base, peanut butter layer, chocolate dip—but I promise it’s not fussy.

  • Make the shortbread dough: Start by creaming the softened butter and granulated sugar in a big mixing bowl. You’ll want it looking fluffy and pale. Once that’s cozy, add in the vanilla extract. Then slowly mix in the flour and salt just until it comes together. The dough may feel soft, almost like Play-Doh, which is exactly right.

  • Roll and cut the cookies: Sandwich your dough between two sheets of parchment (trust me, this keeps things clean), then roll it out to about 1/4 inch thick. Use a round cookie cutter—about 2 inches is ideal. Cut out circles and transfer them to a parchment-lined baking sheet. If the dough gets too soft, pop it in the fridge for 5-10 minutes before cutting more.

  • Bake and cool: Into a 350°F oven they go for 10 to 12 minutes, just until the edges turn golden. Don’t overbake. Let them cool completely on a wire rack before you even think about peanut butter.

  • Make the peanut butter filling: Stir together the creamy peanut butter and powdered sugar until smooth and happy. It should be pliable, like edible Play-Doh. Roll about a teaspoon of it into a little ball, flatten it gently, then press one onto each cooled cookie.

  • Chill the assembled cookies: This step is annoying but necessary. Pop them in the freezer for 8 to 10 minutes, or until the peanut butter layer is firm. This helps them stay intact during their chocolate bath.

  • Dip in melted chocolate: Melt those chocolate wafers in the microwave in short bursts until smooth and glossy. Dip each chilled cookie carefully—forks or dipping tools help!—and give them a gentle wiggle to drip off excess.

  • Let them set: Back on the parchment-lined tray they go. Let the chocolate harden at room temp or in the fridge for 15 minutes, depending on your patience levels. Try not to eat half while pretending to organize the fridge.

Homemade Tagalong Cookies

Storage Options

So, you’ve got a batch of shiny, peanut-buttery gems and you’re wondering: What now?

Start with letting them set at room temperature if they’re still glossy. Once they’re fully hardened, store the homemade Tagalong cookies in an airtight container. If your house runs warm or you (like me) prefer a snappy chocolate shell, go ahead and refrigerate them. They’ll be great for about 1 week in the fridge.

Want to save some for future cravings? Good thinking. Pop them in a freezer-safe container with parchment layers between each row to prevent sticking. They freeze beautifully for up to 2 months. No need to thaw—just let them sit at room temp for 5–10 minutes so they don’t feel like biting into a brick.

Microwaving is a no-go here. The chocolate can sweat or melt weirdly. If you’re after a gooey moment, maybe just make fresh ones and leave a few half-dipped…

Variations and Substitutions

You can totally play mix-and-match with this one. It’s a great base cookie for adapting to your cravings or pantry situation.

  • Almond butter sub: Swap peanut butter for almond butter for a lighter, slightly floral twist. Macadamia butter also works, but now we’re just being fancy.
  • Dark chocolate dip: Go bittersweet for that deep cocoa punch. It balances the peanut butter sweetness really nicely.
  • Add crunch: Stir chopped roasted peanuts into the peanut butter layer for texture and a salty surprise.
  • Gluten-free flour: A 1:1 baking blend will sub in nicely. Just chill your dough a bit longer—it’s usually a touch more delicate.
  • Shape it differently: No round cutter? No problem. Use a knife and go rustic with squares. It’s not any less tasty.

Homemade Tagalong Cookies

What to Serve with Homemade Tagalong Cookies

Once these are ready, they honestly don’t need much—except maybe a cozy spot and a plate. But if you’re feeling extra, here’s how to elevate the moment.

  • If you’re hosting brunch and want to offer an unexpected treat, slide these next to your coffee bar. Yes, it’s a cookie dessert, but it pairs like magic with lattes and dark roast.

  • For something cold and creamy, sandwich a small scoop of vanilla bean or chocolate frozen yogurt between two cookies. Like these dreamy peanut butter & banana ice cream sandwiches, it’s a fork-optional experience.

  • Need a quick dessert platter? Pair them with other cozy throwback sweets like Seven Layer Bars. You’ll hit every nostalgic note from crunchy to gooey.

  • They also shine after a delicate dinner. If you’re going savory first, try something like pan seared cod with rainbow chard to keep the meal light and balanced before these rich beauties close the show.

Homemade Tagalong Cookies

Frequently Asked Questions

Can I use natural peanut butter for this recipe?

You technically can, but proceed with caution. Natural peanut butter tends to be oilier and looser, which means it might not firm up as well for sandwiching or dipping. Your cookies could end up messier, with sliding fillings and thinner layers. If it’s all you have, try mixing in extra powdered sugar to stiffen the filling a bit. But if you’re aiming for that classic bite, use a more conventional creamy style like Jif or Skippy.

How do I keep the chocolate coating smooth?

Melting wafers are your best friend here. Unlike chopped chocolate, they’re designed to melt without tempering and stay glossy. Be patient with your microwave—use 20 to 30 second bursts and stir in between each. Don’t let it overheat, or you’ll end up with sad, clumpy chocolate. If it’s too thick, add a tiny bit of coconut oil to loosen it. Smooth dips await.

Do I really need to chill the cookies before dipping?

Yes, yes, yes. Don’t skip this. Without that quick freezer blast, the peanut butter layer stays soft and gooey, and when you dip, it might slide right off into your chocolate like a little blob rebellion. Chilling firms things up so the coating goes on cleanly and sets beautifully. Trust the process—it only takes 10 minutes.

How long do homemade Tagalong cookies stay fresh?

Stored in an airtight container in the fridge, they’ll stay delicious for about a week. If you can’t eat them that fast (impressive restraint!), stash them in the freezer for up to 2 months. They honestly taste amazing cold, straight from the fridge, so you won’t even have to wait to thaw. Win-win.

Homemade Tagalong Cookies

Homemade Tagalong Cookies

Prep Time 30 minutes
Cook Time 12 minutes
Chilling Time 10 minutes
Total Time 1 hour 30 minutes
Buttery shortbread, creamy peanut butter, and silky chocolate come together in these homemade Tagalong cookies. Just six main ingredients, all cozy and crave-worthy. These cookies taste like your Girl Scout faves, but even fudgier and more peanut buttery, with a rich, nostalgic flavor you’ll want to make again and again.
24 cookies

Ingredients

Shortbread Base

  • 1 cup (226 g) unsalted butter softened
  • 2/3 cup (135 g) granulated sugar
  • 1 tsp (5 ml) vanilla extract
  • 2 1/4 cups (280 g) all-purpose flour
  • 1/4 tsp (1.5 g) salt

Peanut Butter Filling

  • 1 cup (250 g) creamy peanut butter not natural or oily style
  • 1/2 cup (60 g) powdered sugar

Chocolate Coating

  • 12 oz (340 g) chocolate melting wafers semisweet or milk chocolate

Equipment

  • Electric Mixer or Mixing Bowl and Spoon
  • Parchment paper
  • Rolling Pin
  • Round Cookie Cutter (2-inch)
  • Baking sheet
  • Microwave-safe bowl
  • Wire rack

Instructions
 

  1. Make the shortbread dough: In a large bowl, cream together the softened butter and granulated sugar with an electric mixer until pale and fluffy. Mix in vanilla extract. Gradually add flour and salt and mix just until combined into a soft dough.
  2. Roll and cut the cookies: Place the dough between two sheets of parchment paper. Roll to 1/4 inch thickness. Use a 2-inch round cookie cutter to cut out circles. Transfer to a parchment-lined baking sheet. If dough softens too much, chill for 5–10 minutes before cutting more shapes as needed.
  3. Bake and cool: Bake at 350°F (180°C) for 10–12 minutes, until edges just begin to turn golden. Remove and let cool completely on a wire rack.
  4. Make the peanut butter filling: Stir together peanut butter and powdered sugar in a medium bowl until smooth and pliable. Roll a teaspoon of filling into a ball, flatten gently, and press one onto each cooled cookie.
  5. Chill the assembled cookies: Place tray of topped cookies in the freezer for 8–10 minutes, until peanut butter is firm.
  6. Dip in melted chocolate: Melt chocolate wafers in a microwave-safe bowl in 20–30 second bursts, stirring after each until smooth. Using a fork or dipping tool, dip each chilled cookie into the chocolate, letting excess drip off. Return to parchment-lined tray.
  7. Let them set: Allow chocolate to harden at room temperature or refrigerate for 15 minutes, until fully set.

Notes

Store fully cooled cookies in an airtight container at room temperature for up to 2 days, in the fridge for 1 week, or in the freezer for up to 2 months (separated by parchment). Let come to room temp for a few minutes if frozen before enjoying. For best results, use conventional creamy peanut butter (not natural/oily) and melting wafers for the coating. Variations: Add a spoonful of chopped peanuts for crunch, swap almond butter, or use dark chocolate.

Nutrition

Calories: 180kcal | Carbohydrates: 20g | Protein: 3g | Fat: 10g | Saturated Fat: 4g | Cholesterol: 10mg | Sodium: 55mg | Potassium: 80mg | Fiber: 1g | Sugar: 11g | Vitamin A: 90IU | Calcium: 11mg | Iron: 0.6mg

Buttery graham cracker crumbs, gooey sweetened condensed milk, toasted coconut, and melty chocolate come together in these seven layer bars for a warm, rich bite every time.

This is the kind of dessert you make when your kitchen smells like vanilla dreams, your socks are fuzzy, and you’re craving something with crunch, chew, and deep butterscotchy soul. Every bite tastes like a hug (but with a little crunch and a lot more chocolate).

Magic Cookie Bars, also called seven layer bars depending on who you ask (and how much snack-induced nostalgia they’re feeling), are a delightful exercise in barely lifting a finger. You don’t stir. You don’t whisk. You just layer, drizzle, and bake until the house smells like someone hugged a candy shop. Perfect for potlucks, movie nights, or that afternoon moment when coffee needs a sweet companion. They’re low-effort but high-reward.

Table of Contents

Magic Cookie Bars

Why You’ll Love this Seven Layer Bars Recipe

No stand mixer. No chill time. No vague instructions like “until it feels right.” These bars are the gold-standard for effortless sweetness.

  • Ridiculously simple to make: You just squish, sprinkle, drizzle, and bake. Precision is optional (but greasing your dish is not).
  • Sweet-and-salty magic: Chocolate, butterscotch, roasted nuts, and a chewy coconut top keep each bite interesting.
  • Texture heaven: Crunchy edges, soft middle, melty chips, plus a toasted coconut canopy—it’s the whole snack spectrum.
  • Totally customizable: Not feeling pecans? Swap in macadamias. Want flakes instead of shredded coconut? Go wild.
  • Reliable potluck hero: These hold up well, travel beautifully, and make a satisfying thwap when you slice them.
  • Nostalgic, but not boring: They taste like vintage bake-sale royalty with a richer, gooier edge.

Magic Cookie Bars

Ingredient Notes

The ingredients here are humble, sure, but don’t be fooled. This is the snack equivalent of a surprise party in familiar shoes.

  • Unsalted butter: Melting it is key—you want it to help cling the crust together. Salted butter works, too; just skip adding salt elsewhere.
  • Graham cracker crumbs: You can blitz whole crackers in a food processor or buy pre-crushed, but I highly support taking a rolling pin to a bag of crackers for stress relief.
  • Semisweet chocolate chips: These bring the deep cocoa notes and pair beautifully with the sweetness around them. Milk chocolate can be used, but it leans sweeter.
  • Butterscotch chips: Sweet, caramelly, and slightly creamy. You can sub white chocolate or skip them if they’re not your thing, though they really pull their weight here.
  • Chopped nuts: Walnuts, pecans, or macadamia nuts all work great. Lightly toasting them first boosts the flavor a lot.
  • Sweetened condensed milk: This stuff is the binding glue that turns everything into fudgy, chewy, golden magic. Don’t mix it before pouring, just drizzle it evenly.
  • Shredded coconut: Use sweetened for a stickier top or unsweetened if you want a little more chew and a bit less sugar.

Magic Cookie Bars

How To Make This Seven Layer Bars Recipe

Pull your hair back, flip on your oven light (because you’re going to want to watch the magic happen), and let’s dive in.

  • Preheat and grease your dish: Start by cranking the oven to 350°F (175°C), and give your 13×9 inch baking dish a good butter or spray coating. Trust me, you want these to release cleanly.
  • Build the crust: Melt the butter (microwave or stovetop, your call), then mix in the graham cracker crumbs with a fork. Press that buttery rubble into the dish, nice and even. Or, if you’re more of a freestyler, pour the melted butter straight into the dish, swirl it around, then sprinkle the crumbs over it and gently press.
  • Layer the goodies: Grab your chocolate chips, then the butterscotch chips, and sprinkle them over the crust. Next come the nuts. No mixing needed, just even-ish layers.
  • Pour on the condensed milk: Take that glorious can of sweetened condensed milk and drizzle it slowly over everything. Try to pour in thin ribbons so it seeps down in between.
  • Finish with coconut: Sprinkle that fluffy shredded coconut evenly on top. It’ll toast up beautifully in the oven and add a chewy golden crust.
  • Bake until golden: Slide the pan into the oven and bake for about 25 minutes. You’re looking for toasted coconut and bubbling edges—the smell will confirm you’re doing life correctly.
  • Cool and slice: Let them cool completely before slicing. This part is, admittedly, the hardest. But they slice so much cleaner when cool. Plus you won’t burn your mouth on molten butterscotch…

Magic Cookie Bars

Storage Options

Alright, so you’ve made these bars and maybe (maybe!) you have a few left. Here’s what to do:

Pop them in an airtight container at room temp for up to 4 days. The bars are happiest when stored in a single layer, but you can stack them with a sheet of parchment in between if space is tight.

Want to save some for a rainy week? You can absolutely freeze them. Once cooled and cut, wrap each piece in plastic wrap, then stash them in a bag or container in the freezer. They’ll be good for about 2 months. Just thaw at room temp before eating.

Reheating isn’t totally necessary since they’re meant to be chewy and room-temperature-delicious, but if you’re going for max gooeyness, 10 seconds in the microwave works wonders.

Variations and Substitutions

You know I can’t leave a recipe without playing around a little. These bars are basically a choose-your-own-adventure in square form.

  • Swap in different chips: Peanut butter chips, white chocolate, or dark chocolate chunks all play well with the classics. Go half-and-half for drama.
  • Make it gluten-free: Use gluten-free graham cracker crumbs—easy swap, same satisfying crunch.
  • Add dried fruit: Chopped dried cherries or cranberries add a hit of tart chewiness to balance the sweetness.
  • Use flaky coconut: Big flakes instead of shredded make for a fancy bakery-style topping with extra crunch.
  • Try biscotti crumbs instead: If you’re feeling wild, crush crisp biscotti for the crust instead of graham crackers. It’s a whole thing.
  • Get spice-happy: Stir a pinch of cinnamon or cardamom into the crumbs. It’s a subtle twist, but so warming.

Magic Cookie Bars

What to Serve with Seven Layer Bars

Want to round out your dessert table, or just add a couple more textures? These bars love a good supporting cast.

  • A creamy something alongside them works great. Try pairing them with scoops of peanut butter & banana ice cream for the ultimate chewy-creamy combo. The soft cold bite against a chewy sweet square? Yes please.
  • Coffee’s obvious, but add a dash of cinnamon or cardamom to your cup to echo the warmth in the bars. I love that cozy, spiced-sugar vibe.
  • For a classic bake-sale spread, throw in a few warm, gooey Toll House cookies. It’s the cookie trifecta (especially if you cut those bars into triangles to keep guests guessing).
  • A light lemony dessert is also a good contrast. Something creamy and tart like this lemon icebox cake totally works as a refreshingly cool sidekick.
  • If you’re in savory mode afterward, balance all that sweetness with a simple tea or light snacky board—soft cheese, fruit slices, olives. Keep it weird. It works.

Magic Cookie Bars

Frequently Asked Questions

Can I make seven layer bars ahead of time?

Totally. These are basically made for planning ahead. You can bake them a day or two before you need them, let them cool completely, then store them in an airtight container. They’ll actually taste even better the next day as everything settles and gets cozy together.

Can I leave out the nuts?

Yes, you can absolutely skip the nuts if they’re not your thing (or if allergies are a concern). Just know you’ll lose a little crunch and depth, but the bars will still be sweet, gooey, and totally satisfying. You could add some broken pretzels or sunflower seeds for texture if you’re feeling it.

Do I need to refrigerate the bars?

Short answer: nope. They’re delightfully low-maintenance and fine at room temperature for several days. That said, if your kitchen’s toasty or humid, the chips can get a bit melty, so storing them in the fridge isn’t a bad call. Just let them sit out a bit before eating so they’re not cold and hard.

Can I double the recipe?

Yes, just use two 9×13 pans rather than trying to make one massive tray. These bars rely a bit on the depth of layers and the toasty top, so keeping the thickness right helps them bake evenly and still get those gooey layers with crisp tops.

Magic Cookie Bars

Seven Layer Bars (Magic Cookie Bars)

Prep Time 10 minutes
Cook Time 25 minutes
Cooling Time 25 minutes
Total Time 1 hour
Buttery graham cracker crumbs, gooey sweetened condensed milk, toasted coconut, and melty chocolate come together in these seven layer bars for a warm, rich bite every time. The easiest dessert for any craving—just layer, drizzle, and bake.
24 bars

Ingredients

Crust Layer

  • 1/2 cup (113 g) unsalted butter melted
  • 1 1/2 cups (165 g) graham cracker crumbs

Filling Layers

  • 1 cup (175 g) semisweet chocolate chips
  • 1 cup (175 g) butterscotch chips
  • 1 cup (120 g) chopped nuts walnuts, pecans, or macadamia nuts, lightly toasted if desired
  • 14 oz (396 g) sweetened condensed milk 1 (14 oz) can
  • 1 1/3 cups (110 g) shredded coconut sweetened or unsweetened

Equipment

  • 9x13 inch Baking Dish
  • Medium mixing bowl
  • Measuring cups
  • Fork
  • Spatula

Instructions
 

  1. Preheat oven to 350°F (175°C). Grease a 9x13 inch baking dish with butter or nonstick spray.
  2. In a medium bowl, mix melted butter and graham cracker crumbs until evenly moistened. Press mixture evenly into the bottom of the prepared baking dish to form a crust.
  3. Sprinkle chocolate chips evenly over the crust, followed by butterscotch chips and chopped nuts. Do not stir.
  4. Drizzle the sweetened condensed milk slowly and evenly over the layered ingredients, covering as much surface as possible.
  5. Top evenly with shredded coconut.
  6. Bake for 25 minutes or until edges are golden and coconut is lightly toasted.
  7. Allow bars to cool completely in the pan before slicing into squares. Enjoy!

Notes

Customize with your favorite mix-ins like white chocolate chips, peanut butter chips, dried fruit, or gluten-free crumbs. Store bars in an airtight container at room temperature for up to 4 days, or freeze individually wrapped bars for up to 2 months. Bars slice cleanest when fully cooled.

Nutrition

Calories: 220kcal | Carbohydrates: 26g | Protein: 3g | Fat: 12g | Saturated Fat: 7g | Cholesterol: 15mg | Sodium: 70mg | Potassium: 85mg | Fiber: 1g | Sugar: 20g | Vitamin A: 100IU | Calcium: 60mg | Iron: 1mg

Let's Get Cooking!

100+ Recipes for Busy Nights

In a time crunch? Take a look around and browse plenty of recipes to help you get dinner ready and on the table on those busy nights!

Sweet Recipes

Pumpkin Banana Muffins

Pumpkin Banana Muffins Recipe

Strawberry Pie Bars

Strawberry Pie Bars Easy Oven Recipe

White Chocolate Raspberry Muffins

White Chocolate Raspberry Muffins Recipe

Snickerdoodle Muffins

Snickerdoodle Muffins Recipe for Oven

PIN NOW

Follow KitchenetteBlog on Pinterest

Love cozy recipes that actually make it to the table? On Pinterest, I share new comfort-food ideas every week—desserts, dinners, and those little snack cravings that hit at midnight. Come pin with me and never run out of kitchen inspo.

Savory Recipes

Turkey Tetrazzini

Turkey Tetrazzini Baked Pasta Recipe

Grilled Chicken Panini Sandwich

Grilled Chicken Panini Sandwich Recipe

Sweet Potato Cornbread

Sweet Potato Cornbread Recipe Oven Baked

Classic Waldorf Salad

Waldorf Salad Simple Classic Recipe

Get 5 Recipes to Simplify Your Life!

Delicious, versatile recipes you can make over and over.