Get 5 recipes to simplify your life:

easy, delicious, real food recipes

Latest Recipes

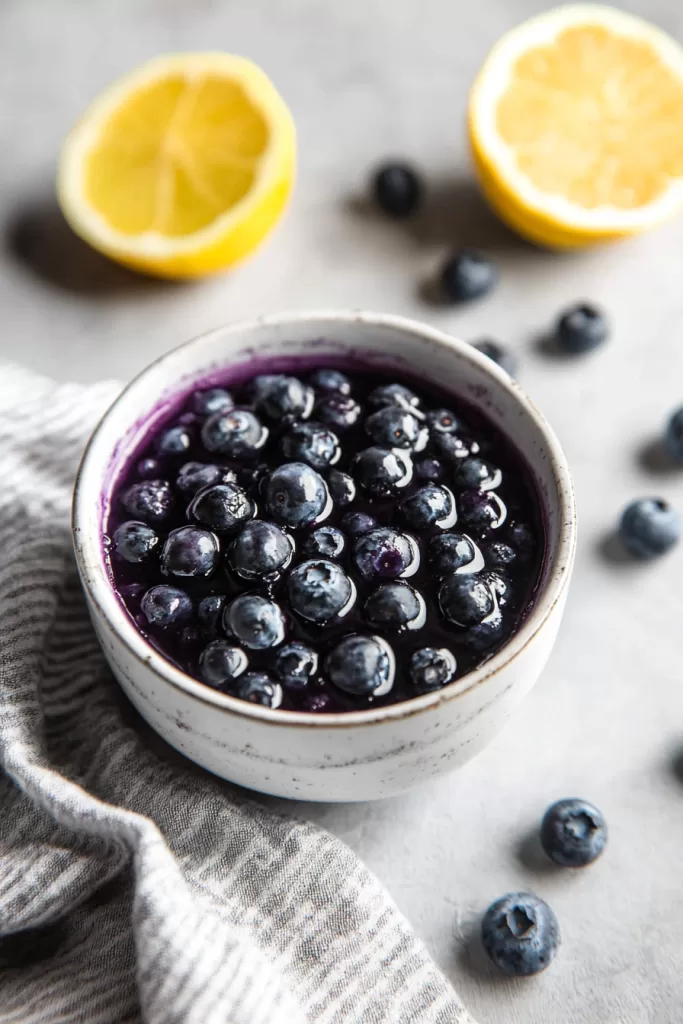
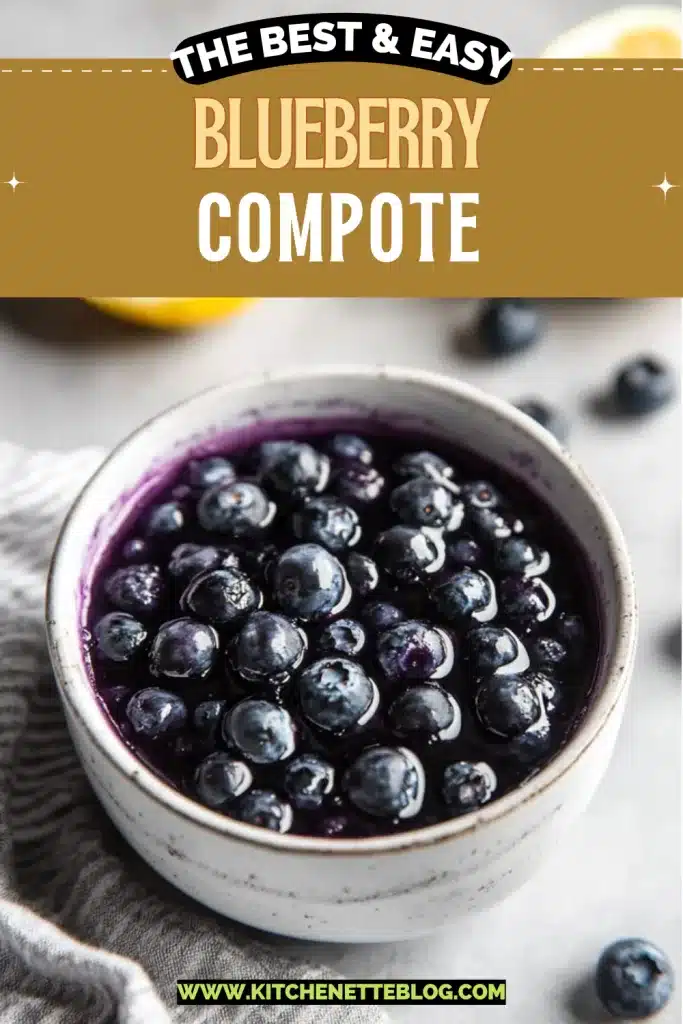
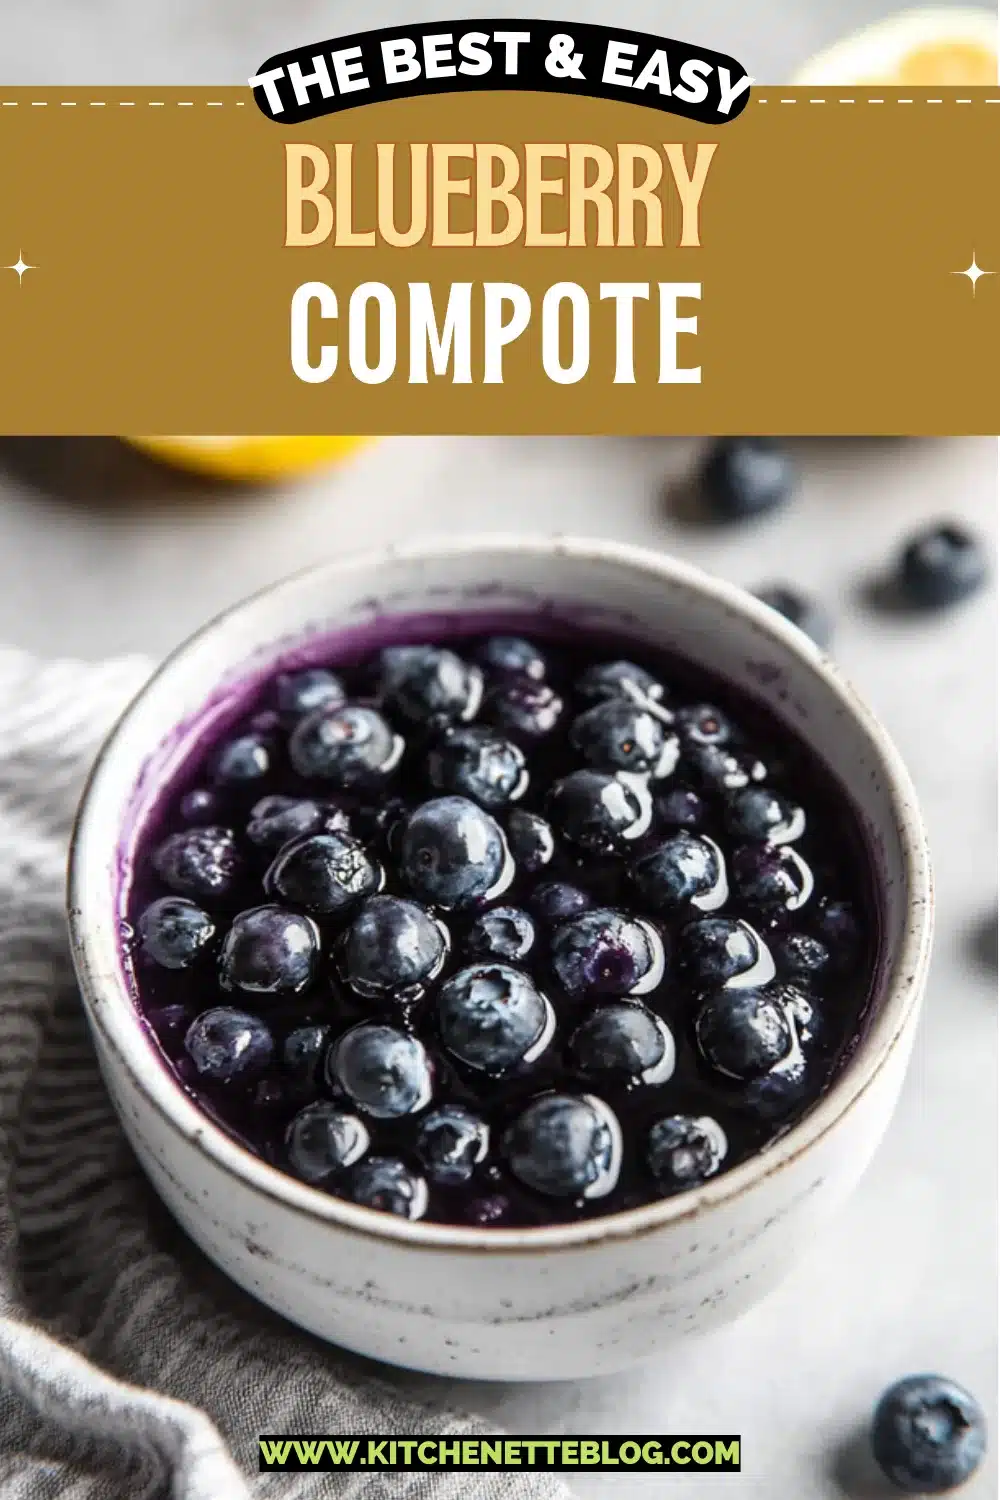
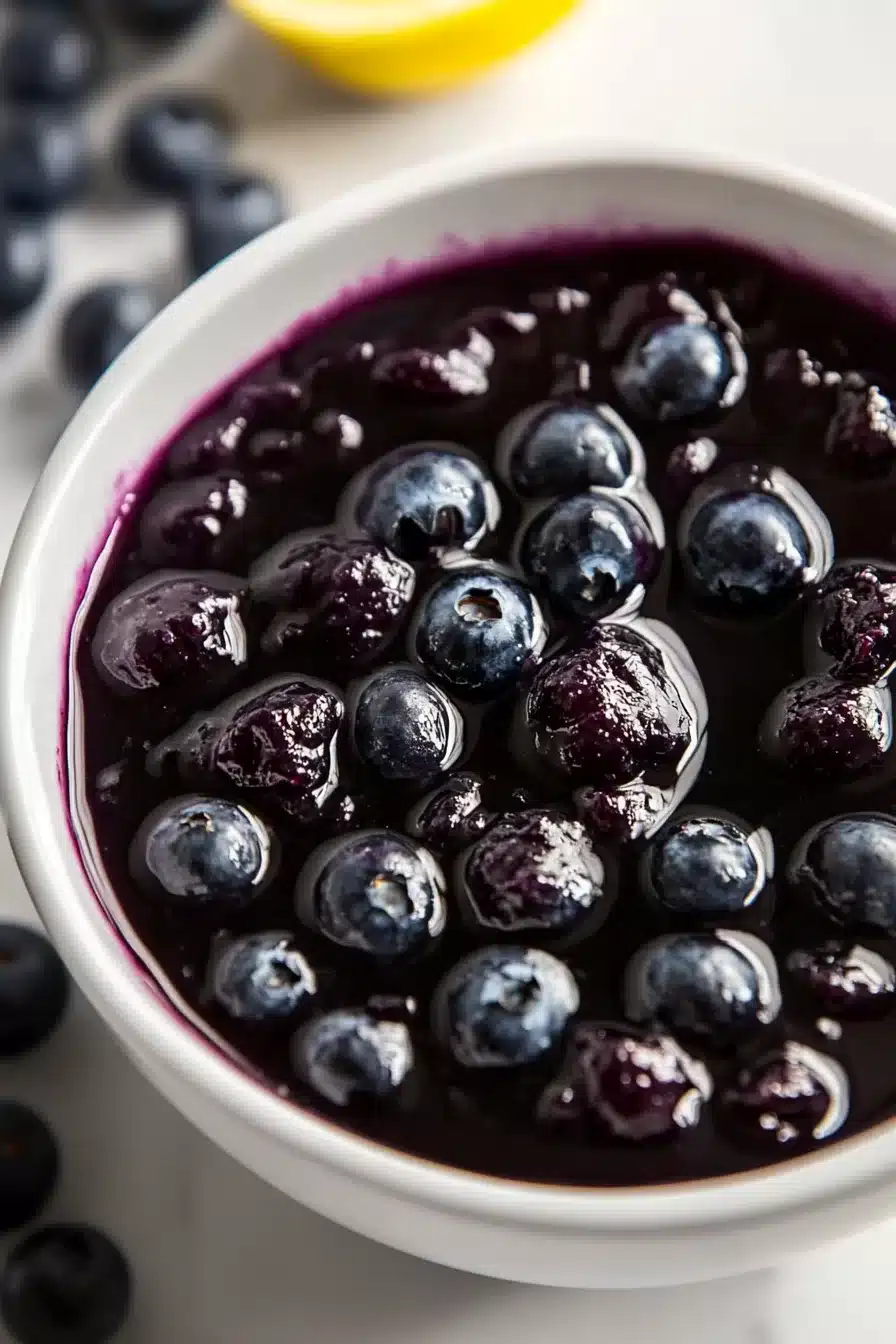
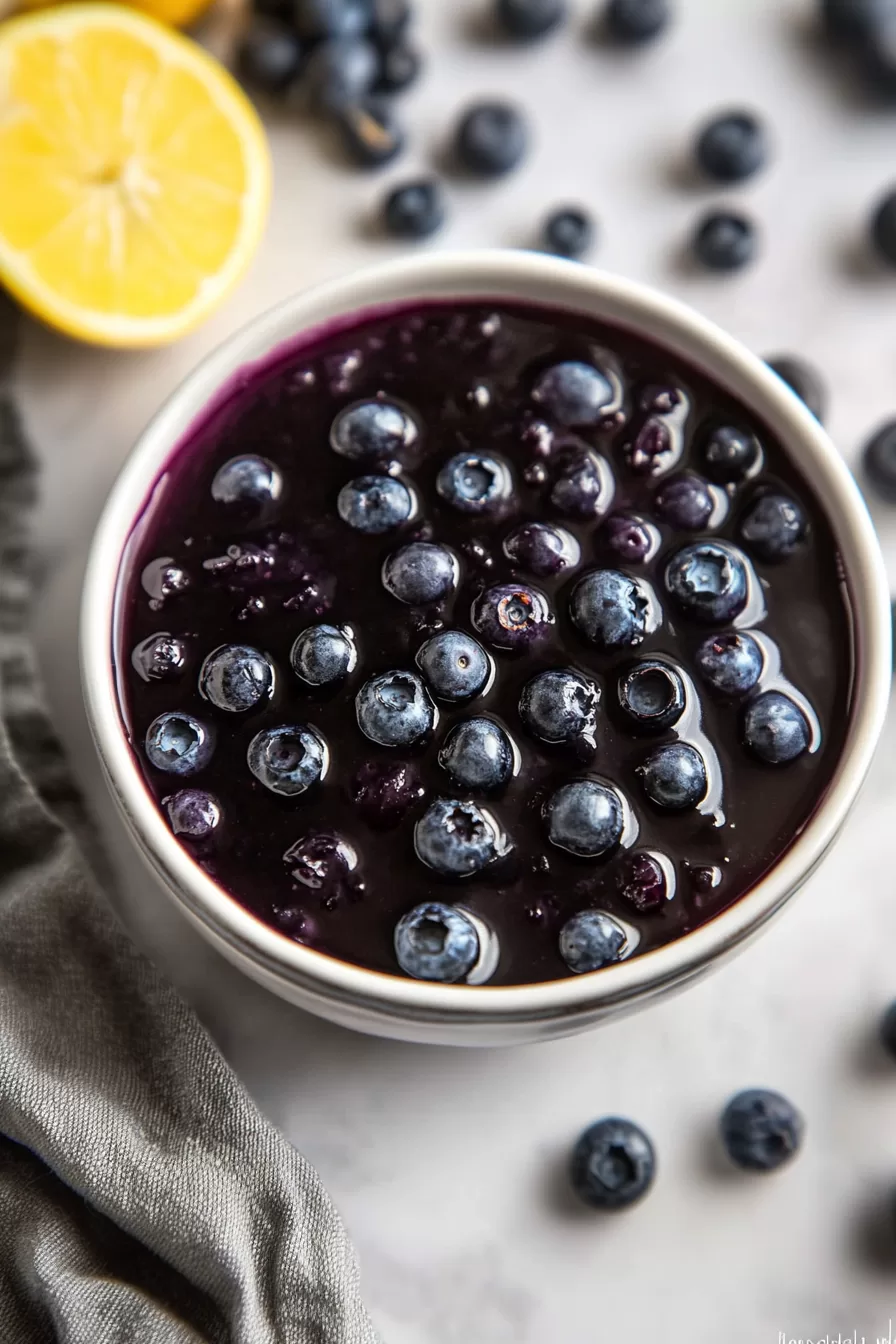
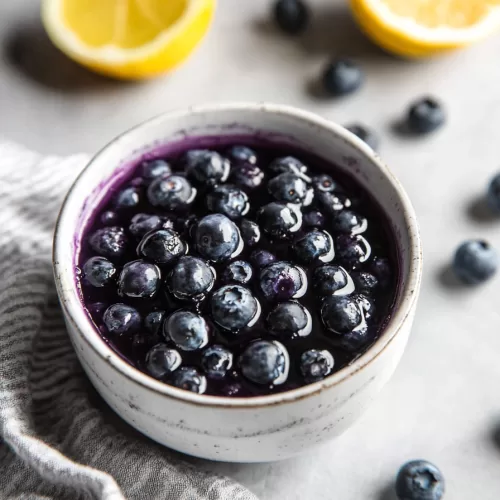
Sweet, tangy, and bursting with blueberry goodness, this blueberry compote isn’t fussy—just frozen blueberries, sugar, lemon juice, and a splash of water.
Warm and vibrant, it smells like summer jam bubbling on the stove, even if it’s snowing outside.

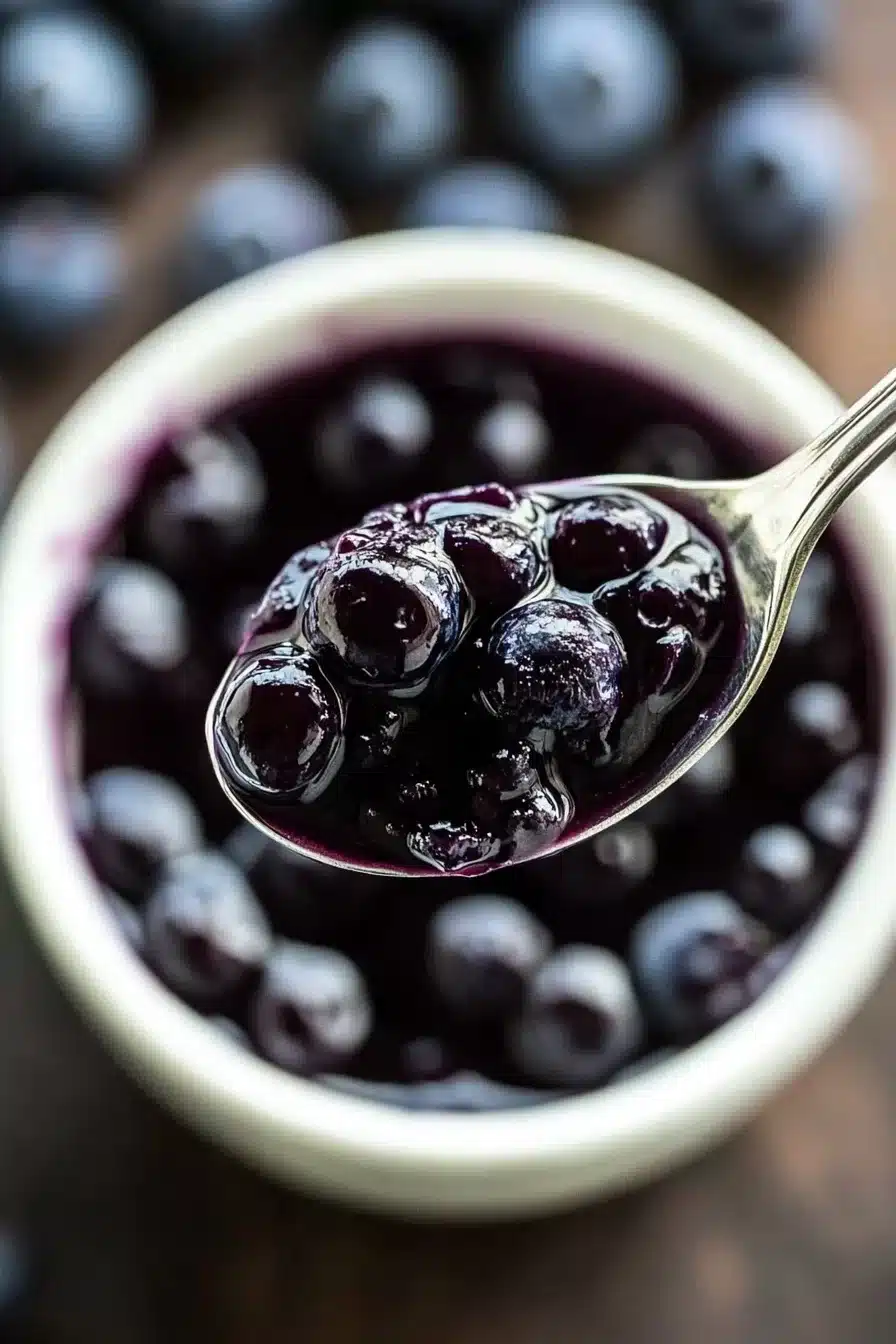
This is the kind of thing you make once and suddenly want to spoon over everything. Pancakes? Obviously. Ice cream? Yes, please. A spoon by itself while standing at the fridge door contemplating your life choices? Been there. This blueberry compote is saucy, just the right amount of sweet, and so ridiculously simple that it basically cooks itself while you make coffee. The simmering berries get all jammy, and the lemon holds things together with a tiny pop of brightness. I like to think of it as the soft jeans of toppings—comfortable, reliable, and pretty cute, too.

Table of Contents

Blueberry Compote

Why You’ll Love this Blueberry Compote

This isn’t a groundbreaking kitchen experiment—it’s just good, simple stuff. A few pantry basics, a pot, and you’re off.

  • Ridiculously simple to make: You toss stuff in a pot, give it a stir now and then, and basically it’s done.
  • Dreamy over everything: Pancakes, yogurt, oatmeal, grilled meats (trust me)—you’ll find ways to use it.
  • Frozen blueberries = year-round joy: No need to wait for berry season, frozen berries bring their A-game every time.
  • Balanced sweet-tart flavor: The lemon keeps it from going into overly sugary territory, just bright enough to wake things up.
  • Smells like a jam-making fairytale: Your kitchen will do that “gurgling berry steam” thing and suddenly it’s a better day.
  • Customizable if you’re feeling spicy: Add cinnamon, vanilla, or even a pinch of salt to mix up the mood.

Blueberry Compote

Ingredient Notes

Just a few things—really, it’s that uncomplicated. But like anything small and simple, the details matter. Here’s what we’re working with:

  • Frozen blueberries: They hold their shape better than fresh when cooked and are usually picked at peak ripeness. Keep a stash in the freezer for “dessert emergencies.”
  • Water: Just a little to get things started before the berries let out their juices. Don’t overdo it or you’ll end up with blueberry soup.
  • Granulated sugar: Adds sweetness and helps create that beautiful syrupy gloss. You can go up or down depending on your taste.
  • Lemon juice: Brightens everything, balances the sweetness, and keeps the compote from feeling one-note. Fresh-squeezed is best if you’ve got it.

Blueberry Compote

How To Make This Blueberry Compote

Okay, ready? This is so doable. Like, this-is-the-least-intimidating-recipe kind of doable. Honestly, the hardest part is not eating it straight out of the pot.

  • Start with half the berries: In a small saucepan over medium heat, combine 1 cup of blueberries with the water, sugar, and lemon juice. Stir gently as things begin to heat, and you’ll notice the berries breaking down slightly and the liquid thickening into a sweet syrup.

  • Simmer and stir: Let it cook for about 10 minutes. Stir occasionally—nothing wild, just enough to keep everything mingling. It’s fine if some berries fall apart here; we’re building that luscious base.

  • Add the rest of the berries: Toss in the remaining 1 cup of blueberries. This is what gives the compote that mix of syrupy liquid with soft, whole berries floating through it. Cook for another 8 minutes or so. Stir now and then, and listen as the pot bubbles and your kitchen starts to smell like a pie cooling on a farmhouse windowsill.

  • That’s it. Serve it warm: Or let it cool, if you can resist. It’ll thicken up slightly as it cools, so give it a gentle stir before spooning it over your next culinary masterpiece (or snack situation).

Blueberry Compote

Storage Options

Let’s talk leftovers—if you have any.

Once it’s cool, transfer your blueberry compote into an airtight container (a mason jar works beautifully and makes you feel 12% more like a kitchen wizard). It’ll hang out happily in the fridge for up to a week.

Want to keep it around longer? Totally fine. Freeze it! Spoon it into freezer-safe containers or even an ice cube tray, if you’re the kind of person who thinks ahead and likes portion control. Once frozen, pop the cubes into a bag and keep for up to 3 months.

To reheat, just scoop some into a small saucepan and warm gently over low heat. You can also microwave it in short bursts. If you’ve frozen it, defrost in the fridge overnight or use the low setting on the microwave. Give it a stir to wake everything up, and it’s ready to shine again.

Variations and Substitutions

There’s no law saying you can’t mix it up a little (I checked). Here are some fun tweaks if you’re feeling playful or just short on something.

  • Fresh blueberries: Go for it. They’ll break down a bit faster, so keep an eye on the texture as you go.
  • Swap the sugar: Honey or maple syrup works great here. Just expect a slightly deeper, richer sweetness and a softer set.
  • Add vanilla extract: A splash at the end gives it a warm, comforting vibe. Tastes like the filling of your favorite blueberry pie.
  • Try citrus zest: Add lemon or orange zest for a bit of zingy drama. Nothing big, just a gentle surprise on the tongue.
  • Make it boozy: A tablespoon of cassis or brandy stirred in at the end? Yes, please. Date night deserves a little flair.
  • Go savory-adjacent: Add a pinch of salt and spoon it over something like pan-seared salmon. Trust me, it walks the line beautifully.

Blueberry Compote

What to Serve with Blueberry Compote

This is where things get dangerously fun. There are so many good pairings. Half the fun is trying new ones, but here are a few favorites to get you started.

  • Pancakes, waffles, or French toast: Basically breakfast’s favorite accessory. Spoon it on warm, let it sink into the nooks and crannies, then just sit back and enjoy. If you like things extra special, try it over lemon ricotta pancakes—pure heaven.

  • Yogurt or oatmeal: This combo is sneaky good. The compote adds sweetness and a little drama, and breakfast becomes anything but boring. Sprinkle a few nuts or granola on top if you’re feeling extra.

  • Ice cream: Vanilla is the obvious choice, but don’t underestimate how great it is over a scoop of salted caramel or even dairy-free coconut ice cream. Warm compote + cold ice cream? Magic.

  • Pound cake or cheesecake: Just… yes. Spoon it liberally over any buttery, cakey dessert and pretend you planned the whole thing.

  • Savory meats (hear me out): This is the messy elegance we all need some nights. A dollop on top of roasted pork or tucked next to glazed pork tenderloin sounds wild at first, but it works. Promise.

Blueberry Compote

Frequently Asked Questions

Can I make blueberry compote with fresh blueberries instead?

Yes, absolutely! Fresh blueberries work beautifully. Just be aware they might break down a little faster as they cook, and you may want to shorten the second cook time by a minute or two to keep some whole berries for texture. The flavor is still great—it’s just a touch lighter in color and body.

Is blueberry compote supposed to be thick?

Great question. It’s more like a thick sauce than a jelly. It should be pourable but syrupy, with pockets of soft fruit and a glossy finish. If it’s too thin for your liking, simmer it a bit longer. Prefer it thicker for toast? Cook a touch more and let it cool—it thickens as it sits.

Can I use other kinds of fruit in this recipe?

Yes, go wild! You can sub in other berries like raspberries, blackberries, or even chopped strawberries. Peaches, tart cherries, or plums work really well too. Just be mindful of sweetness levels—some fruits may need a little less sugar.

How long does blueberry compote last in the fridge?

Usually around 5 to 7 days if stored in an airtight container. Make sure it cools before you refrigerate it. And if it thickens too much or looks like it’s lost a little shine, just heat it gently with a splash of water to bring it back to life.

Blueberry Compote

Simple Blueberry Compote

Prep Time 3 minutes
Cook Time 18 minutes
Total Time 21 minutes
Sweet, tangy, and bursting with blueberry goodness, this blueberry compote is unfussy and delicious. Frozen blueberries, sugar, lemon juice, and a splash of water transform into a jammy, versatile sauce you’ll want to spoon over pancakes, ice cream, or eat by itself right from the fridge.
8 servings

Ingredients

Blueberry Compote

  • 2 cups (280 g) frozen blueberries divided
  • 3 tbsp (38 g) granulated sugar adjust to taste
  • 1 tbsp (15 ml) lemon juice fresh-squeezed preferred
  • 2 tbsp (30 ml) water

Equipment

  • Small Saucepan
  • Wooden spoon or spatula
  • Measuring cups
  • Measuring spoons

Instructions
 

  1. In a small saucepan over medium heat, combine 1 cup of frozen blueberries with the water, sugar, and lemon juice.
  2. Stir gently as the mixture heats up. The berries will begin to break down and the liquid will thicken into a syrup.
  3. Let it simmer for about 10 minutes, stirring occasionally.
  4. Add the remaining 1 cup of frozen blueberries. Continue cooking for another 8 minutes, stirring occasionally until the compote is glossy and some berries remain whole.
  5. Remove from heat. Serve warm or let cool to thicken further. Stir gently before serving.

Notes

You can substitute fresh blueberries for frozen. For a more complex flavor, try adding a pinch of cinnamon, a dash of vanilla extract, or a little citrus zest. For a looser or thicker compote, adjust simmer time and water as desired.

Nutrition

Calories: 54kcal | Carbohydrates: 14g | Protein: 0.5g | Fat: 0.1g | Sodium: 1mg | Potassium: 50mg | Fiber: 1.5g | Sugar: 11g | Vitamin A: 25IU | Vitamin C: 5mg | Calcium: 5mg | Iron: 0.2mg

Sizzling umami, sweet-savory glaze, tender bites of sirloin—this beef teriyaki is all the good smells wafting from a cozy kitchen. It stars beef sirloin, soy sauce, mirin, and ginger.

We’ve got salty, we’ve got sticky, and oh yes, we’ve got the kind of slight crisp around the edges that makes your fork dive right back in for more. If you’ve got rice, a pan, and 30 minutes, dinner’s basically done. Let’s get into it.

This is one of those dishes that makes you pause mid-bite just to appreciate what’s happening in your mouth. It’s rich with umami, crunchy-tender thanks to a light starch crust, and glossy from that thick, ginger-infused glaze that practically begs for something carby underneath. It’s cozy, fast, and weeknight-fluid: serve it over rice, tuck it into lettuce cups, or pile it over noodles if you’re feeling wild. And if you happen to sneak a piece out of the pan before plating? I get it. Happens every time.

Table of Contents

Beef Teriyaki

Why You’ll Love this Beef Teriyaki

You don’t have to be a pro stir-fryer or sauce whisker to make this work. No judgment if the soy sauce lives next to your cereal.

  • Ridiculously simple to make: You just shake, sear, pour, and simmer. Feels more like a magic trick than cooking.
  • Restaurant-style results at home: We’re talking sticky, glossy sauce and beef that’s both crispy and tender.
  • Totally customizable: Add broccoli, swap the beef, leave off the sesame seeds… it’s your skillet, friend.
  • Fast enough for a Tuesday night: From fridge to plate in under 30 minutes, unless you stop to admire your work.
  • Big flavor, small shopping list: Everything comes from standard pantry and fridge staples (nothing wacky or obscure).

Beef Teriyaki

Ingredient Notes

Just a few basics pulling way above their weight here. Everything plays its part in the flavor drama.

  • Beef sirloin or flank steak: Both work beautifully. Just slice thin against the grain, and you’ll get that tender-chewy texture we love.
  • Soy sauce: I use low-sodium to keep things balanced. Regular works too, just reduce the salt elsewhere.
  • Mirin: This sweet Japanese rice wine brings that slightly boozy glaze flavor. If you’re out, a splash of sake plus sugar can do in a pinch.
  • Brown sugar or honey: Either will sweeten and thicken the sauce, but brown sugar adds a lovely molasses depth.
  • Rice vinegar: Cuts through the rich sweetness and lifts the whole thing. Don’t skip it—it’s sneaky important.
  • Sesame oil: Just a little! Too much and it’ll hijack the dish. Think of it as a whisper of nuttiness.
  • Ginger and garlic: Fresh is the move here. Mince ‘em fine so they melt into the sauce.
  • Cornstarch slurry: This thickens the sauce to that glorious sticky-slick consistency.
  • Extra cornstarch or potato starch for beef: Helps the meat crisp and gives the sauce something to cling to.
  • Vegetable oil: Neutral and hot—it’s there to sear, not to steal the show.

Beef Teriyaki

How To Make This Beef Teriyaki

This comes together quickly once you start, so have your sauce whisked and meats sliced before the pan gets hot. Trust me, it moves fast.

  • Make the sauce upfront: In a bowl, whisk everything—water, soy sauce, mirin, vinegar, sweet stuff, sesame oil, garlic, ginger, and that cheeky little slurry. Stir until it’s smooth and the sugar’s dissolved, then set it aside so you’re not scrambling while things sizzle.

  • Slice the beef: Thin slices (think 1/4 inch or so) across the grain make all the difference. Pat them dry first so they crisp, then toss in cornstarch until lightly dusted. Not caked, but not shy either.

  • Sear it hot and fast: Heat your pan nice and high, add the oil, then drop in the beef without overcrowding. Let it sit for a minute or two per side so it forms that golden crust. Don’t fuss with it; let it do its thing.

  • Add the sauce and simmer: Once all the beef is nicely seared, drop the heat a notch and pour in your sauce. Now stare in awe as the whole thing bubbles and thickens, coating every edge of beef in a lacquered glaze.

  • Serve and garnish: Plate it up over rice, plop some sesame seeds and green onions on top if you’re feeling cute, and dive in while it’s warm and glossy.

Beef Teriyaki

Storage Options

Alright, let’s talk leftovers. If you’ve got any (which is a big “if”), this beef teriyaki holds up surprisingly well.

Pop any cooled leftovers into an airtight container and stash them in the fridge. They’ll keep happily for about 3 to 4 days. The sauce thickens when cold, but a quick reheat loosens it back up.

To reheat, just toss it in a skillet over medium heat with a splash of water or a drizzle of soy sauce. Microwave works too (30-60 second bursts), but the stovetop keeps things from turning rubbery.

And yes, you can freeze it—but I’d freeze just the cooked beef-teriyaki mixture without rice or garnishes. Thaw overnight in the fridge, then reheat on the stove. Great for lazy dinners or “I forgot to shop” emergencies.

Variations and Substitutions

This dish wears many hats. Here’s how to mix things up if you’re low on options, or just like to stir the pot.

  • Different protein: Swap in chicken thighs, pork tenderloin, or even tofu. Just adjust cooking time depending on the protein.
  • No mirin? Try sake plus sugar, or even a bit of white wine with honey. Not traditional, but it works in a pinch.
  • Gluten-free option: Use tamari instead of soy sauce. And double-check your cornstarch if gluten sensitivity is real for you.
  • Vegetable boost: Toss in broccoli, bell peppers, snow peas, or whatever needs saving in your produce drawer.
  • Honey instead of brown sugar: This adds a floral sweetness and a thicker, glossier finish to your sauce.

Beef Teriyaki

What to Serve with Beef Teriyaki

Now that your pan is singing and the sauce is clinging, here’s what pairs beautifully with this sweet and savory beauty.

  • A bed of freshly steamed jasmine or short-grain rice is the classic move. It soaks up that saucy glaze like a dream. I’ve also been known to scoop it onto leftover fried rice for a meal remix.

  • If you’re trying to sneak in more greens (hello, future me), serve it over lightly sautéed bok choy or stir-fried green beans. Something crisp helps balance it all out.

  • For a starchy sidekick with a twist, try a warm batch of soft dinner rolls for sopping up extra sauce. Might not be traditional, but my taste buds don’t mind.

  • If you’re feeling something lighter, go with a bright Asian-style salad. Crunchy cabbage, sesame dressing, maybe some mandarin slices…it really works.

Beef Teriyaki

Frequently Asked Questions

Can I use a different cut of beef?

Absolutely. Sirloin and flank steak are ideal because they’re tender and cook quickly, but you can also use ribeye or even thinly sliced chuck in a pinch. The important part is slicing thin and against the grain—this keeps everything chew-friendly, not shoe-leathery.

How do I keep the beef from getting soggy?

Don’t overcrowd the pan when searing, and make sure to pat the slices dry before tossing them with starch. Moisture’s the enemy of crisp edges. Also, make sure your oil is hot before adding beef, so it can form that golden crust fast.

What can I use instead of mirin?

If you don’t have mirin, try using sake with a spoonful of sugar, or even dry sherry or white wine with honey. Some folks use rice wine vinegar and sugar as a quick fix, though it’ll be a little more tart. It won’t taste *exactly* the same, but it’ll get the job done.

Is this recipe gluten-free?

It can be! Just swap the soy sauce for tamari or a certified gluten-free soy sauce, and double-check that your cornstarch is gluten-free (most are, but it never hurts to check the label). Everything else is naturally gluten-free.

Beef Teriyaki

Beef Teriyaki

Prep Time 15 minutes
Cook Time 12 minutes
Total Time 27 minutes
Sizzling umami, sweet-savory glaze, tender bites of sirloin—this beef teriyaki is all the good smells wafting from a cozy kitchen. Sirloin, soy sauce, mirin, and ginger combine for a takeout-worthy dish in under 30 minutes!
4 servings

Ingredients

For the Sauce

  • 1/4 cup (60 ml) soy sauce low-sodium preferred
  • 3 tbsp (45 ml) mirin
  • 2 tbsp (28 g) brown sugar or honey
  • 1 tbsp (15 ml) rice vinegar
  • 1 tsp (5 ml) sesame oil
  • 1 tbsp (15 ml) water
  • 2 cloves garlic minced
  • 1 tbsp fresh ginger minced
  • 2 tsp (6 g) cornstarch mixed with 2 tsp water for slurry

For the Beef

  • 1 lb (450 g) beef sirloin or flank steak sliced very thin against the grain
  • 2 tbsp (16 g) cornstarch or potato starch for dusting beef
  • 2 tbsp (30 ml) vegetable oil or other neutral oil

Optional Garnishes

  • sesame seeds
  • green onions sliced
  • steamed rice for serving

Equipment

  • Large skillet or wok
  • Mixing bowls
  • Whisk
  • Tongs

Instructions
 

  1. Make the sauce: In a bowl, whisk together soy sauce, mirin, brown sugar, rice vinegar, sesame oil, water, garlic, ginger, and the cornstarch slurry (2 tsp cornstarch mixed with 2 tsp water). Stir until smooth and sugar is dissolved. Set aside.
  2. Prepare the beef: Slice beef thinly (about 1/4 inch) across the grain. Pat slices dry with paper towels, then toss with 2 tbsp cornstarch or potato starch until lightly coated.
  3. Sear the beef: Heat 2 tbsp vegetable oil in a large skillet or wok over medium-high heat. Working in batches, add beef in a single layer. Let sear undisturbed for 1–2 minutes per side, until browned and crispy around the edges. Remove to a plate as you finish each batch.
  4. Add the sauce: Return all beef to the pan. Pour in sauce mixture and reduce heat to medium. Let simmer, stirring, for 2–3 minutes or until sauce thickens and beef is well-glazed.
  5. Serve: Spoon the beef and sauce over steamed rice. Garnish with sesame seeds and green onions if desired. Enjoy while hot and glossy!

Notes

Storage: Leftovers keep in an airtight container in the fridge for 3–4 days. Reheat in a skillet with a splash of water or soy sauce. For freezing, store beef and sauce mixture (without rice or garnishes) for up to 2 months.
Variations: Try chicken, pork, or tofu instead of beef. For gluten-free, use tamari. Add broccoli, bell peppers, or snap peas for extra veggies. Substitute honey for brown sugar for a different sweetness profile.

Nutrition

Calories: 370kcal | Carbohydrates: 18g | Protein: 29g | Fat: 19g | Saturated Fat: 5g | Cholesterol: 88mg | Sodium: 889mg | Potassium: 564mg | Fiber: 1g | Sugar: 8g | Vitamin A: 40IU | Vitamin C: 1mg | Calcium: 36mg | Iron: 2.6mg

Soft, buttery, and still warm from the oven, these copycat Texas Roadhouse rolls taste like a hug for your mouth. Made with pantry staples like yeast, milk, sugar, eggs, and plenty of butter, they’re fluffy little clouds with just the right pull. Imagine tearing one open and watching the steam escape before slathering on that cinnamon honey butter. Yeah, welcome to roll heaven.

Whether you’re trying to recreate a steakhouse dinner at home or just need a good excuse to turn your oven on, this recipe is dangerously easy to fall for. The dough is smooth and stretchy, the scent while baking is what dreams smell like, and the butter? Oh, the butter… sweet, whipped, lightly spiced magic. Honestly, I could make a meal out of these rolls and a good-sized scoop of the honey cinnamon spread. Not that I’ve definitely done that on a Tuesday at 2pm. Nope…

Table of Contents

Copycat Texas Roadhouse Rolls

Why You’ll Love this Copycat Texas Roadhouse Rolls

Sometimes you need a roll that’s extra. These are soft enough to squish, sturdy enough to dunk, and charming enough to bring to dinner uninvited.

  • Soft and pillowy texture: These rolls rise like little bread clouds, with a light chew and a golden, glossy top.
  • That cinnamon honey butter though: Sweet, salty, a touch spiced, and deeply spreadable, it’s really the co-star of the show.
  • Very make-ahead friendly: You can prep the dough earlier in the day or even freeze for later, which is wildly helpful.
  • Beginner-baking friendly: If you can stir, knead (ish), and roll, you’ve basically got it down.
  • Better-than-the-original energy: Fresh out of the oven, slathered in butter, and no waiting for a table? Say less.
  • Pairs with so many things: Steak dinner, soup night, or solo snacking—these rolls are equal opportunity delicious.

Copycat Texas Roadhouse Rolls

Ingredient Notes

There’s nothing too fancy here, which is part of the magic. Just a bunch of humble basics joining forces to create baked bliss.

  • Active dry yeast: Helps these babies puff up beautifully. Just make sure it’s fresh so your dough actually rises.
  • Warm water (100–105°F): Wakes the yeast up gently. Not too hot or you’ll accidentally commit yeasticide.
  • Sugar (both kinds): Granulated goes into the dough to feed the yeast and sweeten things up; powdered sugar adds creaminess to the butter spread.
  • Milk (scalded and cooled): Adds richness to the dough. Let it cool after scalding so it doesn’t wreck the yeast.
  • Butter (all of it): Melted in the dough, brushed on top, and whipped into the star-of-the-show honey butter.
  • Eggs: They help make the rolls tender and rich and totally worth the carb commitment.
  • All-purpose flour: Nothing fancy here. Scoop-and-level method works best to avoid brick-like dough.
  • Honey: Balances sweetness in the butter spread. Taste and adjust—I go for 3 tablespoons, but you do you.
  • Cinnamon: Just enough to play nicely with the honey. Don’t skip it unless you’re actively cinnamon-averse.

Copycat Texas Roadhouse Rolls

How To Make This Copycat Texas Roadhouse Rolls

Let’s roll (sorry). But truly, it’s an easy process once you get going—it’s dough, rest, shape, rest again, bake, butter. Then inhale.

  • Activate the yeast: In your stand mixer’s bowl, stir together the yeast, warm water, and a teaspoon of sugar. Let it sit until it foams—usually 5 to 10 minutes. If nothing happens, your yeast might be past its bedtime. Start fresh.

  • Build the dough base: Add the milk, melted butter, the rest of the sugar, eggs, and salt. Stir on low using the dough hook. Add flour two cups at a time, and don’t rush it. You’re aiming for a soft dough—slightly sticky but not gluey.

  • Knead and rise: Keep that dough hook going until it’s smooth and pulls away from the bowl on its own. Then transfer to a greased bowl, cover with a dish towel, and let it rise in a warm-ish spot until doubled. Usually about 1 to 1.5 hours. It should feel puffy, soft, and alive.

  • Mix the butter spread: While your dough rises, beat together butter, powdered sugar, cinnamon, and 2 tablespoons of honey. Taste, adjust, and try not to eat the whole bowl with a spoon. Set aside—or hide in the back of the fridge.

  • Punch and roll: Flour your surface and deflate the dough gently. Divide in half so it’s easier to wrangle. Roll out one half into a rectangle about ½ to ¾ inches thick. Use a sharp knife or bench scraper to cut into 3×3 inch squares. Repeat for the second half.

  • Second rise: Transfer your lil’ dough squares to a greased baking sheet with some space between them. Cover with a clean towel and let proof again until doubled—usually 30 to 45 minutes. Meanwhile, preheat your oven to 350°F.

  • **Bake to golden: ** Pop them in the oven and bake for 10 to 15 minutes. You’re looking for a gentle bronze tone—like a bronzed tourist, not a deep tan. When they come out, immediately brush with melted butter. Now’s your moment. Serve warm with generous gobs of that whipped butter.

Copycat Texas Roadhouse Rolls

Storage Options

Okay, so you somehow have leftovers? I’m impressed. Here’s how to make them last a little longer.

First, room temp is fine if you’re eating them within a day. Just store in an airtight container or a zip-top bag and keep them out of direct sunlight or heating vents. Nobody likes surprise reheated rolls that taste like radiator.

If you’re planning to save them longer, toss those puppies in the fridge for up to 4 days. Let them come up to room temp or give them a warm-up in a low oven or a few seconds in the microwave (covered with a damp paper towel, please, so they don’t dry out).

But can you freeze them? Yes. And I highly recommend it. Wrap tightly in plastic wrap, then seal in a freezer bag. They’ll stay dreamy for about 2 to 3 months. When you’re ready, thaw and reheat slowly—300°F oven for 10 minutes or so works great.

That cinnamon honey butter also freezes brilliantly. Just tuck it into a small container and pull it out when you’re ready for magic.

Variations and Substitutions

You can totally riff on these rolls without breaking their buttery spirit.

  • Whole wheat flour: Swap in up to 2 cups of whole wheat for a nutty twist and slightly denser texture. Good if you’re trying to trick yourself into thinking they’re health food.
  • Maple instead of honey: Want something a little more mellow and earthy in the butter? Maple syrup does the trick beautifully.
  • Vegan spin: Try plant-based butter, honey alternative (like agave), and a flax egg or egg replacer. You’ll still get a nice rise and that sweet kiss of cinnamon.
  • **No stand mixer? Work those muscles and knead by hand. It takes longer, sure, but also counts as a mild upper-body workout.
  • Savory butter switch-up: Add chopped chives, garlic powder, or shredded cheese to the butter if you want more of a dinner-roll vibe.

Copycat Texas Roadhouse Rolls

What to Serve with Copycat Texas Roadhouse Rolls

These rolls are team players. They show up, do their job, and make everything on the plate feel a little extra cozy.

  • A cozy bowl of chili is a natural match. I especially love them with this Wendy’s-style stovetop chili. Dip, smear, spoon, repeat.

  • If you’re going all-in on Southern comfort vibes, these are ridiculous next to fried or grilled chicken. Or try them with slow-cooked dishes like creamy crockpot chicken pasta. The contrast of textures is unreal.

  • For a lighter pairing, they’re surprisingly lovely next to baked fish. Something simple like pan-seared cod with greens really lets the rolls be the indulgent bit.

  • And hey, no shame if you just heat up two rolls, slather on butter, and call that lunch. Been there, loved that.

Copycat Texas Roadhouse Rolls

Frequently Asked Questions

Why didn’t my rolls rise?

The usual culprit is sleepy yeast. If your yeast doesn’t foam in the first few minutes, it’s likely expired or your water was too hot. Also, make sure the environment isn’t too chilly during proofing. A slightly warm oven (turned off!) or a sunny windowsill can help.

Can I make the dough ahead of time?

Absolutely! After the first rise, you can refrigerate the dough overnight. Just bring it back to room temp for about 30 minutes before rolling it out and continuing on. It actually develops a little more flavor this way, too.

Is it okay to freeze the baked rolls?

Yes, and they’re surprisingly great after freezing. Just make sure to wrap them well, then reheat in the oven at 300°F until warmed through. You can also freeze the dough after shaping but before the second rise if you’d rather bake them fresh later.

What if I don’t have a stand mixer?

No mixer, no problem. Start mixing with a spoon, then switch to kneading by hand once the dough firms up. It’ll take about 8 to 10 minutes of kneading to reach that smooth, slightly tacky perfection. Turn on some music and get those forearms involved.

Copycat Texas Roadhouse Rolls

Copycat Texas Roadhouse Rolls with Cinnamon Honey Butter

Prep Time 25 minutes
Cook Time 15 minutes
Rising/Proofing Time 1 hour 45 minutes
Total Time 2 hours
Soft, buttery, and still warm from the oven, these copycat Texas Roadhouse rolls taste like a hug for your mouth. Made with pantry staples like yeast, milk, sugar, eggs, and plenty of butter, they're fluffy little clouds with just the right pull. The real star? That whipped cinnamon honey butter to spread on top. Welcome to roll heaven.
18 rolls

Ingredients

For the Rolls

  • 2 1/4 tsp (7 g) active dry yeast 1 standard packet
  • 1/2 cup (120 ml) warm water 100–105°F
  • 1/2 cup (100 g) granulated sugar divided
  • 1 cup (240 ml) whole milk scalded and cooled
  • 6 tbsp (85 g) unsalted butter melted and slightly cooled
  • 2 (2 large) large eggs room temperature
  • 1 tsp (5 g) salt
  • 4 1/2 to 5 cups (560 to 625 g) all-purpose flour scoop and level, divided
  • 3 tbsp (42 g) unsalted butter melted, for brushing

Cinnamon Honey Butter

  • 1/2 cup (113 g) unsalted butter room temperature, very soft
  • 3 tbsp (24 g) powdered sugar
  • 3 tbsp (60 g) honey plus more to taste
  • 1 tsp (2.5 g) ground cinnamon
  • Pinch salt optional, for the butter

Equipment

  • Stand Mixer (optional)
  • Mixing bowls
  • Bench scraper or knife
  • Baking sheet
  • Rolling Pin

Instructions
 

  1. Activate the yeast: In your stand mixer’s bowl, combine the active dry yeast, warm water, and 1 teaspoon of the sugar. Let it sit until foamy, about 5 to 10 minutes. If nothing happens, your yeast may be dead—start over with fresh yeast.
  2. Build the dough base: Add the scalded and cooled milk, melted butter, the remaining sugar, eggs, and salt to the yeast mixture. Mix gently. Add flour, 2 cups at a time, and mix on low with a dough hook (or stir with a sturdy spoon) until a soft, slightly sticky dough forms.
  3. Knead and rise: Knead with the dough hook (or by hand) until smooth and pulling away from the bowl, about 5 minutes. Transfer to a greased bowl, cover, and let rise in a warm place until doubled, about 1 to 1.5 hours.
  4. Mix the butter spread: While the dough rises, beat together the softened butter, powdered sugar, honey, cinnamon, and optional pinch of salt to make the cinnamon honey butter. Taste and adjust honey or cinnamon as desired. Set aside at room temp or refrigerate.
  5. Punch and roll: Lightly flour your work surface. Gently deflate the dough and divide in half. Roll one half into a rectangle about 1/2 to 3/4 inch thick. Cut into 3x3-inch squares and transfer to a greased baking sheet. Repeat with the second half of dough.
  6. Second rise: Cover the shaped rolls with a towel and let rise again in a warm place until puffy and nearly doubled, about 30 to 45 minutes. Meanwhile, preheat the oven to 350°F (175°C).
  7. Bake to golden: Bake the rolls for 10 to 15 minutes, until the tops are lightly golden and they're cooked through. Immediately brush tops with melted butter. Serve warm with the cinnamon honey butter.

Notes

You can prep the dough ahead of time by refrigerating it after the first rise—let it warm up before shaping. Baked rolls (and butter) freeze well: wrap tightly and reheat gently when ready to eat. Swap in up to 2 cups of whole wheat flour for extra flavor, try maple syrup in the butter for a twist, or make things vegan with plant-based swaps. Don’t have a stand mixer? Knead by hand for about 8-10 minutes.

Nutrition

Calories: 180kcal | Carbohydrates: 29g | Protein: 4g | Fat: 5g | Saturated Fat: 3g | Cholesterol: 26mg | Sodium: 130mg | Potassium: 50mg | Fiber: 1g | Sugar: 7g | Vitamin A: 200IU | Calcium: 22mg | Iron: 1.5mg

Succulent chicken, tangy Olive Garden dressing, melty cream cheese, and pasta come together in this cozy crockpot Olive Garden chicken pasta. Toss in garlic and Parmesan? Irresistible.

This creamy crockpot meal tastes like a hug in a bowl. With juicy chicken and warm penne soaking up that cheesy Italian goodness, it smells incredible from the moment the lid comes off.

It’s rich, it’s velvety, and it’s one of those “dump it in, forget it, eat like royalty” kind of situations. This crockpot Olive Garden chicken pasta is creamy, garlicky, and just a little zippy from the dressing—in the best way. It’s a low-effort dinner that feels like you actually tried (but you didn’t, and that’s our little secret). Perfect for weeknights when you want your dinner to taste like you left the house and ordered in, but all you really did was spin some pasta. Win, win.

Table of Contents

Crockpot Olive Garden Chicken Pasta

Why You’ll Love this Crockpot Olive Garden Chicken Pasta

This isn’t a viral recipe accident. It delivers. And keeps delivering—with leftovers that somehow taste better the next day, no clue how that works.

  • Ridiculously simple to make: You basically pour stuff over chicken, toss in cheese, and let it do its thing while you slack off responsibly.
  • Creamy but not cloying: That Italian dressing keeps things tangy and bright, so it’s rich without being too much.
  • Smells like an Olive Garden exploded into your kitchen: In the best garlicky, cheesy, “where’s the breadsticks” kind of way.
  • Incredibly cozy and filling: You’ve got protein, pasta, and cheese holding hands in a bowl. Need I say more?
  • Make-ahead and freezer-friendly(ish): It holds up surprisingly well if you’re into planning lunches like a real adult.
  • Customizable without drama: Swap the pasta, up the garlic (yes), or toss in spinach if you’re being that person.

Crockpot Olive Garden Chicken Pasta

Ingredient Notes

Only a few ingredients stand between you and your new favorite pasta situation. Here’s what’s going in and why it matters.

  • Boneless, skinless chicken breasts: They shred beautifully after a low-and-slow cook. You could also use thighs if that’s your thing, just keep the same weight.
  • Olive Garden Italian dressing: This magical bottle is tangy, herby, and sneaky-delicious when heated. Use the original (nothing light or weird).
  • Fresh Parmesan cheese: Adds salty, nutty depth. Pre-grated stuff doesn’t melt as well, so bring out the grater if you can.
  • Black pepper: Just enough to balance the richness. Don’t skip, it brings the flavor harmony.
  • Fresh garlic: Four cloves might feel excessive—but trust me, it melts right into the sauce like a dream.
  • Full-fat cream cheese: Meltier, creamier, and silkier than reduced fat. Just cube it up so it melts evenly.
  • Penne pasta: It grabs onto thick sauces like a champ. You could use rigatoni or rotini in a pinch.

Crockpot Olive Garden Chicken Pasta

How To Make This Crockpot Olive Garden Chicken Pasta

Once you’ve got everything lined up, this really is a “set-it-and-forget-it” sort of deal. Let’s walk through it together like it’s Sunday afternoon and we’re pretending there’s jazz playing.

  • Layer the chicken in your slow cooker: Just lay the boneless breasts right on the bottom. No need to sear or season first—this is weekday realness.

  • Whisk up the sauce: In a separate bowl (use a giant coffee mug if your bowls are in the dishwasher, I won’t judge), stir together the dressing, half your grated Parmesan, the pepper, and minced garlic. It should smell intense and zippy and kind of amazing.

  • Pour the party over the chicken: Drizzle your sauce mixture evenly on top. Then scatter the cubed cream cheese over everything. Don’t stir it—just let the slow cooker work its magic.

  • Cover and cook low and slow: Set it for 4 hours on HIGH or 6 hours on LOW. Honestly, either works, just don’t peek too much. Your patience is about to be rewarded.

  • Boil that pasta: Near the end of the cook time, bring a pot of salted water to a boil and cook that penne until al dente. Keep about a cup of the starchy pasta water in case you want to loosen the sauce later.

  • Shred the chicken into creamy bliss: Use two forks (or clean claws, if you’re wild) to shred the chicken straight in the crock. It should fall apart like butter and mix into the creamy, tangy sauce on its own.

  • Toss in the pasta and finish: Add your freshly cooked pasta to the slow cooker and gently fold everything together. That sauce should coat every noodle like a warm hug. If it’s too thick, drizzle in reserved pasta water a bit at a time.

  • Top with more Parm and serve: Go ahead and sprinkle the rest of the Parmesan on top. Maybe a little cracked black pepper too?

Crockpot Olive Garden Chicken Pasta

Storage Options

Alright, so maybe you went wild and made the full batch even though it’s just you and your cat. No shame. This pasta stores like a champ.

In the fridge, leftovers keep well for about 3 to 4 days. Just scoop it into an airtight container once it’s fully cooled (don’t steam up your fridge with a hot pot—been there, regretted it). The sauce can thicken up overnight, but that’s where your pasta water or a splash of milk comes in. Add it when reheating to bring things back to creamy town.

Reheating is easy: microwave on medium power in 30-second bursts so you don’t overcook the chicken or turn the sauce into glue. Stir between each go. Or warm gently on the stove with a splash of water or milk stirred in.

And yes, technically, you can freeze it. But the dairy might get a little funky in texture. If you’re cool with a slightly grainier sauce after thawing, go for it. Freeze in portions so you don’t have to commit to the whole thing later.

Variations and Substitutions

Whether you’re swapping for dietary reasons or just playing fridge roulette, this recipe is surprisingly flexible. Here are a few options to keep things interesting:

  • Chicken thighs instead of breasts: More flavor, more moisture, and a little higher fat. They also shred beautifully after a long cook.
  • Different dressings: Can’t find Olive Garden’s? Try another Italian-style dressing with tang and herbs. Just avoid creamy Caesar types—it won’t be the same ride.
  • Use a different pasta shape: Rotini or shells work well. Even bowties have their charm. Just go with something that traps sauce in its ridges.
  • Add veggies at the end: Stir in cooked broccoli, thawed spinach, or peas once the chicken’s shredded. It’s a sneaky way to add green stuff without drama.
  • Spicy version: Toss in a pinch of red pepper flakes with the sauce mix or add chopped banana peppers on top for some casual heat.

Crockpot Olive Garden Chicken Pasta

What to Serve with Crockpot Olive Garden Chicken Pasta

This creamy, saucy pasta is pretty self-sufficient. But let’s be honest—it shines even brighter with a few bonus players on the plate.

  • A simple side salad with lemony vinaigrette balances the richness beautifully. Something crunchy, fresh, and a little acidic makes everything pop more. Plus, it tricks your brain into thinking this is a balanced meal.

  • Garlic bread or cheesy focaccia is wildly good here. You’ll want something carby to mop up any extra sauce. If you’ve never dunked bread in a cream cheese-based pasta sauce, you haven’t lived.

  • Roasted vegetables (think zucchini, bell peppers, or even brussels sprouts) add some smoky depth against the creamy pasta. I usually toss them in olive oil and go wild in the oven.

  • If you’re trying to stretch this into a feast, add a light appetizer or dessert. I love ending creamy meals with something bright like a raspberry trifle—tart-fruity goodness layered like a sweet architectural miracle.

  • Feeling meat-heavy? Serve smaller portions alongside a crisp protein like pan-seared salmon or grilled chicken thighs for a funky high-low vibe.

Crockpot Olive Garden Chicken Pasta

Frequently Asked Questions

Can I use frozen chicken in the crockpot?

Technically yes, but it’s not ideal. Slow cookers don’t bring the meat up to a safe temperature quickly enough, so it increases the risk of bacteria hanging around too long. Best to thaw the chicken first. You can safely defrost it using our handy trick for defrosting meat with a microwave—just don’t cook it in there, we’re not animals.

What can I use if I don’t have the Olive Garden dressing?

No worries. Look for a zesty Italian dressing at the store—something with visible herbs and a vinegar-forward base. Brands like Ken’s or Kraft can work in a pinch. Just skip the creamy versions; they’ll change the whole flavor and texture vibe.

Can I make this dish gluten-free?

Absolutely. Just swap in your favorite gluten-free pasta. Penne works great, but cook it al dente (or slightly under), as gluten-free pasta can get mushy fast when reheated. Also, double-check your dressing just to be sure there’s no sneaky gluten hiding in there.

Can I double the recipe?

Yep, just make sure your crockpot can handle the volume. A 6 to 7-quart cooker should be fine for a double batch. You may want to give it an extra 30 minutes to an hour if things are stacked tight. And stir it really well once the chicken is shredded so the sauce distributes evenly.

Crockpot Olive Garden Chicken Pasta

Crockpot Olive Garden Chicken Pasta

Prep Time 10 minutes
Cook Time 4 hours
Total Time 4 hours 10 minutes
Succulent chicken, tangy Olive Garden dressing, melty cream cheese, and pasta come together in this cozy crockpot Olive Garden chicken pasta. Toss in garlic and Parmesan? Irresistible. This creamy slow cooker meal tastes like a hug in a bowl and is ridiculously easy to make — perfect for weeknights!
6 servings

Ingredients

Chicken & Sauce

  • 2 lbs (900 g) boneless, skinless chicken breasts or use chicken thighs, same weight
  • 16 oz (475 ml) Olive Garden Italian dressing 1 standard bottle (not light or reduced fat)
  • 4 cloves fresh garlic minced
  • 1 tsp black pepper freshly cracked preferred
  • 8 oz (225 g) cream cheese full-fat, cut into cubes
  • 1.5 cups (125 g) fresh Parmesan cheese grated and divided, plus more for serving

Finishing & Pasta

  • 16 oz (450 g) penne pasta or rigatoni, rotini, etc.
  • reserved pasta cooking water as needed to loosen sauce
  • additional Parmesan cheese for topping

Equipment

  • Crockpot or Slow Cooker
  • Large Knife
  • Cutting board
  • Mixing bowl
  • Saucepan for boiling pasta

Instructions
 

  1. Layer the chicken in your slow cooker: Place the chicken breasts (or thighs) in the bottom of the crockpot.
  2. Whisk up the sauce: In a bowl or large mug, mix together the Italian dressing, half of the grated Parmesan, cracked black pepper, and minced garlic. Stir until combined.
  3. Pour the sauce over the chicken: Evenly pour the dressing mixture over the chicken in the crockpot. Scatter the cubed cream cheese over the top. Do not stir.
  4. Cook low and slow: Cover and cook on HIGH for 4 hours or LOW for 6 hours, until chicken is very tender. Do not open the lid during cooking if possible.
  5. Cook pasta: About 20 minutes before chicken is done, boil the penne pasta in salted water until just al dente. Reserve about 1 cup of pasta water. Drain the pasta.
  6. Shred the chicken: Use two forks to shred the chicken right in the crockpot and mix into the creamy sauce.
  7. Combine pasta & sauce: Add the cooked pasta to the crockpot and gently fold to combine. If the sauce is too thick, add a little reserved pasta water as needed so everything is nicely coated.
  8. Top and serve: Sprinkle the remaining Parmesan cheese and more cracked black pepper on top before serving. Enjoy immediately!

Notes

This creamy chicken pasta is wildly cozy, make-ahead friendly, and flexible. Leftovers keep 3-4 days refrigerated and reheat best with a bit of milk or reserved pasta water stirred in. Freezes okay but may have texture changes. Swap in any short pasta, use rotisserie chicken for a shortcut, or mix in spinach or cooked broccoli after shredding for a veggie boost. Make it gluten-free by swapping the pasta for your favorite GF shapes.

Nutrition

Calories: 645kcal | Carbohydrates: 55g | Protein: 45g | Fat: 27g | Saturated Fat: 11g | Cholesterol: 146mg | Sodium: 1373mg | Potassium: 775mg | Fiber: 3g | Sugar: 7g | Vitamin A: 500IU | Vitamin C: 3mg | Calcium: 355mg | Iron: 2.5mg

Sweet, creamy, and just the tiniest bit tart, this raspberry trifle brings together cream cheese, whipped cream, raspberry jam, pound cake, and fresh raspberries in swoon-worthy layers. It’s the kind of no-bake dessert that whispers “just one more bite” before you accidentally eat half a bowl.

Picture soft cake soaking in berry bliss, clouds of whipped cream on top, and little bursts of juicy raspberry in every spoonful. Come on in, the dessert’s fine.

Now, let’s be real for a second. Trifles aren’t fussy. That’s their charm. You layer, you swirl, you maybe sneak a raspberry or three when no one’s looking. This raspberry trifle recipe skips all the oven drama and jumps straight into that creamy-tangy-sweet territory I happen to adore. It’s smashing for parties or… Tuesday. There’s pound cake, soft and buttery. There’s silky cream. And that glossy raspberry jam? It practically shimmies. Bonus: it looks kind of stunning without you having to do anything complicated. Win-win.

Table of Contents

Raspberry Trifle Recipe

Why You’ll Love this Raspberry Trifle Recipe

This comes together like one of those daydream desserts you throw together and suddenly everyone thinks you’re a magician. For real.

  • Ridiculously simple to make: You just layer, spread, dollop, and chill. It’s like edible arts and crafts.
  • No baking required: Not a single pan to preheat, so your kitchen stays cool and your day stays chill.
  • Texture bomb in the best way: Soft, dense cake, fluffy cream, plump raspberries, and a jammy swirl. It’s a spoonful party.
  • Great use of store-bought pound cake: Because sometimes you just want to skip the extra step and still serve something fab.
  • Make-ahead friendly: It actually tastes better after a little nap in the fridge. Who doesn’t?
  • Pretty enough for guests (or just you): Serve it in a clear dish so everyone can applaud the layers.

Raspberry Trifle Recipe

Ingredient Notes

No need to overthink this. The ingredients are straightforward, but each brings their own little magic to the party.

  • Cream cheese: This gives the filling some tang and body. Let it soften fully before whipping or it’ll go lumpy on you.
  • Powdered sugar: Split between the cream cheese base and the whipped cream for balanced sweetness. It also helps stabilize all that fluff.
  • Lemon juice: Trust me, don’t skip it. Adds brightness and cuts through the richness like a little squeeze of sunshine.
  • Vanilla extract: Just a splash makes everything feel buttery and rounded.
  • Heavy whipping cream: When beaten properly, it fluffs up into soft peaks and folds into the cream cheese like a dream.
  • Raspberry jam: Look for seedless if you can; it’s glossy, spreadable, and brings serious raspberry tang.
  • Fresh raspberries: Use the best-looking berries you can find. Ideally not squished or sleepy from the back of the fridge.
  • Pound cake: Store-bought is totally fine. A buttery, dense loaf gets chopped into cubes and gives our trifle structure and sweetness.
  • Chocolate curls: Optional but delightful. They add flair on top and melt just slightly against the cool cream.

Raspberry Trifle Recipe

How To Make This Raspberry Trifle Recipe

This is one of those surprisingly easy-goes-fancy recipes that makes your guests think you have secret chef training. Let’s get into it.

  • Beat the cream cheese until smooth: Grab a large mixing bowl and mix on medium till creamy. Scrape down the bowl once or twice to make sure no rogue lumps escape your attention.
  • Add sugar, lemon juice, and vanilla: Turn the mixer to low, then blend in half the powdered sugar, the lemon juice, and the vanilla. Once it all comes together, set it aside.
  • Whip the cream: In a separate chilled bowl (cold helps it whip faster), beat the heavy cream slowly until it starts to foam. Bump up the speed gradually and mix in the rest of the sugar. Look for stiff peaks—the kind that hold their shape without slumping.
  • Gently fold cream into the cheese mixture: Don’t stir like you’re mixing cement. Use a spatula and fold with love until smooth and dreamy.
  • Build your first layer: Spread about half that ruby red raspberry jam in the bottom of a clear trifle bowl. Scatter one third of your berries on top.
  • Add pound cake and cream mixture: Toss in half of your buttery cake cubes, followed by a thick, fluffy layer of the cream cheese-whip.
  • Repeat those dreamy layers: A second round of jam, berries, cake, then finish with the last of the cream on top. You could do a third mini round if your bowl allows.
  • Garnish and chill: Top it with your fanciest remaining berries and sprinkle some chocolate curls across like you’re doing dessert graffiti. Let it chill in the fridge for at least an hour so the layers can cozy up.

Raspberry Trifle Recipe

Storage Options

Alright, let’s talk leftovers (if there are any). Raspberry trifle actually gets better after a little fridge time. The cream melds into the cake, the berries plump up, and everything just kind of learns to live together in flavor harmony.

You can store it in the fridge, tightly covered, for up to 3 days. After that, the texture of the whipped cream starts to break down, and the cake can go a little too soggy-town. But days 1 and 2? Chef’s kiss.

As for freezing? Mmm, not ideal. Cream and fresh berries don’t really behave themselves post-thaw. The texture goes weird and watery, and sad trifle is not a vibe. So keep it chilled, not frozen.

If you’ve made individual servings (like mason jar trifles, which are super cute), just pop lids on those and store them as-is in the fridge. No reassembling required.

Variations and Substitutions

You can absolutely make this recipe your own, which is half the fun. Try a twist (or five).

  • Swap the fruit: Blackberries or cherries make fantastic substitutes if raspberries aren’t available or you want a flavor shake-up.
  • Use sponge cake instead of pound cake: It’s lighter and still soaks up all the gooey-good stuff without being too rich.
  • Add liqueur for grownups: A little raspberry liqueur or limoncello drizzled over the cake cube layer makes it extra indulgent.
  • Make it chocolatey: Use chocolate pound cake, then go wild with more chocolate curls or even chopped dark chunks between the layers.
  • Go dairy-free: Use a dairy-free cream cheese and coconut whipped topping—plenty of solid options these days if you’re shopping for them.

Raspberry Trifle Recipe

What to Serve with Raspberry Trifle Recipe

This dessert brings the drama, so pairing with something simpler is usually a good move. But honestly, it plays well with lots of dishes.

  • Got something savory yet cozy on the table? A hearty casserole like this dump-and-bake meatball casserole would balance the sweetness perfectly.
  • If you’re into a cooler, more elegant dinner, follow something like this pan-seared cod and rainbow chard with a chilled fruity trifle to keep things light and lovely.
  • For brunch situations, imagine this trifle next to a tray of mini quiches or a big bowl of lemony ricotta pancakes. Bonus points if there’s coffee cake nearby.
  • Want to double-down on dessert? Pair with simple dark chocolate shortbread or espresso. You’ll be everyone’s favorite instantly.
  • Serve small bowls alongside a cheese board for a modern après-dinner twist. Soft cheeses like bloomy Brie or mild goat cheese play well with the raspberries.

Raspberry Trifle Recipe

Frequently Asked Questions

Can I make raspberry trifle the day before?

Absolutely, and I kind of recommend it. Letting it chill overnight helps all the layers blend together—like a dessert sleepover. Just be sure to keep it tightly covered in the fridge so the berries stay fresh and the cream doesn’t absorb any fridge smells (looking at you, onion pizza box).

What’s the best dish to use?

Clear glass trifle bowls are perfect for showing off the layers, but honestly, any large bowl will do in a pinch. Even a 3-quart salad bowl or a deep Pyrex works fine. And if you’re going solo-serving style, use mason jars or pretty glasses. No one will complain, I promise.

Can I use frozen raspberries?

Technically yes, but fresh is best in this case. Frozen berries can get mushy and bleed a lot of juice, which turns the cream a weird pink tint. But if that’s all you’ve got, thaw them first and drain well before using.

How do I make chocolate curls for the top?

So much easier than it looks! Run a vegetable peeler along the side of a chocolate bar (milk or dark both work). Room temp chocolate curls better than cold, and it helps to warm the bar slightly between your palms. Store extras in a zip bag and chill if your kitchen’s warm.

Raspberry Trifle Recipe

Raspberry Trifle

Prep Time 25 minutes
Cook Time 0 minutes
Chill Time 1 hour
Total Time 1 hour 25 minutes
Sweet, creamy, and just the tiniest bit tart, this raspberry trifle brings together cream cheese, whipped cream, raspberry jam, pound cake, and fresh raspberries in swoon-worthy layers. No baking, no fuss — just dreamy, showstopping dessert magic that comes together with simple layering.
8 servings

Ingredients

For the Cream Layer

  • 8 oz (226 g) cream cheese softened
  • 1 cup (120 g) powdered sugar divided (see instructions)
  • 1 tbsp (15 ml) lemon juice freshly squeezed
  • 1 tsp (5 ml) vanilla extract
  • 1.5 cups (355 ml) heavy whipping cream well chilled

For the Layers

  • 1.25 cups (400 g) raspberry jam preferably seedless
  • 12 oz (340 g) fresh raspberries divided
  • 1 pound (454 g) pound cake store-bought or homemade, cut into 1-inch cubes
  • chocolate curls optional, for garnish

Equipment

  • Trifle Bowl or Large Clear Glass Bowl
  • Electric mixer
  • Mixing bowls
  • Spatula

Instructions
 

  1. Beat the cream cheese until smooth: In a large mixing bowl, beat the softened cream cheese with an electric mixer on medium speed until creamy and smooth, scraping the bowl as needed.
  2. Add sugar, lemon juice, and vanilla: With the mixer on low, blend in half the powdered sugar (1/2 cup), the lemon juice, and vanilla extract until well combined. Set aside.
  3. Whip the cream: In a separate chilled bowl, using clean beaters, whip the cold heavy cream. Gradually add the remaining half cup of powdered sugar and continue to beat until stiff peaks form.
  4. Fold cream into cheese mixture: Gently fold the whipped cream into the cream cheese mixture using a spatula, until no streaks remain.
  5. Start layering: Spread about half the raspberry jam in the bottom of a clear trifle bowl or large glass bowl. Scatter one-third of the raspberries on top.
  6. Add cake and cream: Layer in half of the pound cake cubes, then spread about half of the cream cheese/whip mixture on top.
  7. Repeat: Add another layer with the remaining jam, another third of the raspberries, the remaining pound cake, and most of the rest of the cream mixture (reserve some for the final top if desired).
  8. Finish and garnish: Top with the final cream layer, remaining raspberries, and chocolate curls (if using).
  9. Chill: Refrigerate for at least 1 hour (or up to overnight) before serving so the flavors and textures meld.

Notes

The trifle can be made a day ahead — cover and refrigerate until ready to serve. For best presentation, use a clear bowl to showcase the pretty layers. Feel free to substitute with blackberries, cherries, or even chocolate pound cake for a twist.

Nutrition

Calories: 420kcal | Carbohydrates: 48g | Protein: 6g | Fat: 24g | Saturated Fat: 14g | Cholesterol: 110mg | Sodium: 240mg | Potassium: 150mg | Fiber: 2g | Sugar: 38g | Vitamin A: 850IU | Vitamin C: 10mg | Calcium: 90mg | Iron: 1.1mg

A cheesy, cozy, low-effort dinner you’ll actually want on repeat. This dump and bake meatball casserole blends uncooked pasta, frozen meatballs, and gooey mozzarella into a bubbling, saucy dream.

You stir it together (in the same dish it bakes in, bless), then let the oven work its magic. Bonus: your kitchen ends up smelling like an old-school Italian grandma just moved in.

Table of Contents

Dump and Bake Meatball Casserole

Imagine the easiest pasta night of your life. You don’t even need to boil noodles. This dump and bake meatball casserole is a gloriously hands-off, cheesy, tomato-saucy comfort food dinner. You toss everything into one baking dish, and it transforms in the oven into something melty, savory, and deeply satisfying. It’s bubbly, a little sticky around the edges, and smells exactly like you hoped it would as that shredded mozzarella turns golden. Great for weeknights. Also great when “I don’t know what to make” turns into “Wait, this tastes amazing.” Just try not to eat it straight from the dish with a big spoon (unless you’re into that, no judgment).

Why You’ll Love this Dump and Bake Meatball Casserole

There’s no drama here, just a casserole that quietly gets dinner done—and tastes like you put in way more effort than you did.

  • Ridiculously simple to make: Stir, dump, bake, cheese, done. You don’t even defrost the meatballs.
  • Perfectly cozy and cheesy: That melty mozzarella gets all gooey underneath and crispy-brown on top.
  • One dish, zero boiling: Yup, no pot to simmer pasta. The uncooked noodles soak it all in while baking.
  • Meal prep gold: It reheats like a champ, and it actually tastes even better the next day.
  • Flexible with swaps: You can play around with sauces, cheese blends, or even add a veggie or two if the mood strikes.
  • Family-and-leftovers-friendly: It makes a big pan, so you’re covered for dinner tonight and lunch tomorrow.

Dump and Bake Meatball Casserole

Ingredient Notes

Nothing fancy, just pantry staples and a freezer stash turning into pure dinner gold.

  • Water: Strange as it sounds, it’s crucial. It helps the pasta cook properly in the oven by absorbing moisture from the sauce and steam.
  • Marinara sauce: Use your favorite jarred one—chunky is fine, thinner works too. A garlicky version really boosts the flavor.
  • Crushed red pepper flakes: Optional, but they give a small kick that cuts the richness. Add more or less depending on who’s eating.
  • Uncooked rotini or penne pasta: The sturdy shapes hold up well in the oven. Avoid thin noodles, or you’ll get mush.
  • Frozen precooked meatballs: No thawing. Just throw them in straight from the freezer. Turkey, beef, or plant-based all work.
  • Shredded mozzarella (divided): Half melts into the pasta like a hug, the rest browns on top for that golden crusty situation we all chase.
  • Chopped fresh parsley (for serving): Totally optional, but it adds a pop of green and somehow makes it feel more “finished.”

Dump and Bake Meatball Casserole

How To Make This Dump and Bake Meatball Casserole

This is one of those recipes where measuring feels optional (though, do measure the liquid please), and yet it still turns out so good.

  • Preheat the oven to 425°F (220°C): Crank it up. We want a hot oven to get the party started and help the pasta cook evenly.

  • Mix the liquids and spices: In your 9×13 baking dish, pour in the water, marinara, and red pepper flakes. Stir directly in the dish. Less cleanup is the whole point here.

  • Add the pasta: Toss in your uncooked rotini or penne. Use a spoon to mix well so every little spiral gets coated in sauce.

  • Scatter meatballs on top: Don’t overthink it. Just make sure they’re spread out and about halfway sitting in that saucy bath. It’s oddly satisfying arranging them.

  • Cover tightly with foil and bake 30 minutes: The steam will help the pasta soften and the meatballs heat through. No peeking!

  • Uncover, stir gently, check pasta doneness: Give it a careful mix without mashing the meatballs. If the pasta’s still too firm, cover it back up and bake another 5–10 minutes.

  • Stir in half the cheese: Once the pasta’s al dente, mix in 1 cup of mozzarella until it melts into the sauce. It gets super creamy and luscious.

  • Top with remaining cheese and bake again: Sprinkle the last cup of cheese on top. Bake uncovered for 10–15 minutes until golden and bubbling.

  • Let it rest a few minutes (hardest part): It’ll thicken slightly and be easier to scoop. Scatter some parsley on top, if you’re fancy. Then dive in.

Dump and Bake Meatball Casserole

Storage Options

Leftovers from this dump and bake meatball casserole are next-day gold. Seriously, it reheats like it was made for meal prep.

To store in the fridge, let it cool completely before covering the dish with foil or popping individual servings into airtight containers. It’ll keep nicely in there for 3 to 4 days.

Freezer-wise, you’ve got options. You can bake it fully, let it cool, then freeze in slices or as a whole pan (wrapped super tight in foil and plastic wrap). Or freeze it unbaked, just skip adding the cheese until after baking. Either way, it should last about 2 months.

For reheating, I like to splash a tablespoon of water over the portion before microwaving—it wakes up the sauce. If you’re reheating the whole pan, warm it in a 350°F oven, covered, until hot and bubbly (about 20 to 25 minutes depending on size).

Variations and Substitutions

Want to change it up a little? Easy. This casserole is laid-back. It won’t mind.

  • Different pasta shapes: Shells, ziti, or fusilli all work. Just steer clear of noodles that go mushy fast like spaghetti or angel hair.
  • Jar sauce swap: Alfredo? Vodka sauce? Go wild. Just make sure it’s not too thick or thickened with too much cheese, or it might get gunky.
  • Add a veggie boost: Toss in baby spinach, chopped zucchini, or frozen peas after the first 30 minutes of baking. They’ll soften up quickly.
  • Alternative meatballs: Chicken, turkey, or even plant-based ones bake up beautifully. Just look for pre-cooked versions to keep things simple.
  • Cheese variety: Mix mozzarella with provolone, fontina, or even some sharp cheddar if you’re feeling bold and melty.

Dump and Bake Meatball Casserole

What to Serve with Dump and Bake Meatball Casserole

Since this thing is carby, cheesy, and hearty, a few lighter sides or bright bites on the side really round everything out.

  • A simple green salad with lemony vinaigrette gives you that crisp, punchy balance. Something leafy and fresh helps offset the richness of all that pasta and cheese. You could even throw together the wild combo in our roasted beet and lentil salad if you’re trying to class things up.

  • Garlic bread is technically extra carbs on carbs… but also, absolutely essential. You know? Crunchy-edged, buttery, and made to swipe through cheesy tomato puddles.

  • Roasted veggies work too. Think sheet pan broccoli or Brussels sprouts. Toss in oil, salt, pepper, and roast at the same temp in the last 20 minutes of baking.

  • If you’re looking for contrast, try a little bright condiment like a bit of gremolata or a dollop of pesto on the side for dipping. Sounds fancy, tastes effortless.

  • And if you want to finish strong: something gently sweet works great. Maybe a few bites of cinnamon roll monkey bread after dinner? You’ve earned it.

Dump and Bake Meatball Casserole

Frequently Asked Questions

Can I make this meatball casserole ahead of time?

Totally. You can assemble everything ahead—mix the sauce, pasta, and meatballs, then cover and stick it in the fridge for up to 24 hours. Just hold off on the cheese until you’re ready to bake. If you’re baking it straight from the fridge, add an extra 10 minutes to the initial covered bake time (since it’ll start colder).

Can I use homemade meatballs?

Yes, you overachiever. Just make sure the meatballs are fully cooked before adding them in so they bake evenly with the pasta. You don’t want raw meat sitting in there while the pasta steams. If they’re big, maybe cut them in half so they heat through faster.

Why is my pasta still crunchy after baking?

This usually means there wasn’t quite enough liquid or the foil seal was loose, which lets steam escape. Make sure you measure the water and sauce, and that the foil is tuck-it-in-tight secure. If it’s too crunchy at 30 minutes, just re-cover the dish and bake another 5–10 minutes before stirring in the cheese.

Can I add more veggies to this casserole?

Absolutely. I’d stick with quick-cooking ones like baby spinach, chopped zucchini, or thin-sliced mushrooms. Frozen peas or corn also work well. Add them after the initial 30-minute bake so they don’t overcook into mush city. Stir them in with the cheese to sneak ’em in all stealthy-like.

Dump and Bake Meatball Casserole

Dump and Bake Meatball Casserole

Prep Time 10 minutes
Cook Time 55 minutes
Total Time 1 hour 5 minutes
A cheesy, cozy, low-effort dinner you’ll actually want on repeat. This dump and bake meatball casserole blends uncooked pasta, frozen meatballs, and gooey mozzarella into a bubbling, saucy dream. Stir it together in one dish, bake, and prepare for ultimate comfort with minimal effort!
6 servings

Ingredients

Base Ingredients

  • 2 cups (475 ml) water
  • 1 jar (700 ml) marinara sauce about 24 ounces / 700 ml
  • 1/4 tsp (0.25 tsp) crushed red pepper flakes optional, adjust to taste
  • 12 oz (340 g) uncooked rotini or penne pasta about 340g, sturdy shapes work best
  • 1 lb (450 g) frozen precooked meatballs about 450g, any variety (beef, turkey, or plant-based)
  • 2 cups (200 g) shredded mozzarella cheese divided
  • chopped fresh parsley for serving, optional

Equipment

  • 9x13 inch Baking Dish
  • Aluminum foil
  • Mixing spoon

Instructions
 

  1. Preheat the oven to 425°F (220°C).
  2. In a 9x13-inch baking dish, stir together the water, marinara sauce, and red pepper flakes until combined.
  3. Add the uncooked rotini or penne pasta to the baking dish and mix until all noodles are coated in sauce.
  4. Arrange the frozen meatballs evenly on top, making sure some are nestled partway into the sauce and pasta mixture.
  5. Cover the dish tightly with aluminum foil and bake for 30 minutes.
  6. Uncover, carefully stir (without breaking the meatballs), and check the pasta for doneness. If the pasta is still too firm, re-cover and bake for an additional 5–10 minutes.
  7. Once pasta is al dente, stir in 1 cup of shredded mozzarella until melted and creamy.
  8. Sprinkle the remaining 1 cup of mozzarella over the top. Bake uncovered for 10–15 minutes until bubbly and golden brown on top.
  9. Let casserole rest for 5 minutes before serving. Top with chopped fresh parsley, if desired, and enjoy!

Notes

This recipe is endlessly flexible—swap cheese blends, add veggies, or use your favorite jarred sauce. For best results, use sturdy pasta shapes and precooked meatballs. Leftovers reheat beautifully, and the casserole can be assembled ahead for even easier weeknights.

Nutrition

Calories: 530kcal | Carbohydrates: 55g | Protein: 28g | Fat: 22g | Saturated Fat: 9g | Cholesterol: 70mg | Sodium: 1130mg | Potassium: 660mg | Fiber: 4g | Sugar: 8g | Vitamin A: 450IU | Vitamin C: 10mg | Calcium: 330mg | Iron: 4mg

Let's Get Cooking!

100+ Recipes for Busy Nights

In a time crunch? Take a look around and browse plenty of recipes to help you get dinner ready and on the table on those busy nights!

Sweet Recipes

Pumpkin Banana Muffins

Pumpkin Banana Muffins Recipe

Strawberry Pie Bars

Strawberry Pie Bars Easy Oven Recipe

White Chocolate Raspberry Muffins

White Chocolate Raspberry Muffins Recipe

Snickerdoodle Muffins

Snickerdoodle Muffins Recipe for Oven

PIN NOW

Follow KitchenetteBlog on Pinterest

Love cozy recipes that actually make it to the table? On Pinterest, I share new comfort-food ideas every week—desserts, dinners, and those little snack cravings that hit at midnight. Come pin with me and never run out of kitchen inspo.

Savory Recipes

Turkey Tetrazzini

Turkey Tetrazzini Baked Pasta Recipe

Grilled Chicken Panini Sandwich

Grilled Chicken Panini Sandwich Recipe

Sweet Potato Cornbread

Sweet Potato Cornbread Recipe Oven Baked

Classic Waldorf Salad

Waldorf Salad Simple Classic Recipe

Get 5 Recipes to Simplify Your Life!

Delicious, versatile recipes you can make over and over.