Get 5 recipes to simplify your life:

easy, delicious, real food recipes

Latest Recipes

Juicy baked chicken breasts smothered in creamy Caesar dressing and bubbling cheese—this baked Caesar chicken recipe with mozzarella, Parmesan, and breadcrumbs doesn’t mess around.

It smells like your favorite corner of a cozy Italian place, but it’s sneaky-easy to pull off on a Tuesday. Creamy, crispy, cheesy—it’s a texture-lover’s dream with just enough crunch to keep you going back for another bite.


This baked Caesar chicken is saucy, melty, and unapologetically comforting. We’re talking about a creamy Caesar dressing situation that clings to tender chicken breasts, topped with mozzarella (optional, but I mean… come on), a snowy sprinkle of Parmesan, and a final golden crown of crisp panko breadcrumbs.

The Caesar flavor isn’t bossy, just perfectly savory with that little tang and umami punch that makes you go, “Wait, this is really good.” Exactly the kind of thing I make when dinner needs to feel slightly fancy but I’m wearing pajama pants and have zero ambition.

Table of Contents

Baked Caesar Chicken

Why You’ll Love this Baked Caesar Chicken

No need to overhype this one, but I will say, it delivers. A few ingredients, a little layering, and you get that bubbling, cheesy masterpiece.

  • Ridiculously simple to make: You just squish, smear, sprinkle, and wait for the oven to do its magic.
  • Restaurant-ish flavor with pantry basics: Caesar dressing does most of the flavor heavy lifting, no measuring spoons needed.
  • Perfectly juicy every time: Thanks to the sauce and cheese duo, your chicken will never dry out on you.
  • Flexible to dress up or down: You can add mozzarella or skip it, toss in herbs, or just go full simple mode.
  • Makes leftovers you’ll actually want to eat: Pop it in a pan and reheat until crisp—yes, crisp—then pretend it’s fancy again.
  • Satisfying without being fussy: No stirring bowls of sauce, no whisking anything… just scoop, bake, and broil.

Baked Caesar Chicken

Ingredient Notes

This recipe uses simple ingredients, but let’s give them a little love with some good-to-know details.

  • Chicken breasts: Boneless, skinless, and best when pounded out to even thickness to make sure they cook evenly and stay tender.
  • Salt and freshly ground black pepper: Just enough seasoning to underscore everything else, especially helpful if your dressing is on the mild side.
  • Creamy Caesar dressing: The MVP. Pick one you like the taste of straight from the bottle. A slightly garlicky, boldly creamy dressing works best here.
  • Mozzarella cheese (optional): Totally up to you, but it adds that gooey factor that’s just really satisfying under the broiler.
  • Parmesan cheese: The finely grated kind melts beautifully and packs in salty, nutty flavor. Pre-grated in a pinch is okay, but fresh is worth the grating time.
  • Italian-seasoned panko breadcrumbs: Adds that crunch factor on top. Give them a gentle sprinkle—no clumping!—so they broil up evenly golden.
  • Fresh parsley (optional): Toss it over the top if you’ve got some. It adds freshness and a little visual flair.

Baked Caesar Chicken

How To Make This Baked Caesar Chicken

Okay, let’s break it down like we’re making it together. You don’t need a ton of time or equipment. Just your hands, a whisk-free mindset, and the power of melted cheese.

  • Preheat the oven and prep your pan: Set your oven to 375°F. Spray a 9×13-inch baking dish with some nonstick spray so nothing gets clingy in the wrong way.

  • Pound the chicken and season it up: Use plastic wrap and a meat mallet (or honestly, a rolling pin works great) to even out your chicken breasts. Season generously with salt and pepper on both sides and pat them dry to help the dressing stick.

  • Layer that dressing magic: Spread 1/4 cup of Caesar dressing over the base of your baking dish—this keeps the chicken ultra moist. Then nestle your chicken breasts in, laying them side by side in a single layer. Spread the rest of the Caesar dressing over the top so they’re completely cozy and smothered.

  • Bake the chicken to juicy perfection: Slide the dish in the oven for 25–30 minutes. Check that internal temp hits 165°F. No guessing. Then—and this is the fun part—crank your oven to broil on high.

  • Add the cheese and breadcrumbs, then broil it!: Sprinkle your mozzarella (if using), Parmesan, and then the panko evenly on top of the chicken. Broil for 2–3 minutes until everything bubbles and crisps up. Watch closely. Like hawk-level close. Breadcrumbs go from golden to scorched real fast.

  • Let it chill (just a bit): Rest the baked Caesar chicken for 5 minutes before serving. It helps the juices settle and makes it less “molten cheese lava” on the plate. Sprinkle with chopped parsley if you’re feeling fancy or need a pop of green.

Baked Caesar Chicken

Storage Options

Got leftovers? Lucky you. This chicken keeps pretty well, and there are a few tricks to revive that crunchy top without too much hassle.

In the fridge, you can store the chicken in an airtight container for up to 4 days. Reheat in a skillet or toaster oven if you want to bring back some of that crispy breadcrumb vibe. The microwave works fine too, though it won’t win you back the crunch.

If you’re wondering, “Can I freeze it?”—yes, technically. Freeze individual portions, tightly wrapped, then tuck them in a freezer-safe bag or container. They’ll hold up for up to 3 months. Just expect the topping to get a bit softer after thawing.

To reheat from frozen, thaw overnight in the fridge and warm in a 350°F oven until heated through. You can broil it again for a minute or two if you want to fake that fresh-baked finish. Not quite the same, but totally worth it.

Variations and Substitutions

This dish holds up beautifully to a little experimenting, and sometimes necessity is the mother of invention (aka when the store is out of your go-to dressing).

  • Greek yogurt Caesar dressing: If you’re trying to lighten things a bit, a Greek yogurt–based Caesar works just fine and still brings the zip.
  • Chicken thighs instead of breasts: Thighs bring extra moisture and flavor, and they’re a little more forgiving if you accidentally overbake things.
  • Add garlic or shallots: A few sliced shallots or minced garlic tucked under the dressing layer can bump up the savory factor.
  • Go gluten-free: Swap the panko for crushed gluten-free crackers or a seasoned almond flour mix. Just make sure they crisp up well under the broiler.
  • Add spice with red pepper flakes: A small pinch adds warmth without taking over the show. Perfect if you like a little heat to cut through the creaminess.

Baked Caesar Chicken

What to Serve with Baked Caesar Chicken

Once your chicken’s all baked, bronzed, and gorgeous, it’s time to think about sides. Here are a few ideas to round things out without overshadowing the main event.

  • Simple roasted veggies: Think broccoli, carrots, or asparagus tossed with olive oil, salt, and a little lemon. Roasted just until crisp-tender, they bring a fresh contrast to all the creamy richness.

  • Buttery mashed potatoes: One of my favorite pairings. The sauce from the chicken kind of seeps in like gravy, and you get this dreamy bite-within-a-bite situation.

  • A crisp green salad: Sometimes Caesar on Caesar is too much, so go with a lemon vinaigrette and crunchy greens to cut through the creaminess. Bonus points if there are shaved radishes in there.

  • Garlicky pasta or orzo: Something lightly dressed—think olive oil, parmesan, and cracked pepper—keeps the carbs mellow and complementary.

  • A fun side like these bacon basil cornbread muffins: They’re a little toasty, a little savory, and unbelievably good with something saucy.

Baked Caesar Chicken

Frequently Asked Questions

Can I use store-bought Caesar dressing?

Absolutely, and in fact I usually do. Just pick a brand you like the taste of straight out of the bottle, since it basically becomes your sauce. A good, creamy Caesar with a little garlic bite works beautifully here. If you prefer to make your own dressing, go ahead—the chicken won’t mind either way.

Is it okay to skip the mozzarella?

Totally okay. It’s optional for a reason. The Parmesan and the dressing do most of the flavor work, so if you’d rather keep things a bit lighter (or just don’t have mozzarella on hand), skip it. You’ll still get plenty of savory, cheesy bite with the Parmesan alone.

Does this recipe work with chicken thighs?

Yes it does, and I actually love it that way. Boneless, skinless thighs work best. They’re fattier than breasts, which means they stay juicy even if you get distracted mid-bake and leave them in a little long (not that I’ve done that… ahem). Just check the internal temp for doneness like always.

What’s the best way to reheat leftovers?

If you’ve got time, use a skillet over medium heat or slide a foil-covered dish into a 350°F oven for 10–15 minutes. That helps preserve the texture. For a quick reheat, microwave in 30-second bursts. If you want to bring that crisp back, throw it under the broiler for 1 minute after reheating—but keep an eye on it!

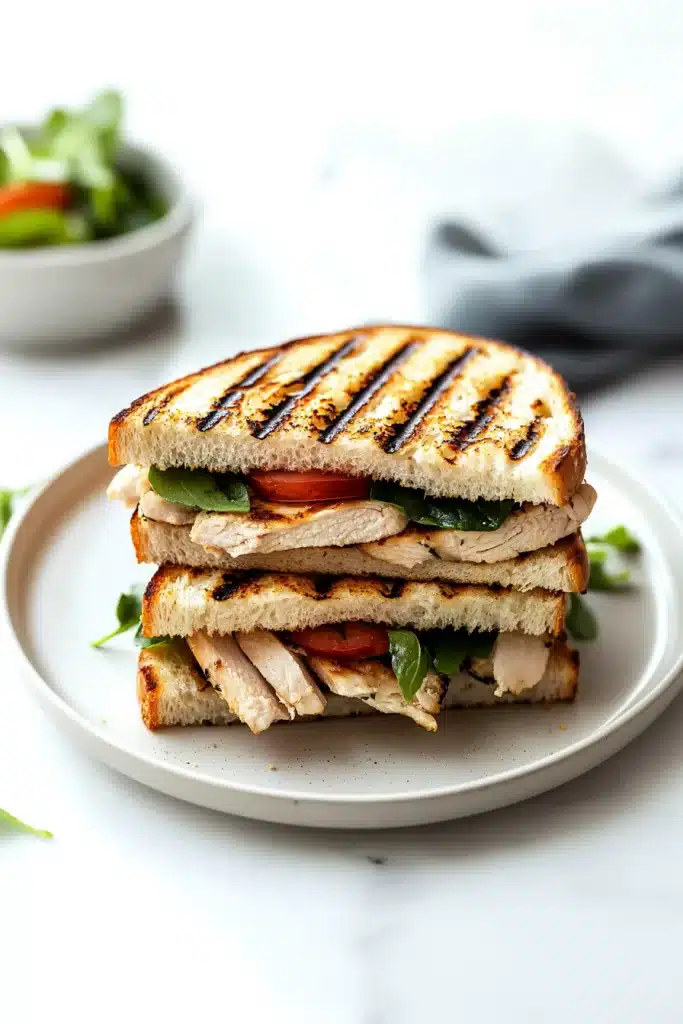
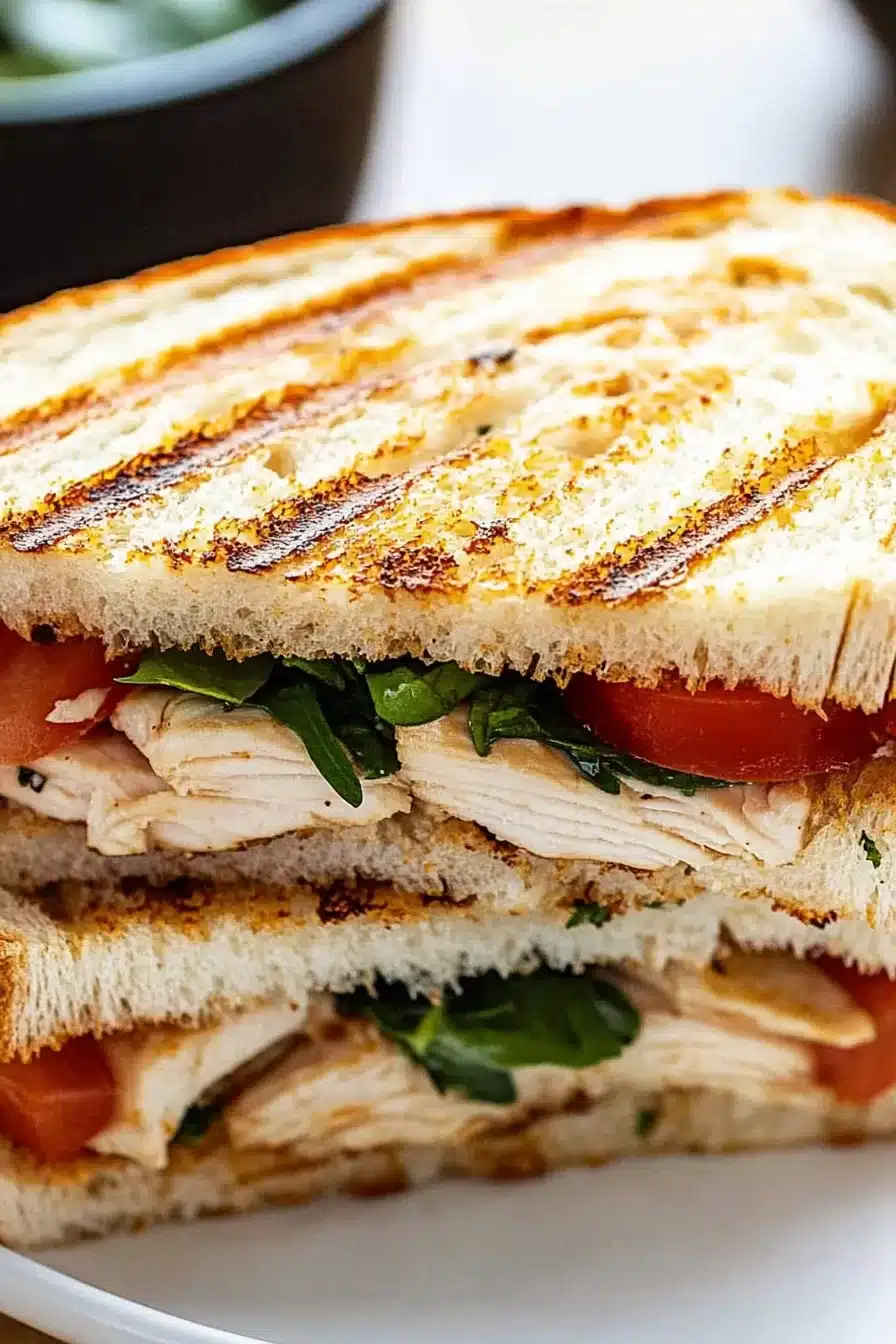
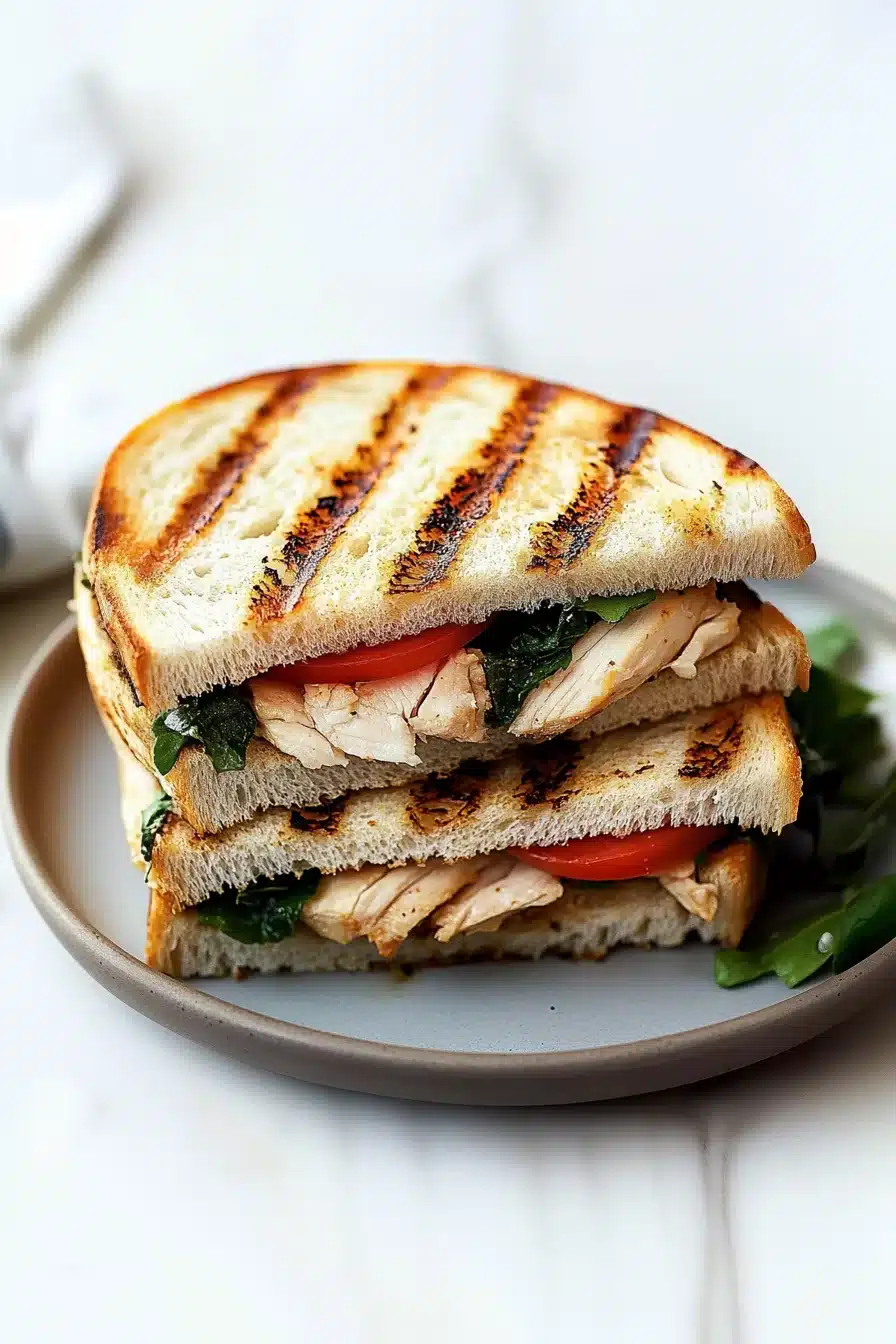
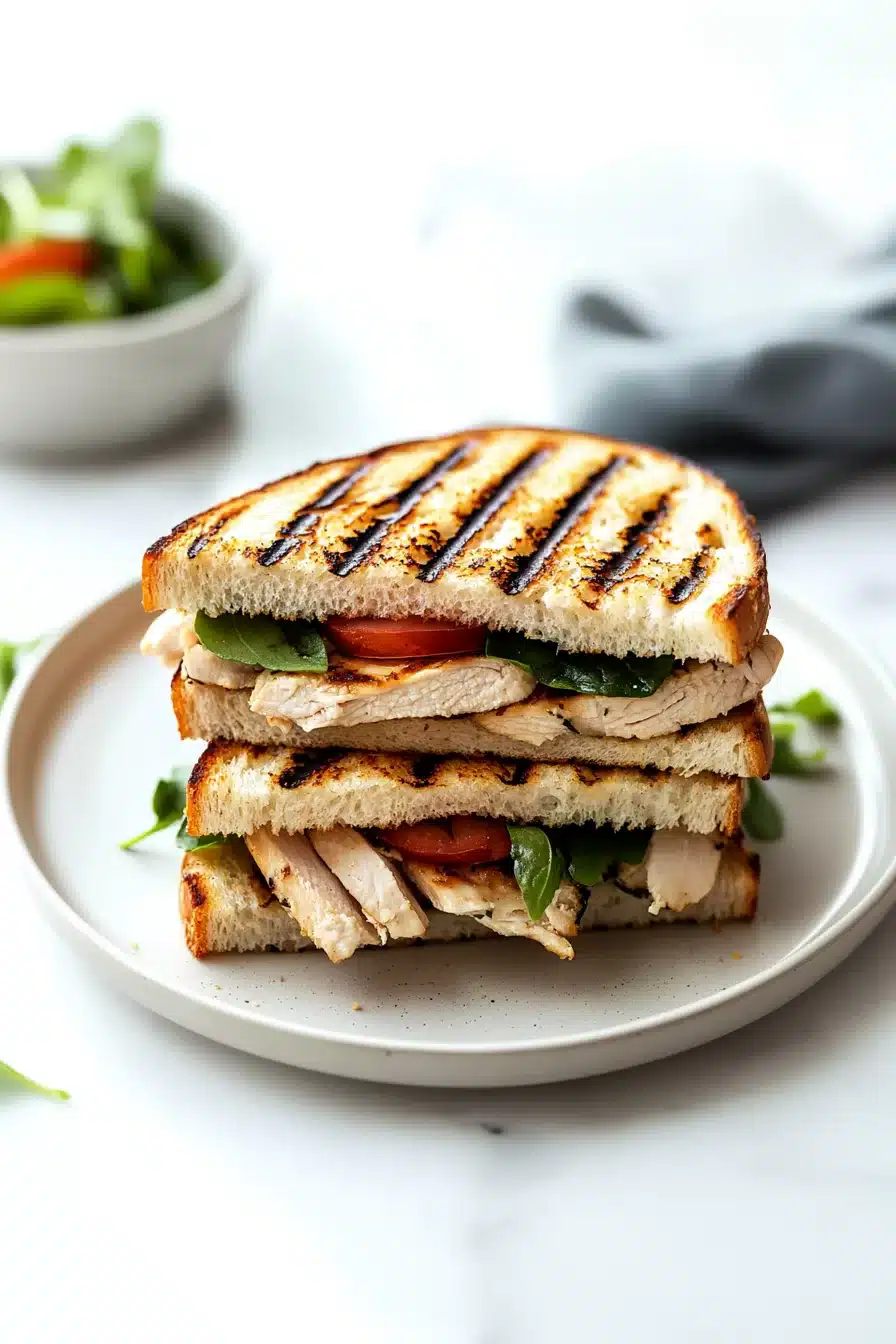
P.S. If you’ve still got chicken on the brain, this chicken panini situation absolutely deserves a spot on your menu rotation too.

Baked Caesar Chicken

Baked Caesar Chicken

Prep Time 10 minutes
Cook Time 35 minutes
Resting Time 5 minutes
Total Time 45 minutes
Juicy baked chicken breasts smothered in creamy Caesar dressing and bubbling cheese—this baked Caesar chicken is melty, saucy, and unapologetically comforting, topped with mozzarella, Parmesan, and a crown of golden panko breadcrumbs. Restaurant flavor meets weeknight ease!
4 servings

Ingredients

Chicken & Caesar Base

  • 4 (2) boneless, skinless chicken breasts pounded to even thickness
  • salt and freshly ground black pepper to taste
  • 3/4 cup (180 ml) creamy Caesar dressing plus more for serving if desired

Cheesy Topping

  • 3/4 cup (75 g) shredded mozzarella cheese optional but recommended
  • 1/2 cup (40 g) finely grated Parmesan cheese
  • 1/2 cup (30 g) Italian-seasoned panko breadcrumbs

Finishing Touch

  • chopped fresh parsley for garnish, optional

For the Pan

  • nonstick cooking spray

Equipment

  • 9x13 inch Baking Dish
  • Meat mallet or rolling pin

Instructions
 

  1. Preheat your oven to 375°F (190°C). Spray a 9x13-inch baking dish with nonstick cooking spray.
  2. Pound the chicken breasts to an even thickness (about 1/2–3/4-inch) using a meat mallet or rolling pin for even cooking.
  3. Season chicken generously on both sides with salt and pepper, and pat dry with paper towels.
  4. Spread 1/4 cup Caesar dressing across the bottom of the baking dish. Place chicken breasts in a single layer on top.
  5. Spread remaining Caesar dressing over the top of each chicken breast, smothering completely.
  6. Bake uncovered for 25–30 minutes, or until internal temperature reaches 165°F (74°C).
  7. Remove from oven and turn broiler to high. Sprinkle mozzarella (if using), Parmesan, then panko evenly over the chicken. Broil for 2–3 minutes, watching closely, until cheese is bubbling and panko is golden brown.
  8. Let chicken rest for 5 minutes before serving. Garnish with parsley if desired.

Notes

Swap mozzarella for more Parmesan or another cheese you like, or omit entirely for a lighter dish. To make gluten-free, use GF panko or crushed crackers. This reheats best in a skillet or toaster oven for a crisp topping. Store leftovers in the fridge for up to 4 days, or freeze (topping may soften after thawing).

Nutrition

Calories: 410kcal | Carbohydrates: 10g | Protein: 44g | Fat: 21g | Saturated Fat: 7g | Cholesterol: 133mg | Sodium: 970mg | Potassium: 600mg | Fiber: 1g | Sugar: 2g | Vitamin A: 280IU | Vitamin C: 2mg | Calcium: 260mg | Iron: 1.3mg

Sweet, cozy, and dipped in cinnamon sugar—these baked pumpkin spice donut holes smell like your kitchen just got a hug. Made with pumpkin puree, warm spices, and a buttery sugar dip, they’re soft, squishy, and sneakily easy to pull off.

These little fall nuggets are just the thing for when warm socks go on and candles start smelling suspiciously like dessert. Whether you eat them fresh from the oven or sneak one (or three) room-temp with coffee tomorrow morning, they’re dangerously poppable.

Table of Contents

Baked Pumpkin Spice Donut Holes

Why You’ll Love this Baked Pumpkin Spice Donut Holes Recipe

Okay, no need for any grand story arc here. These are soft little cake-like bites with a tiny bit of spice, a lot of cinnamon sugar, and just enough pumpkin to feel seasonal but not overwhelming. Think cozy, not cloying.

  • Ridiculously simple to make: You mix a few bowls, scoop into a mini muffin tin, and boom—donut holes without frying.
  • Full of fall flavor: Pumpkin pie spice does the heavy lifting, giving that warm, sweet aroma that makes your house smell like you bake professionally on weekends.
  • Not too sweet: Thanks to brown sugar and pumpkin puree, the sweetness is balanced… until the sugar-dip moment, anyway.
  • Mini size, major snacking: You get 50-ish little bites, perfect for sharing or hoarding with zero judgment.
  • Kid-friendly and adult-approved: These are fuss-free but still feel a little special, so everyone’s into them.
  • Zero frying mess: We’re talking oven-baked, so no hot oil drama, no splatters, no smell that lingers until Thursday.

Baked Pumpkin Spice Donut Holes

Ingredient Notes

This crew of ingredients is cozy, familiar, and gets along well together. Nothing fancy, but each one plays a role—kind of like a spice-scented sitcom cast.

  • All-purpose flour: The base holding everything together. Spoon and level it into your measuring cup to avoid surprise concrete-textured donuts.
  • Brown sugar: Adds moisture and a little depth from the molasses. Light or dark works, depending on your mood.
  • Pumpkin pie spice: That all-in-one fall magic—clove, cinnamon, nutmeg, ginger. You can DIY it, but the jar works beautifully here.
  • Salt: Just enough to keep the sweetness balanced and wake up the spice mix.
  • Egg + yolks: The whole egg adds structure, while the extra yolks give that soft richness we crave in baked goodies.
  • Melted butter & vegetable oil: A combo that keeps the texture both tender and moist. Sounds odd, but trust—it works.
  • Vanilla extract: Not just for show. It brings warmth and rounds out the flavor.
  • Pumpkin puree: Use pure pumpkin, not pie filling. It thickens the batter and delivers that subtle earthy sweetness.
  • Whole milk: Keeps the batter loose without thinning it out too much. Skim just won’t hit the same.
  • Granulated sugar & cinnamon (for rolling): This sweet, sparkly combo sticks to the warm butter-coated bites for that classic donut shop finish.

Baked Pumpkin Spice Donut Holes

How To Make This Baked Pumpkin Spice Donut Holes Recipe

You don’t need anything wild here—just a couple of bowls, a mini muffin tin, and a spoon you don’t mind licking.

  • Prep the tin and preheat your oven: Start by heating the oven to 375°F. Lightly spritz two 24-cup mini muffin tins with cooking spray and set them aside like little soldiers waiting for their batter.

  • Whisk up the dry ingredients: In a big ol’ bowl, mix your flour, brown sugar, baking powder, baking soda, pumpkin pie spice, and salt. Try not to inhale too deeply or you might sneeze spice everywhere (learned that the floury way).

  • Mix the wet crew: In another bowl, beat the egg and yolks. Then pour in the melted butter, oil, vanilla, and pumpkin puree. Whisk it until it’s nice and smooth. Looks a little like baby food? That’s completely normal.

  • Combine the dry and wet ingredients with milk: Alternate adding the flour mix and the milk to the pumpkin mix, starting and ending with dry. Just do a few gentle folds with a spatula—no need to beat it senseless. A few streaks are okay. Overmixing will lead to dense donut rocks.

  • Scoop the batter: Use about a tablespoon of batter per muffin hole. You should get around 50 donut holes. You’ll feel excessive, but it’s a worthwhile excess.

  • Bake ’em: Place the trays into the hot oven and bake for 10–12 minutes. You’ll know they’re ready when a toothpick poked in the center comes out clean and the edges look lightly golden.

  • Make the coating while they bake: Melt that butter and let it come to room temp (not sizzling hot). In another bowl, stir together the granulated sugar and cinnamon—you want it well mixed so the coating’s even.

  • Cool, dip, and roll: Let the baked donut holes cool for around 5 minutes. Then dip each one in butter (a little spa moment), then toss in cinnamon sugar. Use a spoon or your fingers—though fair warning, your fingers will smell like fall all day.

Baked Pumpkin Spice Donut Holes

Storage Options

So you made (and maybe devoured) a small mountain of donut holes—but what if you want to save some for later?

Great news: these little guys hold up surprisingly well. At room temp, store them in an airtight container for up to 2 days. If your kitchen’s warm and humid, fridge is a smarter move (nobody likes a soggy sugar coating).

Yes, you can absolutely freeze them! Skip coating them first, then freeze in a single layer on a baking sheet. Once frozen, scoop into a freezer-safe bag or container. They’ll be good for about 2 months. When you’re ready, reheat in a warm oven (around 300°F) for 5–8 minutes, then dip in fresh butter and cinnamon sugar. It’s like autumn, reheated.

Microwave reheating works too, though it makes them a tad softer and might melt the sugar a bit, so I save that for emergencies… like 11 p.m. cravings.

Variations and Substitutions

You can tweak these however your pantry (or palate) feels like playing along. Here are a few swaps I’ve tried or totally plan to:

  • Gluten-free flour blend: Sub in your favorite 1:1 all-purpose GF mix. Just don’t overbake—they tend to dry out quicker.
  • Maple twist: Use maple extract instead of vanilla, and replace part of the brown sugar with pure maple syrup. Sorta like these maple cookies, but fluffier and snagable.
  • Spice it differently: Swap pumpkin pie spice for apple pie spice, or go rogue with chai spice for a subtle zing.
  • Coconut oil instead of butter: For something dairy-free and lightly tropical, though the flavor shift is noticeable (in a good way).
  • Roll in powdered sugar: If cinnamon isn’t your jam, plain powdered sugar works great. Or mix it with nutmeg for a little extra flare.

Baked Pumpkin Spice Donut Holes

What to Serve with Baked Pumpkin Spice Donut Holes

These are stars on their own, but if you’re feeling extra (and I admire that), here’s how to round out the moment.

  • Hot coffee or spiced tea: Honestly these donut holes are begging for a warm drink next to them. A cinnamon chai or a dark roast with a splash of cream just completes the cozy trifecta: heat, spice, and something sweet.

  • A dollop of whipped cream or creamy dip: Think Greek yogurt with honey and a pinch of cinnamon. Slightly tangy and super dippable, especially when the donut hole is warm and the whipped part is cold. Texture heaven.

  • Fruit compote (apple or cranberry): Warm fruit on the side feels fancy even if it’s just microwaved leftovers. The tart contrast is a nice little twist.

  • As dessert with fall dinner: There’s no shame in plating these next to something savory. If you’re making something hearty like pan-seared salmon or roasted poultry, these are a playful bite to end with.

  • Ice cream sandwich? Yes, please: Slice a donut hole in half (carefully), stuff with a small scoop of vanilla or pumpkin ice cream, and freeze for 10 minutes. Or get inspired by these ice cream sandwich ideas and riff your own.

Baked Pumpkin Spice Donut Holes

Frequently Asked Questions

Can I make these donut holes without a mini muffin tin?

Yes! If you don’t have a mini muffin tin, you can use a regular muffin pan and just fill each cup with a tablespoon of batter. They won’t be hole-like, but rather stubby muffin bites—which are still insanely tasty. You may need to shave a minute or two off the bake time, so keep an eye on them.

Do I need to chill the batter before baking?

Nope, skip the chill. This isn’t cookie dough. In fact, the sooner you bake the batter after mixing, the better your donut holes will rise. Letting the leaveners sit too long can affect texture, so scoop and bake right away.

Why are my donut holes dry?

The sneaky culprit is overbaking or overmixing. Mix gently, just until everything’s combined. Then bake only until a toothpick comes out clean—12 minutes max, generally. If you’re unsure, slightly underbake and let carryover heat work its magic.

Can I make them dairy-free?

Totally doable. Swap the butter for melted coconut oil or a neutral dairy-free margarine, and use plant-based milk like oat or almond. Just pick an unsweetened version so it doesn’t throw off the flavor balance.

Baked Pumpkin Spice Donut Holes

Baked Pumpkin Spice Donut Holes

Prep Time 20 minutes
Cook Time 12 minutes
Total Time 32 minutes
Sweet, cozy, and dipped in cinnamon sugar—these baked pumpkin spice donut holes fill your kitchen with fall aromas. Pumpkin puree and warm spices make them soft and squishy, finished with a buttery sugar dip. Simple, oven-baked, and dangerously easy to enjoy by the handful.
50 donut holes

Ingredients

Donut Holes

  • 2 cups (250 g) all-purpose flour spooned and leveled
  • 3/4 cup (150 g) brown sugar light or dark
  • 2 tsp baking powder
  • 1/2 tsp (0.5 tsp) baking soda
  • 2 tsp pumpkin pie spice
  • 3/4 tsp (0.75 tsp) salt
  • 1 large egg
  • 2 egg yolks
  • 1/3 cup (75 g) unsalted butter melted
  • 1/4 cup (60 ml) vegetable oil
  • 2 tsp vanilla extract
  • 1 cup (245 g) pumpkin puree not pie filling
  • 1/2 cup (120 ml) whole milk

For Rolling

  • 4 tbsp (56 g) unsalted butter melted, cooled slightly
  • 1/2 cup (100 g) granulated sugar
  • 2 tsp cinnamon

Equipment

  • Mini muffin tin
  • Mixing bowls
  • Whisk
  • Spatula
  • Measuring Cups & Spoons

Instructions
 

  1. Preheat your oven to 375°F (190°C). Lightly spray two 24-cup mini muffin tins with cooking spray and set aside.
  2. In a large bowl, whisk together flour, brown sugar, baking powder, baking soda, pumpkin pie spice, and salt.
  3. In a separate bowl, whisk the egg and egg yolks. Add melted butter, vegetable oil, vanilla, and pumpkin puree and whisk until smooth.
  4. Alternate adding the flour mixture and milk to the wet ingredients, starting and ending with the dry. Gently fold just until combined; do not overmix.
  5. Scoop about 1 tablespoon of batter into each mini muffin cup (you should get about 50 donut holes).
  6. Bake for 10–12 minutes, or until a toothpick inserted in the center comes out clean and edges look lightly golden.
  7. While baking, prepare the coating: melt the 4 tbsp butter and let cool slightly. In a bowl, combine granulated sugar and cinnamon for rolling.
  8. Let donut holes cool for 5 minutes. Dip each in melted butter, then immediately roll in cinnamon sugar to coat. Serve warm or at room temperature.

Notes

For best results, use pure pumpkin puree (not pumpkin pie filling). Store leftovers in an airtight container at room temperature for up to 2 days, or freeze uncoated donut holes for up to 2 months. To reheat from frozen, warm in a 300°F oven for 5–8 minutes and coat in fresh butter and cinnamon sugar.

Nutrition

Calories: 85kcal | Carbohydrates: 12g | Protein: 1g | Fat: 4g | Saturated Fat: 2g | Cholesterol: 15mg | Sodium: 65mg | Potassium: 28mg | Fiber: 0.5g | Sugar: 5g | Vitamin A: 900IU | Vitamin C: 1mg | Calcium: 17mg | Iron: 0.5mg

Sweet, chewy, and a little nutty in all the best ways, these maple cookies with maple icing are made with rich brown sugar, butter, maple syrup, and a whisper of vanilla.

The kitchen fills with that unmistakable warm, toasty aroma—the kind that makes people wander in asking, “What smells so good?” And then they stay. Because you’ve got soft, golden cookies and a glossy maple glaze to drizzle (or, let’s be honest, slather).

There’s something about maple that says, “Put on your comfiest flannel and stay a while.” These cookies are no exception. They’re tender and golden, with that slightly crisped edge that gives way to a chewy center. The maple icing? It’s got a caramel-like hug going on, and it sets into the prettiest glossy sheen. Perfect for sharing over coffee, sneaking with tea, or sandwiching around whipped cream if you’re feeling extra fancy (or indecisive).

Table of Contents

Maple Cookies with Maple Icing

Why You’ll Love this Maple Cookies with Maple Icing

If you lean into baked goods that toe the line between cozy and impressive, these are gonna earn a permanent spot in your rotation.

  • Soft and chewy cookie texture: Thanks to egg yolks and brown sugar, you get that bakery-style tenderness with a hint of caramel chew.
  • Layered maple flavor: With syrup in both the dough and the icing, maple doesn’t just show up—it moves in.
  • No strange ingredients needed: You probably have everything already. And if not, a quick dash to the store sorts it.
  • Make-ahead friendly: The dough chills beautifully overnight, which means you can prep today and bake tomorrow.
  • Optionally nutty: Pecans are totally invited but not mandatory. If you skip them, the cookies still shine.
  • Simple to decorate: The icing sets fast and smooths out small cookie flaws, so no one needs to know your dough was slightly lopsided.

Maple Cookies with Maple Icing

Ingredient Notes

Nothing wild here—just pantry basics teaming up with a bottle of real maple magic. Here’s a rundown of what’s what:

  • All-purpose flour: The base that keeps things sturdy but soft. Do not overmix once it’s in, or your cookies might throw a (chewy) tantrum.
  • Baking soda: Gives just enough lift without turning these into puffy domes. Think gently risen and golden, not cakey.
  • Salt: Just a bit to balance all that sugary goodness. Don’t skip it. Seriously.
  • Unsalted butter: You’ll want it softened for the dough and melted for the icing. It brings richness and helps that perfect spread.
  • Brown sugar: For depth and moisture. It keeps the cookies chewy and gives the icing a toffee-like background.
  • Egg + extra yolks: The extra richness from more yolks equals that soft-in-the-middle dream cookie texture.
  • Pure maple syrup: Please, the real stuff. It’s the heart of the flavor—no maple-flavored corn syrup here.
  • Whole milk: Helps bind the dough and later, thins the icing just enough for a pourable consistency.
  • Vanilla extract: It quietly boosts the maple and brown sugar flavors. You’ll notice when it’s missing.
  • Chopped pecans (optional): They bring a gentle crunch and toasty flavor. Totally skippable, but lovely if you like a nutty twist.
  • Powdered sugar: For the icing. Makes it smooth and spreadable. Sift it if it’s lumpy—trust me.

Maple Cookies with Maple Icing

How To Make This Maple Cookies with Maple Icing

You won’t need a mixer all the way through—just at the start to cream butter and sugar. After that, it’s mostly good ol’ hand stirring and cookie-sheet patience.

  • Mix your dry ingredients: In one bowl, stir together the flour, baking soda, and salt. It’s your basic dry mix—just make sure it’s even so there are no surprise baking soda spots.

  • Cream the butter and sugar: Grab a large mixing bowl and beat the softened butter with the brown sugar until it looks light and fluffy. This part adds air and makes everything extra tender. Don’t rush it.

  • Add wet stuff gradually: Beat in the egg first, then the extra yolks, followed by the maple syrup, milk, and vanilla. It’ll look a bit messy at first, but it smooths out. If it smells like French toast batter, you’re doing it right.

  • Fold in the dry ingredients: Do this in two batches so you’re not flinging flour all over the kitchen. If you’re using pecans, toss them in with the second scoop of flour.

  • Chill the dough: Cover and refrigerate for at least 2 hours. Overnight is even better, if you’re a planner. This helps the dough firm up and the flavors settle in.

  • Scoop and bake: When ready, drop 2-tablespoon portions of chilled dough onto parchment-lined baking sheets. Give them room—at least 2 inches between. Bake at 350°F for 10–12 minutes. Edges should be barely golden, centers soft-looking. Let them cool for a bit on the tray before transferring to a rack.

  • Make the maple icing: In a small saucepan, melt the butter and brown sugar over medium heat and whisk constantly until it boils. Let it bubble for 2 minutes, then remove from heat. Let it cool 10–15 minutes so you don’t scorch the milk.

  • Whisk in the good stuff: Add maple syrup, milk, and a pinch of salt, then stir in powdered sugar a bit at a time until it hits pourable perfection. Thin it, if needed, with more milk (one teaspoon at a time).

  • Drizzle or spread: Work quickly—the icing sets fast. I like using the back of a spoon and going for a gentle swirl. Rustic chic at its finest.

Maple Cookies with Maple Icing

Storage Options

Once the icing has set (usually within 30 minutes), you’re good to store these guys.

On the countertop, they’ll stay fresh in an airtight container for 2–3 days. After that, they get a little crisp around the edges—not bad, but not peak chewy either.

If you’re planning to make a batch ahead, you can refrigerate the baked cookies (with or without icing) for up to 5 days. I separate layers with a bit of parchment so they don’t stick together. The texture holds up surprisingly well.

And yes, you can freeze them! Either freeze the dough balls for future baking adventures, or freeze the fully baked (and cooled) cookies before icing. Just thaw on the counter, add icing, and voilà. If you’re freezing already-iced cookies, freeze them on a tray until solid, then pack them in layers between wax paper in a container.

Variations and Substitutions

You can totally riff on these depending on your pantry situation or just what you’re in the mood for. Let’s play.

  • Gluten-free mix: Use a good 1:1 GF flour blend with xanthan gum. The texture’s slightly different but still super satisfying.
  • Use walnuts instead of pecans: For a slightly earthier flavor. Or go wild and stir in toasted hazelnuts.
  • Add cinnamon or nutmeg: Warm spices play so well with maple. Even a splash of spiced rum in the icing wouldn’t be mad.
  • Skip the icing: They stand up beautifully solo (especially with a crunchier edge). Or dust with powdered sugar if you want a little flair.
  • Swap butter for browned butter: Just slightly browned butter in the cookie base will deepen the nuttiness and up the maple richness.
  • Fold in crushed cornflakes: Sounds weird, but trust me. It adds amazing crunch without overpowering things. Like edible autumn gravel (in a good way).

Maple Cookies with Maple Icing

What to Serve with Maple Cookies with Maple Icing

If you’re going all in on maple vibes (as one does), these cookies vibe well with cozy drinks and simple add-ons.

  • A piping hot mug of cinnamon tea or fresh-brewed coffee. Not groundbreaking, but sometimes it’s the obvious choices that deliver, right? The warm bitterness balances all that sweet maple goodness.

  • For a brunch tray, serve these alongside fruit and yogurt. If I’m being totally honest, I’ve had one with a smear of cream cheese and… wow. It’s basically dessert-meets-bagel.

  • Stack ‘em for dessert with a scoop of vanilla ice cream (or even better, try these peanut butter banana ice cream sandwiches if you’re riding the cozy-sweet train).

  • Want them to feel more polished? Add to a dessert board with grapes, dark chocolate bark, and mini muffins (possibly bacon basil cornbread muffins for an herby-savory counterpoint).

Maple Cookies with Maple Icing

Frequently Asked Questions

Can I make the dough ahead of time?

Yes! In fact, the longer chill gives more flavor. You can make the dough up to 48 hours in advance and keep it covered in the fridge. Just let it sit out for 10–15 minutes before scooping so it’s easier to handle.

Do I have to use real maple syrup?

Please try to. The flavor difference is pretty significant. Pancake syrup just won’t give that deep, woodsy mapleness that makes these shine. Look for 100% pure maple syrup on the label.

Why is my icing hardening too fast?

It does set quickly—sugar science in action! That’s totally normal. Work swiftly while drizzling or spreading. If it starts firming up in the pan, just whisk in a teaspoon or two of milk to loosen it back up.

Can I freeze the finished cookies?

Yep, they freeze surprisingly well. Let them cool and set completely first. Then freeze in a single layer before stacking to avoid sticking. Let thaw at room temp and enjoy like they’re fresh outta the oven.

Maple Cookies with Maple Icing

Maple Cookies with Maple Icing

Prep Time 25 minutes
Cook Time 12 minutes
Chilling Time 2 hours
Total Time 3 hours
Sweet, chewy, and a little nutty in all the best ways, these maple cookies with maple icing are made with rich brown sugar, butter, real maple syrup, and a whisper of vanilla. The cookies are tender and golden with a chewy center, while the glossy maple icing sets into a pretty sheen. Perfect for cozy gatherings, sharing with coffee, or sandwiching around whipped cream for a treat.
24 cookies

Ingredients

For the Cookies

  • 2 1/4 cups (280 g) all-purpose flour
  • 3/4 tsp (3.5 g) baking soda
  • 1/2 tsp (3 g) salt
  • 3/4 cup (170 g) unsalted butter softened
  • 1 cup (220 g) brown sugar packed
  • 1 large egg room temperature
  • 2 egg yolks room temperature
  • 1/3 cup (80 ml) pure maple syrup
  • 2 tbsp (30 ml) whole milk
  • 2 tsp (10 ml) vanilla extract
  • 1/2 cup (55 g) chopped pecans optional

For the Maple Icing

  • 2 tbsp (28 g) unsalted butter melted
  • 2 tbsp (28 g) brown sugar packed
  • 3 tbsp (45 ml) pure maple syrup
  • 2 tbsp (30 ml) whole milk plus more as needed
  • 1/8 tsp (1 g) salt
  • 1 cup (120 g) powdered sugar sifted if lumpy

Equipment

  • Mixing bowls
  • Saucepan
  • Electric mixer
  • Baking sheet
  • Parchment paper
  • Wire rack
  • Spoon or Cookie Scoop

Instructions
 

  1. Mix your dry ingredients:
    In a medium bowl, whisk together flour, baking soda, and salt. Set aside.
  2. Cream the butter and sugar:
    In a large bowl, use a mixer to beat softened butter and brown sugar until light and fluffy, about 2–3 minutes.
  3. Add wet ingredients:
    Beat in the egg, then egg yolks, one at a time; mix in the maple syrup, milk, and vanilla until fully combined.
  4. Combine wet and dry:
    Fold dry ingredients into wet in two additions. If using pecans, fold them in with the last addition.
  5. Chill the dough:
    Cover and refrigerate dough for at least 2 hours (or overnight for best flavor and texture).
  6. Bake:
    Preheat oven to 350°F (175°C). Line baking sheets with parchment. Scoop 2-tbsp portions of chilled dough on sheets, leaving 2 inches between. Bake 10–12 minutes until edges are just golden and centers look slightly soft. Cool briefly on tray, then transfer to a rack.
  7. Make the maple icing:
    In a small saucepan, melt butter and brown sugar over medium heat, whisking, until it boils. Let bubble for 2 minutes, then remove from heat. Cool 10–15 minutes.
  8. Add maple syrup, milk, and salt; whisk well. Gradually whisk in powdered sugar until icing is smooth and pourable (thin further with milk if needed, a teaspoon at a time).
  9. Ice the cookies:
    Drizzle or spread icing over cooled cookies. Allow to set for about 30 minutes before serving or storing.

Notes

Storage: Store in an airtight container up to 3 days at room temp, or up to 5 days in the refrigerator. Cookies (baked or unbaked dough) can be frozen—thaw before icing.
Make-ahead: Dough can be prepared up to 48 hours ahead and chilled.
Variations: Swap pecans for walnuts, add cinnamon, use browned butter, or fold in a handful of crushed cornflakes for crunch!

Nutrition

Calories: 170kcal | Carbohydrates: 25g | Protein: 2g | Fat: 7g | Saturated Fat: 4g | Cholesterol: 31mg | Sodium: 71mg | Potassium: 43mg | Sugar: 15g | Vitamin A: 205IU | Calcium: 24mg | Iron: 0.6mg

BBQ chicken, rich cheddar, juicy tomatoes, and crispy bacon meet melty, toasty goodness in this bold, cheesy chicken panini. Ranch and BBQ sauce keep things extra saucy.

A chicken panini is one of those gloriously satisfying meals that hits the sweet spot between lazy and luxurious. It’s warm, crunchy, gooey, a little tangy, and just… smushes together perfectly. One bite in, and you’ll probably do that quiet happy head tilt thing. Toasted bread cradling Ranch-massaged chicken, smoky strips of bacon, sunshiney tomato slices, and all that cheese pulling into long, ridiculous ribbons. Plus it involves squishing things inside a grill, which is objectively fun. Ideal for a weeknight when the brain’s too foggy for fancy steps but you still want real flavor.

Table of Contents

Grilled Chicken Panini Sandwich

Why You’ll Love this Chicken Panini

No spin required here. It’s a sandwich, but make it cozy, indulgent, and just slightly over-the-top in the best way.

  • Ridiculously simple to make: You just layer things, smear sauces, and squash it all ’til it’s golden and gooey.
  • That ranch + BBQ combo: Tangy meets smoky is a surefire win—and way more fun than sticking to one sauce.
  • Cheese everywhere: It’s got cheddar (or Havarti or Jack, if you wanna switch it up). Melted, stretchy, drippy magic.
  • Bacon, baby: Enough said. Crispy, salty, savory little crunch bombs in every bite.
  • Totally adaptable: Don’t have a panini press? A skillet stack works just fine.
  • Satisfying, but not fork-and-knife fussy: It’s hearty enough to count as dinner but not so messy you’re chasing toppings with a spoon.

Grilled Chicken Panini Sandwich

Ingredient Notes

This beauty doesn’t ask for much, but here’s a peek at the stars of the show.

  • Thick-cut bread or ciabatta rolls: Something sturdy! Sourdough, Italian, or ciabatta all hold up to heat and moisture without turning into sad mush.
  • Ranch dressing: Creamy, herby, and slightly tangy. It gives the sandwich backbone and balances the smoky BBQ.
  • BBQ sauce: Go smoky, sweet, or spicy based on your vibe. Try mixing two if you’re feeling extra.
  • Cheese slices: Sharp cheddar holds up like a champ, but Monterey Jack or Havarti melt like a dream and add that soft creaminess too.
  • Cooked shredded chicken: Rotisserie cheat? Yes, please. Leftover grilled chicken works too—just make sure it’s seasoned.
  • Crispy bacon: Adds salt, crunch, and flavor complexity (that’s the fancy way of saying it tastes awesome).
  • Ripe tomatoes: Juicy rounds add freshness and balance out the richness. A nice sprinkle of salt on the slices helps, too.
  • Olive oil spray: This is your golden crispiness ticket without drowning the bread. Spray both sides before grilling.

Grilled Chicken Panini Sandwich

How To Make This Chicken Panini

You’ve got your ingredients, you’ve got a sandwich hankering… let’s bring it all together. No restaurant tricks, just good layering and a bit of smooshing.

  • Preheat your gear: Get that panini press warmed up to medium heat (or a grill pan with a heavy skillet if you’re going analog). Trust me, starting hot equals crisp bread rather than a soggy situation.

  • Smear and savor: Spread ranch dressing on two slices of your bread and BBQ sauce on the other two. Don’t skimp on the corners—we want every bite to count.

  • Start stacking: On the ranch slices, layer two pieces of cheese, then pile on that tender shredded chicken, a couple strips of bacon, and those dreamy tomato slices. Top with the other two cheese slices. (Yes, cheese on top and bottom. You’re not a monster.)

  • Cap it off: Crown your layers with the BBQ-brushed bread slices. Press down gently just to tell everyone to behave.

  • Spray and sizzle: Give the tops a quick olive oil mist, then pop them oiled side down onto the press or grill pan. Spray the other side too. Close or press with your skillet savagely (with love) and cook for 3–5 minutes until the bread is crispy and the insides are a molten lava of joy.

  • Flip (if needed): If you’re using a grill pan, flip with care, oil the other side again, and griddle another few minutes. Use your senses: golden color, cheese goo at the edges, sizzling sound… you’re close.

  • Cool and slice: Once grilled, let them sit a minute. It helps the cheese settle a bit (plus you won’t lava-blast your tongue). Slice diagonally because we’re civilized.

Grilled Chicken Panini Sandwich

Storage Options

Let’s be honest here—these chicken paninis are best hot off the press. That crisp edge, that juicy interior… that’s the stuff. But if you’ve got leftovers (or you’re just meal-prepping like a boss), here’s what you need to know.

In the fridge, leftovers hold up for about 2 to 3 days. Just wrap them tightly in foil or seal in an airtight container. The bread may soften slightly, but a toaster or low oven will fix that right up.

Freezing, though? Technically doable, but you’ll want to fully cool the sandwiches and wrap each individually in parchment, then foil or plastic wrap. Stash ’em in a freezer-safe bag and enjoy within a month for best flavor. Reminder: tomato slices can get a bit watery post-freeze, so consider leaving them out and adding fresh later.

To reheat, skip the microwave unless you enjoy steamy bread and limp bacon (I don’t judge, but here we strive for crispness). Use a skillet over medium heat with a lid to gently warm the inside without burning the bread, or pop it in a 350°F oven for about 10 minutes.

Variations and Substitutions

Want to riff a little? Totally fair. Chicken paninis are delightfully flexible sandwich canvases.

  • Bread swap: Sourdough works beautifully, but if you’re leaning fancy, focaccia brings herbed flavor and soft chew. Gluten-free? Grab your favorite firm GF bread, just don’t go too thin.

  • Spicy BBQ sauce: If you like heat, use a chipotle BBQ or add a few slices of pickled jalapeño inside. The cool ranch tempers it perfectly.

  • Different cheeses: Havarti’s ultra-melty. Smoked gouda adds depth. Pepper Jack equals spice with a wink.

  • Turkey bacon or veg version: Swap regular bacon for turkey bacon or crispy tempeh for a vegetarian twist. You still get that edge of salty crunch.

  • No panini press: Use a hot nonstick pan and something heavy (like another skillet or foil-wrapped brick, yes really). Weight is flavor here.

Grilled Chicken Panini Sandwich

What to Serve with Chicken Panini

So let’s say you’ve got your panini piping hot and golden, cheese laced through every layer. What now? Pair it like a champ.

  • A crunchy slaw: Something vinegar-based and snappy with cabbage, carrots, and maybe apple slices. It gives balance and cuts through all that melty richness.

  • A cozy soup moment: Tomato soup’s always a classic, but if you want something different, try pairing it with this vibrant rainbow chard soup for a veggie boost.

  • Simple roasted veggies: Toss some broccoli, carrots, or Brussels sprouts in olive oil, salt, and pepper. Roast until crisp-tender. Done and done.

  • Pickle-y things: Dill pickles, pickled onions, or even giardiniera add brightness and crunch. The acidity plays off the ranch BBQ vibe so well.

  • A cheeky little dessert bite: If you’re feeling indulgent, round it off with a square of homemade sweetness. These addictive toffee bars come to mind.

Grilled Chicken Panini Sandwich

Frequently Asked Questions

Can I make this chicken panini ahead of time?

Sort of! You can prep everything—cook the bacon, slice the tomatoes, shred the chicken, and lay out the cheese. You could even assemble the sandwich fully and refrigerate it for a few hours, then grill when ready to eat. But I wouldn’t press them in advance unless you like chewy toast (which, again, no judgment, but you’re missing peak hot-melty magic).

What’s the best kind of bread for a panini?

Something firm and hearty. Thin sandwich bread will flatten into a pancake and possibly go soggy with the sauces. I like thick-cut sourdough or ciabatta rolls. Focaccia also works if you want a softer, flavorful base—but avoid anything too crusty like a baguette unless you want your sandwich to launch fillings across the kitchen while you bite into it.

Can I use leftover rotisserie chicken?

Absolutely. In fact, it’s my favorite shortcut. Just shred it up, warm it a touch so it doesn’t chill your cheese melt, and you’re ready for layering. Leftover grilled or baked chicken works too—just make sure it’s seasoned or give it a quick toss in extra BBQ sauce before adding to the sandwich.

Is there a vegetarian version of this that actually tastes good?

Totally! Swap the chicken for roasted mushrooms or even smashed chickpeas mixed with a little ranch. Use crispy tofu or tempeh bacon in place of the porky stuff, and cheese it up just the same. A bit of sweetness (like a smoky BBQ drizzle) still brings that magic contrast. It won’t mimic meat, but it’ll be seriously satisfying in its own delicious way.

Grilled Chicken Panini Sandwich

BBQ Ranch Chicken Panini

Prep Time 10 minutes
Cook Time 10 minutes
Total Time 20 minutes
BBQ chicken, rich cheddar, juicy tomatoes, and crispy bacon are squished into melty, golden perfection in this bold, cheesy chicken panini. Ranch and BBQ sauce keep every bite extra saucy and delicious.
2 paninis

Ingredients

Panini

  • 4 slices thick-cut bread or ciabatta rolls such as sourdough, Italian, or ciabatta; sturdy enough to grill
  • 2 tbsp ranch dressing
  • 2 tbsp BBQ sauce smoky, sweet, or spicy as preferred
  • 4 slices cheddar cheese or Monterey Jack or Havarti
  • 1 cup (150 g) cooked shredded chicken rotisserie or leftover grilled chicken; seasoned
  • 4 strips cooked bacon crispy
  • 1 ripe tomato sliced
  • olive oil spray for crisping the bread

Equipment

  • Panini Press
  • Skillet or Grill Pan

Instructions
 

  1. Preheat your gear: Heat up your panini press (or grill pan/skillet) to medium heat for crispy bread.
  2. Smear and savor: Spread ranch dressing on two bread slices and BBQ sauce on the other two. Make sure to go to the edges for full flavor.
  3. Start stacking: On the ranch slices, layer one cheese slice each, then top with shredded chicken, 2 strips of bacon, tomato slices, and another cheese slice per sandwich.
  4. Cap it off: Place the BBQ-sauced bread slices on top to close the sandwiches. Press gently to set the layers.
  5. Spray and sizzle: Mist the top with olive oil spray. Place sandwiches oil side down on the hot panini press (or grill pan). Spray the other side, then close or press with a skillet. Grill for 3–5 minutes or until the bread is golden and the cheese is melty.
  6. Flip (if needed): If using a grill pan, flip the sandwiches carefully, oil the other side, and grill until both sides are crisp and golden.
  7. Cool and slice: Let paninis cool for a minute, then slice diagonally and serve hot.

Notes

Feel free to swap in your favorite cheese (Havarti, Jack, Gouda), different breads (sourdough, focaccia), or use turkey bacon or veggie bacon for a twist. No panini press? A grill pan plus a heavy skillet works great. Enjoy immediately for maximum crispiness, or reheat leftovers in a skillet or oven.

Nutrition

Calories: 650kcal | Carbohydrates: 38g | Protein: 37g | Fat: 37g | Saturated Fat: 14g | Cholesterol: 110mg | Sodium: 1500mg | Potassium: 550mg | Fiber: 2g | Sugar: 8g | Vitamin A: 700IU | Vitamin C: 6mg | Calcium: 350mg | Iron: 3.2mg

Buttery, chewy, and crunchy all at once, these toffee bars are layered with brown sugar, chocolate, and milky caramel. Grab butter, flour, and some good toffee bits—you’re in for a treat.

Imagine walking into a kitchen that smells like warm brown sugar and melted chocolate. That golden, toasty aroma wraps around you like a cozy sweater that’s just a tad snug after dessert. That’s the vibe these toffee bars give off. They’ve got a cookie-meets-candy personality going on, with just enough chew and crunch to keep things interesting.

You bake the base, let the chocolate do its melty thing, and (if you’re in a caramel kind of mood) drizzle and swirl until your kitchen counter gets just a little sticky. They’re casual enough for a snack-but-not-a-snack moment, yet fancy enough for gifting, or for hoarding in the fridge and pretending you forgot about them. Speaking of which…

Table of Contents

Toffee Bars

Why You’ll Love this Toffee Bars Recipe

These bars don’t need a sales pitch—they win people over by simply existing. But if you’re on the fence (which, fair), here’s why they earn their spot on the treat tray.

  • Ridiculously simple to make: You just squish, smear, melt, and drizzle. The oven basically does the hard part.
  • Versatile toppings: Chocolate, pecans, finished with a scatter of toffee bits… or skip the nuts if they’re not your thing.
  • Optional caramel swirl: Because sometimes, chocolate isn’t enough. (Yes, I said it.)
  • Buttery shortbread base: It’s crumbly without being dry, and it smells like someone loves you deeply.
  • Great make-ahead treat: These bars actually get better once they chill, especially if you’re going for those lovely clean cuts.

Toffee Bars

Ingredient Notes

These bars don’t try to be mysterious. Here’s the lowdown on what goes into them and a few little tricks along the way.

  • Unsalted butter: Soften it at room temp—it’s the only way to get that creamed, whipped texture with brown sugar that makes the crust plush and tender.
  • Packed brown sugar: This adds that deep, almost caramelly sweetness. Light or dark both work, depending on how molassesy you feel.
  • Egg yolk: Just one! It binds everything with a richness that a whole egg would overpower.
  • Vanilla extract: Go for real vanilla if you can—it brings out the warmth of the sugar and chocolate.
  • All-purpose flour: Standard flour does the job here. Don’t overmix though, or it might get a bit too tough.
  • Salt: Just enough to balance the sweet—it’s subtle, but don’t skip it.
  • Milk chocolate chips: They melt beautifully into a glossy layer. Semi-sweet works too, but milk chocolate vibes really well with the toffee.
  • Toffee bits: These little guys add crackle and a buttery crunch. The kind in the baking aisle is perfect.
  • Chopped pecans (optional): Toast ’em first if you’re using them. They add a roasty flavor and a satisfying chew.
  • Chewy caramel candies + heavy cream (optional): This combo turns into a pourable caramel you’ll want to sneak by the spoonful. Try brands like Werther’s for easy melting.

Toffee Bars

How To Make This Toffee Bars Recipe

This whole process is un-fussy and smells absolutely ridiculous in the best way. Like, “why does my kitchen smell like a toffee-scented candle” kind of good.

  • Prep your baking pan and oven: First, line a 9×13-inch pan with parchment. This makes for easy clean-up and even easier lifting later. Preheat to 350°F and let it buzz while you prep the dough.

  • Mix up the base layer: Grab a large bowl and beat the softened butter with the brown sugar using a hand mixer. You’re aiming for fluffy and light, which should take 2 to 3 minutes. Add the egg yolk and vanilla, and beat again for a few seconds until it melds. At this point, your kitchen is already smelling like cookies, and we haven’t even baked yet.

  • Add dry ingredients: Stir in the flour and salt with a spatula. Don’t use the mixer here—it’ll overwork the dough and ruin the texture. The dough will look crumbly and weirdly dry, but that’s exactly right.

  • Press and bake: Take that crumbly dough and press it into the pan with your hands or the back of a measuring cup. Get it nice and even. Bake for 20 to 25 minutes, or until the edges get a pale golden tan.

  • Caramel or chocolate topping—your call: Once it comes out of the oven, move quickly. If you’re going the caramel route, melt the caramels and cream in the microwave (go slow—30-second bursts, stir often) until smooth and pourable. Spread over the hot crust. If you’re leaning into just chocolate, sprinkle the chips right onto the hot crust instead. Let them sit and soften for a few minutes, then spread into a glossy layer.

  • Add the final crunchies: Sprinkle on the toffee bits and pecans while the chocolate or caramel is still melty, so they’ll stick. Then let the whole pan cool just until you can’t stand to wait anymore.

  • Chill and slice: Once it’s all set (fridge helps speed this up), slice into squares. For super clean edges, pop the whole tray in the fridge for about 30 minutes before cutting.

Toffee Bars

Storage Options

These toffee bars actually have an ideal personality for make-ahead situations. Store them in the fridge or freezer, and they hold up beautifully.

If you’re keeping them on the counter, make sure it’s not too warm in the kitchen—chocolate gets moody and melty. In a sealed container, they’ll be fine at room temp for up to 3 days, though I prefer sticking them in the fridge where they stay firm and the flavors settle in even more.

They’re very freezer-friendly too. Slice them first, then layer with parchment or wax paper between tiers in an airtight container. When the day calls for one (or four), let a bar sit out at room temp for about 15 minutes, or eat it cold if you’re into that whole “straight from the freezer” thrill like I am.

Variations and Substitutions

There’s room to play here. These bars are forgiving and open to interpretation—just like a good playlist.

  • Nut-free version: Skip the pecans entirely if needed. You can add a few extra toffee bits for that same crunch vibe.
  • Dark chocolate chips: If milk’s too sweet for your tastes, try dark or semisweet chips for a bit more bite.
  • Add sea salt flakes: A tiny sprinkle on top right after baking? Chef’s kiss. Contrasts beautifully with the sweetness.
  • Use graham flour or oat flour: For a slightly rustic twist, swap a quarter of the flour with oat or graham. It makes it a little nuttier.
  • Make it s’mores-inspired: Layer mini marshmallows under the chocolate chips before melting. They’ll get gooey, toasty, and ridiculous in a good way.

Toffee Bars

What to Serve with Toffee Bars

These are lovely solo, but pairing them with something cozy (or zippy) makes them even more special.

  • A cold glass of milk or a mug of coffee (your vibe decides): The richness in the bars meets its match in something palate-cleansing. Especially if you lean into the optional caramel drizzle—it gets sticky-sweet fast.

  • Vanilla bean ice cream: It melts slightly over a chilled bar and turns into this dreamy warm-cold-dessert combo. Total overachiever move.

  • A savory meal first: Balance these sweet bites after dinner. Something crisp like pan-seared cod with rainbow chard or even a cozy fall dinner smooths the way in.

  • A party platter moment: Stack squares between layers of parchment and pair with salty snacks (pretzels, nuts, maybe even bacon basil cornbread muffins if you’re feeling brunchy). Sweet and savory is always a hit.

Toffee Bars

Frequently Asked Questions

Can I make toffee bars ahead of time?

Yep! They’re actually better that way. Bake them, top them, let them cool, and refrigerate up to 4 days in advance. The chill time makes the layers firm up and the flavors settle in. Slice right before serving if you’re looking for those tidy bakery-style edges.

Can I freeze these toffee bars?

Definitely. Freeze the bars once cooled, either whole or sliced into squares. Use parchment between layers to avoid sticking. When you’re ready to enjoy, either thaw overnight in the fridge or let them sit out for about 15–20 minutes at room temp (pro tip: they’re also pretty great straight from the freezer if you like that bite).

Can I use different kinds of chocolate?

Sure can. Milk chocolate is classic here because of how it pairs with sweet toffee and caramel, but dark or semisweet chocolate works well if you want it less sugary. You can even mix and match chip types or throw in some chopped chocolate bars for a rustic feel.

How do I get clean slices?

The trick is chilling. After the bars are fully cooled, pop the whole tray into the fridge for 30 minutes. Then use a sharp knife (wipe it clean between cuts) and go slow. You’ll get nice, tidy squares without dragging the topping everywhere. It’s weirdly satisfying.

Toffee Bars

Buttery Chocolate Toffee Bars

Prep Time 15 minutes
Cook Time 25 minutes
Chilling Time 30 minutes
Total Time 50 minutes
Buttery, chewy, and crunchy all at once, these toffee bars are layered with brown sugar, chocolate, and milky caramel. With a cookie-meets-candy personality and just the right balance of chew and crunch, these bars are the treat you’ll want to hoard in your fridge.
24 bars

Ingredients

Shortbread Base

  • 1 cup (227 g) unsalted butter softened to room temperature
  • 1 cup (200 g) packed brown sugar light or dark
  • 1 large egg yolk
  • 1 tsp (5 ml) vanilla extract
  • 2 cups (250 g) all-purpose flour
  • 1/2 tsp (2.5 ml) salt

Toppings

  • 1 1/2 cups (255 g) milk chocolate chips or semisweet or dark if preferred
  • 1 cup (160 g) toffee bits like Heath baking bits
  • 1/2 cup (60 g) chopped pecans optional, toasted

Optional Caramel Swirl

  • 12 (120 g) chewy caramel candies like Werther's
  • 2 tbsp (30 ml) heavy cream

Equipment

  • 9x13-inch Baking Pan
  • Parchment paper
  • Hand Mixer
  • Mixing bowls

Instructions
 

  1. Preheat the oven to 350°F (175°C) and line a 9x13-inch baking pan with parchment paper.
  2. In a large mixing bowl, beat the softened butter and brown sugar together with a hand mixer for 2-3 minutes until light and fluffy.
  3. Add the egg yolk and vanilla extract; mix briefly until combined.
  4. Stir in the flour and salt with a spatula until just combined. The dough will look crumbly; that's perfect.
  5. Press the crumbly dough evenly into the prepared pan using your hands or the back of a measuring cup.
  6. Bake for 20-25 minutes, or until the edges are lightly golden. Remove from oven.
  7. If adding caramel: Melt caramel candies with heavy cream in a microwave-safe bowl in 30-second increments, stirring until smooth. Pour and spread evenly over the hot crust.
  8. Immediately sprinkle chocolate chips over the hot crust (and caramel, if using). Let sit for 2-3 minutes to soften, then gently spread into a smooth, even layer.
  9. Sprinkle toffee bits and pecans (if using) over the chocolate while still warm so they stick.
  10. Allow the bars to cool at room temperature until just barely warm. For cleanest slicing, refrigerate the pan for 30 minutes to firm up.
  11. Lift the bars from the pan using the parchment, slice into squares, and enjoy!

Notes

  • Feel free to skip the pecans for a nut-free version. Add extra toffee bits for crunch.
  • For a s’mores twist, add mini marshmallows under the chocolate chips before melting.
  • Try dark chocolate chips or add a sprinkle of sea salt flakes on top for variation.
Storage: Bars keep well in an airtight container at room temp (up to 3 days), in the fridge (up to 7 days), or frozen for up to 2 months.

Nutrition

Calories: 230kcal | Carbohydrates: 28g | Protein: 2g | Fat: 13g | Saturated Fat: 7g | Cholesterol: 27mg | Sodium: 80mg | Potassium: 46mg | Fiber: 1g | Sugar: 16g | Vitamin A: 300IU | Calcium: 36mg | Iron: 0.8mg

Crazy moist and full of tropical vibes, this coconut bread with glaze is pure comfort with a golden crust and tender, coconut-kissed middle. Made with butter, eggs, sugar, and full-fat coconut milk.

Imagine slicing into a warm, brown-edged loaf that smells like a bakery took a vacation somewhere breezy. This coconut bread is soft enough to sink your teeth into but sturdy enough to hold that glossy, coconut milk glaze. It’s the kind of thing you “just taste” while it’s cooling… four slices later. Whether you’re having a quiet moment with tea or sneaking a midnight slice (no judgment), it works. And bonus: the batter comes together in one bowl, no stress baking here.

Table of Contents

Coconut Bread

Why You’ll Love this Coconut Bread with Glaze

Not everything needs fireworks. This loaf is just simple, slightly sweet, and satisfyingly coconutty.

  • Ridiculously simple to make: You don’t even need a mixer for the dry stuff and barely fuss with the wet. Stir, pour, bake.
  • The texture walks the line beautifully: Buttery, tight crumb inside with a barely crisp edge that gets better overnight.
  • Smells like a tropical hug: That mixture of coconut milk, toasted coconut, and sugar is kind of magical mid-bake.
  • That glaze, though: It’s creamy, gently sweet, and goes on in lazy drizzles. Then it sets into a soft shell? Ugh, yes.
  • Takes well to flavor experiments: Almond? Lime zest? Chocolate chips? You’ve got room to play.
  • Make-ahead friendly: It somehow tastes even better the next day, if you can manage to not eat it all.

Coconut Bread

Ingredient Notes

Let’s walk through a few ingredients so you know what’s going on under that crust. These are the key pieces that make this coconut bread with glaze so dreamy.

  • All-purpose flour: Just your regular pantry flour gives the loaf its structure without weighing it down. Spoon and level it for best results.
  • Baking powder + baking soda: This combo gives the bread its gentle lift without puffing it into cake territory. Don’t skip one or the other.
  • Granulated sugar: Sweetens the crumb without making it cloying. It also helps with that soft golden crust.
  • Unsalted butter: Adds richness and a little body. Let it come to room temp so it creams easily.
  • Eggs and yolks: Whole eggs help with structure, and the extra yolks add a custardy texture—think tender, not dry.
  • Full-fat coconut milk: Key player here. The fat gives richness and… okay, the scent is heavenly.
  • Coconut extract: Optional but lovely. It deepens the flavor and gives that boost of ooh, what’s that?
  • Sweetened shredded coconut: Little chewy bits of texture in every bite. They toast up slightly as the loaf bakes, which is pure magic.
  • Powdered sugar: Used for the glaze to get that silky smooth drizzle. No sifting unless you’re feeling extra.
  • Extra shredded coconut (for topping): For flair. You can toast it or leave it soft—both ways work.

Coconut Bread

How To Make This Coconut Bread with Glaze

This is not a high-maintenance loaf. If you can stir, you’re in. Here’s how it goes down:

  • Set the stage (oven and pan): Preheat your oven to 350°F and grease your 9×5 inch loaf pan. Line it with parchment so you can lift the bread right out later like a pro.

  • Mix the dry ingredients: In a large bowl, whisk your flour, baking powder, baking soda, and salt. This saves you from surprises later—like biting into a clump of baking soda. Not ideal.

  • Cream the butter and sugar: In a separate bowl, use an electric mixer to cream the butter and sugar together until fluffy and pale. That’ll take about 2 to 3 minutes. It should almost look like frosting. That’s your sign it’s ready.

  • Add eggs and liquids: Beat in the eggs and yolks one at a time. Don’t rush—give each one a second to mingle before adding the next. Then comes the coconut milk and coconut extract. It might look a little “curdled” at this point, but it’ll all smooth out when we bring it together.

  • Combine wet and dry: Make a well in the center of your flour bowl, pour in the wet mixture, and fold gently. When you see streaks of flour still hanging around, toss in your shredded coconut and fold just until combined. Don’t overmix unless you’re trying to make it chewy (please don’t).

  • Bake the loaf: Scrape the batter into your pan, smooth the top and slide it into the oven. It’ll need 45 to 55 minutes—start checking around 45. The top should be golden and a toothpick poked in the middle should come out with just a few crumbs.

  • Cool it (literally): Let the bread sit in its pan for 10 minutes, then lift it out and cool completely on a rack. Warm glaze on warm bread is a slippery mess. Patience wins here.

  • Make the glaze: In a small bowl, whisk the powdered sugar with coconut milk and a pinch of salt. It should be drizzle-able. Add more milk as needed (just go a half teaspoon at a time).

  • Glaze and sprinkle: Once the loaf is cool, drizzle over the glaze and top with shredded coconut. Let it set for 10 to 15 minutes so it doesn’t stick to your fingers like glue.

Coconut Bread

Storage Options

So, say you didn’t polish off the whole loaf while “taste testing.” Here’s how to keep those slices happy longer.

Room temp is great for short-term—in fact, for up to 3 days, just wrap it loosely in foil or pop it in a cake dome to keep it soft. Avoid airtight plastic, which can make the crust soggy.

If it’s a scorcher outside or you’re a planner, the fridge will keep it good for up to a week. Wrap slices in parchment and foil so they don’t dry out. Toasting a slice straight from the fridge brings back a little life (and who doesn’t love toasted glaze bits?).

Freezing? Totally doable. Wrap slices tightly in plastic wrap and then pop them all in a freezer bag. They’ll be fine for up to 2 months. Reheat in a toaster oven or low oven until warm and just crisp around the edges. Or eat it cold while standing over the sink—I’ve heard that’s a thing.

Variations and Substitutions

One of my favorite things about this coconut bread with glaze is how flexible it is. You can riff depending on what you’re craving or what’s hanging out in your pantry.

  • Almond extract instead of coconut: It adds a slightly floral note that somehow still plays well with coconut. Don’t overdo it—just 1/2 teaspoon goes far.

  • Add citrus zest: Lime or orange zest stirred into the batter gives it a whole new personality. Bright, sunny, and slightly punchy.

  • Swap in whole wheat flour: Just replace 1/2 cup of the AP flour with whole wheat. It adds a little nuttiness without drying things out.

  • Crank it up with chocolate chips: Fold in 1/2 cup of mini semi-sweet chips for sweet bursts in every bite. Coconut + chocolate = yes please.

  • Use unsweetened coconut: If you want a little less sugar and don’t mind a more muted coconut flavor, go unsweetened for both the batter and topping.

  • Make it into muffins: This same batter works beautifully in muffin tins. Bake for about 20–25 minutes and start checking early.

Coconut Bread

What to Serve with Coconut Bread with Glaze

This coconut bread is lovely solo, no doubt. But if you’re building a vibe—or a little brunch plate—here are some tasty pairings.

  • Hot coffee or tea: The warm spices of black tea or the richness of a light roast coffee really highlight the coconut flavor. Plus, sipping something hot with a glazed slice just feels… right.

  • Tropical fruit salad: Think chunks of mango, pineapple, and kiwi with a lime-honey drizzle. Cold and juicy meets warm and glazed? It works almost too well.

  • A scoop of vanilla frozen yogurt: This adds a creamy, tangy element that balances the sweetness. It’s also your excuse to have this for dessert.

  • Next to a seafood dinner: Hear me out. A small slice of this on the side of something like pan-seared cod? Game changer. It bridges savory and sweet in such an unexpected way.

  • More coconut vibes: Pair with a chilled glass of White Christmas Punch—the coconut milk sparkle in that drink matches this loaf’s tropical energy.

Coconut Bread

Frequently Asked Questions

Can I make this coconut bread ahead of time?

Yes, and honestly, it might even taste better the next day. The flavors settle and mellow beautifully overnight. Just wrap it in foil or store it in an airtight container at room temp, and you’ve got a perfect next-day treat. The glaze will firm up as well, making slicing even easier.

Can I use light coconut milk?

You can, but fair warning: the bread won’t be quite as rich or moist. Full-fat coconut milk gives the best texture and flavor. If light is all you’ve got, go ahead—but maybe toss in an extra yolk to help make up for the lost fat.

How do I know when the bread is done baking?

Start checking around the 45-minute mark. A toothpick in the center should come out clean or with a few moist crumbs (not batter). Also, the top should be firm and golden. If it’s jiggly in the middle or smells eggy, it probably needs more time.

What if I don’t have coconut extract?

No worries! You can skip it or use a little vanilla instead. The coconut milk and shredded coconut still bring plenty of flavor. That extract just adds a little extra oomph, like coconut-flavored perfume for your loaf.

Coconut Bread

Coconut Bread with Glaze

Prep Time 15 minutes
Cook Time 50 minutes
Cooling Time 15 minutes
Total Time 1 hour 20 minutes
Crazy moist coconut bread with a glossy coconut glaze—tender, coconut-rich, and just sweet enough. It’s pure comfort, made in one bowl, no stress. Enjoy it as a snack, a brunch treat, or breakfast with tropical vibes.
10 slices

Ingredients

For the Coconut Bread

  • 2 cups (260 g) all-purpose flour spooned and leveled
  • 2 tsp baking powder
  • 1/2 tsp (0.5 tsp) baking soda
  • 1/2 tsp (0.5 tsp) salt
  • 3/4 cup (150 g) granulated sugar
  • 1/2 cup (113 g) unsalted butter softened to room temperature
  • 2 large eggs
  • 2 large egg yolks
  • 1 cup (240 ml) full-fat coconut milk well-shaken
  • 1 tsp coconut extract optional but recommended
  • 1 cup (85 g) sweetened shredded coconut

For the Glaze

  • 3/4 cup (90 g) powdered sugar
  • 1 1/2 tbsp (22 ml) full-fat coconut milk plus more as needed
  • 1 pinch salt

To Finish

  • 2 tbsp (12 g) shredded coconut for topping; toasted or untoasted

Equipment

  • 9x5-inch loaf pan
  • Mixing bowls
  • Whisk
  • Electric mixer
  • Parchment paper

Instructions
 

  1. Prepare oven and pan: Preheat your oven to 350°F (175°C). Grease a 9x5 inch loaf pan and line with parchment paper for easy removal.
  2. Mix dry ingredients: In a large bowl, whisk together all-purpose flour, baking powder, baking soda, and salt.
  3. Cream butter and sugar: In a separate bowl, use an electric mixer to beat the softened butter and granulated sugar on medium speed until light and fluffy, about 2–3 minutes.
  4. Add eggs and liquids: Beat in the eggs and yolks, one at a time, mixing well after each addition. Add coconut milk and coconut extract (if using), and mix until just combined. The mixture may look slightly curdled; this is normal.
  5. Combine wet and dry: Make a well in the center of the dry ingredients, pour in wet mixture, and fold gently. When streaks of flour remain, add shredded coconut and fold until just combined. Do not overmix.
  6. Bake: Scrape the batter into prepared pan, smooth the top, and bake for 45–55 minutes until golden and a toothpick inserted in center comes out with a few moist crumbs.
  7. Cool: Let bread cool in pan for 10 minutes, then lift out and cool completely on a wire rack before glazing.
  8. Make the glaze: In a small bowl, whisk powdered sugar, coconut milk, and pinch of salt until smooth and drizzle-able. Add more milk as needed, a half teaspoon at a time.
  9. Glaze and finish: Once bread is cool, drizzle glaze over the top and sprinkle with extra shredded coconut. Let set for 10–15 minutes before slicing.

Notes

This bread is make-ahead friendly and actually improves in texture after a day. For variations, try adding citrus zest, chocolate chips, or swapping in some whole wheat flour. Leftovers can be stored at room temperature for up to 3 days or frozen for longer storage.

Nutrition

Calories: 320kcal | Carbohydrates: 38g | Protein: 4g | Fat: 16g | Saturated Fat: 12g | Cholesterol: 66mg | Sodium: 230mg | Potassium: 90mg | Fiber: 1g | Sugar: 19g | Vitamin A: 220IU | Calcium: 54mg | Iron: 1.5mg

Let's Get Cooking!

100+ Recipes for Busy Nights

In a time crunch? Take a look around and browse plenty of recipes to help you get dinner ready and on the table on those busy nights!

Sweet Recipes

Pumpkin Banana Muffins

Pumpkin Banana Muffins Recipe

Strawberry Pie Bars

Strawberry Pie Bars Easy Oven Recipe

White Chocolate Raspberry Muffins

White Chocolate Raspberry Muffins Recipe

Snickerdoodle Muffins

Snickerdoodle Muffins Recipe for Oven

PIN NOW

Follow KitchenetteBlog on Pinterest

Love cozy recipes that actually make it to the table? On Pinterest, I share new comfort-food ideas every week—desserts, dinners, and those little snack cravings that hit at midnight. Come pin with me and never run out of kitchen inspo.

Savory Recipes

Turkey Tetrazzini

Turkey Tetrazzini Baked Pasta Recipe

Grilled Chicken Panini Sandwich

Grilled Chicken Panini Sandwich Recipe

Sweet Potato Cornbread

Sweet Potato Cornbread Recipe Oven Baked

Classic Waldorf Salad

Waldorf Salad Simple Classic Recipe

Get 5 Recipes to Simplify Your Life!

Delicious, versatile recipes you can make over and over.