Get 5 recipes to simplify your life:

easy, delicious, real food recipes

Latest Recipes

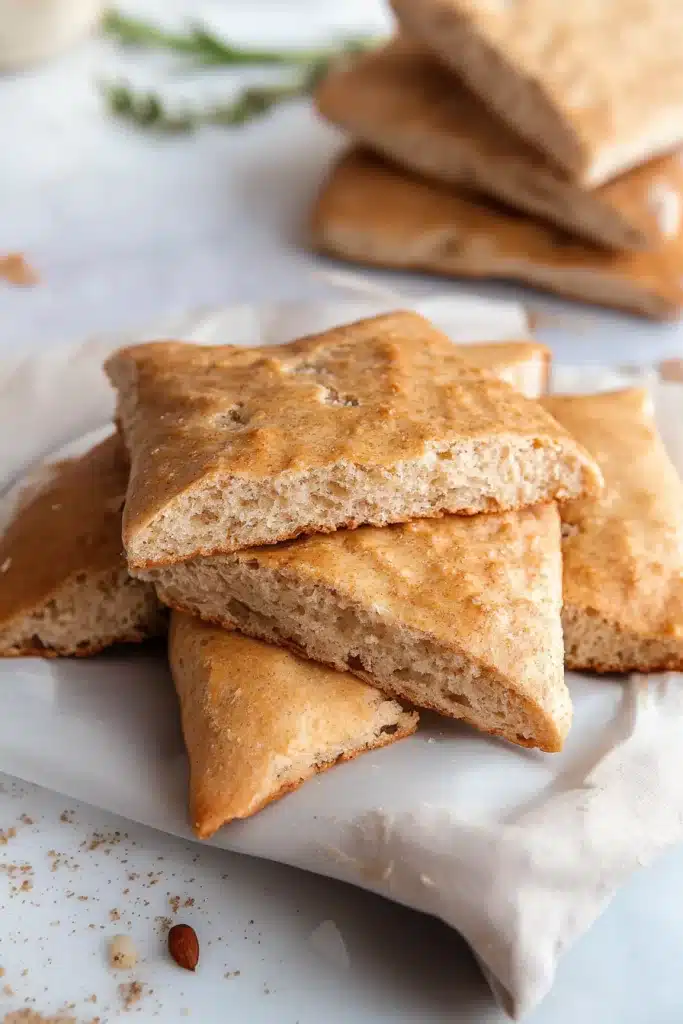
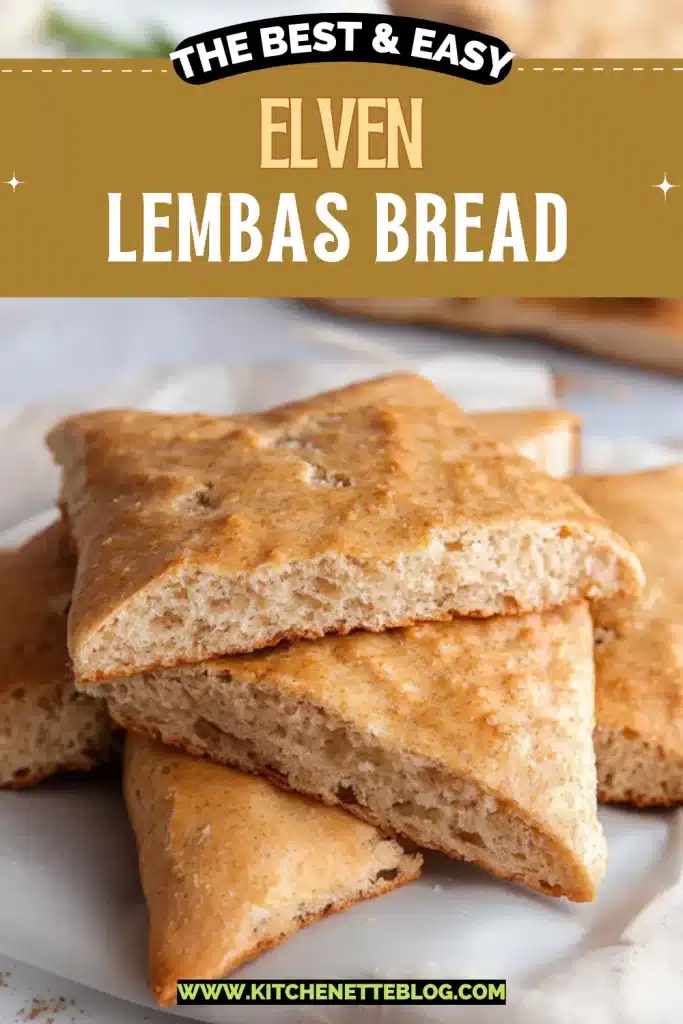
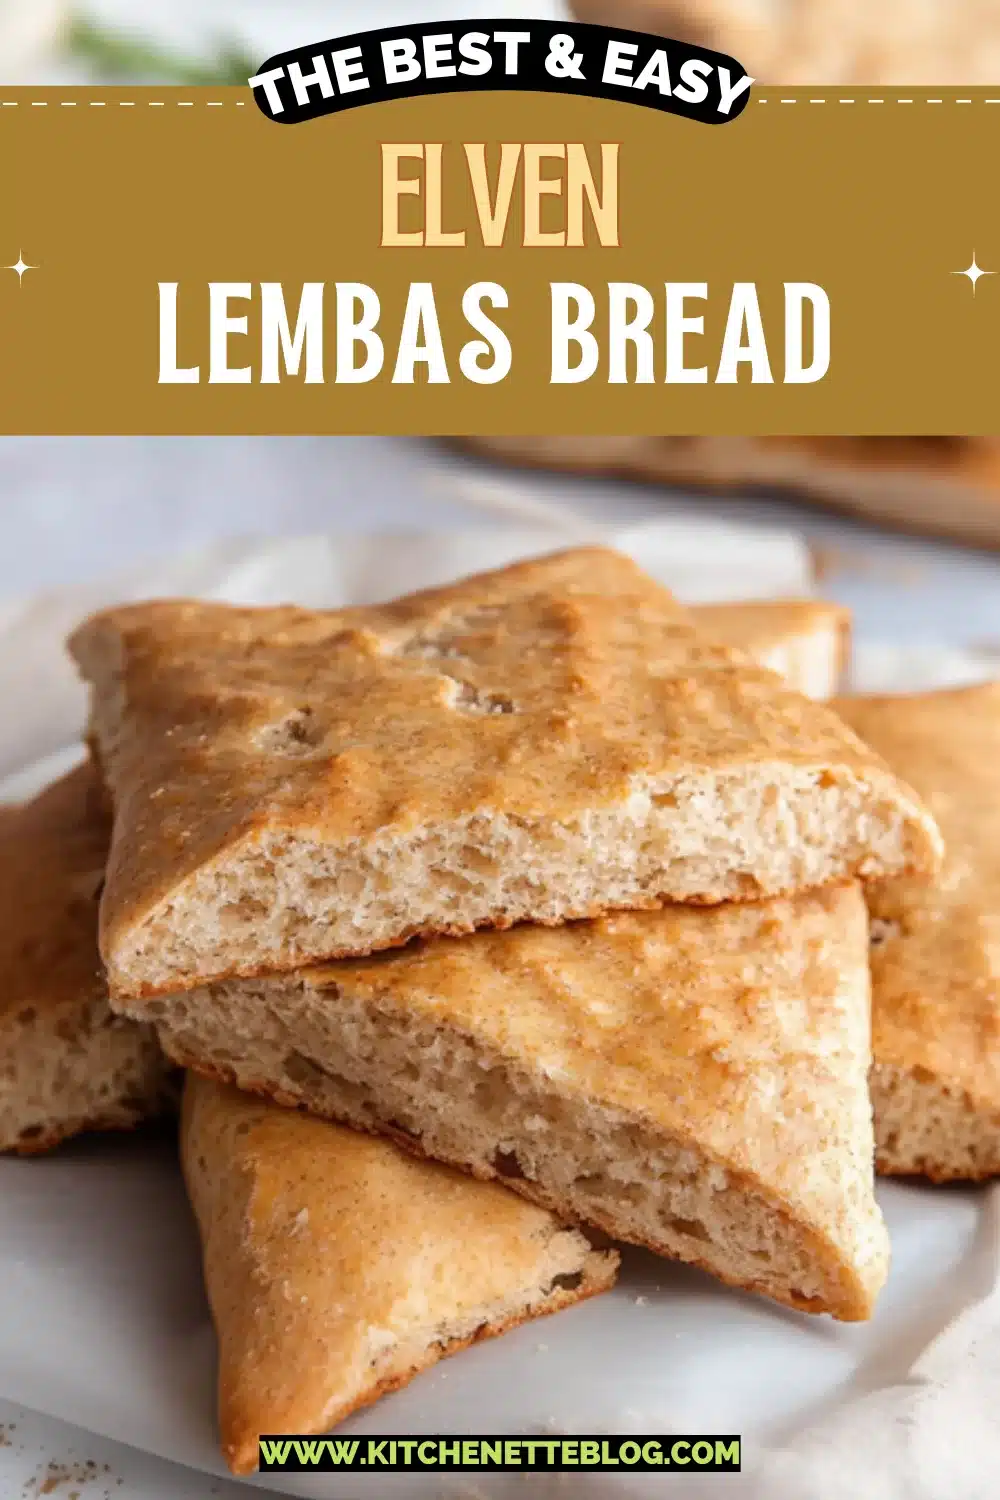
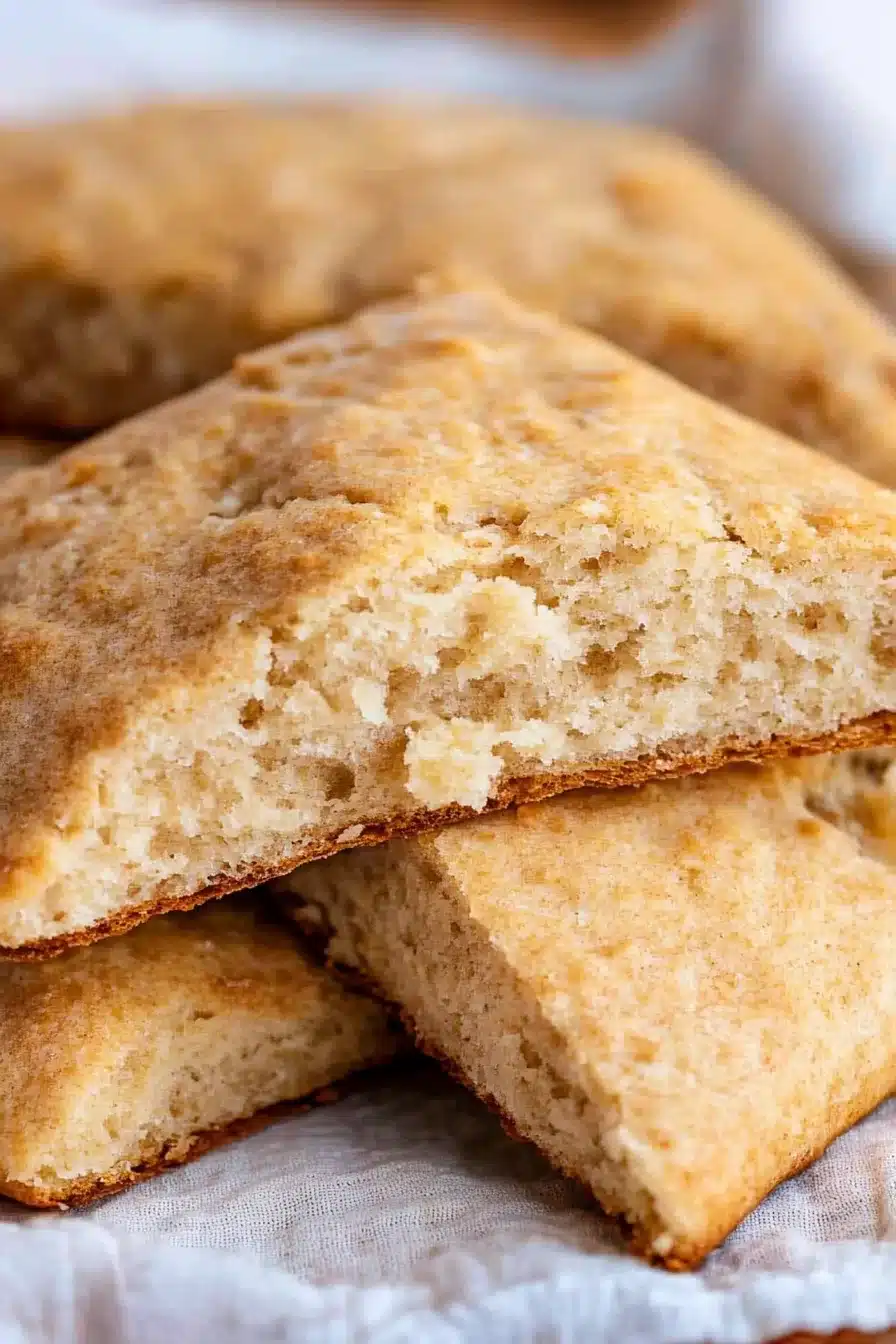
Delicate, lightly spiced, and kissed with hints of honey and vanilla, this buttery lembas bread from Lord of the Rings tastes like a warm hug from an elf—if the elf also owned a charming little bakery. With brown sugar, cinnamon, and nutmeg folded into a soft, crumbly dough, it smells like happiness as it bakes.

So, lembas bread. You know, the stuff the Fellowship nibbled on between sword fights and overly long walking montages. If you’ve ever wondered what it actually tastes like (beyond “magical,” obviously), I’d say it’s a tender shortbread-cookie-meets-biscuit hybrid with cozy fall vibes. It’s the kind of thing you want with a mug of tea… or after fending off a few orcs, depending on your Tuesday.

It’s not overly sweet, which makes it perfect for mid-afternoon snacking, impromptu “elevenses,” or popping into your hiking bag (or backpack, if you’re staying indoors like me).

Table of Contents

Elven Lembas Bread

Why You’ll Love this lembas bread from Lord of the Rings

No need to hike across Middle-earth to enjoy this one.

  • Ridiculously simple to make: You mix, squish, roll, and bake, and before you know it, your kitchen smells like Rivendell.
  • Aromas straight out of an enchanted forest: Cinnamon, nutmeg, and just a whisper of honey float through the house while it bakes.
  • Plays well with others: It’s perfect with tea, coffee, warm milk, or honestly, eaten while leaning over the sink in your pajamas.
  • Keeps beautifully: A great make-ahead option for snacking throughout the week or packing in lunches.
  • Easily shared: These little squares look charming and travel well, whether you’re off to second breakfast or a potluck.

Elven Lembas Bread

Ingredient Notes

Let’s break down the cast—no fellowship needed, just solid pantry folks with a few flavor boosts.

  • All-purpose flour: This is your structural backbone. Regular flour works just fine—no need for anything fancy or elvish-milled.
  • Baking powder and baking soda: These give lembas just enough lift without turning it into a cake. Subtle puffiness, like a dignified rise.
  • Salt: Just a pinch, but it really helps balance the sweetness and bring out those warm spice notes.
  • Cinnamon and nutmeg: I wouldn’t skip these. They whisper of cozy canopies and leaf-strewn paths.
  • Butter: Room temperature is a must here. It gives you that crumbly, biscuit-like texture with rich, buttery flavor.
  • Brown sugar: Adds sweetness but with molasses depth. It also gives the bread a hint of chew right in the middle.
  • Heavy whipping cream: Adds moisture and richness so the dough comes together into something you’ll want to nibble raw (but don’t).
  • Honey: For just a little sticky-sweet magic. It adds softness and mild floral notes.
  • Vanilla and almond extract: The secret whispers. Just enough to make you go “ooh” but not so much that they shout over the spices.

Elven Lembas Bread

How To Make This lembas bread from Lord of the Rings

Okay, friend, gather your ingredients and turn on a chill playlist (or Howard Shore’s score, obviously). Let’s make your kitchen smell like an elf bakery.

  • Preheat and prep the pan: Set your oven to 425°F (or 220°C) and line a cookie sheet with parchment. No sticking, no chaos.

  • Mix the dry ingredients: In a large bowl, sift together the flour, baking powder, salt, cinnamon, and nutmeg. If you don’t have a sifter, just whisk thoroughly. Lazy sifting is still sifting.

  • Add sugar and butter: Toss in that room-temp butter and brown sugar. Beat on low to medium with your mixer until crumbly and soft. You’re looking for something that kind of reminds you of streusel topping.

  • Pour in the magic: Add cream, honey, vanilla, and almond extract. But use a fork to mix here—trust me. It’ll feel rustic, and you’ll feel like someone who bakes by candlelight. The dough should come together thickly but not be sticky.

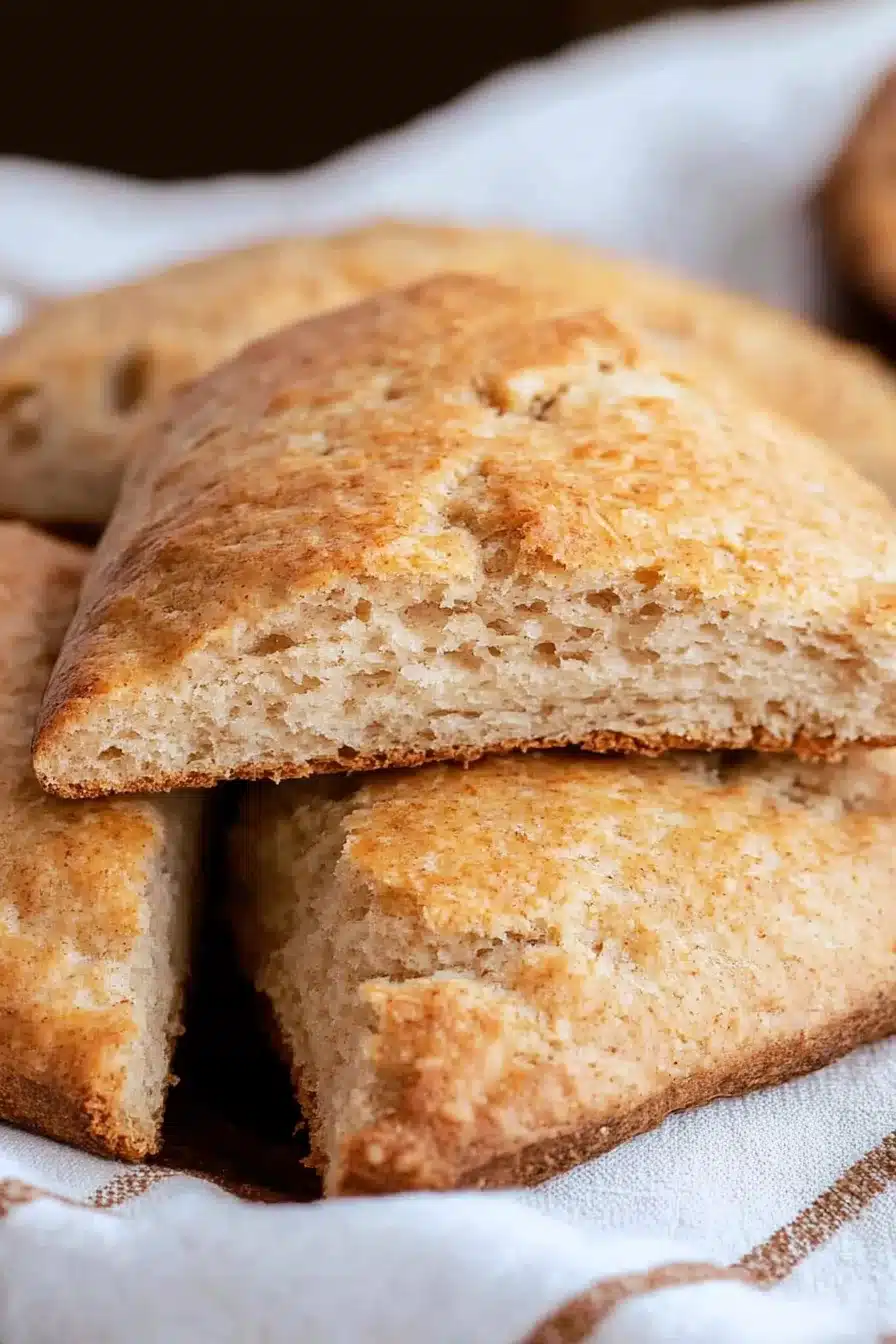
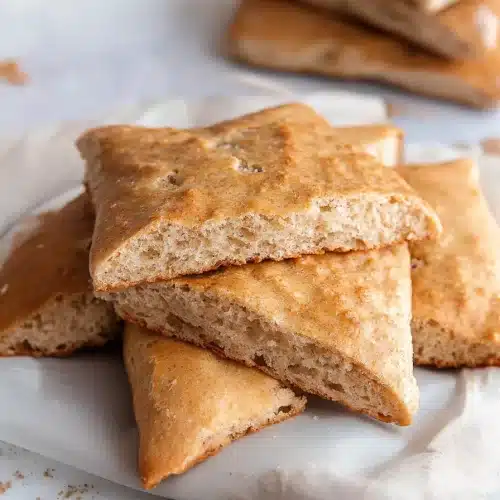
  • Roll and cut: Lightly flour a surface and roll the dough to about ½ inch thick. Cut into 3-inch squares (or whatever size feels “elven” to you). Then use a knife to etch an “X” into each square—deep enough to show, but not all the way through.

  • Bake until golden: Pop them in for 12 minutes. You’ll know they’re done when the edges are golden and the tops are just lightly firmed up. Let them cool completely unless you want to burn your mouth in pursuit of elvish glory. (Tempting, I know.)

Elven Lembas Bread

Storage Options

So you’ve resisted the urge to inhale all the lembas in one sitting—look at you! For leftovers, store them in an airtight container at room temp. They’ll stay tender and lovely for about 4–5 days. They don’t go stale fast, which is ideal if you’re slipping one into a lunchbox or just hoarding them like a dragon.

Want them to last longer? Freeze the baked lembas squares (once cooled) in a zip-top bag with parchment between layers. Just thaw on the counter or give them a quick zap in the microwave for 10–15 seconds. Crumbly, warm perfection.

If you somehow baked ahead (or are prepping for some serious elf cosplay events), you can freeze the raw dough squares too. Flash freeze on a tray, transfer to bags, and bake straight from frozen—just add a minute or two.

Variations and Substitutions

You can absolutely make lembas your own—elves probably had regional differences anyway.

  • Swap honey with maple syrup: It shifts the sweetness toward a deeper, earthier direction. Kinda cozy-cabin-in-the-woods vibe.
  • Add citrus zest: A little grated orange peel brings brightness that cuts through the richness in such a good way.
  • Make it gluten-free: A good 1:1 gluten-free flour blend (preferably something with xanthan gum) can step in pretty flawlessly.
  • Use coconut cream instead of dairy: If you’re dairy-free, this works shockingly well, plus it adds the tiniest hint of coconut.
  • Sneak in chopped nuts: Pecans or walnuts bring great crunch. Rough chop them and fold a handful into the final dough.

Elven Lembas Bread

What to Serve with lembas bread from Lord of the Rings

Now, what walks alongside lembas? Lots of things, depending on your mood.

  • A warm mug of tea—especially something spiced or herbal—makes this feel like you’re curled on a velvet cushion with your third book of the afternoon. It’s snack bliss.

  • Try it with fresh fruit. A little dish of berries or sliced pears is such a lovely contrast to the bread’s rich, spiced flavors. It’s like elevenses with a bit of flair.

  • For something more indulgent, dip the corners in melted dark chocolate. Not canon, but very delicious. I won’t tell the elves.

  • You could even tuck a square next to a light lunch. Something like this pan-seared cod with rainbow chard works beautifully—the subtle sweetness of the bread plays well with savory mains.

  • And if you’ve got a sweet tooth in the room, pair it with something chilled and creamy like these banana ice cream sandwiches. Just… wow.

Elven Lembas Bread

Frequently Asked Questions

Is lembas bread supposed to be sweet or savory?

It leans lightly sweet, but not in a sugary dessert way. The honey, brown sugar, and spices give it a gentle sweetness, balanced by the buttery richness. It’s definitely not savory like dinner rolls, but it’s not quite a cookie either—more of a magical hybrid, just like elves themselves.

Can I make lembas bread ahead of time for a party or picnic?

Absolutely. It stores well, packs easily, and holds its shape, so it’s perfect for make-ahead. I recommend baking it a day or two in advance, then storing it in an airtight container. Don’t forget the X on top—it’s the signature look and oddly makes them easier to break apart when sharing.

Does it matter what kind of honey I use?

Not too much! A basic clover or wildflower honey works great. If you want to experiment, an orange blossom honey adds a slight floral note. Just skip anything too bold, like buckwheat, unless you want its funky punch riding shotgun through every bite.

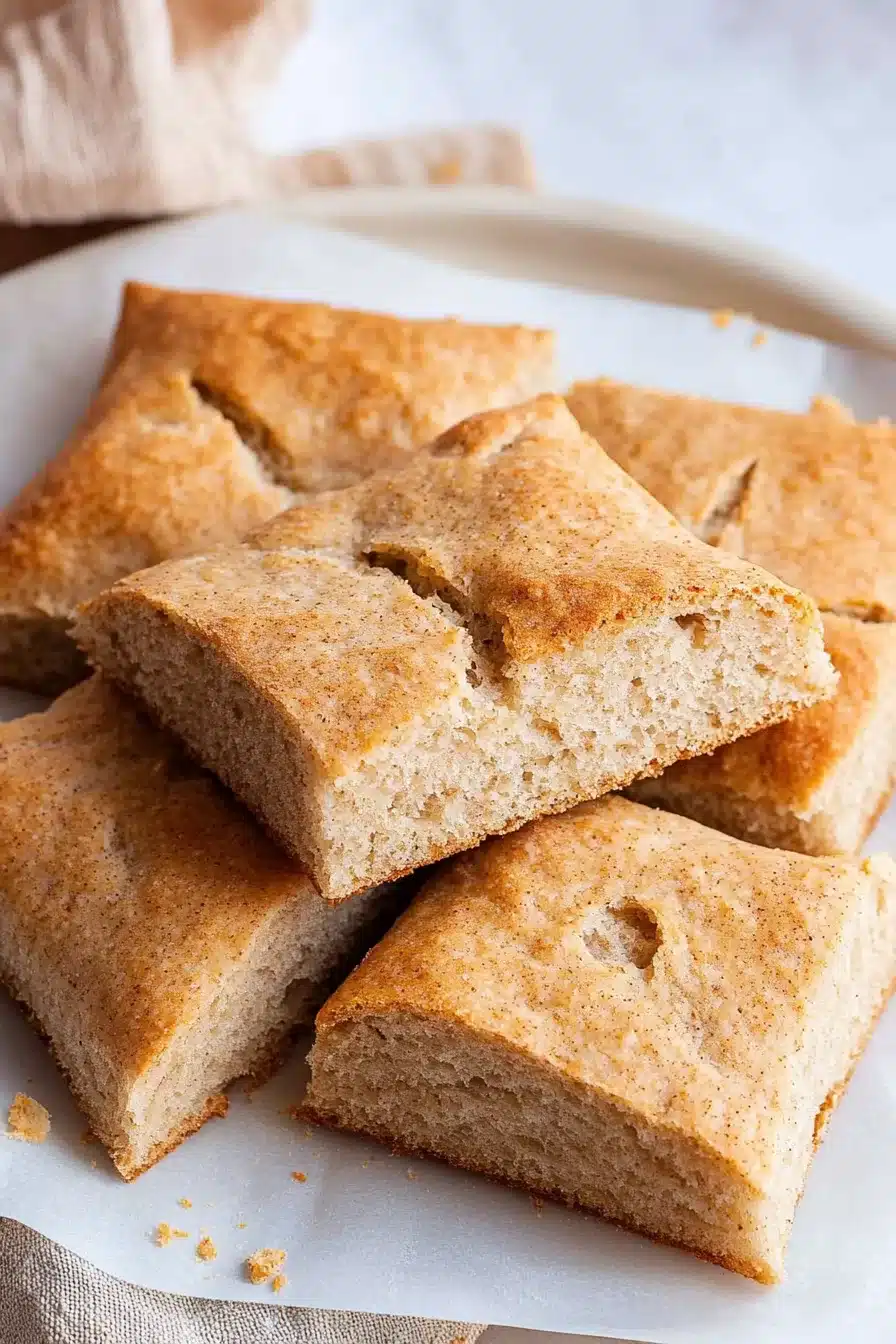
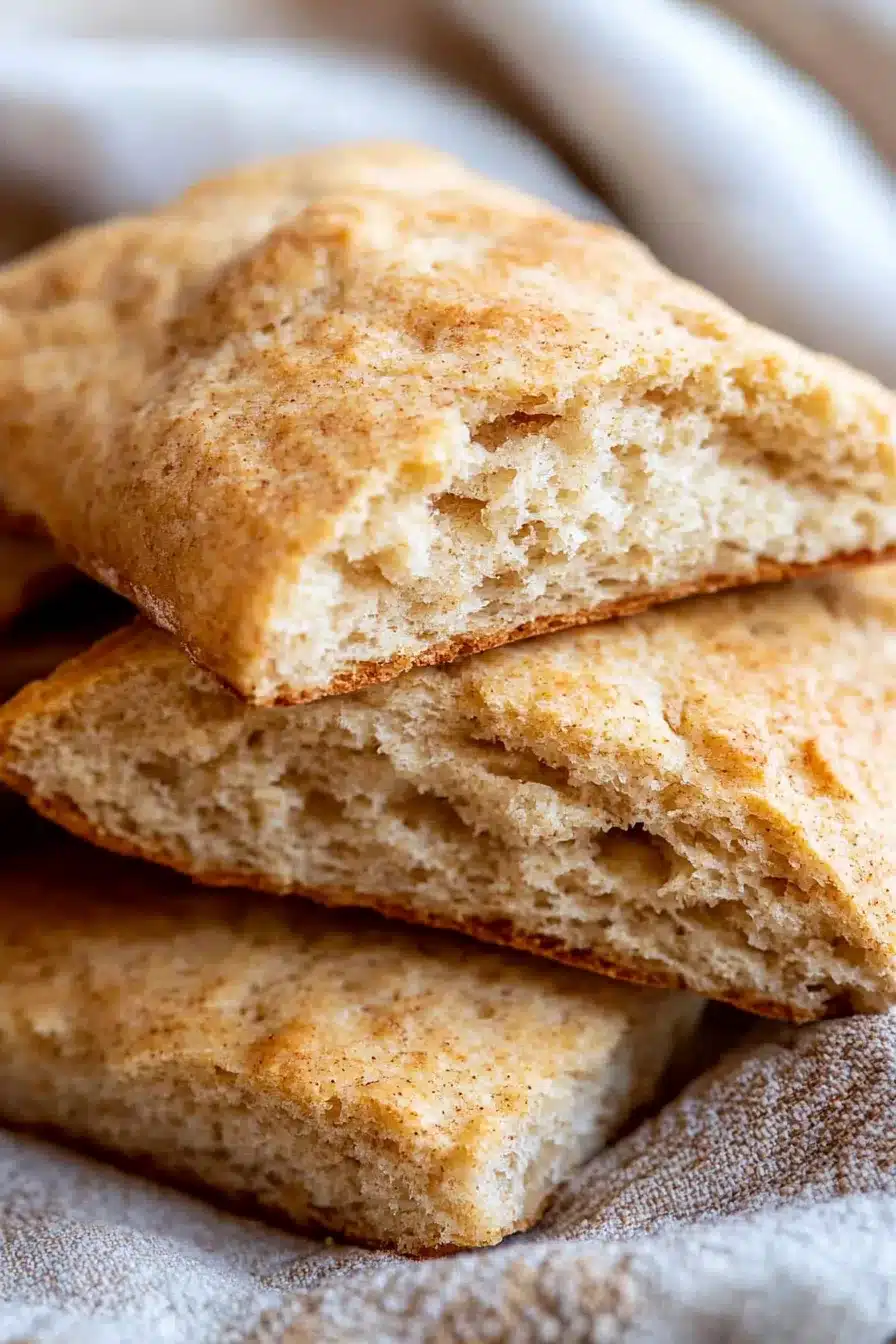
What should the texture of lembas bread be like?

Imagine a cross between shortbread and a soft biscuit. It should hold its shape when broken in half (no crumbles flying everywhere), with a tender interior. You’re aiming for slightly crumbly but not dry. Think soft snap, if that makes any kind of sense.

Elven Lembas Bread

Lembas Bread from Lord of the Rings

Prep Time 15 minutes
Cook Time 12 minutes
Total Time 27 minutes
Delicate, lightly spiced, and kissed with hints of honey and vanilla, this buttery lembas bread tastes like a warm hug from an elf—if the elf also owned a charming little bakery in Lothlórien. Inspired by Tolkien's iconic bread, it's a cross between a tender shortbread and a biscuit, with cinnamon and nutmeg aromas that fill your kitchen with Rivendell magic. Perfect for tea time, hiking snacks, or cozy at-home adventures!
12 squares

Ingredients

Dry Ingredients

  • 2 cups (250 g) all-purpose flour
  • 1 tsp (4 g) baking powder
  • 1/2 tsp (2 g) baking soda
  • 1/2 tsp (3 g) salt
  • 1 tsp (2.5 g) ground cinnamon
  • 1/4 tsp (1 g) ground nutmeg

Wet Ingredients

  • 1/2 cup (115 g) unsalted butter room temperature
  • 1/2 cup (100 g) light brown sugar packed
  • 1/3 cup (80 ml) heavy whipping cream
  • 2 tbsp (30 ml) honey
  • 1 tsp (5 ml) vanilla extract
  • 1/2 tsp (2.5 ml) almond extract

Equipment

  • Large mixing bowl
  • Hand mixer or stand mixer
  • Baking sheet
  • Parchment paper
  • Rolling Pin
  • Sharp knife

Instructions
 

  1. Preheat your oven to 425°F (220°C) and line a baking sheet with parchment paper.
  2. In a large bowl, sift (or whisk) together the flour, baking powder, baking soda, salt, cinnamon, and nutmeg.
  3. Add the brown sugar and pieces of room temperature butter to the dry mix. Using a mixer on low-to-medium speed, blend until the mixture looks crumbly and soft like streusel.
  4. Add heavy cream, honey, vanilla extract, and almond extract. Switch to a fork and gently mix until the dough comes together; it should be thick but not sticky.
  5. On a lightly floured surface, roll dough to about ½ inch (1.25 cm) thick. Cut into 3-inch squares. Use a sharp knife to lightly score an “X” on top of each square, without cutting all the way through.
  6. Place squares on the prepared baking sheet, leaving space between each. Bake for 12 minutes, or until edges are golden and tops are set. Cool completely before enjoying your elven snack!

Notes

Storage: Store cooled lembas bread in an airtight container for up to 4–5 days. Freeze baked or unbaked squares for longer storage. Thaw at room temp or reheat briefly in the microwave.
Variations: Add orange zest for brightness, swap honey with maple syrup for deeper sweetness, use coconut cream for dairy-free, or fold in chopped nuts for crunch.
Serving: Perfect with tea, coffee, milk, fruit, or as an adventurous snack!

Nutrition

Calories: 195kcal | Carbohydrates: 27g | Protein: 2g | Fat: 9g | Saturated Fat: 6g | Cholesterol: 26mg | Sodium: 126mg | Potassium: 45mg | Fiber: 1g | Sugar: 8g | Vitamin A: 320IU | Calcium: 35mg | Iron: 0.8mg

Sweet, melty, and golden at the edges, these Nestle Toll House chocolate chip cookies deliver cozy vanilla aromas, buttery crunch, and pockets of semi-sweet chips.

Buttery dough, rich brown sugar, gooey chocolate, and a whisper of vanilla—this is grandma-level baking with no need for a time machine or a doily.

You know those cookies that make your kitchen smell like a warm hug? That’s what we’ve got here. The classic Nestle Toll House chocolate chip cookies are all about unfussy goodness: crisp edges, soft centers, a little chew, and a whole lot of chocolate. Whether you want to enjoy one warm and gooey right off the rack, or sneak a few after dinner (or breakfast, I’m not judging), they’re the kind of cookie you sort of always want around.

Oh, and they freeze beautifully. In dough form or baked. Dangerous knowledge, right?

Table of Contents

Nestle Toll House Chocolate Chip Cookies

Why You’ll Love this Nestle Toll House Chocolate Chip Cookies

There’s nothing flashy or trendy here—just a solid cookie that never lets you down.

  • Perfect texture trifecta: Buttery soft in the middle, with golden crisp edges and a gentle chew throughout.
  • Chocolate in every bite: Two entire cups of semi-sweet chips means no sad, chip-less bites.
  • Customizable fun: Want nuts? Great. Hate nuts? Leave ‘em out. No one will revolt.
  • Ready in under 30 minutes: From mixing bowl to mouth, you won’t be waiting long.
  • Reliable and nostalgic: This is the original for a reason—it just works, and it tastes like childhood (without the weird haircut).
  • Freezer-friendly dough: Bake a few today, freeze the rest, and have fresh cookies on demand.

Nestle Toll House Chocolate Chip Cookies

Ingredient Notes

No oddball ingredients here, just the standard cookie MVPs doing what they do best.

  • All-purpose flour: Gives the dough enough structure without making it heavy. Keep it leveled and don’t pack it in too tight.
  • Baking soda: This helps the cookies rise and spread a bit. Don’t skip or substitute with baking powder unless you’re okay with mystery results.
  • Salt: Not just for balance—it actually brings out the flavor of the chocolate. A little goes a long way.
  • Butter: Go for the real stuff. Room temperature butter is key here, so it creams nicely with the sugars.
  • Granulated sugar: Adds sweetness and a little crispness to the edges.
  • Brown sugar: Brings that warm, caramelly chew that white sugar just can’t replicate. Dark or light both work!
  • Vanilla extract: Rounds everything out with a rich aroma. Feel free to double it for a little extra depth.
  • Eggs: They pull everything together and give you that perfect cookie body. Use large eggs, and don’t forget to add them one at a time.
  • Semi-sweet chocolate chips: It’s not a Toll House cookie without these. You can swap in chunks or mix it up with other varieties, but this is the baseline.
  • Chopped nuts (optional): Totally up to you. Walnuts or pecans are classic, but if you’re nut-averse, leave them out with zero regrets.

Nestle Toll House Chocolate Chip Cookies

How To Make This Nestle Toll House Chocolate Chip Cookies

Okay, tie on your apron, preheat your oven, and let’s do this together. You don’t need to be a pro—just a person with a bowl and a sweet tooth.

  • Preheat the oven to 375°F: This gives your oven time to get nice and hot, so the cookies start baking right away and get those golden edges we love.

  • Mix the dry stuff first: In a small bowl, sift together the flour, baking soda, and salt. This wakes up the baking soda and evenly distributes the salt so you don’t end up with a single salty monster cookie.

  • Cream the butter, sugars, and vanilla: In a big mixing bowl, beat the softened butter with both sugars and the vanilla. It should look fluffy and creamy, kind of like cookie dough frosting (yes, I’ve tasted it at this stage and no, I regret nothing).

  • Add the eggs one by one: Crack in one egg, beat it in, then go for the second. This gives the dough a smoother texture. If you toss them both in at once, it can look a little… gloopy.

  • Add the dry mix to the wet: Slowly stir in the flour mixture. Don’t overmix here—just blend until the flour mostly disappears. Overmixing = tough cookies, and that’s a big nope.

  • Fold in the chocolate chips (and nuts if using): Use a spatula or wooden spoon and fold them in gently. Try not to snack on too much of the dough here. Try.

  • Scoop and space it out: Drop mounds of dough onto an ungreased cookie sheet. Leave about 2 inches between them. They’ll spread, and we’re not aiming for one giant sheet cookie… tempting as that may be.

  • Bake 9–11 minutes: Watch for golden edges and puffy centers that still look a smidge soft. They’ll finish cooking on the sheet.

  • Let ‘em rest: Give them 2 minutes on the pan to set, then move them to a wire rack to cool completely—or sneak one warm, because obviously.

Nestle Toll House Chocolate Chip Cookies

Storage Options

Once the cookies have cooled (if they last that long), you’ve got some solid options.

On the counter, store them in an airtight container lined with parchment paper. You can layer them with parchment to keep them from sticking together. They’ll stay chewy-soft and yummy for about 4–5 days, assuming the cookie gremlins don’t get to them first.

Want to freeze the dough? Scoop it into balls, set them on a tray to freeze for an hour, then transfer to a zip-top bag. That way, you can bake off one or two cookies whenever the craving hits. Just add an extra minute or two to the bake time if you’re baking from frozen.

Already baked them? Cool completely, then freeze in a single layer before also stashing in a freezer bag. Reheat in the oven for 3–5 minutes at 300°F, or just let them thaw at room temp. Microwave works too, especially if you’re after that slightly melty center vibe.

Variations and Substitutions

There’s fun to be had here without messing with the core vibe. Toll House gives you the blueprint, but you can doodle in the margins.

  • White chocolate or dark chocolate chips: Mix things up by swapping one cup of the semi-sweet chips with something fancier (or just what’s in your pantry).
  • Pecans, macadamias, or pistachios: Walnuts are traditional, but feel free to get a little nutty with other add-ins.
  • Add a pinch of cinnamon or espresso powder: These sneak in a little complexity without taking over. Just a pinch though—your taste buds, not a spice rack takeover.
  • Chopped candy bars: Leftover Halloween candy? Chop it up and throw it in. Not technically sanctioned by Nestle, but we’re living our best kitchen lives here.
  • No eggs? Try using a flax egg or egg replacer; just be prepared for slightly different texture. Still tasty, just unique.

Nestle Toll House Chocolate Chip Cookies

What to Serve with Nestle Toll House Chocolate Chip Cookies

Warm cookies are a whole experience, and the right pairing makes them feel like a full event (even if it’s just Thursday).

  • A big mug of cold milk, obviously. Whether you dunk or sip is your business, but the combo just works. For a twist, try almond or oat milk—they go great with the sweetness.

  • Chilly desserts work surprisingly well with a warm cookie. If you’re in the mood for a dessert duo, pop one on top of this banana icebox cake and dive in with a spoon.

  • Want to make it feel fancy-ish? Serve a couple cookies with a few slices of sharp cheese and dried fruit. Sweet and salty together? Always yes.

  • Totally not required, but a drizzle of warm ganache or salted caramel never hurts. Especially for company… or, let’s be real, just you on a Saturday night.

  • Or hey, get cozy with an afternoon pick-me-up and a cookie alongside a homemade soup like this Greek lemon chicken soup. Unexpected? Maybe. But delightful.

Nestle Toll House Chocolate Chip Cookies

Frequently Asked Questions

Can I use salted butter instead of unsalted?

Yes, you totally can! Just reduce the salt in the dry ingredients by about half to balance things out. Salted butter will still cream beautifully with the sugar, and the flavor will be slightly more savory, which some people actually love in a chocolate chip cookie.

What if I don’t have a mixer?

No problem—just use a sturdy wooden spoon or spatula and some elbow grease. Creaming the butter and sugar by hand takes a little more time (and possibly a bicep rep or two), but it definitely works. Soften the butter well for easier mixing!

Can I make the dough ahead of time?

Absolutely. The dough keeps great in the fridge for up to 3 days. Just keep it tightly wrapped or sealed in an airtight container. You can also pre-scoop the dough into balls and chill them like that, then bake as needed. Honestly, some folks say the cookies taste even better after a day or two chilling.

Why did my cookies turn out flat or too puffy?

That’s usually a butter or flour situation. Too-warm butter can make cookies spread too much, while too much flour keeps them from spreading at all. Make sure your butter is room temp (not melty), and spoon and level your flour instead of scooping straight from the bag.

Nestle Toll House Chocolate Chip Cookies

Nestle Toll House Chocolate Chip Cookies

Prep Time 15 minutes
Cook Time 10 minutes
Total Time 25 minutes
Sweet, melty, and golden at the edges, these Nestle Toll House chocolate chip cookies deliver cozy vanilla aromas, buttery crunch, and pockets of semi-sweet chips. You know those cookies that make your kitchen smell like a warm hug? That’s what we’ve got here—crisp edges, soft centers, a little chew, and a whole lot of chocolate.
60 cookies

Ingredients

Dry Ingredients

  • 2 1/4 cups (280 g) all-purpose flour leveled, not packed
  • 1 tsp (5 ml) baking soda
  • 1 tsp (5 ml) salt

Wet Ingredients & Mix-ins

  • 1 cup (226 g) unsalted butter softened (2 sticks)
  • 3/4 cup (150 g) granulated sugar
  • 3/4 cup (165 g) packed brown sugar light or dark
  • 1 tsp (5 ml) vanilla extract
  • 2 large eggs room temperature
  • 2 cups (340 g) semi-sweet chocolate chips
  • 1 cup (100 g) chopped nuts (optional) walnuts or pecans

Equipment

  • Baking sheet
  • Mixing bowls
  • Electric Mixer or Spoon
  • Wire rack

Instructions
 

  1. Preheat oven to 375°F (190°C). Set aside ungreased baking sheets.
  2. In a medium bowl, whisk together the flour, baking soda, and salt until well combined.
  3. In a large bowl, beat together the softened butter, granulated sugar, brown sugar, and vanilla extract until creamy and fluffy.
  4. Add eggs one at a time, beating well after each addition.
  5. Gradually mix in the flour mixture until just combined. Do not overmix.
  6. Fold in the semi-sweet chocolate chips and nuts (if using) with a spatula.
  7. Drop rounded tablespoons of dough, spaced about 2 inches apart, onto ungreased baking sheets.
  8. Bake for 9–11 minutes, or until golden brown at the edges but still soft in the center.
  9. Cool on baking sheet for 2 minutes, then transfer cookies to wire rack to cool completely (or enjoy warm!).

Notes

Cookies keep 4–5 days in an airtight container. Freeze unbaked dough balls or baked cookies in zip-top bags for cookies on demand—just add a minute or two to the baking time if baking from frozen. Swap nuts, chocolates, or even add-ins like a pinch of cinnamon or espresso powder for fun variations!

Nutrition

Calories: 110kcal | Carbohydrates: 15g | Protein: 1g | Fat: 5g | Saturated Fat: 3g | Cholesterol: 10mg | Sodium: 55mg | Potassium: 23mg | Sugar: 9g | Vitamin A: 35IU | Calcium: 6mg | Iron: 0.4mg

Golden broth, tender chicken, a whiff of lemon that hits the back of your throat just before the steam fogs your glasses—this greek lemon chicken soup is like a warm hug with a citrusy high-five. It’s made with cozy stuff—like rice, onion, celery, carrots, juicy shredded chicken, fresh lemon juice, and egg yolks for creaminess—but still feels light enough that you won’t regret ladling out seconds.

Let’s talk Greek lemon chicken soup (a.k.a. avgolemono in the know). It’s tangy, creamy, brothy—but not too rich. You’re getting that big warm bowl feeling without falling into a food coma. Honestly, it’s one of those soups that works any season. Cold outside? It comforts. Hot outside? Somehow still refreshing, thanks to the lemon. Plus, it’s incredibly satisfying in an “I made something real” way. You’ll taste the brightness of fresh citrus, the richness of the yolks, and the soft bite of rice all in one spoonful.

Table of Contents

Creamy Greek Lemon Chicken Soup

Why You’ll Love this Creamy Greek Lemon Chicken Soup

Let’s keep it real—this soup tastes like you really tried, but it won’t leave you elbow-deep in dishes or stress. Think of it as the soup that lets you show off without breaking a sweat.

  • Ridiculously simple to make: You sauté, simmer, whisk a little, and swirl. That’s about the extent of your labors.
  • Bright and tangy flavor: That lemon cuts through with just the right amount of zing without overdoing it.
  • Soothing on sick days or Mondays: Whether your voice is gone or your will to cook is, this will fix it.
  • Creamy, but not heavy: Egg yolks give you that silky texture without a single drop of cream, which feels like magic.
  • Customizable base: Toss in herbs, swap the rice, or go wild with toppings—this soup doesn’t mind.

Creamy Greek Lemon Chicken Soup

Ingredient Notes

This isn’t one of those mile-long grocery list situations. The joy here is in just a few well-chosen ingredients backing each other up like a little flavor collective.

  • Olive oil: We use this as the base fat—it imparts a mellow, slightly fruity note to the sautéed veggies.
  • Onion, celery, and carrots: Together, this trio gives our broth depth and sweetness. Cut ’em nice and small so they soften quickly.
  • Garlic: A few cloves go a long way; just don’t let them brown or things get bitter.
  • Bay leaves: Woody and aromatic, these sit quietly while the soup simmers, then politely exit stage left before serving.
  • Low-sodium chicken broth: Start with low-sodium so you can control the saltiness. Homemade is great, but store-bought works like a charm.
  • Uncooked rice (or orzo): I use rice here for its heartiness, but orzo would slide into this role like it was made for it. If you have a rice shortage (we’ve all been there), check out this quick guide on a substitute for barley that might just work.
  • Cooked chicken: Leftovers? Rotisserie? Whatever’s on hand. Shredded is ideal for maximum spoon compatibility.
  • Egg yolks and lemon juice: This dynamic duo makes the signature avgolemono finish. Light, luscious, and just a little bit fancy.
  • Salt and black pepper: Season with heart. Start modest and adjust at the end—lemon styling shifts the balance.
  • Fresh dill or parsley: Dill lifts everything, but parsley adds brightness too. Go with preferences or what you didn’t forget at the store.

Creamy Greek Lemon Chicken Soup

How To Make This Creamy Greek Lemon Chicken Soup

Once everything’s chopped and prepped, the whole process feels kinda meditative. There’s stirring, whisking, ladling—very tactile and very satisfying.

  • Sauté your base flavors: Warm olive oil over medium heat, then toss in onion, celery, and carrots. Stir every couple of minutes, until they get soft and fragrant. You’re looking for that mellow, buttery sauté smell, about 8 to 10 minutes in.

  • Deglaze with garlic and broth: Add minced garlic and bay leaves. Stir for a half-minute or so (just enough to smell it bloom), then pour in the chicken broth slowly. Bring everything to a cheerful boil.

  • Add the rice and simmer: Stir in your rinsed rice. Keep the heat gentle, and stir here and there so nothing sticks. This stage takes 20 to 30 minutes, depending on your rice. You’ll want it tender but not mushy.

  • Mix in the chicken: Once the rice is right and the broth is happy, stir in your shredded chicken. Let it get warm and cozy, just a few more minutes.

  • Temper the egg and lemon mix: Whisk your egg yolks until they’re pale and frothy (like a tiny arm workout). Then, pour in your lemon juice as you whisk. Now, here comes the careful part—tempering.

  • Temper like a champ: Slowly ladle about 2 cups of hot soup into the egg-lemon mix in a thin stream, whisking constantly. This keeps the eggs creamy and not scrambled. Trust the whisk.

  • Stir everything together and finish: Turn off the heat and gradually pour the tempered mix back into the pot as you stir gently. The soup will thicken just slightly into this silky, luxurious lemony goodness.

  • Taste and tweak: Remove the bay leaves. Add salt and pepper until it makes you happy. Ladle into bowls, add your herb of choice on top, and bask in your soup-making glory.

Creamy Greek Lemon Chicken Soup

Storage Options

Alright, let’s talk leftover logistics—because this soup makes enough to save, and you’ll absolutely want a repeat performance.

In the fridge, your greek lemon chicken soup will keep for about 4 days. Just pop it into an airtight container once it cools to room temp (hot soup in the fridge is a no-no). The rice keeps soaking up broth as it sits, though, so don’t be surprised if the texture shifts a bit. Nothing wrong with that—think of it as soup growing into a savory risotto cousin.

Reheating? Go gentle. Warm it over medium-low heat on the stove or microwave it in a covered bowl in short bursts, stirring in between. If it thickened too much, just add a splash of broth or water to loosen it up again.

Freezing is… ehhhh, complicated. The egg-lemon mix can get weird when thawed. If you’re planning ahead to freeze portions, I’d recommend freezing the soup before you add the egg-lemon mixture. Then you can thaw it, bring it up to heat, and stir in a fresh egg-lemon swirl moment when ready.

Variations and Substitutions

This soup’s got range. Once you grasp the technique, you can riff a hundred ways without offending any grandmothers (probably).

  • Orzo instead of rice: Makes the whole thing feel silkier and a little more elegant. Just watch the cook time—it softens faster than rice.

  • Cauliflower rice (hey, why not?): Lower-carb, slightly less firm, but still soaking up that good brothiness. Add it toward the end so it doesn’t go soggy.

  • Add spinach or kale: Stir in a handful during the last 5 minutes. They wilt fast and sneak in some greenery.

  • Use rotisserie chicken: Zero shame. Pull it apart while the rice simmers and you’re basically halfway done already.

  • Amp up the lemon: Add lemon zest to the egg-lemon mixture if you’re a citrus maximalist. It’s bright, fresh, and kind of addictive.

Creamy Greek Lemon Chicken Soup

What to Serve with Creamy Greek Lemon Chicken Soup

Honestly, this could totally stand alone, but if you’re in the mood to build it out into a complete meal (perhaps for a cozy dinner or a dinner party where the vibe is “effortless but secretly curated”), here are a few ideas:

  • Crisp green salad with a briny vinaigrette: Something peppery like arugula with olives or capers would balance the creaminess of the soup perfectly. A little feta crumbled on top doesn’t hurt, either.

  • Hunk of toasted sourdough: Dip it until it sags and soaks and almost disintegrates in the lemony broth. Bonus points if it has a buttery crust.

  • Roasted seasonal vegetables: These add earthiness and texture to the mix. You can prep them on a second rack while the soup simmers. We love some herby roasted carrots or crispy Brussels sprouts.

  • For a seafood-loving crowd: This pan seared salmon with pomegranate reduction makes a dazzling plated partner. Fancy-but-not-fussy.

  • Savory quickbread or muffin: Something like these savory bacon basil cornbread muffins would be unexpected but fabulous alongside.

Creamy Greek Lemon Chicken Soup

Frequently Asked Questions

Can I use whole eggs instead of just the yolks?

Technically yes, but using the whole egg will change the texture a bit. Yolks give you that rich, velvety finish. Whole eggs can make the soup a little frothy and might curdle more easily unless you temper very, very slowly. If eggs are in short supply, it’s worth trying with one whole egg plus a yolk to hedge your bets.

How do you keep the eggs from scrambling in the soup?

The key is tempering—it’s basically a tiny trust exercise with your eggs. Slowly add hot broth into the egg-lemon mixture while whisking constantly. This warms up the eggs gently so they don’t freak out when they hit the soup. Then you stir the warm mixture back into the pot gradually. Low and slow wins here.

Can I make this vegetarian?

You could! Swap in a good veggie broth, amp up the aromatics, and skip the chicken. For protein, consider adding chickpeas or white beans (different vibe but honestly lovely). Still whisk those yolks and lemon in—vegetarians deserve creaminess too.

Does this soup taste super lemony?

It’s pleasantly lemony, not punch-you-in-the-face citrusy. The lemon is balanced by the egg yolks and broth, so it has a bright finish without overwhelming the dish. If you’re unsure, start with less lemon juice—you can always add more after tasting.

Creamy Greek Lemon Chicken Soup

Creamy Greek Lemon Chicken Soup (Avgolemono)

Prep Time 15 minutes
Cook Time 35 minutes
Total Time 50 minutes
Golden broth, shredded chicken, rice, and a whisper of lemon—the classic Greek avgolemono soup is bright, comforting, and creamy without any cream. With egg yolks and lemon for richness and tang, it's an easy, cozy recipe for any season.
6 bowls

Ingredients

Soup Base

  • 2 tbsp (30 ml) olive oil
  • 1 yellow onion finely diced
  • 2 stalks (2) celery finely diced
  • 2 carrots peeled and finely diced
  • 3 cloves garlic minced
  • 2 bay leaves
  • 8 cups (2 liters) low-sodium chicken broth
  • 2/3 cup (135 g) uncooked white rice or orzo
  • 2 cups (260 g) cooked chicken shredded (rotisserie or leftovers work great)

Avgolemono (Egg-Lemon Mixture)

  • 4 egg yolks large
  • 1/2 cup (120 ml) fresh lemon juice from 2–3 lemons, plus more to taste

To Finish

  • salt and freshly ground black pepper to taste
  • fresh dill or parsley chopped, for garnish

Equipment

  • Large Soup Pot
  • Whisk
  • Ladle
  • Cutting board
  • Knife

Instructions
 

  1. Heat olive oil in a large soup pot over medium heat. Add diced onion, celery, and carrots. Sauté for 8–10 minutes, stirring occasionally, until vegetables are soft and fragrant.
  2. Add minced garlic and bay leaves to the pot. Sauté for 30 seconds until fragrant (do not let garlic brown).
  3. Pour in the chicken broth. Bring to a gentle boil.
  4. Stir in the uncooked rice or orzo. Reduce heat to a simmer and cook, stirring occasionally, until rice is tender but not mushy, about 20–30 minutes.
  5. Add shredded cooked chicken and simmer just until warmed through, about 3–5 minutes.
  6. While the soup simmers, whisk the egg yolks with lemon juice in a medium bowl until pale and frothy.
  7. Slowly ladle about 2 cups of hot broth from the soup into the egg-lemon mixture in a thin stream, whisking constantly to temper the eggs.
  8. Turn off the heat under the soup. Gradually pour the tempered egg-lemon mixture back into the pot, stirring gently.
  9. Remove and discard bay leaves. Taste and season with salt and black pepper as desired. Ladle into bowls, garnish with chopped dill or parsley, and serve.

Notes

If you plan to freeze the soup, do so before adding the egg-lemon mixture. When ready to serve, thaw, reheat gently, and add the avgolemono fresh. Leftovers will thicken as the rice absorbs more broth—add extra stock or water to loosen when reheating. Try orzo instead of rice, stir in spinach or kale, or boost the lemon with some zest for a twist!

Nutrition

Calories: 320kcal | Carbohydrates: 36g | Protein: 22g | Fat: 10g | Saturated Fat: 2.5g | Cholesterol: 120mg | Sodium: 970mg | Potassium: 490mg | Fiber: 2g | Sugar: 4g | Vitamin A: 3100IU | Vitamin C: 11mg | Calcium: 50mg | Iron: 2.2mg

Sweet, creamy, and full of cozy nostalgia, this banana icebox cake layers banana cream pudding, ripe bananas, graham crackers, and fluffy whipped topping into one chilled slab of joy. It’s got that no-fuss, back-of-the-fridge magic to it—and smells like childhood memories and dessert potlucks collided in the best way.

This is the kind of dessert that sits quietly in the fridge, minding its business, and then BAM—out it comes looking deceptively mellow, but tasting like an entire banana cream pie got hugged by a cake. The graham crackers get soft (like sponge cake without the baking), the pudding thickens just right, and the chilled bananas become soulful little pockets of sweetness. Personally, I love sneaking a slice for breakfast. Nobody said anything about banana pudding rules, right?

Table of Contents

Banana Pudding Icebox Cake

Why You’ll Love this Banana Icebox Cake

No drama here—just a solid fridge-friendly dessert that welcomes layering, resting, and a touch of caramel drizzle if you’re feeling wild. It’s the chill cousin of actual baking recipes.

  • Ridiculously simple to make: You whisk, layer, and refrigerate—no oven, no sweat, and certainly no flaky crust anxiety.
  • Surprisingly elegant if you want it to be: A drizzle of caramel and some smug crushed graham crackers make it look almost fancy.
  • Perfect for ripening bananas: They’ll shine here without the drama of banana bread.
  • Feeds a party, or just your fridge-marauding self: Keeps well all week if you don’t inhale it in one go.
  • Soft, creamy, dreamy texture: Think banana pudding meets cake, without any forks bouncing off crusts.
  • Flexible and forgiving: You can mess with it a little (more on that below) and it’ll still taste like a hug.

Banana Pudding Icebox Cake

Ingredient Notes

You won’t need much to make this banana icebox cake, and honestly, most of it’s probably waving at you from your pantry or fridge already.

  • Banana cream instant pudding mix: This is the backbone of the whole vibe. Don’t skip the banana flavor—vanilla’s nice and all, but not the point here.
  • Cold milk: Essential for activating the pudding; your pudding dreams won’t set with warm milk, promise.
  • Whipped topping (like Cool Whip): Adds that easy, fluffy fold-in magic. Thawed is key—straight-from-freezer turns this into a scooping disaster.
  • Graham crackers: They’ll soften like cake after a good chill, especially if you’re layering with pudding like it’s your job.
  • Ripe bananas: Go for the sweet spot—golden yellow, maybe with little freckles. Too green and they fight you, too mushy and they melt into the pudding too soon.
  • Optional garnishes (crushed crackers, banana slices, caramel drizzle): Highly recommended flute-solo of crunchy/sweet/fancy to finish it off with flair.

Banana Pudding Icebox Cake

How To Make This Banana Icebox Cake

You’re really just doing a pudding dance with some graham crackers here. No oven mitts needed, unless they’re just for fashion.

  • Whisk the pudding mix with cold milk: In a big mixing bowl, whisk the pudding packets with the chilled milk until smooth, about 2 minutes. Then let it sit for 5 minutes so it thickens up a little. It should look glossy and spoon-hugging—no puddle vibes.

  • Fold in one tub of whipped topping: Grab your spatula and gently stir in one container of whipped topping. Don’t go full mixer here, just fold it together so it’s light but still thick enough to stay put in layers.

  • Start with a base layer in the pan: Spread a little bit of pudding mixture across the bottom of a 9×13 dish. This is just to prevent cracker slippage. Think of it as dessert glue.

  • Begin layering like a dessert architect: First, set down graham crackers to form a full layer, snapping them as needed to fit. Then add a layer of banana slices (don’t skimp). Follow that with about a third of the pudding mixture, smoothing it evenly.

  • Repeat, repeat, and finish: Do the whole graham-cracker-banana-pudding dance two more times. Then top with a final cracker layer.

  • Top it all with the second tub of whipped topping: This is your creamy, snow-white crown. Spread it gently over the last cracker layer until it’s smooth and majestic.

  • Chill to victory: Cover it up with plastic wrap, tuck it into the fridge, and let it sit for at least 4 hours. Overnight is best because those graham crackers need time to soften and become one with the pudding.

  • Garnish and serve: Right before serving, top with banana slices, some crushed graham crackers if you like crunch, and maybe—maybe—a golden drizzle of caramel.

Banana Pudding Icebox Cake

Storage Options

This banana icebox cake is honestly even better the day after it’s made. The graham crackers soften into a dreamy, cake-like texture, and everything has time to settle into harmony.

Pop any leftover squares into an airtight container and keep them in the fridge. They’ll stay good for 3 to 4 days—though the bananas might darken a little. Totally harmless, just oxidation doing its thing. If you want to keep the look clean, you can always garnish with fresh banana slices just before serving instead of layering them in.

Now, what about freezing? Technically yes, you can freeze it. Wrap tightly in plastic and foil, or portion into containers. The texture will shift slightly (whipped topping likes to go a little airy-icy in the freezer), but it does thaw nicely overnight in the fridge. I wouldn’t recommend microwaving it, though. This is not a hot dessert moment.

Variations and Substitutions

This cake loves a good remix, so if your kitchen’s short an item or you’re just feeling spicy (figuratively), here are some tasty deviations.

  • Vanilla pudding instead of banana cream: If you can’t find the banana flavor or just want a more subtle banana profile, vanilla works beautifully with fresh banana slices.

  • Fresh whipped cream instead of whipped topping: Want to go the real cream route? Beat heavy cream with a bit of powdered sugar and vanilla until soft peaks form. Dreamy.

  • Use Nilla Wafers instead of graham crackers: It’s more traditional to Southern banana pudding and gives an even sweeter, more delicate texture once softened.

  • Add peanut butter (trust me): A drizzle between layers or stirred into the pudding takes it in a glorious peanut butter pie direction. Plus, hello, banana + PB = forever love.

  • Chocolate graham crackers for contrast: Adds a whole new layer of decadence and turns it slightly “banana split” in vibe.

Banana Pudding Icebox Cake

What to Serve with Banana Icebox Cake

This chilled dessert pairs really well with snacks, meals, or even just a quiet moment.

  • A mug of dark roast coffee or a bitter iced espresso cuts through the creaminess and balances that sweet banana-milk thing surprisingly well. Ideal at brunch or mid-afternoon pondering.

  • If you’re serving this after dinner, something comforting like classic pot roast makes a cozy lead-in. Hearty and warm meets cool and creamy.

  • For a light, bright contrast, consider a fruity main like pan-seared salmon with pomegranate reduction. The acidity and freshness play nicely with the soft sweetness of the cake.

  • A scoop of vanilla bean or peanut butter ice cream beside the cake can be a wow moment. Especially if you went heavy on the caramel drizzle. No regrets.

  • Pair it with something frosty like a banana milkshake or an ice cream sandwich if you’re layering snacks on snacks. Why not?

Banana Pudding Icebox Cake

Frequently Asked Questions

Can I make banana icebox cake ahead of time?

Yes, and actually, it’s better that way! This dessert improves significantly with some chill time, ideally overnight. The graham crackers soften into that perfect cake-like consistency, and everything gets a little more cozy and cohesive. Just cover it well and let it do its magic in the fridge.

How ripe should the bananas be?

You want them ripe but not mushy. Bright yellow with some freckles is the sweet spot—soft, flavorful, and easy to slice. Avoid green ones (too firm and bland) or super brown ones (they’ll dissolve into the pudding and taste overly fermented).

Can I freeze leftovers?

You can, though the texture changes a bit. The whipped topping can get airy and slightly icy, but it still tastes great after thawing. Slice and wrap portions in plastic, then foil or a container, and thaw overnight in the fridge. It’s not ideal for a dinner party, but perfect for solo snacking later.

Could I use homemade pudding instead?

Absolutely, if you’re partial to stovetop pudding! Just make sure it’s fully cooled before layering. Keep it nice and thick or it’ll make the graham crackers too soggy. Homemade banana pudding adds richness and depth—definitely worth it if you’re feeling a little fancy.

Banana Pudding Icebox Cake

Banana Icebox Cake

Prep Time 20 minutes
Chilling Time 4 hours
Total Time 4 hours 20 minutes
Sweet, creamy, and full of cozy nostalgia, this banana icebox cake layers banana pudding, ripe bananas, graham crackers, and whipped topping into one chilled slab of joy. It's an easy, no-bake dessert that tastes like banana cream pie hugged by a cake—perfect for potlucks or any time you need a make-ahead treat!
12 slices

Ingredients

Base & Layers

  • 2 3.4 oz boxes (192 g) banana cream instant pudding mix or substitute vanilla if needed
  • 3 cups (700 ml) cold milk
  • 2 8 oz tubs (450 g) whipped topping thawed (like Cool Whip)
  • 1 box (400 g) graham crackers about 14-16 oz, enough for 4 layers
  • 4-5 ripe bananas peeled and sliced

Topping (optional)

  • Banana slices to garnish
  • Crushed graham crackers for garnish
  • Caramel sauce for drizzling (optional)

Equipment

  • Mixing bowl
  • Whisk
  • Spatula
  • 9x13 inch Baking Dish
  • Plastic Wrap

Instructions
 

  1. Whisk the banana cream pudding mixes with the cold milk in a large bowl for about 2 minutes until smooth. Let sit for 5 minutes to thicken slightly.
  2. Fold in one tub of whipped topping gently, using a spatula, until just combined and fluffy.
  3. Spread a few spoonfuls of the pudding mixture over the bottom of a 9x13 inch baking dish to create a thin base.
  4. Arrange a single layer of graham crackers on the bottom, breaking some as needed to cover completely.
  5. Add a layer of sliced bananas on top of the crackers, covering them evenly.
  6. Scoop about one-third of the pudding mixture over the bananas and gently spread into an even layer.
  7. Repeat the process (graham crackers, bananas, pudding) two more times for three complete layers, finishing with a layer of graham crackers on top.
  8. Top the final cracker layer with the second tub of whipped topping, spreading evenly and smoothly over the surface.
  9. Cover tightly with plastic wrap and refrigerate at least 4 hours, preferably overnight, to allow the crackers to soften and flavors to meld.
  10. Just before serving, garnish with extra banana slices, crushed graham crackers, and a drizzle of caramel sauce if desired.

Notes

This cake gets creamier and more cake-like the longer it chills. Bananas may darken after a day; for best look, add fresh on top just before serving. Try mixing it up with vanilla pudding, fresh whipped cream, Nilla Wafers, or even peanut butter between layers! See full post for all substitutions and storage details.

Nutrition

Calories: 320kcal | Carbohydrates: 53g | Protein: 4g | Fat: 10g | Saturated Fat: 7g | Sodium: 430mg | Potassium: 235mg | Fiber: 2g | Sugar: 31g | Vitamin A: 90IU | Vitamin C: 4mg | Calcium: 110mg | Iron: 1.2mg

Bright, tangy lemon meets cool, creamy goodness in this no-bake lemon icebox cake with cream cheese, graham crackers, lemon pudding, and whipped topping.

So, here’s what you’re in for: smooth, dreamy lemon pudding whipped into cream cheese (oh hello, cheesecake vibes), all layered with graham crackers that magically go soft and cakey in the fridge. It’s like your favorite lemon bar and a no-fuss cheesecake had a summer fling and chilled out. As in, literally chilled out in the fridge. This dessert comes together fast, disappears faster, and tastes like sunshine on a fork. Not too sweet, not too tart—just the right amount of pucker and comfort.

Table of Contents

Lemon Cream Icebox Cake

Why You’ll Love this Lemon Icebox Cake

Let’s be honest: some recipes try a little too hard. This one doesn’t. It just does what it came to do, and does it beautifully.

  • Ridiculously simple to make: You just layer, whip, and chill. No oven, no drama, no regrets.
  • Perfectly cool and creamy: The texture is ridiculously smooth, thanks to the pudding and whipped topping tag team.
  • Bright lemon flavor that sings: Not a whisper of lemon, but a proper high note in every bite.
  • Make-ahead friendly: It actually gets better with time in the fridge (rare superpower, that).
  • Crowd-friendly portions: It fills a 9×13 pan, so you’re set for potlucks, BBQs, or let’s be real, late-night fridge raids.
  • Instant nostalgia with a citrus twist: It has that old-school potluck charm but fresher and zingier.

Lemon Cream Icebox Cake

Ingredient Notes

You don’t need a grocery list the size of a novel here. Just a few fridge and pantry staples—most of which you might already have hanging around.

  • Cream cheese: Go for the full-fat version. It adds richness and bites back a little from all the sweetness.
  • Instant lemon pudding mix: Use the 3.4-ounce size (you’ll want two). This gives you that bright lemon flavor without needing a single real lemon for the filling.
  • Cold milk: Helps activate the pudding mix and makes the filling luscious and thick. Whole milk gives best results, but 2% works too.
  • Whipped topping (like Cool Whip): Fold it in gently and watch the whole thing come together like actual lemon mousse.
  • Graham crackers: The humble hero. They soften in the fridge and mimic sponge cake. Magical.
  • Lemon zest and slices (for garnish): These are optional but highly recommended. Adds sparkle and a little personality.

Lemon Cream Icebox Cake

How To Make This Lemon Icebox Cake

Let’s do the layering dance. You don’t need to be precise. This recipe is like a nap in the sun—casual and deeply satisfying.

  • Beat the cream cheese until smooth: Use an electric mixer and scrape the bowl often. You really want it creamy, with no little cold lumps lurking around.

  • Add pudding mix and milk: Beat those in for about two minutes. Your arm will get a little workout and poof, it thickens beautifully. You’ll end up with something between frosting and custard.

  • Gently fold in whipped topping: Use a spatula and a soft wrist here. Don’t overmix. Just swirl until it looks dreamy and unified.

  • Layer with graham crackers: Line a 9×13 pan with a single layer of crackers. No need for perfection. Break a few pieces to fit—think puzzle, not Jenga.

  • Spread on your lemon filling: Use about a third and smooth it with a nice swoop motion. Repeat the grahams and pudding until you’ve got three layers, ending with pudding on top.

  • Chill and wait (ugh, I know): Cover it with plastic wrap and pop it in the fridge for at least 4 hours. Overnight is even better if you’ve got the patience.

  • Garnish and serve: Sprinkle on fresh lemon zest just before serving, and a few thin lemon slices if you’re going for extra wow.

Lemon Cream Icebox Cake

Storage Options

Refrigerator? This baby thrives there. Keep your lemon icebox cake covered—plastic wrap or a snug baking dish lid will do the trick. It’ll stay creamy and dreamy for up to 4 days, maybe even 5 if you’re lucky (though it’s usually long gone before that).

Now, can you freeze it? Technically yes, but I’ll level with you: the texture changes. The whipped topping goes a little weird, and the graham crackers get sort of… chewy-soggy? Not my favorite. So unless you adore freezer roulette, I’d say skip it.

Reheating? None needed. This one’s chilled bliss by design. Just slice, serve, and maybe sneak a forkful straight from the fridge while pretending you’re cleaning up (no judgment here).

Variations and Substitutions

This lemon cream icebox cake is the comfy white tee of desserts—it plays well with others and can be dressed up or down.

  • Lemon curd swirl: Drop dollops of lemon curd between the pudding layers and gently swirl. Adds zingy richness and looks fancy with zero effort.
  • Crushed vanilla wafers instead of grahams: If you’re out of graham crackers or want a slightly softer bite, go with Nilla wafers. Or try speculoos if you’re chaos-y (in a good way).
  • Use homemade whipped cream: Sub in 3 cups of lightly sweetened whipped cream if you want to skip tub-town. Just make sure it’s stiff enough to hold its shape.
  • Switch up the pudding flavor: Try cheesecake or white chocolate flavored pudding if lemon isn’t your jam, or match it to seasonal fruit toppings.
  • Add fruit between layers: Sliced strawberries or blueberries bring a nice textural contrast and keep things feeling fresh. If you love strawberry desserts, you might like this strawberry dump cake too.

Lemon Cream Icebox Cake

What to Serve with Lemon Icebox Cake

This lemony delight doesn’t need much backup, but here are a few ways to round out the experience—whether it’s a dinner party, brunch, or backyard snackfest.

  • If you’re serving this after a rich meal, a cup of hot tea (Earl Grey or mint is lovely) balances the sweetness and cools things off just right. Bonus: your pinky may naturally lift as you sip.

  • Pair it with a light citrus salad or slivers of prosciutto and melon at brunch. Yes, it’s dessert, but no one’s stopping you from starting early. Lemon at 10am? Absolutely.

  • Grilled meats and sunshine beg for this cake. After a summery grill session (maybe something like this salmon with pomegranate glaze), this chilled dessert wraps things up with a refreshing finale.

  • Got leftovers? Smash a cold square between two gingersnaps. It’s a wobbly, sweet sandwich and my not-so-secret midnight snack.

Lemon Cream Icebox Cake

Frequently Asked Questions

Can I use homemade whipped cream instead of the frozen topping?

Yes, and it’s honestly lovely. Just be sure your whipped cream is made with heavy whipping cream and beaten until stiff peaks form, so it holds up. You’ll need about 3 cups total to sub for the 8-ounce tub. You’ll get a slightly richer, fresher flavor and a little less stability, but it’s a worthwhile trade if you’ve got a mixer and the motivation.

Do I have to use instant pudding mix?

Yes, instant pudding is kind of the backbone of this particular dessert. The magic is in how quickly it thickens and sets without cooking. Cook-and-serve pudding will not work here because it needs heat to thicken, and that completely misses the whole “no-bake cake” memo. Stick with instant—even off-brand usually works just fine if you’re in a pinch.

How long does lemon icebox cake need to chill?

I recommend a solid 4 hours in the fridge, minimum. Overnight is even better if you can swing it. That gives the graham crackers enough time to soften and become cake-like, and lets the flavors settle into something beautifully balanced. If you try to cut it too soon, it might fall apart in a delicious but slightly tragic way.

What kind of graham crackers should I use?

Any standard honey graham cracker works well here. You can even play with cinnamon grahams if you’re feeling spicy. Just avoid flavored brands that lean too sweet or too dense—they can mess with the balance. And remember, the crackers absorb moisture and turn soft in the best way, so no need to be fancy. Broken crackers are welcome guests in the layering party.

Lemon Cream Icebox Cake

Lemon Cream Icebox Cake

Prep Time 20 minutes
Chilling Time 4 hours
Total Time 4 hours 20 minutes
Bright, tangy lemon meets cool, creamy goodness in this no-bake lemon icebox cake with cream cheese, graham crackers, lemon pudding, and whipped topping. It’s sunshine on a fork—ridiculously easy, dreamy and perfect for a crowd.
12 servings

Ingredients

Main Ingredients

  • 2 packages (450 g) cream cheese 8 oz each, softened
  • 2 packages (192 g) instant lemon pudding mix 3.4 oz each
  • 2.5 cups (590 ml) cold milk preferably whole or 2%
  • 1 container (225 g) whipped topping (like Cool Whip) 8 oz, thawed
  • 1 box (225 g) graham crackers about 14-16 full sheets

For Garnish (optional)

  • lemon zest
  • lemon slices

Equipment

  • 9x13 inch Baking Dish
  • Electric mixer
  • Mixing bowls
  • Spatula

Instructions
 

  1. Beat the cream cheese in a large bowl with an electric mixer until smooth and creamy, scraping the sides as needed to avoid lumps.
  2. Add instant lemon pudding mixes and cold milk. Beat for about 2 minutes until the mixture thickens and forms a smooth, scoopable filling.
  3. Gently fold in the whipped topping using a spatula, just until blended and creamy. Don't overmix.
  4. Arrange a single layer of graham crackers in the bottom of a 9x13 inch baking dish. Break crackers as needed to fit.
  5. Spread about one third of the lemon-cream mixture over the crackers. Repeat the layers two more times, ending with the lemon mixture on top (for three total layers of each).
  6. Cover the dish with plastic wrap and refrigerate for at least 4 hours (overnight is even better) to soften the graham crackers and set the cake.
  7. Before serving, garnish with fresh lemon zest and thin lemon slices if desired. Slice and serve cold.

Notes

This cake can be made 1-2 days ahead and gets creamier as it sits. Store leftovers covered in the fridge for up to 4 days. Freezing is not recommended as it changes the texture. To substitute Cool Whip, use 3 cups stiffly whipped cream. Try a swirl of lemon curd between layers, or add fresh berries for variety.

Nutrition

Calories: 350kcal | Carbohydrates: 48g | Protein: 6g | Fat: 15g | Saturated Fat: 9g | Cholesterol: 45mg | Sodium: 480mg | Potassium: 190mg | Fiber: 1g | Sugar: 27g | Vitamin A: 600IU | Vitamin C: 1mg | Calcium: 170mg | Iron: 1.2mg

Tuck into this cozy oven-braised pot roast with tender chuck roast, earthy carrots, creamy potatoes, and all the comforting kitchen aromas you crave.

Slow-braised goodness, rich gravy, and fork-tender bites… this is the kind of meal that fills your house with the kind of smells neighbors hope are coming from their place next.

Sometimes you need a meal that feels like a hug, and this oven-braised pot roast brings it. It’s quietly confident, not flashy. Chuck roast takes a long, delicious soak in wine, broth, and a few little flavor elves like Worcestershire, thyme, garlic… you get the idea.

It’s great for Sunday afternoons or when you really want leftovers that don’t feel like punishment. I mean, gently reheated roast with gravy over toast? Yes please. Bonus: barely any active work, and the oven does all the heavy lifting. So pour yourself a cup of something and let’s walk through this together.

Table of Contents

Oven-Braised Pot Roast

Why You’ll Love this Oven-Braised Pot Roast

Let’s pause for just a second. This isn’t some reinvent-the-wheel kind of roast. It’s just exactly what you want pot roast to be: fall-apart meat, silky sauce, nubby vegetables that were once carrots but now taste like warm memories.

  • Ridiculously simple to make: Season, sear, stir, and then let the oven do all the magic while you try to resist peeking.
  • Unreasonably comforting: That first whiff when you open the oven? It’s the edible version of fuzzy socks and a good blanket.
  • Leftovers are a dream: Sandwich it. Shred it into tacos. Eat it cold from the fridge while thinking “this is better than lunch out.”
  • Feeds a small crowd, or yourself four times: Either way, it’s economical and satisfying. We love a multitasking roast.
  • Layers and layers of flavor: There’s wine, tomato paste, garlic, and all the slow-simmered good stuff that makes people say, “Wait—what’s in this?”

Oven-Braised Pot Roast

Ingredient Notes

This list might look like a lot, but honestly? It’s just the basics done well. The ingredients are unfussy, but they come together like a very good, very savory jigsaw puzzle.

  • Chuck roast: Look for a 4-pounder, nicely marbled. Tying it just keeps it from flopping around while you brown it (yes, that’s the technical term).
  • Kosher salt and black pepper: Simple, yes, but don’t skimp. This is your base flavor foundation and it needs to be generous.
  • Olive oil: For that golden sear on the beef and a little base for the veggies to sauté in later.
  • Yellow onions: They’ll soften and caramelize slightly in the pot, adding sweetness and depth to the gravy.
  • Carrots: They go tender and sweet after a long roast. Think stew-like softness, not mush.
  • Yellow potatoes: Small ones with skin hold up well, get buttery inside, and make you not miss mashed potatoes.
  • Garlic: Eight cloves seems like a lot, but it mellows and softens beautifully. Go on, trust me.
  • Tomato paste: It sneaks in a rich umami depth and beautifully darkens the gravy.
  • Dry red wine: Nothing fancy—a mid-range cab or a dry blend is fine. Just don’t use anything labeled “cooking wine,” ever.
  • Low-sodium beef broth: Starts mild, then soaks in everything while the roast does its thing.
  • Bay leaves and thyme: They infuse the entire dish with that “hey, is this from a fancy French bistro?” vibe.
  • Worcestershire sauce: A little zing to balance all that richness. It’s your flavor insurance policy.

Oven-Braised Pot Roast

How To Make This Oven-Braised Pot Roast

We’re just layering flavor on flavor here, letting time do the heavy lifting. Deep breaths, wooden spoon in hand, let’s roll.

  • Preheat the oven and season your meat: Set the temp to 325°F. Pat that chuck roast dry (really dry) so it sears, not steams. Then season the heck out of it with salt and pepper. Don’t be timid—it’s a big hunk of meat.

  • Sear the roast: Heat olive oil in a Dutch oven until it shimmers. Then brown the roast on all sides. Yes, this takes 10–15 minutes, and yes, it smells amazing. This step builds the base flavor, so don’t rush it. Get a deep crusty brown.

  • Sauté the veggies: Set the roast aside and toss your onions and carrots into the same pot. Let them soften a bit and pick up some tasty bits at the bottom (they’ll love it). After five minutes, stir in the garlic and tomato paste and give it all a minute to mingle.

  • Deglaze with wine: Pour the wine into the pot and scrape up all those golden-brown specks. They’re like flavor glitter. Let it simmer just a bit—2 minutes or so—to mellow the wine.

  • Build the braise: Stir in the beef broth, potatoes, bay leaves, dried thyme, and Worcestershire sauce. Give it a good mix. Now return the roast and any of its juices to the pot. Nestle it in there like it’s being tucked into bed.

  • Pop it in the oven: Cover the pot, let it come to a gentle boil on the stovetop, then transfer the whole glorious mess into the oven. It needs about 3 to 3.5 hours to turn fall-apart tender. Go read a book, stare at the wall, or, more realistically, do dishes.

  • Finish the gravy: Once the roast is done, transfer meat and veggies to a big platter and skim the fat off the top of the cooking liquid. For the gravy, whisk flour into a bit of that cooking liquid to make a paste, then slowly whisk in the rest. Simmer until it thickens up and tastes like… well, roast gravy heaven.

  • Serve and devour: Slice or shred the roast, pile on the veg, get generous with gravy, and sprinkle some parsley if you’re feeling fancy.

Oven-Braised Pot Roast

Storage Options

So, you’ve got leftovers. Good. That’s the pot roast’s magical second life.

Start with the fridge: slice the beef or shred it, then tuck it into an airtight container with some of the gravy to keep it moist. It’ll hold up well for 3 to 4 days. You can also keep the gravy and veggies in their own containers if you like.

What about freezing? Absolutely. Just let it cool completely before you portion it out. I like freezing it in individual servings with a bit of gravy, so I don’t have to thaw a whole roast just for lunch. Wrap tightly in foil, then go for a freezer bag or sealed container. It should be solid for up to 3 months.

Reheating is low-stress—just warm it gently in a covered pan with a splash of broth or water to rehydrate that gravy. Or, throw it in the microwave with a damp paper towel over the top and pretend it never left the oven.

Variations and Substitutions

Once you’ve got your basic oven-braised pot roast down, there’s room to play around a bit.

  • Different root vegetables: Not a fan of carrots? Swap in sweet potatoes, turnips, or even parsnips (unless you’re looking for a substitute for parsnips). Just aim for hearty, oven-loving veggies.

  • Use a different protein: Brisket is great if you want something even more unctuous. Short ribs also work, though they’ll need a slightly longer braise.

  • Go broth-only: If wine’s not your thing, just add an extra cup of beef broth and a splash of vinegar or lemon juice for balance.

  • Fresh herbs instead of dried: If you’ve got fresh thyme or rosemary handy, throw in a few sprigs. They’re lovely, just remember to fish them out later.

  • Add mushrooms: Sliced cremini or baby bellas can be sautéed with the onions for extra umami and a slightly stew-like feel.

Oven-Braised Pot Roast

What to Serve with Oven-Braised Pot Roast

This dish can stand alone, sure. But if you want to round things out (or just show off a little), here’s some good company for it.

  • Crusty bread or biscuits: A warm bakery loaf or some homemade herb scallion biscuits are perfect for sopping up all that gravy. It also gives you an excuse to linger at the table a little longer.

  • A bright salad: Something crisp and slightly acidic can cut through the richness. Maybe a little arugula with lemon vinaigrette or even this roasted butternut squash salad with tangy dressing for contrast.

  • Bacon potato salad (yes, really): If you’re skipping the braised potatoes and doing a roast-only vibe, this bacon potato salad hits that creamy-salty corner just right. The smoky crunch adds something fun.

  • A not-too-sweet dessert: Something simple like roasted pears, or maybe a slice of pear upside-down cake, just to ease into the post-roast glow.

Oven-Braised Pot Roast

Frequently Asked Questions

Can I make oven-braised pot roast ahead of time?

Yes, and it actually tastes better the next day. Let everything cool, then store it in the fridge tightly covered. When you’re ready to serve, reheat gently in a low oven or on the stovetop with a bit of extra broth to loosen the gravy. The flavors have time to deepen overnight, so it’s kind of like meal-prep magic.

What’s the best cut of meat for pot roast?

Chuck roast is my go-to. It has enough fat and connective tissue to turn melty and tender after hours of braising. Brisket or bottom round can also work, but they tend to be leaner, so your roast might need more time (and maybe a little extra fat) to get as soft as you’d like.

Do I really need to tie the roast before searing?

If your roast is a bit floppy or uneven, tying it with butcher’s twine helps it sear evenly and hold together during cooking. Totally optional, though. Some store-bought roasts come pre-tied, so check before you reach for the string.

Can I skip making the gravy?

Technically yes, but why would you? That cooking liquid has absorbed all the goodness from the meat, veggies, and herbs. Turning it into gravy takes just a few minutes and transforms the dish from good to glorious. Don’t skip it unless absolutely necessary (like hungry kids pacing in the kitchen).

Oven-Braised Pot Roast

Oven-Braised Pot Roast

Prep Time 25 minutes
Cook Time 3 hours 30 minutes
Total Time 3 hours 55 minutes
This cozy oven-braised pot roast features tender chuck roast, earthy carrots, creamy potatoes, and a silken gravy—classic comfort with minimal hands-on work. Layered with deep flavor thanks to red wine, aromatics, and thyme, this is the ultimate Sunday supper (and a lifesaver for leftovers) that fills your home with irresistible aromas.
6 servings

Ingredients

For the Pot Roast

  • 1 (1.8 kg) chuck roast about 4 lbs, tied if possible
  • 2 tsp (10 g) kosher salt
  • 1 tsp (2 g) black pepper freshly ground
  • 2 tbsp (30 ml) olive oil
  • 2 yellow onions cut into wedges
  • 4 carrots peeled and cut into chunky pieces
  • 1.5 lb (680 g) yellow potatoes small potatoes, halved if large
  • 8 cloves (8) garlic peeled and smashed
  • 2 tbsp (30 g) tomato paste
  • 1 cup (240 ml) dry red wine such as Cabernet or any dry blend
  • 2 cups (480 ml) low-sodium beef broth
  • 2 bay leaves
  • 1 tsp dried thyme or 3-4 sprigs fresh thyme
  • 2 tbsp (30 ml) Worcestershire sauce

For the Gravy

  • 2 tbsp (16 g) all-purpose flour

To Serve (optional)

  • chopped fresh parsley for garnish

Equipment

  • Dutch oven or oven-safe large pot with lid
  • wooden spoon
  • Chef’s knife
  • Cutting board

Instructions
 

  1. Preheat the oven to 325°F (165°C). Pat the chuck roast dry with paper towels and season all over with kosher salt and black pepper.
  2. Heat olive oil in a Dutch oven over medium-high heat. Add the roast and brown deeply on all sides, about 10–15 minutes total. Transfer roast to a plate.
  3. Add onions and carrots to the pot. Sauté for about 5 minutes, scraping up browned bits. Stir in the garlic and tomato paste; cook for 1 minute until fragrant.
  4. Pour in the wine and scrape up any remaining browned bits. Simmer for about 2 minutes, letting the wine reduce slightly.
  5. Add beef broth, potatoes, bay leaves, thyme, and Worcestershire sauce. Stir to combine. Return the browned roast and any juices to the pot, nestling it among the vegetables.
  6. Bring to a gentle simmer on the stovetop. Cover and transfer to the oven. Braise for 3 to 3.5 hours, or until the roast is fork-tender.
  7. Remove roast and vegetables to a large platter. Skim fat from cooking liquid. For the gravy, whisk flour with a little hot broth to make a smooth paste, then whisk into the pot. Bring to a simmer and cook until thickened, about 3–5 minutes.
  8. Slice or shred the roast. Serve with vegetables and plenty of gravy. Garnish with chopped fresh parsley if desired.

Notes

This pot roast is even better the next day. Store leftovers in an airtight container with some gravy to keep things moist. It also freezes well—portion individually for easy lunches. Try swapping in other root veggies, or use fresh herbs for a different flavor profile.

Nutrition

Calories: 560kcal | Carbohydrates: 24g | Protein: 49g | Fat: 27g | Saturated Fat: 10g | Cholesterol: 157mg | Sodium: 1140mg | Potassium: 1460mg | Fiber: 4g | Sugar: 5g | Vitamin A: 6240IU | Vitamin C: 24mg | Calcium: 70mg | Iron: 7mg

Let's Get Cooking!

100+ Recipes for Busy Nights

In a time crunch? Take a look around and browse plenty of recipes to help you get dinner ready and on the table on those busy nights!

Sweet Recipes

Pumpkin Banana Muffins

Pumpkin Banana Muffins Recipe

Strawberry Pie Bars

Strawberry Pie Bars Easy Oven Recipe

White Chocolate Raspberry Muffins

White Chocolate Raspberry Muffins Recipe

Snickerdoodle Muffins

Snickerdoodle Muffins Recipe for Oven

PIN NOW

Follow KitchenetteBlog on Pinterest

Love cozy recipes that actually make it to the table? On Pinterest, I share new comfort-food ideas every week—desserts, dinners, and those little snack cravings that hit at midnight. Come pin with me and never run out of kitchen inspo.

Savory Recipes

Turkey Tetrazzini

Turkey Tetrazzini Baked Pasta Recipe

Grilled Chicken Panini Sandwich

Grilled Chicken Panini Sandwich Recipe

Sweet Potato Cornbread

Sweet Potato Cornbread Recipe Oven Baked

Classic Waldorf Salad

Waldorf Salad Simple Classic Recipe

Get 5 Recipes to Simplify Your Life!

Delicious, versatile recipes you can make over and over.